---
title: Customize a theme for hosted pages
description: "Estimated time to complete: 20 minutes."
component: pingoneaic
page_id: pingoneaic:use-cases:use-case-customize-theme
canonical_url: https://docs.pingidentity.com/pingoneaic/use-cases/use-case-customize-theme.html
keywords: ["Implementation Guide", "Use Case", "Journeys", "Hosted Pages", "Authentication"]
page_aliases: ["implementation:use-case-customize-theme.adoc"]
section_ids:
themes-description: Description
themes-goals: Goals
themes-prereqs: Prerequisites
themes-tasks: Tasks
themes-task-1: "Task 1: Create a new theme and define the branding"
themses-task-2: "Task 2: Set the new theme as the default theme"
themes-validation: Validation
themes-validation-steps: Steps
themes-video-validation: Video of validation
themes-explore-further: Explore further
themes-reference-material: Reference material
---
# Customize a theme for hosted pages
## Description
Estimated time to complete: 20 minutes *(tooltip: This assumes you complete the prerequisites beforehand.)*.
In this use case, you customize the look and feel of the hosted pages to match your organization's branding.
### Goals
After completing this use case, you will know how to do the following:
* Create a new theme in Advanced Identity Cloud.
* Define the branding for end-user journey pages and account pages.
* Enable account controls so that end users can download and delete their data from their profile page.
* Set the new theme as the default theme for the hosted pages.
## Prerequisites
Before you start work on this use case, ensure you have these prerequisites:
* Access to your Advanced Identity Cloud development environment as an administrator.
* A URL that specifies the location of a logo image. The URL must be publicly accessible.
* A proficient understanding of HTML. Ping Identity allows you to customize pages with your own custom HTML.
* You have completed the use case [create test users and roles](use-case-test-users-and-roles.html). Specifically, you have created the test user `acruse`.
## Tasks
### Task 1: Create a new theme and define the branding
In this task, you create a new theme for end-user hosted pages and define the branding.
1. Log in to the Advanced Identity Cloud admin console as an administrator.
2. Go to [icon: wysiwyg, set=material, size=inline] Hosted Pages and [icon: add, set=material, size=inline] New Theme.
3. Enter `My Organization Theme`, and then click Save.
The Hosted Pages editor displays.
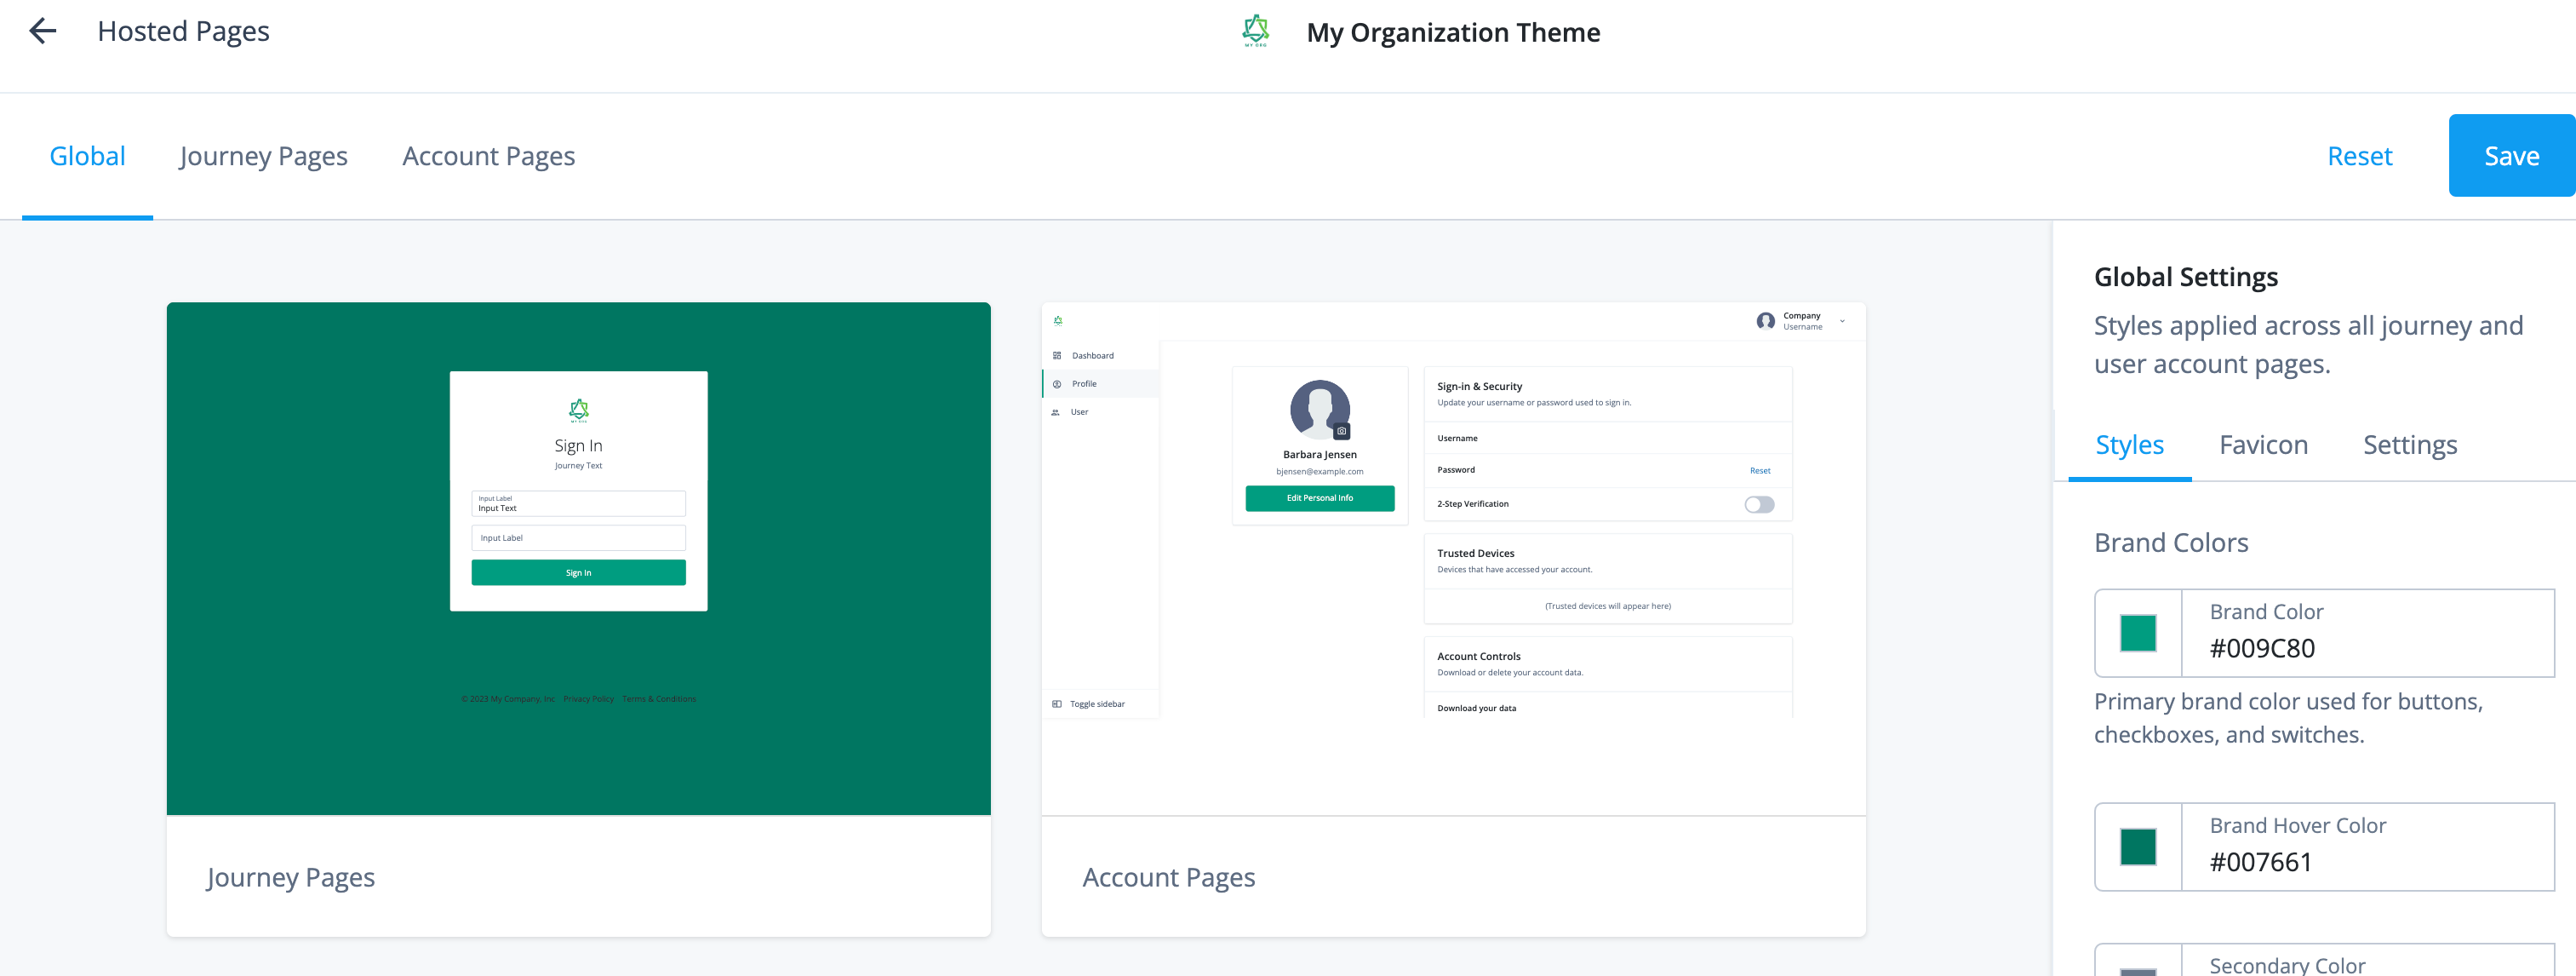
4. In Global Settings make the following branding changes:
| Tab | Option | Customize |
| ------ | ------------ | -------------------------------------------------------------------- |
| Styles | Brand Colors | Click the Brand Color field and enter the hex value `#009C80`. |
| | | Click the Brand Hover Color field and enter the hex value `#007661`. |
5. Click Journey Pages and make the following branding changes:
| Tab | Option | Customize |
| ------ | --------------- | ------------------------------------------------------------------------------------------------------------------------------------------------------------------------------------------------------------------------------------------------------------------------------------------------------------------------------------------------------------------------------------------------------------------------------------------------------------------------------------------------------------------------------------------------------------------------------------------------------- |
| Styles | Page Background | Click the Page Background Color field and enter the hex value `#007661`. |
| Logo | Logo | Click the pencil icon ([icon: pencil-alt, set=fa]), enter your logo URL in the Logo URL field, and then click Update. |
| Layout | Footer | Enable the Footer switch.Click the pencil icon ([icon: pencil-alt, set=fa]), edit the HTML, and then click Update. For example, enter the following:```html
``` |
6. Click Account Pages and make the following branding changes:
| Tab | Option | Customize |
| ------ | ----------------- | -------------------------------------------------------------------------------------------------------------------------------------------------------------------------------------------------------------------------------------------------------------------------------------------------------------------------------------------------------------- |
| Logo | Expanded Version | Click the pencil icon ([icon: pencil-alt, set=fa]), enter your logo URL in the Logo URL field, and then click Update. |
| | Collapsed Version | Click the pencil icon ([icon: pencil-alt, set=fa]), enter your logo URL in the Logo URL field, and then click Update. |
| Layout | Profile Page | Enable Account Controls.Account controls allow end users to download the data Identity Cloud has about them in a JSON format and allow end users to delete their account information. End users can only view the information and take actions for the items you enable in the Profile Page. Learn more in Configure visible information and end-user actions. |
7. Click Global to review your changes.
8. Click Save.
### Task 2: Set the new theme as the default theme
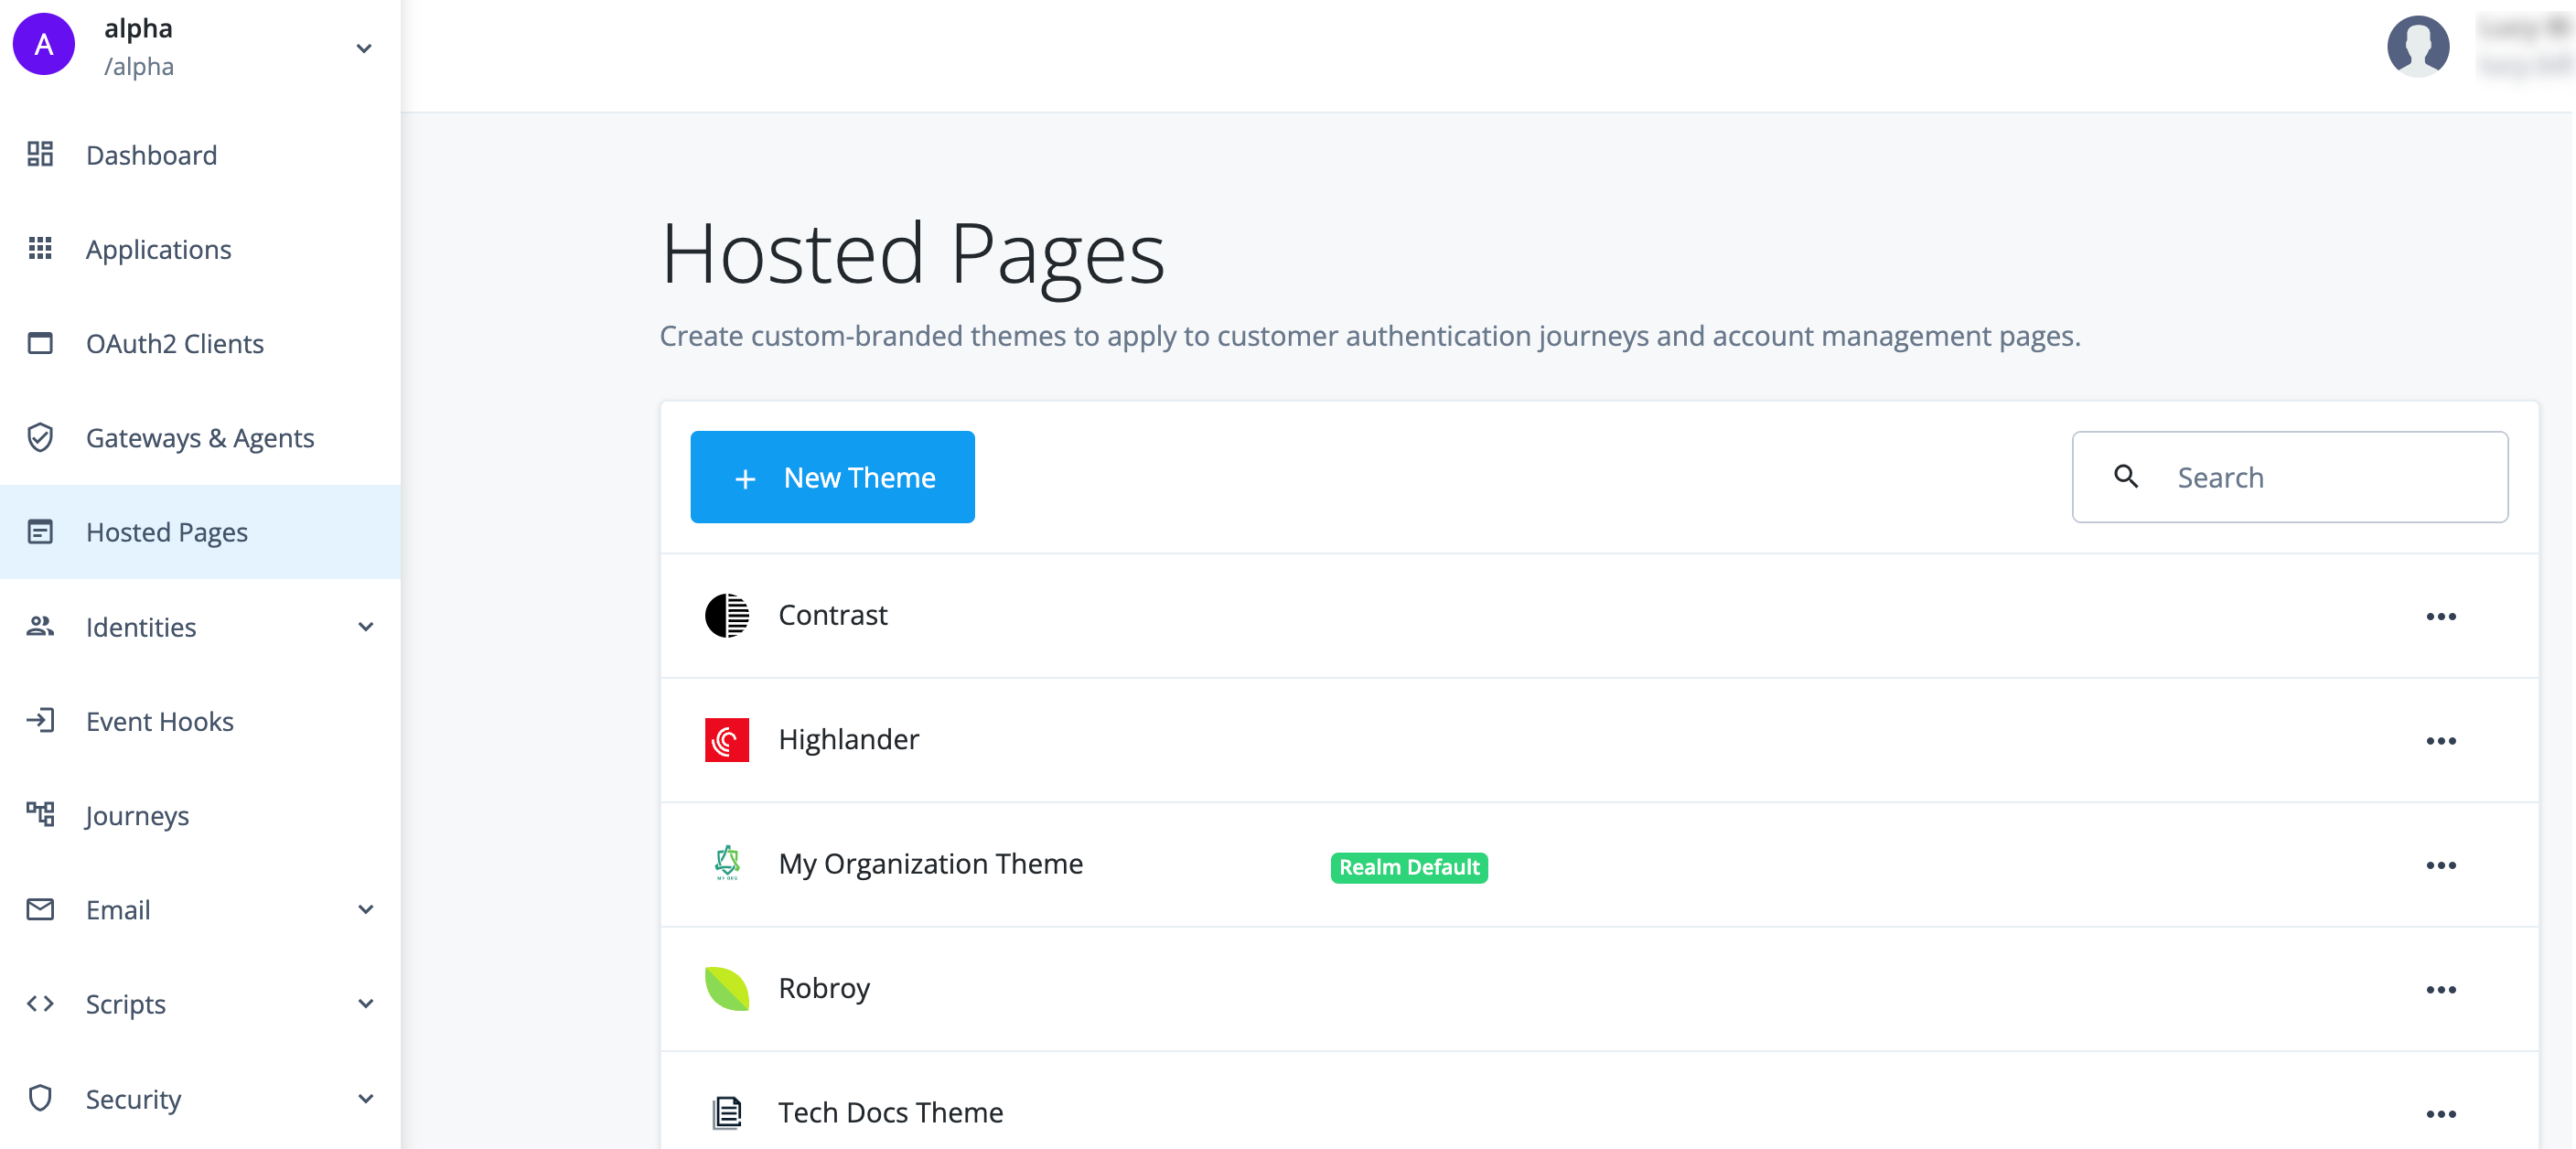
1. In the Advanced Identity Cloud admin console, go to [icon: wysiwyg, set=material, size=inline] Hosted Pages.
2. Click the ellipsis icon ([icon: ellipsis-h, set=fa]) for the `My Organization Theme` and select Set as Realm Default.
`My Organization Theme` is now the realm default theme.
| | |
| - | ---------------------------------------------------------------------------------------------------------------------------------------------------------------------------------------------------------------------------------------------------------------------------------------- |
| | The default theme applies to the hosted journey and account pages. You can add custom themes so that your end users are presented with screens specific to their authentication journey. Learn more in [Add a custom theme](../end-user/hosted-pages-customize.html#add-a-custom-theme). |
Check in
At this point, you:
| | |
| -------------------------------------------------------------------------- | ------------------------------------------------------------------------------------------- |
| [icon: check, set=fa]Created a new theme. | [icon: check, set=fa]Defined the branding for the theme. |
| [icon: check, set=fa]Enabled account controls in the hosted account pages. | [icon: check, set=fa]Set the new theme as the default for hosted journey and account pages. |
## Validation
Now that you have created your new theme and set it as the default, you are ready to validate the configuration.
The steps in this validation check that the hosted journey and account pages display the new theme, including letting end users download and delete their account data.
| | |
| - | ------------------------------------------------------------------------------------------------------------------------------------------------ |
| | In this validation task you log in as `acruse`, who is one of the users created in [Create users and roles](use-case-test-users-and-roles.html). |
### Steps
1. In the Advanced Identity Cloud admin console, go to [icon: account_tree, set=material, size=inline] Journeys and click on the `Login` journey provided as default in Advanced Identity Cloud.
2. Copy and paste the `Preview URL` into an incognito window.
The Sign In page for the tenant displays with the `My Organization Theme` branding.
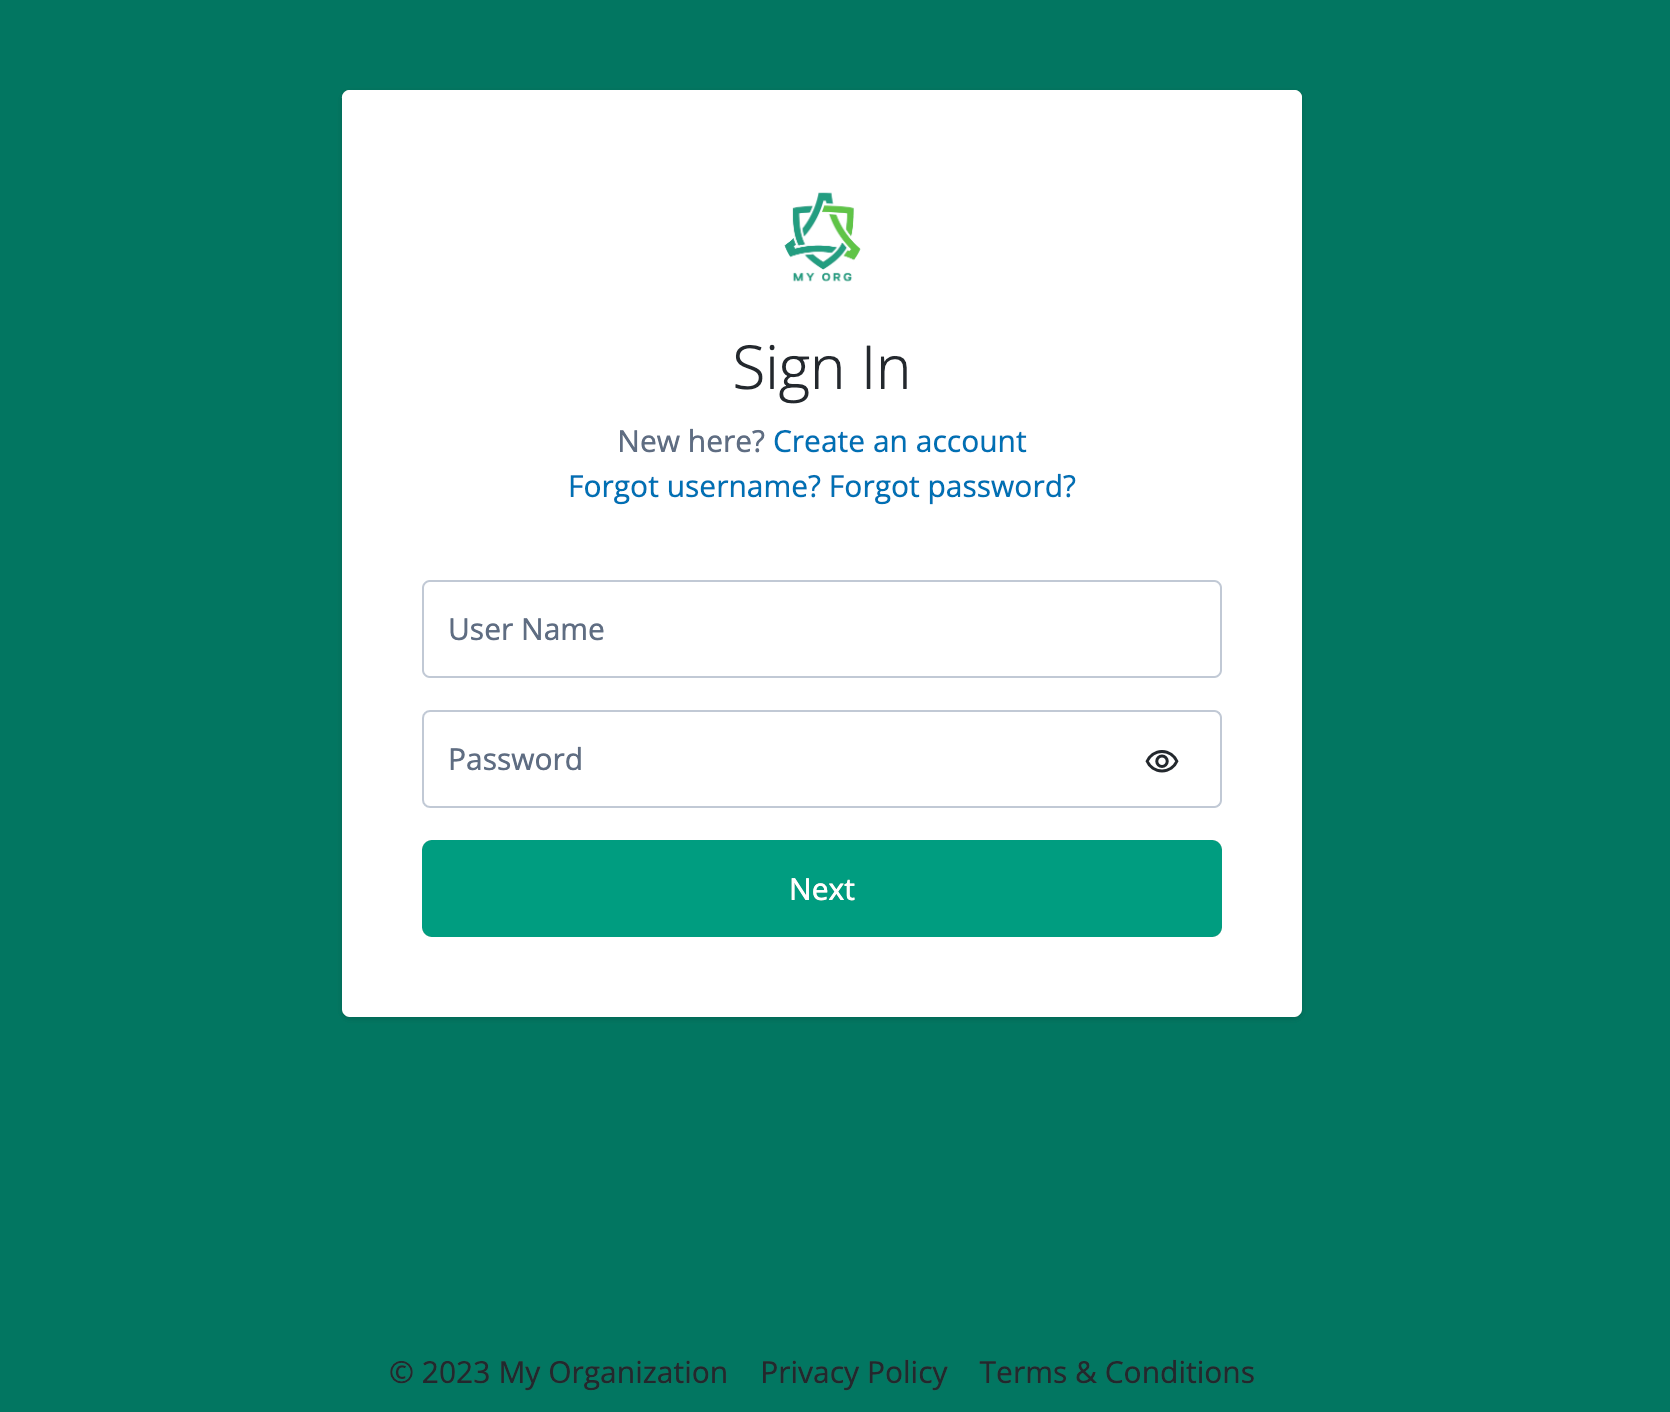
3. Enter the username and password for `acruse`, and then click Next.
You are signed on to the hosted account pages.
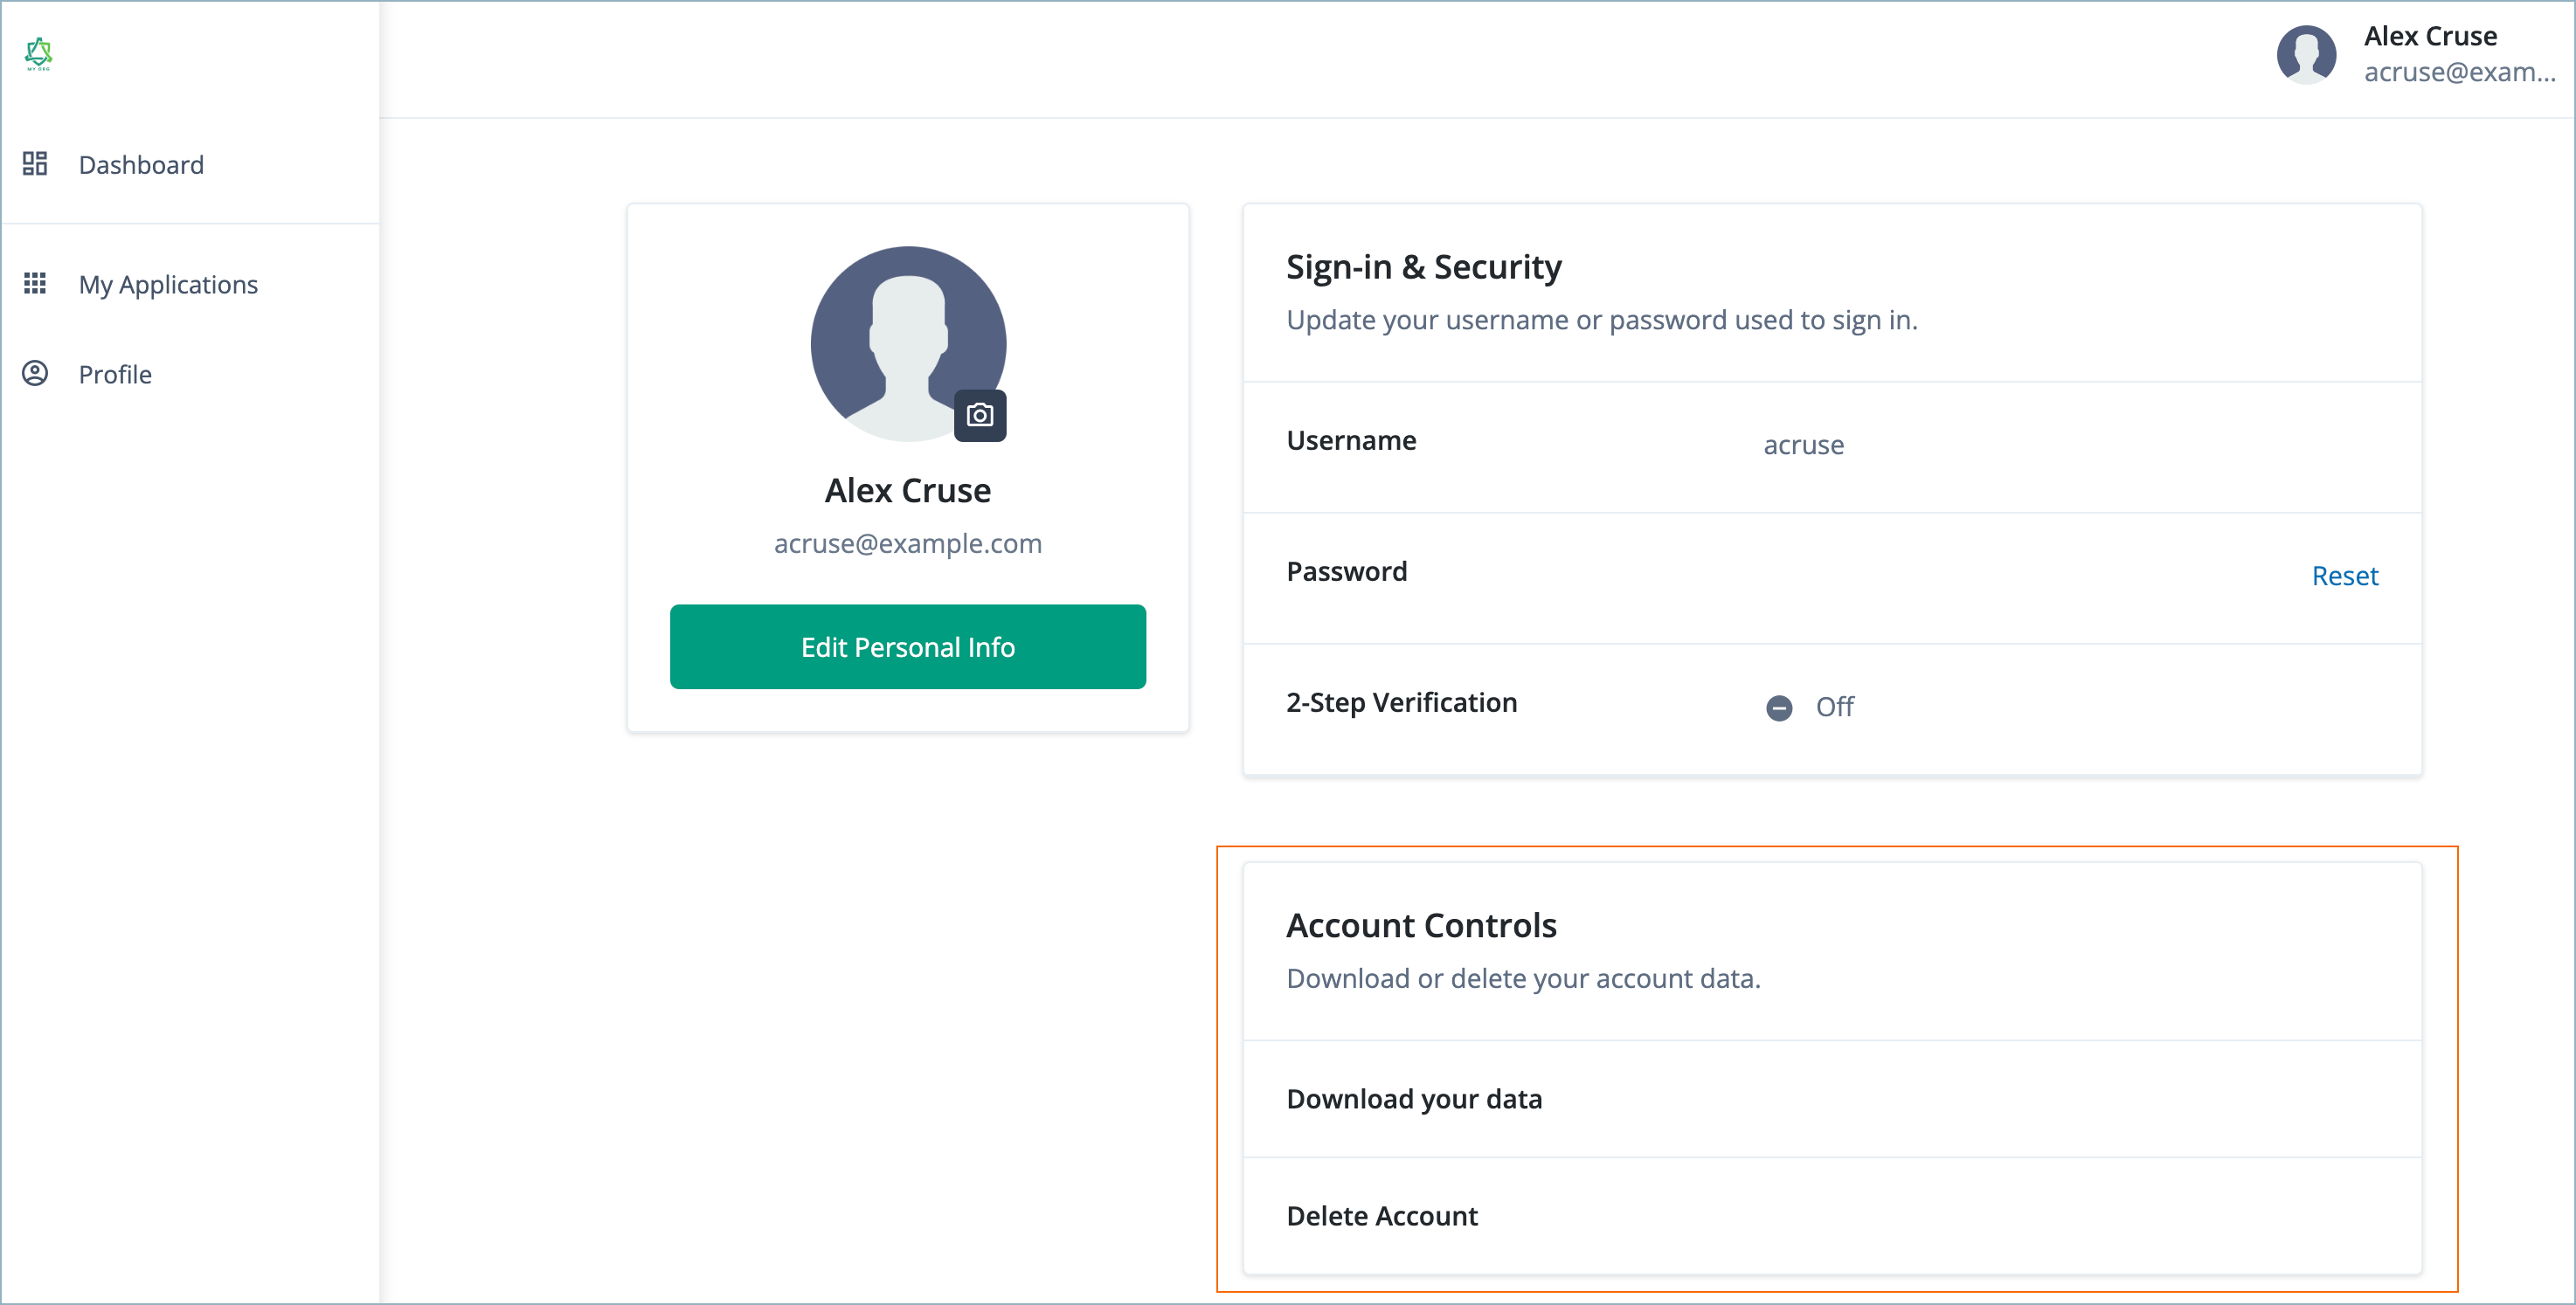
4. Click Edit Your Profile.
The Profile page displays, including Account Controls.
5. In the Advanced Identity Cloud admin console, go to [icon: wysiwyg, set=material, size=inline] Hosted Pages.
6. Click the ellipsis icon ([icon: ellipsis-h, set=fa]) for a different theme and select Set as Realm Default.
7. Go back to the hosted account pages (in the incognito window) and refresh the browser.
The look and feel of the hosted pages changes to the theme you selected as the default.
### Video of validation
The following video displays the expected validation of logging in with the new theme and changing to a different default theme:
**Video (Brightcove)**
\
## Explore further
### Reference material
| Reference | Description |
| --------------------------------------------------------------------------------------------------------------------------------------------------------------------------------------------------------------- | -------------------------------------------------------------------------------------------------------------------------- |
| [Identity Cloud hosted pages](../end-user/hosted-pages.html) | Learn about hosted pages. |
| [Demo: Configure themes for the Alpha and Bravo realms - ForgeRock University](https://backstage.forgerock.com/university/on-demand/path/TGVhcm5pbmdQYXRoOjY%3D/chapter/Q291cnNlOjE1Nzgw/play/Q29udGVudDoxNzIx) | A guided walkthrough video demonstrating how to configure themes for the hosted pages. |
| [Use case: Create dynamically branded journeys in Advanced Identity Cloud](https://community.forgerock.com/t/use-case-create-dynamically-branded-journeys-in-forgerock-identity-cloud/3185) | A guided walkthrough demonstrating how to apply themes dynamically during a journey, based on the end user's organization. |