Creating a policy to check consent and then change the server response
Using the Trust Framework attributes and services we created, we now create a policy for the meme game API to get a user’s answers and change the server response with various statements based on the consent status.
About this task
Here is a snippet of an unedited response. It shows the id, type, and attributes attributes.
{
 	"data": [{
                "id": "1",
                "type": "answers",
                "attributes": {
                        "url": "https: //l.imqflip.com/2fm6x.jpq",
                        "captions": ["Still waiting for the bus to Jennie's"],
                        "rating": null,
                        "created_at": "2020-05-e6T22:25:06-00:00"
                }
        },
Steps
-
Sign on to the Policy Editor, click Policies in the left pane, and then click Policies along the top.
-
Select the existing meme-game policies policy. The new policy is created under this policy.
-
From the menu, select Add Policy.
-
For the name, replace Untitled with
Control user’s response to answers request. -
Click next to Applies to.
-
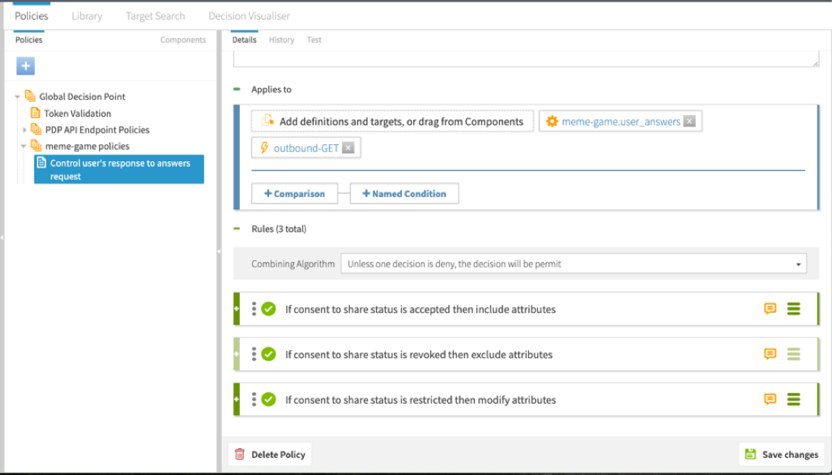
Click Add definitions and targets, or drag from Components and add the meme-game.user_answers service, which we set up in Getting a path component from the request URL. Also, because we want to control the response to the client, add the outbound-GET action.
-
Set Combining Algorithm to Unless one decision is deny, the decision will be permit.
-
Add a rule to include attributes.
-
Click Add Rule.
-
For the name, replace Untitled with
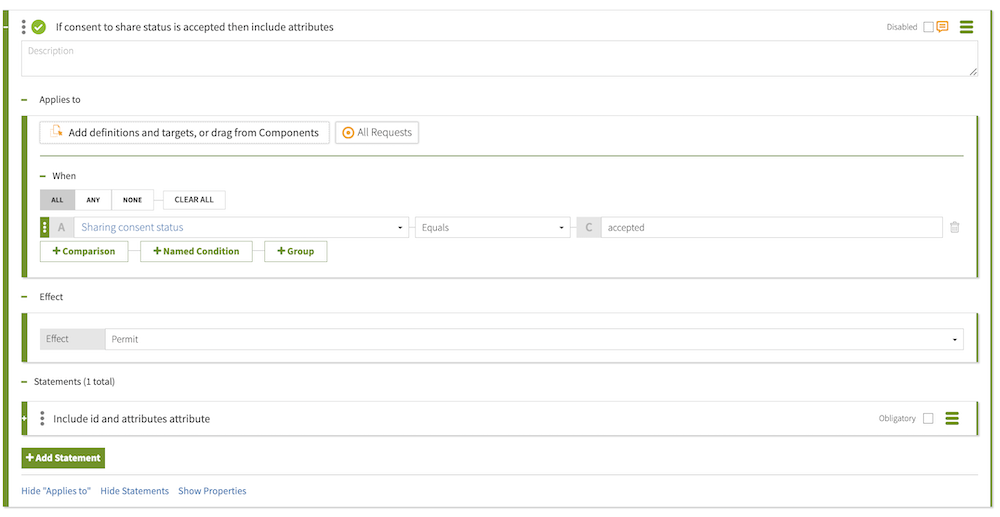
If consent to share status is accepted then include attributes. -
Specify the condition.
-
Click Comparison.
-
From the Select an Attribute list, select Sharing consent status, which we created in Getting consent status from the consent record.
-
In the second field, select Equals.
-
In the third field, type
accepted.
-
-
Specify the statement.
-
Click Show Statements.
-
Click next to Statements.
-
Click Add Statement > Include Attributes.
Use this statement to be explicit about which attributes to keep, especially when you have a large set of attributes where you only need a small subset in the response.
For information about this statement, see Include Attributes.
-
For the name, replace Untitled with
Include id and attributes attribute. -
In the Code field, enter
include-attributes. -
From the Applies To list, select Permit.
-
In the Payload field, enter the following text to include the
idattribute and theattributesattribute but not thetypeattribute.["data[*].id","data[*].attributes.*"] -
Click Save changes.
The following screen shows the rule.

With the policy in place, trying the request again gets a response with the
typeattribute removed, as shown in the following snippet.{ "data": [{ "attributes": { "url": "https: //l.imqflip.com/2fm6x.jpq", "captions": ["Still waiting for the bus to Jennie's"], "rating": null, "created_at": "2020-05-e6T22:31:06-00:00" "id": "1", } },
-
-
-
-
Add a rule to exclude attributes.
-
Click Add Rule.
-
For the name, replace Untitled with
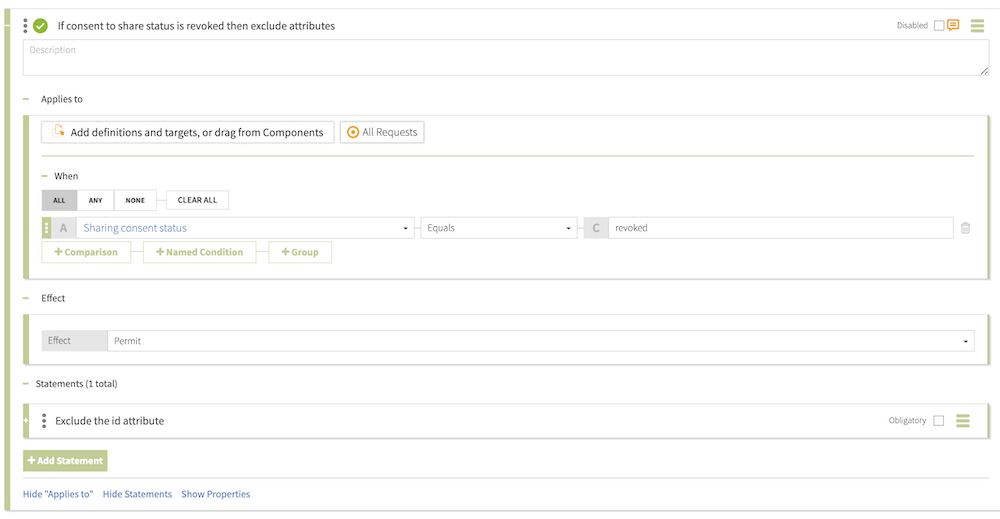
If consent to share status is revoked then exclude attributes. -
Specify the condition.
-
Click Comparison.
-
From the Select an Attribute list, select Sharing consent status, which we created in Getting consent status from the consent record.
-
In the second field, select Equals.
-
In the third field, type
revoked.
-
-
Specify the statement.
-
Click Show Statements.
-
Click next to Statements.
-
Click Add Statement > Exclude Attributes.
Use this statement to be explicit about which attributes to leave out. For example, a third-party client might request banking records; the client does not need account numbers, so give them everything but the account number.
For information about this statement, see Exclude Attributes.
-
For the name, replace Untitled with
Exclude the id attribute. -
In the Code field, enter
exclude-attributes. -
From the Applies To list, select Anything.
-
In the Payload field, enter the following text to exclude the
idattribute.["data[*].id"] -
Click Save changes.
The following screen shows the rule.

With the policy in place, trying the request again gets a response with the
idattribute removed, as shown in the following snippet.{ "data": [{ "type": "answers", "attributes": { "url": "https: //l.imqflip.com/2fm6x.jpq", "captions": ["Still waiting for the bus to Jennie's"], "rating": null, "created_at": "2020-05-e6T22:35:06-00:00" } },You can use the Decision Visualiser to see how the decision engine processed the decision. In the Policy Editor, click Policies in the left pane, then click Decision Visualiser along the top, and then click Recent Decisions. Click a decision and follow the green paths to see which policies are executed and which rules are invoked. Click Attributes along the top to see the names and values of attributes that are used in the decision.
-
-
-
-
Add a rule to modify attributes.
-
Click Add Rule.
-
For the name, replace Untitled with
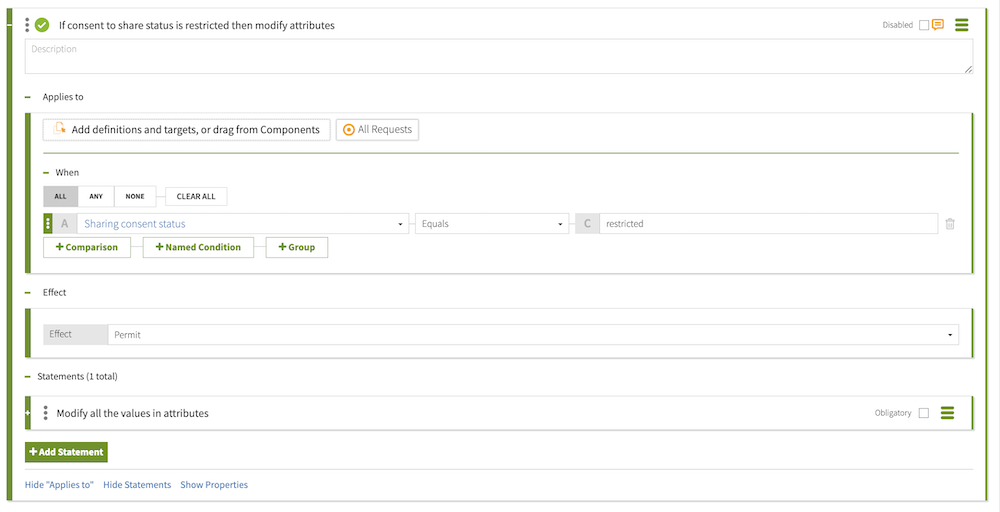
If consent to share status is restricted then modify attributes. -
Specify the condition.
-
Click Comparison.
-
From the Select an Attribute list, select Sharing consent status, which we created in Getting consent status from the consent record.
-
In the second field, select Equals.
-
In the third field, type
restricted.
-
-
Specify the statement.
-
Click Show Statements.
-
Click next to Statements.
-
Click Add Statement > Modify Attributes.
Use this statement to change attributes. For example, the client might request health records and require all items from a record, such as a social security number, even if partially or fully hidden.
For information about this statement, see Modify Attributes.
-
For the name, replace Untitled with
Modify all the values in attributes. -
In the Code field, enter
modify-attributes. -
From the Applies To list, select Permit.
-
In the Payload field, enter the following text to replace all values in the
attributesattribute with three dashes.{"data[*].attributes.*":"---"} -
Click Save changes.
The following screen shows the rule.

With the policy in place, trying the request now gets a response with the
idandtypeattributes unchanged but all theattributesvalues changed to dashes, as shown in the following snippet.{ "data": [{ "id": "168", "type": "answers", "attributes": { "url": "---", "captions": "---", "rating": "---", "created_at": "---" } },
-
-
-
Result
The following image shows what the policy applies to and the three rules.
