Configuring PingFederate for PingAuthorize
Configure PingFederate to authorize external access through tokens to the PingAuthorize Policy Editor.
About this task
You can also use PingAccess to authorize external access through rules. Learn more in Rule Creation in PingAccess in the PingAccess documentation.
The following example configuration assumes that any authenticated user can access the PingAuthorize Policy Editor. You can find more informarion about limiting access to members of a specific group in Configuring PingFederate group access for PingAuthorize.
Steps
-
In the PingFederate administrative console, go to System > Data & Credential Stores > Data Stores.
-
Click Add New Data Store.
-
On the Data Store Type tab, in the Name field, enter a name for the datastore.
-
In the Type list, select Directory (LDAP), and then click Next.
-
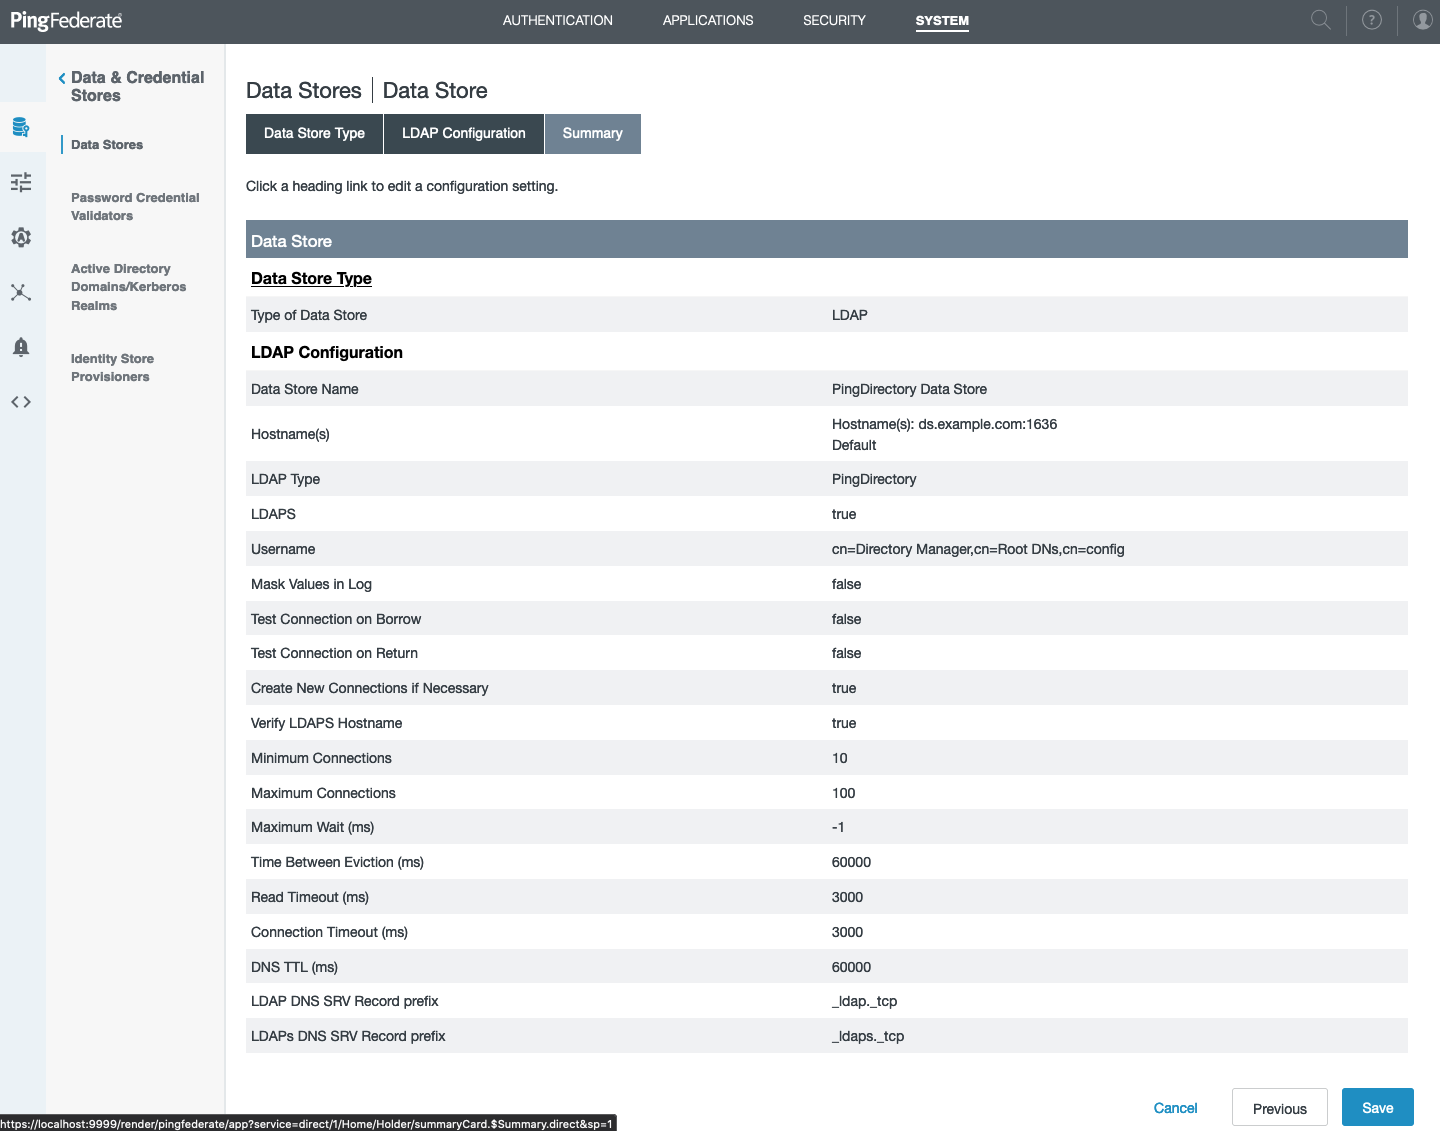
On the LDAP Configuration tab, enter the address and authentication information for PingFederate to use when accessing PingDirectory, and then click Next.
-
On the Summary tab, review your configuration. Click Save.
-
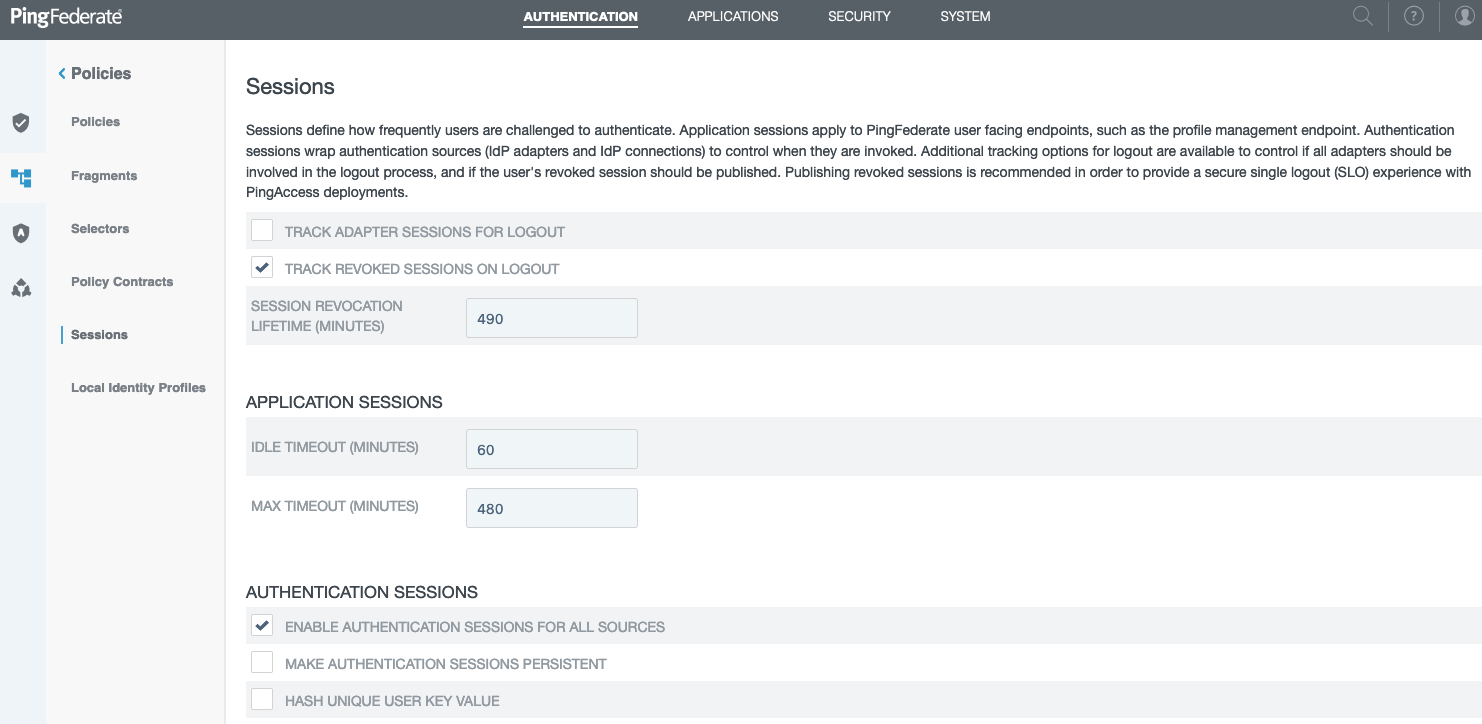
Go to Authentication > Policies > Sessions and enable authentication sessions. The following example enables authentication sessions for all sources. Make the appropriate change for your environment, and then click Save.
-
Go to Security > Certificate & Key Management > SSL Client Keys & Certificates and import your JWT signing certificate. Click Save.
PingFederate expects the certificate chain and keys to be encoded in PKCS12 format.
-
Configure your OAuth server using the OpenID Connect protocol.
-
Go to System > OAuth Settings > Scope Management and create scopes.
-
In the Scope Value field, enter the
email,openid, andprofilescopes and click Add after each entry. Click Save.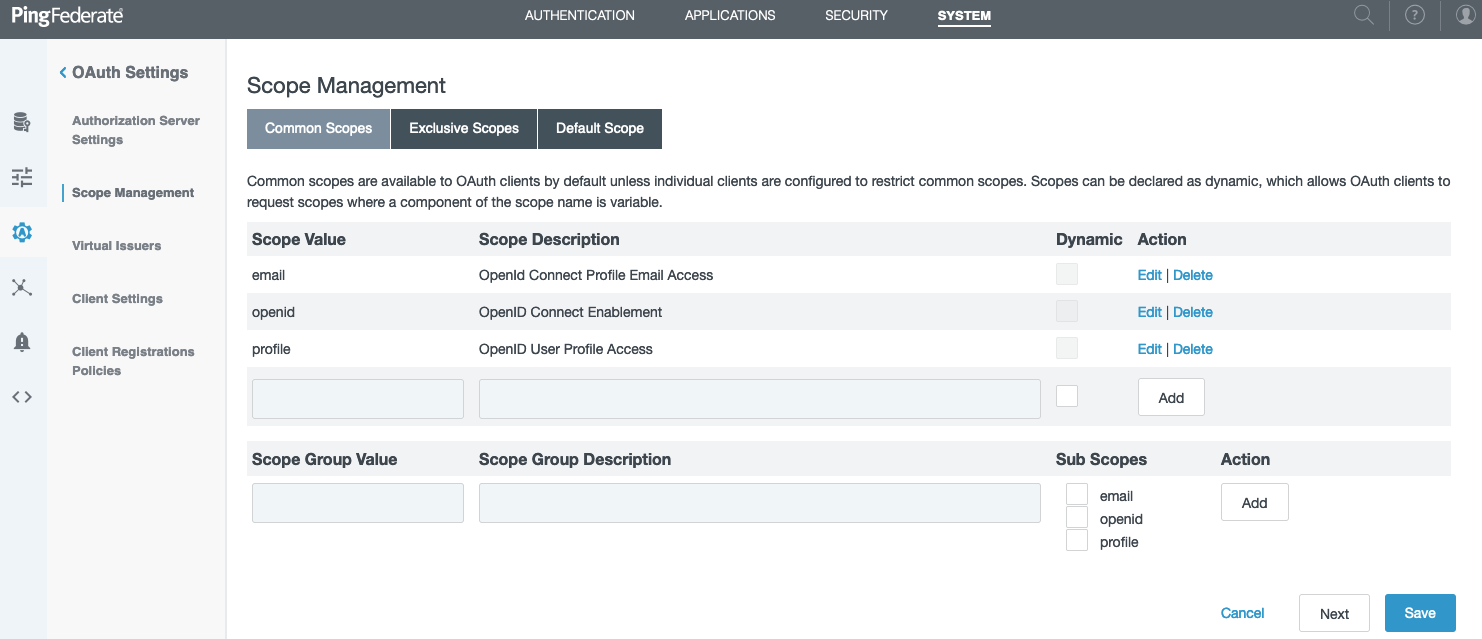
-
Go to Applications > OAuth > Access Token Management and click Create New Instance.
-
On the Type tab, in the Type list, select JSON Web Tokens. In the Parent Instance list, select None. Click Next.
-
On the Instance Configuration tab, click Add a new row to 'Certificates' and add the previously imported signing certificate. Select the desired signing algorithm and token timeout, and then click Next.
-
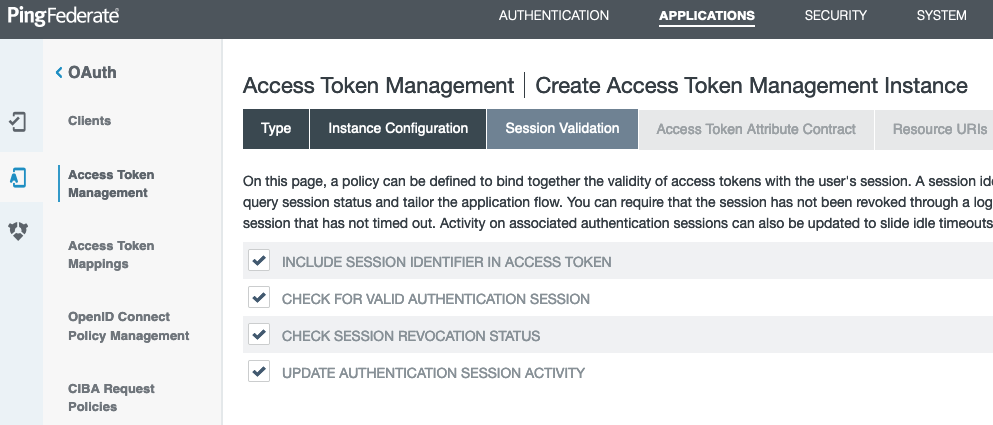
On the Session Validation tab, enable the session validation options.
-
On the Access Token Attribute Contract tab, add the attributes to be included in the OAuth access token. This example extends the contract with
cn,email,scope,sub, anduidattributes.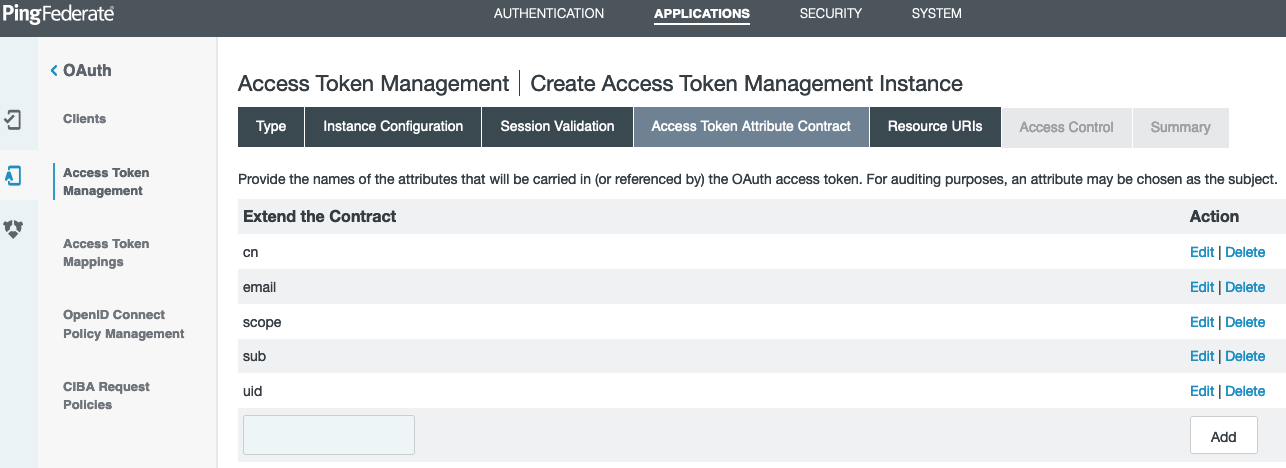
-
Click Next until you reach the Summary tab. Click Save. Accept the default values for the Resources URIs and Access Control settings.
-
Go to Applications > OAuth > Access Token Mappings to create an Access Token Mapping in the Default context for the Access Token Manager you just created. Click Add Mapping, and then click Add Attribute Source.
-
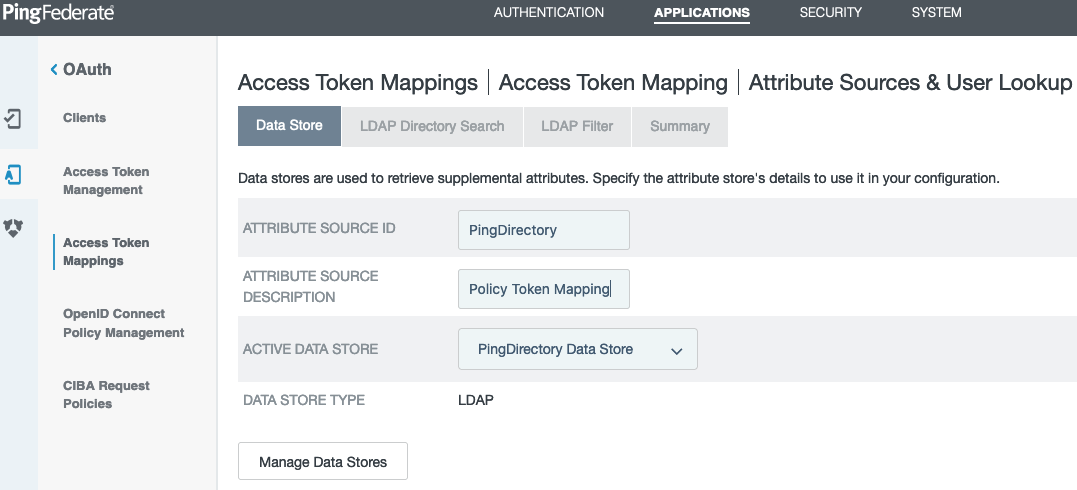
In the Active Data Store list, select the PingDirectory datastore that you created in step 2. Click Next.
-
On the LDAP Directory Search tab, in the Base DN field, enter the base DN for the PingDirectory data that provides your identities.
-
In the Attributes to return from search section, click Add Attribute and enter the attributes to be retrieved.
The sample data uses
ou=People,dc=example,dc=com, and the configuration shown in the following image retrieves thecn,mail, anduidattributes.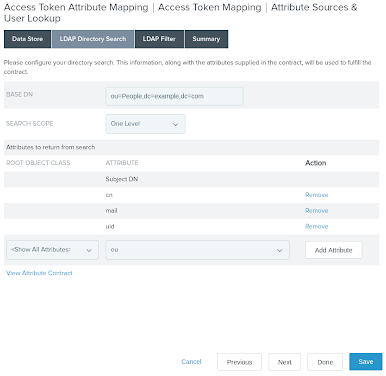
-
On the LDAP Filter tab, in the Filter field, enter
uid=${USER_KEY}to match the PingDirectory sample data with the authenticating user information.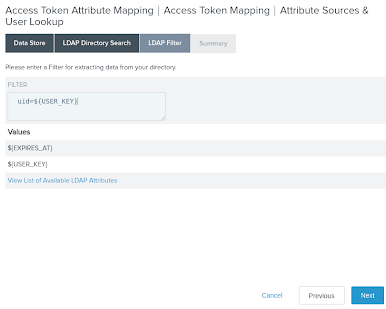
-
On the Summary tab, click Next and Save.
-
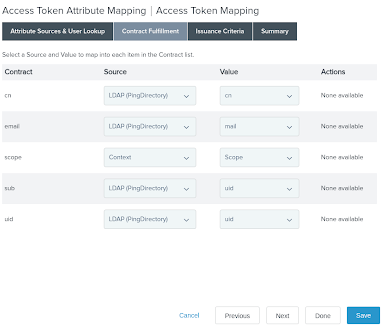
On the Contract Fulfillment tab, fulfill the contract with the LDAP attributes from the PingDirectory datastore. Leave the remaining settings as their defaults and click Save.
The scope attribute is fulfilled from the OAuth context.
-
Go to Applications > OAuth > OpenID Connect Policy Management and click Add Policy.
-
On the Manage Policy tab, from the Access Token Manager list, select the access token manager you created previously.
-
Ensure that the Include User Info in ID Token checkbox is selected. Click Next.
-
On the Attribute Contract tab, extend the policy contract with the
emailandnameattributes. Click Next. -
On the Attribute Scopes tab, map the previously defined
emailandprofilescopes to theemailandnameID token attributes. Click Next.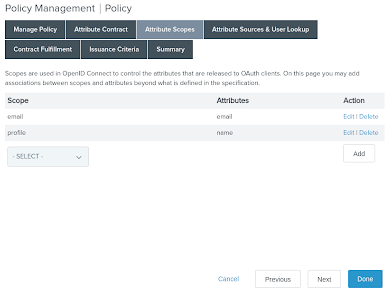
-
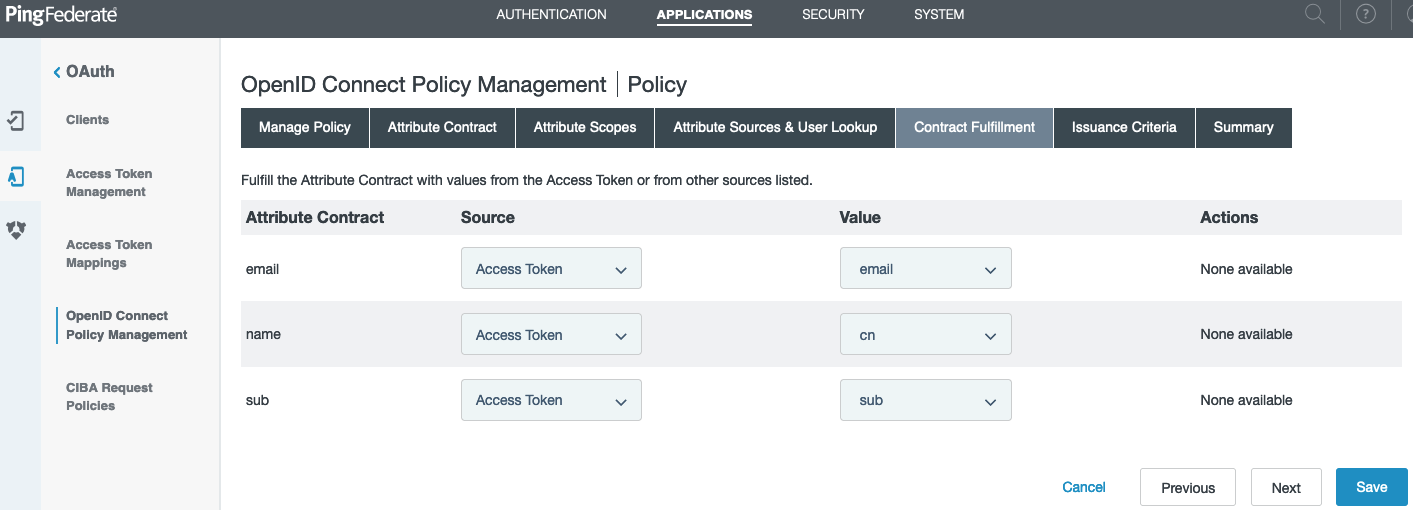
On the Contract Fulfillment tab, fulfill the contract with the values in the access token. Click Next until you reach the Summary tab, and then click Save.
-
Click Set as Default to set the newly created policy as the default policy.
-
Go to Applications > OAuth > Clients and click Add Client.
To provide the Policy Editor with appropriate defaults, configure PingFederate with a Client ID of
pingauthorize-papand select the Authorization Code checkbox in the Allowed Grant Types section. In the Default Access Token Manager list, select the JWT Manager created earlier, and in the Redirection URIs field, add the correct callback URL for the Policy Editor, such as https://pap.example.com:9443/idp-callback.Click Save.
-
Go to Authentication > OAuth > IdP Adapter Grant Mapping and create a new Form Adapter Mapping, fulfilling the contracts for
USER_NAMEandUSER_KEYwith the username form field. Click Next and Save on the Summary tab.
-
Because this PingFederate instance uses a different domain from the Policy Editor, you must modify the PingFederate CORS settings. Go to System > OAuth Settings > Authorization Server Settings. In the Cross-Origin Resource Sharing Settings section, enter the domain for the Policy Editor in the Allowed Origin field. Click Add and then Save.

Result
PingFederate is configured to handle OpenID Connect (OIDC) requests.
-