Tutorial 1: Importing default policies
This tutorial describes how to use the PingAuthorize Policy Editor to import default attribute-based access control policies. It also introduces the Trust Framework and describes the default policies.
About this task
Before you can begin writing policies, you must import the default policies from a snapshot file. This file contains a minimal set of policies and the default Trust Framework. The Trust Framework defines the foundational elements that you use to build policies, such as application programming interface (API) services, HTTP methods, and HTTP request.
The default policies and Trust Framework are stored in a snapshot file named defaultPolicies.SNAPSHOT, which is bundled with both PingAuthorize Server and the Policy Editor. You must base all policies that you create for use with PingAuthorize on the policies and Trust Framework entities defined in this file.
To use the default policies that are distributed with PingAuthorize Server:
Steps
-
Copy
defaultPolicies.SNAPSHOTfrom the PingAuthorize Policy Editor container to the current directory on your computer using the following command.Be sure to include the trailing
.character.docker cp {PAP_CONTAINER_NAME}:/opt/out/instance/resource/policies/defaultPolicies.SNAPSHOT . -
Sign on to the Policy Editor using the URL and credentials from Accessing the GUIs.
-
In the Import a Branch from a Snapshot section, click Snapshot and select the file that you just copied to your computer.
-
In the Name field, enter
PingAuthorize Tutorials.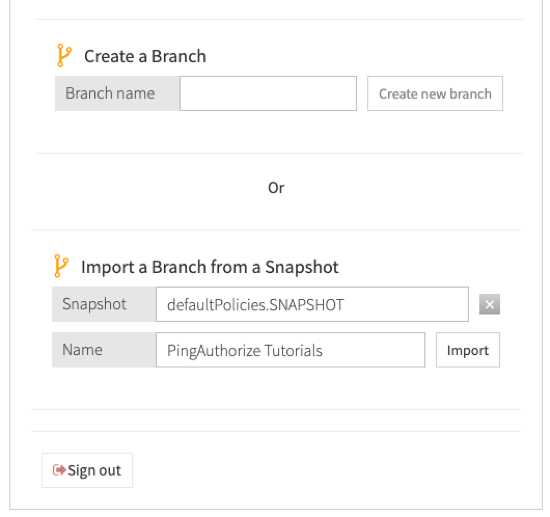
-
Click Import.
Result:
The Policy Editor displays the Version Control page. From this page, you can manage policy changes similar to how you would in a software source control system.
-
To select the policy branch that you just created, click PingAuthorize Tutorials.
Result:
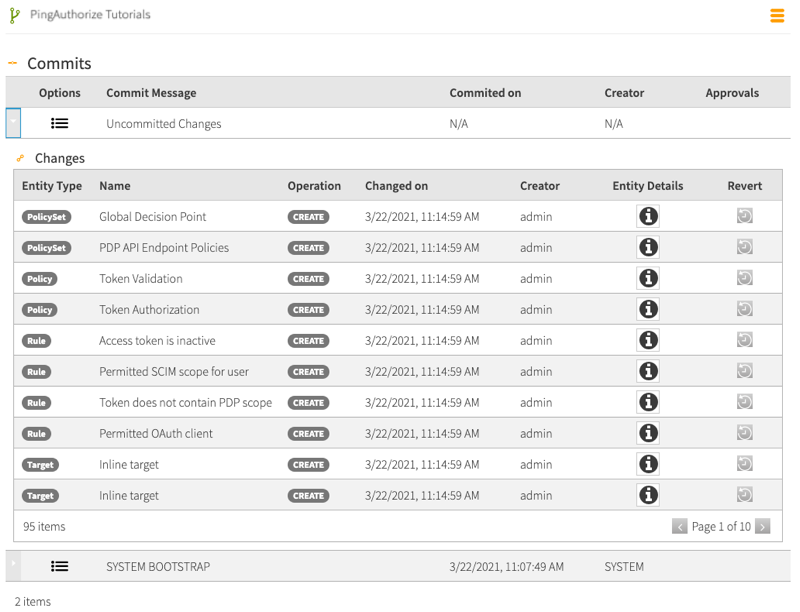
A Commits table opens. This table provides a log of all changes made to a policy branch.
-
Click the expand arrow at the left of the top line for Uncommitted Changes.
Result:
This opens a list of all changes to the policy branch that are yet to be committed. In this case, the list includes all of the contents of the snapshot that you just imported.
-
Click Commit New Changes.
-
In the Commit Message field, enter
Initial commit. Click Commit.

|
As you develop your own policies, you can use the Policy Editor’s version control feature to manage your changes. Follow best practices by committing your changes every time you achieve a satisfactory working state. |
Introduction to the Trust Framework and default policies
You can now use the Policy Editor with PingAuthorize Server. First though, explore the interface, paying particular attention to the Trust Framework and Policies sections in the left pane.
Trust Framework
In the Trust Framework section, shown below, you define the foundational elements that you use to build policies and make access control decisions.
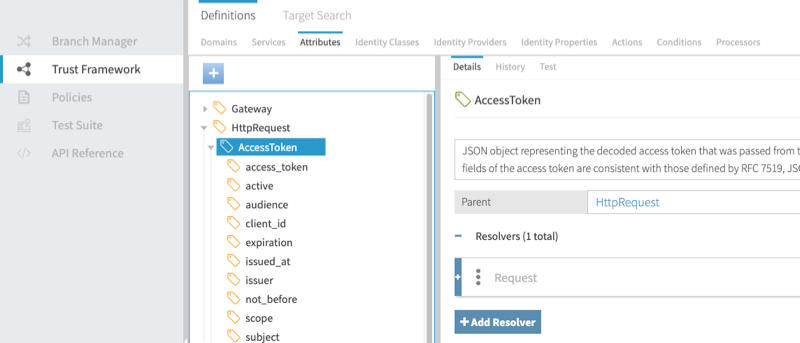
The Trust Framework provides several types of entities. The following table describes the ones you will use most.
| Entity | Description |
|---|---|
Services |
Services perform two functions. Most often, they represent a specific API service or API resource type to be protected by your policies. They can also define policy information points, external data sources (such as APIs or LDAP directory servers) that PingAuthorize can use to make policy decisions. |
Attributes |
Attributes provide the context that informs fine-grained policy decisions. Attributes often correspond to elements of an HTTP request, such as an access token subject. However, you can obtain their values from a variety of sources. |
Actions |
Actions label the type of a request and generally correspond to HTTP methods (GET, POST, and so on) or CRUD actions (create, delete, and so on). |
Look at the Trust Framework’s default attributes and consider how you could use them in your own policies. Some important Trust Framework attributes include those in the following table.
| Attribute | Description |
|---|---|
|
This is the introspected or deserialized access token from the HTTP request. |
|
This is the HTTP request body, typically present for POST, PUT, and PATCH operations. |
|
This is the upstream API server’s HTTP response body. |
|
For SCIM operations, this is the SCIM resource being retrieved or modified. |
|
For requests authorized using an access token, this is the user who granted the access token. |
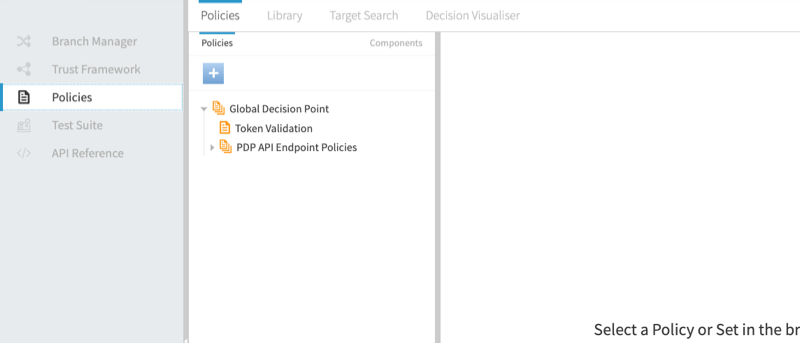
Policies
In the Policies section, shown below, you define your organization’s access control policies.
You define your policies within a hierarchical tree that consists of two types of items.
- Policy Set
-
A container for one or more policies.
- Policy
-
A policy, which defines a set of rules that yield a policy decision when evaluated.
When the policy engine receives a policy request from PingAuthorize Server in response to an API call, it starts at the Global Decision Point and walks down the policy tree, first checking if each policy set or policy is applicable to the current policy request, and then evaluating the rules defined by each policy. Each rule returns a policy decision, typically PERMIT or DENY. Likewise, each policy might return a different policy decision. The policy engine evaluates an overall decision using combining algorithms.
The default policy tree contains the following policy sets and policies:
- Global Decision Point
-
This is the root of the policy tree. Place all other policy sets or policies under this point. This node’s combining algorithm is set to A single deny will override any permit. This algorithm requires no denies and at least one policy to permit the API call.
- Token Validation
-
For most cases, this is the only default policy. It checks for a valid access token. In combination with the Global Decision Point combining algorithm, this is rather permissive. Any API caller can succeed with a valid access token.
- PDP API Endpoint Policies
-
The PingAuthorize Server XACML-JSON PDP API uses these policies. They are not discussed further in this tutorial.
You will use the following items in the UI in a tutorial.
- Library
-
The default policy library contains example advice and rules.
- Decision Visualiser
-
You will use this tool to examine policy decisions in detail.