Enabling profile management
In addition to registration, you can enable self-service profile management and specify which local identity fields users can update on the profile management page.
About this task
Use the administrative console to enable profile management.
To illustrate the configuration steps, consider the sample use case in Setting up self-service registration or Enabling third-party identity providers with the added requirement of allowing users to modify their mobile number and to remove their local accounts.
Configuration steps:
|
As the required components remain the same, the step sequence matches those in Setting up self-service registration and Enabling third-party identity providers as well. If you require more information for a given step, see the same step in one of the aforementioned pages. |
Steps
-
Set up PingDirectory to connect with PingFederate.
-
Create an authentication policy contract. For more information on how to create an authentication policy contract, see Managing policy contracts.
-
Configure profile management when creating a new or reconfiguring an existing local identity profile.
-
Go to Authentication > Policies > Local Identity Profiles configuration wizard.
-
On the Profile Info tab, select the Enable Profile Management checkbox. Click Next.
-
(Optional) On the Authentication Sources tab, define authentication sources. For more information, see Defining authentication sources.
-
On the Fields tab, select the Profile Management checkbox under Applies To for the applicable fields as you define local identity fields.
These selected local identity fields will be shown to authenticated users on the profile management page.
For this sample use case, select the Profile Management checkbox for the
lipMobilelocal identity field. -
On the Email Verification tab, click Next.
-
On the Registration tab, click Next.
-
On the Profile Management tab, select the Enable Profile Deletion checkbox.
In general, this is an optional feature. It is selected here because it is one of the requirements of this sample use case.
-
Continue from step 3f as documented in Setting up self-service registration or Enabling third-party identity providers.
-
-
Configure an HTML Form Adapter instance for customer identities. For more information, see Configuring the HTML Form Adapter for customer identities.
-
Create an IdP authentication policy. For more information, see Defining authentication policies.
-
Provide the profile management URL to users.
-
Go to Authentication > Policies > Local Identity Profiles.
-
Select the local identity profile that you have configured profile management in [step_o3x_zvl_wcb].
-
Copy the profile management URL as shown on the Summary tab and pass it to the users.
-
Result
You have now successfully enabled profile management. Authenticated users can review and modify the local identity fields that have been configured to show on the profile management page and delete their local accounts if the option has been enabled.
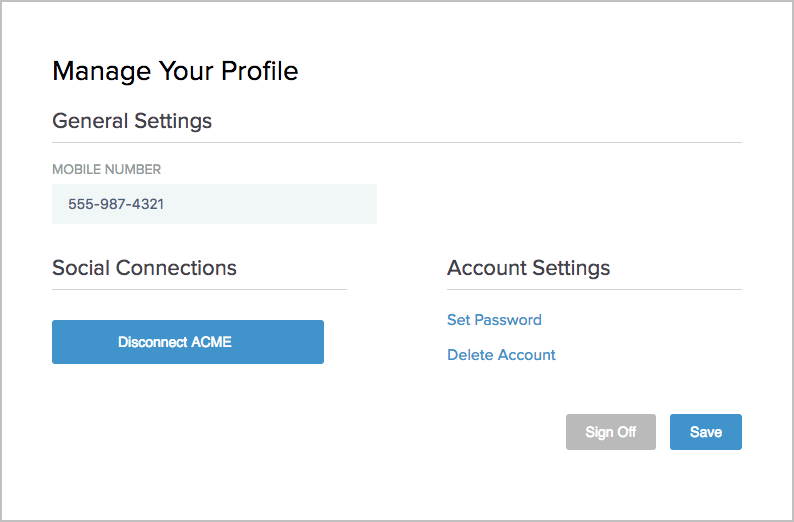
The following screen capture provides a sample of the profile management page based on the sample use case.

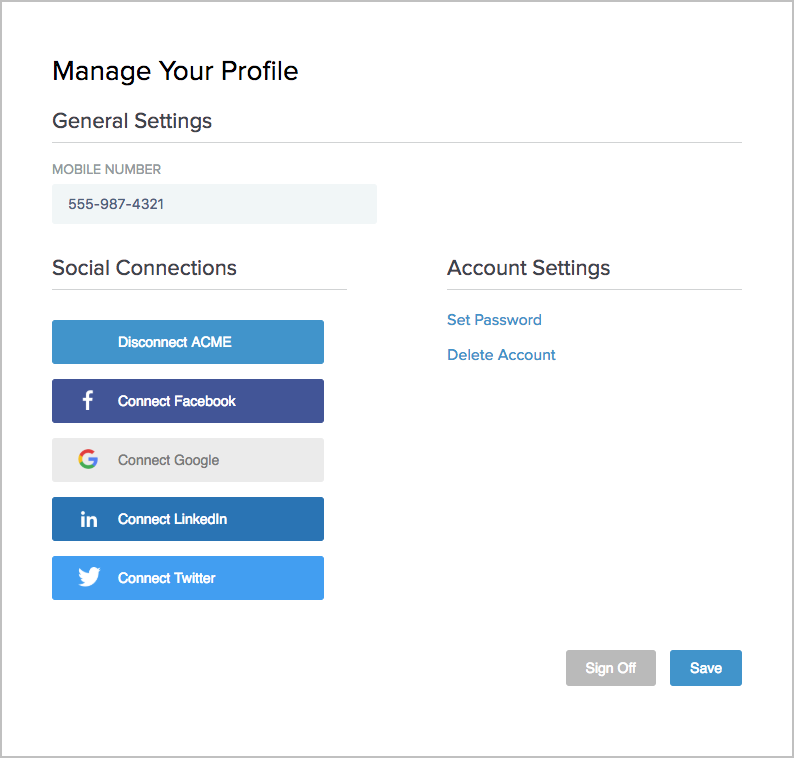
If you add Facebook, Google, LinkedIn, and Twitter to the local identity profile, when a user accesses the profile management page, the user will see a page similar to the following screen capture.

If you have only one authentication source, the profile management page reminds the users that they must set a password for their local accounts before disconnecting the third-party identity provider.