Adding environments
Use the wizard to add PingFederate and PingAccess environments to PingCentral.
Steps
-
On the Environments page, click Add Environment.
-
On the Connect to Instances page, connect to a PingFederate environment:
-
Complete the PingFederate Admin, PingFederate Admin Username, and PingFederate Admin Password fields with your authentication information.
If this is the first time you have set up this environment, and you set it up correctly, you won’t see a Skip Verification option. However, if the initial validation fails, this option shows. If selected, it allows you to skip the validation process.
-
Click Next.
-
On the Name Environment page, complete the Name, Short Code, and Description fields.
-
Optional: : To prevent non-administrators from promoting applications to the environment, select the Protect check box.
-
Click Save and Continue.
-
Optional: To add an identity provider certificate, select the appropriate certificate in the Signing Certificate list or to upload your own certificate, click Choose and enter the certificate password in the appropriate field. Click Save and Close.
Result:
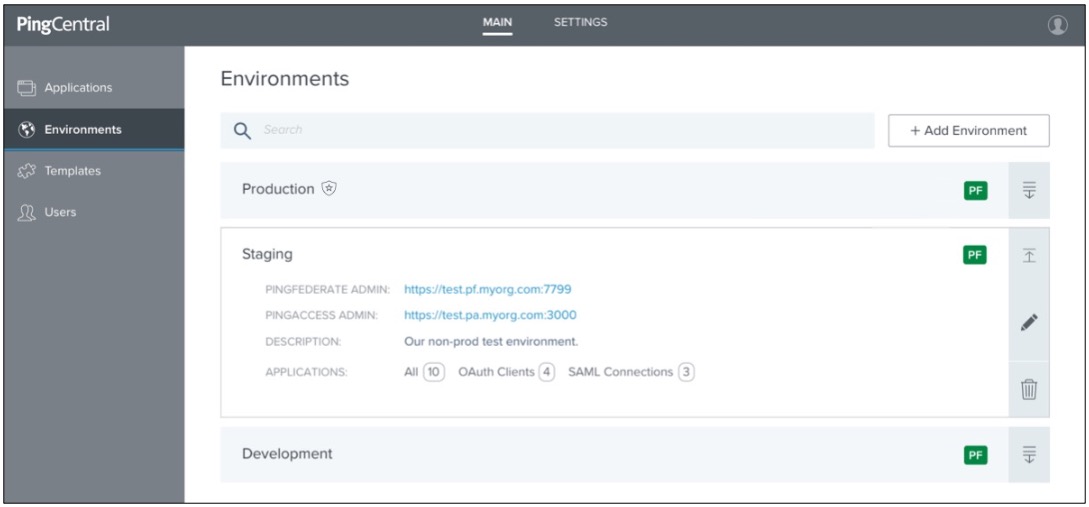
The environment is displayed on the Environments page. If you chose to protect the environment, a shield icon displays next to its name. A PF icon also displays. The color of this icon represents the status of the environment. A green PF icon indicates that the environment is verified while a red PF icon indicates that the environment isn’t verified.
-
Click the expandable icon associated with the environment to view environment details.Environment details include:
-
A link to PingFederate.
-
A description of the environment.
-
The total number of applications hosted on this environment and a breakdown of OAuth/OIDC clients and SAML service provider (SP) connections. Click these links to access filtered lists of these applications on the Applications page.

-
-
-
To add a PingAccess environment instance to PingCentral, access the Connect to Instances page by either clicking on Add Environment or by clicking the Pencil icon for an existing PingAccess application.
-
Complete the PingAccess Admin, PingAccess Admin Username, and PingAccess Admin Password fields with your authentication information.
If this is the first time you have set up this PingAccess environment, and you set it up correctly, you won’t see a Skip Verification option. However, if the initial validation fails, this option displays. If selected, it allows you to skip the validation process.
-
Click Next.
-
On the Name Environment page, complete the Name, Short Code, and Description fields.
-
Optional: To prevent non-administrators from promoting applications to the environment, select the Protect check box.
-
Click Save and Continue.
Result:
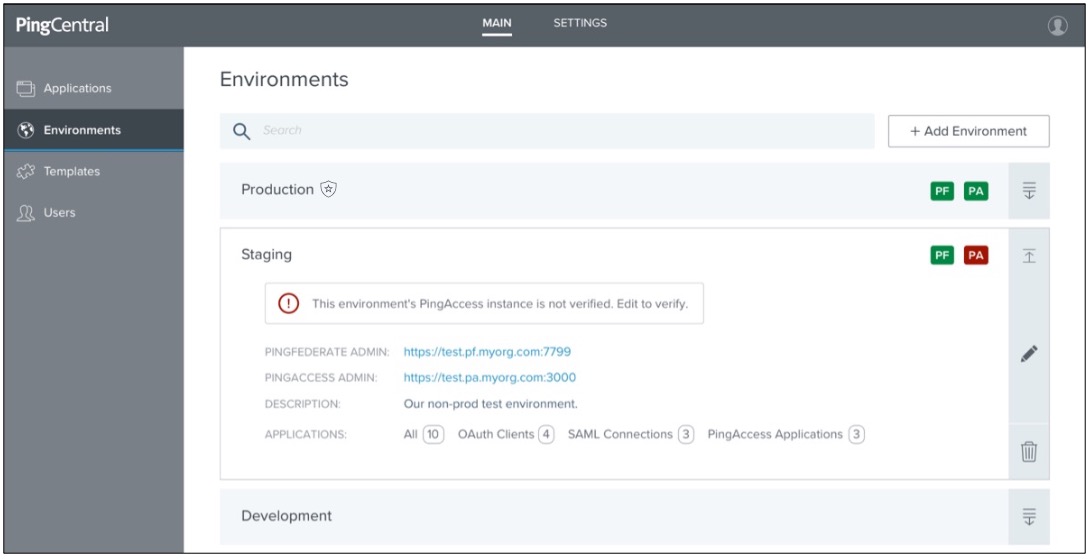
The environment is displayed on the Environments page. If you chose to protect the environment, a shield icon displays next to its name. A PA icon also displays. The color of this icon represents the status of the environment. A green PA icon indicates that the environment is verified while a red PA icon indicates that the environment isn’t verified.

-
Click the expandable icon associated with the environment to view environment details.
Environment details include:
-
A link to PingFederate.
-
A link to PingAccess.
-
A description of the environment.
-
The total number of applications hosted on this environment and a breakdown of OAuth/OIDC clients, SAML SP connections, and PingAccess applications. Click these links to access filtered lists of these applications on the Applications page.
If an environment is unavailable, applications in that environment don’t display on the Applications page.
If the environment is not verified, you receive an error message.
-
-
Ensure that PingFederate is configured as a token provider for PingAccess.
For more information, see Configuring PingFederate as a PingAccess token provider.
-