Configuring PingFederate for SSO
About this task
To access PingFederate from PingCentral using SSO:
Steps
-
Review the PingFederate configurations:
-
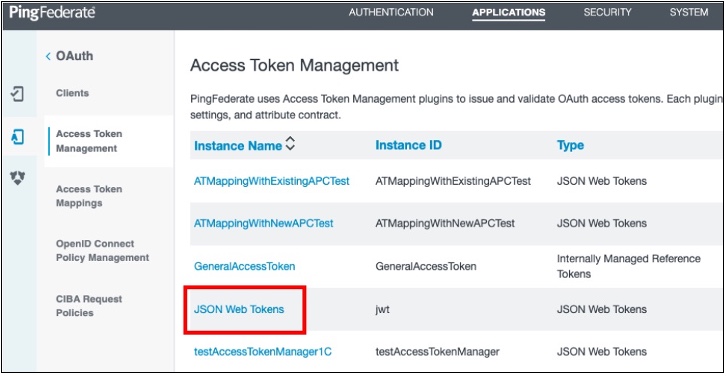
In PingFederate, go to Applications → OAuth → Access Token Management and ensure that JSON web tokens are configured, as shown in this example.
See Configuring JSON-token management in the PingFederate Server guide for details.
-
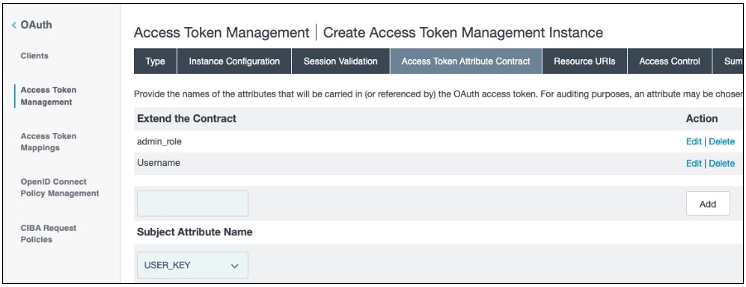
On the Access Token Attribute Contract tab, ensure that the access token attribute contract includes the following attributes, as listed here and shown in this example.
-
admin_role -
Username
-
See Defining the access token attribute contract in the PingFederate Server guide for details.
-
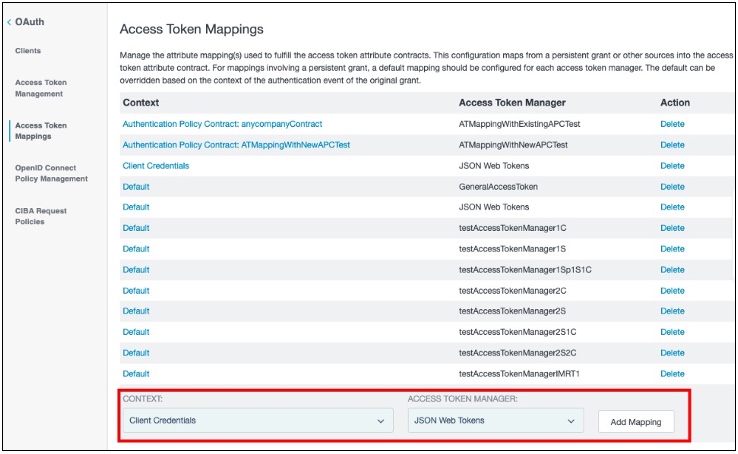
Go to Applications → OAuth → Access Token Mappings and ensure that Client Credentials are mapped to useJSON Web Tokens as the access token manager, as shown in this example. Click Add Mapping.
-
-
On the Contract Fulfillment tab, ensure that the access token attributes in the contract are correctly mapped and the following attributes are included in the contract:
-
Username: The username of the administrator used to access APIs. -
admin_role: This multi-valued attribute must include theadminandcryptoadminroles. In this example, an OGNL expression is used to include these values.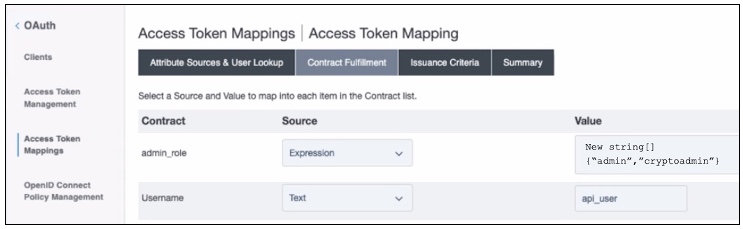
-
Configure a new PingFederate client:
-
-
-
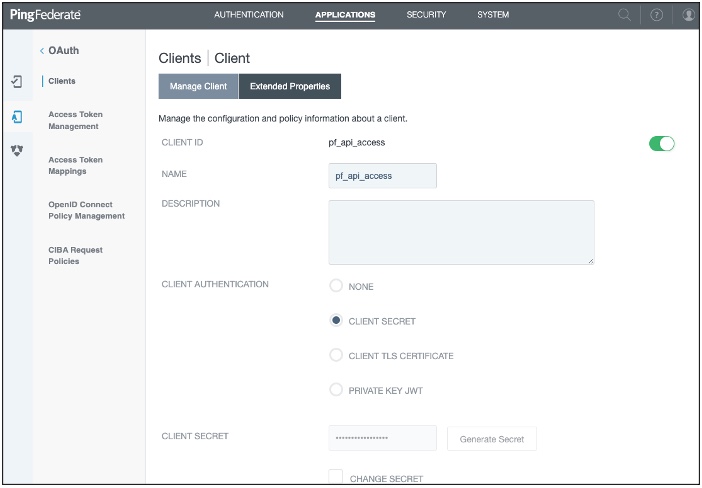
In PingFederate, go to Applications → OAuth → Clients.
-
On the Manage Client tab, complete these fields:
-
Client ID: Enter a unique identifier for the client.
-
Name: Enter a name for the client.
-
Description: Enter a description of the client.
See Configuring OAuth clients in the PingFederate Server guide for details.
-
-
In the Client Authentication field, select Client Secret.
-
In the Client Secret field, you can:
Option Description Create or generate a secret.
Choose from:
-
To create a strong, random alphanumeric string, click Generate Secret.
-
Manually enter a secret.
Modify an existing secret.
-
Select the Change Secret check box.
-
Click Generate Secret to create a strong random alphanumeric string or manually enter a secret.
-
-
In the Grant Types field, select the Client Credentials and Access Token Validation (Client is a Resource Server) options.
-
In the Default Access Token Manager field, select JSON Web Tokens . Click Save.
-
Access the PingFederate
<pf_install>/pingfederate/bin/run.propertiesfile, and ensure that this property is set:pf.admin.api.authentication=OAuth2. -
Access the PingFederate
<pf_install>/pingfederate/bin/oauth2.propertiesfile, and ensure that the following properties are set.Property Description client.idThe unique client identifier defined in step 2.
client.secretThe client secret defined in step 4.
introspection.endpointThis URL specifies where PingFederate validates the authentication token.
For example,
https://<PF_RUNTIME_HOST>:<PF_RUNTIME_PORT>/as/introspect.oauth2required.scopesUse any of the scopes defined in PingFederate.
Go to System → OAuth Settings → Scope Management to see a list of available scopes.
For details, see Scopes in the PingFederate Server guide.
username.attribute.nameThe value mapped to the Username attribute defined on the Contract Fulfillment tab.
role.attribute.nameThe value mapped to the admin_role attribute defined on the Contract Fulfillment tab.
-
Configure PingCentral:
-
-
In PingCentral, to connect to the new PingFederate client, go to Environments → Add Environments.
-
On the Connect to Instances page, complete the following fields using the properties you just set in the PingFederate
oauth2.propertiesfile.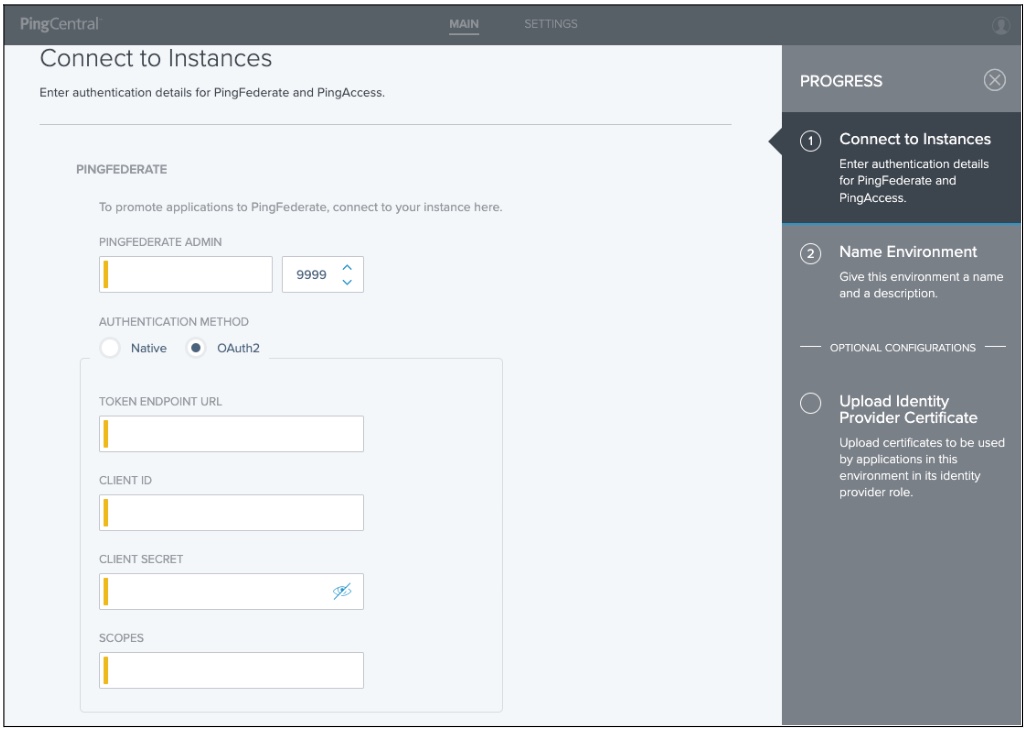
-
PingFederate Admin: Enter the URL defined in the
pf.admin.baseurlproperty for the new client. For details, see Configuring PingFederate properties in the PingFederate Server guide. -
Authentication Method: Select OAuth2.
-
Token Endpoint URL: Enter the token endpoint URL, which is PingFederate:
https://<PF_RUNTIME_HOST>:<PF_RUNTIME_PORT>/as/token.oauth2. -
Client ID: Enter the unique client identifier set as the
client.idproperty. -
Client Secret: Enter the client secret set as the
client.secretproperty. -
Scopes: Enter the scopes set as the
required.scopesproperty.
-
-
Click Next.