Applying the custom MuleSoft policy for PingAuthorize
You must apply the deployed custom MuleSoft policy to use MuleSoft as an application programming interface (API) gateway with PingAuthorize.
About this task
The PingAuthorize policy supports HTTP APIs configured with the Endpoint with proxy or Basic Endpoint options.
Steps
-
Sign on to your MuleSoft Anypoint account.
-
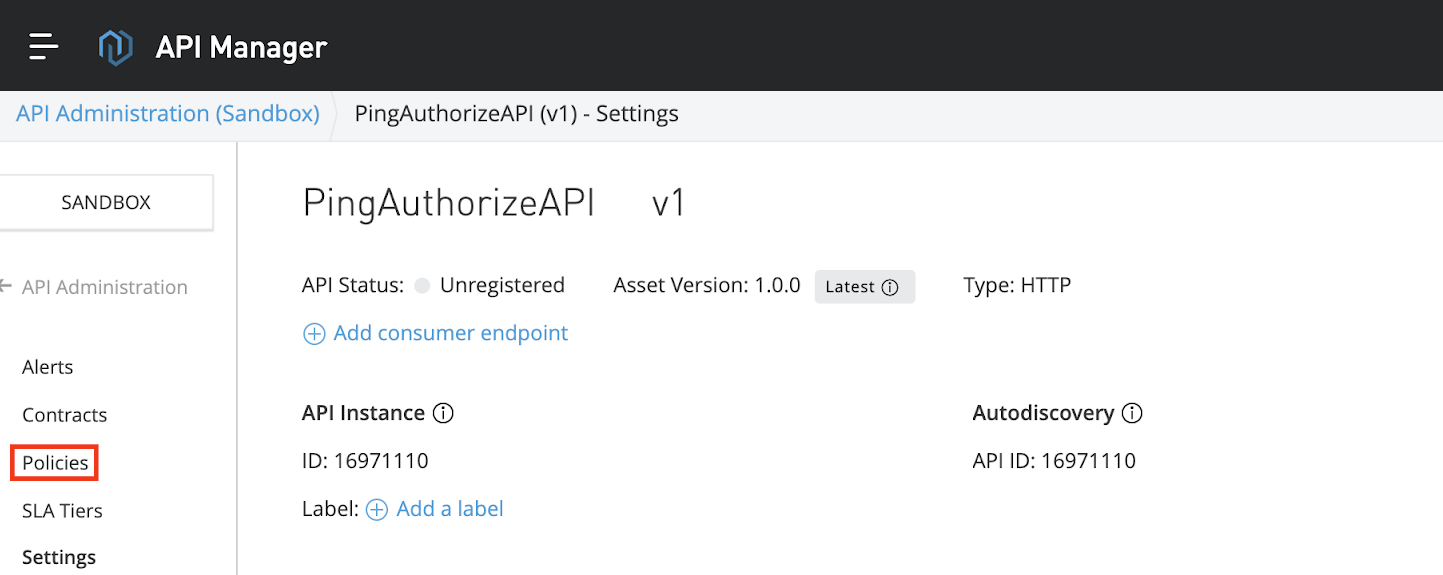
Go to the API manager, expand the API to which you want to attach the PingAuthorize policy, and click Version.

-
In the left navigation pane, click Policies.
The Policies page supports applying the PingAuthorize policy to the API.

-
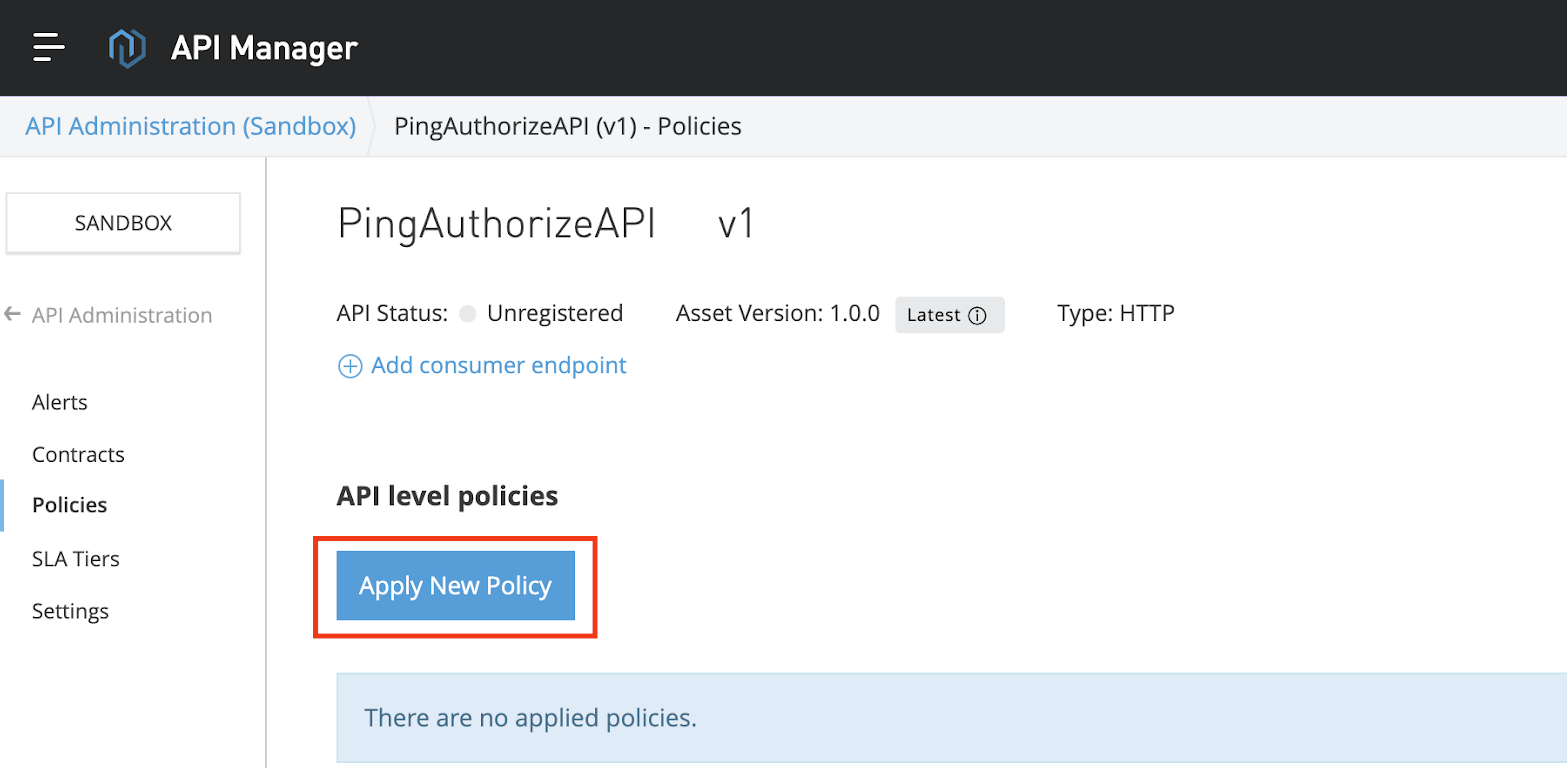
Click Apply New Policy.

Result:
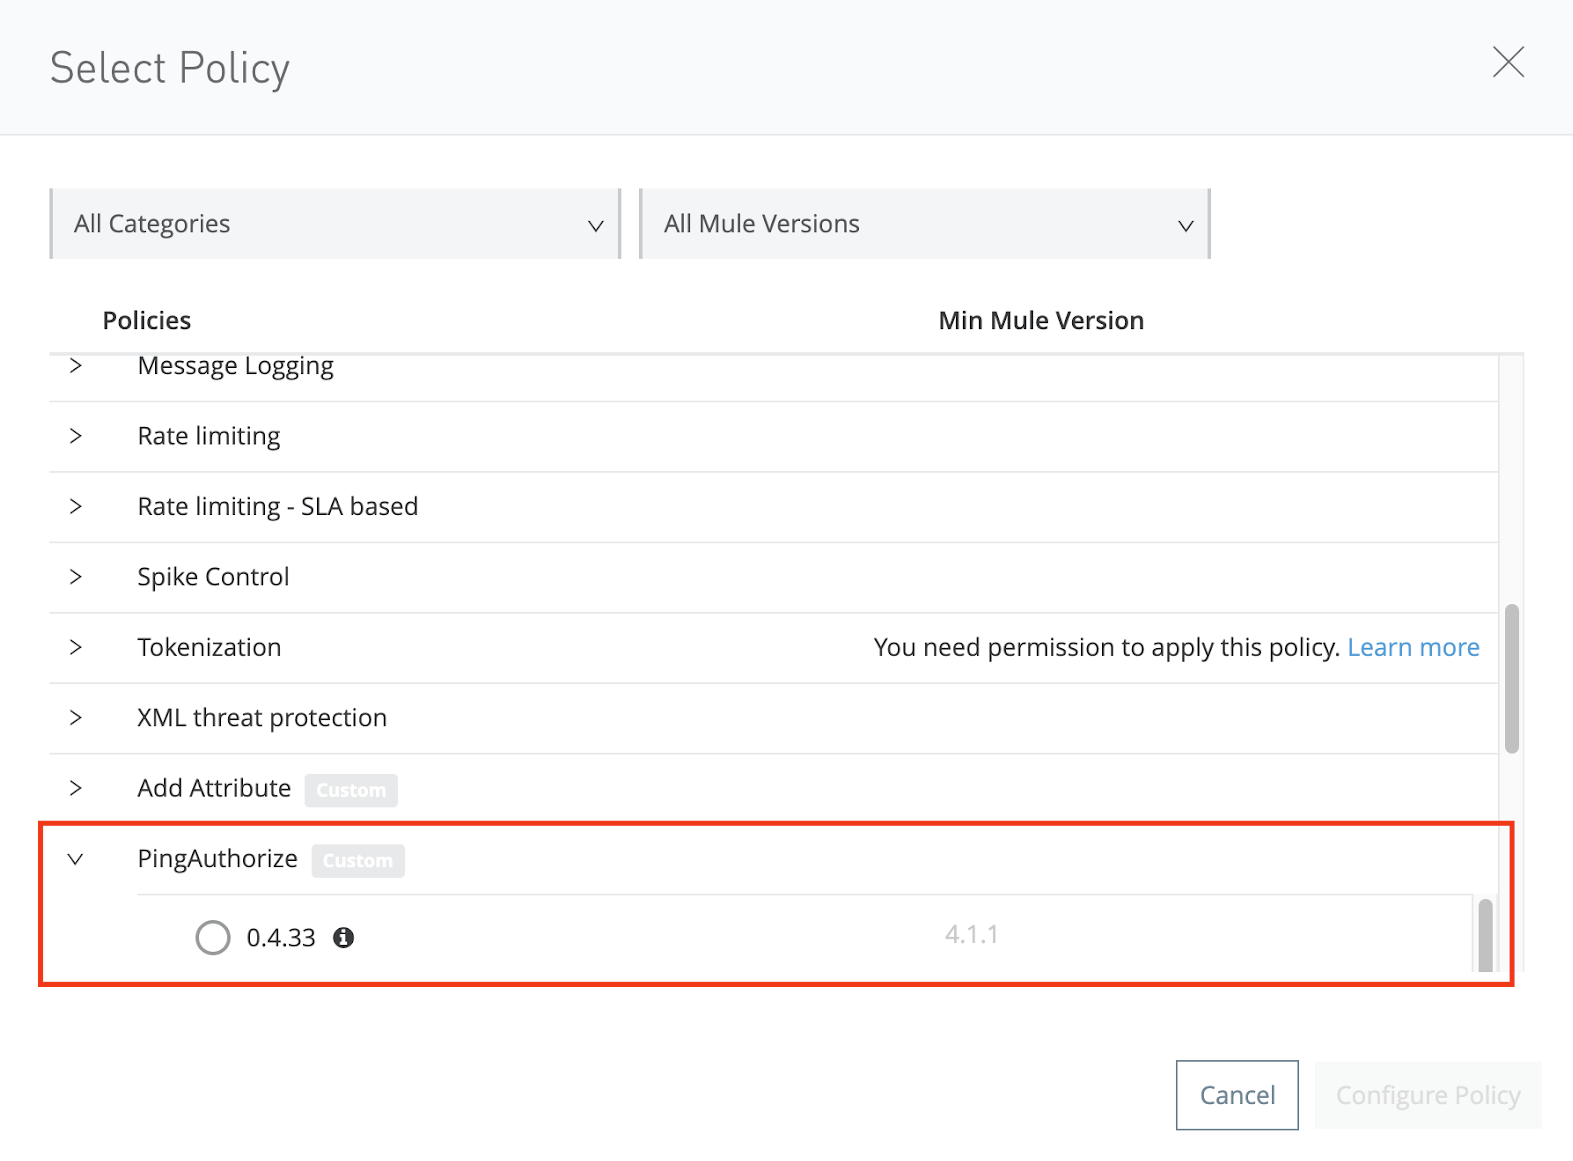
The Select Policy window opens.
-
In the Select Policy window, select the PingAuthorize policy and current version. Click Configure Policy.

-
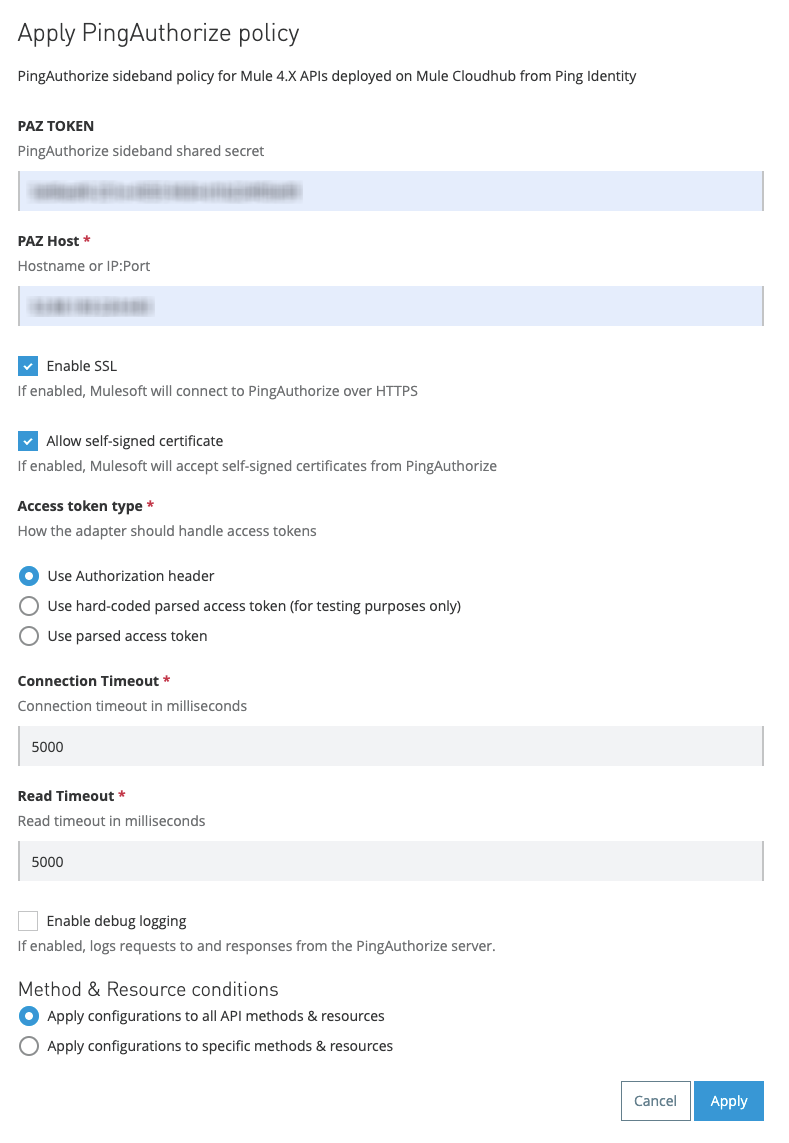
On the Apply Policy page, enter the following values:
-
In the PAZ Token field, enter the sideband adapter shared secret generated as part of the prerequisites in Deploying the custom MuleSoft policy for PingAuthorize.
-
In the PAZ Host field, enter the PingAuthorize host and port.
Do not include the connection scheme (http:// or https://).
-
Select the Enable SSL check box for a secure HTTPS connection between MuleSoft and PingAuthorize.
-
Select the Allow self-signed certificate check box to enable MuleSoft to accept a self-signed certificate from PingAuthorize.
For information about configuring PingAuthorize to use trusted certificates, see Importing signed and trusted certificates.
-
Select an access token type:
Choose from:
-
Use Authorization Header: Indicates that the authorization header of an incoming request should be passed to PingAuthorize and used to authorize the client.
-
Use hard-coded parsed access token: Allows configuration of an access token that will be used for every request. Use this only for testing purposes.
-
Use parsed access token: Allows configuration of a DataWeave expression for retrieving a parsed access token from the Mule message. When you use MuleSoft’s OAuth 2.0 Token Enforcement policies to obtain a parsed access token, use the expression
#[authentication.properties.userProperties]. For more information, see DataWeave Language.
-
-
Optional: Configure the Connection Timeout and Read Timeout.
Timeouts govern the behavior of the API gateway when it cannot connect to PingAuthorize or the response from PingAuthorize is delayed.
+
Timeout parameter Description Connection Timeout
Governs the time the API gateway waits to establish a connection with PingAuthorize, following which it sends the client request to the backend server.
Read Timeout
Governs the time the API Gateway waits for PingAuthorize’s response before sending the request to the backend server.
+
The default value is 5000 milliseconds (5 seconds). It’s good practice to configure a small value to limit the delay in case PingAuthorize isn’t reachable or is unresponsive.
-
Optional: Select the Enable debug logging check box to see requests sent to PingAuthorize Server along with responses.
-
Optional: Configure Methods & Resource Conditions.
See Resource-Level Policies for more information.

-
Next steps
If there are any changes to PingAuthorize endpoints, repeat the process explained in step 6 and re-deploy the configuration.