Localizing flows with PingOne
Localizing a flow lets you present a single flow to customers who use multiple languages, providing a better experience for customers and reducing backend complexity.
You can use the PingOne Languages feature to provide translations for forms created in PingOne. In this solution, you create one or more forms in PingOne and then use the Languages feature to add translations for the fields, options, error messages, and other content used by those forms. You then include the forms in your DaVinci flows.
When a user reaches one of the forms, PingOne uses their browser’s language setting to present them with the correct translation of the form.
Procedure
This section shows you how to create one or more forms, add translations for those forms, and add the forms to one or more flows.
|
The forms, languages, and flows in your environment will vary. This procedure is as specific as possible while still applying to all environments. |
Creating forms
About this task
First, create one or more forms in PingOne.
|
This procedure does not cover all of the options available in the Forms section. You can find information about all available options in the Forms documentation. |
Steps
-
Sign on to PingOne and go to User Experience > Forms.
-
Click the icon to create a new form.
-
In the Form Name field, enter
User Information Example. -
In the Form Usage list, select DaVinci Flow Forms.
-
Click Add Form.
-
Select a template or a blank form as a starting point.
-
(Optional) Add one or more custom fields and create a translation key for each one:
-
Drag the custom field onto the form.
-
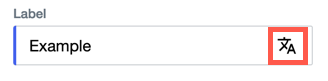
In the left pane, click the translation key icon in the Label field.
-
Select Create New Key.
-
In the Key column, enter an internal name for the key.
-
In the Default Translation column, enter the value of the key in your environment’s default language.
-
Click Select.
-
-
(Optional) Drag one or more PingOne Attribute Fields onto the form.
-
Click Save.
Adding languages and translations
About this task
After creating your forms, enable one or more languages, then provide translations for the fields in your forms for each enabled language.
|
This procedure does not discuss all options available in the Languages section. For more information about all available options, see the Languages documentation. |
Steps
-
Sign on to PingOne and go to User Experience > Languages.
-
Click the icon to add a language.
-
In the Languages list, select a language to add.
-
Click Save Changes.
-
Select the language that you added from the list of languages.
-
In the Module list, select DaVinci Forms.
-
Provide translations for the standard fields in your forms:
-
In the Page list, select Standard Fields.
-
Click the Pencil icon.
-
Enter translations for the standard fields that you used in your forms.
-
Click Save.
-
-
Provide translations for the custom fields in your forms:
-
In the Page list, select Custom Messages.
-
Click the Pencil icon.
-
Enter translations for the custom fields that you used in your forms.
-
Click Save.
-
-
Provide translations for additional text that you used in your forms:
-
In the Page list, select Others.
-
Click the Pencil icon.
-
Enter translations for the additional text that you used in your forms.
-
Click Save.
-
-
(Optional) Repeat steps 5-9 for each additional language that you have enabled.
Adding forms to flows
About this task
After adding your languages and translations for your forms, add the forms to your flow.
|
This procedure does not discuss all of the options available for the Form connector. For more information about all available options, see the Form connector documentation. |
Steps
-
Sign on to DaVinci and click the Flows tab.
-
Find the flow to which you want to add the forms and go to ... > Edit.
-
Click the icon to add a node.
-
In the Add Connector list, select the PingOne Forms connector.
-
Click and drag a line from the new node to the existing nodes.
-
Click the PingOne Forms node.
-
Select the Show Form capability.
-
In the Form list, select your form.
-
Click Apply.
-
(Optional) Repeat steps 3-9 for each additional form that you want to add.
-
(Optional) Repeat steps 2-10 for each additional flow.
Result
The flows now include the forms, which use the language defined in the user’s browser settings. Integrate these flows into your environment using a redirect to begin using them. Learn more in Launching a PingOne flow with a redirect.