Install .NET RCS
The .NET Remote Connector Server (RCS) requires .NET 4.6.2 or later and Windows Server version 2012 R2, 2016, 2019, or 2022. Exact memory, disk space, and CPU requirements vary depending on how many connectors are running.
The .NET RCS comes bundled with a PowerShell connector. Learn more in PowerShell connector toolkit.
Installation
The .NET RCS distribution is available from the Backstage download site in the following formats:
openicf-version-dotnet.msi-
Installs the RCS as a Windows service.
openicf-version-dotnet.zip-
Contains the files required to run the RCS.
Install .NET RCS as a service
-
Double-click the
openicf-version-dotnet.msiinstallation file.You must run the wizard as a user who has permission to start and stop a Windows service; otherwise, the service won’t start. -
Select Typical as the setup type and complete the wizard to install the RCS as a Windows service.
-
Open the Microsoft Services console and verify the RCS is listed (
OpenICF Connector Server).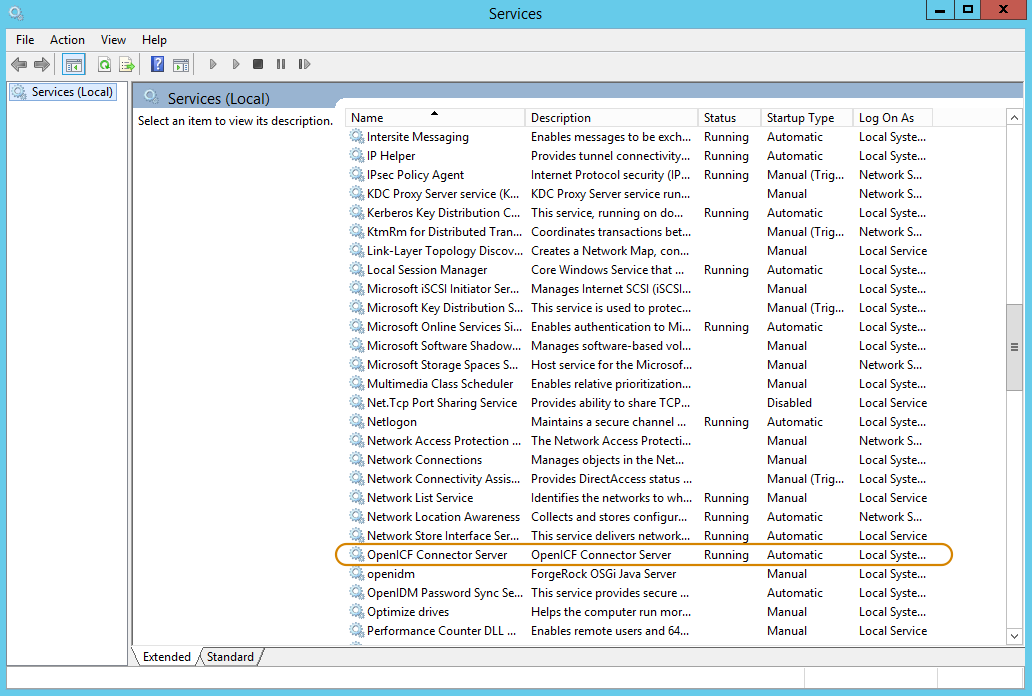
-
To continue server setup or make configuration changes, you must stop the service. If the service is running, use the Microsoft Services console to stop it.
Unpack the RCS zip
-
If you don’t want to run the RCS as a Windows service, download and extract the
openicf-1.5.7.0-dotnet.zipfile.If you already extracted the .zip file but want to run the RCS as a service, install the service manually with the following command:
.\ConnectorServerService.exe /install /serviceName service-name
-
At the command prompt, change to the directory where the RCS was installed, for example:
cd "c:\Program Files (x86)\ForgeRock\OpenICF"
Server setup
-
Run the
ConnectorServerService /setKeycommand to set a secret key for the RCS. The key can be any string value. This example sets the secret key toPassw0rd:ConnectorServerService /setKey Passw0rd Key has been successfully updated.
This key is used by clients connecting to the RCS. The key that you set here must also be set in the IDM or Advanced Identity Cloud Configure a remote connector server (RCS).
-
Edit the RCS configuration file.
The RCS configuration is saved in a file named
ConnectorServerService.exe.Config(in the directory where the RCS is installed).Check and edit this file, as necessary, to reflect your installation. Specifically, verify that the
baseAddressreflects the host and port on which the RCS is installed:<system.serviceModel> <services> <service name="Org.ForgeRock.OpenICF.Framework.Service.WcfServiceLibrary.WcfWebsocket"> <host> <baseAddresses> <add baseAddress="http://0.0.0.0:8759/openicf" /> </baseAddresses> </host> </service> </services> </system.serviceModel>The baseAddressspecifies the host and port on which the RCS listens and is set tohttp://0.0.0.0:8759/openicfby default. If you set a host value other than the default0.0.0.0, connections from all IP addresses other than the one specified are denied.If Windows Firewall is enabled, you must create an inbound port rule to open the TCP port for the RCS (8759 by default). If you do not open the TCP port, IDM won’t be able to contact the RCS. For more information, refer to the corresponding Microsoft documentation.
Configure the RCS to use SSL
|
This section doesn’t apply to Advanced Identity Cloud, as it requires filesystem access. |
-
Open a PowerShell terminal as a user with administrator privileges, then change to the ICF installation directory:
cd 'C:\Program Files (x86)\ForgeRock\OpenICF'
-
Use an existing CA certificate, or use the
New-SelfSignedCertificatecmdlet to create a self-signed certificate:New-SelfSignedCertificate -DnsName "dotnet", "dotnet.example.com" -CertStoreLocation "cert:\LocalMachine\My" PSParentPath: Microsoft.PowerShell.Security\Certificate::LocalMachine\My Thumbprint Subject ---------- ------- 770F...BF2 CN=dotnet
-
Assign the certificate to the RCS:
.\ConnectorServerService.exe /setCertificate
Select certificate you want to use:
Index  Issued To                Thumbprint
-----  ---------                -------------------------

0)  dotnet                      770F...BF2
0
Certificate Thumbprint has been successfully updated to 770F...BF2.
-
Bind the certificate to the RCS port (default
8759):-
Use the
New-Guidcmdlet to generate a new UUID:New-Guid Guid ---- 0352cxxx-xxxx-xxxx-xxxx-xxxxxxxx4c77
-
Enter the
netsh httpconsole and add the certificate thumbprint generated in the previous step, and the UUID that you have just generated:netsh netsh> http netsh http> add sslcert ipport=0.0.0.0:8759 certhash=770F5...FFBF2 appid={0352c...4c77} SSL Certificate successfully added
-
-
Change the RCS configuration (
ConnectorServerService.exe.Config) to use HTTPS and not HTTP:-
Change
baseAddress="http..."tobaseAddress="https...":<host> <baseAddresses> ... <add baseAddress="https://0.0.0.0:8759/openicf"/> </baseAddresses> </host> -
Change
httpTransporttohttpsTransport:<httpsTransport authenticationScheme="Basic" realm="OpenICF"> <webSocketSettings transportUsage="Always" createNotificationOnConnection="true" .../> </httpsTransport>
-
-
Export the certificate:
-
Launch the certificate management MMC (
certlm.msc). -
Right-click the
dotnetcertificate, and select All Tasks > Export to launch the Certificate Export Wizard. -
Select Next > No, do not export the private key > DER encoded binary X.509 (.CER) > Next.
-
Save the file in an accessible location (for example,
C:\Users\Administrator\Desktop\dotnet.cer), and click Finish.
-
-
Import the certificate into the IDM truststore:
-
Transfer the certificate from the Windows machine to the machine running IDM.
-
Change to the
openidm/securitydirectory and use the Javakeytoolcommand to import the certificate:cd /path/to/openidm/security keytool -import -alias dotnet -file ~/Downloads/dotnet.cer -keystore ./truststore Enter keystore password: changeit Owner: CN=dotnet Issuer: CN=dotnet Serial number: 1e3af7...41835 Valid from: Tue Aug 08 15:58:32 SAST 2017 until: Wed Aug 08 16:18:32 SAST 2018 Certificate fingerprints: MD5: D1:B7:B7:46:C2:59:1A:3C:94:AA:65:99:B4:43:3B:E8 SHA1: 77:0F:53:1F:14:AF:43:5E:96:3E:14:AD:82:B7:0A:47:A4:BF:FB:F2 SHA256: C0:52:E2:E5:E5:72:9D:69:F8:11:4C:B8:4C:E4:E3:1C:19:95:86:19:70:E5:31:FA:D8:81:4B:F2:AC:30:9C:73 Signature algorithm name: SHA256withRSA Version: 3 ... Trust this certificate? [no]: yes Certificate was added to keystore
-
When you Configure a remote connector server (RCS), remember to set
"usessl": true.
-
Log tracing
By default, the RCS outputs log messages to the \path\to\openicf\connectorserver.log file. To change the log file location, set the initializeData parameter in the configuration file. The following example sets the log directory to C:\openicf\logs\connectorserver.log:
<add name="file" type="System.Diagnostics.TextWriterTraceListener" initializeData="C:\openicf\logs\connectorserver.log" traceOutputOptions="DateTime">
    <filter type="System.Diagnostics.EventTypeFilter" initializeData="Information"/>
</add>
Adjust the trace settings under system.diagnostics in the RCS configuration file:
<system.diagnostics>
  <trace autoflush="true" indentsize="4">
    <listeners>
      <remove name="Default" />
      <add name="console" />
      <add name="file" />
    </listeners>
  </trace>
  <sources>
    <source name="ConnectorServer" switchName="switch1">
      <listeners>
        <remove name="Default" />
        <add name="file" />
      </listeners>
    </source>
  </sources>
  <switches>
    <add name="switch1" value="Information" />
  </switches>
  <sharedListeners>
    <add name="console" type="System.Diagnostics.ConsoleTraceListener" />
    <add name="file" type="System.Diagnostics.TextWriterTraceListener"
         initializeData="logs\ConnectorServerService.log"
         traceOutputOptions="DateTime">
      <filter type="System.Diagnostics.EventTypeFilter" initializeData="Information" />
    </add>
  </sharedListeners>
</system.diagnostics>
The RCS uses the standard .NET trace mechanism. For more information about tracing options, refer to Microsoft .NET documentation for System.Diagnostics.
The default trace settings are a good starting point. For less tracing, set the EventTypeFilter’s initializeData to Warning or Error. For very verbose logging, set the value to Verbose or All. The logging level has a direct effect on the RCS performance, so take care when setting this level.
Running the server
Start the .NET RCS as a Windows service or directly running the program executable.
Start the server as a Windows service
You can start the service using the Microsoft Services console or the command line.
- Start the server as a Windows service, using the Microsoft Services console
-
-
Launch the Microsoft Services console.
-
Locate the RCS service (
OpenICF connector server), and click Start the service or Restart the service.The service runs with the credentials of the "run as" user (default
System).
-
- Start the server as a Windows service, by using the command line
-
In the Windows Command Prompt, run the following command:
net start ConnectorServerService
To stop the service, run the following command:
net stop ConnectorServerService
Start the server directly
-
In the Windows Command Prompt, change to the RCS installation directory, for example:
c:\> cd "c:\Program Files (x86)\ForgeRock\OpenICF"
-
Start the server with the following command:
ConnectorServerService.exe /run
This command starts the RCS with the credentials of the current user. It doesn’t start the server as a Windows service.