Configuring an OIDC Application in PingOne for PingIntelligence Dashboard
Complete the following steps in PingOne, to create and configure an OIDC(Open ID Connect) application for setting up single signon (SSO) to PingIntelligence for APIs Dashboard.
Steps
-
From the PingOne dashboard, create a new connection.
-
Go to Connections → Applications, and click Add Application.
-
On the New Application page, select Web App → OIDC, and click Configure.
-
-
On the Create App Profile page, provide the information for following fields, and then click Next.
-
APPLICATION NAME
-
DESCRIPTION (Optional)
-
ICON (Optional)
-
-
On the Configure page, enter the following URL in the Redirect URLs field and clickSave and Continue.
The path in the URI is as follows:
https://<pi_install_host>:8030/login/oauth2/code/PingIntelligence. Do not change the path in the URI, just substitute the hostname. For example, https://127.161.140.180:8030/login/oauth2/code/PingIntelligence.
-
On the Grant Resource Access to Your Application page, to add theprofile scope to the list of scope grants, click the associated Plusicon. Click Save and Continue.
-
On the Attribute Mapping page, add the following attributes and map them to the PingIntelligence Dashboard SSO.properties. Select the Required check box for each attribute. When you are finished, clickSave and Close.
| OIDC Attributes | Value |
|---|---|
User ID PingOne User Attribute |
The value defaults to sub. |
Family Name PingOne User Attribute |
The value of this property should be a claim name that holds the last name of the signed-on user in |
Given Name PingOne User Attribute |
The value of this property should be a claim name that holds the first name of the signed-on user in |
Role Static Key |
The value of this property should be a claim name that holds the value of the role of the signed-on user in The default value in Dashboard is |
-
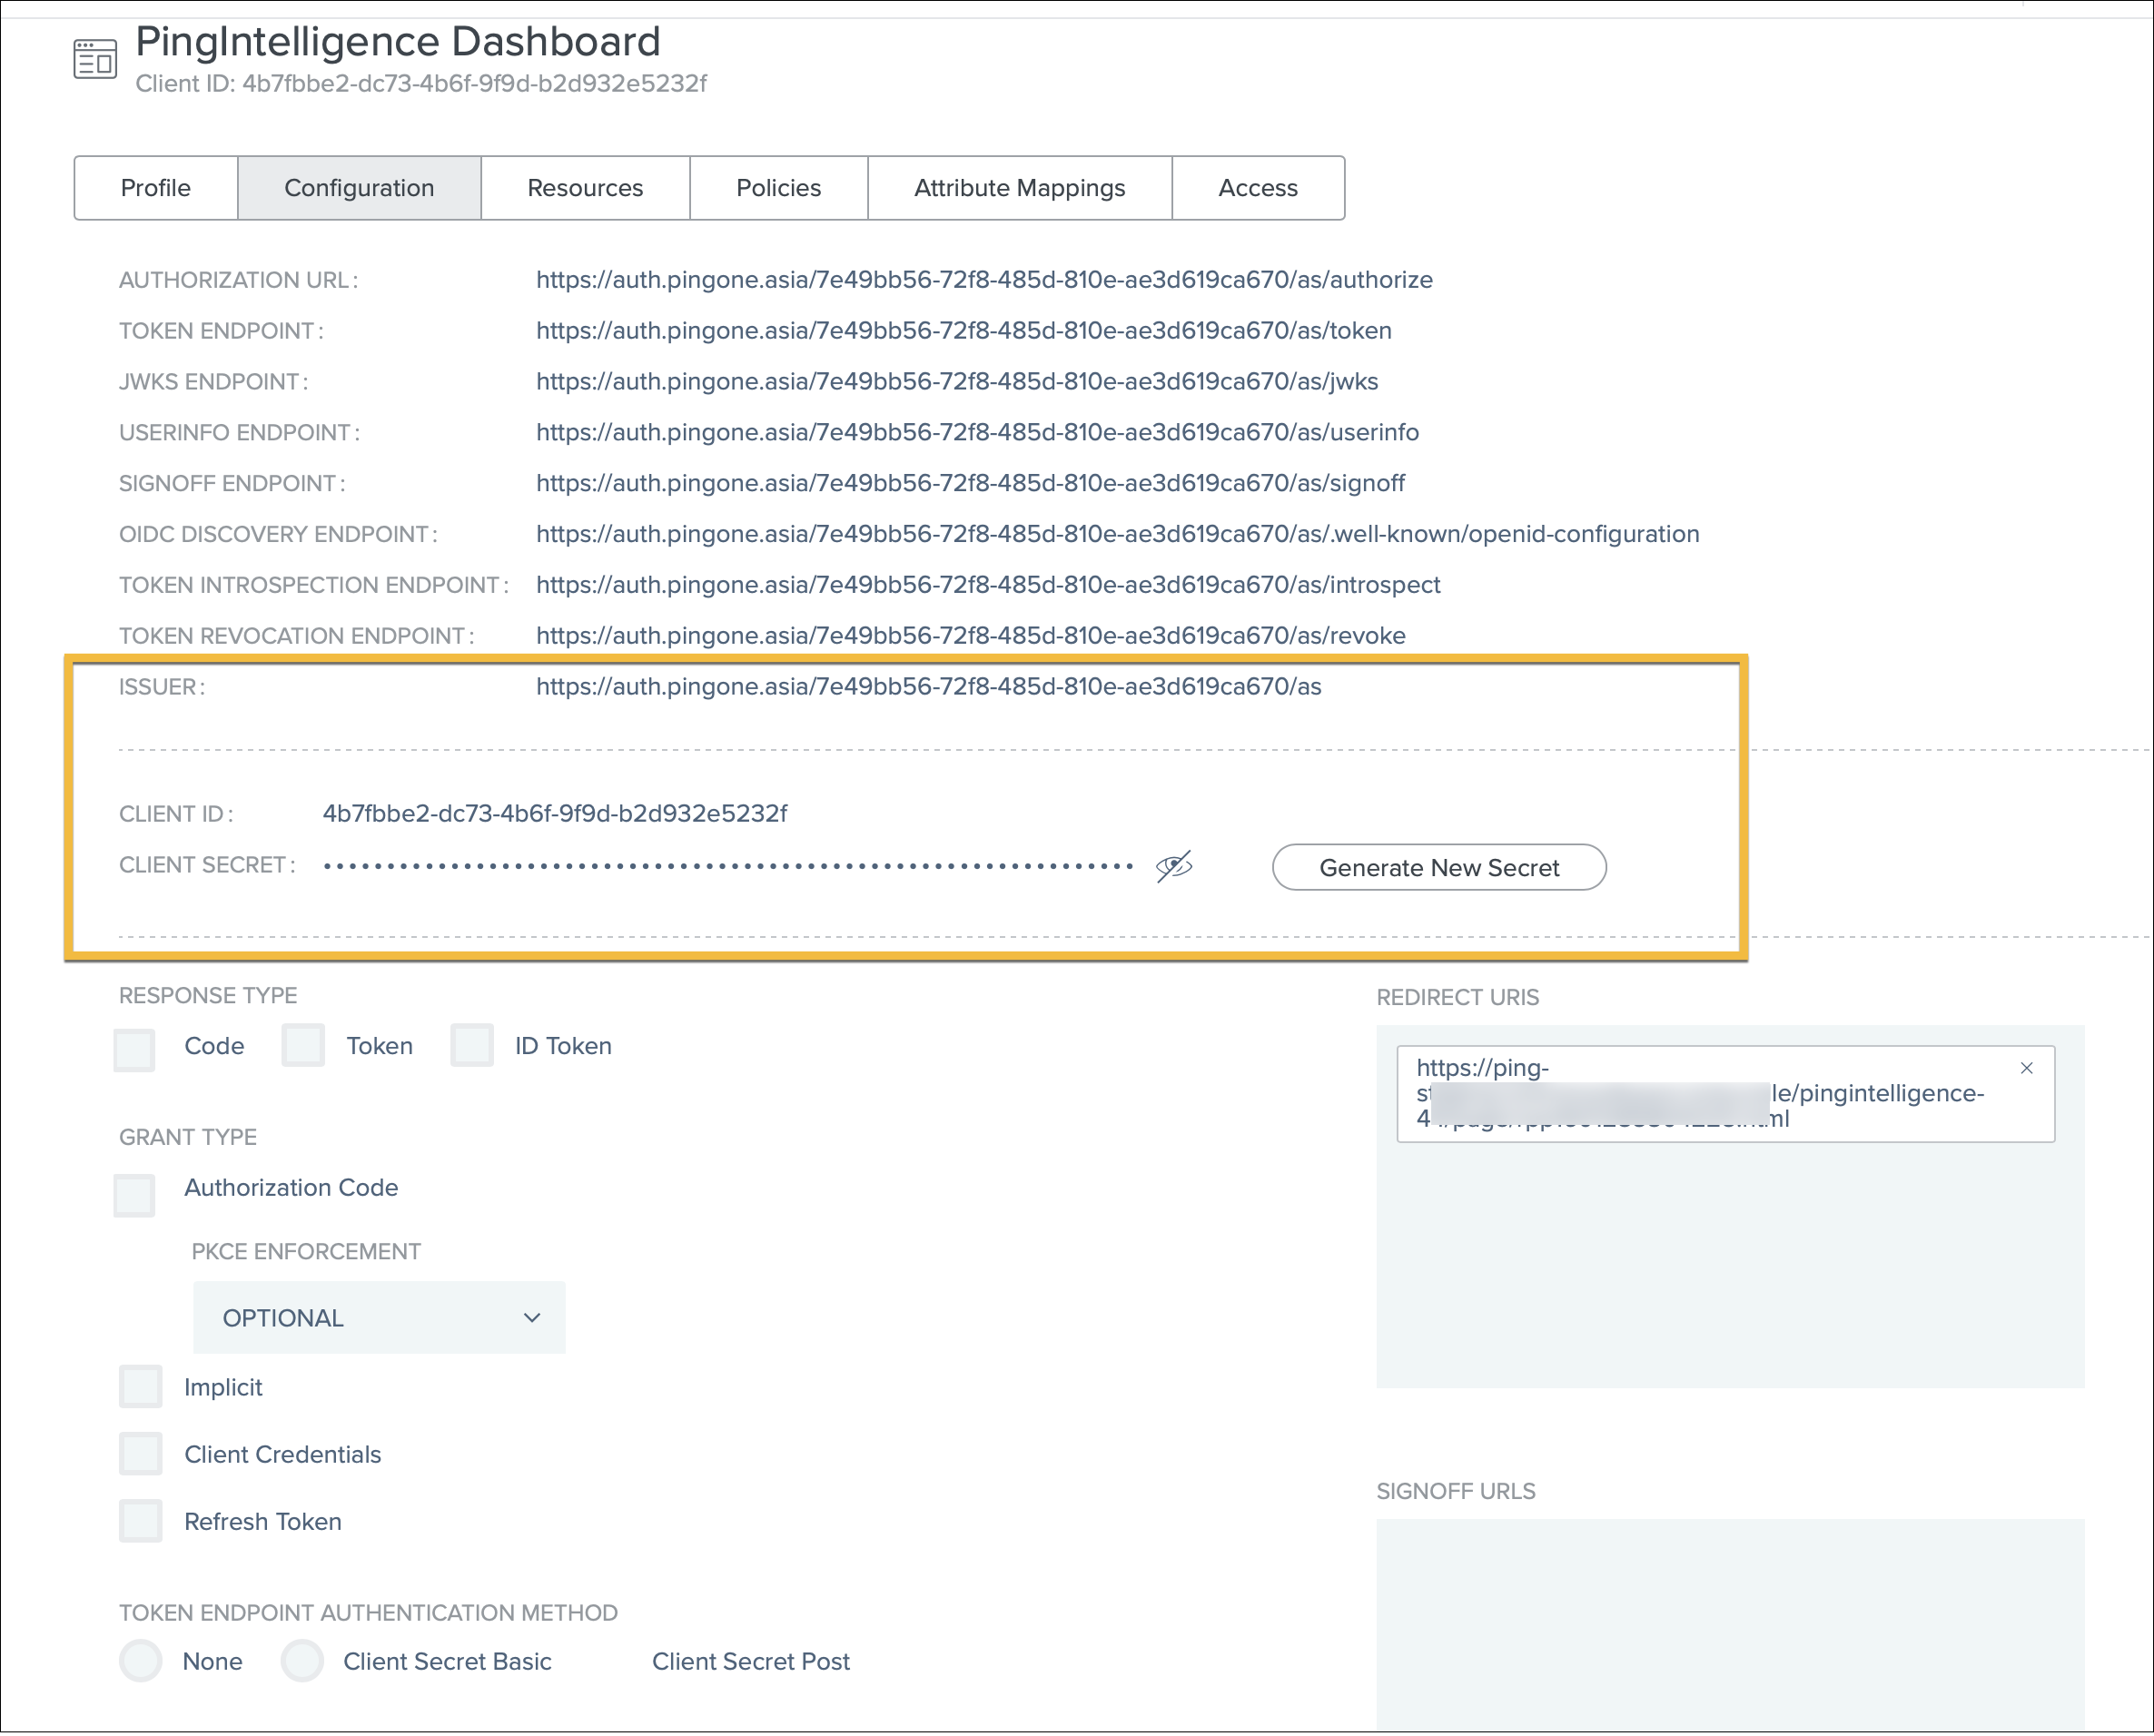
On the Applications page, click the

icon next to PingIntelligence Dashboard application. Click the Configuration tab and record the values for the following application properties to use in later steps in Configuring Dashboard sso.properties for PingOne:
-
Issuer
-
Client ID
-
Client Secret
-
Click the pencil icon on the right and set the following properties and click Save.
-
+[caption=] .
| Property | Value |
|---|---|
Response Type |
Select Code. |
Grant Type |
Select Authorization Code. Keep the PKCE as OPTIONAL. |
Token Endpoint Authentication Method |
Select None, Client Secret Basic, or Client Secret Post. |
-
To enable the application, click the toggle switch to the on (green) position.
Next steps
Complete the SSO configuration in PingIntelligence for APIs Dashboard. For more information see, Configuring Dashboard sso.properties for PingOne.