HTTP Connector
This powerful and versatile connector lets you show custom HTML pages, make REST application programming interface (API) calls, and more in your DaVinci orchestration flow.
Use it to create a custom HTML message, show flow progress, or send custom responses in an API-triggered flow. You can use the messages as quick placeholders to help you sketch out a new flow. If you want to craft a memorable user experience, use the Custom HTML Template capability to create complete HTML pages with your own structure, style, and scripts.
Because this connector allows you to quickly add API calls and user interfaces, it can be a valuable sketching tool in your flow design process or to prove the design for a connector your organization might build.
Setup
Configuring the HTTP connector
In DaVinci, add an HTTP connection. Learn more in Adding a connector.
Connector configuration
reCAPTCHA v2 Site Key
The site key provided in your reCAPTCHA dashboard. Learn more in Creating reCAPTCHA keys in the Google documentation.
This field is only needed for the connector’s reCAPTCHA capability.
reCAPTCHA v2 Secret Key
The secret key provided in your reCAPTCHA dashboard. Learn more in Creating reCAPTCHA keys in the Google documentation.
This field is only needed for the connector’s reCAPTCHA capability.
Using the connector in a flow
Showing simple messages
If you want to show information to the user, the Custom HTML Message capability gives you a premade page with a title, message, and button. You can’t change the structure, but you can add an icon or style the message with your CSS. This is useful for error messages and confirmations, such as confirming a user’s registration details.
-
In your flow, add the HTTP connector and select the Custom HTML Message capability.
-
Add a Message Title, such as “Welcome.”
-
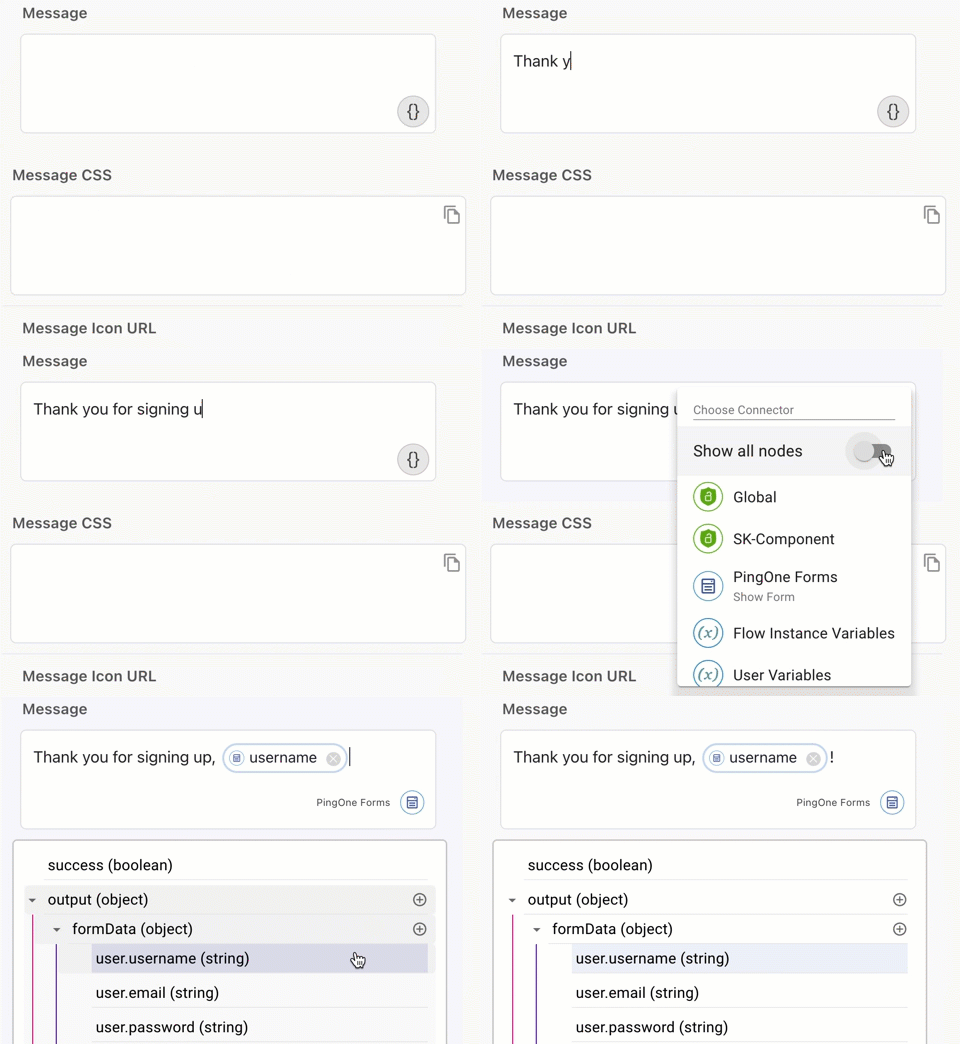
Add a Message. You can include values from elsewhere in your flow by clicking {}, then selecting the attribute that holds the value you want.
For this example, insert the username that the user entered into the registration form created by the PingOne Forms connector:
-
If you don’t want the flow to end here, turn on Show Continue Button and customize the button Display Name.
Building a custom page
The Custom HTML Template capability lets you include an HTML page in your flow. The structure, style, and behavior is entirely up to you.
|
For creating forms, the PingOne Forms connector provides a drag-and-drop experience builder. Learn more in Form Connector and PingOne Forms. |
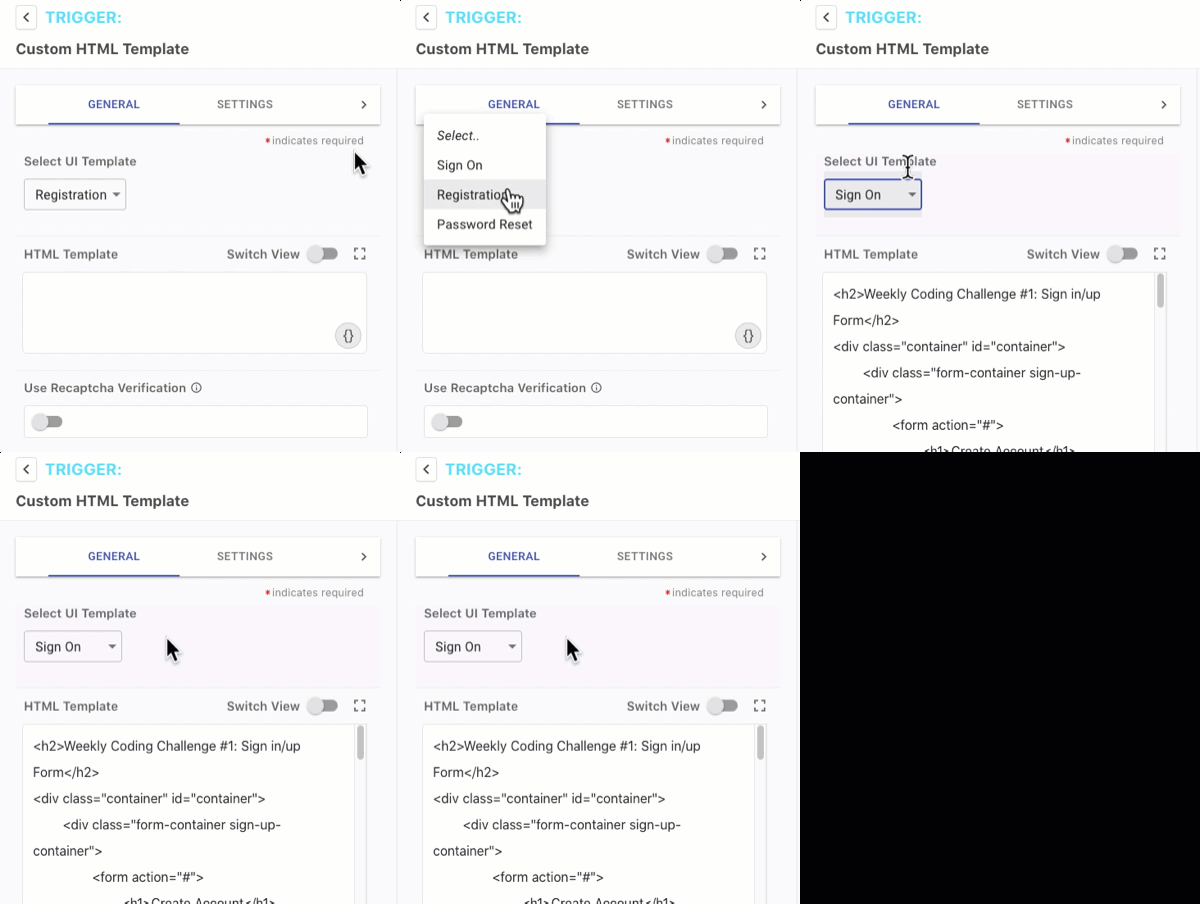
Starting with a template from the UI Studio
To start your custom HTML page, you can autofill its settings from any template you created in the UI Studio. This makes it easy to create several pages from the same template. Keep the following in mind:
-
If you modify your HTML page in your flow, it won’t affect your original template in the UI Studio.
-
When you select a UI template from within an HTTP node, it overwrites any work you’ve done in that node. The UI templates are best used for newly-created HTTP nodes.
Adding your HTML, CSS, and scripts
Your custom page defines the look and behavior of a widget that’s powered by React.
Adding custom HTML
The HTML Template field lets you see and modify the HTML for your page.
|
|
For security reasons, the HTML field only allows certain HTML elements. You can find the elements on the allow list in the DOMPurify allow list. Note that custom HTML elements from the These restrictions apply to all custom HTML fields in DaVinci. |
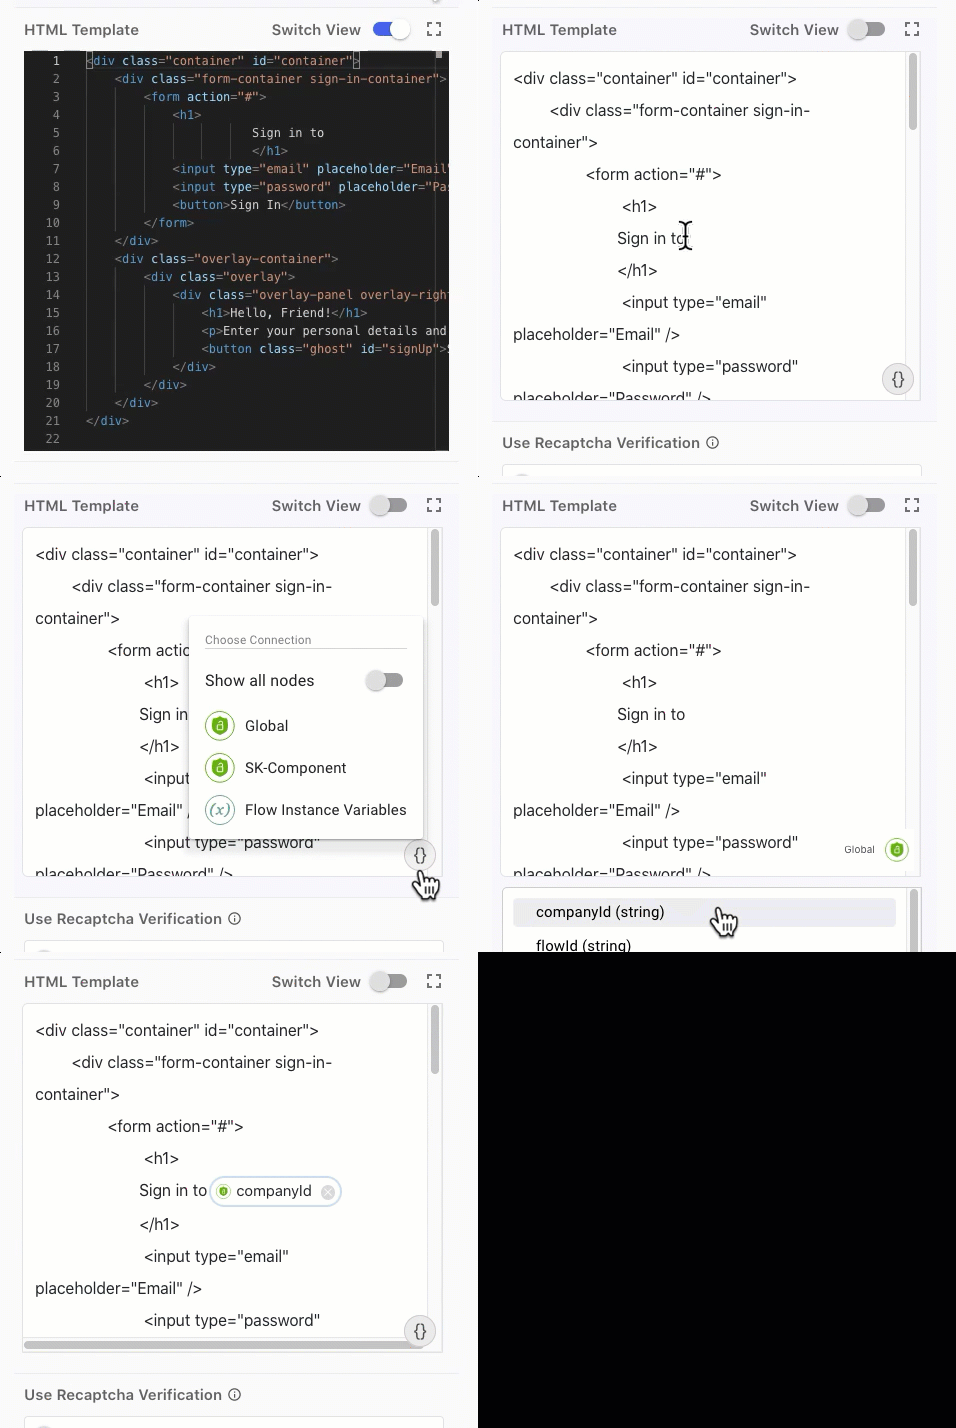
If you want your HTML to include values from elsewhere in your flow, switch back to the initial view (white background), click {}, and then select the variable that holds the value you want.
|
The HTML Template field doesn’t support inline events or script tags. Refer to the following script Adding a custom script. |
Adding custom CSS
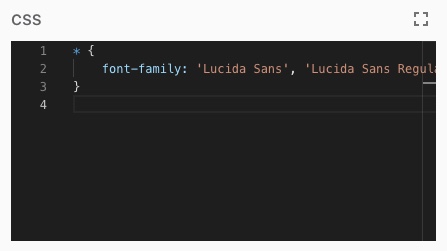
The CSS field lets you add styles to the HTML page. The contents of the CSS field is appended to the body of the widget. You can use any standard CSS, including @import.
- Adding a custom script
-
The Script field allows you to customize the behavior of your page. You can use any standard JavaScript in the Script field.
The HTML Template field doesn’t support inline events or script tags. Instead of triggering events with the HTML, such as with
<button onclick="myFunction()">Click me</button>, use the Script field to listen for the event instead.
Example: Triggering a script with a button
In the HTML Template field, add a button.
<h2>JavaScript addEventListener()</h2>

<p>This example uses the addEventListener() method to attach a click event to a button.</p>

<button id="myButton">Try it</button>

<p id="demo"></p>
In the Script field, add an event listener and associate it with the button ID.
//Listen for a click event on 'myButton', then run myFunction
document.getElementById("myButton").addEventListener("click", myFunction);

function myFunction () {
  //Enter your code here, for example:
  document.getElementById("demo").innerHTML = Date();
}
Managing the widget’s states and functions
By default, scripts can’t access the state and functions of the widget that contains the HTML page. To access them, you can use event-based communication between the script and the widget by dispatching JavaScript custom events.
In the Script field, trigger a custom event using the following structure.
const event = new window.CustomEvent('skevent', {
    detail: {
        type: EVENT_TYPE,
        payload: PAYLOAD
    }
})

window.dispatchEvent(event);
The widget has an event listener for skevent, so the widget will catch and process this event. The detail object is designed to match syntax of a standard Redux action object. You can use the following event types:
-
SET_STATElets you set a value in the state of the widget:const event = new window.CustomEvent('skevent', { detail: { type: 'SET_STATE', payload: { name: 'email', value: 'testuser@example.com' } } }); window.dispatchEvent(event); -
GET_STATElets you get a value from the current state of the widget:const event = new window.CustomEvent('skevent', { detail: { type: 'GET_STATE', payload: 'email' } }); window.dispatchEvent(event);The
GET_STATEevent dispatches an event calledskeventresponsewith theSTATEevent type. To complete the process, add an event listener to listen for theskeventresponseevent:window.addEventListener('skeventresponse', e => { switch(e.detail.type) { case 'STATE': console.log(e.detail.payload); break; } });The event listener produces the result from the
GET_STATEevent:{ "name": "email", "value": "testuser@example.com" }
Adding form validation rules
You can add one or more form validation rules. Enter the name of the field in the Property Name field, then select a validation rule in the Rule Name list. The options for validation rules are:
-
Required
-
Email
-
Length
-
Format
-
Equality
For each rule, validation is checked, and a validation message is displayed based on the results.
Adding output fields
You can add one or more output fields under Output Fields List. These fields outline the different outputs of the HTML form for use in Direct or SDK Flow Executions.
To configure an output field:
-
Enter a unique name for the property in the Property Name field. This name is assigned to the output in subsequent nodes when selecting the field as a variable.
-
Select a Control Type from the list and configure it based on the following table:
Control Type Description Configuration Text Field
A field for users to input relevant information.
This control type is supported by both Direct and SDK Flow Executions with the following configuration:
-
The Display Name provides text to help users understand the purpose of the text field.
-
The Value represents a default text value that will be populated in the text field.
Secure Text Field / Password
A field to allow users to authenticate with a password.
This control type is supported by both Direct and SDK Flow Executions with the following configuration:
-
The Control Type must be Text Field.
-
The Display Name provides text to help users understand the purpose of the password field.
-
Secure must be toggled on to make the text field a password field.
-
The Value represents a default, pre-populated password. We recommend leaving this field empty.
Dropdown
A dropdown list for uses such as providing country codes for phone numbers.
This component is supported only by SDK Flow Executions with the following configuration:
-
The Display Name provides text to help users understand the purpose of the dropdown.
-
You can enter label-value pairs to populate the dropdown options in two ways:
-
Toggle on Enter label-value pairs as CSV and enter pairs separated by commas:

-
In Enter label-value pairs, click the icon and enter the Label and Value.

-
Radio Button List
A radio button component to provide a user with a small set of options.
This component is supported only by SDK Flow Executions with the following configuration:
-
The Display Name provides text to help users understand the purpose of the radio button list.
-
You can enter label-value pairs to populate the dropdown options in two ways:
-
Toggle on Enter label-value pairs as CSV and enter pairs separated by commas.
-
In Enter label-value pairs, click the icon and enter the Label and Value.
-
Label
A label for the form that can be used as a form heading, such as "Welcome" or "Sign On."
This component is supported only by SDK Flow Executions with the following configuration:
-
The Value is required to provide the content of the label in the user-facing form. For example:

-
Making a REST API call
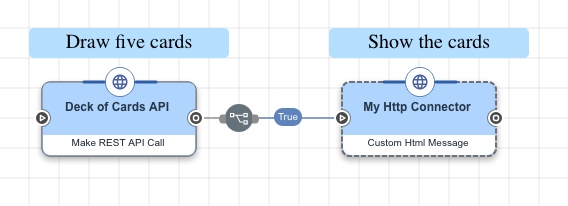
You can use the HTTP connector to make a call to any REST API. You can choose the call method (such as GET or POST) and configure query parameters, headers, body, and the responses. This is a flexible way to integrate your flow with external systems.
|
Best practice is to use secret variables stored in DaVinci > Variables. Learn more in Variables and Creating Variables. |
The following example uses the http://deckofcardsapi.com/Deck of Cards API] call to draw five cards, then make the cards available in the flow.
The Deck of Cards API documentation specifies the following URL to draw five cards:
http://deckofcardsapi.com/api/deck/new/draw/?count=5
Getting an API response
-
Making an API call
-
In your flow, add the HTTP connector and select the Make REST API Call capability.
-
In the URL, enter the API URL. In this example, this is
http://deckofcardsapi.com/api/deck/new/draw/. -
From the HTTP Method list, select the action to take, such as GET.
-
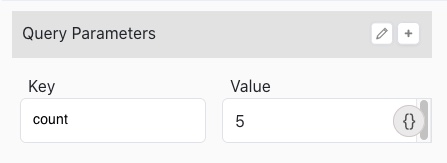
In the Query Parameters section, add each query parameter and its value. You can include values from elsewhere in your flow by clicking {}, then selecting the variable that holds the value you want. For this example, get five cards every time:
-
In the MTLS Support list, select a key configured in PingOne to select the client certificate used in outbound mTLS connections.
Keys are configured in PingOne. To create a key in the PingOne admin console, click the Certificates & Keypairs link.
-
(Optional) In the Timeout (ms) field, enter a timeout for the API call.
To not have a timeout, leave the field blank. You can select any timeout value, but if the API call needs a response, there is a hard timeout at 30 seconds.
-
Click Apply to save your changes.
In your own flow, you can use the Headers and Body Parameters sections the same way to add any other parameters you need in your API call, and use the Body list, select the content type of the body data you’re sending to the API.
-
-
Working with the API response
-
Following your Make REST API Call node, add an HTTP connector and select the Custom HTML Message capability.
-
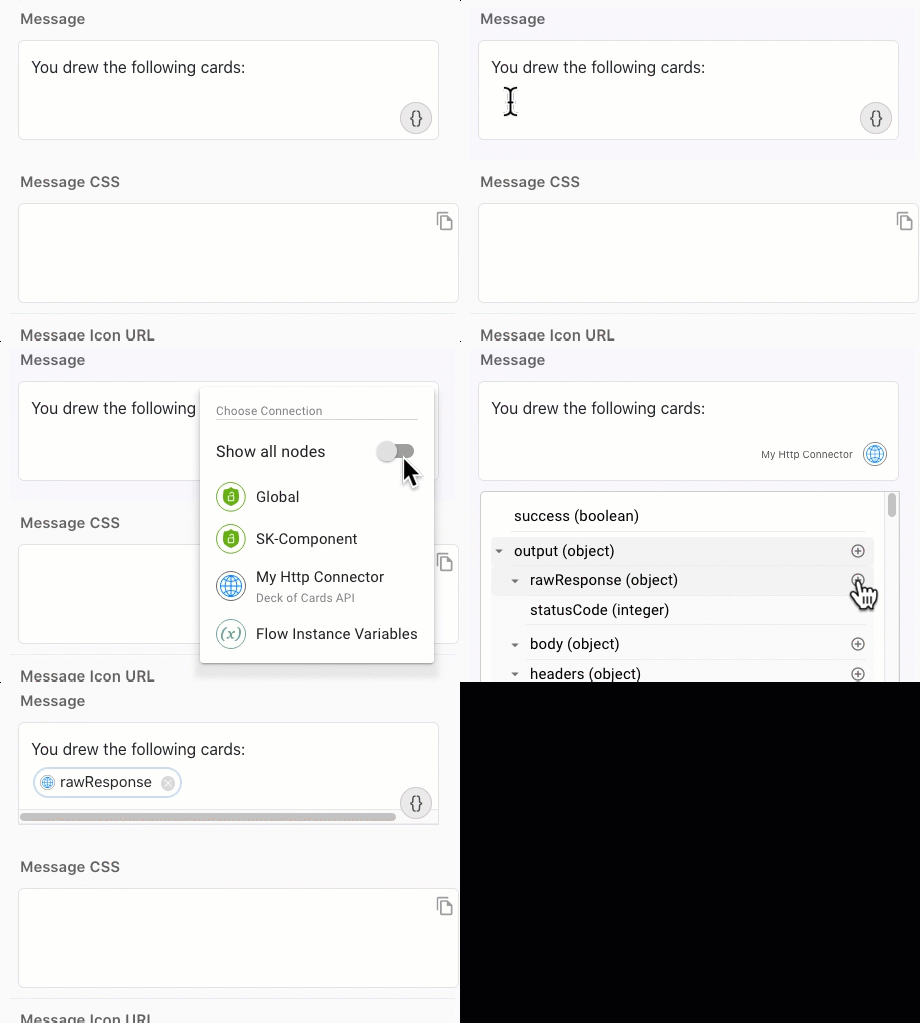
In the Message field, click {} and select the rawResponse variable from your Make REST API Call node by clicking (+).
-
Test the flow by clicking Save, Deploy, and Try Flow.
The resulting message shows the card information, including the card value, suit, and an image. Copy this block of text, starting with
{"headers"…. You’ll use it in the next step.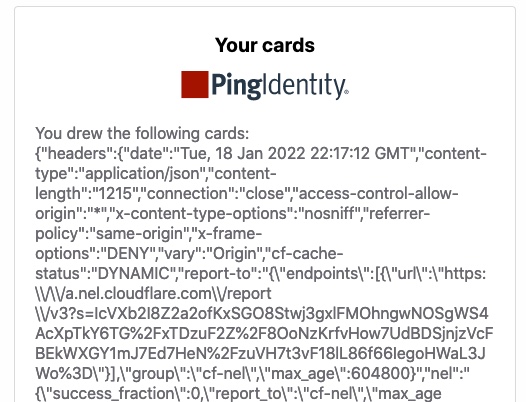
-
-
Separate the raw response into usable values by defining a response schema:
-
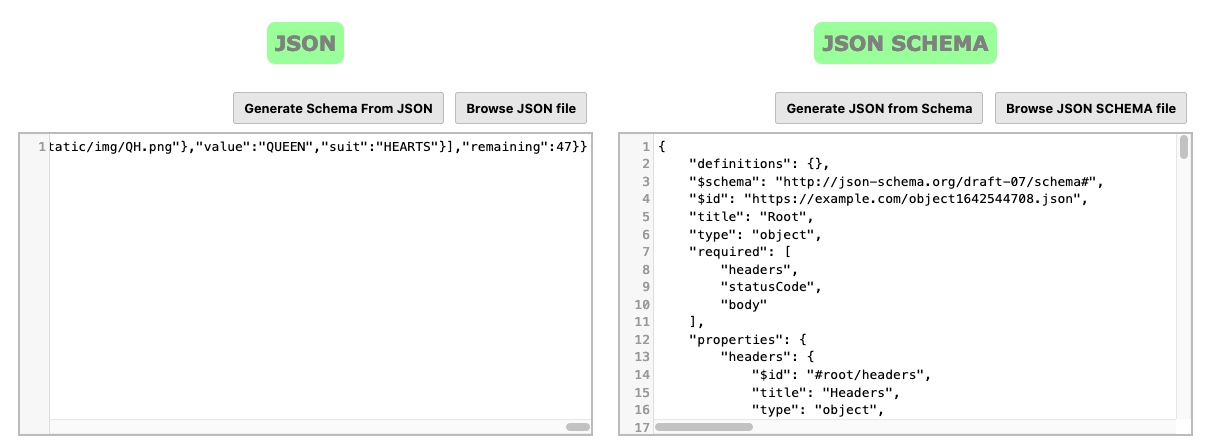
In a browser, open the Online JSON Schema Validator and Generator tool. You’ll use it to generate the JavaScript Object Notation (JSON) schema.
-
Paste the JSON response you copied into the JSON field. Click Generate Schema From JSON. Copy the output from the JSON SCHEMA field.
-
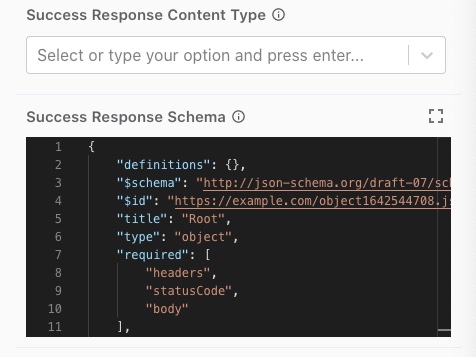
In your Make REST API Call node, paste the JSON schema into the Success Response Schema field.
-
Apply your changes, then go back to your Custom HTML Message node.
-
In your Custom HTML Message node, remove the rawOutput variable that you included in the Message field. Because you added a response schema, you can select specific parts of the JSON response to include in our message. Click {} and select the
cardsvariable: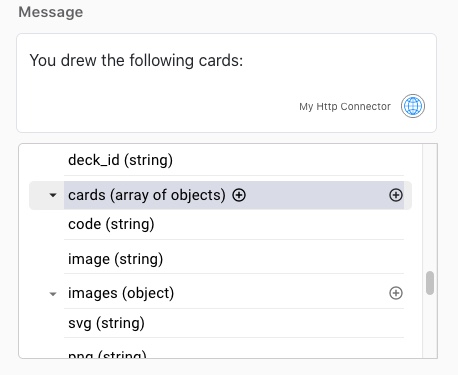
-
Capabilities
Send Success JSON Response
Send a successful response.
Show details
-
Properties
- returnRequestParameters toggleSwitch
- Additional Fields in the Response selectNameValueListColumn
-
Use this section to add additional fields to the response
- additionalFieldsName textField
- Validate the additional properties toggleSwitch
-
The flow will fail if the validation is failed.
- Signed Response toggleSwitch
-
Sign the response as JWT using your company’s private keys. Signatures can be validated using JWKS public keys in the Company section.
- Validity textField
-
Expiry time in milliseconds. Default is 86400000 (1 day).
Send Error JSON Response
Send an error response.
Show details
-
Properties
- returnRequestParameters toggleSwitch
- Additional Fields in the Response selectNameValueListColumn
-
Use this section to add additional fields to the response
- additionalFieldsName textField
- Signed Response toggleSwitch
-
Sign the response as JWT using your company’s private keys. Signatures can be validated using JWKS public keys in the Company section.
- Validity textField
-
Expiry time in milliseconds. Default is 86400000 (1 day).
Send Custom JSON Response
Send a custom response.
Show details
-
Properties
- HTTP Body (JSON) textArea
-
This property needs to be a properly formatted JSON value. It can contain DaVinci parameters, which will be replaced at runtime. If you are using DaVinci parameters that are of type 'string', you will need to put string quotes around it.
- httpStatusCode textField
- httpHeaders textArea
Custom HTML Message
Creates a customizable HTML message.
Show details
-
Properties
- messageTitle textField
-
Default:
Information - message textArea
- Message Icon URL textField
- Message Icon Height (in pixels) textField
- showFooter toggleSwitch
- Display Name button
- challenge textField
- Enable Polling? toggleSwitch
- pollInterval textField
-
Default:
2000 - pollRetries textField
-
Default:
60 - pollChallengeStatus toggleSwitch
- showContinueButton toggleSwitch
reCAPTCHA v2 Verification
Verify that you are not a robot and proceed.
Show details
-
Properties
- title textField
-
Form title.
- bodyHeaderText textField
-
Form body title.
- nextButtonText textField
Make REST API Call
Extend the functionality of the DaVinci platform by invoking any third party service.
Show details
-
Properties
-
Output Schema
- URL textField required
- HTTP Method dropDown required
- Query Params keyValueList
- Headers keyValueList
- Body dropDown
- Body Params keyValueList
- raw codeEditor
-
Input your raw request body
- Success Response Content Type dropdownWithCreate
-
Content Type of the response data. To apply output schema content type must be application/json
- outputSchema codeEditor
-
Follow example for JSON schema.
- Keep API output if the validation failed toggleSwitch
- Error Response Content Type dropdownWithCreate
-
Content Type of the response data. To apply output schema content type must be application/json
- outputSchemaError codeEditor
-
Follow example for JSON schema.
- MTLS Support dropDown
-
Select the client certificate used to make outbound mTLS connections.
-
None (Default)
-
- Ignore TLS Errors toggleSwitch
-
When enabled, the connector ignores TLS errors. Use this for testing in non-production environments.
- Block Redirects toggleSwitch
-
When enabled, DaVinci enhances the security of the flow by preventing the browser from automatically following redirects and an error occurs instead.
- Timeout (ms) textField
-
Timeout for API call. Leave blank to not have timeout.
-
output object
-
rawResponse object
-
statusCode integer
-
body array/object/number/string/boolean
-
headers array
-
item object
-
-
-
Custom HTML Template
Create an HTML page using this customizable template.
Show details
-
Properties
-
Output Schema
- Content Source dropDown
-
Select the source of the HTML, CSS, & Script content
- Template
- HTML Template textArea
- HTML CDN URL textField required
-
Enter the CDN URL that hosts the HTML you would like to use. The CDN hostname must be listed in the Trusted Sites under the connector settings.
- CSS codeEditor
- CSS CDN URL textField
-
Enter the CDN URL that hosts the CSS you would like to use. The CDN hostname must be listed in the Trusted Sites under the connector settings.
- Script codeEditor
-
Write custom JavaScript. Caution: Custom code is for advanced users only. Before using custom code, review the security risks in the DaVinci documentation by searching for "Using custom code safely".
- Script CDN URL textField
-
Enter the CDN URL that hosts the Javascript you would like to use. The CDN hostname must be listed in the Trusted Sites under the connector settings.
- Use Recaptcha Verification toggleSwitch
-
Add sk-component skrecaptcha to use this feature.
- Form validation rules validationRules
-
Rules to check to validate form inputs
- inputSchema codeEditor
-
Follow example for JSON schema.
- outputSchema codeEditor
-
Follow example for JSON schema.
- formFieldsList formFieldsList
- challenge textField
-
output object
-
formFieldsList object
-
Create QR Code for URL
Create a QR code that contains a URL.
Show details
-
Properties
-
Input Schema
-
Output Schema
- URL textField required
-
default object
-
properties object
-
customUrl string required minLength: 0 maxLength: 400
Custom URL to create the QR Code
-
-
Input Example
{
  "properties": {
    "customUrl": "testurl.com"
  }
}-
output object
-
generatedQr string
-
Continue Polling
Use this capability in conjunction with Polling in Custom HTTP capabilities.
Show details
-
Properties
- Node ID of the UI node (Optional) textField
-
In advanced scenarios, it might be required to specify the Node ID of the UI node where polling in enabled. When a Node ID is not entered (default behavior), polling will continue on the current UI node.
Simulate Latency
Send a response with latency.
Show details
-
Properties
-
Output Schema
- Delay Time (ms) textField
-
Time to wait for response to be sent in milliseconds. Default: 50
Default:
50 - Return Success Response toggleSwitch
-
Return success or failure response
- HTTP Body (JSON) textArea
-
This property needs to be a properly formatted JSON value. It can contain DaVinci parameters, which will be replaced at runtime. If you are using DaVinci parameters that are of type 'string', you will need to put string quotes around it.
-
output object