PingOne
These pages show you how to use PingGateway with PingOne for SSO and API security. The examples target PingOne evaluators, administrators, and architects.
Before you start
Unless otherwise stated, the examples in these pages assume you have:
-
PingGateway installed.
-
The sample application installed.
-
A PingOne test environment as described in Create a PingOne test environment.
-
A PingOne test user as described in Add a PingOne test user.
Create a PingOne test environment
In the PingOne console, create a test environment with the following values:
-
Select a solution for your Environment: Build your own solution
-
Select solution(s) for your Environment:
PingOne SSO -
ENVIRONMENT NAME:
Test environment -
DESCRIPTION: OIDC
Test environment -
ENVIRONMENT TYPE:
Sandbox
Learn more in the PingOne documentation on Adding an environment.
Add a PingOne test user
-
In the PingOne test environment under Directory > Users, add a user.
To match a user known to the sample application, use the following values:
-
Given Name:
Wilhelm -
Family Name:
Wolkig -
Username:
wolkig -
Email:
wolkig@example.com -
Password: Click Generate Password and record the generated password.
Learn more in the PingOne documentation on Adding a user.
-
-
Under Settings > Environment Properties > URLs, copy the Self-Service Url for your environment.
-
In your browser’s privacy or incognito mode, go to the URL you copied and sign on as the user you created.
-
When prompted, change the password so you won’t have to change it again when trying an example.
To match the credentials to those known to the sample application, set the new password to
Geh3imnis!.
PingOne as OIDC provider
This example sets up PingOne as an OIDC provider with PingGateway as a relying party.
Prepare PingOne
After you prepare the PingOne environment and test user, follow these steps to create a PingOne OIDC web application:
-
In the test environment, create a web application with the following values:
-
Application Name:
oidc_client -
Description:
OIDC client -
Application Type:
OIDC Web App
-
-
In the application, select the Overview panel and click Protocol OpenID Connect.
-
In the Redirect URIs field, add
https://ig.example.com:8443/home/id_token/callbackand save the application. -
In the Overview panel, click Resource Access, select the
emailandprofilescopes in addition to the defaultopenidscope, and click Save.Learn more from the PingOne documentation on Editing an application - OIDC.
-
At the top-right of the page, click the slider to enable the application.
-
Go to the Configuration panel and make a note of the following values in the URLs drop-down list:
-
OIDC Discovery Endpoint
-
Client ID
-
Client Secret
You need the values to set up PingGateway.
-
Prepare PingGateway
-
Add the following basic PingGateway configuration if you have not already done so:
-
Set up PingGateway for HTTPS, as described in Configure PingGateway for TLS (server-side).
-
Add the following route to PingGateway to serve the sample application .css and other static resources:
-
Linux
-
Windows
$HOME/.openig/config/routes/00-static-resources.json
%appdata%\OpenIG\config\routes\00-static-resources.json
{
  "name" : "00-static-resources",
  "baseURI" : "http://app.example.com:8081",
  "condition": "${find(request.uri.path,'^/css') or matchesWithRegex(request.uri.path, '^/.*\\\\.ico$') or matchesWithRegex(request.uri.path, '^/.*\\\\.gif$')}",
  "handler": "ReverseProxyHandler"
}
json -
-
-
Base64-encode the OIDC application’s Client Secret and set the value as an environment variable:
$ export OIDC_SECRET_ID='<base64-encoded-client-secret>'bash -
Add the following route to PingGateway, replacing the following property values with those of the OIDC application:
-
OIDC_Discovery_Endpoint: The OIDC discovery endpoint for the client application you registered.
-
Client_ID: The client ID of the application.
-
Linux
-
Windows
$HOME/.openig/config/routes/oidc-ping.json
%appdata%\OpenIG\config\routes\oidc-ping.json
{
  "name": "oidc-ping",
  "condition": "${find(request.uri.path, '^/home/id_token')}",
  "properties": {
    "OIDC_Discovery_Endpoint": "OIDC Discovery endpoint of the web app",
    "Client_ID": "Client ID of the web app"
  },
  "heap": [
    {
      "name": "SystemAndEnvSecretStore-1",
      "type": "SystemAndEnvSecretStore"
    },
    {
      "name": "AuthenticatedRegistrationHandler-1",
      "type": "Chain",
      "config": {
        "filters": [
          {
            "name": "ClientSecretBasicAuthenticationFilter-1",
            "type": "ClientSecretBasicAuthenticationFilter",
            "config": {
              "clientId": "&{Client_ID}",
              "clientSecretId": "oidc.secret.id",
              "secretsProvider": "SystemAndEnvSecretStore-1"
            }
          }
        ],
        "handler": "ForgeRockClientHandler"
      }
    }
  ],
  "handler": {
    "type": "Chain",
    "config": {
      "filters": [
        {
          "name": "AuthorizationCodeOAuth2ClientFilter-1",
          "type": "AuthorizationCodeOAuth2ClientFilter",
          "config": {
            "clientEndpoint": "/home/id_token",
            "failureHandler": {
              "type": "StaticResponseHandler",
              "config": {
                "status": 500,
                "headers": {
                  "Content-Type": [
                    "text/html; charset=UTF-8"
                  ]
                },
                "entity": "<html><body>Error in OAuth 2.0 setup.<br> ${contexts.oauth2Failure.exception.message}</body></html>"
              }
            },
            "registrations": [
              {
                "name": "oauth2-client",
                "type": "ClientRegistration",
                "config": {
                  "clientId": "${Client_ID}",
                  "issuer": {
                    "name": "PingOne",
                    "type": "Issuer",
                    "config": {
                      "wellKnownEndpoint": "&{OIDC_Discovery_Endpoint}"
                    }
                  },
                  "scopes": [
                    "openid",
                    "profile",
                    "email"
                  ],
                  "authenticatedRegistrationHandler": "AuthenticatedRegistrationHandler-1"
                }
              }
            ],
            "requireHttps": false,
            "cacheExpiration": "disabled"
          }
        }
      ],
      "handler": {
        "type": "StaticResponseHandler",
        "name": "HTMLResponse",
        "config": {
          "status": 200,
          "entity": "<!DOCTYPE html><html><head><title>Authentication Success</title></head><body><p>Welcome, ${attributes.openid.user_info.preferred_username}!</p><code>${attributes.openid.user_info}</code></body></html>",
          "headers": {
            "Content-Type": [
              "text/html"
            ]
          }
        }
      }
    }
  }
}
json -
-
-
Restart PingGateway.
Validation
-
In your browser’s privacy or incognito mode, go to https://ig.example.com:8443/home/id_token.
PingOne displays the sign-on page.
-
Sign on to PingOne as the test user.
The route displays a welcome page:
Welcome, wolkig!

{sub=..., preferred_username=wolkig, given_name=Wilhelm, updated_at=..., family_name=Wolkig, email=wolkig@example.com, ...}
PingOne as SAML IDP
This example shows how to use PingOne as the identity provider with unsigned/unencrypted assertions.
Before you start
-
Add the following basic PingGateway configuration if you have not already done so:
-
Set up PingGateway for HTTPS, as described in Configure PingGateway for TLS (server-side).
-
Add the following route to PingGateway to serve the sample application .css and other static resources:
-
Linux
-
Windows
$HOME/.openig/config/routes/00-static-resources.json
%appdata%\OpenIG\config\routes\00-static-resources.json
{
  "name" : "00-static-resources",
  "baseURI" : "http://app.example.com:8081",
  "condition": "${find(request.uri.path,'^/css') or matchesWithRegex(request.uri.path, '^/.*\\\\.ico$') or matchesWithRegex(request.uri.path, '^/.*\\\\.gif$')}",
  "handler": "ReverseProxyHandler"
}
json -
-
-
Set up the network:
Add
sp.example.comto your/etc/hostsfile:127.0.0.1 localhost am.example.com ig.example.com app.example.com sp.example.comTraffic to the application is proxied through PingGateway, using the host name
sp.example.com. -
Save the sp.xml file as the SAML service provider configuration file
$HOME/.openig/SAML/sp.xml.
Prepare PingOne
-
Prepare the PingOne environment and test user.
Make sure you match the test user’s credentials to those known to the sample application.
-
In the PingOne test environment, create a SAML web application with the following values:
-
Application Name:
saml_app -
Description:
SAML application -
Application Type:
SAML Application
-
-
In the application, select the Import Metadata panel, add the SAML configuration file
sp.xmland save the application. -
On the Attribute Mappings panel, click (edit) and add the following mappings:
saml_app PingOne cn
Given Name
sn
Family Name
-
On the Configuration panel, click (edit) and set the SLO BINDING’s SUBJECT NAMEID FORMAT to
urn:oasis:names:tc:SAML:2.0:nameid-format:transient. -
On the Configuration panel, click Download Metadata and save the downloaded file as the identity provider configuration file
$HOME/.openig/SAML/idp.xml. -
On the Configuration panel, record the Initiate Single Sign-on URL.
You need the value to set up PingGateway.
-
At the top-right of the page, click the slider to enable the application.
Learn more from the PingOne documentation Add a SAML application.
Prepare PingGateway
-
Copy the following example SAML configuration files to
$HOME/.openig/SAMLand edit them to match your configuration:File Required changes FederationConfig.propertiesNone
fedlet.cotReplace idp-entityID with the value of
EntityDescriptor entityIDinidp.xml.idp-extended.xmlReplace idp-entityID with the value of
EntityDescriptor entityIDinidp.xml.sp-extended.xmlNone
-
Make sure the PingGateway configuration at
$HOME/.openig/SAMLcontains the following files:$ ls -l $HOME/.openig/SAML FederationConfig.properties fedlet.cot idp-extended.xml idp.xml sp-extended.xml sp.xmlbash -
Add the following route to PingGateway:
-
Linux
-
Windows
$HOME/.openig/config/routes/saml-filter.json
%appdata%\OpenIG\config\routes\saml-filter.json
{
  "name": "saml-filter",
  "baseURI": "http://app.example.com:8081",
  "condition": "${find(request.uri.path, '^/home')}",
  "handler": {
    "type": "Chain",
    "config": {
      "filters": [
        {
          "name": "SamlFilter",
          "type": "SamlFederationFilter",
          "config": {
            "assertionMapping": {
              "name": "cn",
              "surname": "sn"
            },
            "subjectMapping": "sp-subject-name",
            "redirectURI": "/home/saml-filter"
          }
        },
        {
          "name": "SetSamlHeaders",
          "type": "HeaderFilter",
          "config": {
            "messageType": "REQUEST",
            "add": {
              "x-saml-cn": [ "${toString(session.name)}" ],
              "x-saml-sn": [ "${toString(session.surname)}" ]
            }
          }
        }
      ],
      "handler": "ReverseProxyHandler"
    }
  }
}
json -
-
Restart PingGateway.
Validation
Test IDP-initiated login:
-
In your browser’s privacy or incognito mode, go to the URL given by the web application property Initiate Single Sign-on URL.
PingOne displays the sign-on page.
-
Sign on to PingOne as the test user.
PingGateway displays the sample application home page.
Test SP-initiated login:
-
In your browser’s privacy or incognito mode, go to https://sp.example.com:8443/home.
-
Sign on as the test user.
The request is redirected to the sample application.
PingGateway displays the sample application home page.
| If a request returns an HTTP 414 URI Too Long error, read URI Too Long error. |
PingOne Authorize integration
Use PingOne Authorize with PingGateway to protect APIs and web applications. When you add a PingOneApiAccessManagementFilter to a route, PingGateway requests an authorization decision from PingOne Authorize based on the request and associated access token.
This example uses PingOne as an OIDC provider issuing an ID token with an access token. PingGateway enforces authorization decisions from PingOne Authorize. In this example, the decision to authorize access to a protected application depends on an access token scope.
Before you begin
If you haven’t already done so:
-
Install PingGateway.
-
Install the sample application.
-
Prepare a PingOne test environment and a test user.
Learn more in the overview page for these examples.
Add an OIDC client
Follow these steps to create a PingOne OIDC web application:
-
In the test environment, create a web application with the following values:
-
Application Name:
oidc_client -
Description:
OIDC client -
Application Type: OIDC Web App
-
-
On the Overview tab of the details panel, click Protocol OpenID Connect.
-
In the Redirect URIs field, enter
https://ig.example.com:8443/home/sso/callback. Click Save. -
At the top-right of the application’s profile, click the toggle to enable the application.
-
On the Configuration tab, make a note of the following values in the URLs list:
-
OIDC Discovery Endpoint
-
Client ID
-
Client Secret
You need the values to set up PingGateway.
-
Add an API gateway
PingGateway uses a PingOne API gateway account to authenticate to PingOne Authorize:
-
In the test environment, go to Authorization > API Gateways and click +.
-
Enter PingGateway as the Name. Click Save.
-
Next to Credentials, click + and copy the API gateway credential.
You need the credential value to set up PingGateway.
Add an API service
In this example, PingOne Authorize uses a PingOne API service definition to reach authorization decisions.
The API service holds references to the following:
-
The base URL for PingGateway, which is the base URL for what a user sees in their browser.
-
The base URLs for the protected sample application, which is the object of an authorization decision.
-
The resource to protect, which is the PingGateway URL proxying for the sample application.
-
The scope required for access in this example.
-
In the test environment, go to Authorization > API Services and click +.
-
On the New API Service panel, add the following settings, then click Save. Accept the default values for the settings not listed here:
Setting Value Name
PingGatewayBase URLs
https://app.example.com:8444(for the sample application)
https://ig.example.com:8443(for PingGateway)Enable Custom Policies
Select this.
-
Click Deploy so you can use the new API service.
-
Update the automatically created resource
When you added the PingGateway API service, PingOne automatically created a corresponding resource by default.
Update the resource so its audience (the aud in access tokens) reflects the PingGateway URL
and so that it requires a read scope to get it:
-
In the test environment, go to Applications > Resources and click the PingGateway resource.
-
On the Overview tab, click the Pencil icon, and, in the Audience field, enter
https://ig.example.com:8443. Click Save. -
On the Scopes tab, click Add Scope, and in the Scope Name field, enter
read. Click Save.This adds the
readscope to the PingGateway service. -
Go to Applications > Applications and click oidc_client.
-
On the Resources tab, edit Allowed Scopes, and select the read scope checkbox. Click Save.
Configure PingGateway
-
Prepare the secrets PingGateway needs to act as an OIDC RP and an API gateway when making requests to PingOne.
Base64-encode the API gateway’s credential and the OIDC application’s client secret and set both values as environment variables:
$ export GATEWAY_SECRET_ID='<base64-encoded-api-gateway-credential>' $ export OIDC_SECRET_ID='<base64-encoded-client-secret>' -
Restart PingGateway to read the environment variables.
-
Add the following route to PingGateway, replacing the property values to match those from the test environment:
-
Linux
-
Windows
$HOME/.openig/config/routes/oidc-ping.json
%appdata%\OpenIG\config\routes\oidc-ping.json
{ "name": "pingone-aam", "condition": "${find(request.uri.path, '^/home/sso')}", "baseURI": "https://app.example.com:8444", "properties": { "gatewayServiceUrl": "https://http-access-api.pingone.eu/v1/environments/test-environment-id", "oidcClientId": "oidc-client-id", "oidcWellKnownEndpoint": "https://auth.pingone.eu/test-environment-id/as/.well-known/openid-configuration" }, "heap": [ { "name": "BlindTrustReverseProxyHandler", "type": "ReverseProxyHandler", "comment": "For evaluation and testing only", "config": { "tls": { "type": "ClientTlsOptions", "config": { "trustManager": { "type": "TrustAllManager" }, "hostnameVerifier": "ALLOW_ALL" } } } }, { "name": "SystemAndEnvSecretStore-1", "type": "SystemAndEnvSecretStore" }, { "name": "AuthenticatedRegistrationHandler-1", "type": "Chain", "config": { "filters": [ { "name": "ClientSecretBasicAuthenticationFilter-1", "type": "ClientSecretBasicAuthenticationFilter", "config": { "clientId": "&{oidcClientId}", "clientSecretId": "oidc.secret.id", "secretsProvider": "SystemAndEnvSecretStore-1" } } ], "handler": "ForgeRockClientHandler" } } ], "handler": { "type": "Chain", "config": { "filters": [ { "type": "AuthorizationCodeOAuth2ClientFilter", "config": { "clientEndpoint": "/home/sso", "failureHandler": { "type": "StaticResponseHandler", "config": { "status": 500, "headers": { "Content-Type": [ "text/plain" ] }, "entity": "Error: ${contexts.oauth2Failure.error}\nDescription: ${contexts.oauth2Failure.description}" } }, "registrations": [ { "type": "ClientRegistration", "config": { "clientId": "&{oidcClientId}", "issuer": { "type": "Issuer", "config": { "wellKnownEndpoint": "&{oidcWellKnownEndpoint}" } }, "scopes": [ "openid", "read" ], "authenticatedRegistrationHandler": "AuthenticatedRegistrationHandler-1" } } ] } }, { "type": "PingOneApiAccessManagementFilter", "config": { "gatewayServiceUri": "&{gatewayServiceUrl}", "secretsProvider": "SystemAndEnvSecretStore-1", "gatewayCredentialSecretId": "gateway.secret.id", "accessToken": "${attributes.openid.access_token}", "_sidebandHandler": { "_comment": "s/_sidebandHandler/sidebandHandler/ to troubleshoot AAM decisions", "type": "ClientHandler", "capture": "all" } } } ], "handler": "BlindTrustReverseProxyHandler" } } }jsonNotice the following features of the route:
-
The route properties use the settings you collected from the PingOne environment.
-
The heap has:
-
A handler to trust the self-signed sample application certificate for HTTPS blindly.
In production deployments, use certificates you don’t have to trust blindly. -
A
SystemAndEnvSecretStoreto read get the base64-encoded secrets from the environment variables. -
A handler to get an ID token as the OIDC client.
-
-
The
AuthorizationCodeOAuth2ClientFiltergets the ID token with thereadscope. -
The
PingOneApiAccessManagementFiltermakes the authorization decision request to PingOne Authorize. It sends the access token from the OIDC ID token. -
On success, the
BlindTrustReverseProxyHandlergets the resource from the sample application.
-
Validation
-
In your browser’s privacy or incognito mode, go to https://ig.example.com:8443/home/sso.
PingOne displays the sign-on page.
-
Sign on to PingOne as the test user.
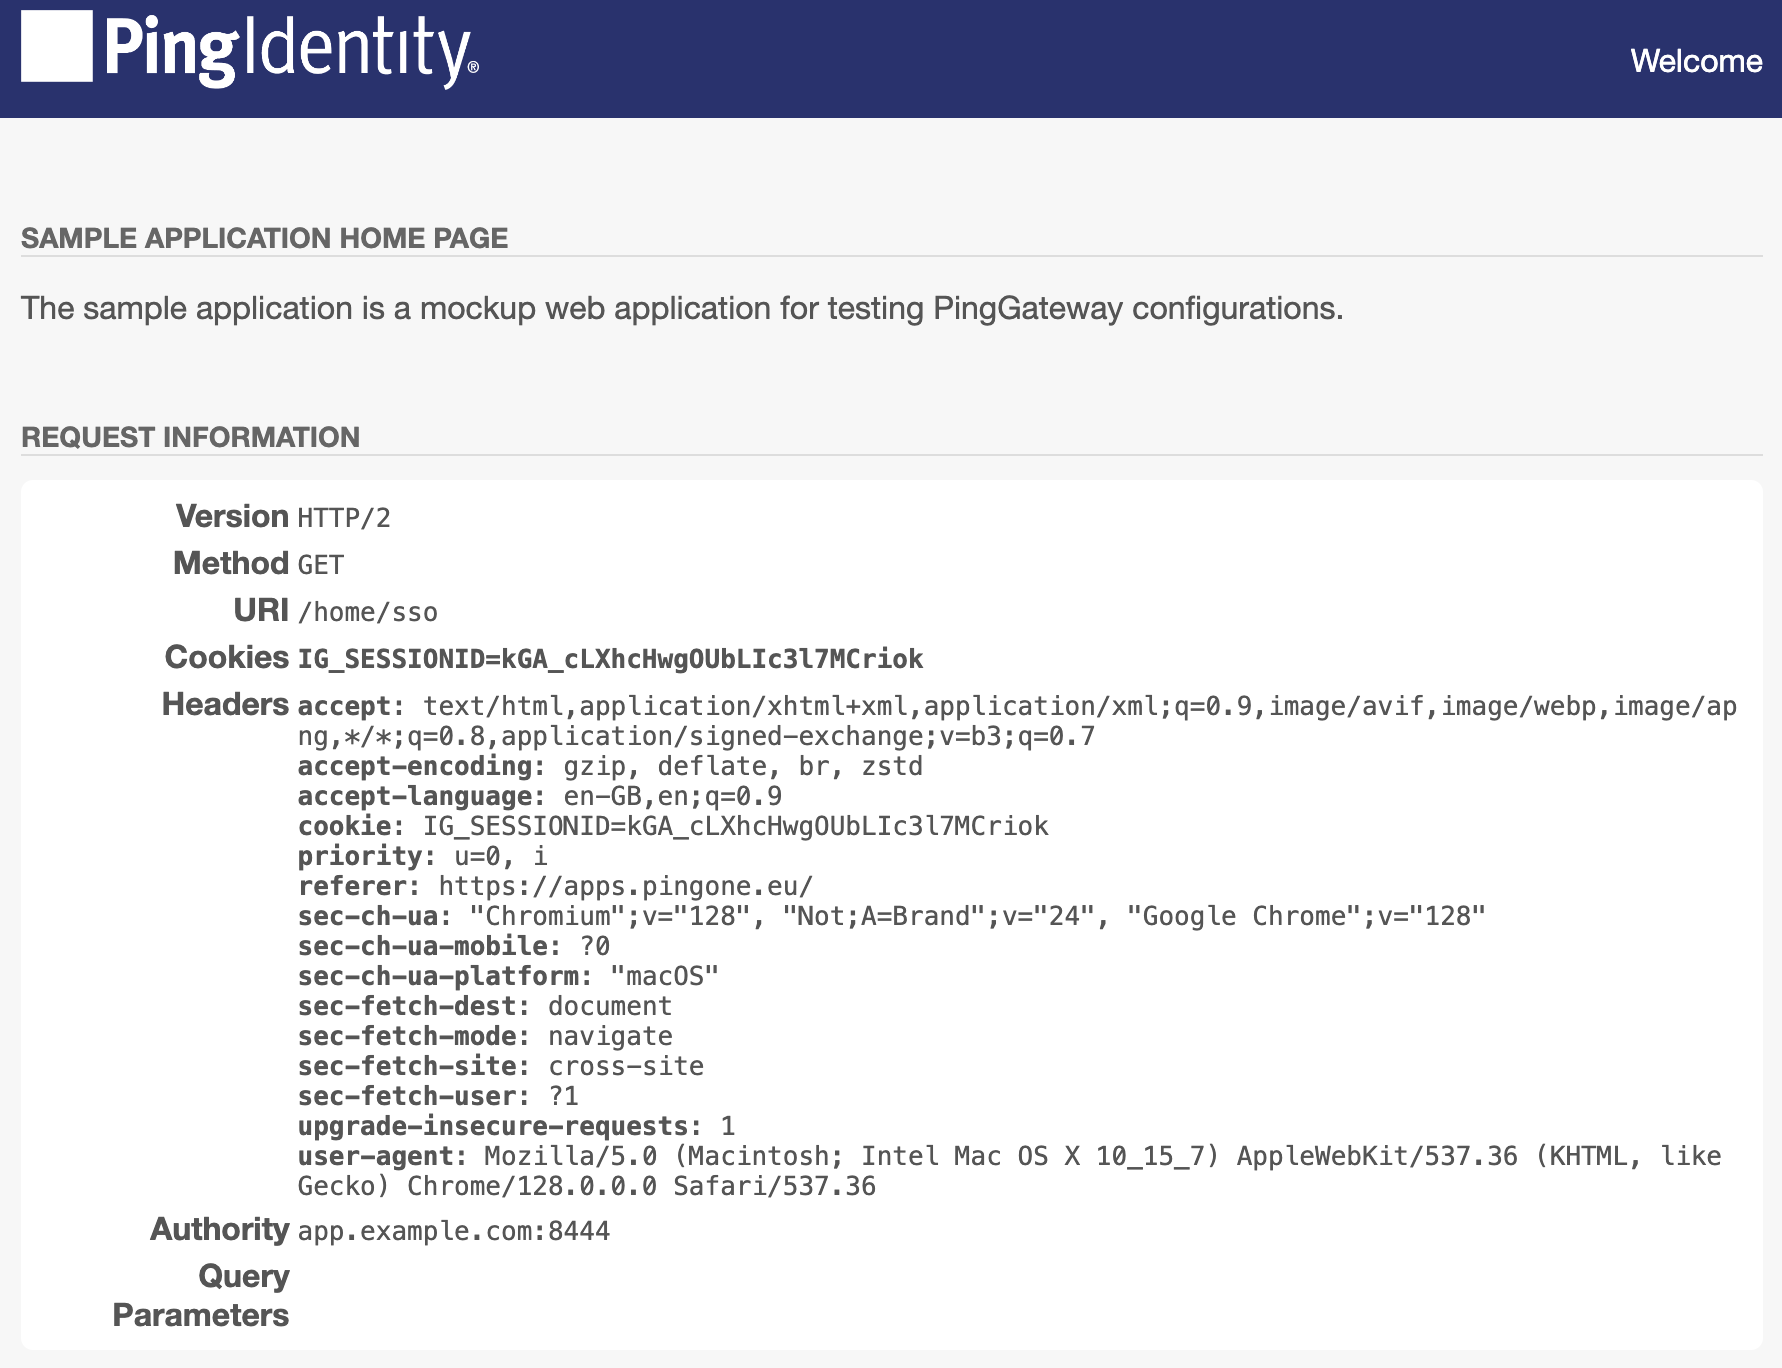
PingGateway displays the sample application home page:
Troubleshooting
If you get unexpected errors, try these debugging options:
-
Update the
PingOneApiAccessManagementFilterconfiguration to enable the capture decorator.Change
"_sidebandHandler"to"sidebandHandler"and save your work to let PingGateway reload the route. -
In the test environment, go to Authorization > Recent Decisions, select the PingGateway decision endpoint, and select a decision to visualize.
PingOne shows you how PingOne Authorize arrived at the authorization decision.
On the Request and Response tabs, you find detailed traces of the parameters for each.
User experience
When PingOne Authorize denies access or the example route fails to get an access token, the browser displays text, which isn’t user-friendly.
Consider using a StaticResponseHandler to show a more friendly page to the user.
PingOne Protect integration
Use PingOne Protect risk evaluations with web applications protected by PingGateway. PingGateway routes requests based on the level of risk PingOne Protect associates with them.
Risk management
PingOne Protect monitors end-user requests and generates a risk score of low, medium, or high based on the user’s activity and device context. You configure and fine-tune risk policies and train risk models prior to using PingGateway with PingOne Protect. Learn more in Threat Protection using PingOne Protect.
You configure PingGateway routes to react to risk scores from PingOne Protect dynamically. For example, if the risk score is medium, PingGateway can direct the user to complete additional verification. If the risk score is high, PingGateway can deny access to the resource instead.
The following sequence diagram shows the PingGateway configuration objects involved in a risk management flow:
-
The PingOneProtectEvaluationFilter calls PingOne Protect.
-
It populates the PingOneProtectEvaluationContext based on the response.
-
The PingOneProtectThreatLevelRoutingHandler dispatches the request based on its risk level.
-
After prompting the user to complete additional actions following a risk evaluation, the PingOneProtectFeedbackSuccessFilter or PingOneProtectFeedbackFailureFilter can send feedback to PingOne Protect and override the risk level in the session context.

-
The initial request enters a Chain configured for risk evaluation with PingOne Protect.
-
The PingOneProtectEvaluationFilter includes data about the request in an API call to PingOne Protect.
-
PingOne Protect provides a risk evaluation response.
-
The PingOneProtectEvaluationFilter populates the PingOneProtectEvaluationContext with the risk level based on the evaluation response and passes control to the PingOneProtectThreatLevelRoutingHandler.
-
-10. The PingOneProtectThreatLevelRoutingHandler dispatches the request based on the risk level. The downstream handler returns a response to the initial request that is appropriate for the risk level. The downstream handlers can prompt additional actions to verify the user’s identity.
Although not shown in the sequence diagram,
when a medium risk level leads to additional authentication steps and the user successfully completes the steps,
a PingOneProtectFeedbackSuccessFilter included in the process updates PingOne Protect to indicate the successful outcome.
The sequence diagram also omits device profile data collection.
When the PingOneProtectEvaluationFilter includes "deviceProfile" settings,
PingGateway gathers profile data from the user-agent by sending it a self-submitting form page
that uses JavaScript to retrieve the profile information.
(If JavaScript is disabled in the browser, PingGateway can’t get the device profile data.)
PingGateway includes the device profile in PingOne Protect risk evaluation requests.
PingGateway runs at the outer edge of your systems, the place where all inbound traffic first arrives and all outbound traffic leaves, just inside the network infrastructure.
PingGateway is well-placed to capture signals about the traffic and its risk profile.
Example: protect against session degradation
Session degradation arises when a valid user session gets used in unexpected ways, increasing the risk the session has been hijacked or otherwise compromised. Session degradation is why we can’t let users stay signed in forever unless we can authenticate them again.
Together, PingGateway and PingOne Protect help you automate fine-grained risk evaluation, avoiding the distraction of additional authentication steps unless they’re required for a risky request. Users stay signed in with their current session, which they experience as a keep me signed in feature. You nevertheless protect their assets from hijacking without needing constantly to verify their identity.
This example demonstrates risk management where the principal already has a valid session. The example doesn’t demonstrate how to configure PingOne Protect.
When PingOne Protect returns a risk evaluation, PingGateway responds based on the risk level. This example demonstrates the following responses:
- High risk
-
Deny access to the requested resource.
Although not shown in this brief example, you could route the request to a honeypot.
- Medium risk
-
Prompt the user to reauthenticate to verify their identity.
The user can perform step up or transactional authentication at this point.
- Low risk
-
Let the request pass through unchanged.
Before you begin
-
Configure PingOne Protect. Learn more in the PingOne Protect documentation.
-
Implement CDSSO with PingOne Advanced Identity Cloud or CDSSO for self-managed AM. This example opts for CDSSO with PingOne Advanced Identity Cloud. When using self-managed AM, also read Self-managed AM.
-
For additional protection with medium-risk requests, implement Step up authorization for a transaction.
-
Verify you can successfully authenticate with CDSSO to the sample application.
Configure PingGateway
What follows extends the CDSSO route to protect against session degradation:
-
Sign on to the PingOne environment with PingOne Protect as an administrator and add an application for PingGateway.
Use the following hints regarding non-default configuration settings:
Setting Value Application Name
PingGateway
Application Type
Worker
Application profile > Roles
Environment Admin
Identity Data Admin -
In the PingOne environment, find and record the values of the following settings:
Property Description Environment UUID
This is
<env-uuid>in other property examples.PingGateway client ID
PingGateway credentials to access PingOne as the application you registered.
PingGateway client secret
Policy set UUID
The PingOne Protect policy for risk evaluation requests.
Service endpoint
For risk evaluation and feedback service requests.
Example:
https://api.pingone.eu/v1/environments/<env-uuid>Token endpoint
For PingGateway to get an access token.
Example:
https://auth.pingone.eu/<env-uuid>/as/token -
In the PingGateway AdminHttpApplication (
admin.json) file, make sure the maximum total headers size is large enough to accommodate request headers for the device profile cookies.After PingGateway collects device profile data, it stores the data in cookies on the user-agent. The user-agent returns these to PingGateway in the
Cookierequest header. Set themaxTotalHeadersSizefor the PingGateway server ports large enough to avoid HTTP 431 Request Header Fields Too Large errors; for example:"connectors": [ { "port": 8080, "maxTotalHeadersSize": 32768 }, { "port": 8443, "maxTotalHeadersSize": 32768, "tls": "TlsConf" } ],jsonYou can skip this step if you don’t use
"deviceProfile"settings in the PingOneProtectEvaluationFilter. -
Set an environment variable for the PingGateway client secret.
PingGateway uses a SystemAndEnvSecretStore to retrieve the client secret, so you must base64-encode the value you found in the PingOne application profile:
$ export CLIENT_SECRET_ID='<base-64-encoded-client-secret>'bash -
Restart PingGateway to load the updated
admin.jsonsettings and the environment variable. -
Update the CDSSO route to add risk management:
{ "name": "risk", "baseURI": "https://app.example.com:8444/login", "condition": "${find(request.uri.path, '^/home/cdsso')}", "properties": { "amInstanceUrl": "https://myTenant.forgeblocks.com/am", "clientId": "my-application-client-id", "policySetId": "my-policy-set-id", "serviceEndpoint": "https://api.pingone.eu/v1/environments/my-environment-id", "tokenEndpoint": "https://auth.pingone.eu/my-environment-id/as/token" }, "heap": [ { "name": "BlindTrustReverseProxyHandler", "type": "ReverseProxyHandler", "comment": "For evaluation and testing only", "config": { "tls": { "type": "ClientTlsOptions", "config": { "trustManager": { "type": "TrustAllManager" }, "hostnameVerifier": "ALLOW_ALL" } } } }, { "name": "SystemAndEnvSecretStore-1", "type": "SystemAndEnvSecretStore" }, { "name": "AmService-1", "type": "AmService", "config": { "url": "&{amInstanceUrl}", "realm": "/alpha", "agent": { "username": "ig_agent", "passwordSecretId": "agent.secret.id" }, "secretsProvider": "SystemAndEnvSecretStore-1", "sessionCache": { "enabled": false } } }, { "name": "ClientCredentialsOAuth2ClientFilter-1", "type": "ClientCredentialsOAuth2ClientFilter", "config": { "tokenEndpoint": "&{tokenEndpoint}", "scopes": [ "openid", "profile", "email", "p1" ], "endpointHandler": { "name": "AccessTokenHandler", "type": "Chain", "config": { "filters": [ { "type": "ClientSecretBasicAuthenticationFilter", "config": { "clientId": "&{clientId}", "clientSecretId": "client.secret.id", "secretsProvider": "SystemAndEnvSecretStore-1" } } ], "handler": "ForgeRockClientHandler" } } } }, { "name": "RiskEndpointHandler", "type": "Chain", "config": { "filters": [ "ClientCredentialsOAuth2ClientFilter-1" ], "handler": "ForgeRockClientHandler" } }, { "name": "PingOneService-1", "type": "PingOneService", "config": { "serviceEndpoint": "&{serviceEndpoint}", "endpointHandler": "RiskEndpointHandler" } }, { "name": "StepUpHandler", "type": "Chain", "config": { "filters": [ { "name": "PolicyEnforcementFilter-1", "type": "PolicyEnforcementFilter", "config": { "application": "PEP-CDSSO", "ssoTokenSubject": "${contexts.cdsso.token}", "amService": "AmService-1" } }, { "name": "SuccessFeedbackFilter", "type": "PingOneProtectFeedbackSuccessFilter", "config": { "pingOneService": "PingOneService-1", "postEvaluationAssumedRiskLevel": "low" } } ], "handler": "ReverseProxyHandler" } }, { "name": "FailureHandler", "type": "Chain", "config": { "filters": [ { "name": "FailureFeedbackFilter", "type": "PingOneProtectFeedbackFailureFilter", "config": { "pingOneService": "PingOneService-1" } } ], "handler": { "type": "StaticResponseHandler", "config": { "status": 403, "headers": { "Content-Type": [ "text/plain; charset=UTF-8" ] }, "entity": "HTTP 403 Forbidden" } } } } ], "handler": { "type": "Chain", "config": { "filters": [ { "name": "CrossDomainSingleSignOnFilter-1", "type": "CrossDomainSingleSignOnFilter", "config": { "redirectEndpoint": "/home/cdsso/redirect", "authCookie": { "path": "/home", "name": "ig-token-cookie" }, "amService": "AmService-1" } }, { "name": "PingOneProtectEvaluationFilter-1", "type": "PingOneProtectEvaluationFilter", "config": { "pingOneService": "PingOneService-1", "policySet": "&{policySetId}", "userId": "${contexts.cdsso.claimsSet.getClaim('subname')}", "nonEvaluatedUrls": "${find(request.uri.path, '/home/cdsso/redirect')}", "deviceProfile": { "callbackEndpoint": "/home/cdsso/profilecallback" } } } ], "handler": { "name": "PingOneProtectThreatLevelRoutingHandler-1", "type": "PingOneProtectThreatLevelRoutingHandler", "config": { "levels": { "low": "BlindTrustReverseProxyHandler", "medium": "StepUpHandler", "high": "FailureHandler" } } } } } }jsonNotice the following features of the updated route:
-
The route properties use the settings you collected from the PingOne environment.
Replace the placeholders in the route properties with the settings you collected.
-
The heap has an evaluation endpoint handler to get an access token for risk evaluation requests.
-
The PingOneProtectEvaluationFilter uses the evaluation endpoint handler to make the risk evaluation request and populate the PingOneProtectEvaluationContext (implicit in the configuration).
-
The PingOneProtectThreatLevelRoutingHandler uses the context to route the request based on the risk level:
-
Low-risk requests pass through unchanged.
-
Medium-risk requests use step up authorization for the request.
-
High-risk requests and requests where the PingOneProtectEvaluationFilter failed to update the context get denied.
-
-
Validation
-
In your browser’s privacy or incognito mode, go to https://ig.ext.com:8443/home/cdsso.
PingOne Advanced Identity Cloud displays the login page.
-
Log in to PingOne Advanced Identity Cloud as the test user.
After authentication, PingGateway gets an access token and uses it to make a risk evaluation request. The PingOneProtectThreatLevelRoutingHandler routes the result:
-
Low-risk requests go directly to the sample app.
-
Medium-risk requests prompt the user for the authorization passcode
7890. -
PingGateway denies access to other requests.
-
You’ve successfully demonstrated risk management to prevent session degradation. Adapt the route to the specifics of your use case.
Self-managed AM
When you use transactional authorization with self-managed AM in this example, you must configure PingGateway to use its URI rather than the URI of the protected application when confirming the transaction.
You can do this by using a PolicyEnforcementFilter "resourceUriProvider"
to rebase the protected URI on the PingGateway URI.
-
Add the following ScriptableResourceUri.groovy script to PingGateway:
-
Linux
-
Windows
$HOME/.openig/scripts/groovy/ScriptableResourceUri.groovy
%appdata%\OpenIG\scripts\groovy\ScriptableResourceUri.groovy
ScriptableResourceUri.groovy
package scripts.groovy import org.forgerock.http.routing.UriRouterContext import org.forgerock.http.util.Uris /** * Sample scriptable {@code RequestResourceUriProvider} (for use with a {@code PolicyEnforcementFilter}). * * This sample script "rebases" the in-flight request URI on top of the original URI. The term "in-flight" represents * the request's URI as it's manipulated as it progresses through the route. This is to ensure route components have had * the opportunity to act on the request prior to policy evaluation - e.g. to manipulate query parameters they may be * responsible for managing. * * <p>Example - indicates in-flight request URI's path, query and fragment retained and rebased on to original URI: * <ul> * <li><b>original request URI</b>: https://ig.ext.com:8443/home?param1=1¶m2</li> * <li><b>in-flight request URI</b>: http://app.example.com:8080/home?param2</li> * <li><b>result (rebased) URI</b>: https://ig.ext.com:8443/home?param2</li> * </ul> * * <p>Example config: * <pre> * {@code { * "name" : "RebasingResourceUriProvider", * "type" : "ScriptableResourceUriProvider", * "config" : { * "file" : "ScriptableResourceUri.groovy", * "type": "application/x-groovy" * } * } * } * </pre> * * <p>Example {@code PolicyEnforcementFilter} usage: * <pre> * {@code { * "type" : "PolicyEnforcementFilter", * "config" : { * "amService" : "...", * "application" : "...", * "resourceUriProvider": "RebasingResourceUriProvider", * ... * } * } * } * </pre> */ def uriRouterContext = context.asContext(UriRouterContext.class) URI originalUri = uriRouterContext.getOriginalUri(); URI requestUri = request.getUri().asURI(); URI pathAndParams = new URI(null, null, requestUri.getPath(), requestUri.getQuery(), requestUri.getFragment()); logger.trace("ScriptableResourceUri rebasing {} with request parameters {}", originalUri, pathAndParams); String rebasedUri = Uris.rebase(pathAndParams, originalUri).toASCIIString(); logger.trace("ScriptableResourceUri rebased to URI '{}'", rebasedUri); return rebasedUri;groovy -
-
Add a reference to the script in the route heap:
{
    "name": "RebasingResourceUriProvider",
    "type": "ScriptableResourceUriProvider",
    "config": {
        "file": "ScriptableResourceUri.groovy",
        "type": "application/x-groovy"
    }
}
json -
In the PolicyEnforcementFilter for the route, use the reference to the script in the
"resourceUriProvider"setting:{ "name": "PolicyEnforcementFilter-1", "type": "PolicyEnforcementFilter", "config": { "application": "PEP-CDSSO", "ssoTokenSubject": "${contexts.cdsso.token}", "amService": "AmService-1", "resourceUriProvider": "RebasingResourceUriProvider" } }json -
Make sure the route’s
"amInstanceUrl"reflects your self-managed AM. -
Save your changes to the route.
After PingGateway reloads the route, you can validate the scenario with your self-managed AM deployment.