Configuring SSO for GlobalProtect VPN with PingFederate
Next-Generation Firewall (NGFW) supports the ability to enable single sign-on (SSO) through the admin UI.
Before you begin
-
PingFederate is installed and configured.
-
NGFW is installed and configured.
-
You have a GlobalProtect portal certificate.
-
You have a Certificate Profile.
-
You have an identity provider (IdP) certificate signed by a certificate authority (CA), and trusted by the NGFW device (recommended).
About this task
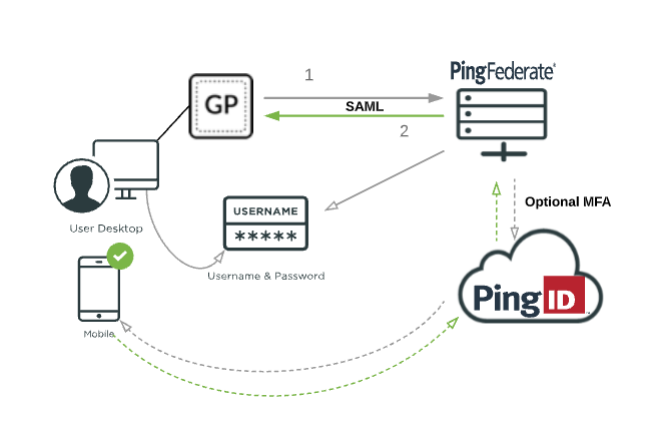
You can combine GlobalProtect VPN with PingFederate for SSO as illustrated in the following diagram.
Exporting the SAML Metadata from PingFederate
Steps
-
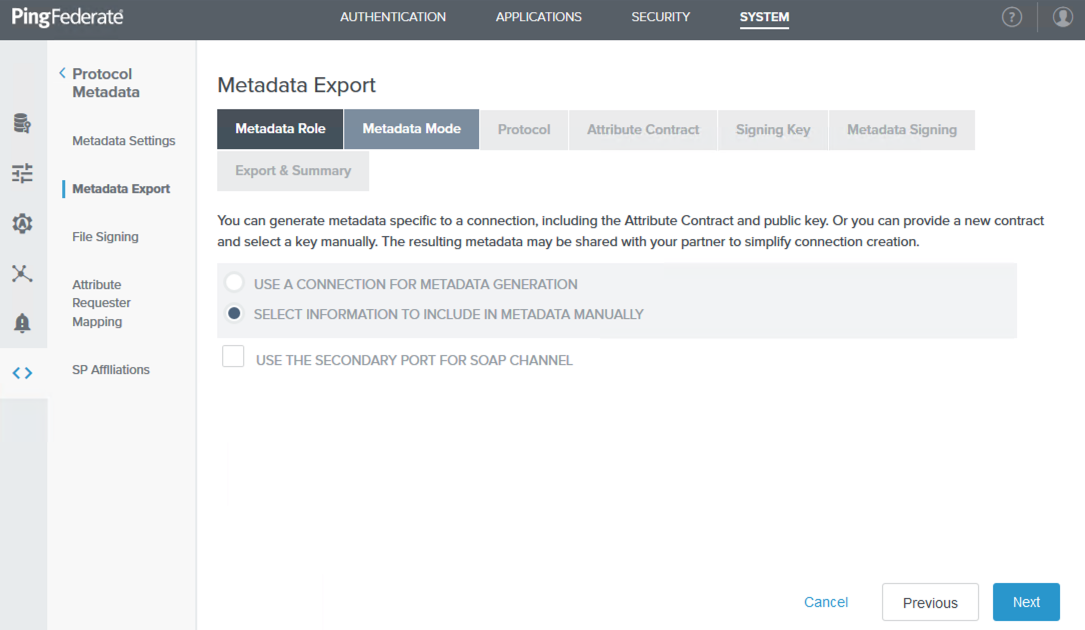
Sign on to the PingFederate administrative console and go to System → Protocol Metadata → Metadata Export.
-
On the Metadata Role tab, select I am the Identity Provider (IdP), and then click Next.

-
On the Metadata Mode tab, select Select Information to Include in Metadata Manually, and then click Next.
-
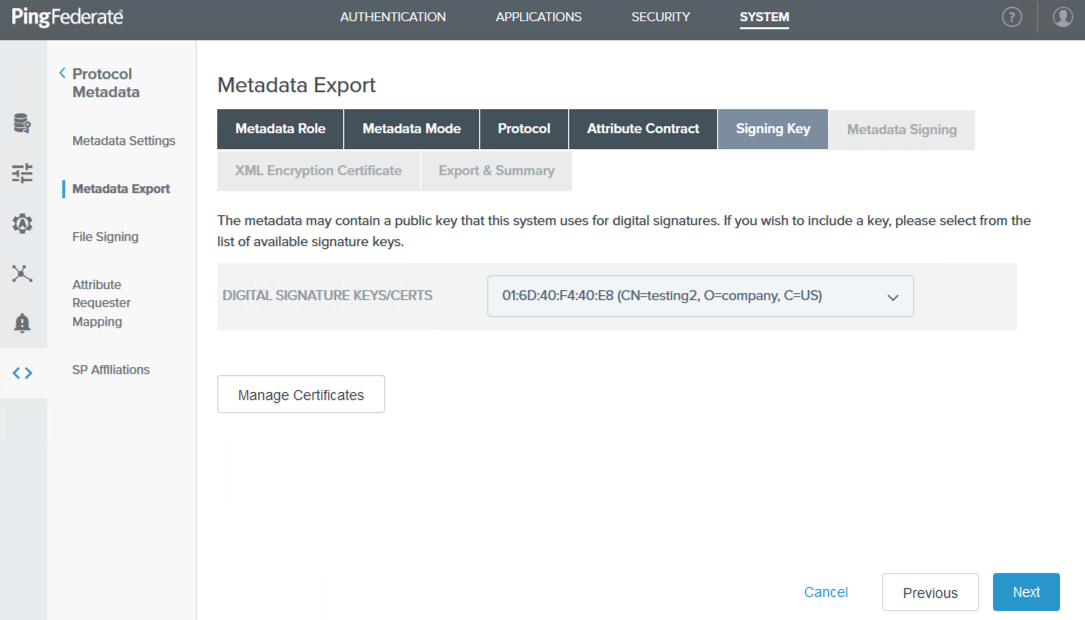
On the Protocol tab, click Next until you reach the Signing Key tab, accepting the default values.
-
On the Signing Key tab, select an available signing key from the Digital Signature Keys/Certs list, and then click Next. If none are available, click Manage Certificates to create a signing key, and then follow the on-screen instructions.
Although you can use a self-signed certificate, a CA-signed certificate is recommended.
-
Click Next until you reach the Export & Summary tab, accepting the default values on the Metadata Signing and XML Encryption Certificate tabs.
-
On the Export & Summary tab, click Export and save the
metadata.xmlfile. You will upload this file to Palo Alto Networks NGFW in the next step.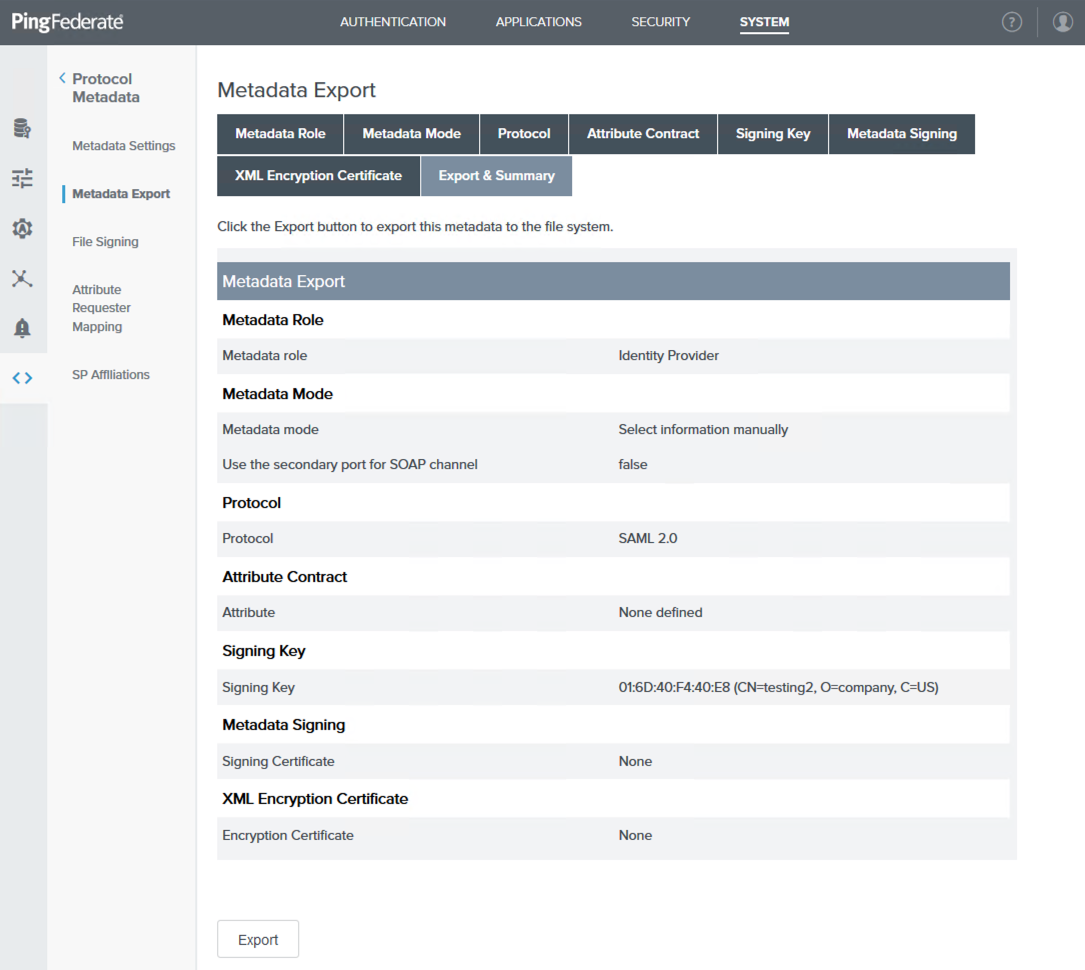
Configuring a SAML Integration with PingFederate in NGFW
Steps
-
Configure the SAML IdP server profile in NGFW.
-
Sign on to Palo Alto Networks NGFW as an administrator, and then go to the Device tab.
-
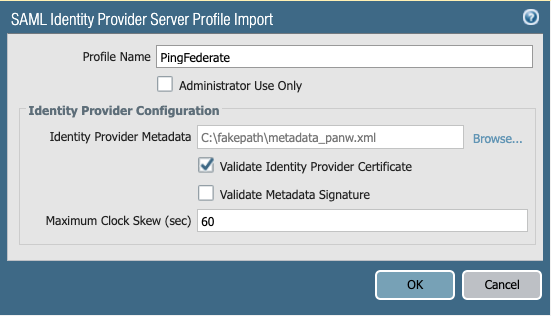
To import the metadata from PingFederate, go to Server Profiles → SAML Identity Provider, and then click Import.
-
Enter a name in the Profile Name field, and then click Browse and select the
metadata.xmlfile from step 7 of Exporting the SAML Metadata from PingFederate.
-
Optional: If you are using a self-signed certificate in PingFederate, clear the Validate Identity Provider Certificate checkbox.
-
Click OK.
-
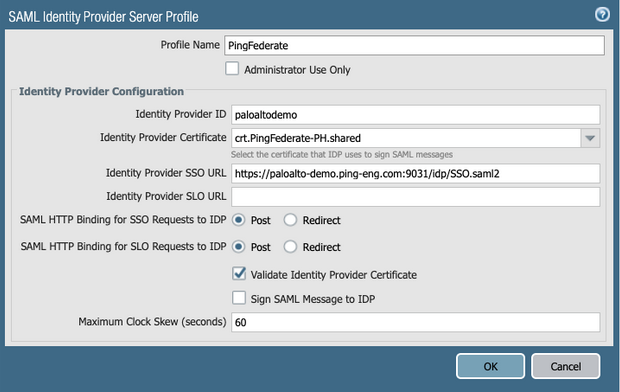
Click on your newly-created profile to open it.
-
Select the Post checkbox for both SAML HTTP Binding for SSO Requests to IDP and SAML HTTP Binding for SLO Requests to IDP.
-
Optional: Adjust the clock skew in the Maximum Clock Skew (seconds) field.
-
Click OK.
-
-
Create the authentication profile in NGFW.
-
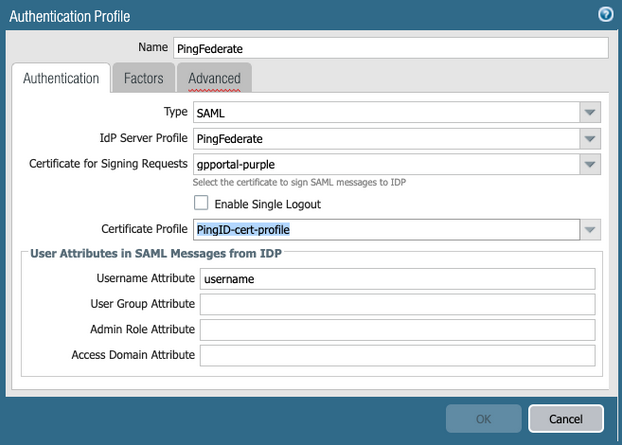
In Palo Alto Networks NGFW, go to the Device tab, and then click Authentication Profile.
-
Click Add, and enter a profile name in the Name field.
-
From the Type list, select SAML.
-
From the IdP Server Profile list, select the SAML profile.
-
From the Certificate for Signing Requests list, select the certificate of your GlobalProtect portal that you have created prior to this configuration. This will be used to sign the SAML message to the IdP.
-
From the Certificate Profile list, select the certificate profile that you have created prior to this configuration.
When using a CA-signed certificate in PingFederate, import the root CA in Device → Certificates, and include it in the certificate profile.
If you want to add multi-factor authentication (MFA), we recommend adding it from the PingFederate administrative console.
-
Go to the Advanced tab, and then click Add.
-
Select the groups that you want to be included in this Authentication Profile, and then click OK.

-
-
Add the authentication profile to the GlobalProtect Portal.
-
In Palo Alto Networks NGFW, go to Network → GlobalProtect → Portals, and then select the portal that you want to configure.
For information on creating a portal, see Set Up Access to the GlobalProtect Portal.
-
Under Server Authentication, select the ssl service profile to the portal.
-
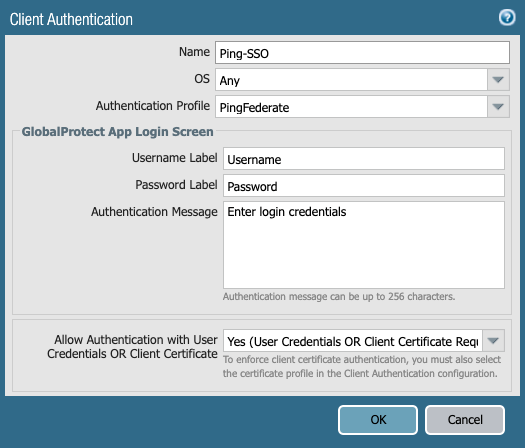
Under Client Authentication, click Add.
-
In the Client Authentication window, enter a name in the Name field. From the Authentication Profile list, select the authentication profile.
-
Optional: From the Allow Authentication with User Credentials OR Client Certificate list, select Yes.
-
Click OK.
-
Go to the Agent tab and set the trusted root CA.
-
Under Agent, click Add.
-
On the Authentication tab, enter a name in the Name field. From the Save User Credentials list, select Save Username Only.
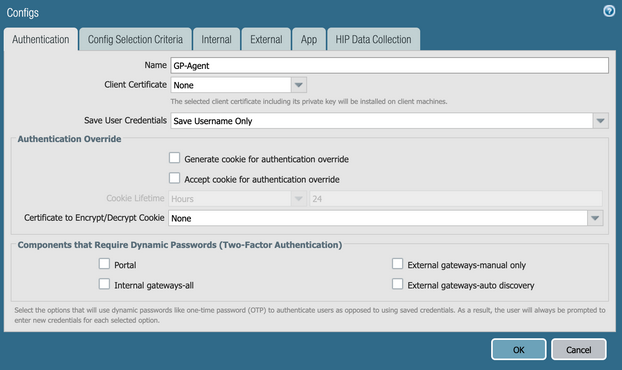
-
Go to the External tab. Under External Gateways, click Add.
-
Enter a name in the Name field, and then enter the FQDN or IP address for the agent.
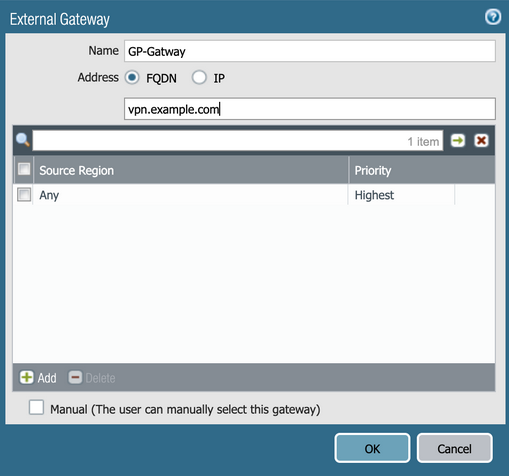
-
Go to the App tab and review your configuration. Make any changes if required, and then click OK.
Make sure the Gateway is configured. For more information, see Configure a GlobalProtect Gateway.
-
-
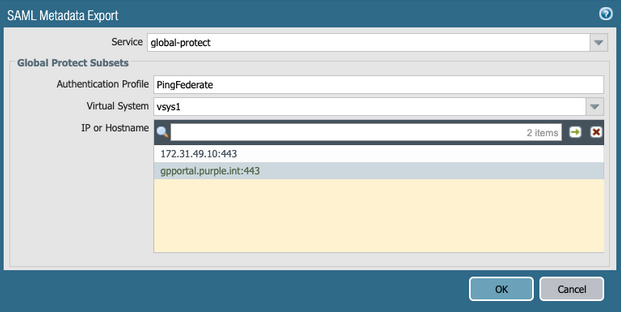
Export the metadata file from NGFW.
-
Click the Metadata link of the authentication profile.

-
From the Service list, select global-protect.
-
From the Virtual System list, select the virtual system.
-
In the IP or Hostname field, select the URL of your GlobalProtect portal, and then click OK.
-
Importing the NGFW Metadata into PingFederate
To complete the integration, import the metadata file from NGFW and finish the service provider (SP) configuration in PingFederate.
Steps
-
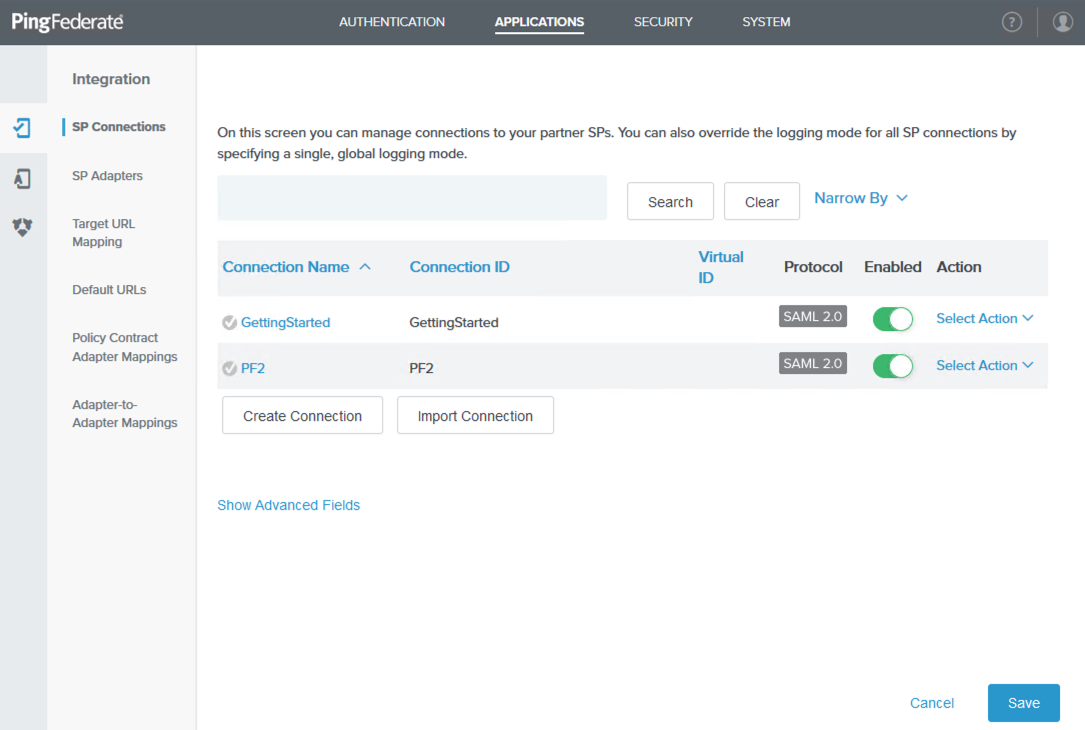
Create an SP in PingFederate, and import the NGFW metadata file.
-
In the PingFederate administrative console, go to Applications → Integration → SP Connections, and then click Create Connection.
-
On the Connection Template tab, select Do Not Use a Template for This Connection, and then click Next.
-
On the Connection Type tab, select the Browser SSO Profiles checkbox, and select SAML 2.0 from the Protocol list. Click Next.
-
On the Connection Options tab, accept the default election and click Next.
-
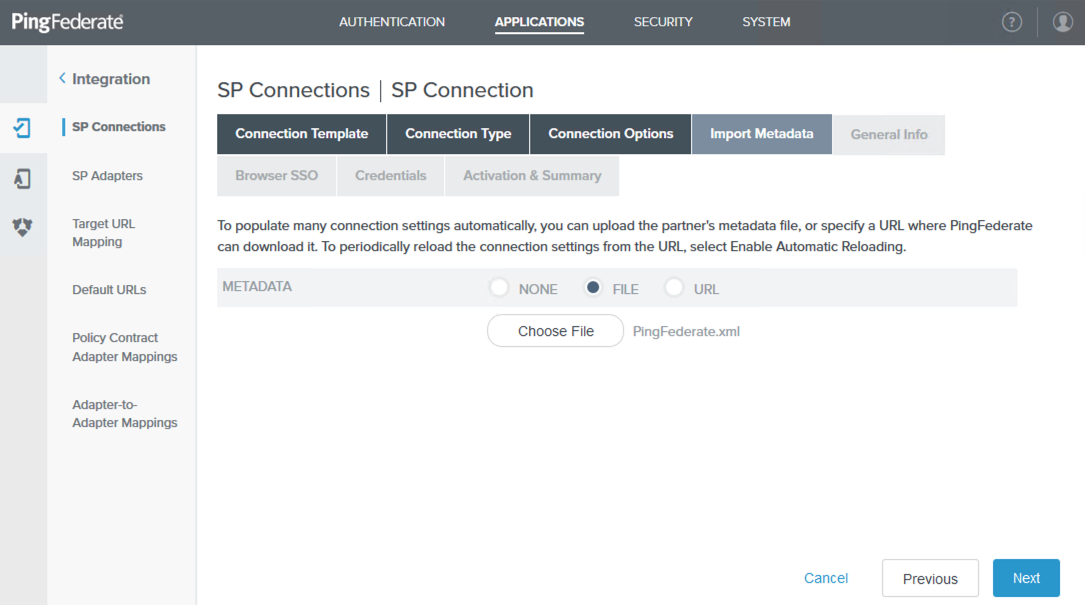
On the Import Metadata tab, select the File checkbox and then click Choose File. Select the NGFW metadata file and then click Next.
-
On the Metadata Summary tab, ensure the imported EntityID field is correct, and then click Next.
-
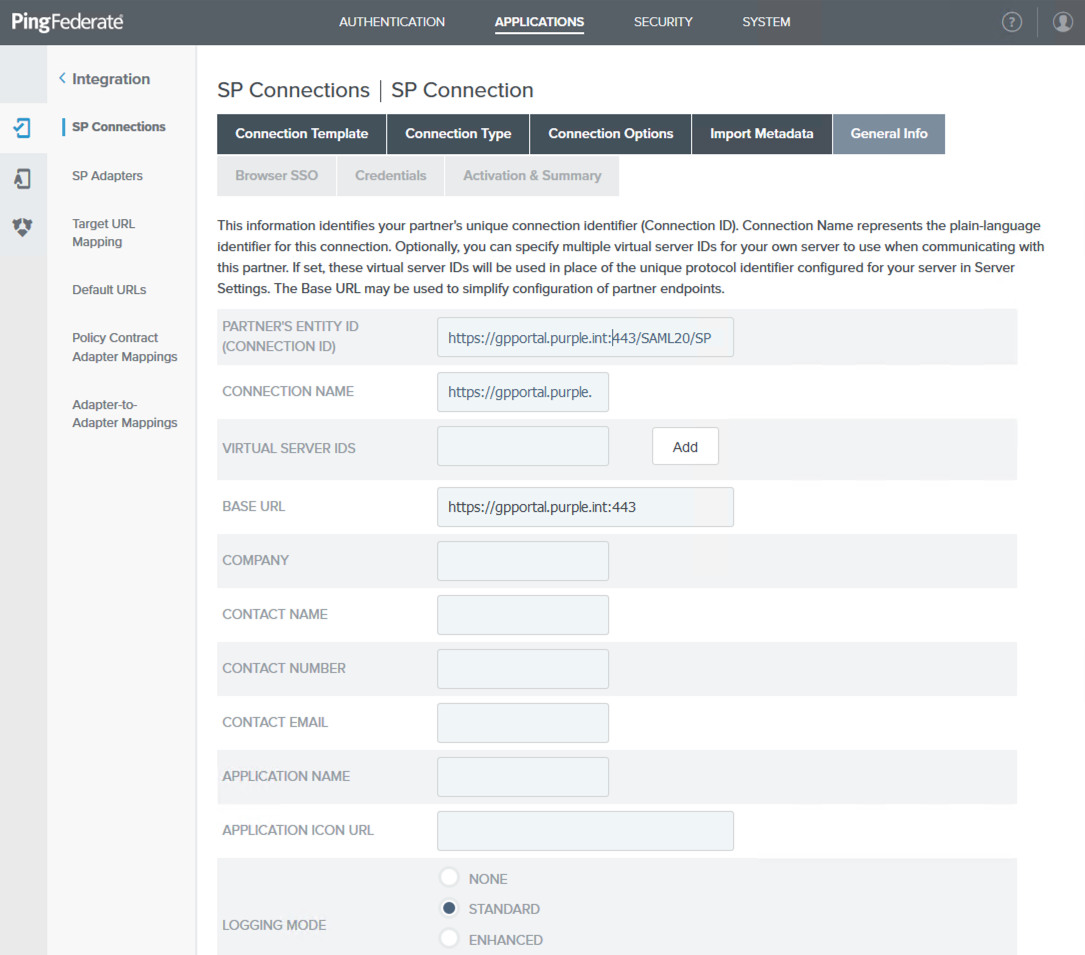
On the General Info tab, review the imported Base URL field, and then click Next.
-
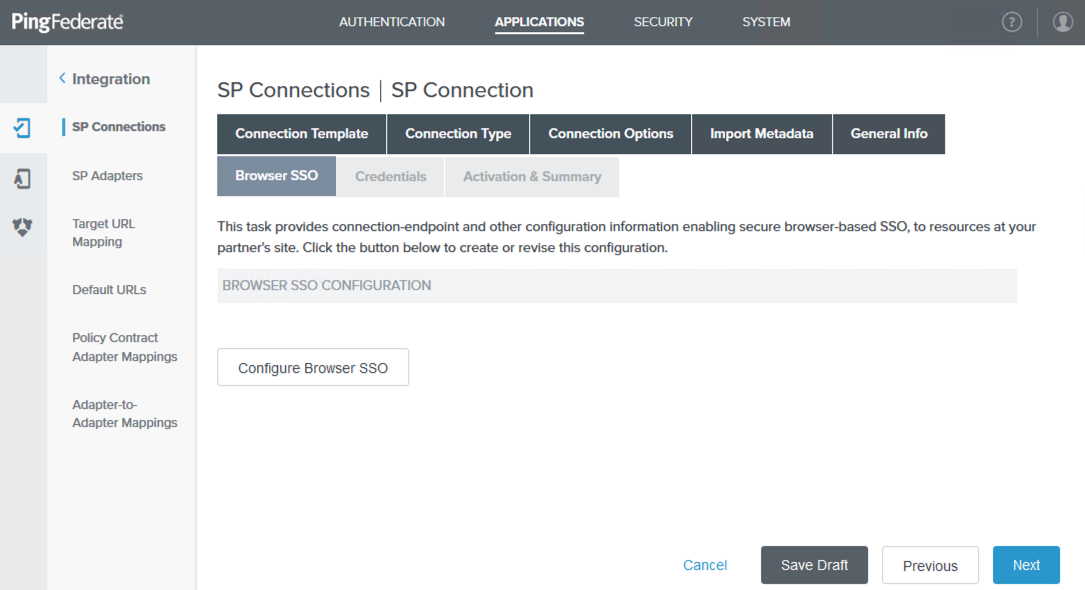
On the Browser SSO tab, click Configure Browser SSO.
-
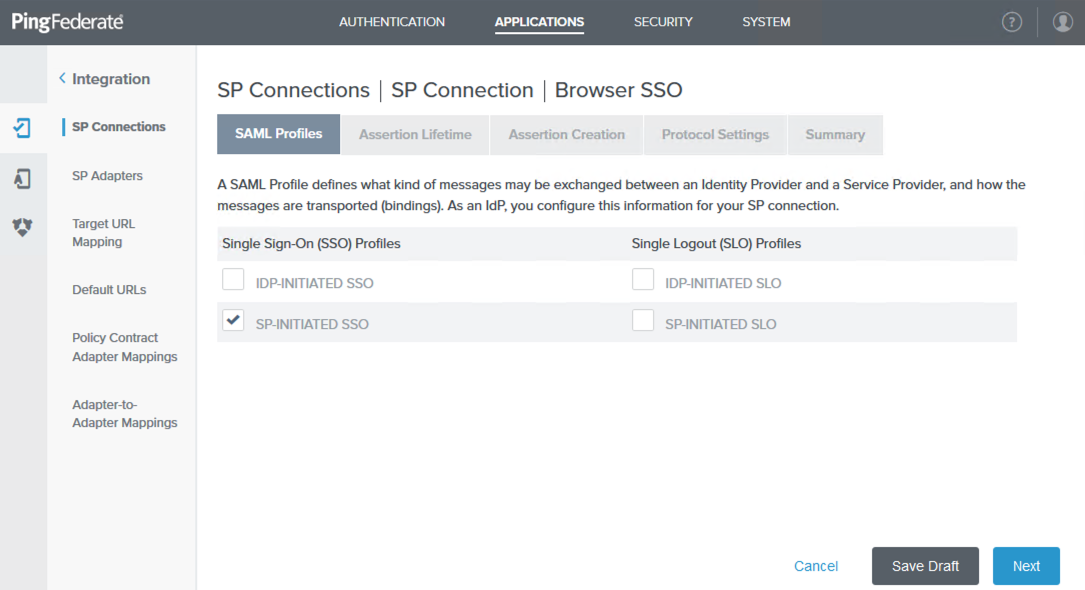
On the SAML Profiles tab, select the SP-Initiated SSO checkbox, and then click Next.
-
On the Assertion Lifetime tab, accept the default values and click Next.
-
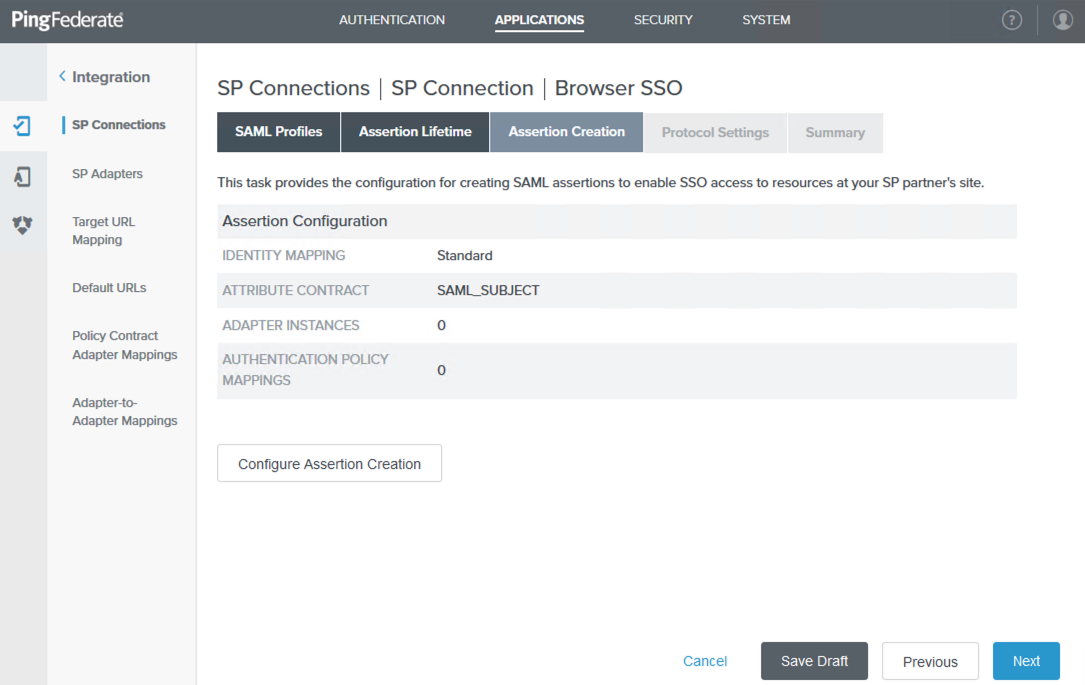
On the Assertion Creation tab, click Configure Assertion Creation.
-
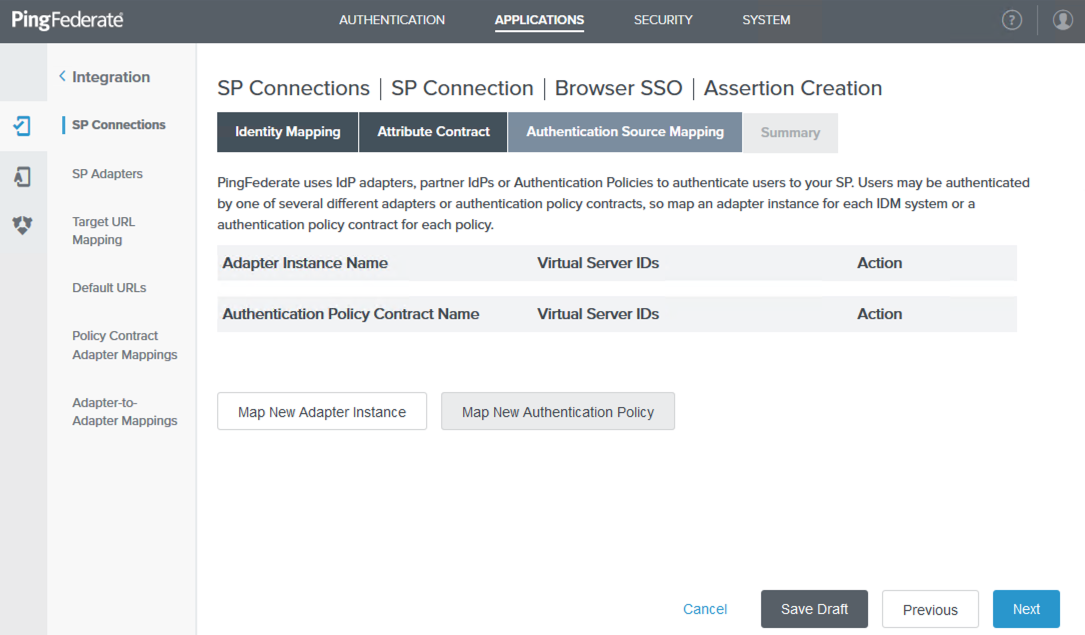
Click Next until you reach the Authentication Source Mapping tab, accepting the default values.
-
On the Authentication Source Mapping tab, an Adapter Instance or Authentication Policy Contract must exist. Click Map New Adapter Instance.
-
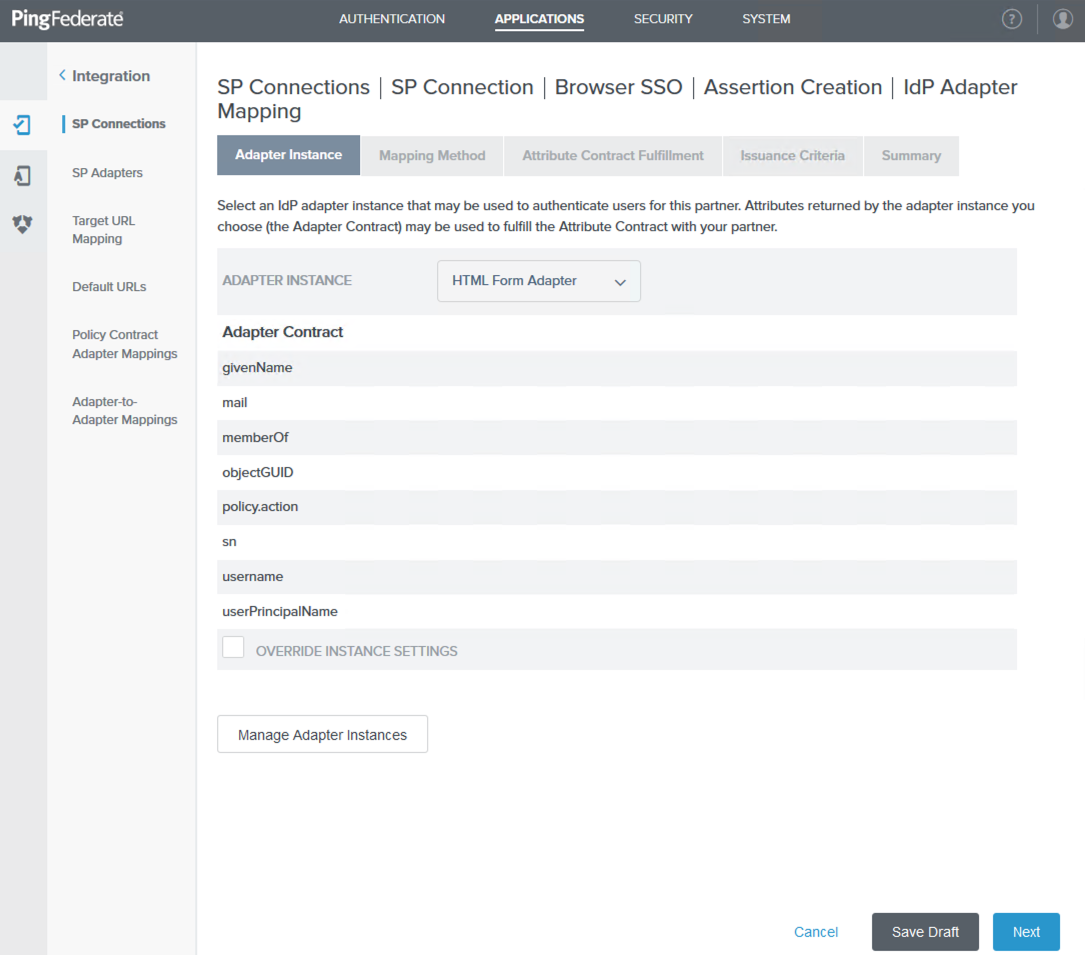
On the Adapter Instance tab, select HTML Form Adapter from the Adapter Instance list, and then click Next.
-
On the Mapping Method tab, accept the default values and click Next.
-
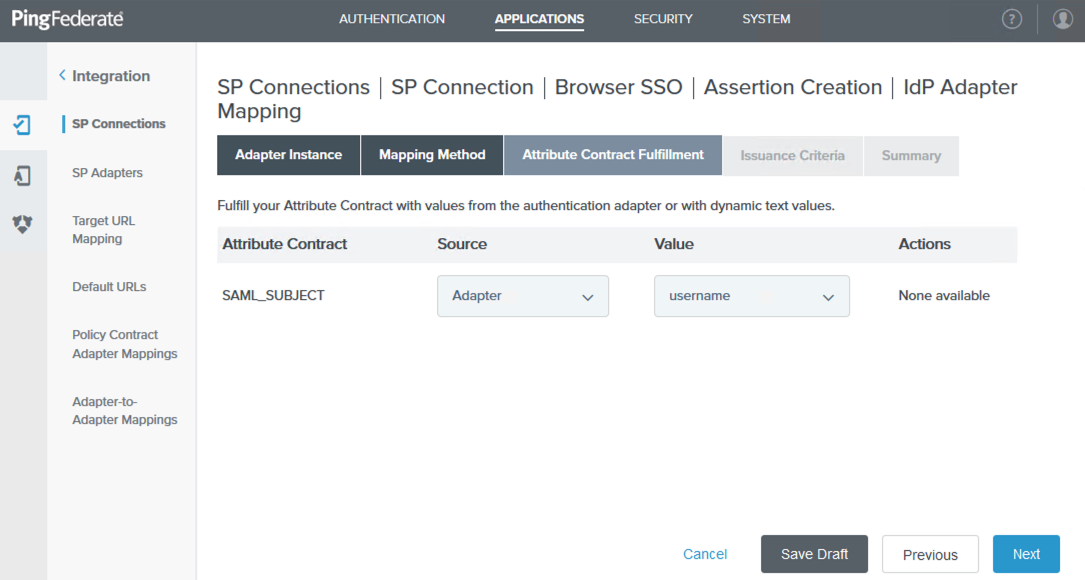
On the Attribute Contract Fulfillment tab, select Adapter from the Source list and select username from the Value list. Click Next.
-
Click Next and Done until you return to the Protocol Settings tab, accepting the default values. Click Configure Protocol Settings.
-
On the Assertion Consumer Service URL tab, ensure that the Endpoint URL is correct, and then click Next.
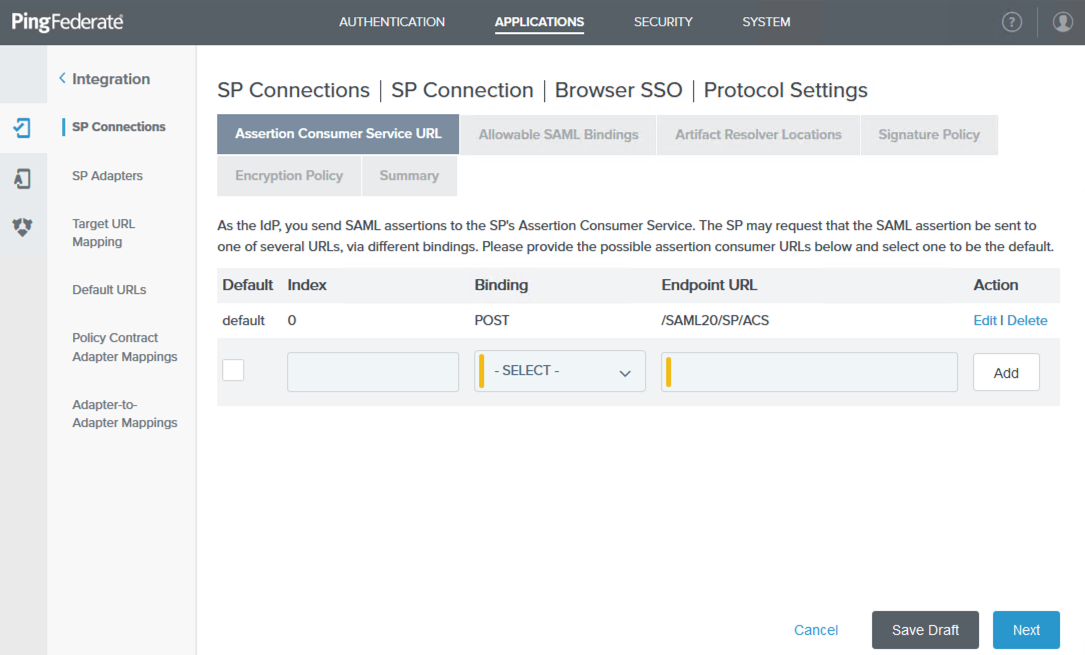
-
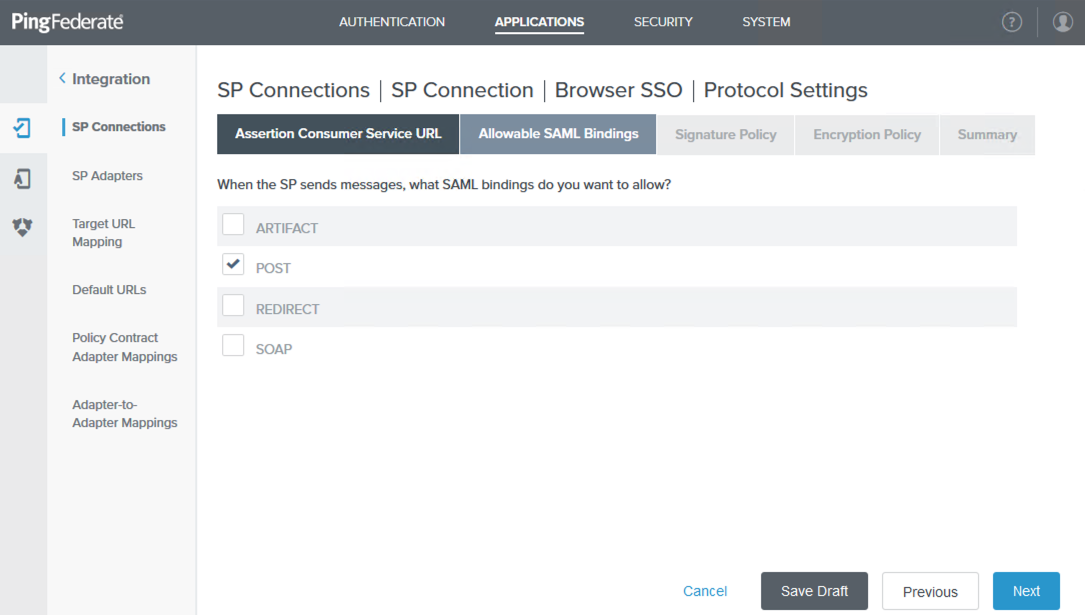
On the Allowable SAML Bindings tab, select POST and then click Next.
-
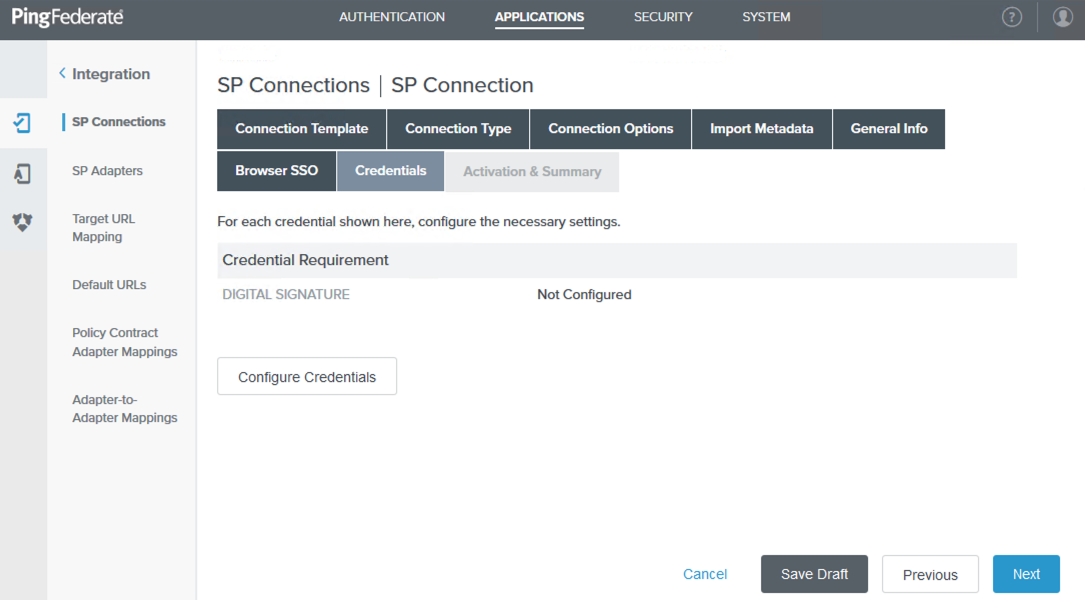
Click Next and Done until you return to the Credentials tab. Click Configure Credentials.
-
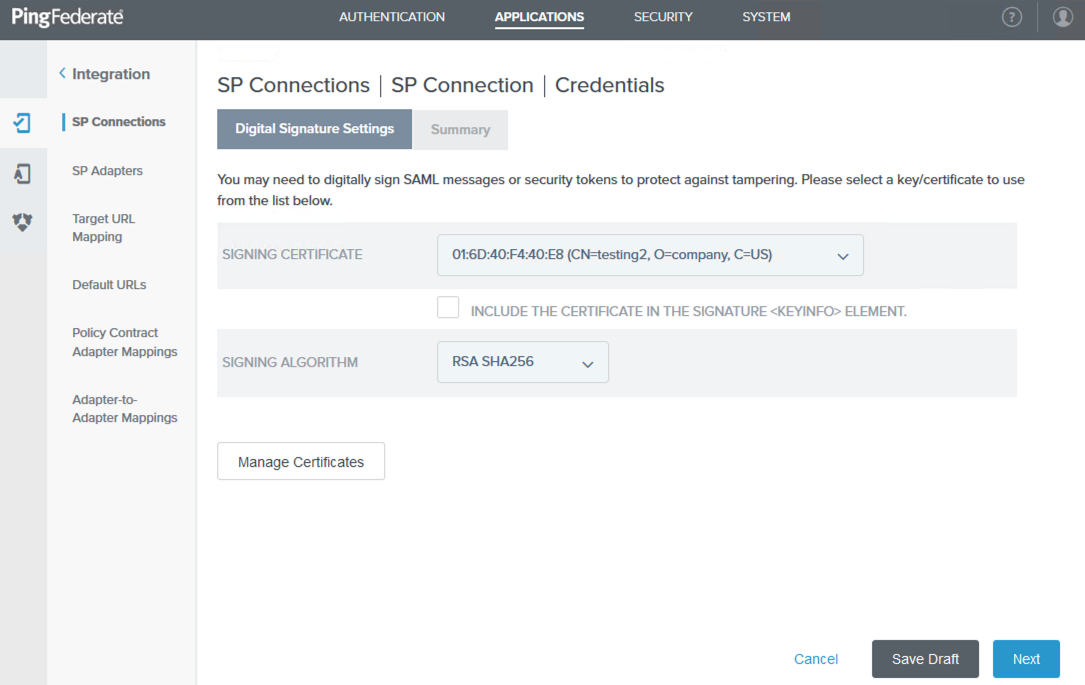
On the Digital Signature Settings tab, select a signing certificate from the Signing Certificate list. Click Done.
-
On the Credentials tab, click Next.
-
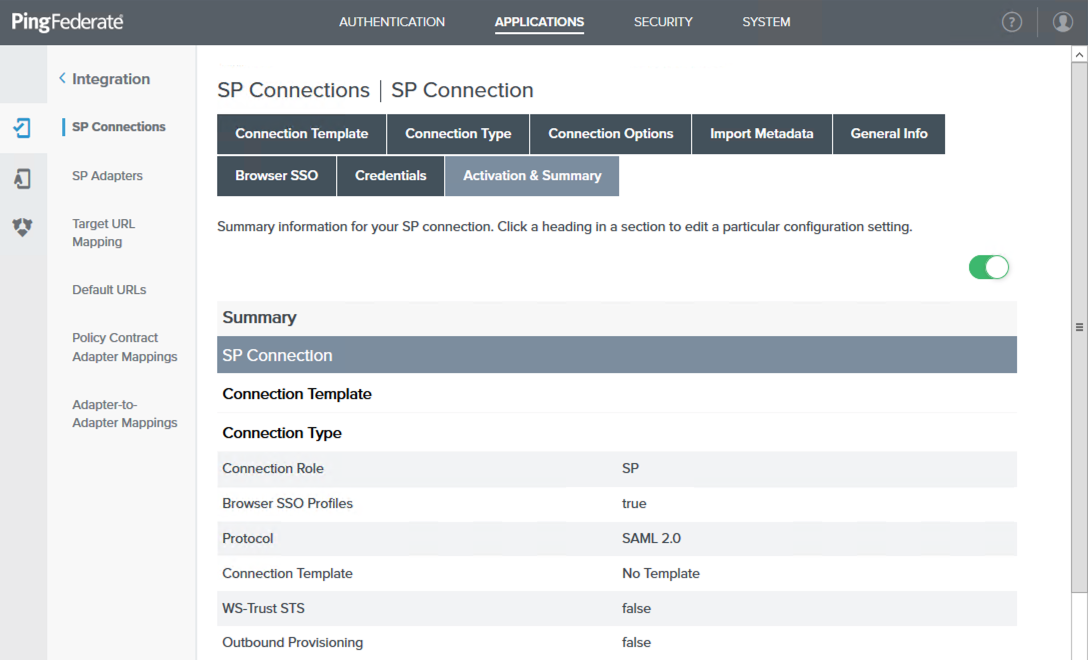
On the Activation & Summary tab, ensure your connection is enabled with the green toggle switch, and then click Save.
-
Troubleshooting
-
For basic troubleshooting, see PingFederate Troubleshooting.
Additional resources include:
-
For user sign-on issues, identify whether the problem is on PingFederate or GlobalProtect.
-
Sign-on issues with PingFederate might be related to incorrect credentials. For more information, see your PingFederate logs.
-
If authentication completes successfully on PingFederate server and the SAML assertion is sent back to GlobalProtect:
-
Check the Palo Alto Networks support logs.
-
Check if the certificate is valid and trusted by the NGFW instance.
-
Check the clock on both NGFW and PingFederate server, and the clock skew on the SAML Identity Provider Server Profile.
-
-