Setting up PingFederate session revocation by user identifier
Starting with PingFederate 10.3, you can revoke a user’s sessions with their authentication sources by submitting a user identifier, such as the mail or userPrincipalName attribute value.
For example, you have a terminated user, and their user account has been disabled in your directory. However, they still have an authentication session with PingFederate on their device that would allow them to single sign-on (SSO) into applications until that session is no longer valid. You can easily revoke their sessions so that any attempt to do so fails.
This process works both for sessions stored in memory across hosts and for persistent sessions stored in an external database.
Component
PingFederate 10.3 and later.
|
The following sections call out the configuration options that relate specifically to session revocation by user identifier. The rest of the configuration is left to you. |
Configuring adapter settings
About this task
In this example, you are configuring an HTML Form Adapter. For more information, see HTML Form Adapter.
Steps
-
In the PingFederate administrative console, go to Authentication → Integration → IdP Adapters.
-
Do one of the following:
Choose from:
-
Create a new HTML Form Adapter by clicking Create New Instance.
-
Edit an existing HTML Form Adapter by clicking the name of the adapter in the Instance Name list.
-
-
On the IdP Adapter tab, for Session State, click None.
The HTML Form Adapter can keep the session state itself, but you need to track the session at the server level.

-
On the Adapter Attributes tab, in the Unique User Key Attribute list, select userPrincipalName.
This is the attribute value that you would submit to find and revoke a user’s sessions. In this example, you are using the
userPrincipalNameattribute from Active Directory, but you could use something likemailif you prefer.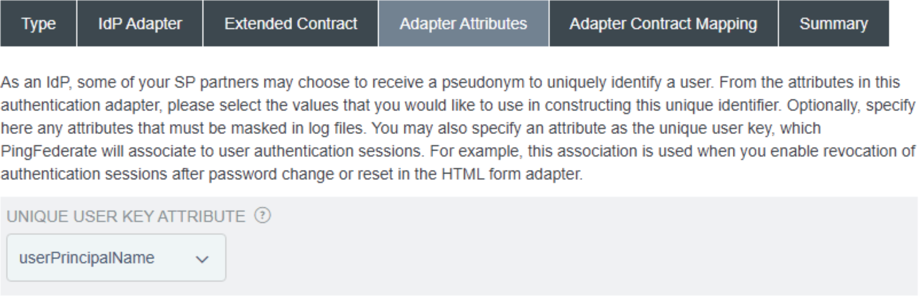
-
If this is a new adapter, complete the rest of the configuration settings.
-
Save your HTML Form Adapter.
Configuring session settings
About this task
The authentication source must have sessions enabled. If it doesn’t, there isn’t anything to revoke, but your users will be asked to authenticate every time they use that authentication source. You can enable sessions for all sources or for specific sources only. For more information, see Configuring authentication sessions.
Steps
-
In the PingFederate administrative console, go to Authentication → Policies → Sessions.
-
If you want to enable authentication sessions for all sources, in the Authentication Sessions area, select the Enable Authentication Sessions For All Sources checkbox.
-
If you want to enable authentication sources for specific sources only, in the Overrides area, configure one or more authentication sources as shown in the following image.
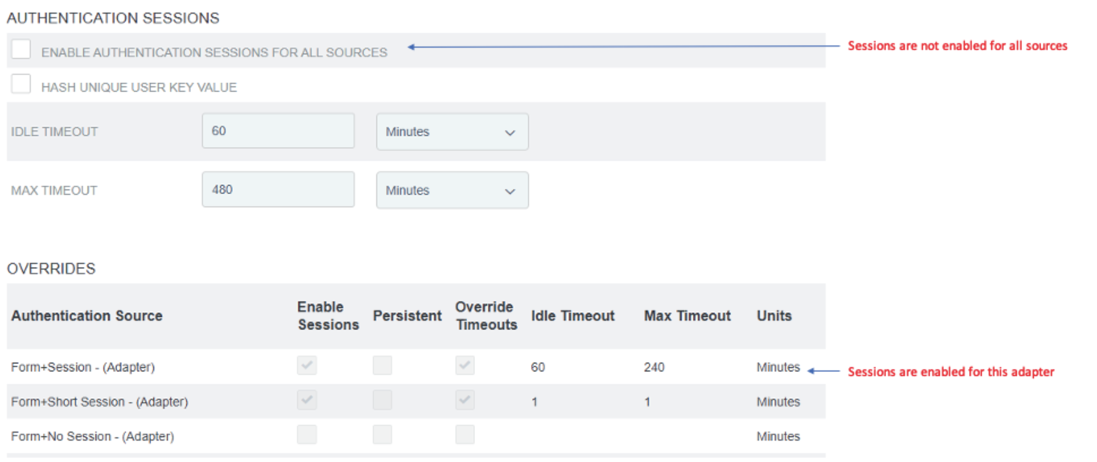
-
Save your session configuration.
Configuring an OAuth client
About this task
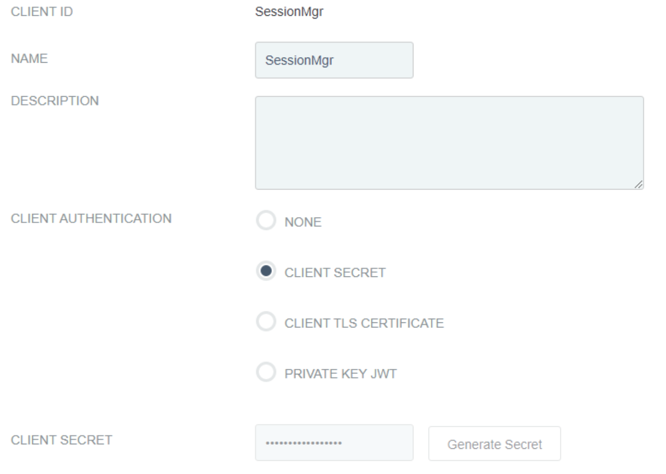
To use the Session Management API, you’ll need an OAuth client enabled. For session revocation, the client must use authentication. In this example, you are using client secret, but you can choose TLS or private key JSON Web Token (JWT). For more information about configuring OAuth clients, see Configuring OAuth clients.
Steps
-
In the PingFederate administrative console, go to Applications → OAuth → Clients.
-
Click Add Client.
-
For Client Authentication, select the Client Secret option.
-
For Client Secret, select Change Secret, and then enter a secret or clickGenerate Secret.
-
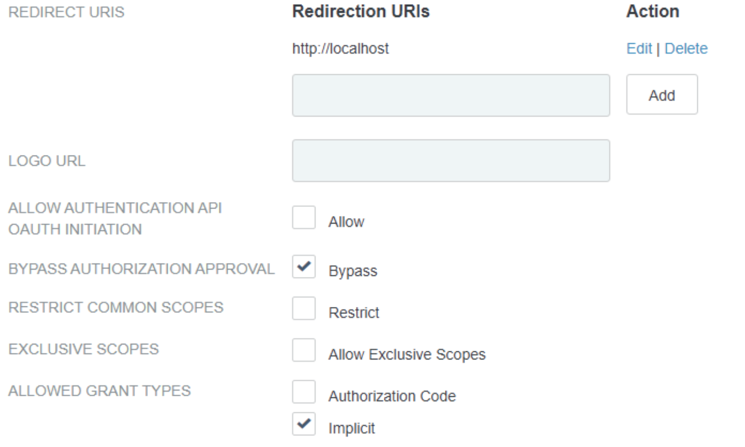
For Redirect URIs, in theRedirection URIs field, enter http://localhost, and click Add.
-
For Bypass Authorization Approval, select the Bypass checkbox to bypass the approval page.
-
For Allowed Grant Types, select the Implicit checkbox to use the implicit grant type.
-
For Session API Endpoints, select the Allow Access to Session Revocation API and Allow Access to Session Management API checkboxes.

-
Save your OAuth client configuration.
Configuring an access token manager
About this task
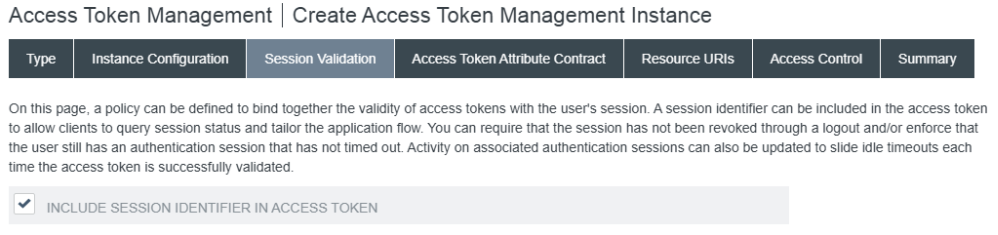
To use the Session Management API, you’ll need an access token manager configured to include session identifiers in its tokens. In the access token management settings, select the checkbox to include the session identifier. For more information, see Access token management.
Steps
-
In the PingFederate administrative console, go to Applications → OAuth → Access Token Management.
-
Click Create New Instance.
-
On the Session Validation tab, select the Include Session Identifier in Access Token checkbox.
-
Save your access token manager instance.
Using the API
In this example, you are using Postman to use the API. You can use CURL or build your own app if you prefer. For testing, we logged into a basic SAML application using the adaptor that we configured for sessions and the unique user key.
|
If you need a SAML testing app, see PingFacile Facile Decoder. |
Using Postman, you can get the user’s sessions with the unique user key that you’ve selected: userPrincipalName in this example. This is a GET request, and you can see that the @ sign in the user identifier is encoded because it’s being sent in the URL.

Replace the PingFederate service host name and port with yours, and jsmith%40ad.reba.org with the appropriate user identifier.
|
In the Headers tab, include the 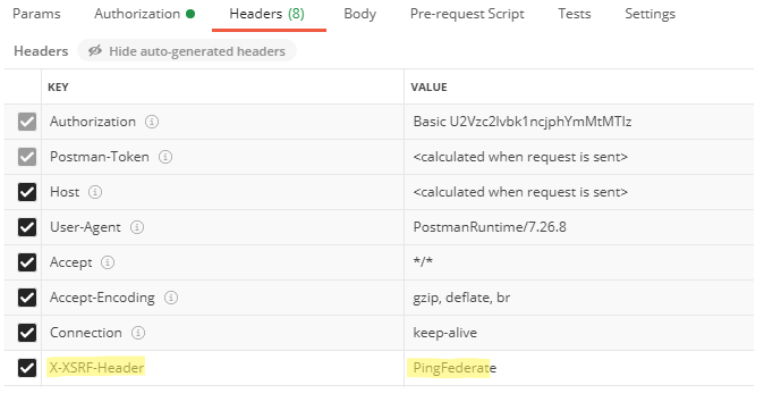
|
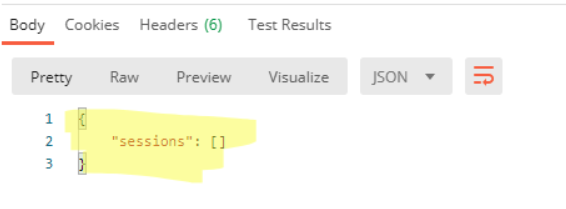
The following figure shows the Body tab in Postman with the user’s session displayed after the GET request was issued.

Now that you can see that the user has sessions, you can make a POST request to the revocation endpoint with the unique identifier. For example:

You won’t receive any response body, but you will receive a 200 OK status message.
When you try the GET endpoint again, you’ll find that there are no sessions for that user.