Integrating Pulse Connect Secure with PingFederate
Learn how to integrate Pulse Connect Secure with PingFederate for single sign-on (SSO).
Before you begin
-
Configure a PingFederate data store. Learn more in Datastores.
-
Configure a PingFederate Password Credential Validator.
-
Configure a PingFederate HTML Form Adapter.
-
Configure a Pulse Connect Secure authentication realm for your users.
-
Configure a Pulse Connect Secure sign-on policy for your users.
Exporting SAML metadata from PingFederate
Steps
-
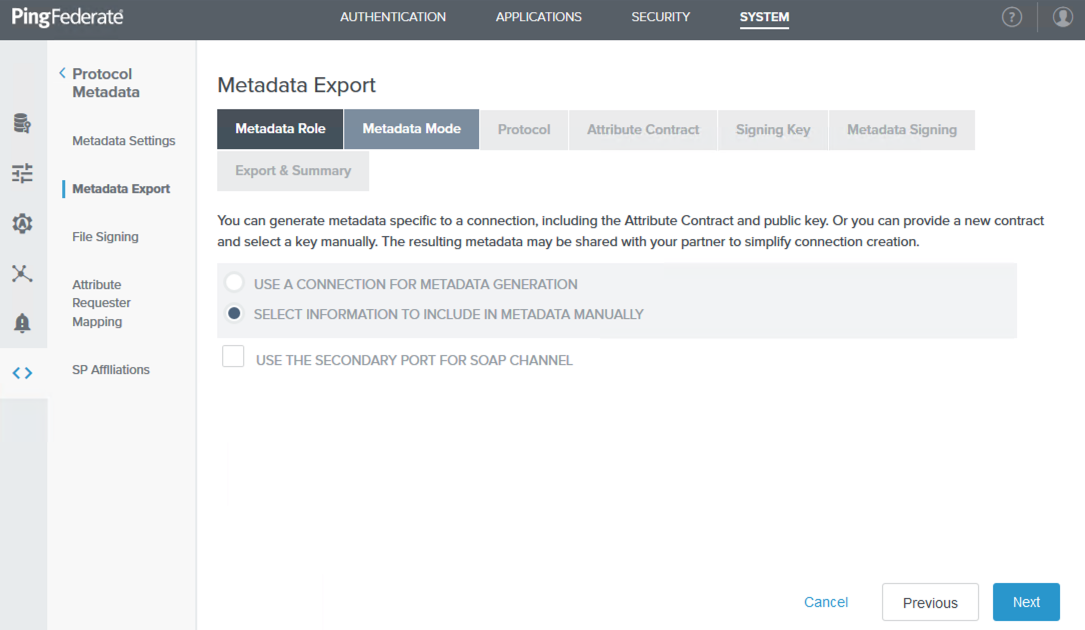
Sign on to the PingFederate administrative console and go to System → Protocol Metadata → Metadata Export.
-
On the Metadata Role tab, select I am the Identity Provider (IdP), and then click Next.

-
On the Metadata Mode tab, select Select Information to Include in Metadata Manually, and then click Next.
-
On the Protocol tab, click Next until you reach the Signing Key tab, accepting the default values.
-
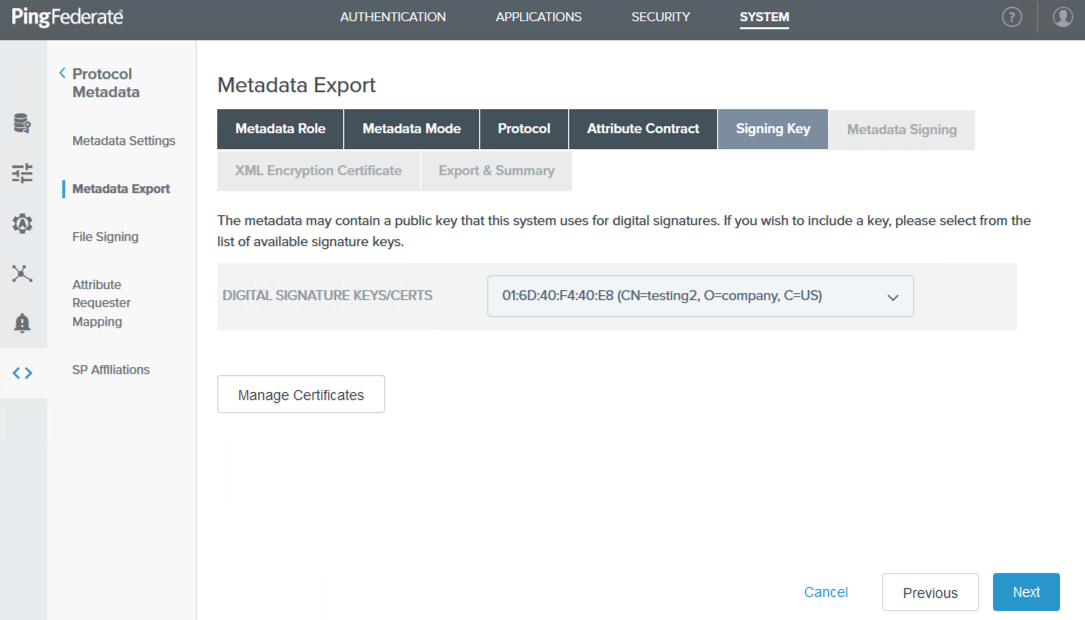
On the Signing Key tab, select an available signing key from the Digital Signature Keys/Certs list, and then click Next. If none are available, click Manage Certificates to create a signing key, and then follow the on-screen instructions.
Although you can use a self-signed certificate, a CA-signed certificate is recommended.
-
Click Next until you reach the Export & Summary tab, accepting the default values on the Metadata Signing and XML Encryption Certificate tabs.
-
On the Export & Summary tab, click Export and save the
metadata.xmlfile. You will upload this file to Palo Alto Networks NGFW in the next step.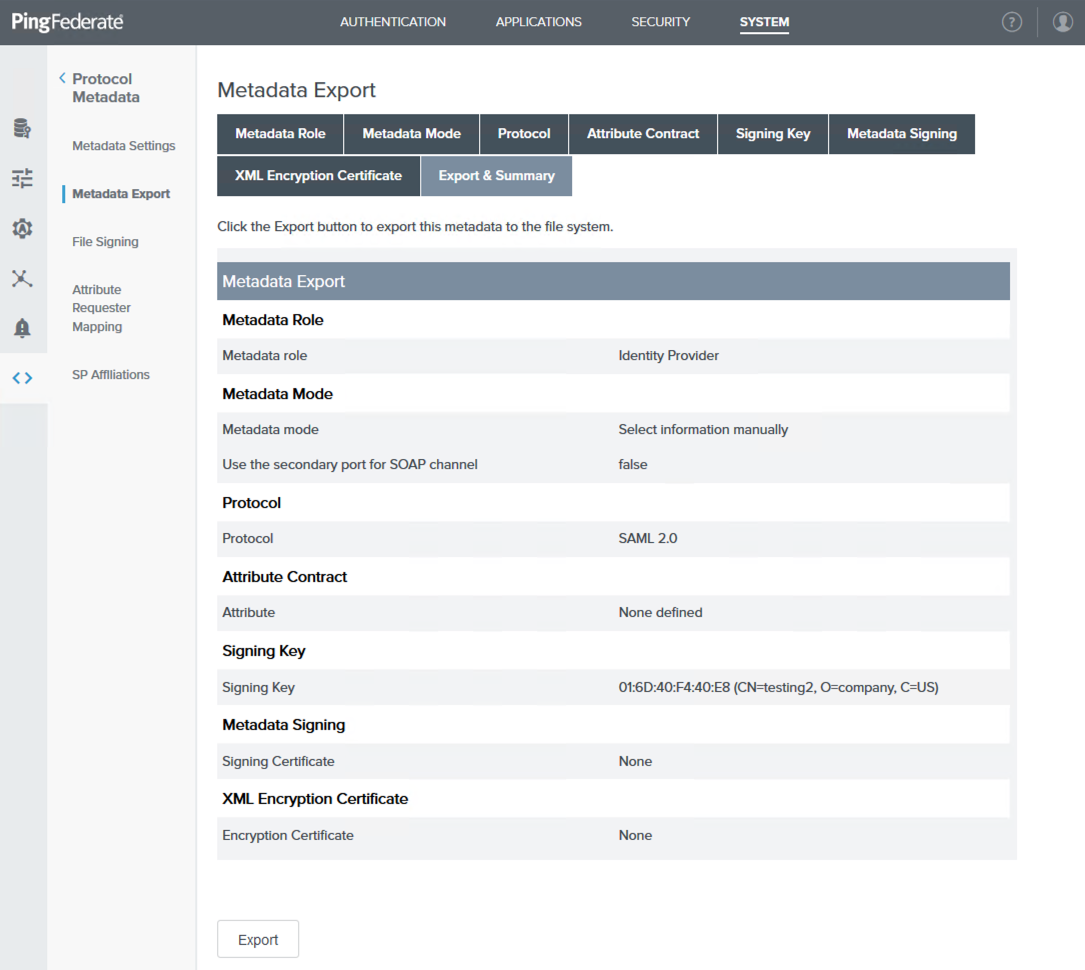
Exporting the signing certificate from PingFederate
Steps
-
Sign on to the PingFederate administrative console.
-
Go to Security > Signing & Decryption Keys & Certificates.
-
In the row of the certificate that you want to use to sign SAML assertions to Pulse Connect Secure, in the Select Action list, select Export.
-
On the Export Certificate tab, click Certificate Only. Click Next.
-
On the Export & Summary tab, click Export and save the file.
-
Click Done.
Configuring SAML integration with PingFederate in Pulse Connect Secure
Steps
-
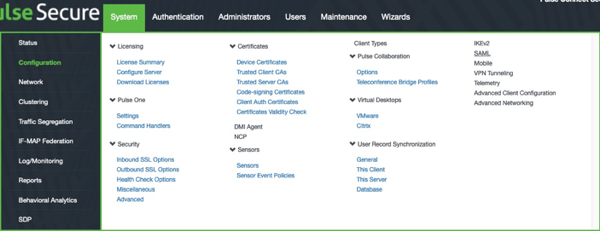
In the Pulse Connect Secure administrative interface, go to System > Configuration > SAML.
-
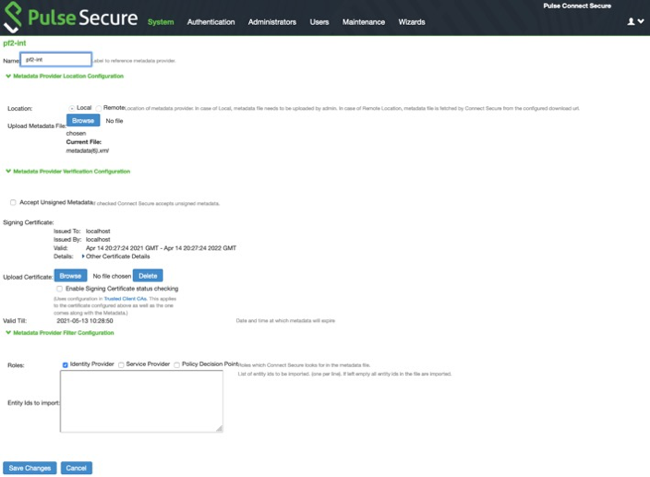
Click New Metadata Provider.
-
Configure the new metadata provider:
-
In the Name field, enter a name.
-
In the Location field, select Local.
-
In the Upload Metadata File field, click Browse and import the metadata file you saved in Configuring SSO for GlobalProtect VPN with PingFederate
-
In the Signing Certificate field, click Browse and select the certificate file you saved in the previous topic Exporting the signing certificate from PingFederate.
-
In the Roles field, select the Identity Provider checkbox.
-
Click Save Changes.
-
-
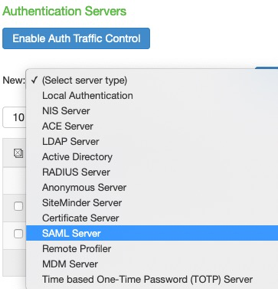
In the Pulse Connect Secure administrative interface, go to Authentication > Auth Servers.

-
In the list, select SAML Server and then click New Server.
-
Configure the new server:
-
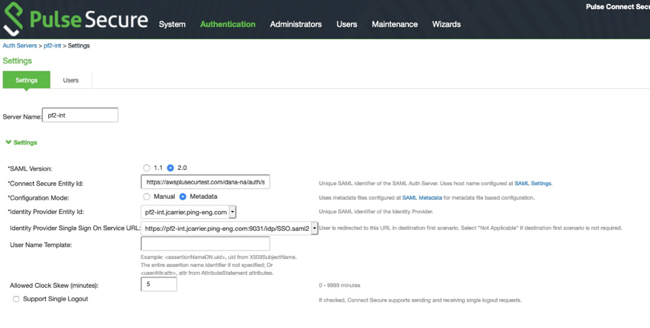
Enter a Server Name.
-
For SAML Version, click 2.0.
-
For Configuration Mode, click Metadata.
-
In the Identity Provider Entity ID list, select the identity provider (IdP) that you created in the previous steps.
-
In the Identity Provider Single Sign On Service URL list, select the appropriate SSO URL.
-
In the SSO Method section, click POST.
-
In the Select Certificate list, select the signing certificate you created previously.
-
In the Metadata Validity field, enter any non-zero value.
You must populate the Metadata Validity field even though it won’t be used.
-
Select the Do Not Publish Connect Secure Metadata checkbox.
-
Click Save Changes.
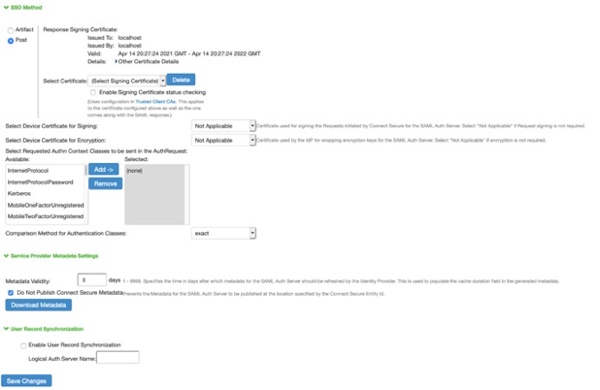
-
Click Download Metadata and save the file.
-
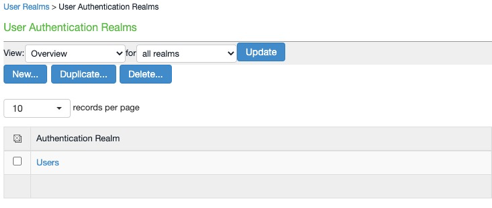
In the Pulse Connect Secure administrative interface, go to Users > User Realms.
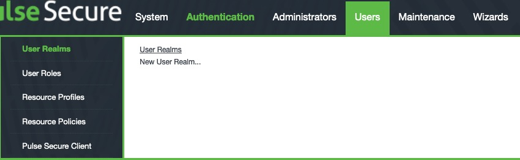
-
Select the authentication realm for your user population.
-
In the Authentication list, select the IdP that you configured.
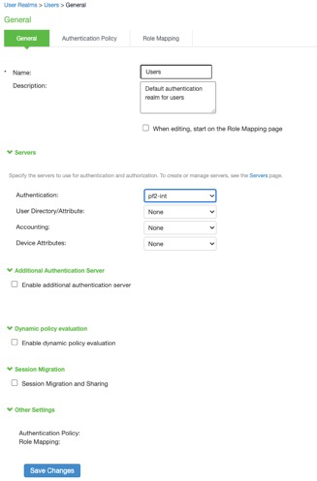
-
Click Save Changes.
-
Configuring SAML integration with Pulse Connect Secure in PingFederate
Steps
-
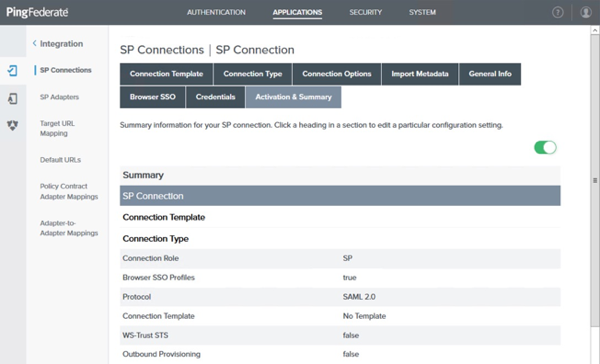
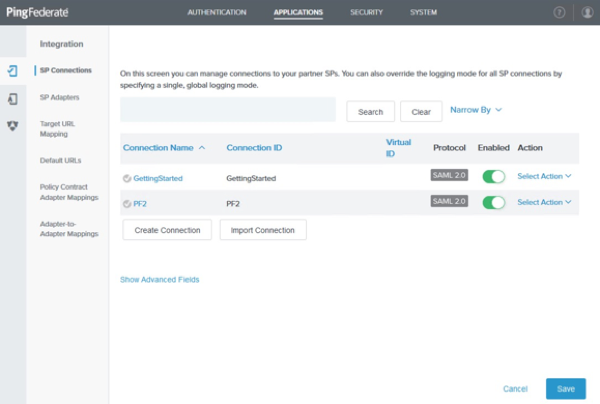
In the PingFederate administrative console, go to Applications > Integration > SP Connections.
-
Click Create Connection.
-
On the Connection Template tab, click Do not use a template for this connection. Click Next.
-
On the Connection Type tab, select the Browser SSO Profiles checkbox.
-
In the Protocol list, select SAML 2.0 and click Next.
-
On the Connection Options tab, click Next.
-
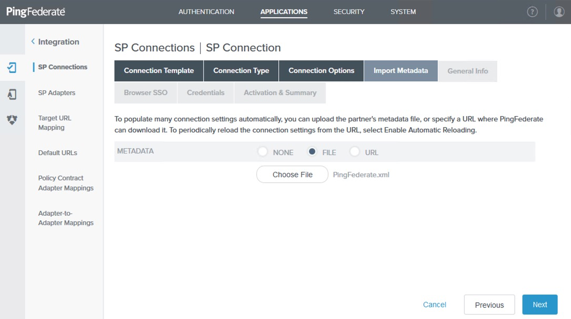
On the Import Metadata tab, click File and then choose the metadata file that you downloaded previously. Click Next.
-
On the Metadata Summary tab, review the EntityID field and click Next.
-
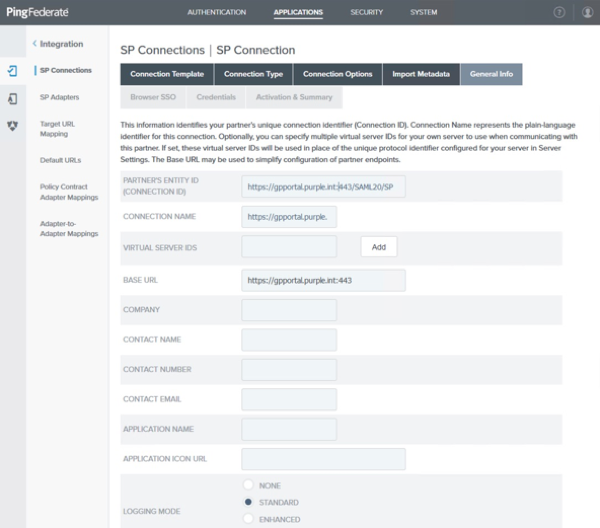
On the General Info tab, review the imported Base URL field, then click Next.
-
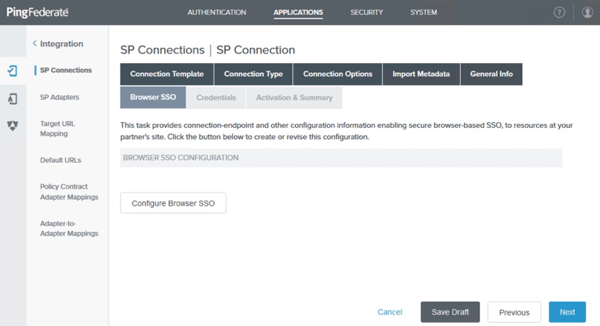
On theBrowser SSO tab, click Configure Browser SSO.
Result:
The tabs for the Browser SSO section display.
-
Configure the browser SSO:
-
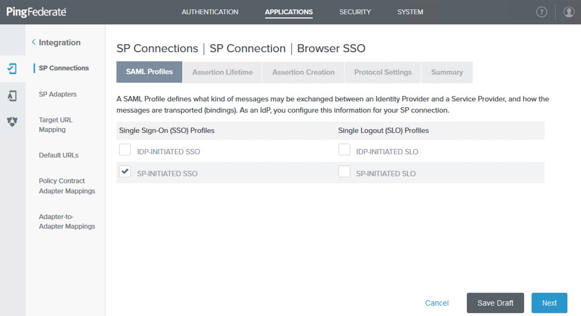
On the SAML Profiles tab, select the SP-Initiated SSO checkbox. Click Next.
-
On the Assertion Lifetime tab, accept the default values and click Next.
-
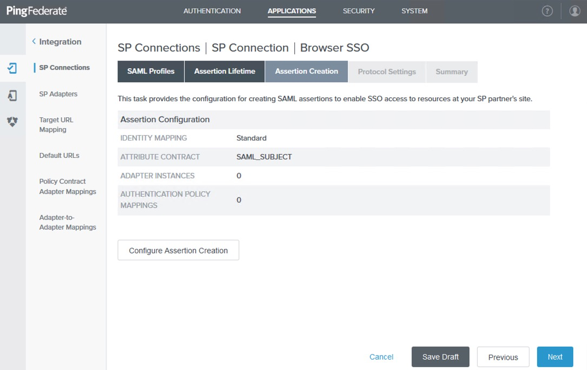
On the Assertion Creation tab, click Configure Assertion Creation.
Result:
The tabs for the Assertion Creation section display.
-
-
Configure the assertion creation:
-
On the Identity Mapping tab, click Next.
-
On the Attribute Contract tab, click Next.
-
On the Authentication Source Mapping tab, click Map New Adapter Instance.
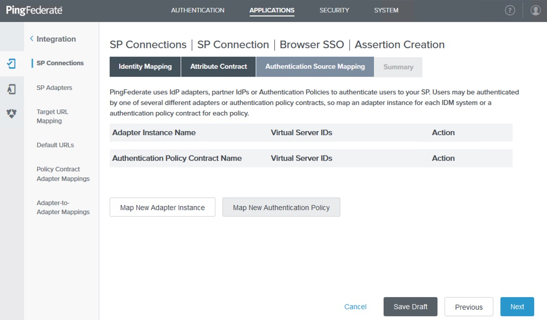
Result:
The tabs for the IdP Adapter Mapping section display.
-
-
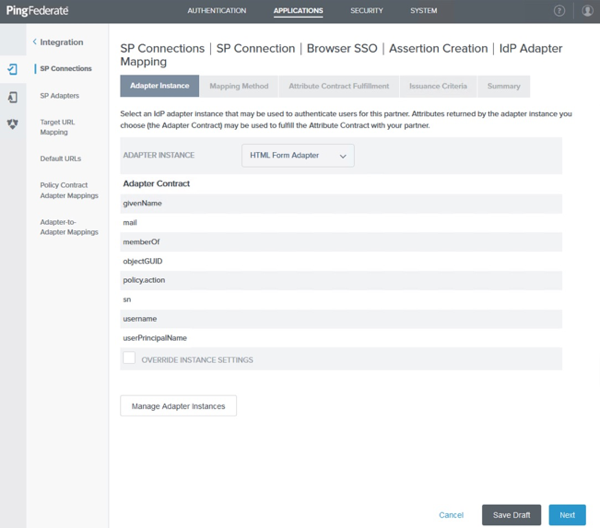
Configure the IdP adapter mapping:
-
On the Adapter Instance tab, select the HTML form adapter that you created. Click Next.
-
On the Mapping Method tab, click Next.
-
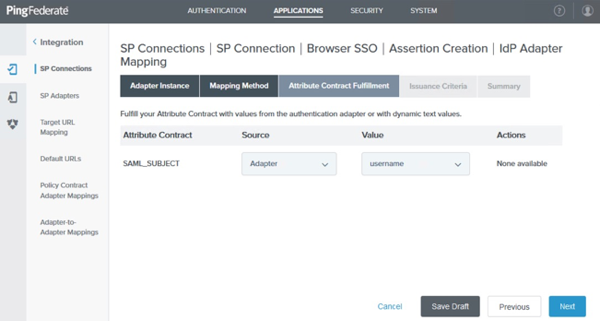
On the Attribute Contract Fulfillment tab, in the Source list select Adapter and in the Value list select username. Click Next.
-
On the Issuance Criteria tab, click Next.
-
On the Summary tab, click Done.
Result:
You return to the Assertion Creation section.
-
-
On the Authentication Source Mapping tab, click Next.
-
On the Summary tab, click Done.
Result:
You return to the Browser SSO section.
-
On the Assertion Creation tab, click Next.
-
On the Protocol Settings tab, click Configure Protocol Settings.
Result:
The tabs for the Protocol Settings section display.
-
Configure the protocol settings:
-
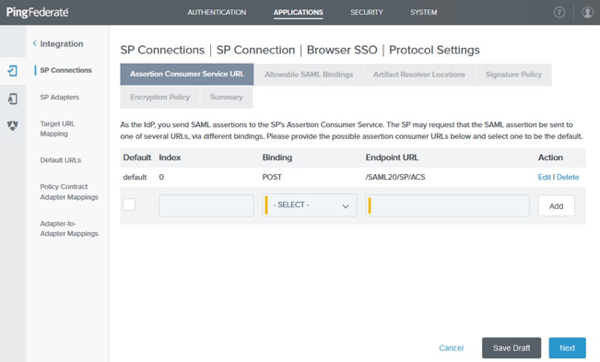
On the Assertion Consumer Service URL tab, review the Endpoint URL value. Click Next.
-
On the Allowable SAML Bindings tab, ensure that POST and REDIRECT are the only values checked. Click Next.
-
On the Signature Policy tab, click Next.
-
On the Encryption Policy tab, click Next.
-
On the Summary tab, click Done.
Result:
You return to the Browser SSO section.
-
-
On the Protocol Settings tab, click Next.
-
On the Summary tab, click Done.
Result:
You return to the SP Connection section.
-
On the Browser SSO tab, click Next.
-
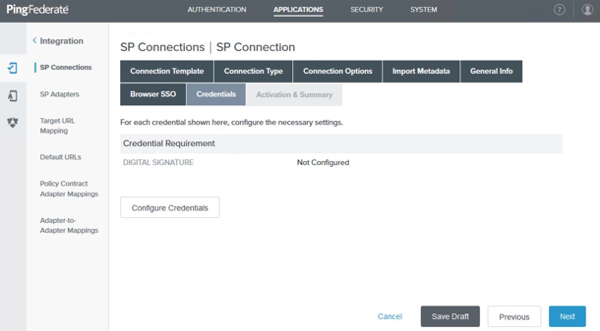
On the Credentials tab, click Configure Credentials.
Result:
The tabs for the Credentials section display.
-
Configure the credentials:
-
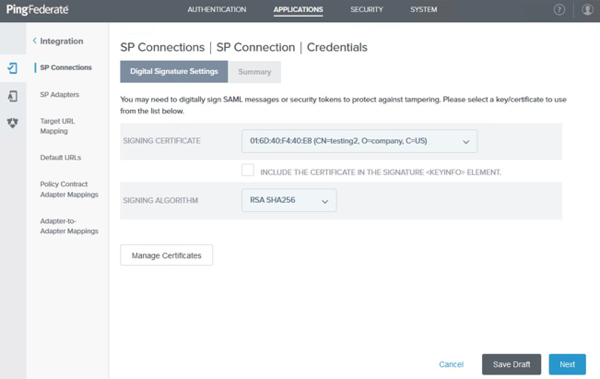
On the Digital Signature Settings tab, select the Signing Certificate that you chose in Exporting the signing certificate from PingFederate. Click Next.
-
On the Summary tab, click Done.
Result:
You return to the SP Connection section.
-
-
On the Credentials tab, click Next.
-
On the Activation & Summary tab, click Save.