Configuring PingFederate for MFA-only VPN
Before you begin
-
Verify that PingFederate 9.3 is installed and running.
-
Register a PingID account as explained in Register the PingID service.
Creating a datastore connection
About this task
If you have already configured a data store connection in PingFederate, you can skip this task.
Steps
-
If you have not already configured a data store connection, use the following steps to configure one:
-
Sign on to PingFederate.
-
Select System > Data Stores to open the Data Stores screen.
-
On the Data Stores screen, click Add New Data Store.
-
Type a name for the data store.
-
Select the type of data store you are connecting to, and click Next.
Depending on which data store you chose, click one of the following links for configuration instructions:
-
Database (JDBC) - Configuring a JDBC connection (page 167)
-
Directory (LDAP) - Configuring an LDAP connection (page 170)
-
REST API - Configuring a REST API data store (page 178)
Configuring an Identifier First Adapter
The Identifier First Adapter allows PingFederate to collect the user identifier and then determine how to challenge the user for credentials. Learn more in Identifier First Adapter.
Steps
-
Select Identity Provider > Adapters.
-
On the Manage IdP Adapter Instances screen, click Create New Instance.
-
Enter an Instance Name and an Instance ID. The Instance Name is any name you want to use to identify this adapter instance. The Instance ID is used internally, and cannot contain spaces or non-alphanumeric characters.
-
Select Identifier First Adapter in the Type list.
-
Click Next, and follow the instructions in Configure an Identifier First Adapter instance (page 710) to complete the configuration.
Configuring a PingID Adapter
Steps
-
Select Identity Provider > Adapters.
-
On the Manage IdP Adapter Instances screen, click Create New Instance.
-
Enter an Instance Name and an Instance ID.
The Instance Name is any name you want to use to identify this adapter instance. The Instance ID is used internally, and cannot contain spaces or non-alphanumeric characters.
-
Select PingID Adapter 2.5.1 in the Type list.
-
Click Next.
-
Click Show Advanced Fields.
-
Follow the instructions in Use PingID for Primary Authentication to complete the configuration.
Configuring an authentication policy
Steps
-
Select Identity Provider → Policies to open the Authentication Policies screen.
-
Click Add Policy.
-
Enter a name for the policy and optionally a description.
-
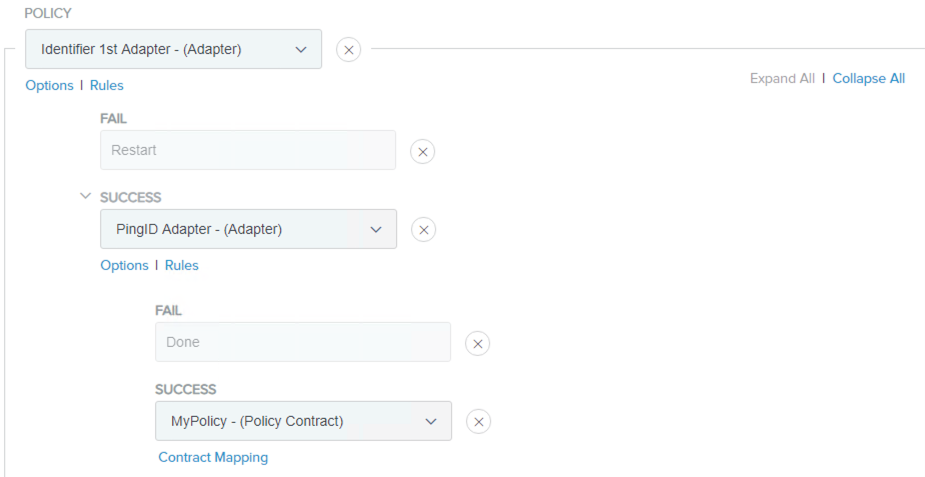
In the Policy list, click the down-arrow and select the Identifier First Adapter that you configured in step 3. Fail and Success fields appear.
-
Under Fail, select Restart.
-
Under Success, click the down-arrow and select the PingID Adapter that you configured in step 4. Fail and Success fields are displayed again.
-
Under Fail, select Done.
-
Under Success, click the down-arrow, and select a Policy Contract.
An example configuration is shown in the following figure.
-
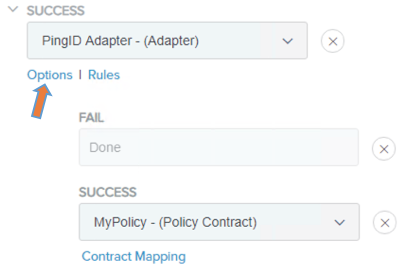
Under the PingID adapter in the Success field, click Options.
-
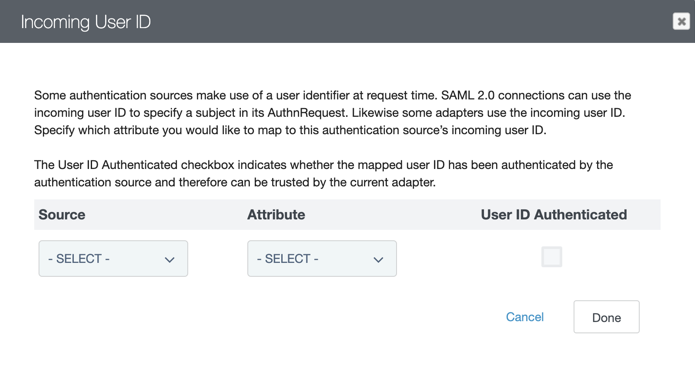
In the Incoming User ID modal, select the Identifier First Adapter for the Source and subject for the Attribute.
This configuration maps the user identifier to use with PingID MFA.
-
Click Done.
-
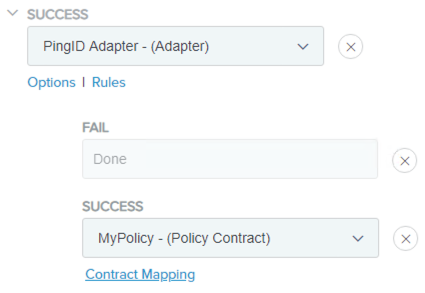
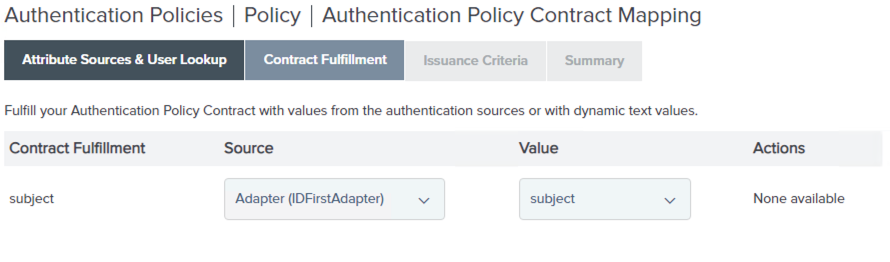
Click Contract Mapping under the Policy Contract in the Success field.
-
Click Next to view the Contract Fulfillment screen.
-
Select the Identifier First Adapter for the Source and subject for the Attribute.
This configuration maps the attributes into your authentication policy contract.
-
Click Next, and then click Next again to view the Summary screen.
-
Click Done to save your contract mapping, and then click Done again to save your authentication policy.