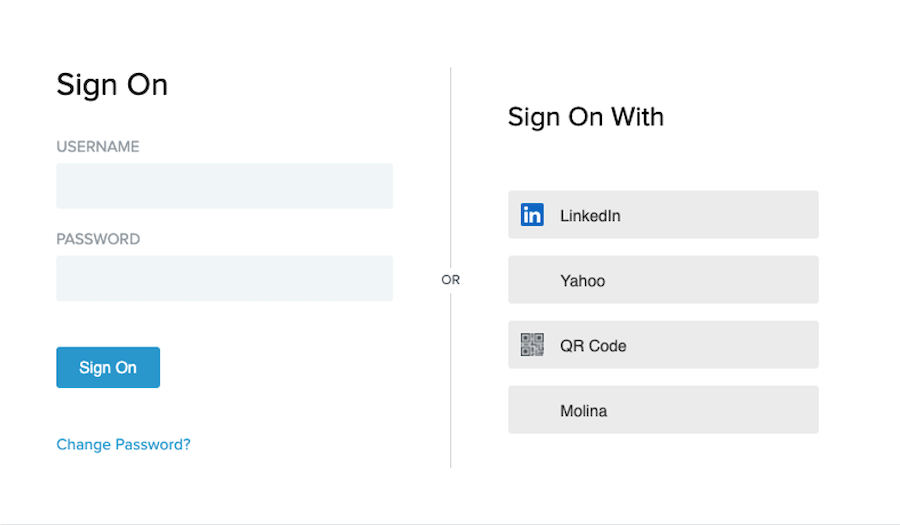
Connecting PingFederate with Yahoo through OIDC
Learn how to connect PingFederate with your Yahoo developer account using OpenID Connect (OIDC).
|
Yahoo no longer supports OpenID2 and migrated to OIDC. |
Creating an OIDC app in your Yahoo developer account
Before you begin
-
Go to developer.yahoo.com and create a developer account.
About this task
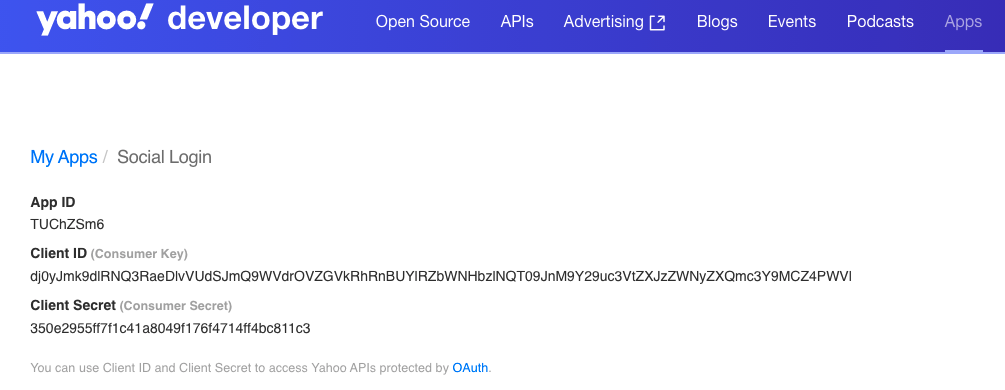
In your Yahoo developer account, create an OIDC app and obtain the Client ID and Client Secret.
Steps
-
Sign on to your Yahoo developer account and go to Apps > Create an App.
-
Copy the Client ID and Client Secret.
Creating an OIDC type IdP connection
Steps
-
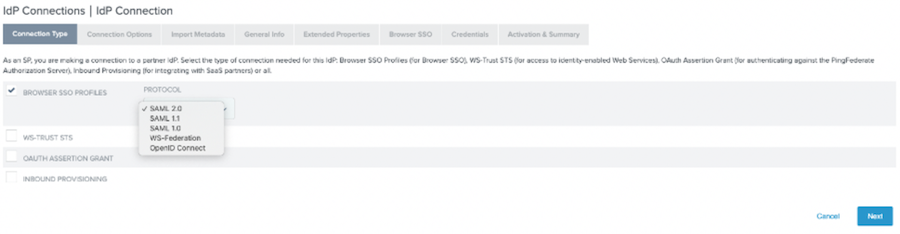
Sign on to PingFederate and go to Authentication > Authorization > IdP Connections. Click Create Connection.
-
On the Connection Type tab, select the Browser SSO checkbox, and in the Protocol list, select SAML 2.0. Click Next.
-
On the Connection Options tab, select the Browser SSO checkbox. Click Next.
-
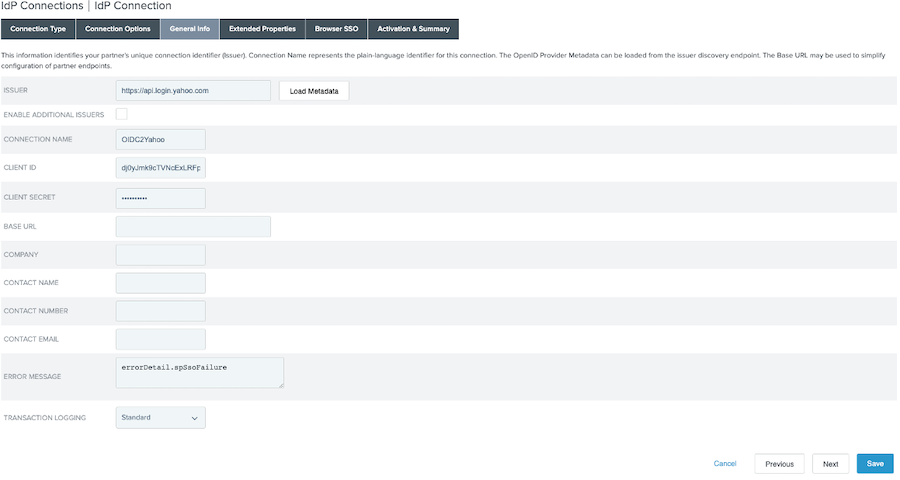
On the General Info tab, in the Issuer field, enter
https://api.login.yahoo.com. -
In the Client ID and Client Secret fields, enter the values copied earlier from your Yahoo OIDC app.
-
Click Load Metadata. Click Next.
-
On the Extended Properties tab, click Next.
-
On the Browser SSO tab, click Configure Browser SSO.
-
On the User Session Creation tab, click Configure User-Session Creation.
-
On the Identity Mapping tab, select Account Mapping. Click Next.
-
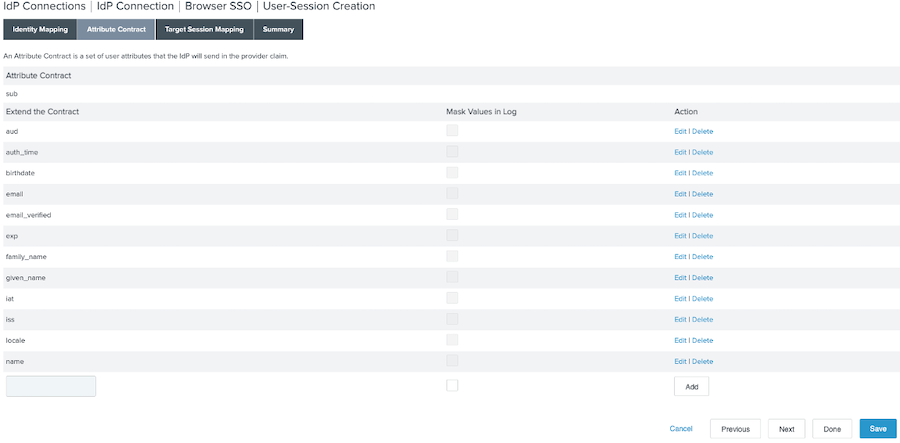
On the Attribute Contract tab, leave the default values selected. Click Next.
-
On the Target Session Mapping tab, click Map New Adapter Instance.
-
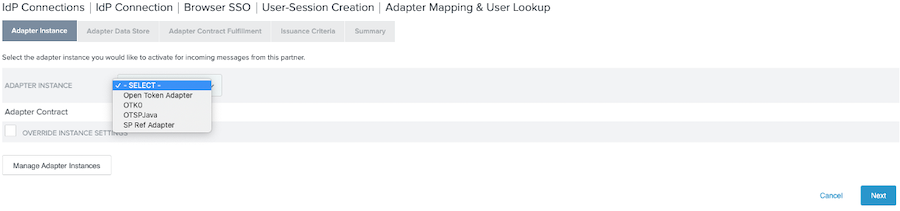
On the Adapter Instance tab, in the Adapter Instance list, select Open Token adapter. Click Next.
-
On the Attribute Data Store tab, leave the default values selected. Click Next.

-
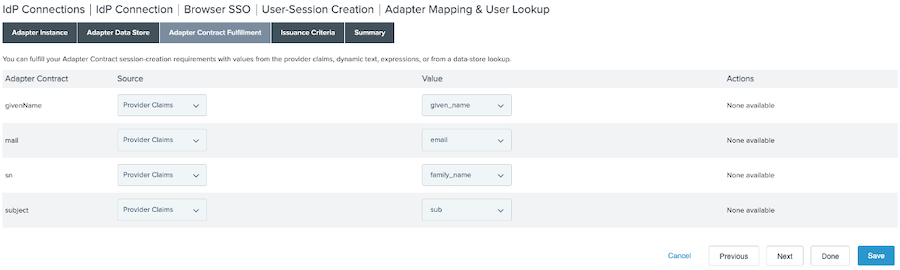
On the Adapter Contract Fulfillment tab, map the values as follows. Click Next.
Attribute Source Value givenName
Provider Claims
given_name
mail
Provider Claims
email
sn
Provider Claims
family_name
subject
Provider Claims
sub
-
On the Issuance Criteria tab, click Next.
-
On the Summary tab, review your entries and click Done.
-
On the User Session Creation tab, click Next.
-
On the Protocol Settings tab, click Configure Protocol Settings.
-
On the OpenID Provider Info tab, review the information and click Next.
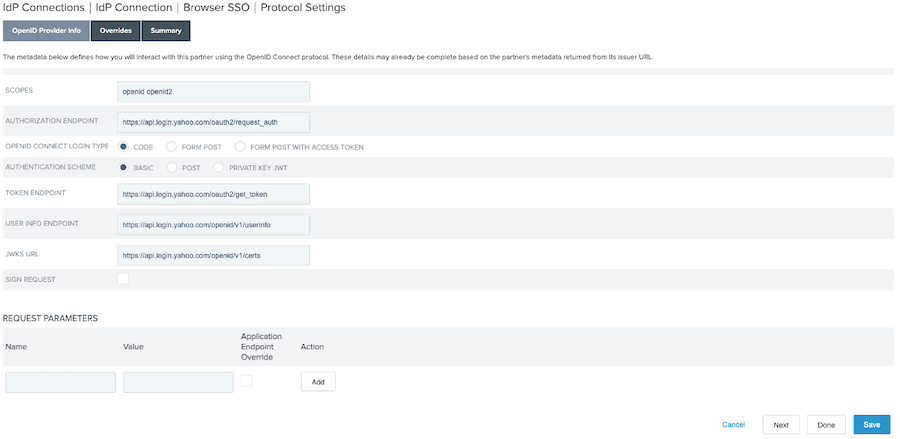
-
On the Overrides tab, enter a Default Target URL. Click Next.
-
On the Summary tab, review your entries and click Done.
-
On the Protocol Settings tab, click Next.
-
On the Summary tab, review your entries and click Done.
-
On the Activation and Summary tab, click the toggle to activate the connection. Click Save.
Creating a local identity profile
Steps
-
Go to Authentication > Policies > Local Identity Profiles and click Create New Profile.
-
On the Profile Info tab, choose an existing policy contract or create a new one. Click Next.
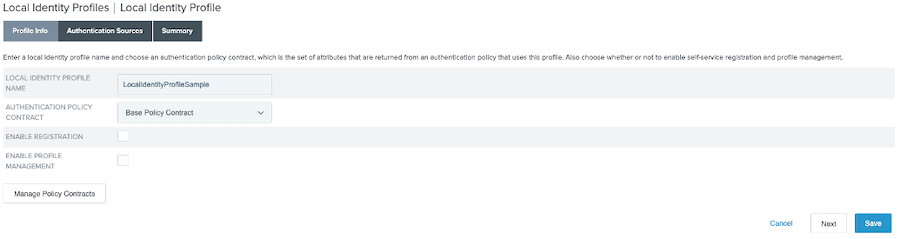
-
On the Authentication Sources tab, in the empty field next to the Add button, enter
Yahoo. Click Add.
-
Click Save.
Creating an HTML form IdP adapter
About this task
Create an HTML form IdP adapter to include the newly created LIP.
Steps
-
Go to Authentication > Integration > IdP Adapters and click Create New Instance.
-
On the Type tab, enter a Instance Name and Instance ID, and in the Type list, select HTML From IdP Adapter. Click Next.
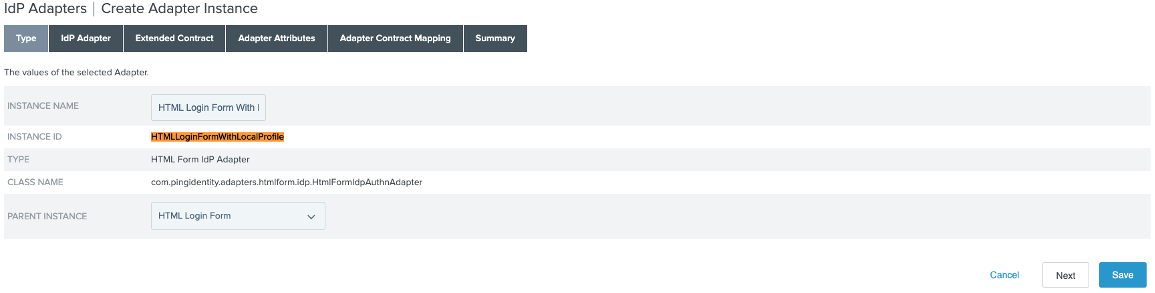
-
On the IdP Adapter tab, select the Local Identity Profile checkbox and select the newly-created LIP in the list. Click Next.

-
On the Extended Contract tab, add all desired attributes. Click Next.
-
To add an attribute, enter the name in the empty field and click Add.
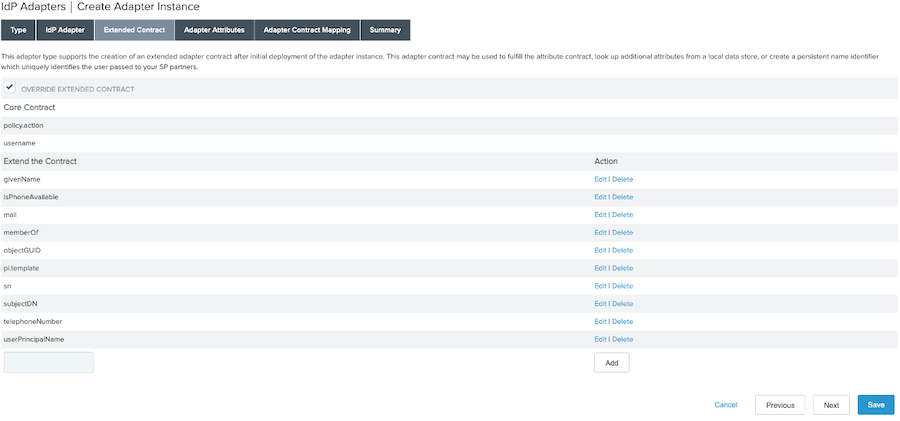
-
-
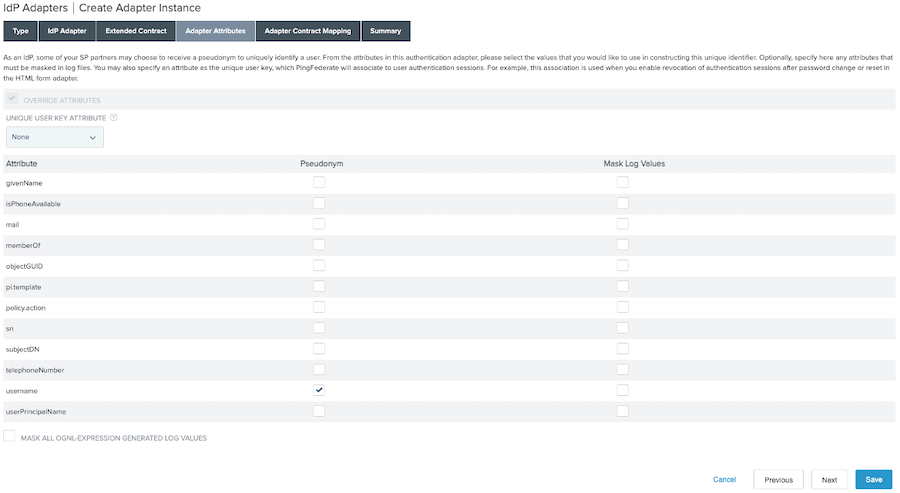
On the Adapter Attributes tab, in the username row, select the Pseudonym checkbox. Click Next.
-
On the Adapter Contract Fulfillment tab, configure the contract as follows. Click Next.
Attribute Value IsPhoneAvailable
#this.get("telephoneNumber")== null? false:#this.get("telephoneNumber").toString().equalsIgnoreCase("")?false:truetelephoneNumber
telephoneNumbermail
mailpolicy.action
policy.actiongivenName
givenNameobjectGUID
objectGUIDmemberOf
memberOfpi.template
{ "name": "strong_authentication"."variables": { "logourl"."https//www.logosurfer.com/wp-content/uploads/2018/03/kohls-log_0.png"."currency": "USD"."recipient": "Charlie Parker" }}sn
snuserPrincipalName
userPrincipalNamesubjectDN
subjectDNusername
username -
On the Summary tab, review your entries. Click Save.
Creating a policy to fulfill the policy contract chosen in the LIP
Steps
-
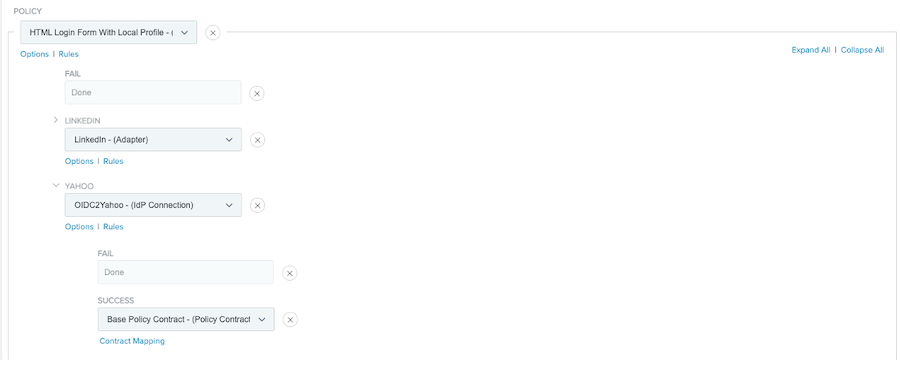
Select the HTML form adapter that you created earlier and click Rules.
-
Add Yahoo as a rule:
-
From the Attribute Name list, select policy.action.
-
From the Condition list, select equal to.
-
In the Value field, enter
Yahoo. -
In the Result field, enter
Yahoo. -
Click Done.
The rest of the values are optional.
-
-
Under the Yahoo branch, in the Policy list, select the IdP connection that you created earlier.
-
In the Success list, select the policy contract that you used in the LIP. Click Contract Mapping.
-
On the Contact Fulfillment tab, configure the following attributes.
Attribute Value UPN
nameEmail
emailGroup Membership
grpObject GUID
objectguidsubject
subFirst Name
given_nameDN
dnLast Name
family_name -
On the Summary tab, click Done.