Extending a PingFederate authentication session for corporate identifiers
Starting with PingFederate 9.3, you can enable longer validity periods for employee authentication sessions than those for non-corporate users.
The solution works by having a dedicated login adapter, such as the HTML Form Adapter, for each user population with their own session timeouts and configuring an Identifier First Adapter to determine which adapter each user group should be routed to. Setting an OGNL expression in the issuance criteria of the corporate adapter ensures that a non-corporate user cannot authenticate with the corporate adapter.
|
For this task, you must have created the login adapters for each user population and customized their session timeouts. To unify the user experience, you can create the non-corporate adapter as a child of the corporate parent adapter. The child adapter will inherit all of the parent’s settings, including any custom templates used for branding. |
Configuring the Identifier First Adapter
About this task
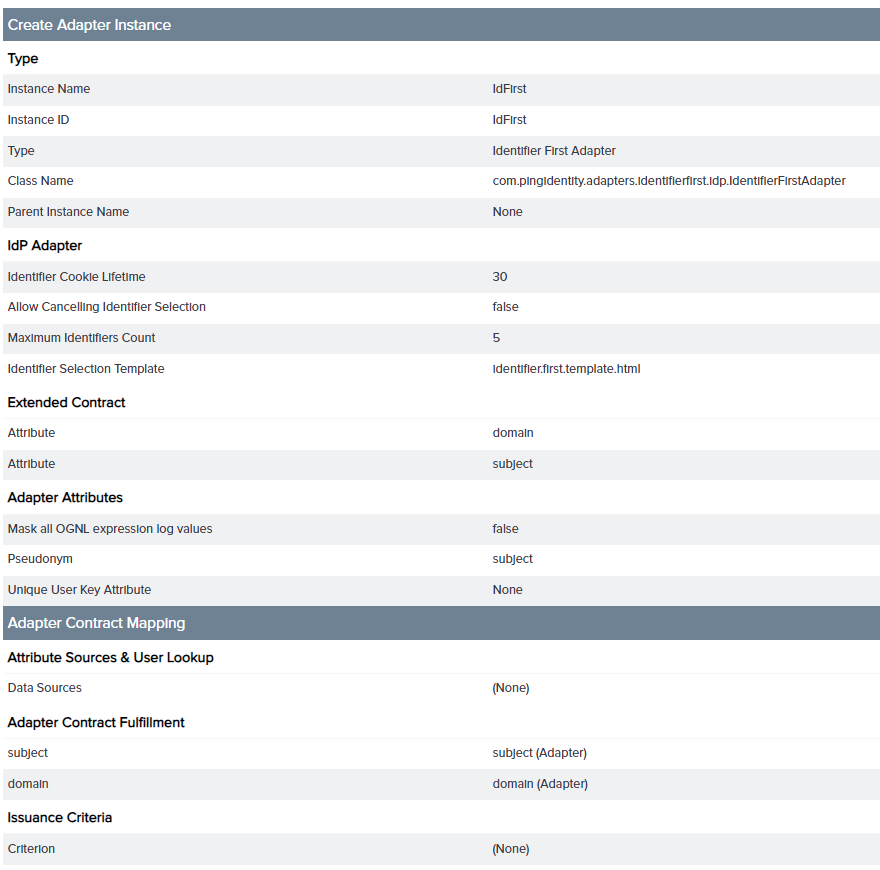
The Identifier First Adapter prompts the user to identify themselves with their email address. Upon submission of the address, the adapter parses out the email domain and subject. You can use the domain information retrieved by the adapter to create policy rule branches. For more information, see Configuring an Identifier First Adapter instance.
Steps
-
In the PingFederate administrative console, go to Authentication → Integration → IdP Adapters.
-
Click Create New Instance.
-
On the Type tab, configure the basics of the adapter instance:
-
Enter the Instance Name and ID.
-
In the Type list, select Identifier First Adapter.
-
Click Next.
-
-
On the IdP Adapter tab, accept the default configuration and click Next.
-
On the Extended Contract tab, accept the default configuration and click Next.
-
On the Adapter Attributes tab, select the Pseudonym checkbox for the domain attribute. Click Next.

-
On the Adapter Contract Mapping tab, click Next.
The adapter will fulfill the adapter contract by default.
-
On the Summary tab, verify your adapter’s configuration.
-
Click Done.
-
On the Manage IdP Adapter Instances page, click Save.
Configuring the Session Authentication Selector
About this task
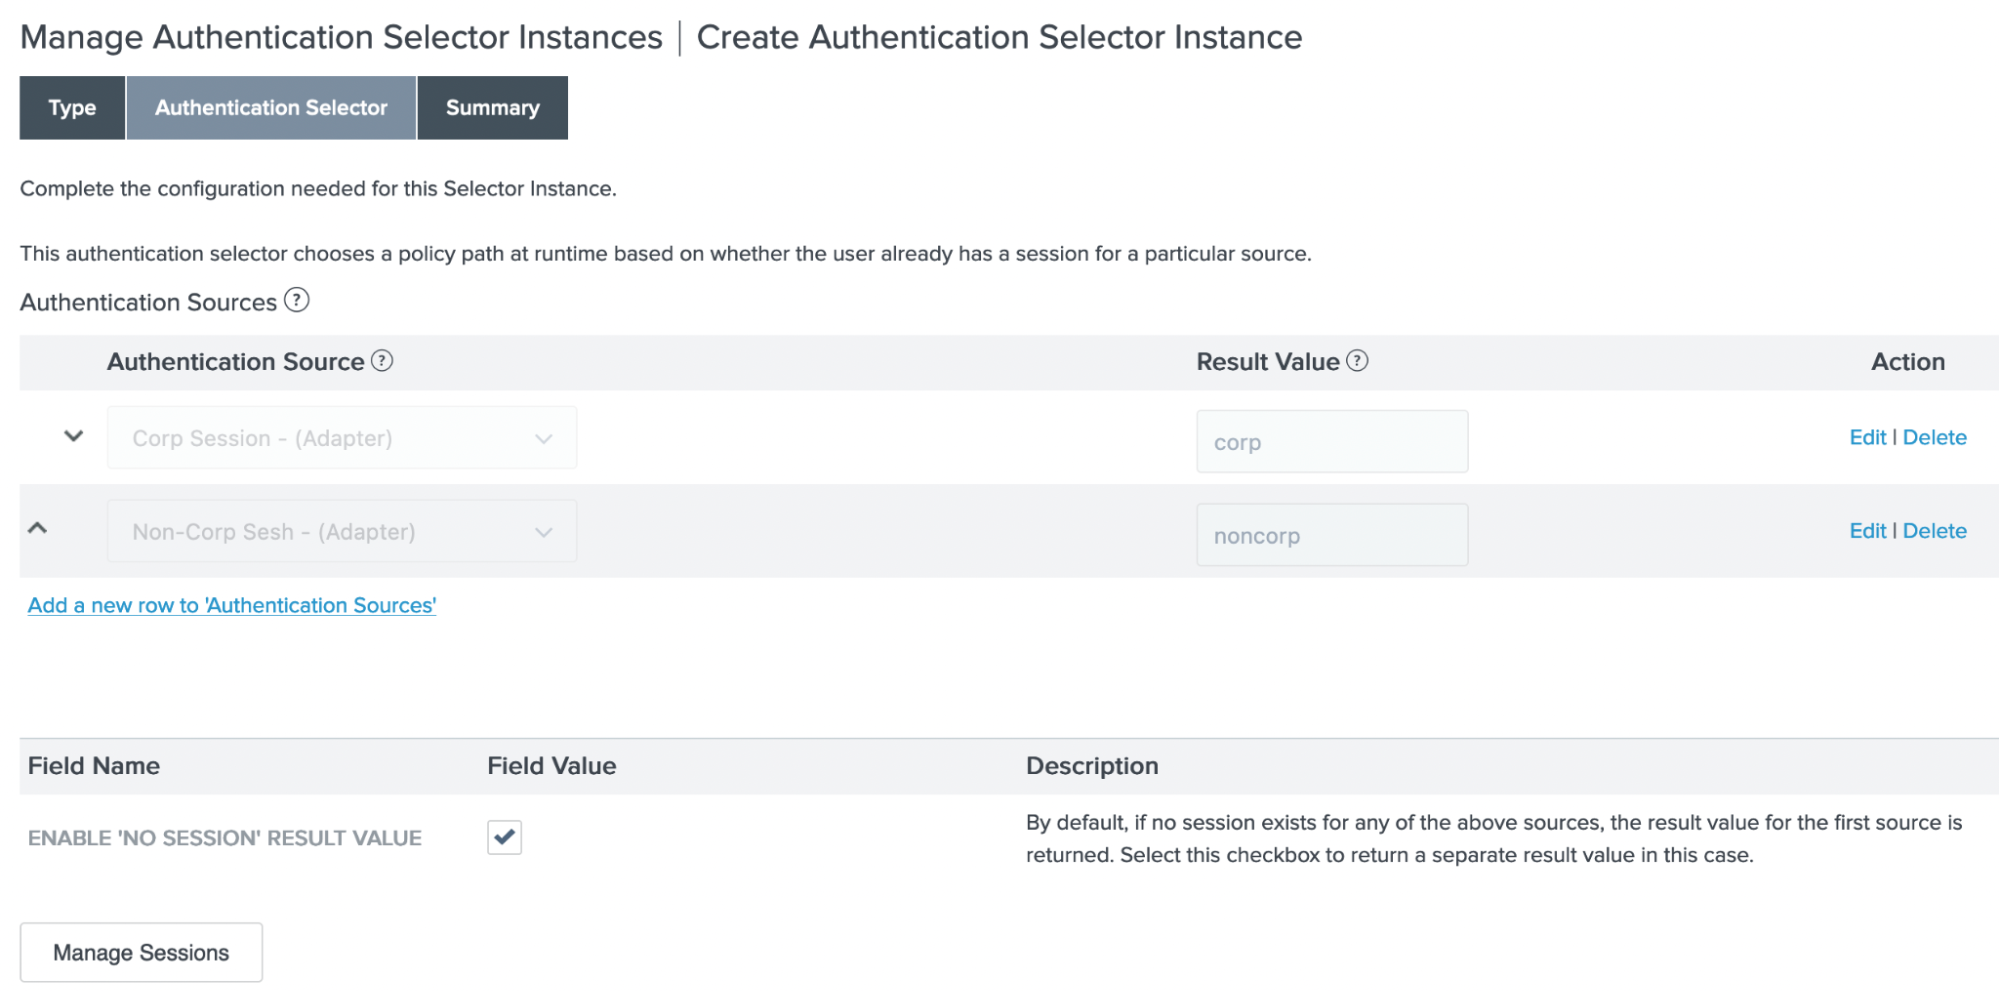
In this example, you are configuring a Session Authentication Selector with the corporate and non-corporate adapters added as authentication sources. The selector will check for an existing authentication session with either adapter. If a session exists, the user bypasses the Identifier First Adapter and is not asked to submit their email address. For more information, see Configuring the Session Authentication Selector.
Steps
-
In the PingFederate administrative console, go to Authentication → Policies → Selectors.
-
Click Create New Instance.
-
On the Type tab, configure the basics of the selector instance:
-
Enter the Instance Name and ID.
-
In the Type list, select Session Authentication Selector.
-
-
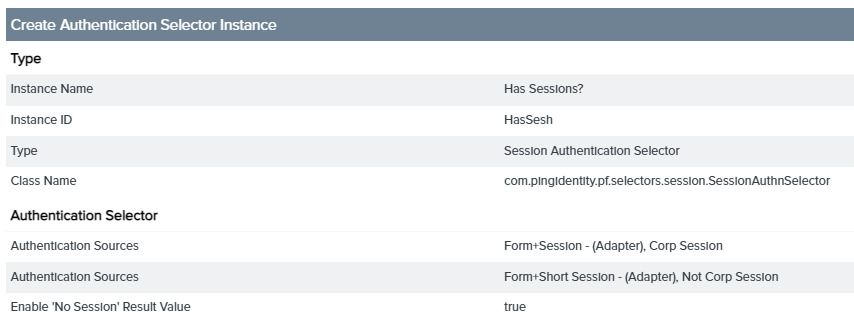
On the Authentication Selector tab, add the corporate and non-corporate adapters as authentication sources, and then select the Enable 'No Session' Result Value checkbox.
-
Click Next and verify your configuration on the Summary tab.
-
Click Done.
-
On the Manage Authentication Selector Instances page, click Save.
Adding an authentication policy
About this task
The authentication policy checks if the user has an existing authentication session. If they do, the user is sent to the corresponding adapter, allowing them to bypass the Identifier First Adapter. If they do not, they are prompted by the Identifier First Adapter to submit their email address to determine if they should be routed to the corporate or non-corporate adapter. For more information, see Authentication Policies.
Steps
-
In the PingFederate administrative console, go to Policies → Policies and click Add Policy.
-
Enter a name for your policy, and in the Policy list, select your newly created Session Authentication Selector.
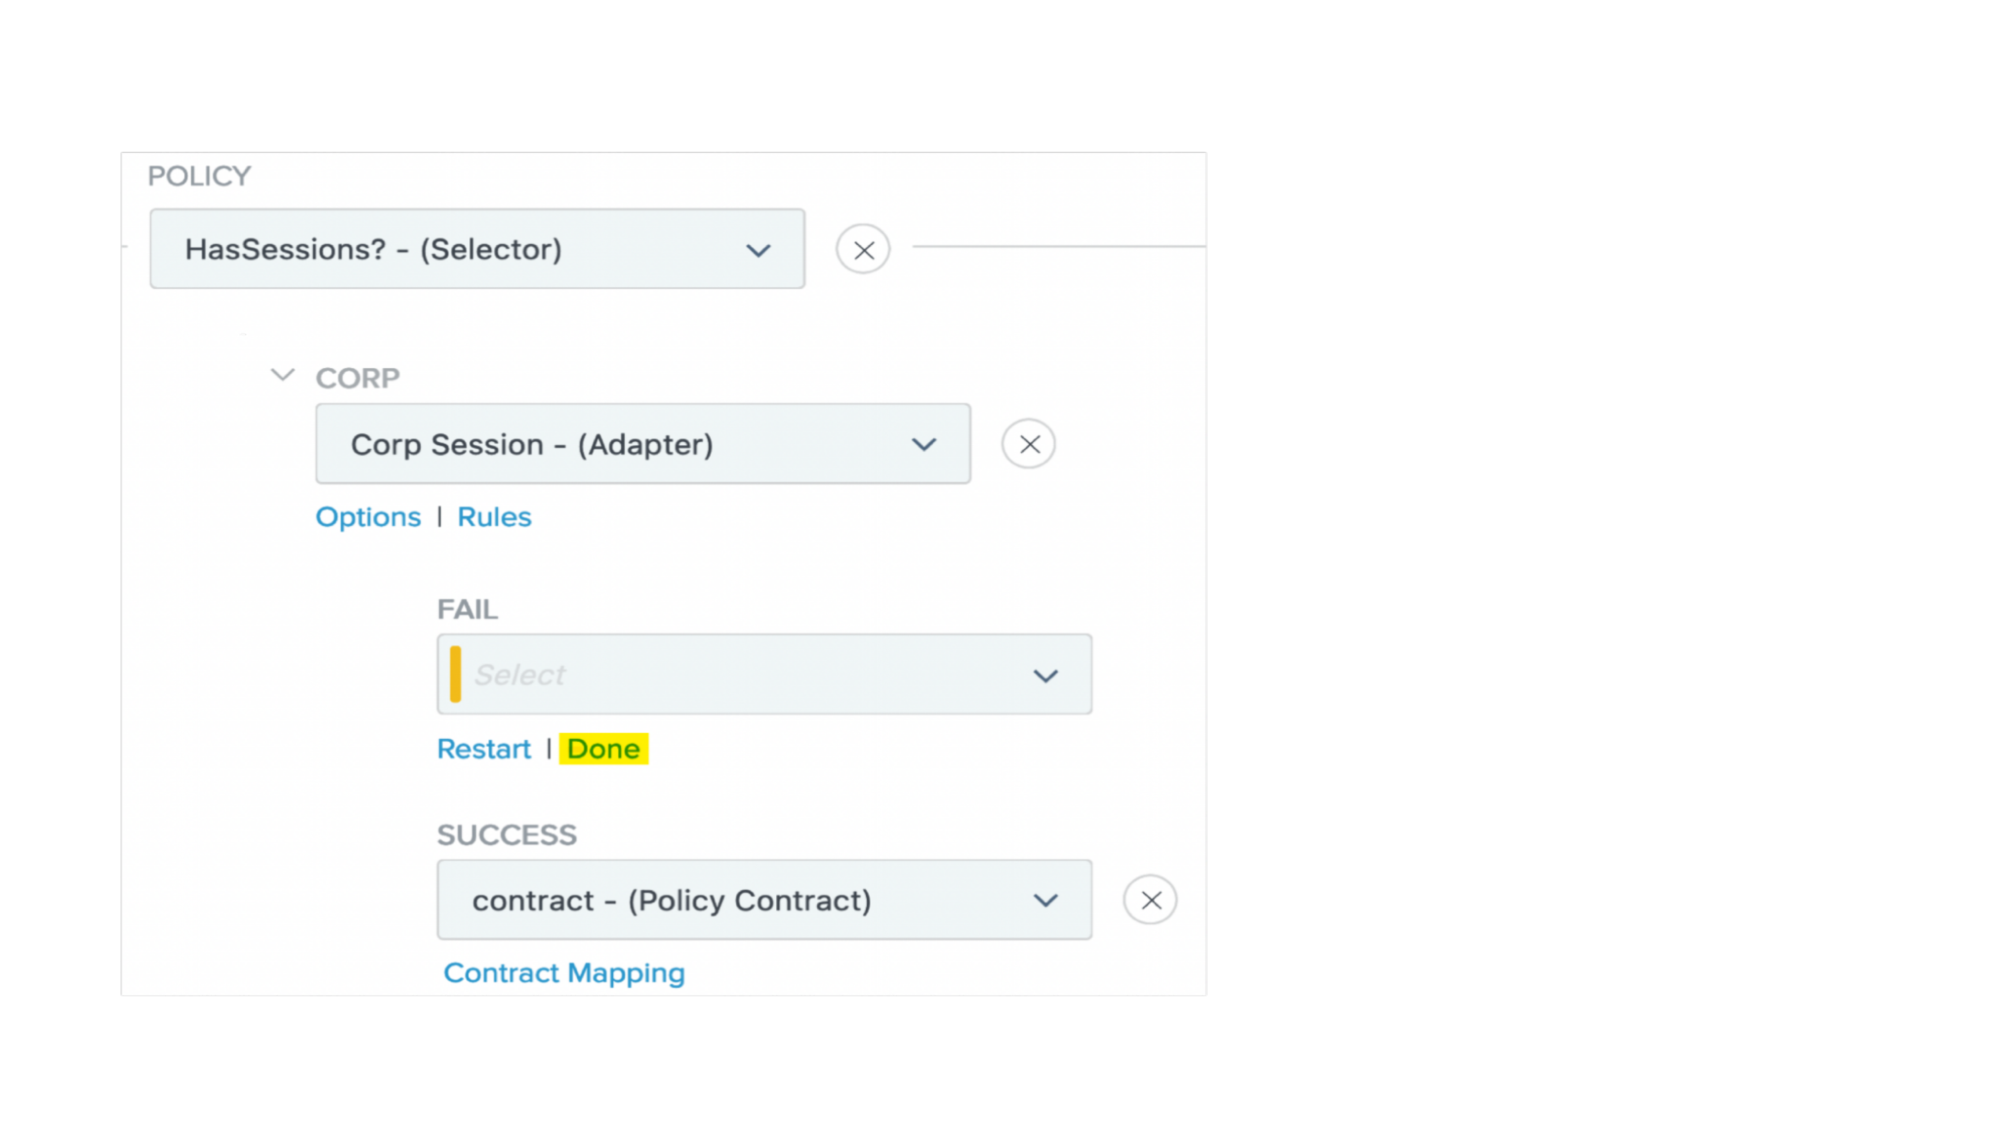
The policy branches are created based on the result values set for each authentication source in the selector.
-
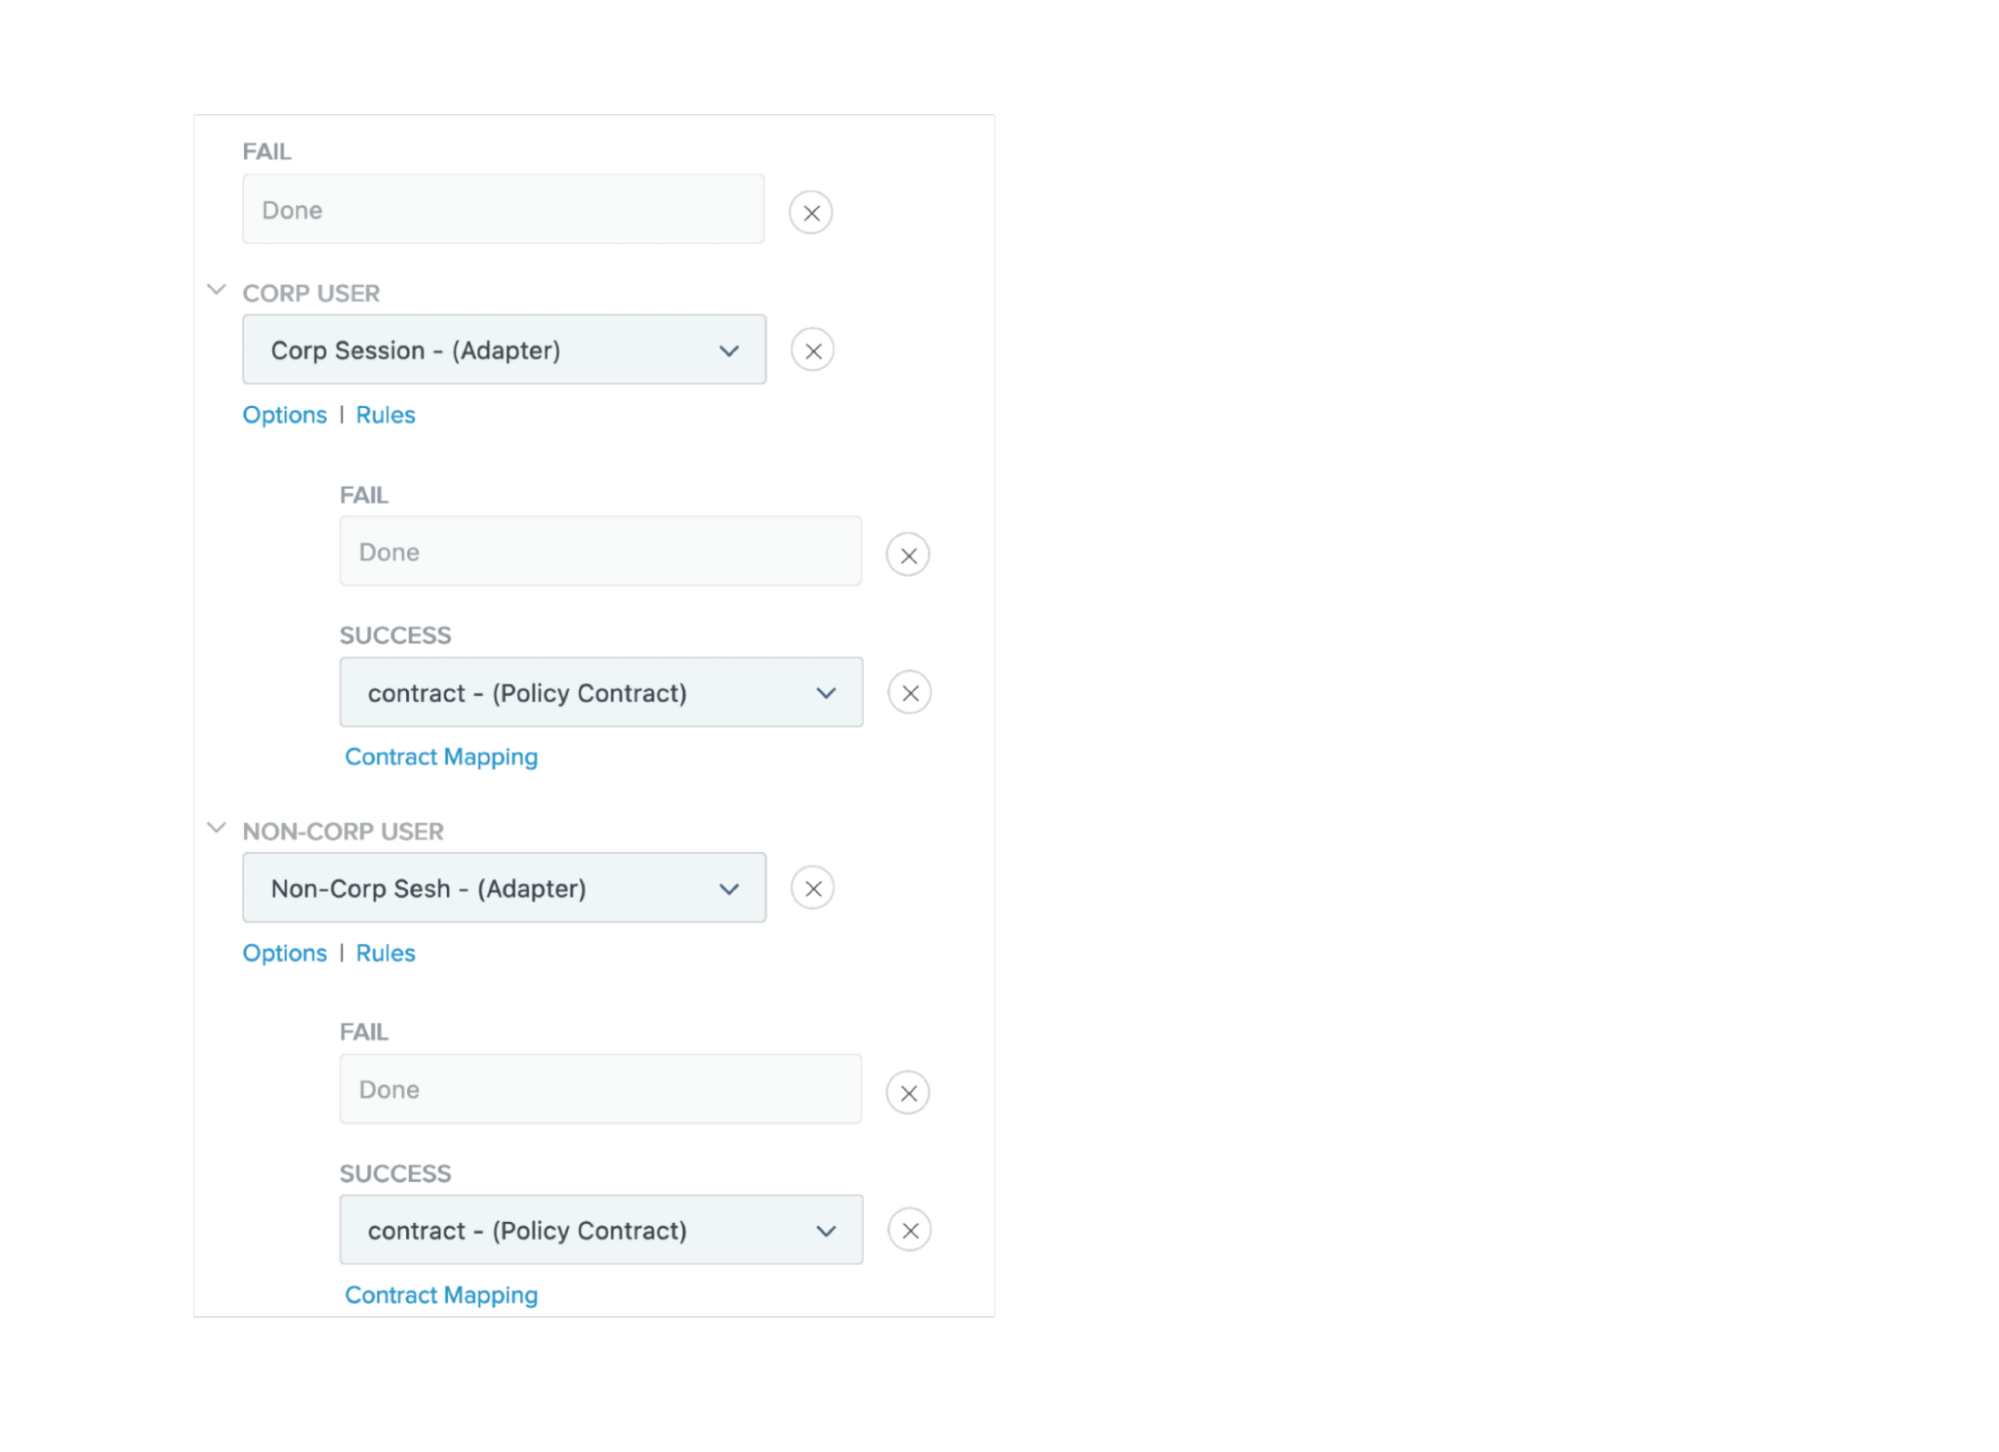
Select the appropriate adapter in the list of each branch:
-
Under the Fail list, click Done.
-
In the Success list, select your policy contract mapping setting.
-
-
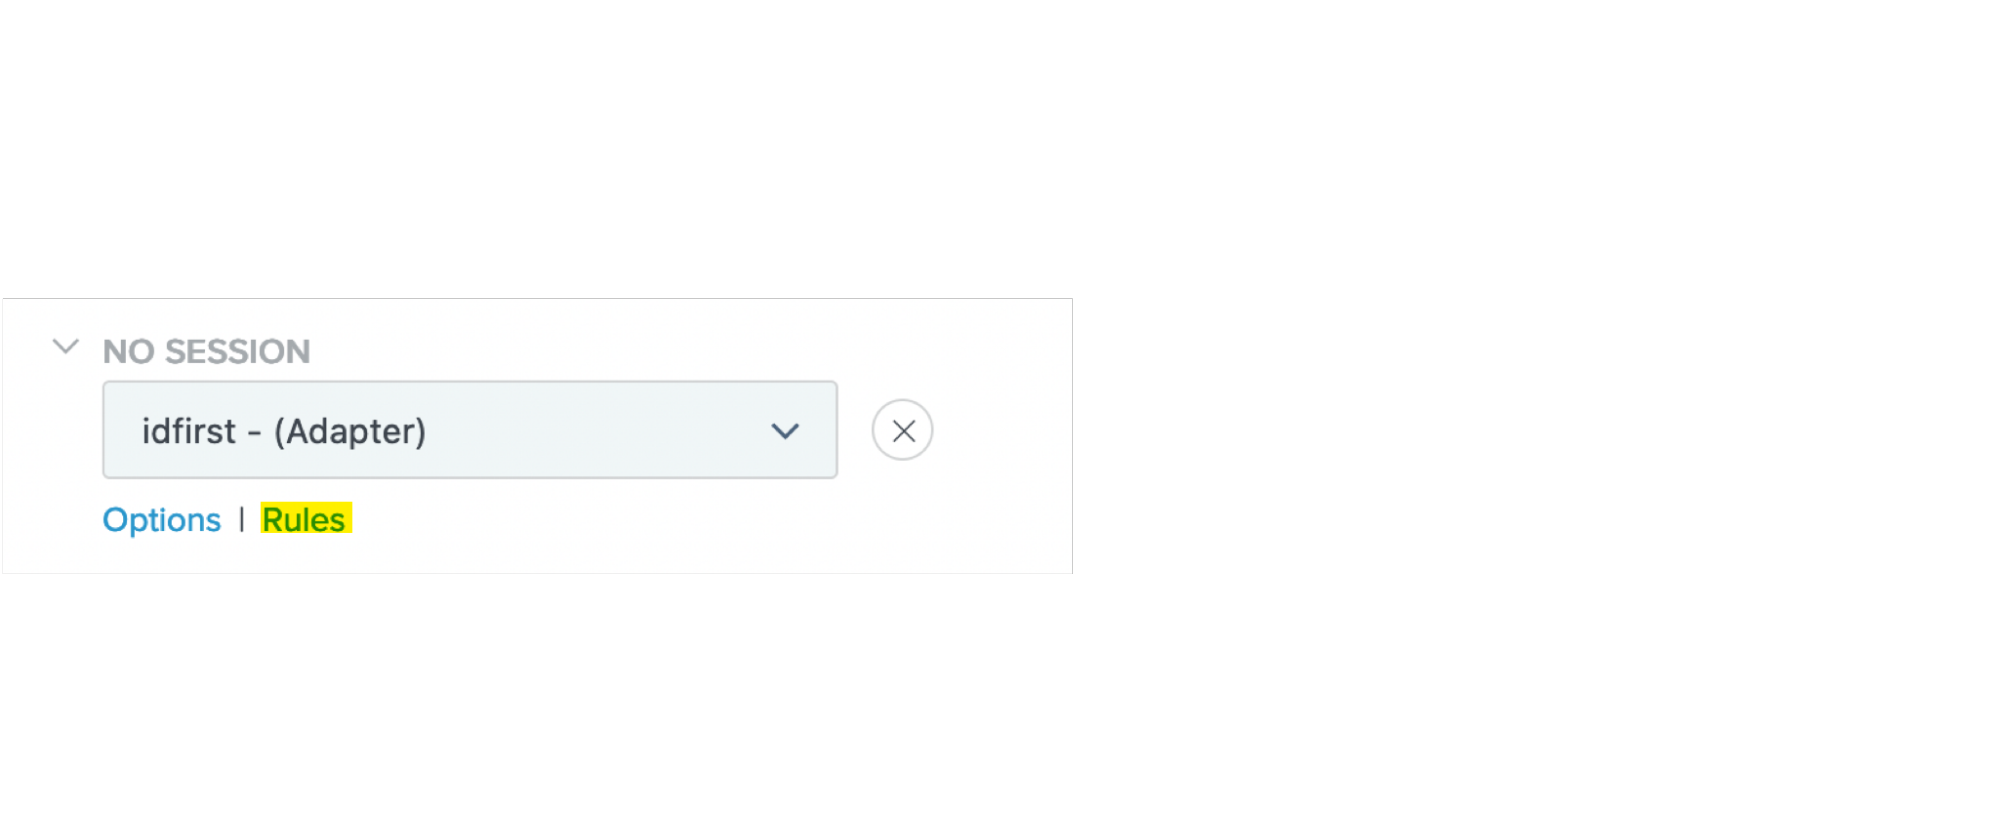
In the No Session list, select your newly created Identifier First adapter.
-
Under the No Session list, click Rules.
-
In the Attribute Name list, select domain.
-
In the Condition list, select equal to.
-
In the Value field, enter the corporate identifier.
-
In the Result field, enter a policy branch name for corporate users.
-
Click Add.
-
Repeat steps 5b-f, replacing the condition with not equal to, and replacing the result with the policy branch name for non-corporate users.
-
Clear the Default to success checkbox.
-
Click Done.
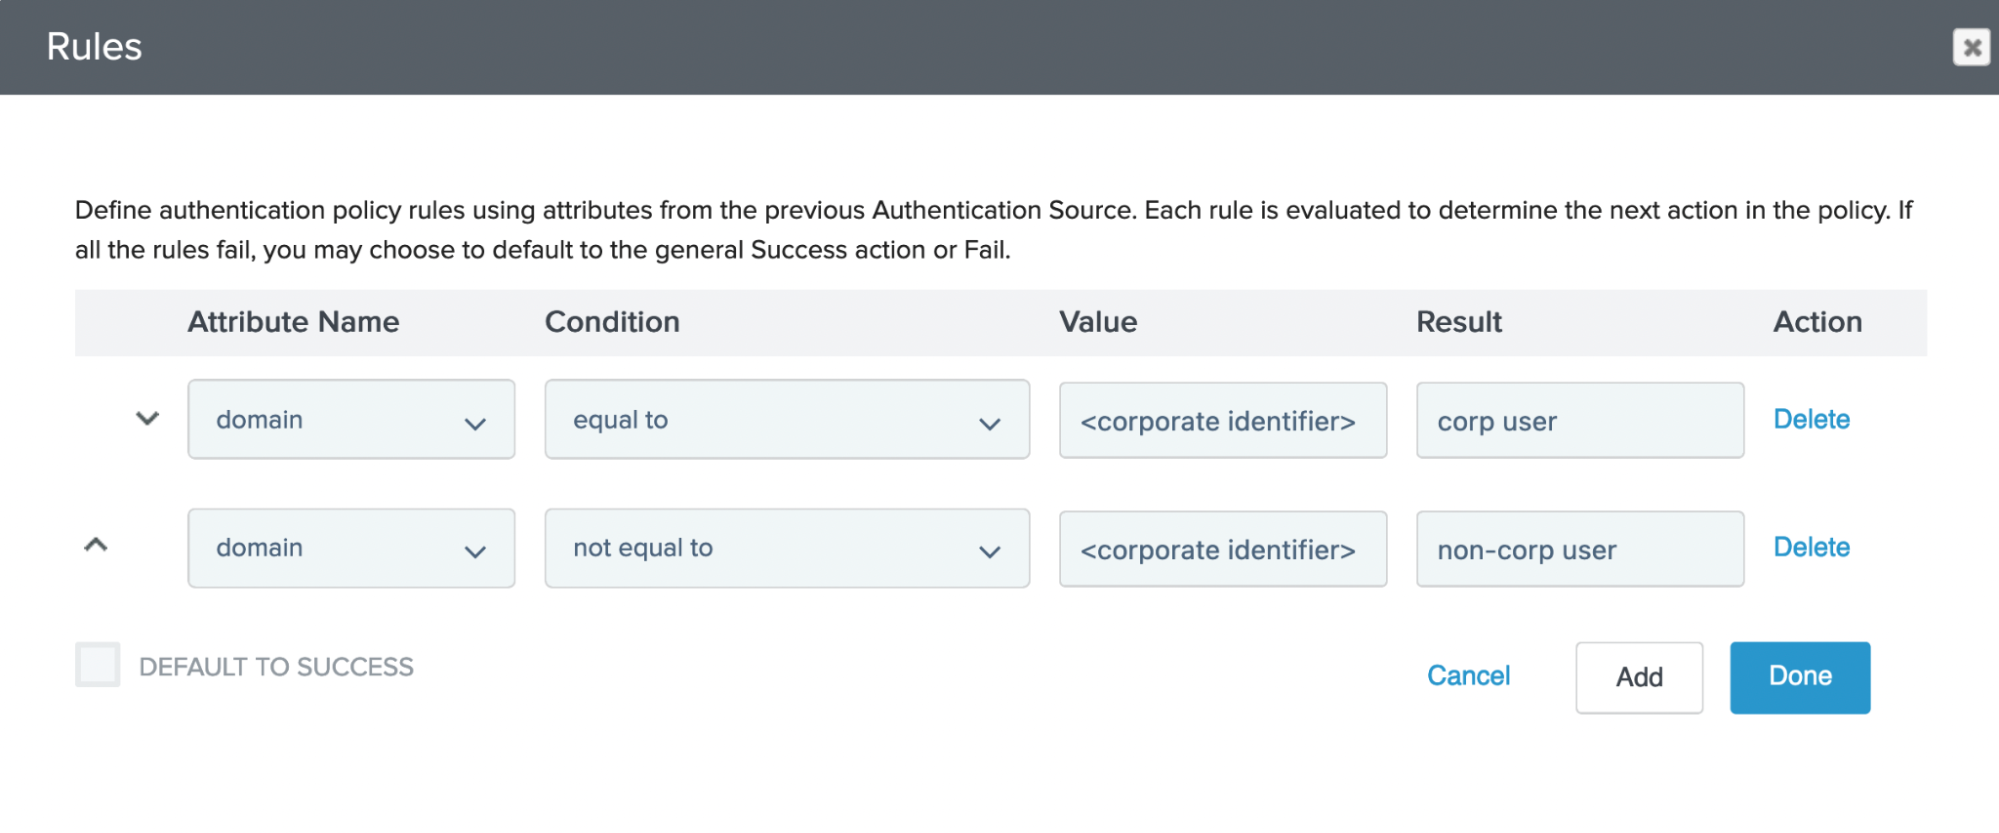
The rules dictate which policy branch the user is routed to if they have no current authentication session.
-
-
Within the No Session branch, under the Fail list, click Done.
-
In each policy branch list, select the appropriate adapter.
-
Under each Fail list, click Done, and in each Success list, select your policy contract mapping setting.
-
Setting an OGNL expression
About this task
In this task, you are adding an OGNL expression to the issuance criteria of the corporate adapter. This expression prevents a non-corporate user from being authenticated with a corporate identifier. For more information, see Construct OGNL Expressions.
Steps
-
In the PingFederate administrative console, go to Authentication → Integration → IdP Adapters.
-
Select your corporate adapter instance.
-
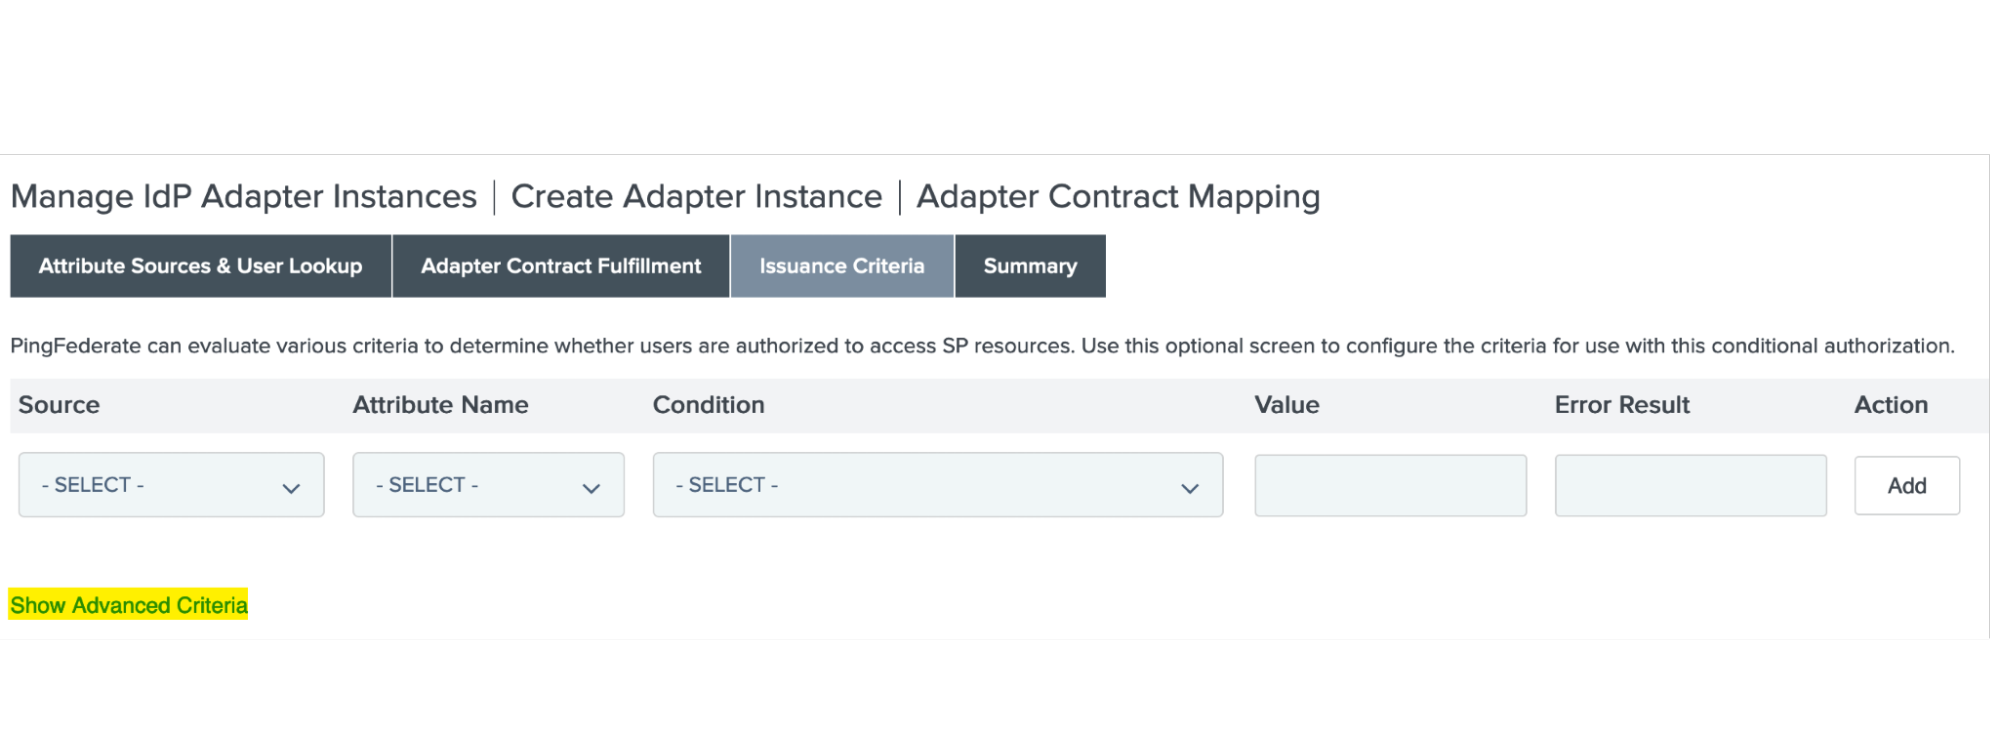
On the Adapter Contract Mapping tab, click Configure Adapter Contract.
-
On the Issuance Criteria tab, click Show Advanced Criteria.
-
In the Expression field, enter the following:
#allowed=#this.get("mapped.mail"), #allowed==null?"false":#this.get("mapped.mail").toString().contains("<corporate email domain>") -
In the Error Result field, enter your desired error message.
The error message displays if the user’s mapped attribute from the adapter is not consistent with the string contained in your OGNL expression. This indicates a failure to authenticate the user as an employee.

-
Click Add, and then click Done.