Password synchronization plugins
Guide to configuring and integrating the password synchronization plugins into your IDM deployment.
Password synchronization ensures uniform password changes across the resources that store the password. This guide shows you how to use password synchronization plugins to synchronize passwords between ForgeRock Identity Management (IDM) and an LDAP server, either ForgeRock Directory Services (DS) or Active Directory.
Password Sync Plugins
Discover how password synchronization works in IDM and learn about the plugins provided for synchronizing passwords with LDAP servers.
Synchronize With DS
Use the ForgeRock Directory Services password synchronization plugin.
Synchronize With AD
Use the Active Directory password synchronization plugin.
ForgeRock Identity Platform™ serves as the basis for our simple and comprehensive Identity and Access Management solution. We help our customers deepen their relationships with their customers, and improve the productivity and connectivity of their employees and partners. For more information about ForgeRock and about the platform, refer to https://www.forgerock.com.
The ForgeRock Common REST API works across the platform to provide common ways to access web resources and collections of resources.
Password synchronization plugins
Password synchronization ensures uniform password changes across the resources that store the password. After password synchronization, a user can authenticate with the same password on each resource. No centralized directory or authentication server is required for performing authentication. Password synchronization reduces the number of passwords users need to remember, so they can use fewer, stronger passwords.
IDM can propagate passwords to the resources that store a user’s password. In addition, you can download plugins from the ForgeRock BackStage download site to intercept and synchronize passwords that are changed natively in ForgeRock Directory Services (DS) and Active Directory.
If you use these plugins to synchronize passwords, set up password policy enforcement on the LDAP resource, rather than on IDM. Alternatively, ensure that all password policies that are enforced are identical to prevent password updates on one resource from being rejected by IDM or by another resource.
The password synchronization plugin intercepts password changes on the LDAP resource before the passwords are stored in encrypted form. The plugin then sends the intercepted password value to IDM, using an HTTP POST request to patch the corresponding managed user object.
|
The plugins do not use the LDAP connector to transmit passwords, but send a generic HTTP POST request with a |
If the IDM instance is unavailable when a password is changed in either DS or Active Directory, the respective password plugin intercepts the change, encrypts the password, and stores the encrypted password in a JSON file. The plugin then checks whether the IDM instance is available, at a predefined interval. When IDM becomes available, the plugin performs a PATCH on the managed user record, to replace the password with the encrypted password stored in the JSON file.
To be able to synchronize passwords, both password synchronization plugins require that the corresponding managed user object exist in the IDM repository.
Synchronize passwords with DS
The ForgeRock Directory Services (DS) password synchronization plugin intercepts passwords that are changed natively in the DS server and propagates these password changes to IDM. The password synchronization plugin captures password changes in clear text, encrypts them, and transmits them to IDM. If IDM is unavailable when a password change occurs, the password change is queued for subsequent retry.
The password synchronization plugin requires keys to encrypt changed passwords and certificates to secure communication between DS and IDM. The examples that follow use the keys generated when you set up the DS and IDM servers.
Set up IDM and DS
The following examples prepare a demonstration of password synchronization from DS to IDM. After this preparation:
-
DS and IDM are installed and running on your computer, with default security settings.
In particular, both servers have key pairs used later in the demonstration:
-
DS has a generated TLS key pair (alias:
ssl-key-pairand certificate subject DN:CN=DS, O=ForgeRock.com) signed by the DS deploymentId-based CA (certificate subject DN:CN=Deployment key, O=ForgeRock.com).DS uses the certificate to set up TLS connections, and to authenticate to IDM.
-
IDM has a generated key pair, alias
openidm-localhost. The certificate is self-signed, and has certificate subject DNCN=openidm-localhost, O=OpenIDM Self-Signed Certificate, OU=None, L=None, ST=None, C=None.DS uses the public key certificate to encrypt passwords before sending them to IDM.
-
-
IDM does not otherwise synchronize DS data with its own.
This lets you confirm that DS, not synchronization, provides the updated password to IDM.
-
DS and IDM both have a user account for Barbara Jensen.
After you have configured password synchronization, when Barbara Jensen’s password changes in DS, DS sends the change to IDM.
Prepare IDM
-
Update your hosts file.
The IDM self-signed certificate uses the domain alias
openidm-localhost. When testing the DS plugin on your computer, add the alias to your/etc/hostsfile:127.0.0.1 localhost openidm-localhost -
Unzip IDM.
-
Start IDM:
/path/to/openidm/startup.shbash -
Add Barbara Jensen’s account to IDM:
curl \
--request PUT \
--header "X-OpenIDM-Username: openidm-admin" \
--header "X-OpenIDM-Password: openidm-admin" \
--header "Accept: application/json" \
--header "If-None-Match: *" \
--header "Accept-API-Version: resource=1.0" \
--header "Content-Type: application/json" \
--data  '{"userName":"bjensen","password":"Password1","mail":"bjensen@example.com","sn":"Jensen","givenName":"Barbara"}' \
"http://localhost:8080/openidm/managed/user/bjensen"
{
  "_id": "bjensen",
  "_rev": "revision",
  "userName": "bjensen",
  "mail": "bjensen@example.com",
  "sn": "Jensen",
  "givenName": "Barbara",
  "accountStatus": "active",
  "effectiveAssignments": [],
  "effectiveRoles": []
}
Prepare DS
-
Download the DS 7.4 .zip distribution from the ForgeRock BackStage download site.
-
Unzip DS:
unzip -q ~/Downloads/DS-7.4.zip -d /path/to
-
Generate a DS deploymentId for DS setup and managing deployments:
/path/to/opendj/bin/dskeymgr create-deployment-id --deploymentIdPassword password
your-deployment-ID
-
Set up and start DS with data from an IDM example that includes Barbara Jensen’s entry:
/path/to/opendj/setup \
--serverId evaluation-only \
--deploymentId your-deployment-ID \
--deploymentIdPassword password \
--rootUserDn uid=admin \
--rootUserPassword password \
--hostname localhost \
--adminConnectorPort 4444 \
--ldapsPort 1636 \
--profile ds-user-data \
--set ds-user-data/baseDn:dc=com \
--set ds-user-data/ldifFile:/path/to/openidm/samples/sync-with-ldap/data/Example.ldif \
--start \
--acceptLicense
The sample data includes an entry for Barbara Jensen. The rest of the sample configuration is not used here.
-
Check that the directory superuser can read Barbara Jensen’s entry in the directory:
/path/to/opendj/bin/ldapsearch \
--port 1636 \
--useSSL \
--usePkcs12TrustStore /path/to/opendj/config/keystore \
--trustStorePassword:file /path/to/opendj/config/keystore.pin \
--hostname localhost \
--bindDn uid=admin \
--bindPassword password \
--baseDn dc=com \
"(uid=bjensen)"
dn: uid=bjensen,ou=People,dc=example,dc=com
objectClass: person
objectClass: organizationalPerson
objectClass: inetOrgPerson
objectClass: top
cn: Barbara Jensen
description: Created for OpenIDM
givenName: Barbara
mail: bjensen@example.com
sn: Jensen
telephoneNumber: 1-360-229-7105
uid: bjensen
userPassword: {PBKDF2-HMAC-SHA256}10:hash
Notice that this entry differs from the account you added to IDM. However, the user identifier is
bjensenin both cases. This will let IDM identify Barbara Jensen’s account as the one whose password has changed when it receives the notification from DS.
Secure communication between IDM and DS
The password synchronization plugin encrypts passwords using IDM’s public key. IDM then uses its private key to decrypt the password.
This section describes how to export IDM’s certificate, containing its public key, to DS so that the password synchronization plugin can use the public key to encrypt the password. The same certificate is used by the plugin to trust the SSL certificate that is provided by IDM.
There are four possible modes of communication between the DS password synchronization plugin and IDM:
- SSL Authentication
-
For this communication mode, you must import IDM’s certificate into the DS truststore (either the self-signed certificate that is generated the first time IDM starts, or a CA-signed certificate).
- Mutual SSL Authentication
-
Mutual SSL authentication is the default configuration of the password synchronization plugin.
For this communication mode, you must:
-
Add the DS certificate subject DN as a value of the
allowedAuthenticationIdPatternsproperty in your project’sconf/authentication.jsonfile.
- AM Bearer Tokens
-
When you use IDM and AM together as a platform, configure the password synchronization plugin to use AM bearer tokens for authentication.
For this communication mode, you must:
- HTTP Basic Authentication
-
IDM supports basic authentication for testing purposes only. Do not use basic authentication in production.
For this mode, the connection is secured using a username and password, rather than any exchange of certificates. Because the password sync plugin requires the IDM certificate to encrypt/decrypt passwords, you must import the IDM certificate into the DS truststore.
For this communication mode, you must:
-
Set the following properties in the plugin configuration:
-
openidm-url -
openidm-username -
openidm-password
-
Enable DS to trust the IDM certificate
The first time IDM starts, it generates a self-signed certificate. This procedure uses the self-signed certificate to demonstrate how to get the password synchronization plugin up and running. In a production environment, use a certificate that has been signed by a Certificate Authority (CA).
The default Java truststore contains signing certificates from well-known CAs. If your CA certificate is not in the default truststore, or if you are using a self-signed certificate, import it into the DS keystore, as described here.
-
Export the IDM self-signed certificate to a file, as follows:
keytool \
-export \
-alias openidm-localhost \
-file openidm-localhost.crt \
-keystore /path/to/openidm/security/keystore.jceks \
-storetype jceks \
-storepass changeit
Certificate stored in file <openidm-localhost.crt>
The default IDM keystore password is
changeit. -
Import the self-signed certificate into the DS keystore:
keytool \
-import \
-alias openidm-localhost \
-file openidm-localhost.crt \
-keystore /path/to/opendj/config/keystore \
-storepass:file /path/to/opendj/config/keystore.pin \
-storetype PKCS12 \
-noprompt
Certificate was added to keystore
-
Check that the IDM certificate is in the DS keystore:
keytool \
-list \
-keystore /path/to/opendj/config/keystore \
-storepass:file /path/to/opendj/config/keystore.pin
...
openidm-localhost, date, trustedCertEntry,
Certificate fingerprint (SHA-256): fingerprint
...
Enable IDM to trust DS certificates
For mutual SSL authentication, you must also import a trusted DS certificate into the IDM truststore, either a trusted CA certificate, or the CA certificate that is generated by the DS deploymentId and deploymentIdPassword. For more information, refer to Deployment IDs in the DS Security Guide. This procedure uses the CA certificate generated by the DS deploymentId and deploymentIdPassword.
-
Run the following command on your DS server to export the CA certificate to a file. Substitute the values for
--deploymentIdand--deploymentIdPasswordwith the values from when you set up the DS server:/path/to/opendj/bin/dskeymgr \ export-ca-cert \ --deploymentId your-deployment-ID \ --deploymentIdPassword password \ --outputFile ssl-key-pair.pem
-
Import the DS CA certificate into the IDM truststore:
keytool \ -importcert \ -alias ssl-key-pair \ -keystore /path/to/openidm/security/truststore \ -storepass changeit \ -file ssl-key-pair.pem Owner: CN=Deployment key, O=ForgeRock.com Issuer: CN=Deployment key, O=ForgeRock.com ... Trust this certificate? [no]: yes Certificate was added to keystore -
Check that the DS CA certificate is in the IDM truststore:
keytool \ -list \ -keystore /path/to/openidm/security/truststore \ -storepass changeit... ssl-key-pair, date, trustedCertEntry, Certificate fingerprint (SHA-256): fingerprint... -
Restart IDM:
/path/to/openidm/shutdown.sh; /path/to/openidm/startup.sh
Configure the plugin for AM bearer tokens
This procedure uses the sample platform setup documentation as the basis for setting up IDM to use AM bearer tokens for authentication and may need adjustment for your specific environment.
-
Perform sample platform setup - shared identity store using the following settings during the applicable steps:
Configuration Store
-
adminConnectorPort 4444
-
ldapPort 1389
-
enableStartTls
-
ldapsPort 1636
-
httpsPort 8443
-
replicationPort 8989
-
deploymentId your-deployment-ID
Identity Store
-
adminConnectorPort 4445
-
ldapPort 1390
-
ldapsPort 1637
-
replicationPort 8990
-
deploymentId your-deployment-ID
Tomcat - AM
-
port: 8080
-
redirects: 8444
resolver/boot.properties-
openidm.port.http=8081
-
openidm.port.https=8445
-
openidm.port.mutualauth=8446
-
openidm.host=openidm.example.com
-
openidm.auth.clientauthonlyports=8446
-
-
Configure a
ds-password-sync-pluginOAuth Client for the Password Sync Plugin:-
If you’re not currently logged in to the AM console as the
amAdminuser, log in. -
In the Top Level Realm, select Applications > OAuth 2.0 > Clients , and click Add Client .
-
Enter the following details:
-
Client ID :
ds-password-sync-plugin -
Client secret :
ds-password-sync-plugin -
Scopes :
fr:idm:*, openid, am-introspect-all-tokens, am-introspect-all-tokens-any-realm
-
-
Click Create .
-
On the Advanced tab:
-
Token Endpoint Authentication Method : Select
client_secret_basic. -
Grant Types : Add
Client Credentials.
-
-
Click Save Changes .
-
-
If you haven’t performed the following procedures, do that now:
-
Add
openidm-localhostto theidm.defaultmapping alias array in your project’sconf/secrets.jsonfile:"mappings": [ { "secretId": "idm.default", "types": [ "ENCRYPT", "DECRYPT" ], "aliases": [ "&{openidm.config.crypto.alias|openidm-sym-default}", "openidm-localhost" ] }, ... ]json -
Log in to the IDM admin UI as
amAdminand create a new managed/user:-
From the navigation bar of the admin UI, select Manage > User , and then click + New User .
-
On the New User page, enter the Username
ds-password-sync-plugin, other information, as necessary, and click Save . -
On the ds-password-sync-plugin user page, select the Authorization Roles tab.
-
Click Add Authorization Roles , select all of the following roles, and then click Add :
openidm-admin
openidm-authorized
openidm-cert
openidm-reg
-
-
Add a
staticUserMappingfor theds-password-sync-pluginuser to theconf/authentication.jsonfile:{ "subject" : "ds-password-sync-plugin", "localUser" : "managed/user/ds-password-sync-plugin", "roles" : [ "internal/role/openidm-authorized", "internal/role/openidm-admin" ] }json
Install and configure the DS plugin
The following steps install the password synchronization plugin on a DS directory server that is running on the same host as IDM (localhost). If you are running DS on a different host, use the fully qualified domain name instead of localhost.
You must use the plugin version that corresponds to your IDM and DS versions. For more information, refer to Supported Password Synchronization Plugins. This procedure assumes that you are using IDM 7.4, DS 7.4, and version 7.4 of the password synchronization plugin.
Depending on whether you are using IDM with AM, select one of the following plugin installation and configuration procedures:
For regular IDM authentication
-
Extract the .zip file contents to the DS installation directory:
unzip ~/Downloads/DS-IDM-account-change-notification-handler-7.4.zip -d /path/to/opendj/
-
Restart DS to load the additional schema from the password synchronization plugin:
/path/to/opendj/bin/stop-ds --restart
Stopping Server...
...msg=Loaded extension from file '/path/to/opendj/lib/extensions/opendj-openidm-account-change-notification-handler-7.4.jar'
...
...msg=The Directory Server has started successfully
-
Configure the password synchronization plugin:
/path/to/opendj/bin/dsconfig \
create-account-status-notification-handler \
--type openidm \
--handler-name "OpenIDM Notification Handler" \
--set enabled:true \
--set openidm-url:https://openidm-localhost:8444/openidm/managed/user \
--set private-key-alias:openidm-localhost \
--set certificate-subject-dn:"CN=openidm-localhost, O=OpenIDM Self-Signed Certificate, OU=None, L=None, ST=None, C=None" \
--set ssl-cert-nickname:ssl-key-pair \
--set key-manager-provider:PKCS12 \
--set trust-manager-provider:PKCS12 \
--set password-attribute:password \
--set attribute-type:entryUUID \
--set attribute-type:uid \
--set query-id:for-userName \
--set log-file:logs/pwsync \
--set update-interval:5s \
--set request-retry-attempts:5000 \
--hostname localhost \
--port 4444 \
--bindDn uid=admin \
--bindPassword password \
--usePkcs12TrustStore /path/to/opendj/config/keystore \
--trustStorePassword:file /path/to/opendj/config/keystore.pin \
--no-prompt
The Openidm Account Status Notification Handler was created successfully
Adapt the settings to match your DS and IDM deployments:
Setting Details enabledEnables the plugin.
Leave this setting as shown.
openidm-urlThe endpoint where the plugin finds IDM managed user accounts.
Port
8444is the IDM default for mutual TLS connections.private-key-aliasThe IDM private key, used to decrypt the JSON objects from DS that contain passwords.
The example references the default IDM private key of the self-signed key pair generated at setup time.
certificate-subject-dnThe certificate subject DN for the IDM public key.
The DS plugin encrypts JSON objects with the IDM public key, so this must match the certificate for the IDM private key specified for the
private-key-aliasproperty.The example shows the subject DN of the default IDM self-signed certificate.
ssl-cert-nicknameThe alias of the DS TLS certificate used to authenticate to IDM.
The example uses the default DS server certificate generated at setup time.
key-manager-providerThe provider for the keystore where DS finds its TLS key pair specified in
ssl-cert-nickname.The example uses the default DS provider configured at setup time.
trust-manager-providerThe provider for the keystore where DS finds the IDM public key specified in
certificate-subject-dn.The example uses the default DS provider configured at setup time, and updated in Enable DS to Trust the IDM Certificate.
password-attributeThe name of the password field in the JSON that DS sends to IDM for a password change.
This attribute type must be defined in the managed object schema in IDM, and it must have either the user password or auth password syntax.
attribute-typeLDAP attributes that the DS plugin sends to IDM with the password. IDM can use these to uniquely identify the user, even if the user’s account has moved.
If no attribute types are specified, DS sends only the DN and the new password to IDM.
query-idThe query-id for the patch-by-query request.
Leave this setting as shown.
log-fileThe DS directory where the plugin writes log files containing encrypted passwords before notifying IDM.
This setting has no effect in the example, where the
update-intervalis zero seconds.update-intervalThe interval at which the DS plugin sends password changes to IDM.
If this value is zero, the plugin sends updates synchronously. No encrypted passwords are stored in the configured
log-filedirectory. The plugin does not retry failed requests, irrespective of therequest-retry-attemptssetting.request-retry-attemptsThe number of times the plugin attempts a synchronization request if the first attempt fails. If this value is zero, the request is not retried. If the value is greater than zero, the plugin retries the specified number of times before giving up and removing the request from its queue.
When a request fails due to a transient condition, such as failure to contact IDM, or a connection timeout, the plugin does not decrement the number of retry attempts. The plugin logs a message with the reason the request failed, and continues to retry until IDM responds.
-
Restart DS for the new configuration to take effect:
/path/to/opendj/bin/stop-ds --restart
-
Update DS password policies to use the password synchronization plugin.
The following example updates the default DS password policy:
/path/to/opendj/bin/dsconfig \
set-password-policy-prop \
--policy-name "Default Password Policy" \
--set account-status-notification-handler:"OpenIDM Notification Handler" \
--hostname localhost \
--port 4444 \
--bindDN uid=admin \
--bindPassword password \
--usePkcs12TrustStore /path/to/opendj/config/keystore \
--trustStorePassword:file /path/to/opendj/config/keystore.pin \
--no-prompt
For details on configuring DS password policies, refer to Passwords in the DS Security Guide.
Configure IDM for password synchronization
The password synchronization plugin uses client certificate authentication to authenticate to IDM. You must also update your security configuration to add the IDM key alias.
-
If your authentication configuration does not already include client certificate authentication, configure it as follows:
-
Add the
CLIENT_CERTauthentication module to your authentication configuration. -
Set the
allowedAuthenticationIdPatternsproperty to the certificate DN of the DS SSL certificate (ssl-key-pairby default). -
Add
internal/role/openidm-certto the array ofdefaultUserRoles.
The following example assumes that you are using the default DS
ssl-key-paircertificate that has a certificate subject DN ofCN=DS, O=ForgeRock:"authModules" : [ ... { "name" : "CLIENT_CERT", "properties" : { "queryOnResource" : "managed/user", "defaultUserRoles" : [ "internal/role/openidm-cert", "internal/role/openidm-authorized" ], "allowedAuthenticationIdPatterns" : [ ".*CN=DS, O=ForgeRock.com.*" ] }, "enabled" : true }, ... ]jsonFor more information about client certificate authentication, refer to CLIENT_CERT.
-
-
Update the IDM secret store (
conf/secrets.json) to add the alias used in theprivate-key-aliasplugin setting to theidm.defaultsecretId:"mappings": [ { "secretId" : "idm.default", "types": [ "ENCRYPT", "DECRYPT" ], "aliases": [ "&{openidm.config.crypto.alias|openidm-sym-default}", "openidm-localhost" ] }, ... ]jsonFor more information about secret stores, refer to Secret stores.
For authentication with AM bearer tokens
-
Extract the .zip file contents to the DS identity store installation directory:
unzip ~/Downloads/DS-IDM-account-change-notification-handler-7.4.zip -d /path/to/opendj-identity/
-
Configure the password synchronization plugin to use AM bearer token authentication:
/path/to/opendj-identity/bin/dsconfig \
create-account-status-notification-handler \
--type openidm \
--handler-name "OpenIDM Notification Handler" \
--set certificate-subject-dn:"CN=openidm-localhost,O=OpenIDM Self-Signed Certificate,OU=None,L=None,ST=None,C=None" \
--set enabled:true \
--set attribute-type:entryUUID \
--set attribute-type:uid \
--set trust-manager-provider:PKCS12 \
--set key-manager-provider:PKCS12 \
--hostname identities.example.com \
--port 4445 \
--bindDn uid=admin \
--trustAll \
--bindPassword str0ngAdm1nPa55word \
--set log-file:logs/pwsync \
--set password-attribute:password \
--set query-id:for-userName \
--set private-key-alias:openidm-localhost \
--set openidm-url:https://openidm-localhost:8445/openidm/managed/user \
--set oauth2-access-token-url:http://am.example.com:8080/openam/oauth2/realms/root/access_token \
--set oauth2-scope:"openid fr:idm:*" \
--set oauth2-client-id:ds-password-sync-plugin \
--set oauth2-client-secret:ds-password-sync-plugin \
--set request-retry-attempts:5000 \
--set update-interval:5s \
--no-prompt
The Openidm Account Status Notification Handler was created successfully
Adapt the above settings to match your DS, IDM, and AM deployments. -
Restart DS for the new configuration to take effect:
/path/to/opendj-identity/bin/stop-ds --restart
-
Configure the DS password policy to use the password synchronization plugin. The following example updates the default DS password policy:
/path/to/opendj-identity/bin/dsconfig \
set-password-policy-prop \
--policy-name "Default Password Policy" \
--set account-status-notification-handler:"OpenIDM Notification Handler" \
--hostname identities.example.com \
--port 4445 \
--bindDN uid=admin \
--bindPassword str0ngAdm1nPa55word \
--usePkcs12TrustStore /path/to/opendj-identity/config/keystore \
--trustStorePassword:file /path/to/opendj-identity/config/keystore.pin \
--no-prompt
For details on configuring DS password policies, refer to Passwords in the DS Security Guide .
-
Generate an AM bearer token. For example:
curl -k \ --request POST \ --user "ds-password-sync-plugin:ds-password-sync-plugin" \ --data "grant_type=client_credentials" \ --data "scope=openid fr:idm:*" \ "http://am.example.com:8080/openam/oauth2/realms/root/access_token" { "access_token": "access_token", "scope": "openid fr:idm:*", "id_token": "id_token", "token_type": "Bearer", "expires_in": 3599 } -
Optionally, to test the AM bearer token, create a new managed user using the token as the authorization. For example:
curl -v \
--header "Authorization: Bearer access_token" \
--header "accept: application/json" \
--header "Accept-API-Version: resource=1.0" \
--header "Content-Type: application/json" \
--request POST "http://openidm-localhost:8081/openidm/managed/user?_action=create" \
--data '{"userName":"jdoe", "password": "6fNcHgBF", "mail": "jdoe@example.com", "sn": "Doe", "givenName": "Jane"}'
{
  "_id": "7884b8ab-a226-4ee5-b9b9-0718f5a19335",
  "_rev": "00000000f527116e",
  "userName": "jdoe",
  "accountStatus": "active",
  "givenName": "Jane",
  "sn": "Doe",
  "mail": "jdoe@example.com"
}
Test the DS plugin
With the plugin installed and configured, and with secure communications enabled between DS and IDM, you can test that the setup has been successful as follows:
-
Change a user password in DS:
/path/to/opendj/bin/ldappasswordmodify \
--hostname localhost \
--port 1636 \
--useSsl \
--usePkcs12TrustStore /path/to/opendj/config/keystore \
--trustStorePassword:file /path/to/opendj/config/keystore.pin \
--bindDN uid=admin \
--bindPassword password \
--authzID dn:uid=bjensen,ou=people,dc=example,dc=com \
--newPassword Chngth5pwd
The LDAP password modify operation was successful
The message
The LDAP password modify operation was successfulonly indicates that the password change succeeded for DS. This does not mean that DS has propagated the change to IDM.When you have successfully updated the password in DS, DS attempts to synchronize the change to the corresponding IDM managed user account.
-
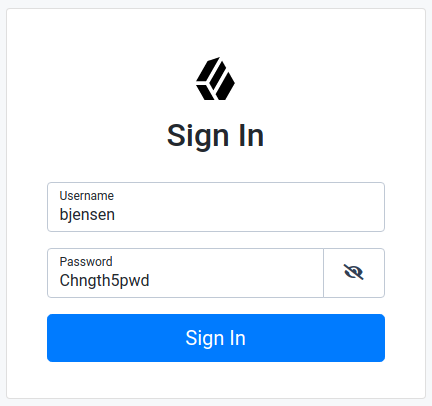
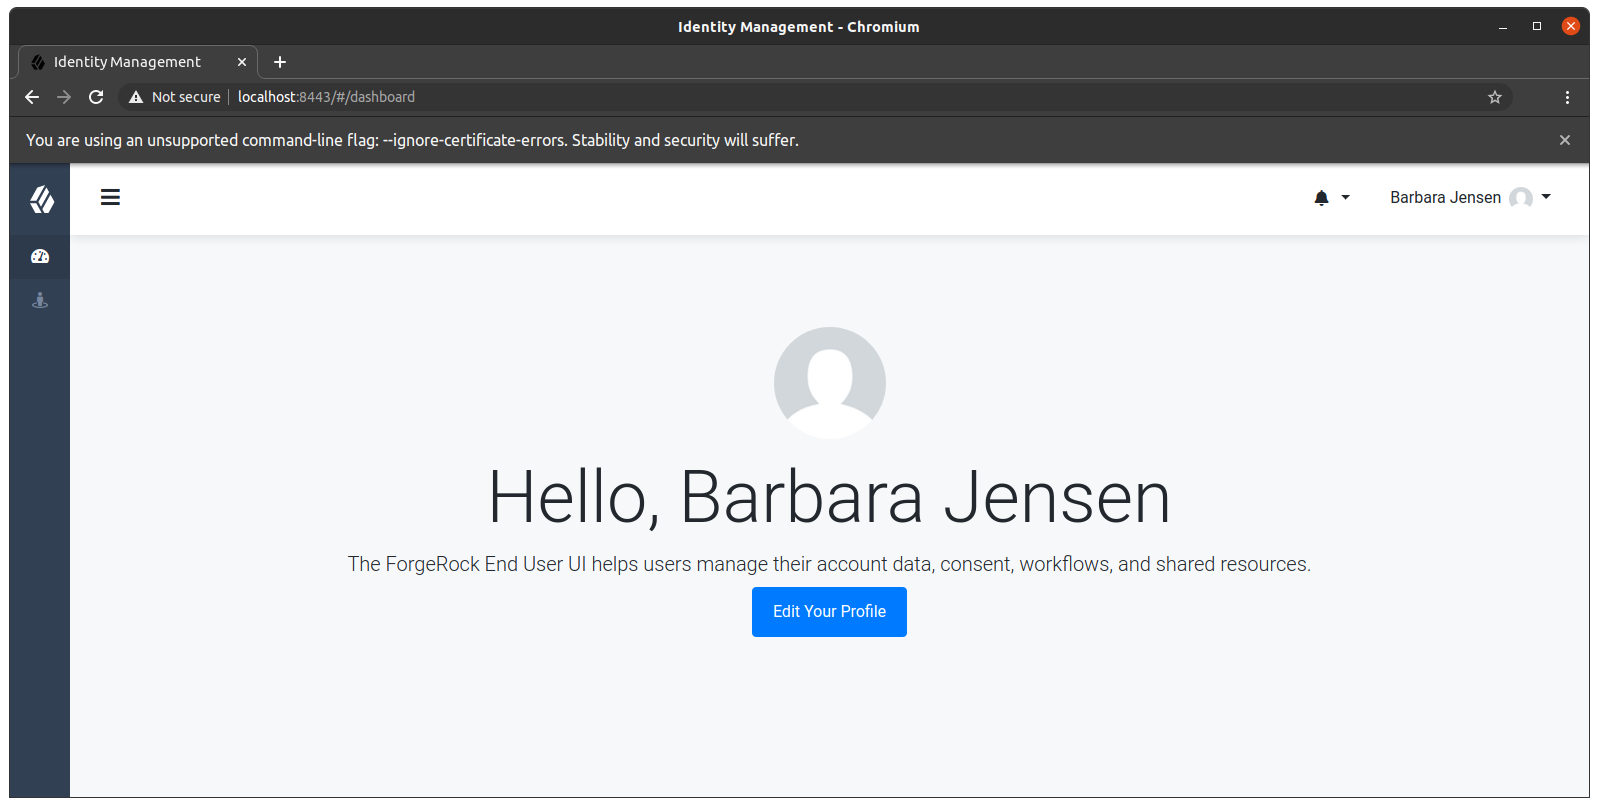
You should now be able to log in to the Self Service UI (https://localhost:8443/#login/) as that user ID with the new password.
Show login process
chromium --ignore-certificate-errors https://localhost:8443/#login
Update the DS plugin
Additional steps may be necessary when updating the DS password synchronization plugin after upgrading DS. Check the corresponding Knowledge Base article for more information.
Uninstall the DS plugin
To uninstall the plugin, change the DS configuration as follows:
-
Reset your DS password policy configuration so that it no longer uses the password synchronization plugin.
The following command resets the default password policy:
/path/to/opendj/bin/dsconfig \
set-password-policy-prop \
--policy-name "Default Password Policy" \
--reset account-status-notification-handler \
--hostname localhost \
--port 4444 \
--bindDN uid=admin \
--bindPassword password \
--usePkcs12TrustStore /path/to/opendj/config/keystore \
--trustStorePassword:file /path/to/opendj/config/keystore.pin \
--no-prompt
-
Delete the IDM Notification Handler from the DS configuration:
/path/to/opendj/bin/dsconfig \
delete-account-status-notification-handler \
--handler-name "OpenIDM Notification Handler" \
--hostname localhost \
--port 4444 \
--bindDN uid=admin \
--bindPassword password \
--usePkcs12TrustStore /path/to/opendj/config/keystore \
--trustStorePassword:file /path/to/opendj/config/keystore.pin \
--no-prompt
The Account Status Notification Handler was deleted successfully
-
Remove the password synchronization plugin from the DS extensions:
rm /path/to/opendj/lib/extensions/opendj-openidm-account-change-notification-handler
-
Restart DS for the new configuration to take effect:
/path/to/opendj/bin/stop-ds --restart
Synchronize passwords with Active Directory
Use the Active Directory (AD) password synchronization plugin to synchronize passwords between IDM and Active Directory (on systems running at least Microsoft Windows Server 2012 R2).
Install the plugin on Active Directory domain controllers (DCs) to intercept password changes, and send the password values to IDM over an encrypted channel. You must have Administrator privileges to install the plugin. In a clustered Active Directory environment, you must install the plugin on all DCs.
Install the Active Directory password synchronization plugin
The following steps install the password synchronization plugin on an Active Directory server:
-
Download the Active Directory password synchronization plugin.
-
Launch the installation wizard using one of the following methods:
-
In Windows Explorer, double-click the ad-passwordchange-handler-1.7.0.exe file.
-
From a Powershell command-line, enter the executable name (
.\ad-passwordchange-handler-1.7.0.exe), and press Enter.When starting the installation wizard from the command-line, the following options are available:
-
To save the settings in a configuration file, use the
/saveinfswitch:PS C:\path\to\dir> .\ad-passwordchange-handler-1.7.0.exe /saveinf=C:\temp\adsync.inf -
If you have a configuration file with installation parameters, you can install the password plugin in silent mode as follows:
PS C:\path\to\dir> .\ad-passwordchange-handler-1.7.0.exe /verysilent /loadinf=C:\temp\adsync.inf
-
-
-
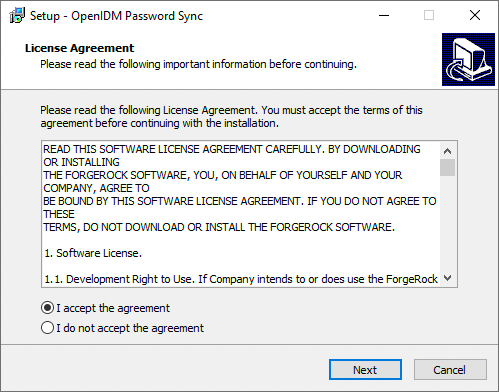
In the Setup - OpenIDM Password Sync window, on the License Agreement page, you must accept the license agreement to continue, and then click Next.
Show Me
-
On the OpenIDM Information: Connection page, enter the applicable information in the following fields, and click Next.
Show Me
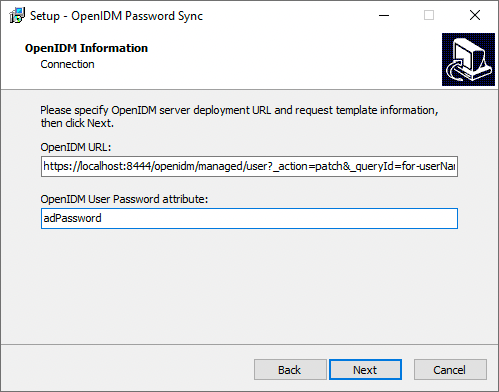
OpenIDM URL
The URL where IDM is deployed, including the query that targets each user account. For example:
https://localhost:8444/openidm/managed/user?_action=patch&_queryFilter=userName+eq+'${samaccountname}'OpenIDM User Password attribute
The password attribute for the
managed/userobject, such asadPassword.If the
passwordattribute does not exist in the IDMmanaged/userobject, the password sync service will return an error when it attempts to replay a password update that has been made in Active Directory. If your managed user objects do not include passwords, you can add anonCreatescript to the Active Directory > Managed Users mapping that sets an empty password when managed user accounts are created. The following excerpt of a samplesync.jsonfile shows such a script in the mapping:"mappings" : [ { "name" : "systemAdAccounts_managedUser", "source" : "system/ad/account", "target" : "managed/user", "properties" : [ { "source" : "sAMAccountName", "target" : "userName" } ], "onCreate" : { "type" : "text/javascript", "source" : "target.password=''" }, ... } ]jsonThe onCreate script creates an empty password in the
managed/userobject, so that the password attribute exists and can be patched. -
On the OpenIDM Information: Authentication page, enter the applicable information in the following fields, and click Next.
Show Me
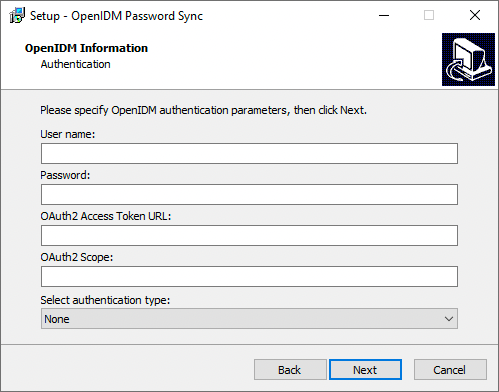
User name
An administrative user that can authenticate to IDM. For example,
openidm-admin.Password
The above, specified user’s password.
OAuth2 Access Token URL
If you are using the authentication type
OAuth2 Access Token, enter the token URL. For example:https://am.example.com/am/oauth2/realms/root/access_token
OAuth2 Scope
If you are using the authentication type
OAuth2 Access Token, enter the OAuth2 token scope. For examplefr:idm:*.Select authentication type
Select the authentication type that Active Directory will use to authenticate to IDM:
-
To use plain HTTP authentication, select OpenIDM Header.
-
To use mutual SSL authentication, select Certificate.
-
To use AM bearer tokens, select OAuth2 Access Token.
-
-
If you selected Certificate as the authentication type, complete this step; otherwise, skip to the next step.
On the OpenIDM Information: Certificate Authentication page, enter the applicable information in the following fields, and click Next.
Show Me
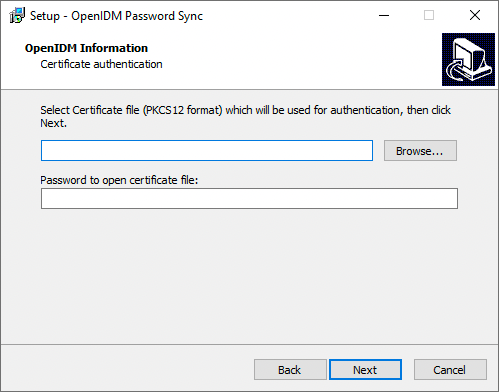
Select Certificate file...
Browse to select the certificate file that Active Directory will use to authenticate to IDM.
The certificate file must be configured with an appropriate encoding, cryptographic hash function, and digital signature. The password synchronization plugin can read a public or a private key from a PKCS #12 archive file.
For production purposes, you should use a certificate that has been issued by a certificate authority. For testing purposes, you can generate a self-signed certificate.
You must also import the certificate into the IDM
keystore.jceksfile. On the machine that is running IDM, enter the following command:keytool \ -importkeystore \ -srckeystore /path/to/ad-pwd-plugin-localhost.p12 \ -srcstoretype PKCS12 \ -destkeystore keystore.jceks \ -deststoretype JCEKS
Private key alias
The certificate alias, such as
ad-pwd-plugin-localhost. The password sync plugin sends the alias when communicating with IDM, which uses the alias to retrieve the corresponding private key in IDM’s keystore.Update the IDM secret store (
conf/secrets.json) to add this certificate alias to theidm.defaultsecretId:{ "stores" : [ { "name" : "mainKeyStore", "class" : "org.forgerock.openidm.secrets.config.FileBasedStore", "config" : { ... "mappings" : [ { "secretId" : "idm.default", "types" : [ "ENCRYPT", "DECRYPT" ], "aliases" : [ "&{openidm.config.crypto.alias|openidm-sym-default}", "ad-pwd-plugin-localhost" ] }, ... ] } }, ... ], ... }jsonFor more information about secret stores, refer to Secret stores.
Password to open certificate file
The keystore password (
changeit, in the previous example). -
On the Password Encryption page, enter the applicable information in the following fields, and click Next.
Show Me
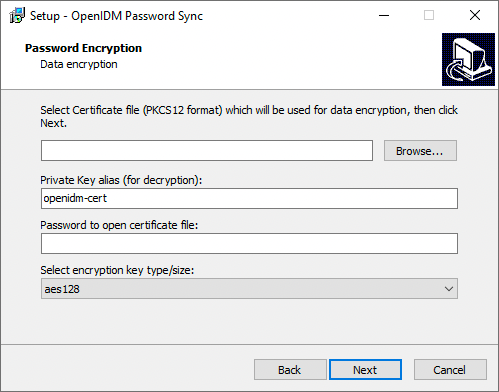
Select Certificate file...
Browse to select the certificate that will be used for password encryption. The certificate format must be PKCS #12.
The certificate file must be configured with an appropriate encoding, cryptographic hash function, and digital signature. The plugin can read a public or a private key from a PKCS #12 archive file.
For production purposes, you should use a certificate that has been issued by a certificate authority. For testing purposes, you can generate a self-signed certificate.
You must also import the certificate into the IDM truststore. On the machine that is running IDM, enter the following command:
keytool \
 -importkeystore \
 -srckeystore /path/to/ad-pwd-plugin-localhost.p12 \
 -srcstoretype PKCS12 \
 -destkeystore truststore \
 -deststoretype JKS
Private key alias
The certificate alias, such as
ad-pwd-plugin-localhost. The password sync plugin sends the alias when communicating with IDM, which uses the alias to retrieve the corresponding private key in IDM’s keystore.Update the IDM secret store (
conf/secrets.json) to add this certificate alias to theidm.defaultsecretId:"mappings": [ { "secretId": "idm.default", "types": [ "ENCRYPT", "DECRYPT" ], "aliases": [ "&{openidm.config.crypto.alias|openidm-sym-default}", "ad-pwd-plugin-localhost" ] }, ... } ]jsonFor more information about secret stores, refer to Secret stores.
Password to open certificate file
The password to access the PFX keystore file, such as
changeit, from the previous example.Select encryption...
The encryption standard to use when encrypting the password value (AES-128, AES-192, or AES-256).
-
On the Data Storage page, enter the applicable information in the following fields, and click Next.
Show Me
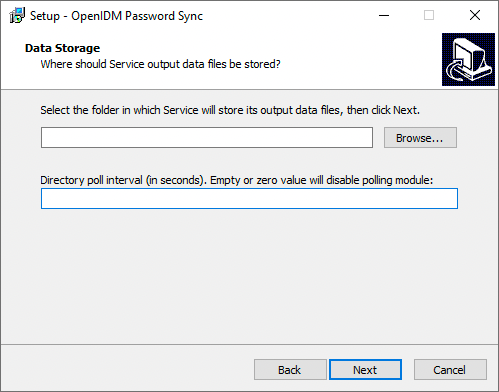
Select the folder in which Service will store its output data files
Browse to select the folder for data output files. The server should prevent access to this folder except for the
Password Sync service.The path name cannot include spaces. Directory poll interval (seconds)
The number of seconds between calls to check whether IDM is available. For example,
60, to poll IDM every minute. -
On the Log Storage page, enter the applicable information in the following fields, and click Next.
Show Me
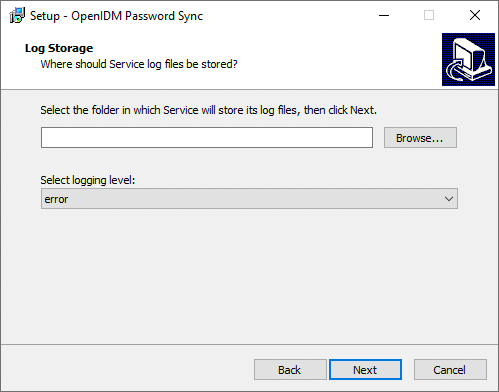
Select the folder in which Service will store its log files
Browse to select the folder for log files.
The path name cannot include spaces. Select logging level
The severity of messages to log:
error,info,warning,fatal, ordebug. -
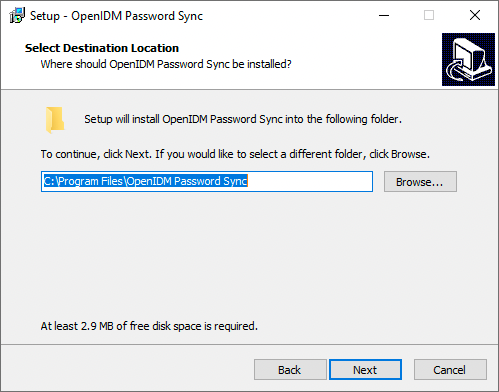
On the Select Destination Location page, browse to select the installation folder (default
C:\Program Files\OpenIDM Password Sync), and click Next.Show Me
-
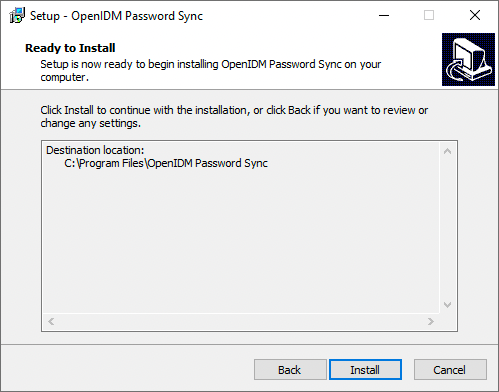
On the Ready to Install page, verify the details are acceptable, and click Install to continue. If you need to change any installation options, click Back.
Show Me
-
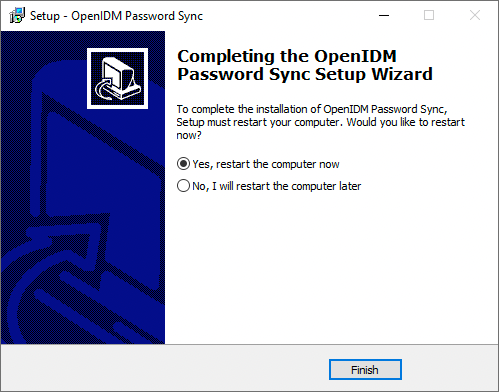
On the Completing the OpenIDM Password Sync Setup Wizard page, select one of the following, and click Finish:
Show Me
-
Yes, restart the computer now
-
No, I will restart the computer later
If you select this option, you must restart the computer before you continue.
-
-
If you selected
Certificateas the authentication type during setup, complete Add a Certificate to the Windows Certificate Store; otherwise, your setup is now complete.
Password synchronization should now be configured and working. To test that the setup was successful, change a user password in Active Directory. That password should be synchronized to the corresponding IDM managed user account, and you should be able to query the user’s own entry in IDM using the new password.
Generate a self-signed certificate
For production purposes, you should use a certificate that has been issued by a certificate authority. For testing purposes, you can generate a self-signed certificate.
-
On the Active Directory host, generate a private key, which will be used to generate a self-signed certificate with the alias
ad-pwd-plugin-localhost:> keytool.exe ^ -genkey ^ -alias ad-pwd-plugin-localhost ^ -keyalg rsa ^ -dname "CN=localhost, O=AD-pwd-plugin Self-Signed Certificate" ^ -keystore keystore.jceks ^ -storetype JCEKS Enter keystore password:changeit Re-enter new password: changeit Enter key password for <ad-pwd-plugin-localhost> <RETURN if same as keystore password>
-
Now use the private key, stored in the
keystore.jceksfile, to generate the self-signed certificate:> keytool.exe ^ -selfcert ^ -alias ad-pwd-plugin-localhost ^ -validity 365 ^ -keystore keystore.jceks ^ -storetype JCEKS ^ -storepass changeit -
Export the certificate. In this case, the
keytoolcommand exports the certificate in a PKCS #12 archive file format, used to store a private key with a certificate:> keytool.exe ^ -importkeystore ^ -srckeystore keystore.jceks ^ -srcstoretype jceks ^ -srcstorepass changeit ^ -srckeypass changeit ^ -srcalias ad-pwd-plugin-localhost ^ -destkeystore ad-pwd-plugin-localhost.p12 ^ -deststoretype PKCS12 ^ -deststorepass changeit ^ -destkeypass changeit ^ -destalias ad-pwd-plugin-localhost ^ -noprompt
-
The PKCS #12 archive file is named
ad-pwd-plugin-localhost.p12. Import the contents of the keystore contained in this file to the system that hosts IDM. To do so, import the PKCS #12 file into the IDM keystore file, namedtruststore, in the/path/to/openidm/securitydirectory.
Add a certificate to the Windows certificate store
If you selected Certificate as the authentication type during setup, you must complete this procedure.
|
The Password Sync Service uses Windows certificate stores to verify IDM’s identity. The certificate that IDM uses must therefore be added to the list of trusted certificates on the Windows machine.
In a production environment, use a certificate that has been issued by a certificate authority. For test purposes, you can use the self-signed certificate that is generated by IDM on first startup.
To add the IDM certificate to the list of trusted certificates, use the Microsoft Management Console:
-
Click the Start Menu, type mmc, and click mmc Run Command.
-
In the Console window, select File > Add/Remove Snap-in.
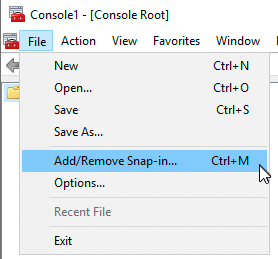
-
From the Available snap-ins area, select Certificates, and click Add >.
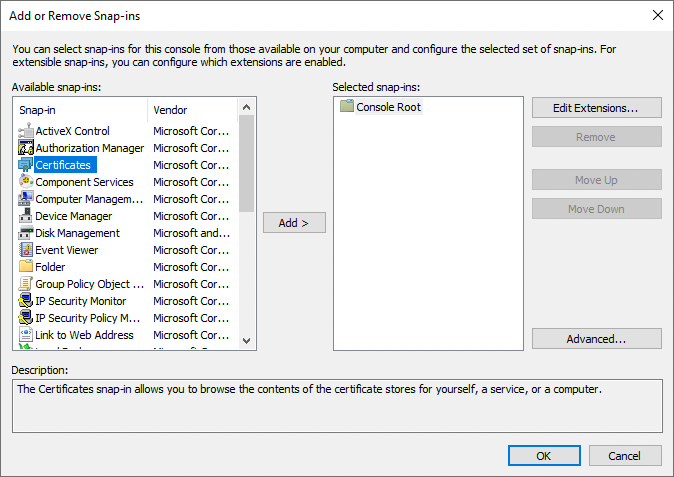
-
In the Certificates snap-in window, select My user account, and click Finish.
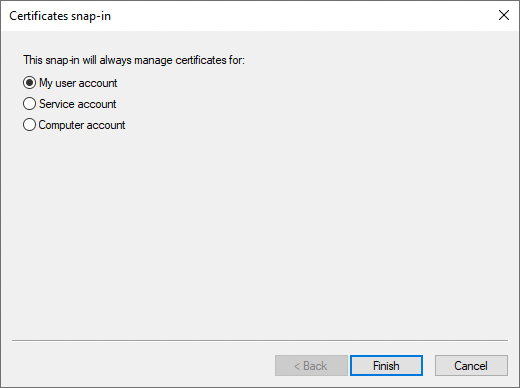
-
From the Available snap-ins area, select Certificates, and click Add >.
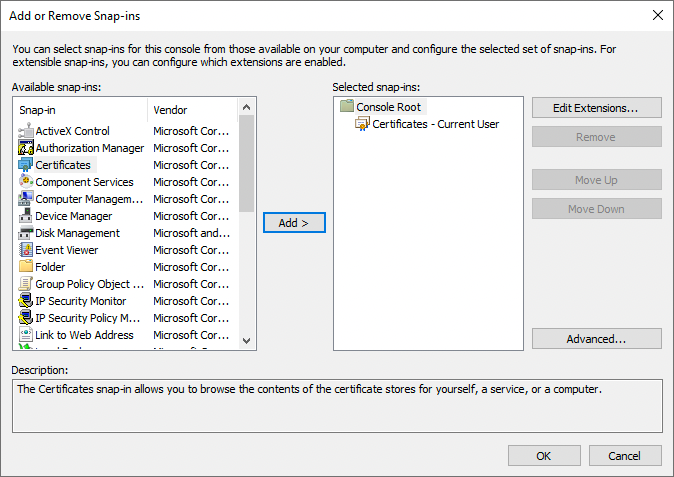
-
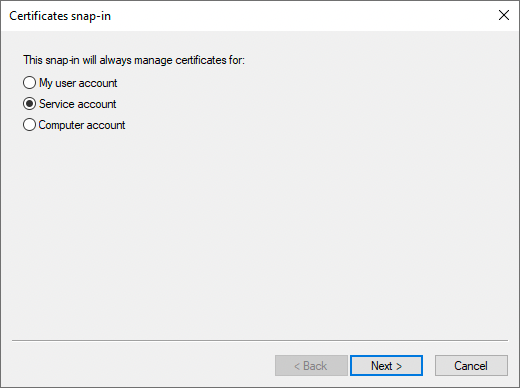
In the Certificates snap-in window, select Service account, and click Next >.
-
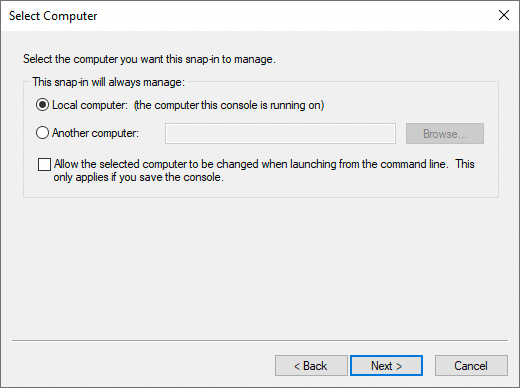
In the Select Computer window, select Local Computer, and click Next >.
-
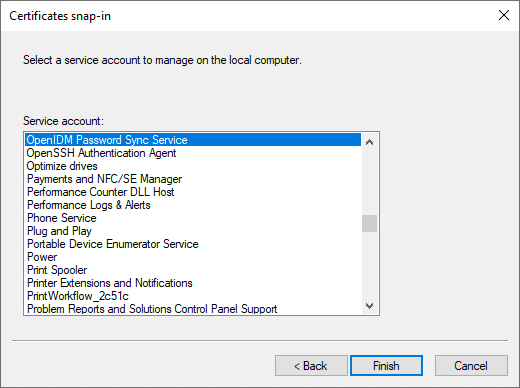
In the Cerificates snap-in window, select the service account OpenIDM Password Sync Service, and click Finish.
-
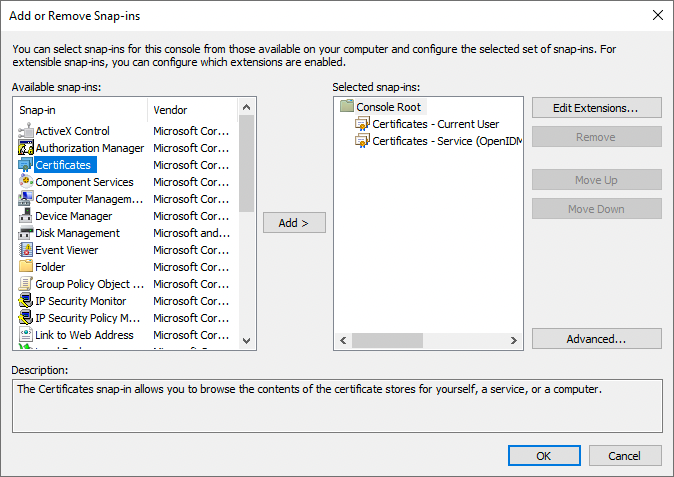
From the Available snap-ins area, select Certificates, and click Add >.
-
In the Certificates snap-in window, select Computer account, and click Next >.
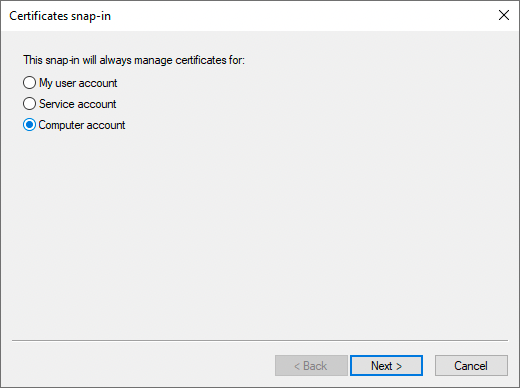
-
In the Select Computer window, select Local Computer, and click Finish.
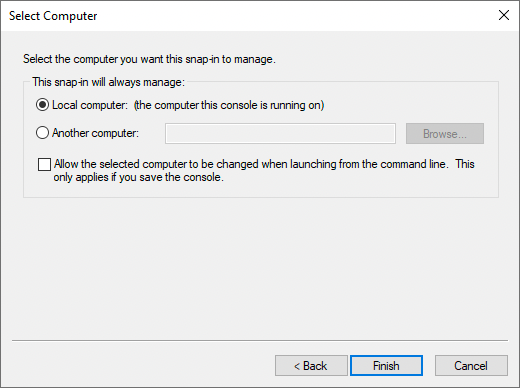
-
In the Add or Remove Snap-ins window, verify that you have three certificates in the Selected snap-ins area, and click OK. If you are missing any certificates, please review the earlier steps in this procedure, and add the missing certificate(s).
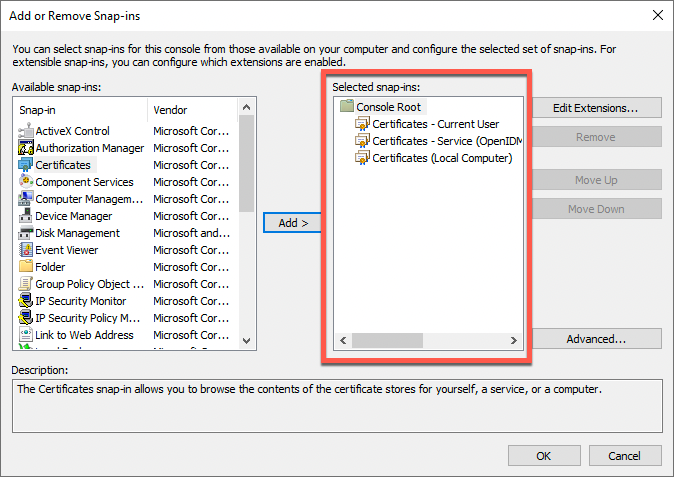
-
For each of the following nodes, import the certificate, as follows:
List of Nodes Certificates - Current User > Personal
Certificates - Current User > Trusted Root Certification Authorities
Certificates - Service > OpenIDM Password Sync\Personal
Certificates - Service > OpenIDM Password Sync\Trusted Root Certification Authorities
Certificates > Local Computer > Personal
Certificates > Local Computer > Trusted Root Certification Authorities
-
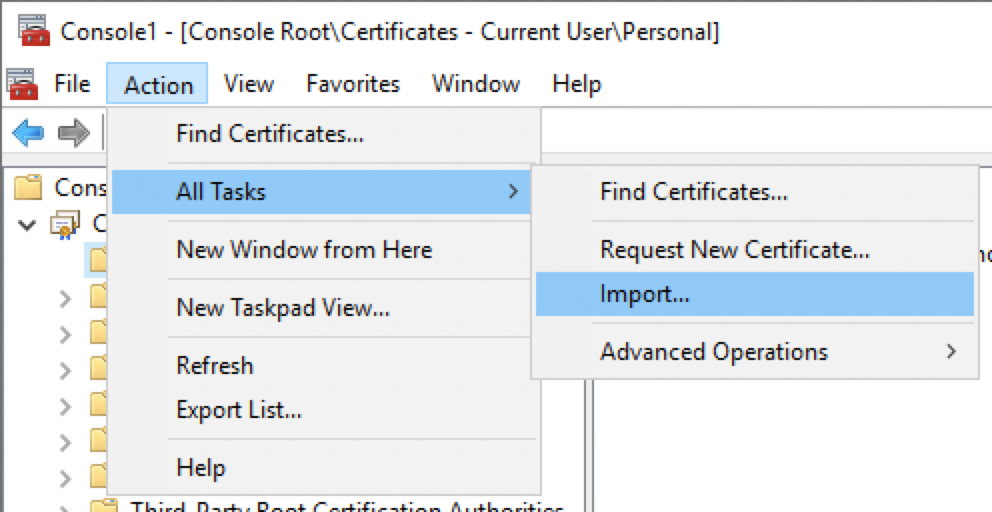
Expand the node, and select the appropriate item. For example, Certificates - Current User > Personal:
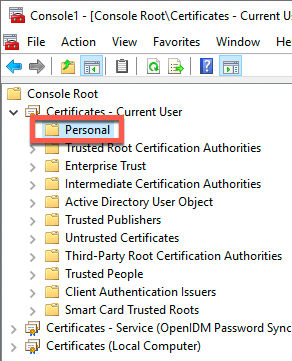
-
From the menu bar, select Action > All Tasks > Import.
-
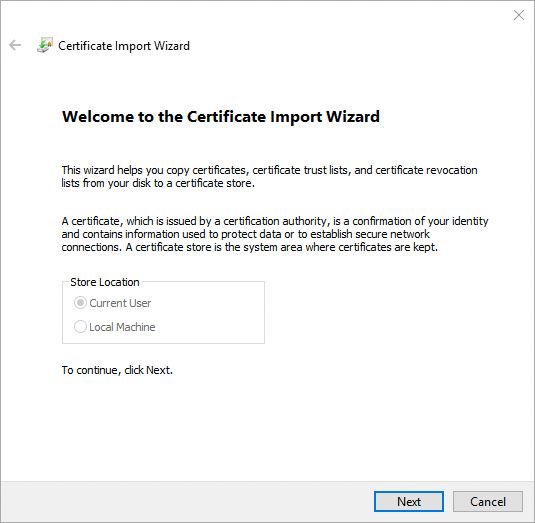
In the Certificate Import Wizard window, click Next.
-
On the File to Import page, click Browse, locate the IDM certificate, and then click Next. If you exported IDM’s self-signed certificate, the certificate is
openidm-localhost.crt.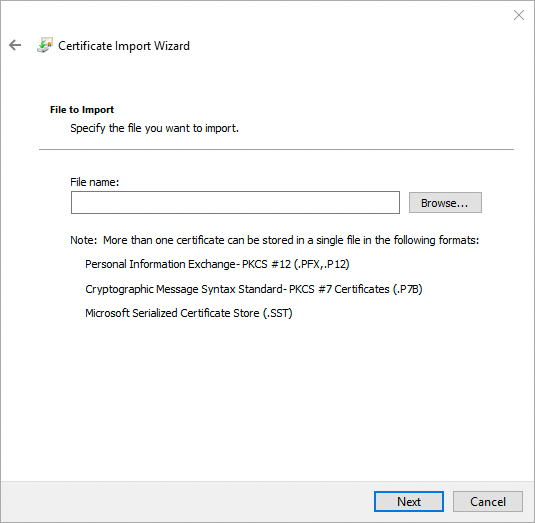
-
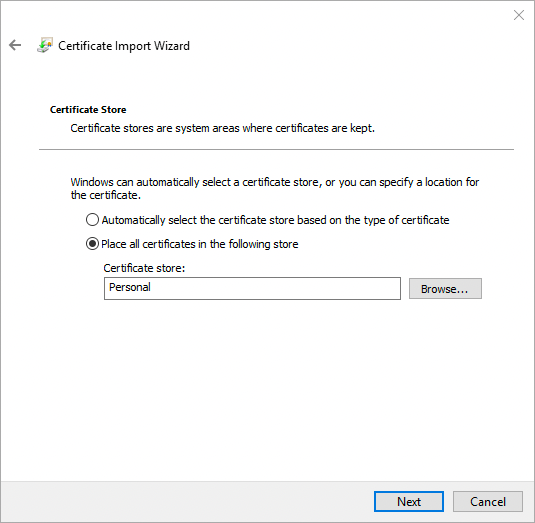
On the Certificate Store page, leave the default option selected, and click Next. For example:
-
On the final page of the wizard, review the details, and click Finish. For example:
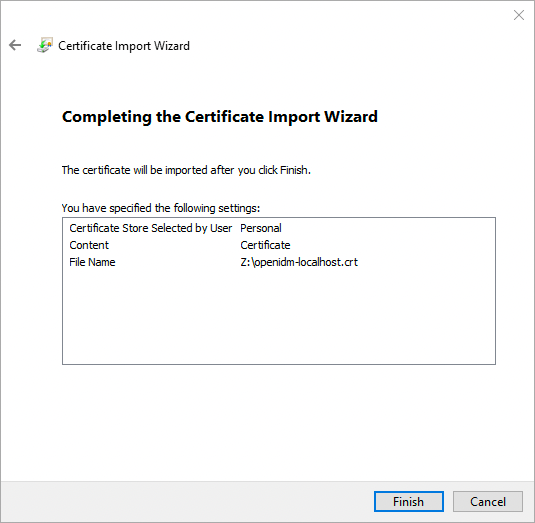
-
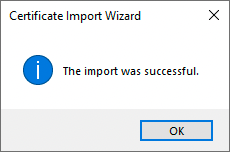
The Certificate Import Wizard window displays the success or failure of the import, click OK.
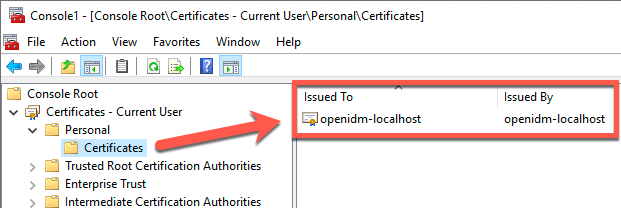
The main window of the Microsoft Management Console now displays the added certificate in a sub-node. For example:
Make sure to repeat this sub-procedure for all required nodes.
-
Upgrade the Active Directory password synchronization plugin
To upgrade the Active Directory password synchronization plugin, you can run the installer over an existing configuration. For more information about installation, refer to Install the Active Directory password synchronization plugin.
Configure the Active Directory password synchronization plugin
If you need to change any settings after installation, access the settings using the Registry Editor. For the full list of available registry key values, refer to Registry Key Values. For information about creating registry keys, refer to the corresponding Windows documentation.
|
After you change a registry key value associated with the password synchronization plugin, perform validation. |
Create or edit registry key values
-
Click the Start Menu, type registry, and click Registry Editor Desktop app.
-
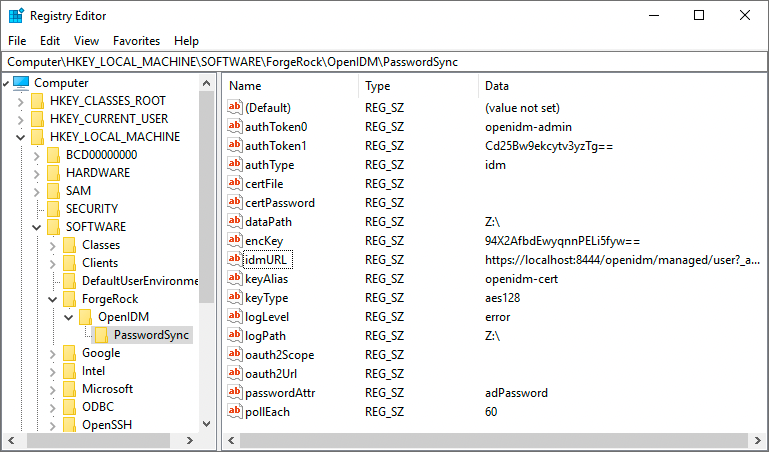
In the left pane of Registry Editor, expand the node:
HKEY_LOCAL_MACHINE > SOFTWARE > ForgeRock > OpenIDM > PasswordSyncFor Example:
-
From here you can edit the registry key values, or create new ones.
-
To edit a value, double-click any item in the Name column. An Edit String window displays.
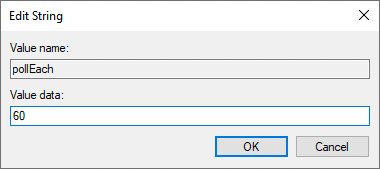
-
To create a new string value, right-click the last folder of the expanded node (PasswordSync), select New > String Value, and enter the applicable information.
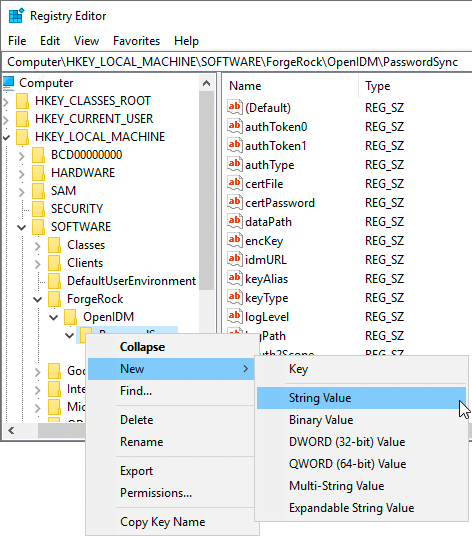
-
Registry key values
Authentication method
The following registry key values let you customize the authorization method between the plugin and IDM.
| Key Value | Description | ||
|---|---|---|---|
(Required) |
The authentication type:
|
||
(Optional) |
When using |
||
(Required) |
The username or certificate path for authentication. For example, for plain HTTP or SSL authentication, For certificate authentication, set |
||
(Required) |
The authentication password. For example, for plain HTTP or SSL authentication, For certificate authentication, set |
||
(Optional) |
The encryption key used to encrypt the values of
|
Password encryption
The following registry key values let you customize the encryption method for captured passwords.
| Key Value | Description |
|---|---|
(Required) |
The path to the keystore used for encrypting captured passwords. For example, |
(Required) |
The |
(Required) |
The |
(Optional) |
The |
Connection & synchronization
The password synchronization plugin assumes that the Active Directory user attribute is sAMAccountName. Although the default attribute works in most deployments, you can specify an alternative attribute. For an example, refer to Example userAttribute Modification.
| Key Value | Description | ||
|---|---|---|---|
(Optional) |
The attribute that identifies the Active Directory user. The password synchronization plugin assumes that the Active Directory user attribute is |
||
(Optional) |
The search filter for locating Active Directory users. Can only be used if
|
||
(Required) |
The URL where IDM is deployed, including the query that targets each user account. |
||
(Required) |
The password attribute for the |
||
(Optional) |
For the authentication type https://am.example.com/am/oauth2/realms/root/access_token |
||
(Optional) |
For the authentication type |
||
(Optional) |
The bind BaseDN used in the Active Directory user search. Use to set a different base dn for attribute search. Default value is derived from Can only be used if |
||
(Optional) |
The bind password used in the Active Directory user search. Can only be used if |
||
(Optional) |
The bind user used in the Active Directory user search. Can only be used if |
||
(Optional) |
Additional control for the behavior of
|
IDM availability
When IDM is unavailable, or when an update fails, the password synchronization plugin stores the user password change in a JSON file on the Active Directory system and attempts to resend the password change at regular intervals.
You can modify this behaviour with the following registry key values:
| Key Value | Description |
|---|---|
(Required) |
The location where the password synchronization plugin stores the unsent changes. When any unsent changes have been delivered successfully, files in this path are deleted. The plugin creates one file for each user. This means that if a user changes their password three times in a row, you will refer to only one file containing the last change. |
(Optional) |
The maximum number of password change retry attempts after which the plugin stops attempting to send changes. |
(Optional) |
The length of time (in milliseconds) before the plugin stops attempting a connection. |
(Optional) |
The interval (in seconds) between each attempt to send changes. |
Logging configuration
| Key Value | Description | ||
|---|---|---|---|
(Optional) |
The path to the log file.
|
||
(Optional) |
The maximum log size (in Bytes) before the log is rotated. When the log file reaches this size, it is renamed |
||
(Optional) |
The severity of messages to log:
|
Other
| Key Value | Description | ||
|---|---|---|---|
(Optional) |
Infinite password sync loop prevention. When Active Directory syncs passwords with IDM bidirectionally, it is possible to enter an infinite loop, where Active Directory and IDM are constantly updating the password and telling the other system to do the same. To help prevent this situation, you can set the
|
Registry key value encryption
For security reasons, you should encrypt the values of the authToken1 and certPassword keys. During password synchronization plugin installation, they are encrypted automatically. If you need to change the values, you can encrypt the values manually by setting the encKey registry key value.
If you do not want to encrypt the values of the authToken1 and certPassword keys, you must delete encKey from the registry. In this case, all password attributes can be set in cleartext (unencrypted).
|
To encrypt the values of the authToken1 and certPassword:
-
Optionally, generate a new encryption key; otherwise, you can use the existing encryption key and skip this step.
PS C:\Program Files\OpenIDM Password Sync> .\idmsync.exe --key keyValue -
Encrypt the sensitive registry key values:
PS C:\Program Files\OpenIDM Password Sync> .\idmsync.exe --encrypt "keyValue" "authToken1Value"

authToken1-keyValue
PS C:\Program Files\OpenIDM Password Sync> .\idmsync.exe --encrypt "keyValue" "certPasswordValue"

certPasswordValue-keyValue
-
Replace the existing values of
encKey,authToken1andcertPasswordkeys with the generated values.For instructions on editing registry key values, refer to Create or Edit Registry Key Values.
Registry key value validation
After you change a registry key value associated with the password synchronization plugin, run path\to\idmsync.exe --validate to perform validation. For example:
PS C:\Program Files\OpenIDM Password Sync> .\idmsync.exe --validate

OpenIDM Password Sync Service

Validating configuration parameters as user "Administrator"

Logging parameters:
logPath:
   "Z:\" has read/write access permissions.

logLevel:
   "error" is a valid logLevel entry.

logSize:
   "" is not a valid logSize entry. Will use default 5120000 byte file size limit.

Service and data storage parameters:
dataPath:
   "Z:\" has read/write access permissions.

pollEach:
   "75" is a valid pollEach entry.

OpenIDM service parameters:
idmURL:
   "https://localhost:8444/openidm/managed/user?_action=patch&_queryId=for-userName&uid=${samaccountname}" is a valid idmURL entry.

keyAlias:
   "openidm-cert" is a valid keyAlias entry.

passwordAttr:
   "adPassword" is a valid passwordAttr entry.

idm2Only:
   Service is configured to run with OpenIDM version 3.x or newer.

netTimeout:
   "" is not a valid netTimeout entry. Will use default 16 second network timeout.

authType, authToken0 and authToken1:
   Service is configured to use "OAuth2 Access Token" authentication
   "oauth2" is a valid authType entry.

Password encryption parameters:
certFile and certPassword:
"Z:\openidm-localhost.crt" file is a valid entry.Example userAttribute modification
The password synchronization plugin assumes that the Active Directory user attribute is sAMAccountName. The default attribute will work in most deployments. If you cannot use the sAMAccountName attribute to identify the Active Directory user, set the following registry keys on your Active Directory server, specifying an alternative attribute. The examples in the following table use the employeeId attribute instead of sAMAccountName.
For instructions on editing registry key values, refer to Create or Edit Registry Key Values.
| Key Value | Data |
|---|---|
|
|
|
|
|
|
Start or stop the plugin
The password synchronization plugin runs as OpenIDM Password Sync Service. You can start and stop the service using Windows Service Manager or the command line.
Windows Service Manager
-
Click the Start Menu, type services.msc, and click Services Desktop App.
-
In the Services windows, right-click OpenIDM Password Sync Service, and select the applicable option (Start, Stop, or Restart):
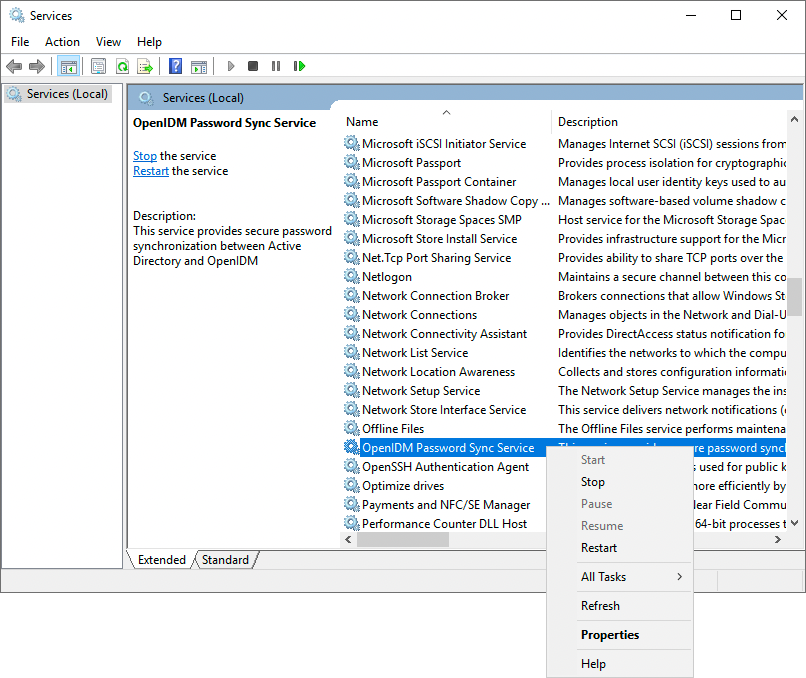
Command line
You can use the following commands to start and stop the service from the command line.
| The service will not start from the command line if any registry key value fails validation. |
PS C:\Program Files\OpenIDM Password Sync> .\idmsync.exe --startPS C:\Program Files\OpenIDM Password Sync> .\idmsync.exe --stopHelp command
The password synchronization plugin executable file includes a help command that prints the available command line options.
PS C:\Program Files\OpenIDM Password Sync> .\idmsync.exe --help

OpenIDM Password Sync Service usage:

install service:
 idmsync.exe --install

uninstall service:
 idmsync.exe --remove

start service:
 idmsync.exe --start

stop service:
 idmsync.exe --stop

query service:
 idmsync.exe --status

validate configuration:
 idmsync.exe --validate

generate encryption key:
 idmsync.exe --key

encrypt password:
 idmsync.exe --encrypt "key" "password"

build and version info:
idmsync.exe --versionUninstall the Active Directory password synchronization plugin
You can uninstall the Active Directory Password Synchronization plugin from multiple locations:
-
Uninstall from the Windows Control Panel (Control Panel > Programs and Features, select
OpenIDM Password Syncfrom the list and select Uninstall). -
Run the uninstaller (
unins000.exe) found in the OpenIDM Password Sync install directory (by default,C:\Program Files\OpenIDM Password Sync).
After the uninstaller finishes, Windows will prompt you to restart. Restart to complete the uninstall process.
Remove installed authentication certificates
If you selected to authenticate with mutual SSL authentication, you can manually remove the IDM certificates using the Microsoft Management Console:
-
Click the Start Menu, type mmc, and click mmc Run Command.
-
For each of the following nodes, expand the node, and delete the certificate.
List of Nodes Certificates - Current User > Personal
Certificates - Current User > Trusted Root Certification Authorities
Certificates - Service > OpenIDM Password Sync\Personal
Certificates - Service > OpenIDM Password Sync\Trusted Root Certification Authorities
Certificates > Local Computer > Personal
Certificates > Local Computer > Trusted Root Certification Authorities
-
If the OpenIDM Password Sync Service is still listed with stored certificates:
-
Select File > Add/Remove Snap-in.
-
From the Selected snap-ins area, select Certificates - OpenIDM Password Sync, and click Remove.
-
Click OK.
-