Manage access requests and request types
In Identity Governance, you can use an access request to grant, change, or revoke a user’s access
to a digital resource, such as an application or a role. A request type defines
each request and specifies the action to perform. For example, you can use the Grant Application
request type to give a user access to a new application, or the Modify User request type
to update their profile information.
As an administrator, you use the Requests page to manage all incoming access requests. You can track the status of each item, whether it’s pending, completed, suspended, or canceled, to ensure your organization processes all requests properly.
Requests
Administrators can manage requests on the Identity Governance requests page.
View and manage requests
-
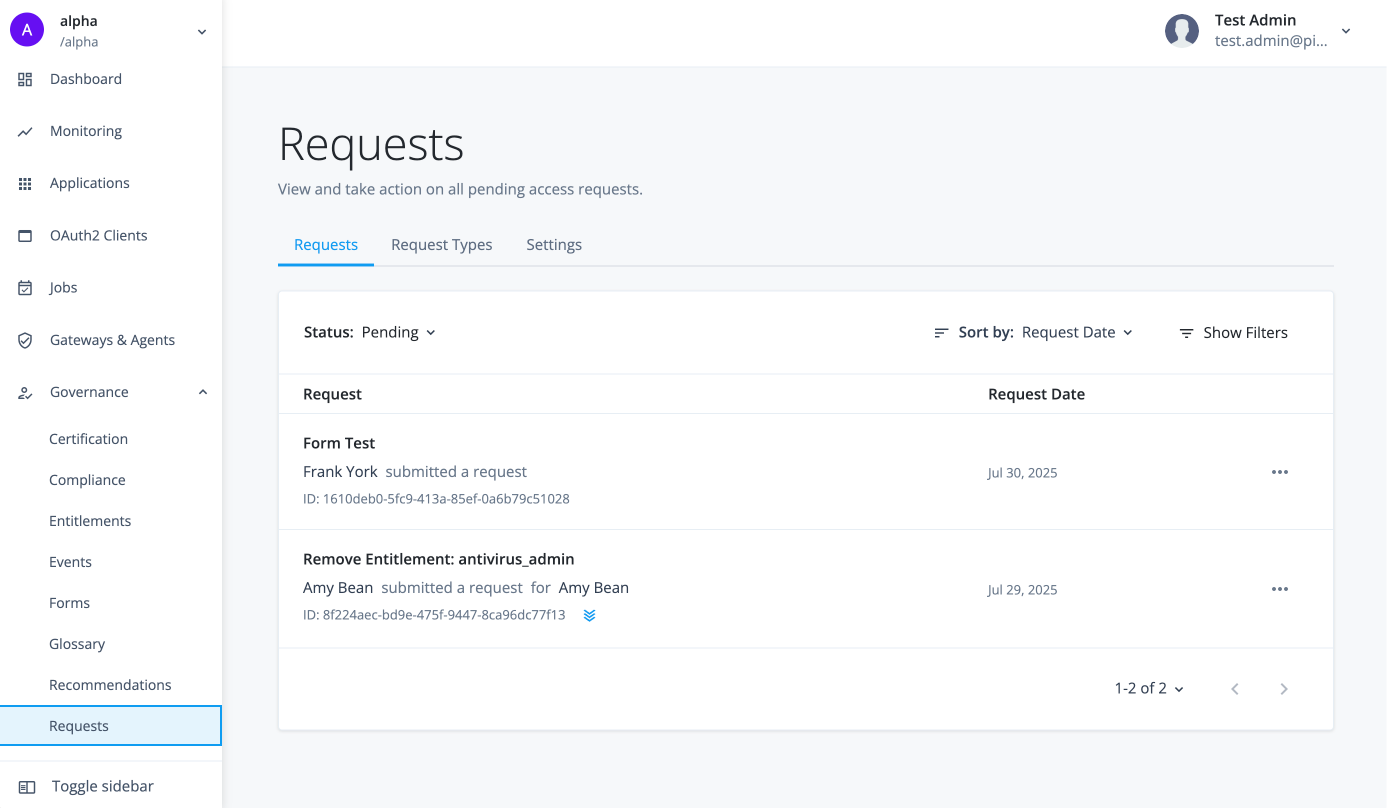
In the Advanced Identity Cloud admin console, go to Governance > Requests. The Requests page appears with a list of pending requests and the date of the each request.
-
By default, the requests page opens with a list of pending requests. You can use the following options to sort and filter the list:
-
Click Status to view Pending, Completed, Suspended, or Canceled requests.

-
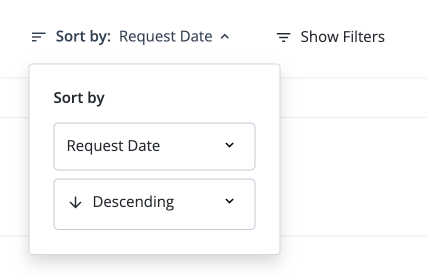
Click the sort menu (which defaults to Request Date) to reorder the requests on the page.
-
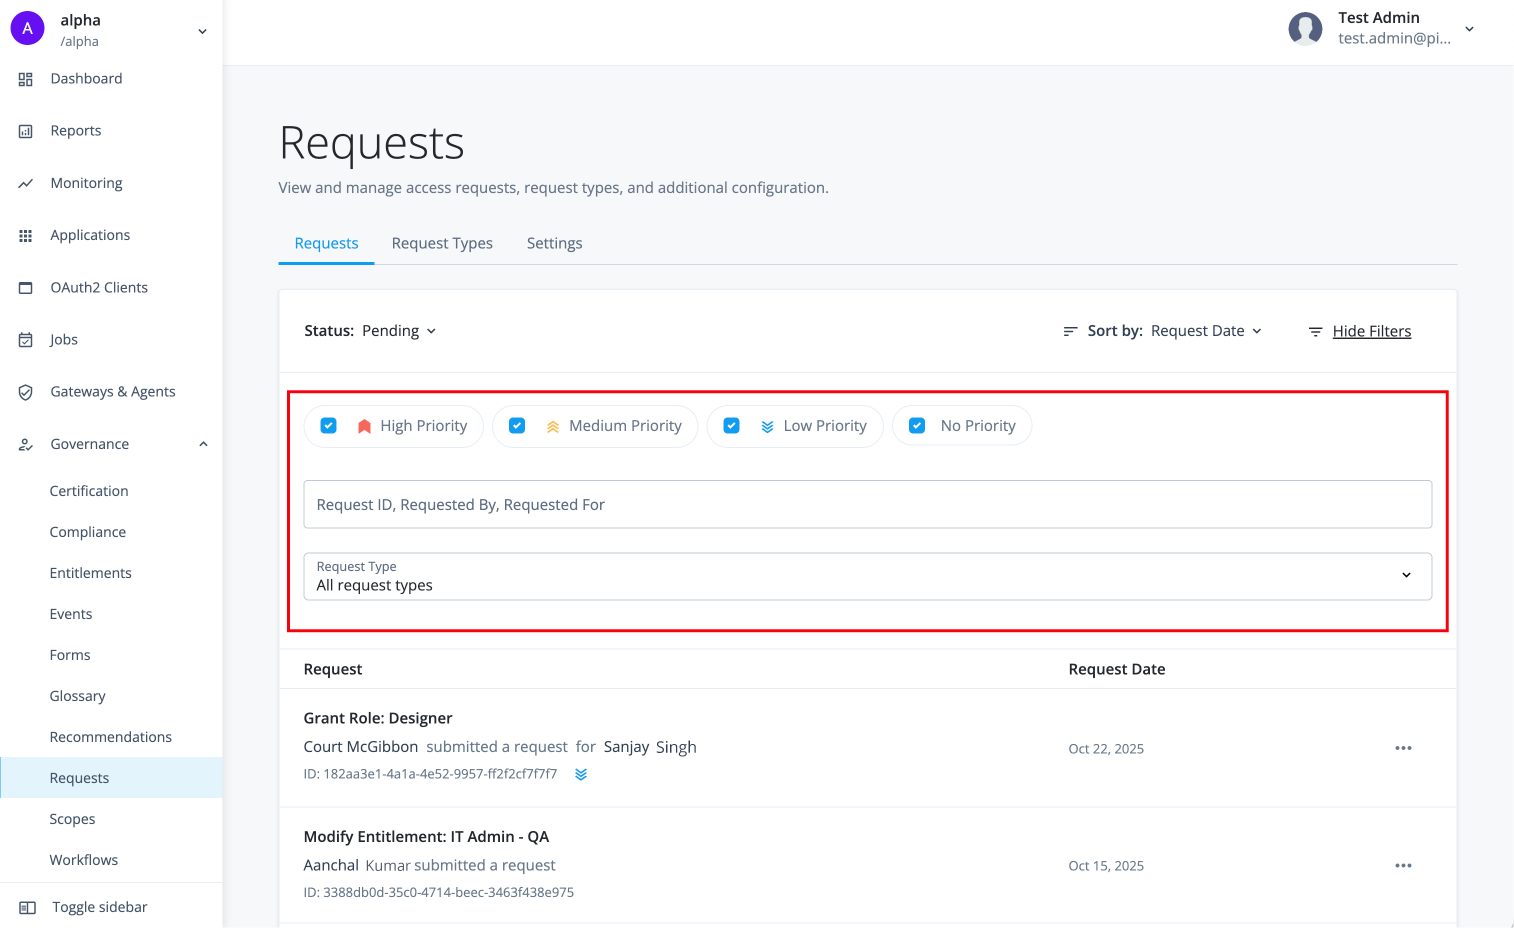
Click Show filters to filter the requests on the page. Select from these options:
-
Priority: High Priority, Medium Priority, Low Priority or No Priority
-
Request: Request ID, Requested By, Requested For
-
Request Type: All request types or an individual request type.
-
-
-
For any request, click ellipsis () to perform various tasks:
-
View Details: Opens a detailed view of the request so you can see all its information.
-
Forward: Sends the request to another person to review and approve.
-
Cancel Request: Stops the request and removes it from the pending queue.
-
View request details
-
In the Advanced Identity Cloud admin console, go to Governance > Requests.
-
On the Requests page, select a request to view its details.
-
On the Request Details page, the top bar displays general information about the request, including:
-
Status: Displays the current status of the request, such as
In Progress,Pending,Approved,Denied, orCompleted. -
Decision: Displays the final decision made on the request, such as
Pending,Approved, orDenied. -
Outcome: Displays the result of the request, such as
Pending,Provisioned, orNot Provisioned. -
Show Additional Details: If you click the link, the page displays additional request information, such as request ID, priority, justification, and external request ID generated from externally submitted requests.

-
The bottom half of the Request Details page contains the following tabs:
-
Details: Displays the request type, requested by, requested for, request date, and target application or role.
-
User: Displays the request’s detail when adding, modifying, or deleting a user.
-
Entitlement: Displays the entitlement source attributes from the targeted application and the glossary attributes.
-
Role: Displays the role’s detail information (name, description, owner, and so on), entitlements, and members.
-
-
Tracking: Displays a timeline of the request’s approval process, including who approved or denied it and when.
-
Comments: Displays any comments added to the request by the system, approvers, or reviewers during the approval process. If the request wasn’t provisioned, the error message appears here.
-
Tasks: Displays any tasks associated with the request, such as approvals or reviews.
The following image displays the Request Details page when an entitlement is requested:

The following image displays the Request Details page when a role is requested:

Cancel a request
-
In the Advanced Identity Cloud admin console, go to Governance > Requests.
-
On the Requests page, click the request you want to cancel.
-
Scroll down the page, and click Cancel Request.
-
In the Cancel Request modal, click Cancel Request.
The request no longer appears in the requests list.
Request types
The Request Types tab lets Identity Governance administrators view a list of out-of-the-box and custom request types in the tenant environment and create custom request types for use in workflows and forms.
The out-of-the-box request types are the set of default request types, such as:
-
Grant Application: Gives a user access to a specific application.
-
Remove Application: Takes away a user’s access to a specific application.
-
Grant Entitlement: Assigns a specific entitlement or permission within an application to a user.
-
Create Entitlement: Adds a new permission that can be assigned within an application.
-
Modify Entitlement: Changes the details of an existing entitlement.
-
Remove Entitlement: Deletes an entitlement from an application.
-
Grant Role: Assigns a user a role, which is a collection of entitlements.
-
Remove Role: Takes away a role and its associated entitlements from a user.
-
Create User: Creates a new user account in the system.
-
Modify User: Updates the profile information for an existing user.
-
Delete User: Removes a user account from the system.
-
Entity Mutation: Handle IGA events. When an event triggers a workflow, the system creates an entity mutation request to process the event’s actions.
Custom refers to those request types that you create using the Identity Governance UI or API.
View request types
-
In the Advanced Identity Cloud admin console, click Governance > Requests.
-
On the Requests page, click the Request Types tab.
-
View the list of out-of-the-box and custom request types.
-
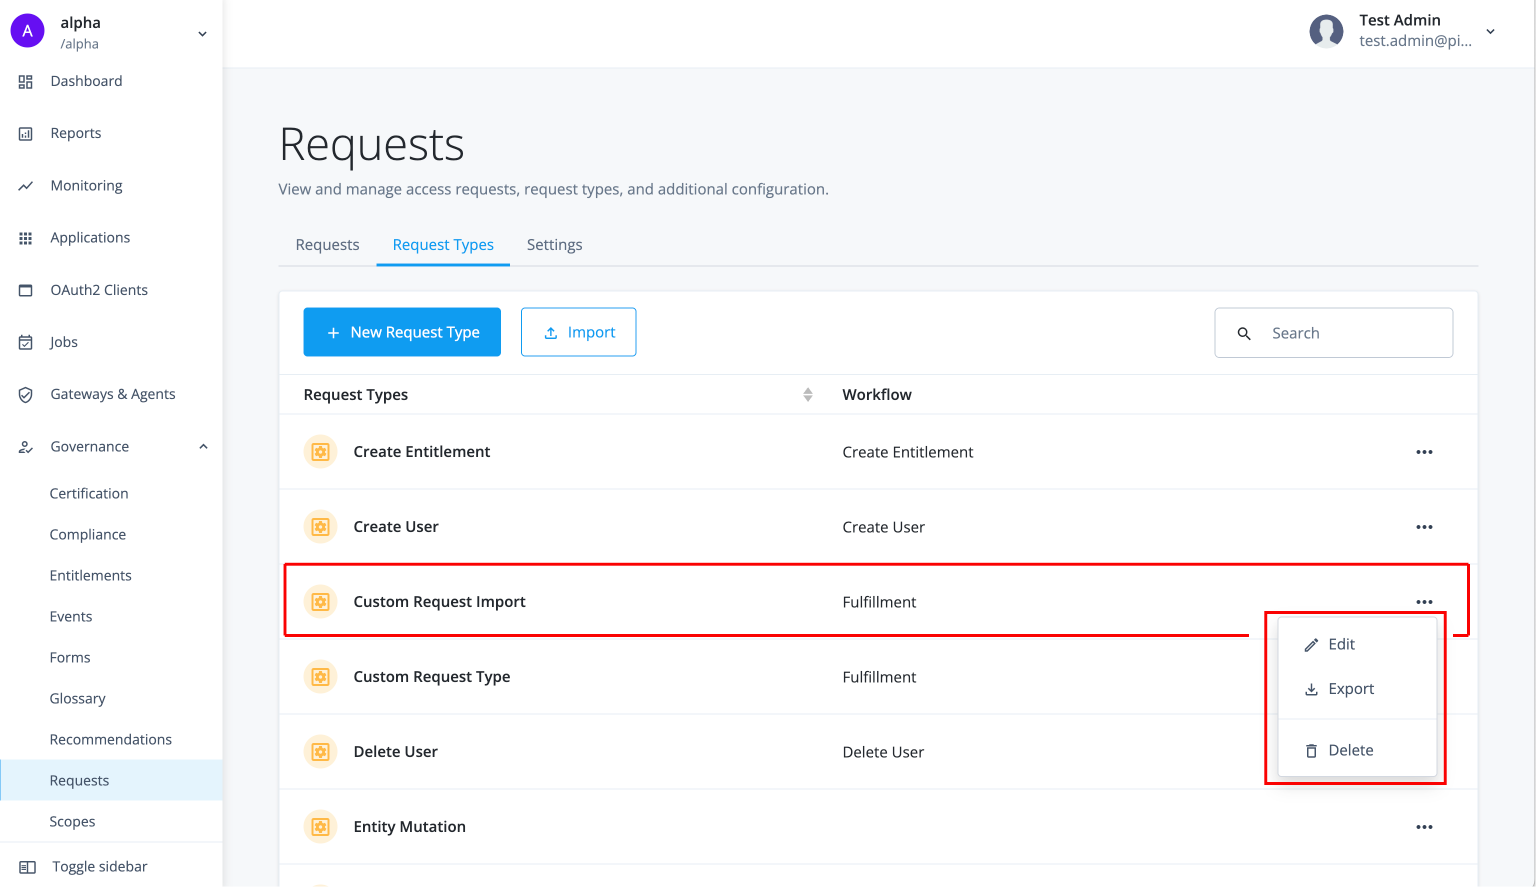
Click ellipsis () > Edit the out-of-the-box request type. If the request type is custom, you have the option to Edit or Delete it.
-
-
Click New Request Type to create a custom request type.
-
In the New Request Type modal, enter the following:
Field Description Name
Enter a descriptive name for your request type.
Description (optional)
Enter a general description for your request type.
Workflow
Select a workflow to associate with the custom request type.
-
Click Save.
-
-
On the Request Type Details tab, click Enable Validation to add a validation script.
-
Click Save to save your script, or click Export to export the request type.
-
Click the Properties tab.
-
Click New Property.
-
In the New Property modal, enter the following:
Field Description Name
Enter a descriptive name for the property.
Label
Enter a human-readable label for the property.
Type
Select a property type. Options are:
-
String
-
Number
-
Boolean
-
Object
Multi-valued
Click if the property is multi-valued.
Required
Click if you want the property to be required.
-
-
Click Save.
-
Repeat the steps to add another property.
-
Import a custom request type
You can import a request type that has been exported from another environment. Identity Governance saves request types as JSON files, which lets you migrate your configurations between tenants, such as from a staging environment to a production environment.
|
You can only edit an out-of-the-box request types. For custom request types, you have more options for custom types, including exporting and deleting them and adding a validation script. |
-
On the Request Types page, click Import.
-
In the Import Request Type modal, click Browse and select your JSON file.
Example custom request type JSON file
{ "displayName": "Custom Request Import", "description": "Request type import example", "notModifiableProperties": [], "workflow": { "id": "Fulfillment" }, "schemas": { "common": [ { "_meta": { "type": "system", "displayName": "commonRequest", "properties": { "justification": { "isRequired": false, "isInternal": true, "display": { "name": "Justification", "isVisible": true, "order": 3, "description": "The reason for the request" } }, "externalRequestId": { "isRequired": false, "isInternal": true, "isChangable": false, "display": { "name": "External Request ID", "isVisible": true, "order": 4, "description": "The external ID for the request" } }, "requestIdPrefix": { "isRequired": false, "isInternal": true, "display": { "name": "Request ID prefix", "isVisible": true, "order": 5, "description": "Prefix for the request ID" } }, "isDraft": { "isRequired": false, "isInternal": true }, "priority": { "isRequired": false, "display": { "name": "Priority", "isVisible": true, "order": 6, "description": "The priority of the reqeust" }, "text": { "defaultValue": "low" } }, "expiryDate": { "isRequired": false, "isInternal": true, "display": { "name": "Request expiration date", "isVisible": true, "order": 7, "description": "User provided date on which the request will cancel" } }, "context": { "isRequired": false, "isInternal": true, "isMultiValue": false, "display": { "name": "Context", "isVisible": true, "order": 1, "description": "The context of the request" } }, "workflowId": { "isRequired": false, "isInternal": true, "isChangable": false, "display": { "name": "BPMN workflow ID", "isVisible": true, "order": 7, "description": "The ID key of the BPMN workflow" } }, "startDate": { "isRequired": false, "isInternal": true, "display": { "name": "Start date", "isVisible": true, "order": 8, "description": "Start date of the grant" } }, "endDate": { "isRequired": false, "isInternal": true, "display": { "name": "End date", "isVisible": true, "order": 8, "description": "End date of the grant" } }, "blob": { "isRequired": false, "isInternal": true } } }, "properties": { "justification": { "type": "text" }, "externalRequestId": { "type": "text" }, "requestIdPrefix": { "type": "text" }, "isDraft": { "type": "boolean" }, "priority": { "type": "text" }, "expiryDate": { "type": "text" }, "context": { "type": "object" }, "workflowId": { "type": "text" }, "startDate": { "type": "text" }, "endDate": { "type": "text" }, "blob": { "type": "object" } } } ], "custom": [ { "_meta": { "type": "system", "properties": { "customProp1": { "display": { "name": "Custom Prop 1", "isVisible": true, "order": 1 }, "isRequired": false, "isInternal": false, "isMultiValue": false }, "customProp2": { "display": { "name": "Custom Prop 2", "isVisible": true, "order": 2 }, "isRequired": false, "isInternal": false, "isMultiValue": false } } }, "properties": { "customProp1": { "type": "text" }, "customProp2": { "type": "text" } } } ] }, "custom": true } -
Click Import. When the import is complete, click View request type configuration to review it.
The new custom request type appears on the Request Types tab.
-
Click ellipsis () to Edit, Export, or Delete the request type.
Request settings
The Settings tab lets you configure global rules that apply to all access requests. You can use these settings to enforce consistent policies, such as requiring a justification for all approvals or denials, and to streamline the approval process by setting a default approver role.
View request settings
-
In the Advanced Identity Cloud admin console, click Governance > Requests.
-
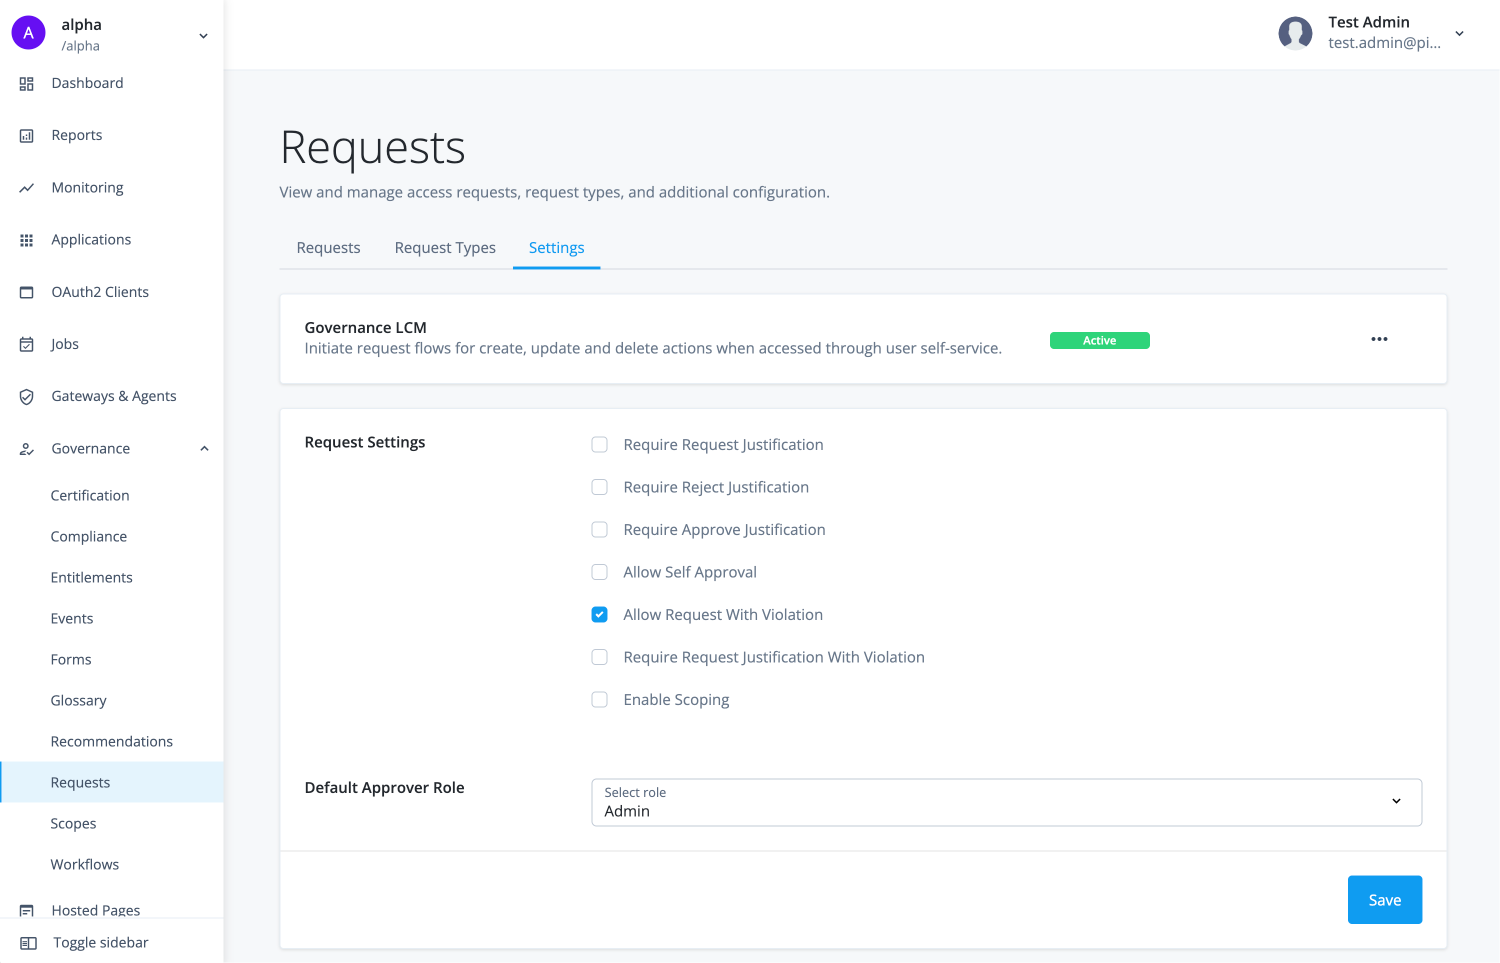
On the Requests page, click the Settings tab to view the available settings.
-
Click any of the following settings:
Property Type Description Governance LCM
Activate, Deactivate
Lets you delegate user and entitlement lifecycle management tasks to authorized end users. Learn more at Governance lifecycle management.
Require Request Justification
Boolean
Requires users to provide a reason when they submit a new access request.
Require Reject Justification
Boolean
Requires approvers to provide a reason when they deny an access request.
Require Approve Justification
Boolean
Requires approvers to provide a reason when they approve an access request.
Allow Self Approval
Boolean
Lets users approve their own access requests.
Default Approver
Managed role approver
Assigns a specific role as the default approver for all access requests.
Allow Request With Violation
Boolean
Lets users submit access requests that would violate a Segregation of Duties (SoD) policy.
Require Request Justification With Violation
Boolean
Requires users to provide a reason when they submit a request that violates an SoD policy.
Enable Scoping
Boolean
Activates scopes to control which resources users can see and request.
-
On the Default Approver Role, select a default role for the approver.
-
Click Save.