Creating a PingOne OIDC application
About this task
To configure your AWS EKS cluster for OIDC authentication, you must first create a PingOne OIDC application to acquire the required OIDC Issuer URL and OIDC Client ID.
To create a PingOne OIDC application:
Steps
-
Sign on to your PingOne for Enterprise tenant.
-
Go to Applications → My Applications → OIDC.
-
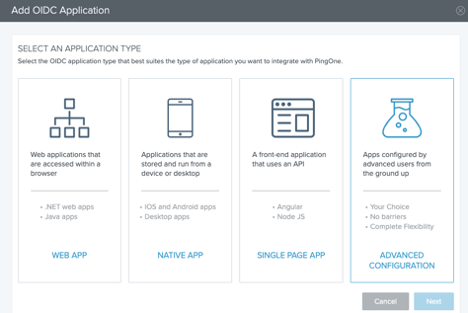
Select Advanced Configuration, and click Next.
-
Type the Application Name and Description, and click Next.
-
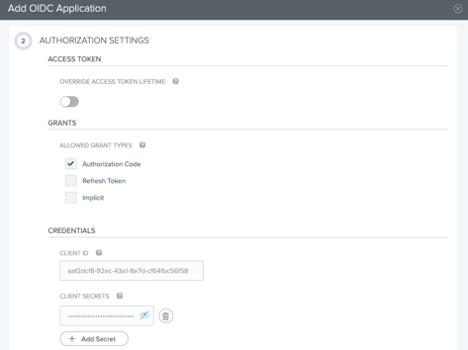
In the Authorization Settings section, check Authorization Code for the Allowed Grant Types.
-
To include a client secret, click Add Secret. Record the Client ID and Client Secret for later use. Click Next.
-
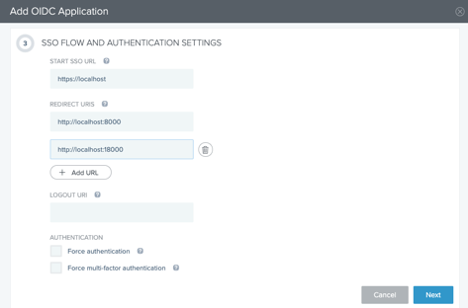
In the SSO Flow and Authentication Settings section, enter the following:
-
In the Start SSO URL field, enter
https://localhost. -
In the Redirect URIs field, enter
http://locallhost:8000andhttp://localhost:18000. -
Click Next.
-
-
Leave the default configuration for Default User Profile Attribute Contract and Connect Scopes.
-
Configure the required Attribute Mapping for the
subjectattribute. Click Next.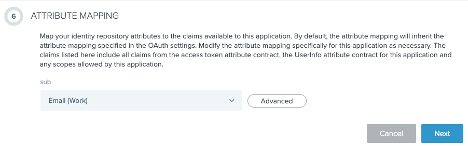
-
Assign any required PingOne Groups for access, and then click Done.