Creating or editing a webhook
You can create a webhook to monitor events in PingIntelligence.
About this task
To create or edit a webhook:
Steps
-
Go to Settings → Webhooks.
-
Click the icon to add a webhook, or expand an existing webhook and click the Pencil icon to edit it.
-
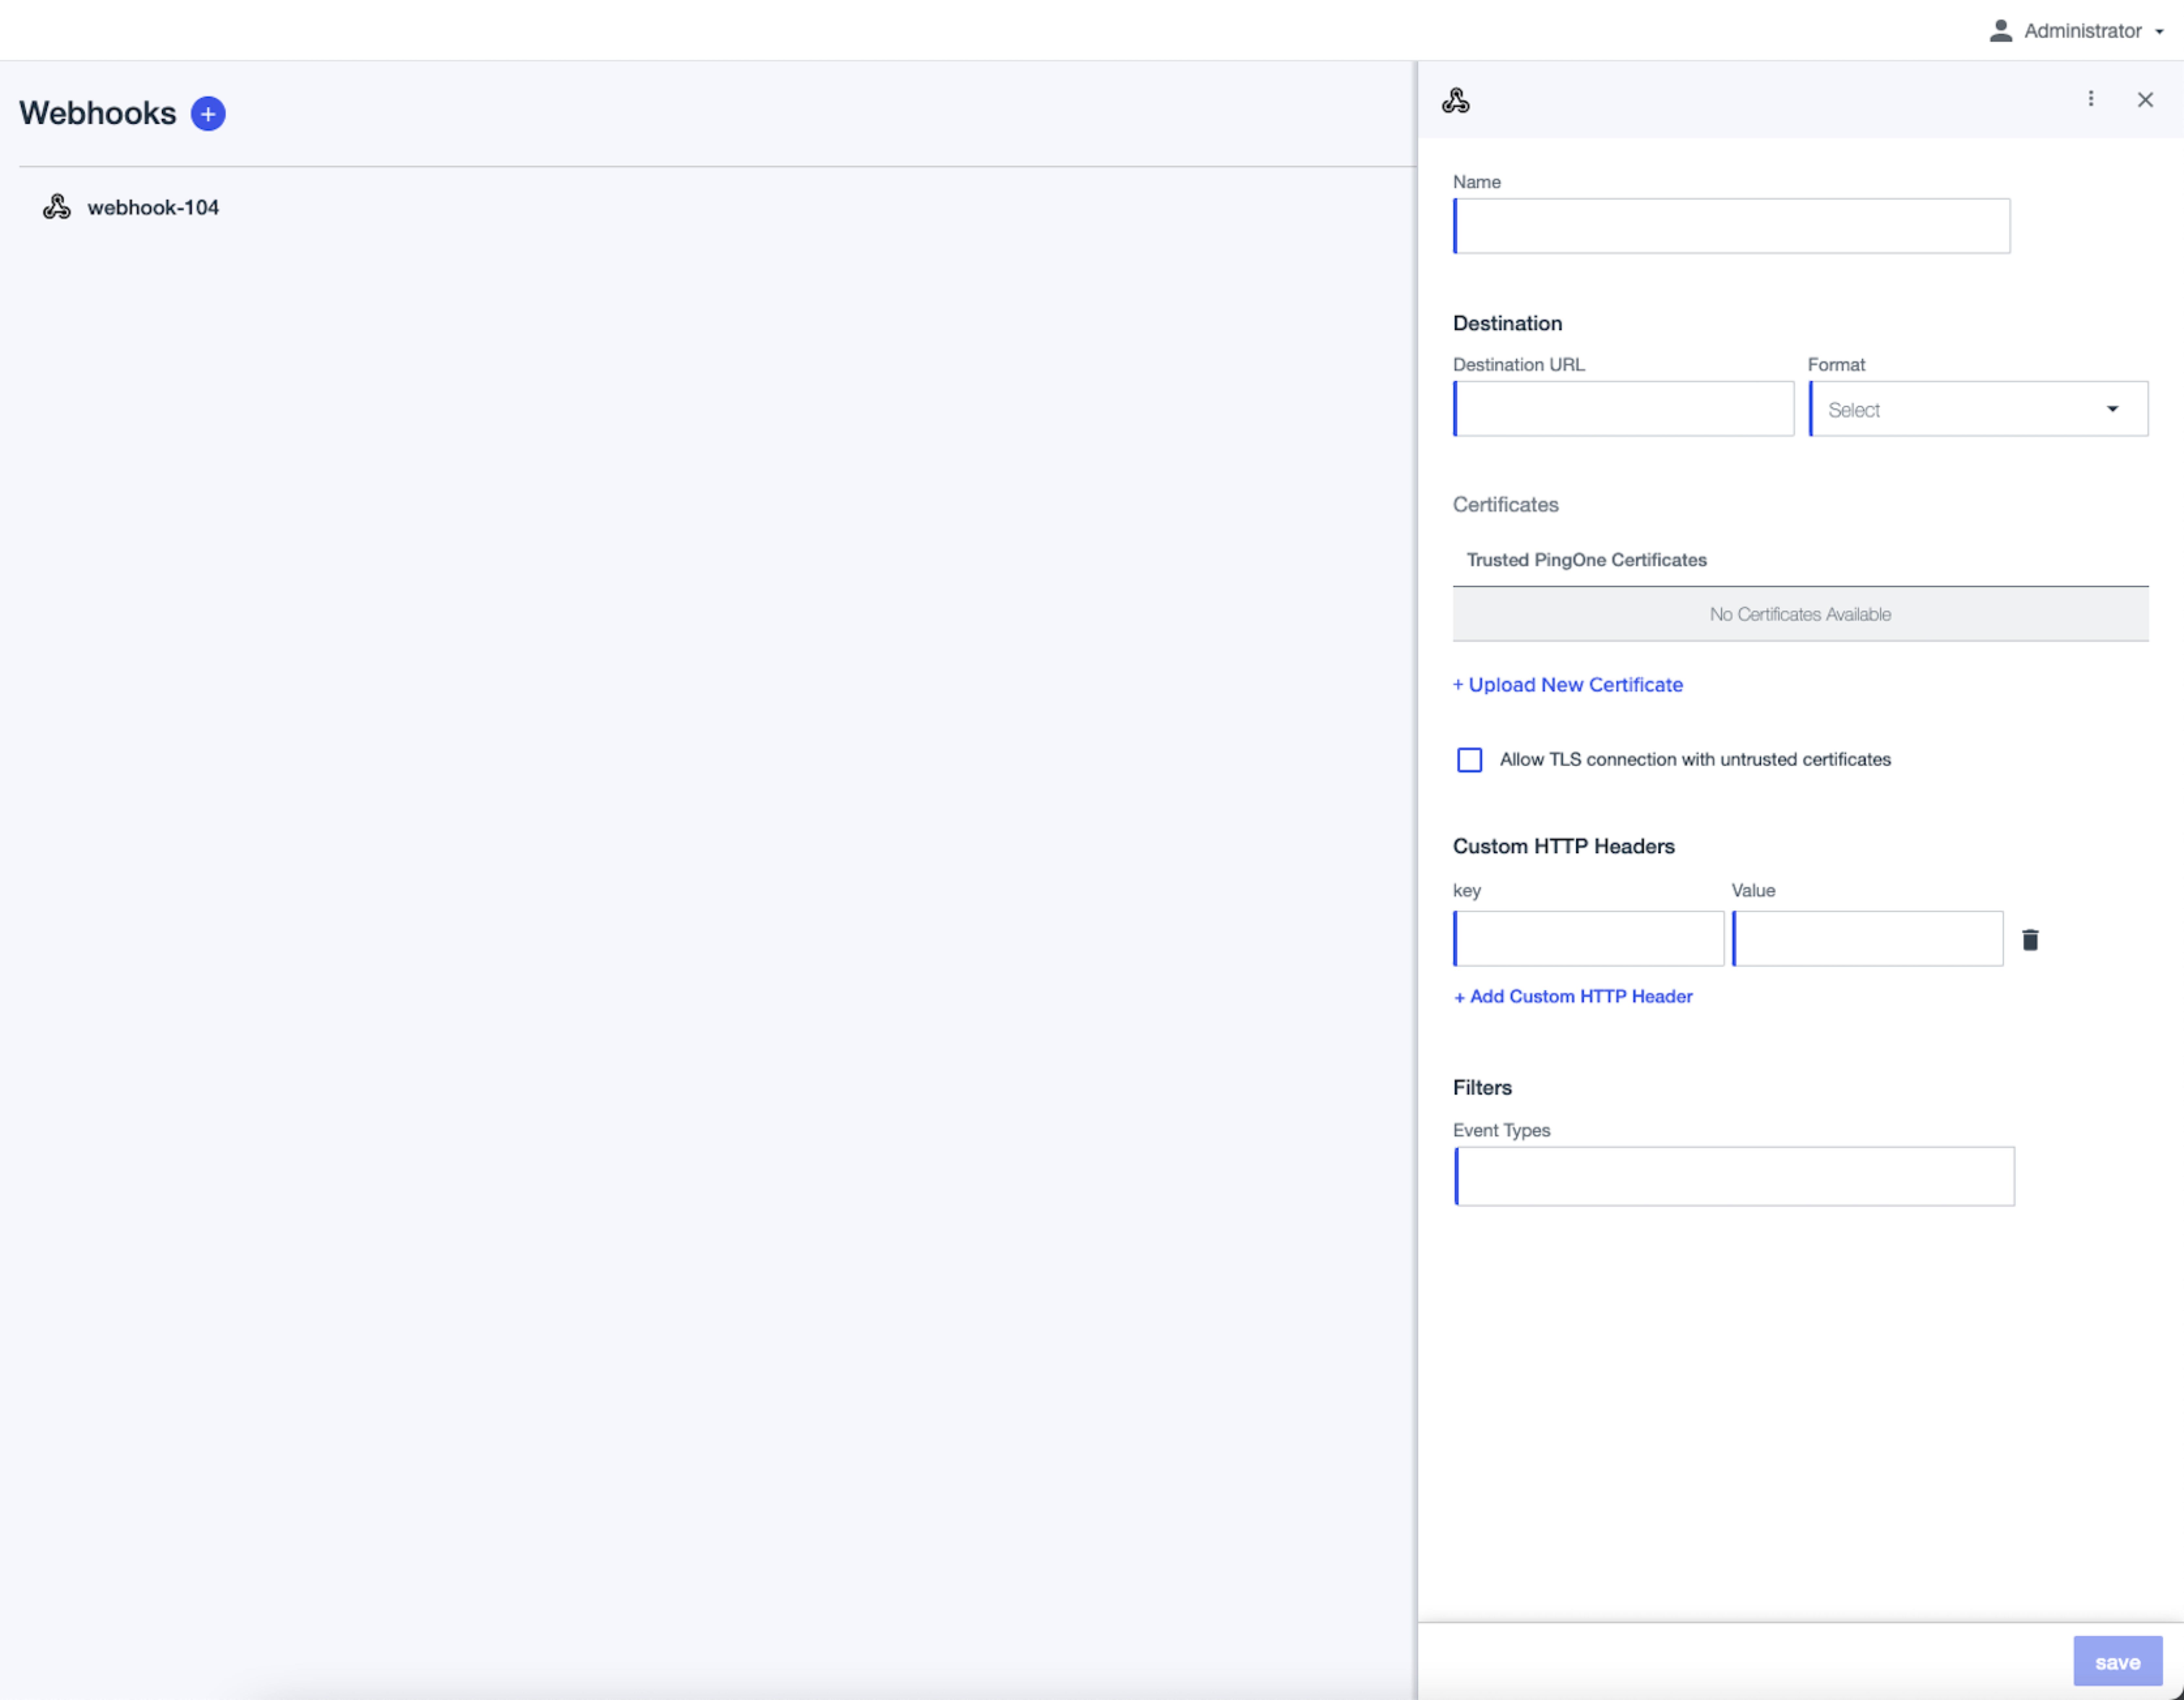
Enter a descriptive Name for the connection.
-
Enter the destination information.
These settings configure the connection to the monitoring system.
-
Destination URL: The URL of the application that you want to send data to.
-
Format: The format of the activity data. Select the format that is most easily consumed by your management system:
-
Splunk: A Splunk-friendly format.
-
-
Certificates: A certificate to ensure that the connection is secure. Browse existing certificates, or upload a new one.
-
Allow TLS connection with untrusted certificates: Select this option to allow a certificate that is not from a certificate authority (CA). PingIntelligence certificates, and all certificates signed by the default CAs are trusted. This option is typically used for testing. For more information, see Certificates and key pairs.
-
Custom HTTP headers: Specify additional information for the HTTP headers. You can provide information in the form of key-value pairs.
-
-
Enter the Filters information.
These settings determine which events are monitored. Select a category or a subset of events in that category.
-
Event Types: Specify the types of events to monitor: Indicators of Attack (IoAs) created or Anomalies created.
-
-
Click Save.