Adding PingIntelligence ASE APIs
Add a primary and secondary ASE node to the Akana API Gateway.
Before you begin
You must:
-
Install and configure the PingIntelligence software. For more information, refer to Automated deployment or Manual deployment.
-
Verify that API Security Enforcer (ASE) is in sideband mode by running the following ASE command:
/opt/pingidentity/ase/bin/cli.sh status
API Security Enforcer
status                  : started
mode                    : sideband
http/ws                 : port 80
https/wss               : port 443
firewall                : enabled
abs                     : enabled, ssl: enabled
abs attack              : disabled
audit                   : enabled
sideband authentication : disabled
ase detected attack     : disabled
attack list memory      : configured 128.00 MB, used 25.60 MB, free 102.40 MB
-
If ASE is not in sideband mode, then stop ASE and change the mode by editing the
/opt/pingidentity/ase/config/ase.conffile. Set mode as sideband and start ASE.
-
-
For a secure communication between the Akana Gateway and ASE, enable sideband authentication by entering the following ASE command:
# ./bin/cli.sh enable_sideband_authentication -u admin –p
-
Ensure SSL is configured in ASE for client side connection using CA-signed certificate.Please refer to Configuring SSL for external APIs for more details.
-
Generate sideband authentication token by entering the following command in the ASE command-line interface (CLI):
# ./bin/cli.sh -u admin -p admin create_sideband_token
-
Enable the connection keepalive between gateway and ASE by navigating to
/opt/pingidentity/ase/config/and setting the value ofenable_sideband_keepalivetotruein thease.conffile.-
If ASE is running, stop it before making the change and start ASE after setting the value. For more information on ASE configuration, see Sideband ASE configuration using the
ase.conffile.
-
About this task
|
The primary and secondary ASE APIs should not be exposed to external API clients. For more details on securing ASE APIs, see Securing PingIntelligence ASE APIs. |
To add ASE APIs to the Akana API Gateway:
Steps
-
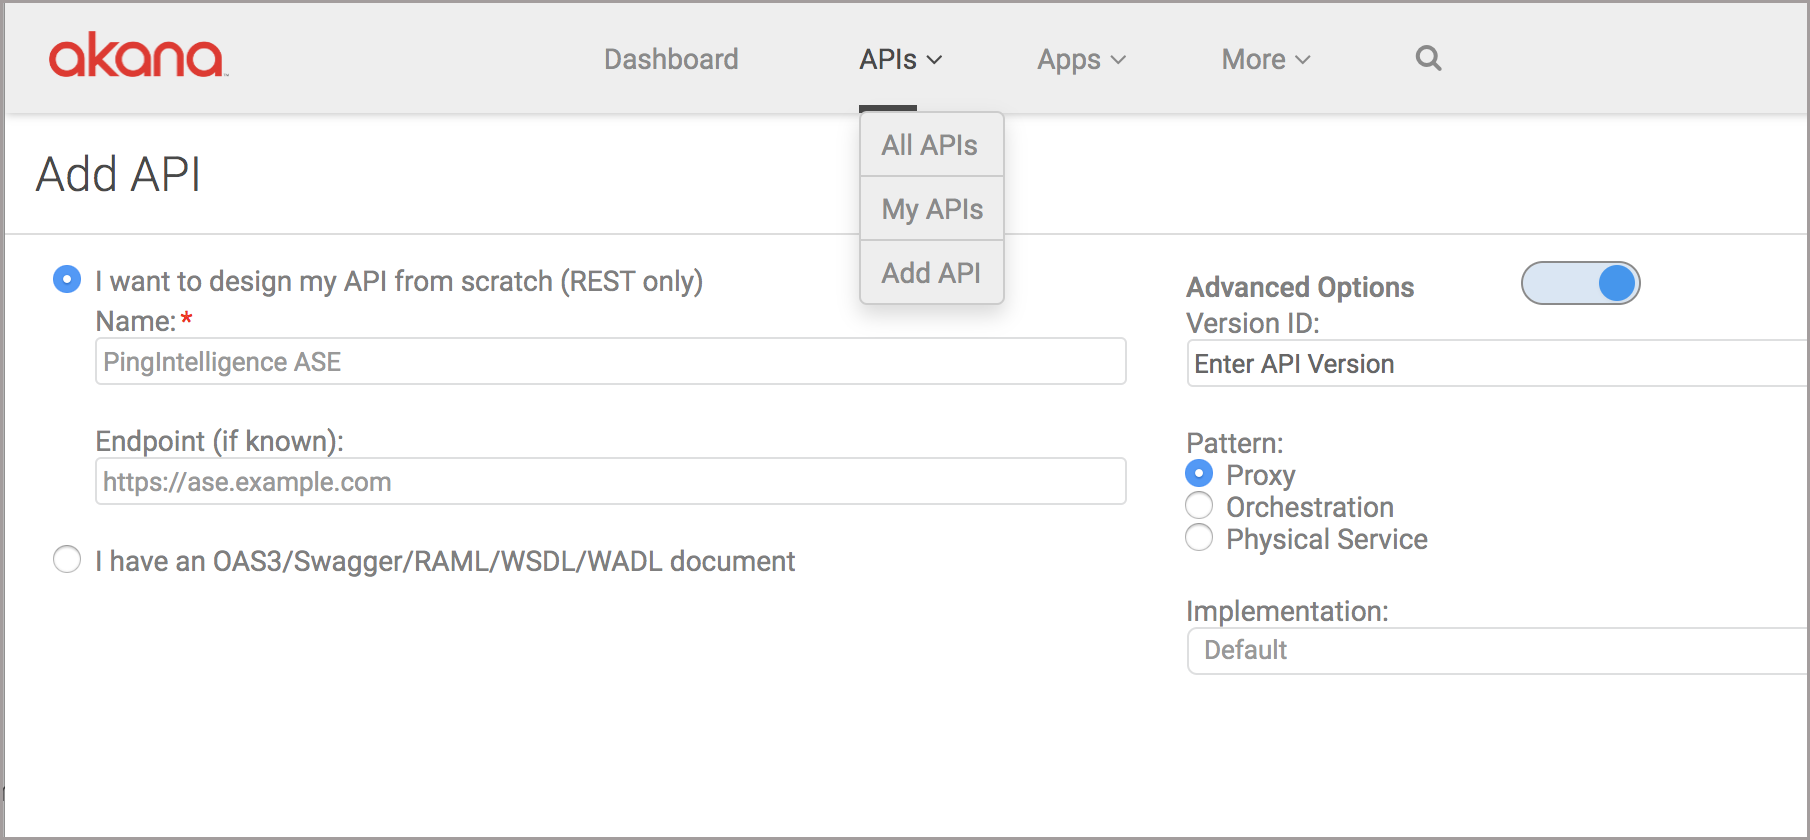
Sign on to the Akana portal and click Add API from the APIs drop-down list.
-
Select I want to design my API from scratch (REST) only.
-
Enter the following details for ASE:
-
Enter the name of the API in the Name field.
-
Enter the Endpoint: <http/https>://<ASE-Hostname or IP>/ase.
-
Click the toggle to enable Advanced Options.
-
Enter the API version in the Version ID field.
-
For Pattern, select Proxy.
-
Select Implementation.
-
Select Deployment Zones.
-
-
Click Save after entering the details.

-
Add two resources under Resources: one to post request metadata to ASE and another to post response metadata to ASE.To add a resource to the ASE API, open API Designer:
-
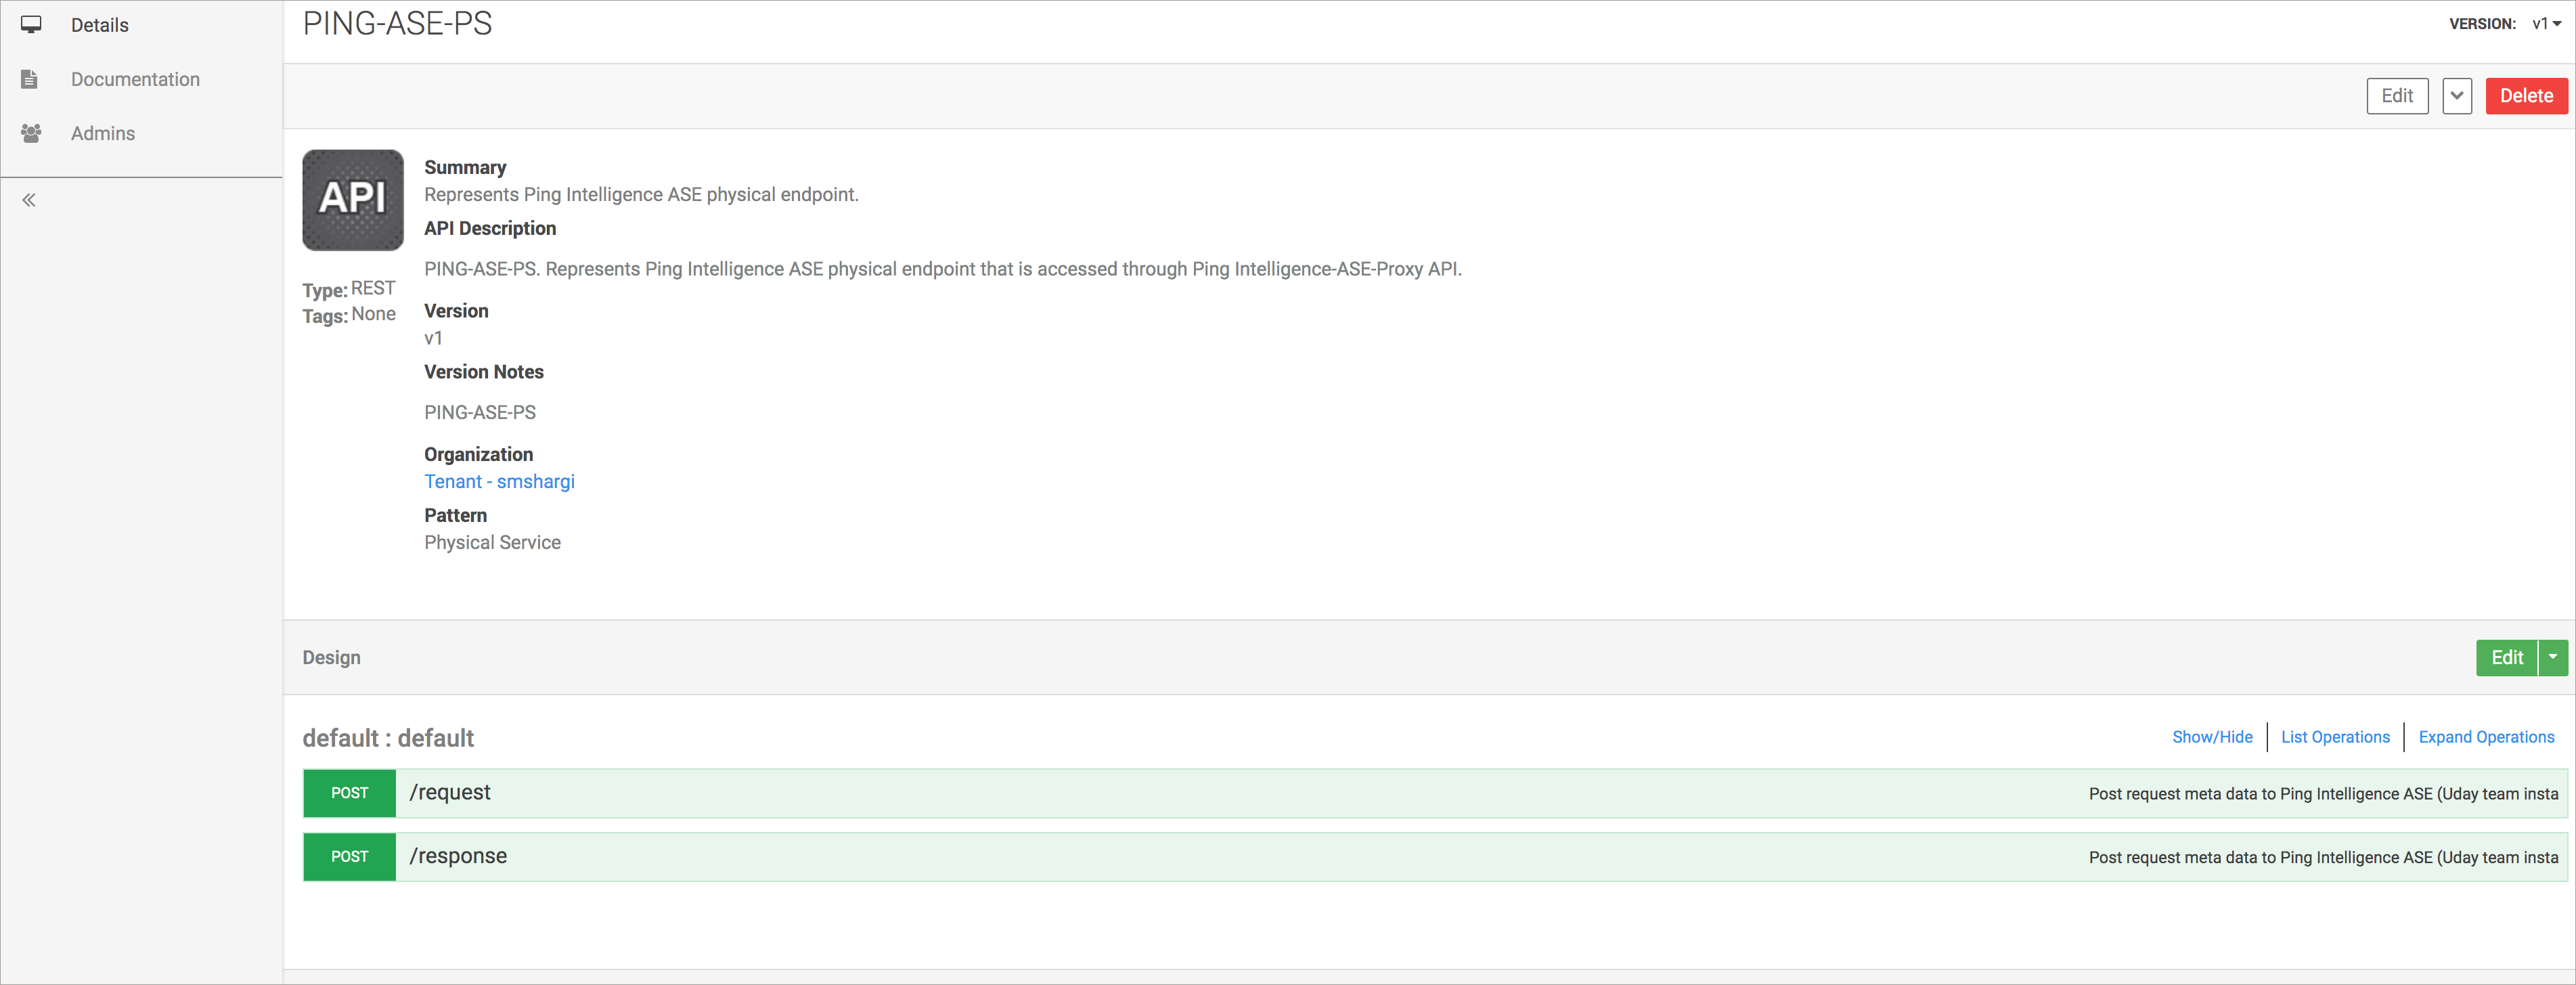
Navigate to the Overview page of the API.
-
Choose Details from the left menu pane. The summary of the API is displayed in the details.
-
In the Design section, click Edit to enter API Designer.

-
-
Add the Request resource to the API:

-
Click Add Resource to open the Edit Resource window.
-
Enter
/requestin the Path to post request metadata to ASE. -
For Verb, choose
POST. -
Enter Operation ID. If the user does not provide the value, a random value is generated for Operation ID.
-
Click Finish after updating the other optional details like Description, Summary, and Tags.
-
Click Save.

A default resource is created when an API is added to Akana API Gateway. This resource can be edited to add the first resource.
-
-
To add the Response resource to the API:
-
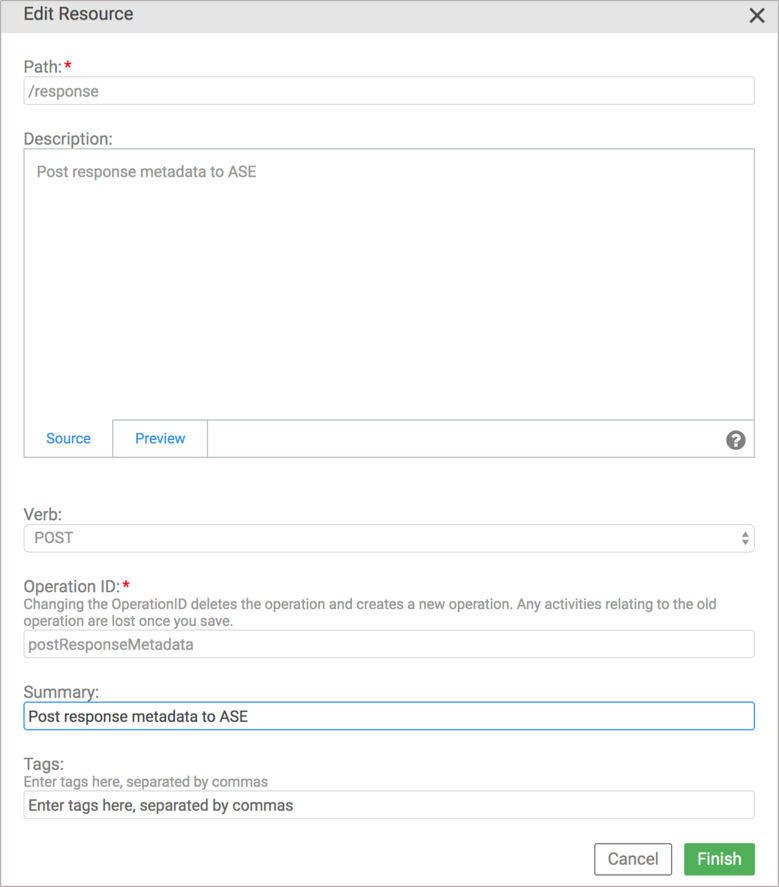
Click Add Resource to open the Edit Resource window.
-
Enter
/responsein the Path field to post request metadata to ASE. -
For Verb, choose
POST. -
Enter Operation ID. If the user does not provide the value, a random value is generated for Operation ID.
-
Click Finish after updating the other optional details like Description, Summary, and Tags.

-
-
To add the secondary (backup) ASE node, repeat steps 1- 5.