Configuring SAML SSO with GitHub Cloud and PingOne for Enterprise
Learn how to enable GitHub sign-on from the PingOne for Enterprise console (IdP-initiated sign-on) and direct GitHub sign-on using PingOne for Enterprise (SP-initiated sign-on).
Before you begin
-
Link PingOne for Enterprise to an identity repository containing the users requiring application access.
-
Populate GitHub with at least one user to test access.
-
You must have administrative access to PingOne for Enterprise and GitHub.
Set up the supplied GitHub application in PingOne for Enterprise
-
Sign on to PingOne for Enterprise for and go to Applications → Application Catalog.
-
Search for
GitHub. -
Expand the GitHub entry and click the Setup icon.

-
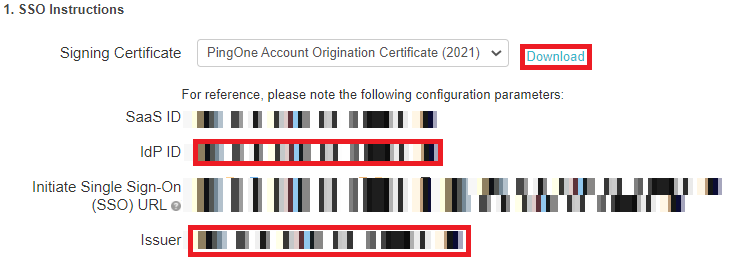
Copy the Issuer and IdP ID values.
-
Download the signing certificate.

-
Click Continue to Next Step.
-
Set ACS URL to
https://github.com/orgs/your-tenant/saml/consume.Set Entity ID to
https://github.com/orgs/your-tenant. -
Click Continue to Next Step.
-
Ensure that SAML_SUBJECT is mapped to the field containing a user’s email address.
-
Click Continue to Next Step twice.
-
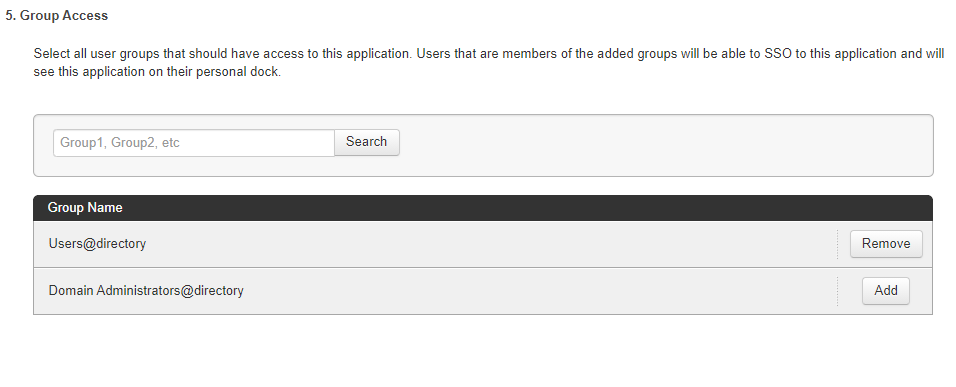
Click Add for all user groups that should have access to GitHub.

-
Click Continue to Next Step.
-
Click Finish.
Add the PingOne for Enterprise IdP connection to GitHub
-
Sign on to GitHub as an administrator.
-
Select your GitHub organization.
-
Click Organization settings, then click Security.
-
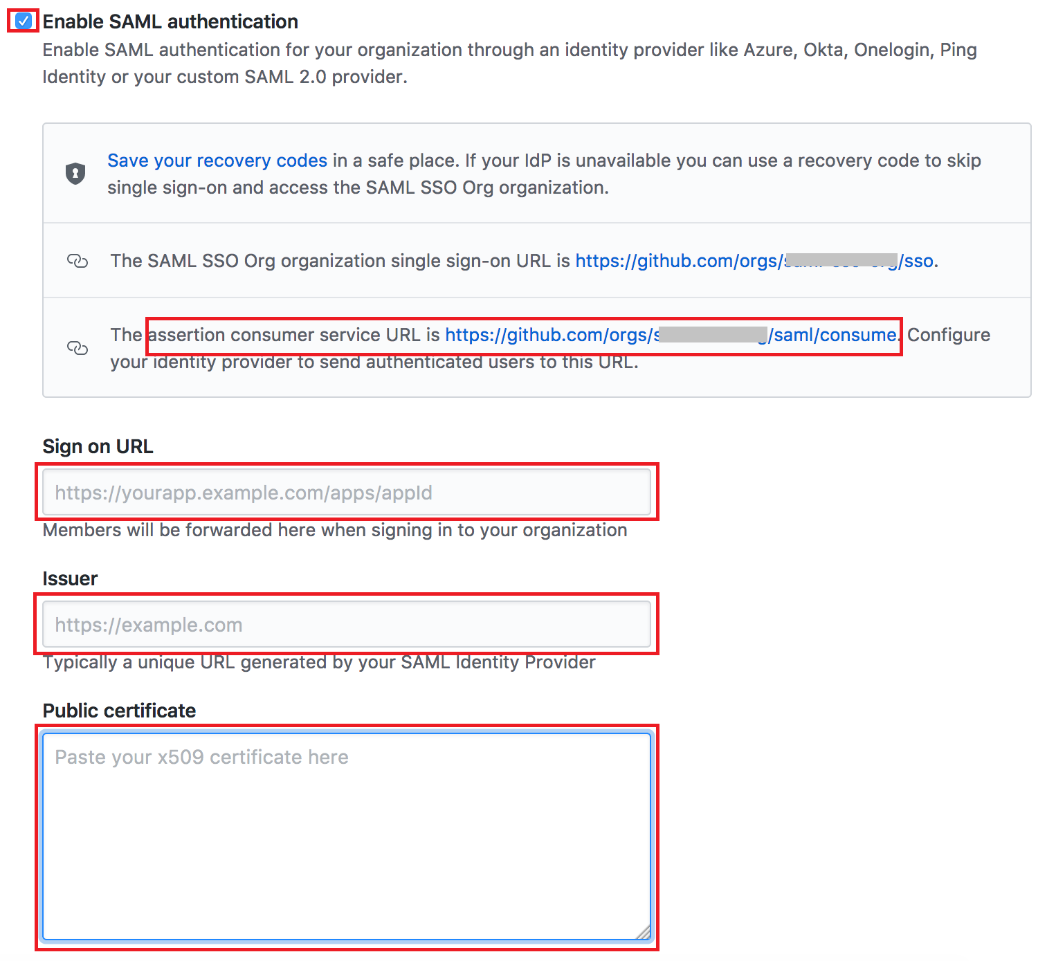
Under SAML single sign-on, select Enable SAML authentication.
The assertion consumer service URL displayed on this screen should match the value that you entered into the PingOne for Enterprise ACS URL field.

-
Set the following values.
Field Value Sign on URL
https://sso.connect.pingidentity.com/sso/idp/SSO.saml2?idpid=PingOne-IdP-ID-valueIssuer
PingOne for Enterprise Issuer value
Public certificate
Paste in the contents of the PingOne for Enterprise signing certificate.
-
Click Save.
