Configuring SAML SSO with Slack and PingOne for Enterprise
Enable Slack sign-on from the PingOne for Enterprise console (IdP-initiated sign-on) and direct Slack sign-on using PingOne for Enterprise (SP-initiated sign-on) with JIT provisioning.
Before you begin
-
Link PingOne for Enterprise to an identity repository containing the users requiring application access.
-
You must have administrative access to PingOne for Enterprise and Slack.
Set up the Slack application in PingOne for Enterprise
-
Sign on to PingOne for Enterprise and go to Applications → Application Catalog.
-
Search for
Slack.
-
Expand the Slack entry and click the Setup icon.
-
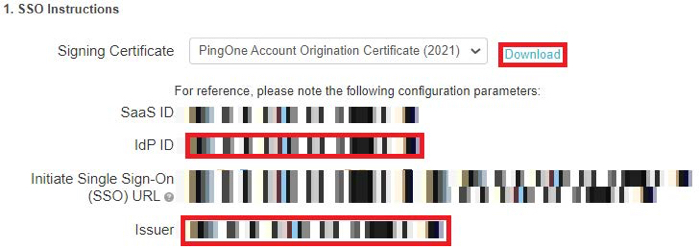
Copy the Issuer and IdP ID values.
-
Download the signing certificate.
-
Click Continue to Next Step.
-
Set ACS URL to
https://your-slack-domain.slack.com/sso/saml. -
Click Continue to Next Step.
-
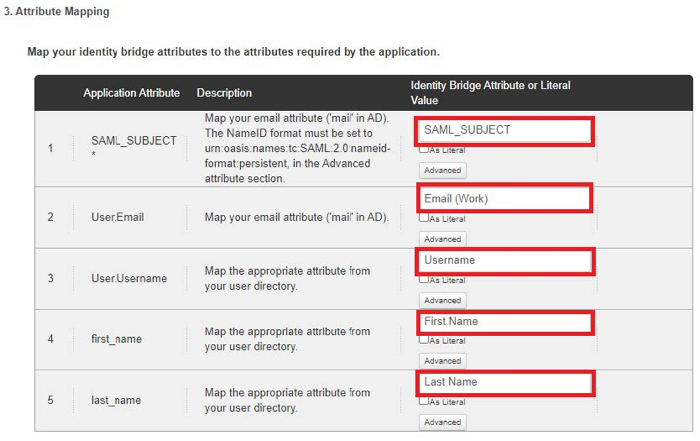
In the Attribute Mapping section, map the attributes to the corresponding attributes in your userstore.
-
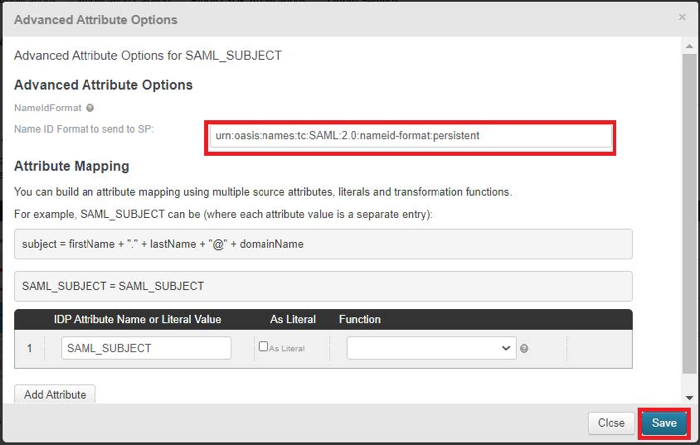
In the SAML_SUBJECT row, click Advanced.
-
In the NameID Format to send to SP field, enter
urn:oasis:names:tc:SAML:2.0:nameid-format:persistent. -
Click Save.
-
Click Continue to Next Step.
-
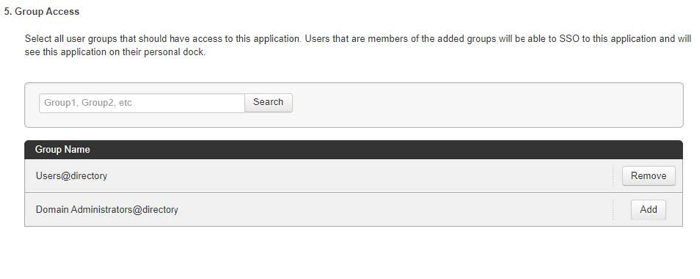
Click Add for each user group that should have access to Slack.
-
Click Continue to Next Step.
-
Click Finish.
Add the PingOne for Enterprise IdP connection to Slack
-
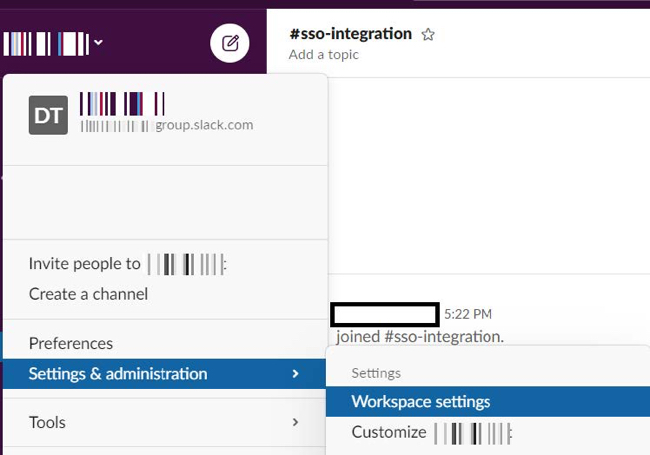
Sign on to your Slack Admin account as an administrator.
-
Go to Settings & Administration → Workspace Settings.
-
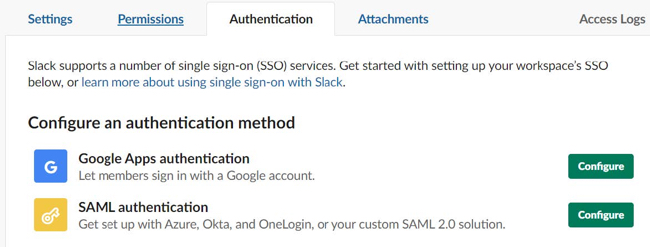
Click the Authentication tab.
-
In the Configure an authentication method section, on the SAML authentication line, click Configure.
-
If prompted, enter your password to continue.
-
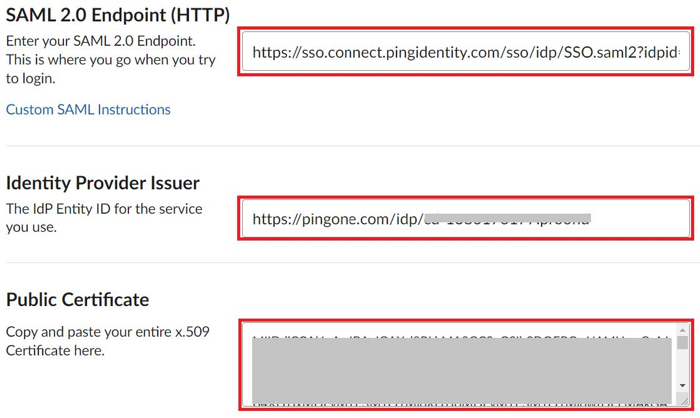
In the SAML 2.0 Endpoint (HTTP) field, enter
https://sso.connect.pingidentity.com/sso/idp/SSO.saml2?idpid=PingOne-IdP-ID-value. -
In the Identity Provider Issuer field, enter
PingOne-Issuer-value. -
In the Public Certificate field, paste in the contents of the PingOne for Enterprise signing certificate.
-
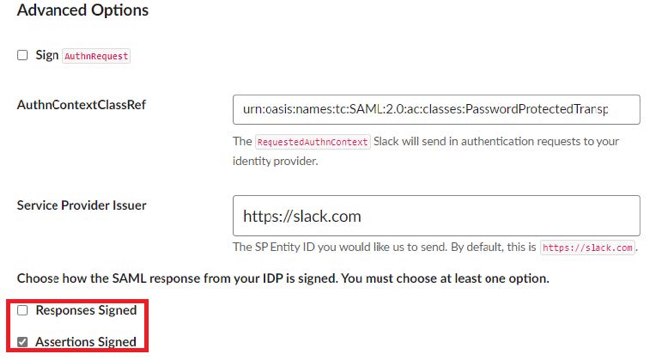
Expand the Advanced Options section and clear the Responses Signed check box.
-
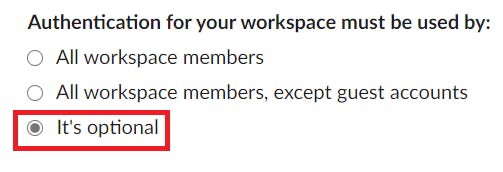
In the Settings section, select the It’s optional check box for the authentication setting.
You can change the authentication setting to your desired value after testing has been completed.
-
Click Save Configuration.

Test the PingOne for Enterprise IdP-initiated SSO integration
-
Go to your Ping desktop as a user with Slack access.
To find the Ping desktop URL in the Admin console, go to Setup → Dock → PingOne Dock URL.
-
Complete the PingOne for Enterprise authentication.
You’re redirected to your Slack domain.
If the user doesn’t exist in Slack, you are prompted to accept the Slack terms.
Test the PingOne for Enterprise SP-initiated SSO integration
-
Go to your Slack domain,
https://your-domain.slack.com. -
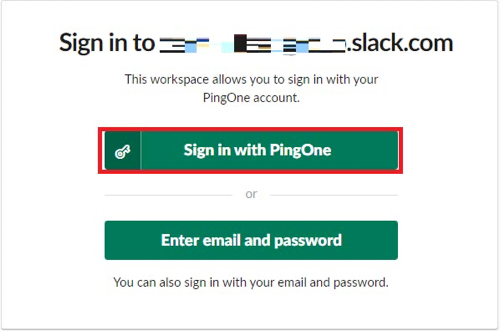
Click Sign in with PingOne.
-
After you’re redirected to PingOne for Enterprise, enter your PingOne for Enterprise username and password.
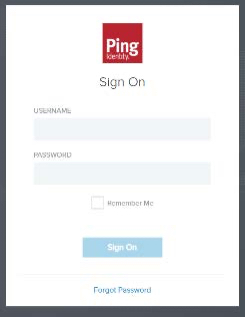
After successful authentication, you’re redirected back to Slack.
If the user doesn’t exist in Slack, you are prompted to accept the Slack terms.

Next steps
After successful testing, you can change the Slack It’s optional authentication setting as necessary.