Configuring SAML SSO with SuccessFactors and PingOne for Enterprise
Learn how to enable SuccessFactors sign-on from the PingOne for Enterprise console (IdP-initiated sign-on) and direct SuccessFactors sign-on using PingOne for Enterprise (SP-initiated sign-on).
Before you begin
-
Link PingOne for Enterprise to an identity repository containing the users requiring application access.
-
Populate SuccessFactors with at least one user to test access.
-
You must have administrative access to PingOne for Enterprise.
-
You must have access to either SuccessFactors Customer Support or the SuccessFactors Provisioning tool.
Obtain the PingOne for Enterprise values for the SuccessFactors application
-
Sign on to PingOne for Enterprise and go to Applications → Application Catalog.
-
Search for
SuccessFactors.
-
Expand the SuccessFactors entry and click the Setup icon.
-
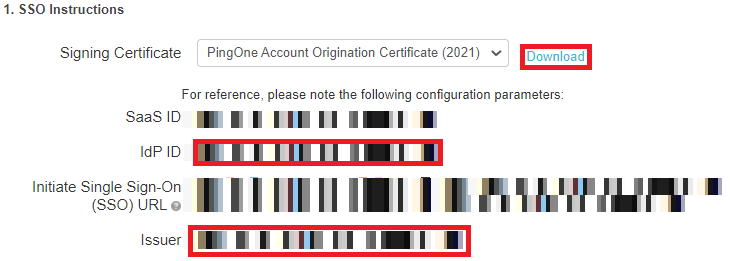
Copy the Issuer and IdP ID values.
-
Download the signing certificate.
Add the PingOne for Enterprise IdP connection to SuccessFactors
-
Sign on to the SuccessFactors Provisioning application.
If you do not have access to this application, you will need to contact SuccessFactors’ Customer Support.
-
Search for your company and click its name link.

-
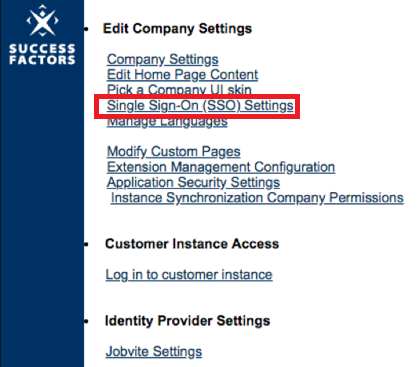
Click Single Sign-On (SSO) Settings.
-
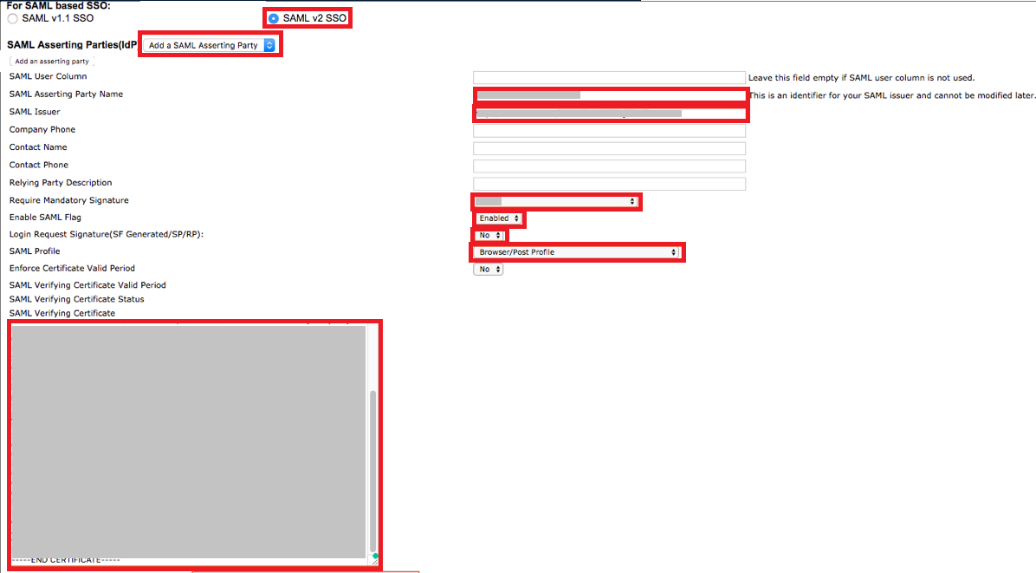
In the For SAML based SSO section, click SAML v2 SSO.
-
In the SAML Asserting Parties (IdP) list, select Add a SAML Asserting Party, and enter the following.
Field Value SAML Asserting Party Name
PingOne for Enterprise
SAML Issuer
The PingOne for Enterprise Issuer value.
Require Mandatory Signature
Assertion
Enable SAML Flag
Enabled
Login Request Signature (SF Generated/SP/RP)
Select No.
SAML Profile
Browser/Post Profile
SAML Verifying Certificate
Paste the PingOne for Enterprise signing certificate contents.
-
In the SAML v2: SP-initiated login section, enter the following.
Field Value Enable sp initiated login (AuthnRequest)
Select Yes.
Default Issuer
Selected.
single sign on redirect service location (to be provided by idp)
Send request as Company-Wide issuer
Select Yes.

-
Click Add an asserting party to save the configuration.

-
In the SAML Asserting Parties (IdP) list, select the asserting party that you created.

-
In the Single Sign On Features section, enter any text value in the Reset Token field.
A value is required only to switch on SSO.
-
Click Save Token.

-
Record the SuccessFactors Assertion Consumer Service URL value containing your SuccessFactors Hostname and Company ID.
(`https://your-hostname.successfactors.com/saml2/SAMLAssertionConsumer?company=your-company-ID)
Complete the SuccessFactors setup in PingOne for Enterprise
-
Continue editing the SuccessFactors entry in PingOne for Enterprise for Enterprise.
If the session has timed out, complete the initial steps to the point of clicking Setup.
-
Click Continue to Next Step.
-
Set the ACS URL to be the SuccessFactors Assertion Consumer Service URL value.
(
https://your-hostname.successfactors.com/saml2/SAMLAssertionConsumer?company=your-company-ID) -
Leave the preset Entity ID.
-
In the Target Resource field, replace
${sfdatacenter}with the hostname from the ACS URL value.
-
Click Continue to Next Step.
-
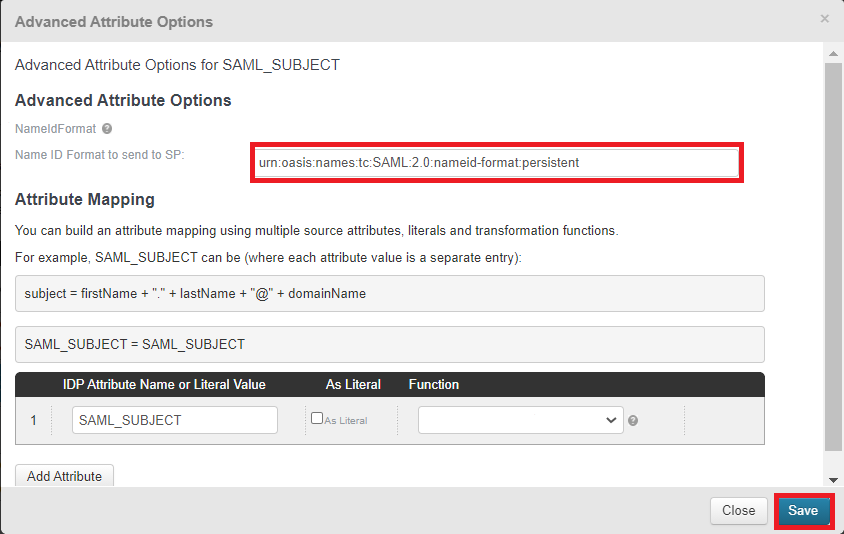
Map the SAML_SUBJECT attribute to the similar attribute names in your environment and click Advanced.

-
Set the Name ID Format to send to SP to urn:oasis:names:tc:SAML:2.0:nameid-format:persistent. Click Save.
-
Click Continue to Next Step twice.
-
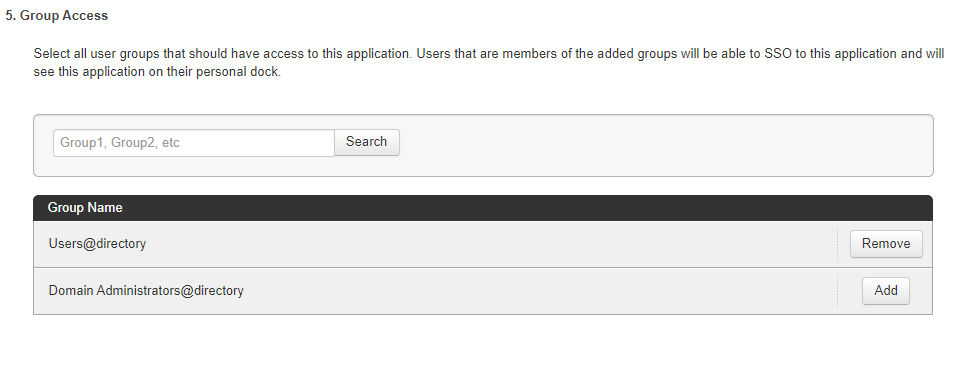
Click Add for all user groups that should have access to SuccessFactors.
-
Click Continue to Next Step.
-
Click Finish.
Test the PingOne for Enterprise IdP-initiated SSO integration
-
Go to your Ping desktop as a user with SuccessFactors access.
To find the Ping desktop URL in the Admin console, go to Setup → Dock → PingOne Dock URL.
-
Complete the PingOne for Enterprise authentication.
You’re redirected to your SuccessFactors account.
