Configuring SAML SSO with Splunk Cloud and PingFederate
Learn how to configure SAML SSO with Splunk Cloud and PingFederate.
About this task
|
An error in configuration could cause users and administrators to be unable to sign on to Splunk Cloud. The following Direct Login link can be used for local authentication:
|
The following table details the required and optional attributes to be configured in the assertion attribute contract.
| Attribute Name | Description | Required / Optional |
|---|---|---|
|
|
Required |
|
User role as per SAML Groups. Attribute name is configurable in SAML configuration for application. |
Required |
|
User Email address. Attribute name is configurable in SAML configuration for application. |
Optional |
|
User display name. Attribute name is configurable in SAML configuration for application. |
Optional |
The following table details the references that are used within this guide that are environment-specific. Replace these with the suitable value for your environment.
| Reference | Description |
|---|---|
|
The instance name for the Splunk Cloud tenant. |
|
The following configuration is untested, and is provided as an example. Additional steps might be required. |
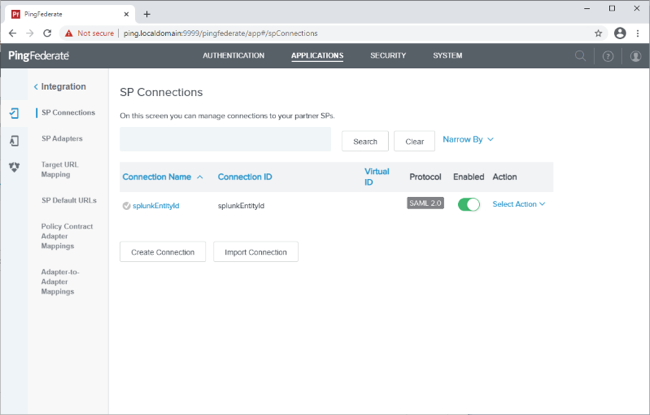
Create a PingFederate SP connection for Splunk Cloud
-
Download the Splunk Cloud metadata from
https://tenant.splunkcloud.com/en-US/saml/spmetadata. -
Sign on to the PingFederate administrative console.
-
Using the metadata that you downloaded, create an SP connection in PingFederate:
-
Configure using Browser SSO profile SAML 2.0.
-
Enable the following SAML Profiles:
-
IdP-Initiated SSO
-
SP-Initiated SSO
-
IdP-Initiated SLO
-
SP-Initiated SLO
-
-
In Assertion Creation: Attribute Contract, set the Subject Name Format to urn:oasis:names:tc:SAML:1.1:nameid-format:emailAddress.
-
Extend the contract:
-
Attribute:
Role -
Format:
urn:oasis:names:tc:SAML:2.0:attrname-format-basic
-
-
In the Assertion Creation: Attribute Contract Fulfilment, map attribute SAML_SUBJECT to the attribute mail and map attribute Role to the LDAP attribute containing the Splunk role.
-
In Protocol Settings: Allowable SAML Bindings, enable Redirect and POST.
-
-
Export the metadata for the newly-created SP connection.
-
Export the signing certificate public key.
Configure the PingFederate IdP-connection for Splunk Cloud
-
Sign on to Splunk Cloud as an administrator.
-
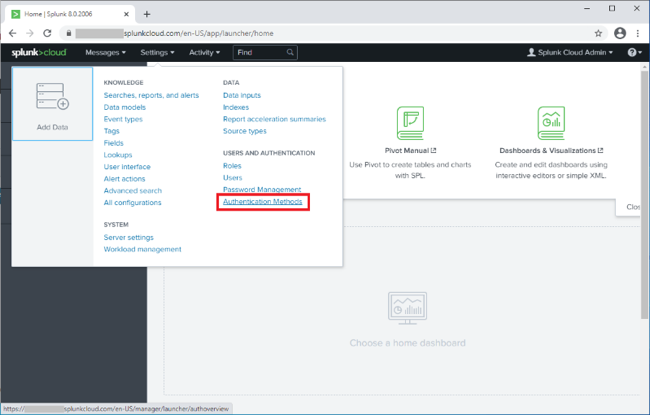
In the top navigation bar, click Settings.
-
Click Authentication Methods.
-
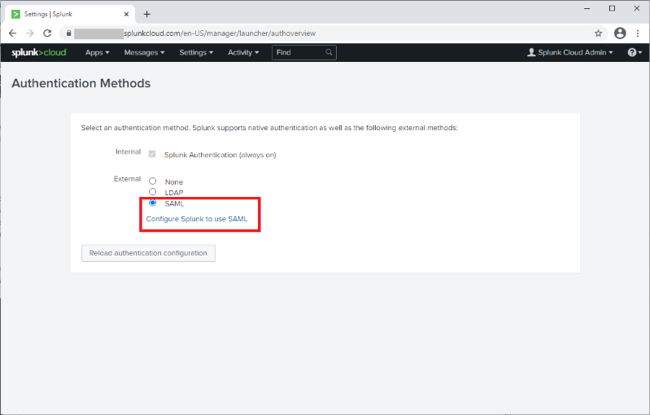
Click SAML, and then click Configure Splunk to use SAML.
-
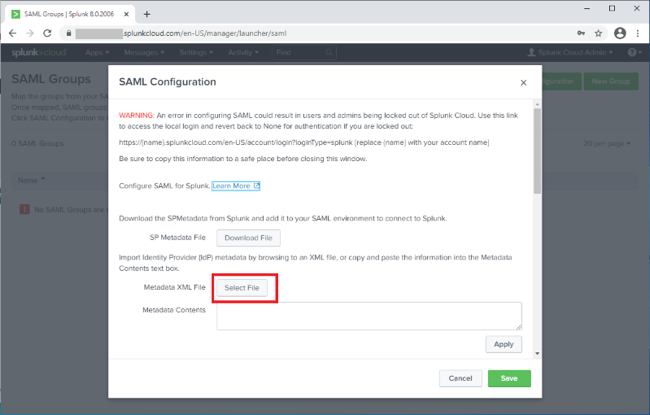
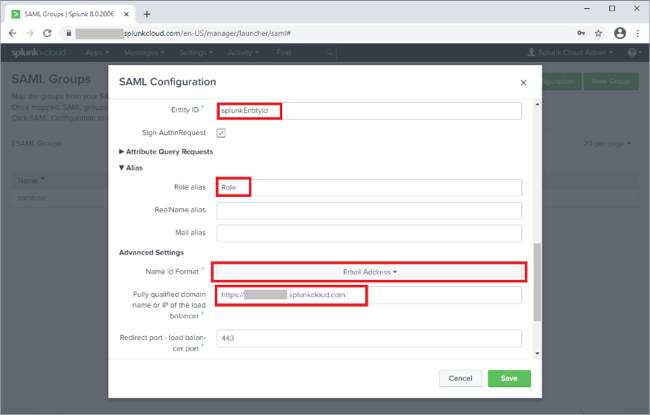
On the SAML Configuration window, note the warning and save the Direct Login URL so that you can use it in the event of integration errors.
-
In the Metadata XML File field, click Select File, and select the PingFederate metadata file that you exported.
-
Review the configuration loaded from the metadata.
-
Set the Entity ID to the one that you configured in PingFederate when creating the SP configuration, such as
splunkEntityId. -
Set the Role alias to the value that you configured in PingFederate for the attribute contract, such as
Role. -
Set the Name ID Format to Email Address.
-
Ensure the fully qualified domain name parameter and port parameter match that of your Splunk Cloud instance.
For example:
-
Fully Qualified Domain Name:
https://tenant.splunkcloud.com -
Port: 443
-
-
Click Save.
-
Go to Settings → Authentication Methods → SAML Settings.
-
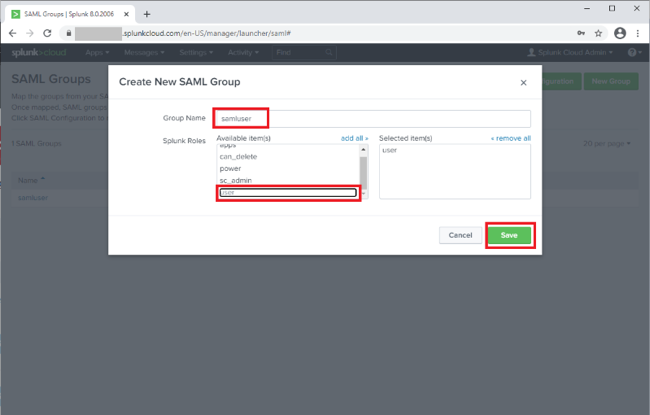
Click New Group and configure the following settings.
Setting Value Name
samluserThis value should match the role you are passing from PingFederate in the SSO Attribute Mapping.
Role
user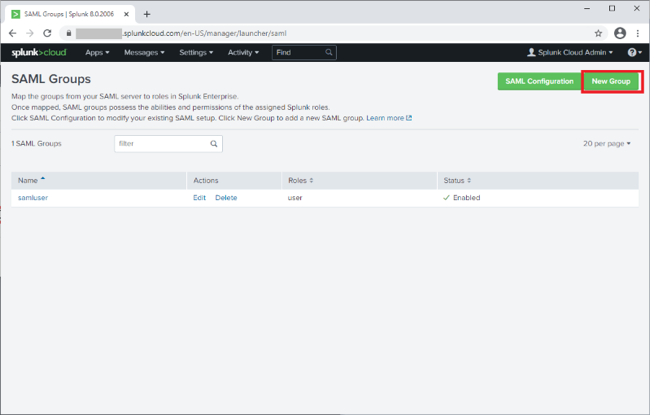
-
Click Save.
-
Create additional groups as required to meet requirements.
The configuration is complete.