Configuring SAML SSO with Evernote and PingOne for Enterprise
Learn how to enable Evernote sign on from the PingOne for Enterprise console (IdP-initiated sign-on) and direct Evernote sign on using PingOne for Enterprise (SP-initiated sign-on).
Before you begin
-
Link PingOne for Enterprise to an identity repository containing the users requiring application access.
-
Populate Evernote with at least one user to test access.
-
You must have administrative access to PingOne for Enterprise and Evernote.
Update the Evernote application in PingOne for Enterprise
-
Sign on to PingOne for Enterprise and go to Applications → Application Catalog.
-
Search for
Evernote.
-
Expand the Evernote entry and click the Setup icon.
-
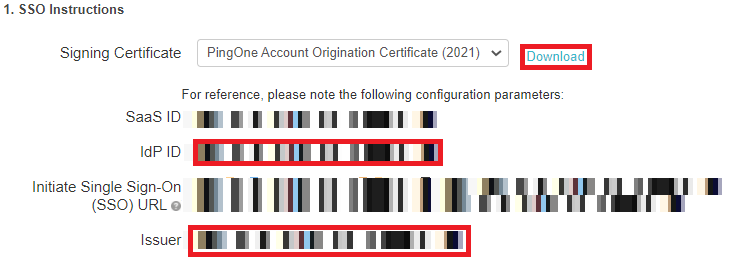
Copy the IdP ID value.
You will need this wherever you see
IdP-ID-valuein the next procedure. -
Download the signing certificate.

-
Click Continue to Next Step twice.
-
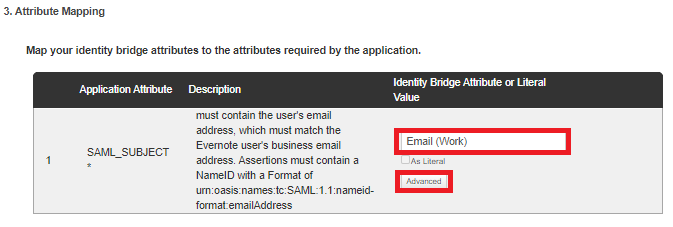
In the Attribute Mapping section, map SAML_SUBJECT to the attribute containing the user’s email address.

-
Click Advanced.
-
In the Name ID format to send to SP field, enter
urn:oasis:names:tc:SAML:1.1:nameid-format:emailAddress.
-
Click Save, then click Continue to Next Step twice.
-
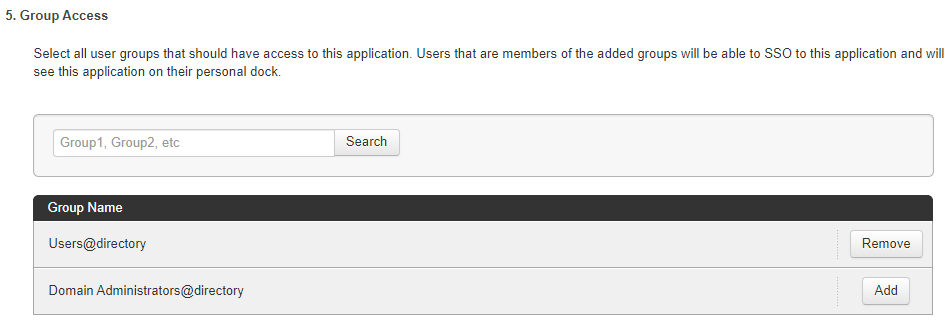
Click Add for all user groups that should have access to Evernote.

-
Click Continue to Next Step.
-
Click Finish.
Add the PingOne for Enterprise IdP connection to Evernote
-
Sign on to your Evernote Admin organization as an administrator and go to the Evernote Business Admin Console.
-
Go to Security → Single Sign-On.
-
Set SAML HTTP Request URL to
https://sso.connect.pingidentity.com/sso/idp/SSO.saml2?idpid=IdP-ID-value. -
In a text editor, open your PingOne for Enterprise signing certificate.
-
Copy and paste your signing certificate contents into the X.509 Certificate field.
-
Click Save & Enable.
