Configuring SAML SSO with SumoLogic and PingFederate
Learn how to enable SumoLogic sign-on from a PingFederate URL (IdP-initiated sign-on) and direct SumoLogic sign-on using PingFederate (SP-initiated sign-on).
Before you begin
-
Configure PingFederate to authenticate against an identity provider (IdP) or datastore containing the users requiring application access.
-
PingFederate’s X.509 certificate should be exchanged to verify the signature in SAML assertions.
-
An email attribute is required in the assertion, either the SAML Subject or another SAML attribute per the SAML configuration. The value of the email attribute must be a valid email address. It is used to uniquely identify the user in the organization.
-
Populate SumoLogic with at least one user to test access.
Create a PingFederate service provider (SP) connection for SumoLogic
-
Sign on to the PingFederate admin console.
-
Configure using Browser SSO profile SAML 2.0.
-
Set Partner’s Entity ID to
https://service.eu.sumologic.com/. -
Enable the following SAML Profiles:
-
IdP-Initiated SSO
-
SP-Initiated SSO
-
-
In Assertion Creation: Attribute Contract, select urn:oasis:names:tc:SAML:1.1:nameid-format:unspecified.
-
In Assertion Creation: Authentication Source Mapping: Authentication Source Mapping, map a new Adapter Instance → HTML Form.
-
In Assertion Creation: Authentication Source Mapping: Attribute Contract Fulfilment, map
SAML_SUBJECT. -
In Protocol Settings: Assertion Consumer Service URL, set Binding to POST and set Endpoint URL to
https://service.eu.sumologic.com/sumo/saml/consume/596910108. This value is received and updated from SumoLogic. -
In Protocol Settings: Allowable SAML Bindings, enable POST.
-
In Credentials: Digital Signature Settings, select the PingFederate Signing Certificate.
-
Save the configuration.
-
Export the signing certificate.
-
Export and then open the metadata file and copy the value of:
-
The entityID
-
The Location entry (
https://your-value/idp/SSO.saml2)
-
Add the PingFederate IdP Connection to SumoLogic
-
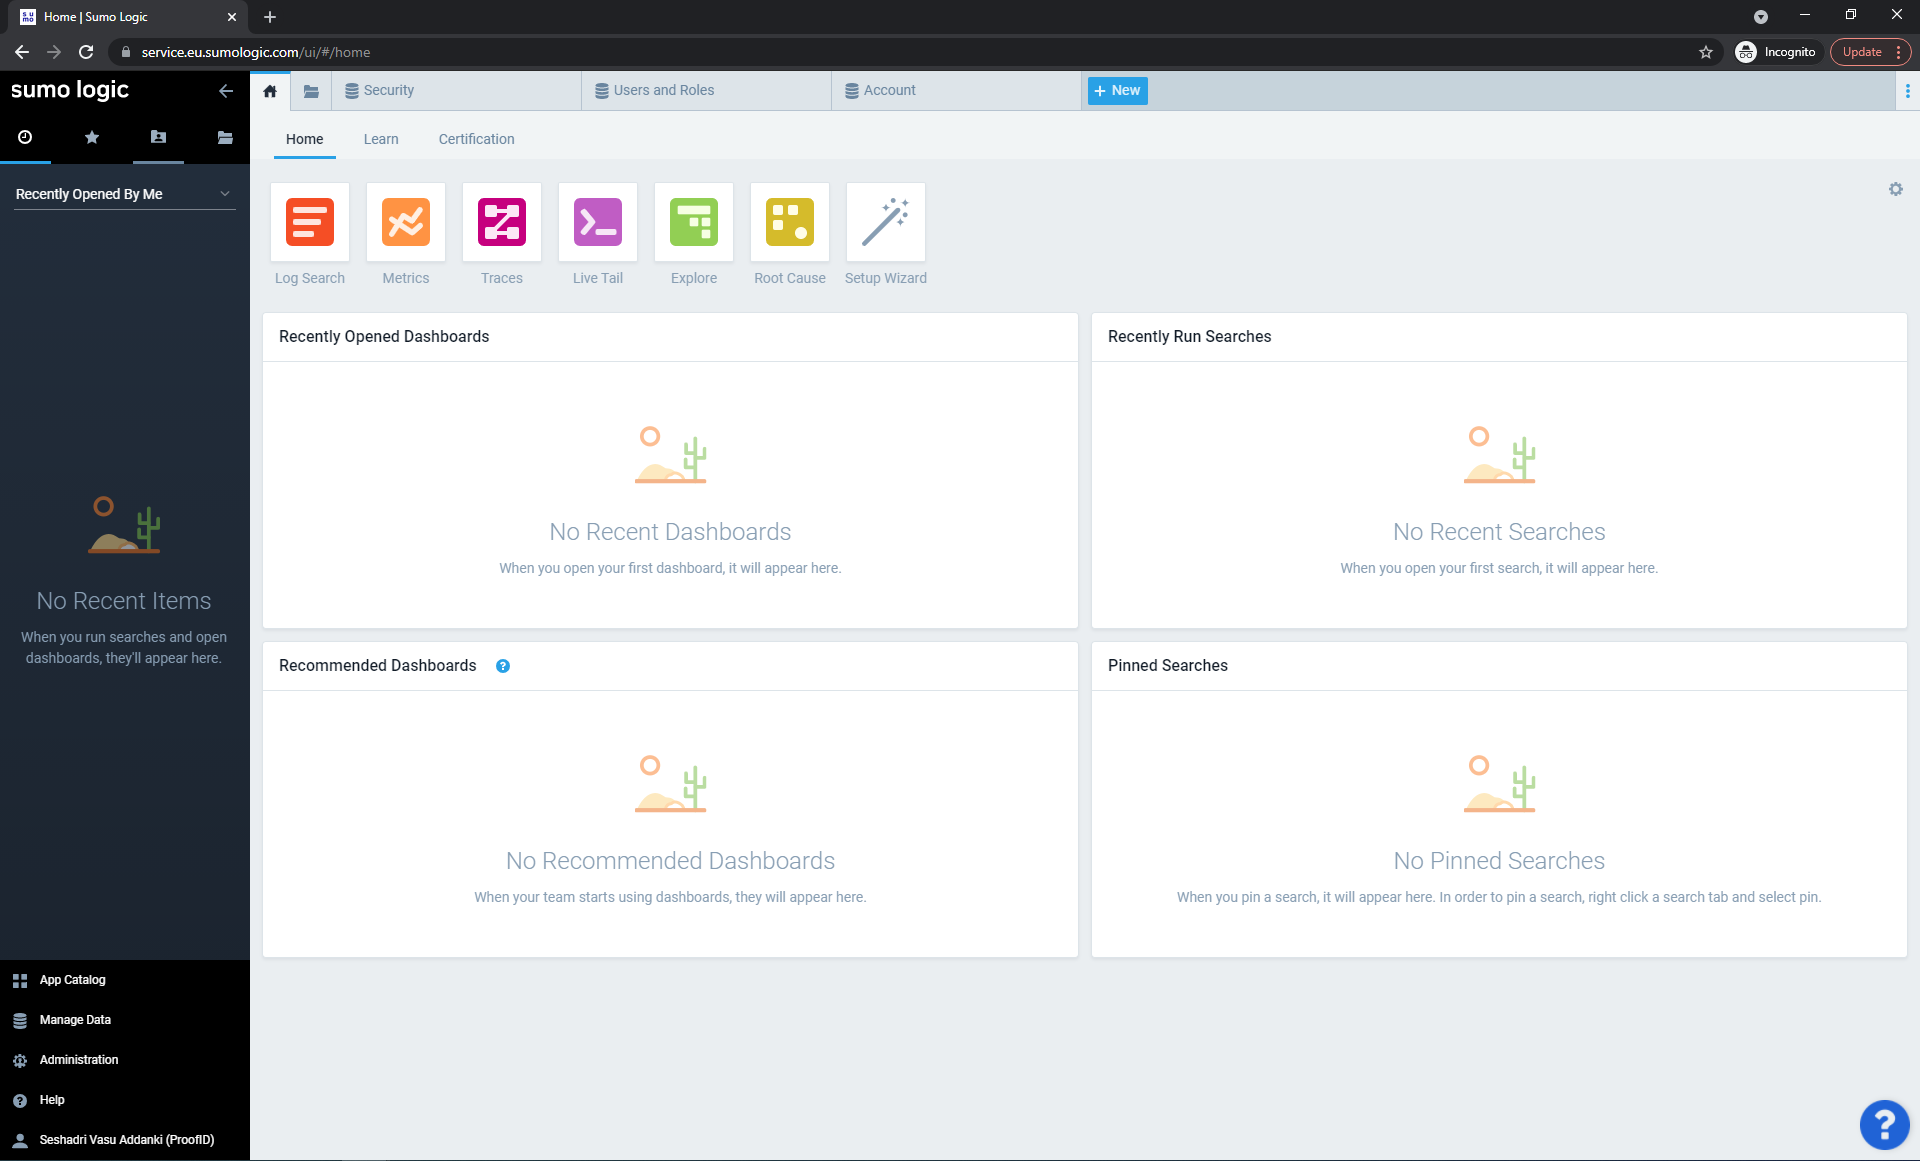
Sign on to the SumoLogic application.
In this example, we have registered and logged in using trial mode.
-
Go to Administration → Security → SAML.

-
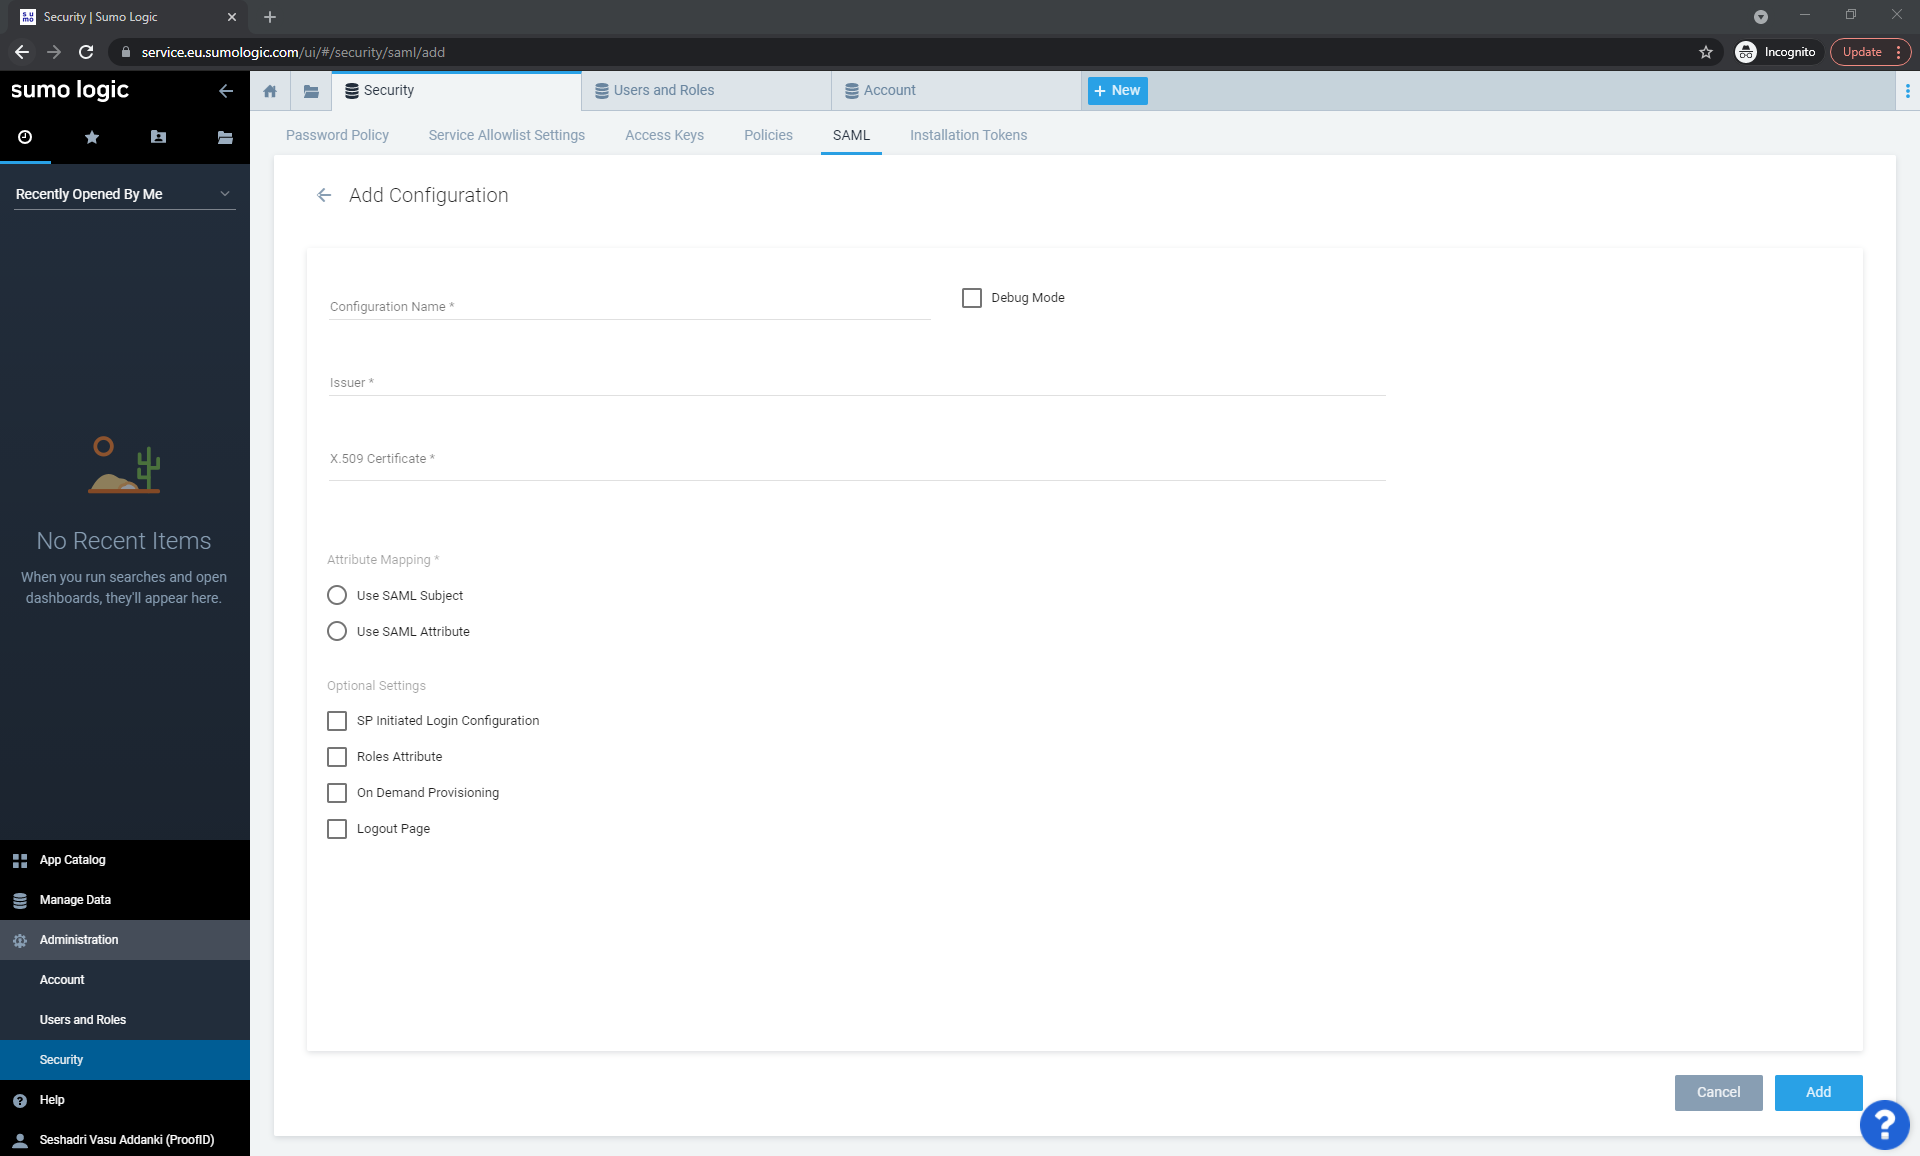
Click Add Configuration.
-
Add the following values:
-
Configuration Name :
pingfed -
Select the Debug Mode check box
-
Issuer: The PingFederate Issuer value
-
X.509 Certificate: Copy PingFederate’s X.509 certificate here for verifying the signature
-
Attribute Mapping: Select Use SAML Subject
-
Optional Settings: Leave the default settings
-
Click Add
-
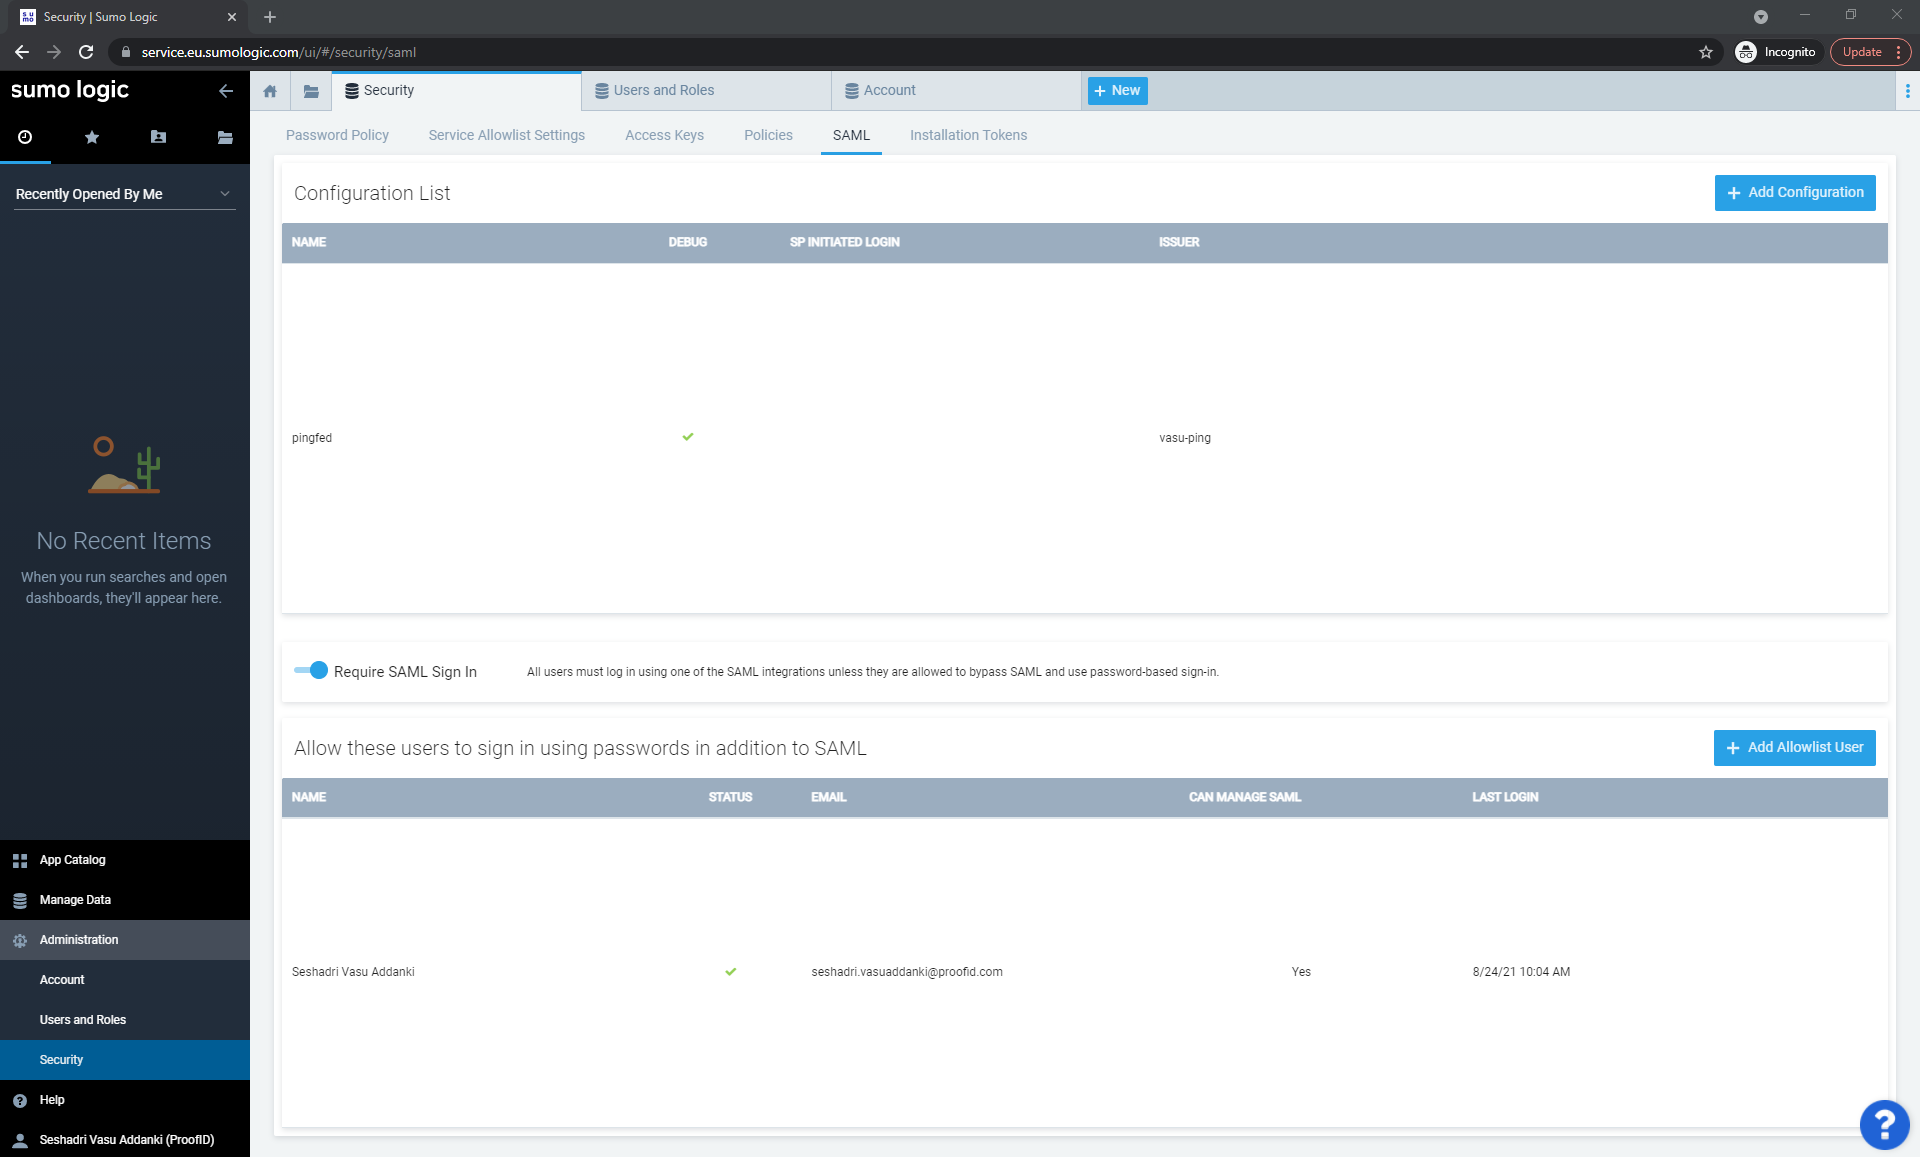
Enable Require SAML Sign In.
-
-
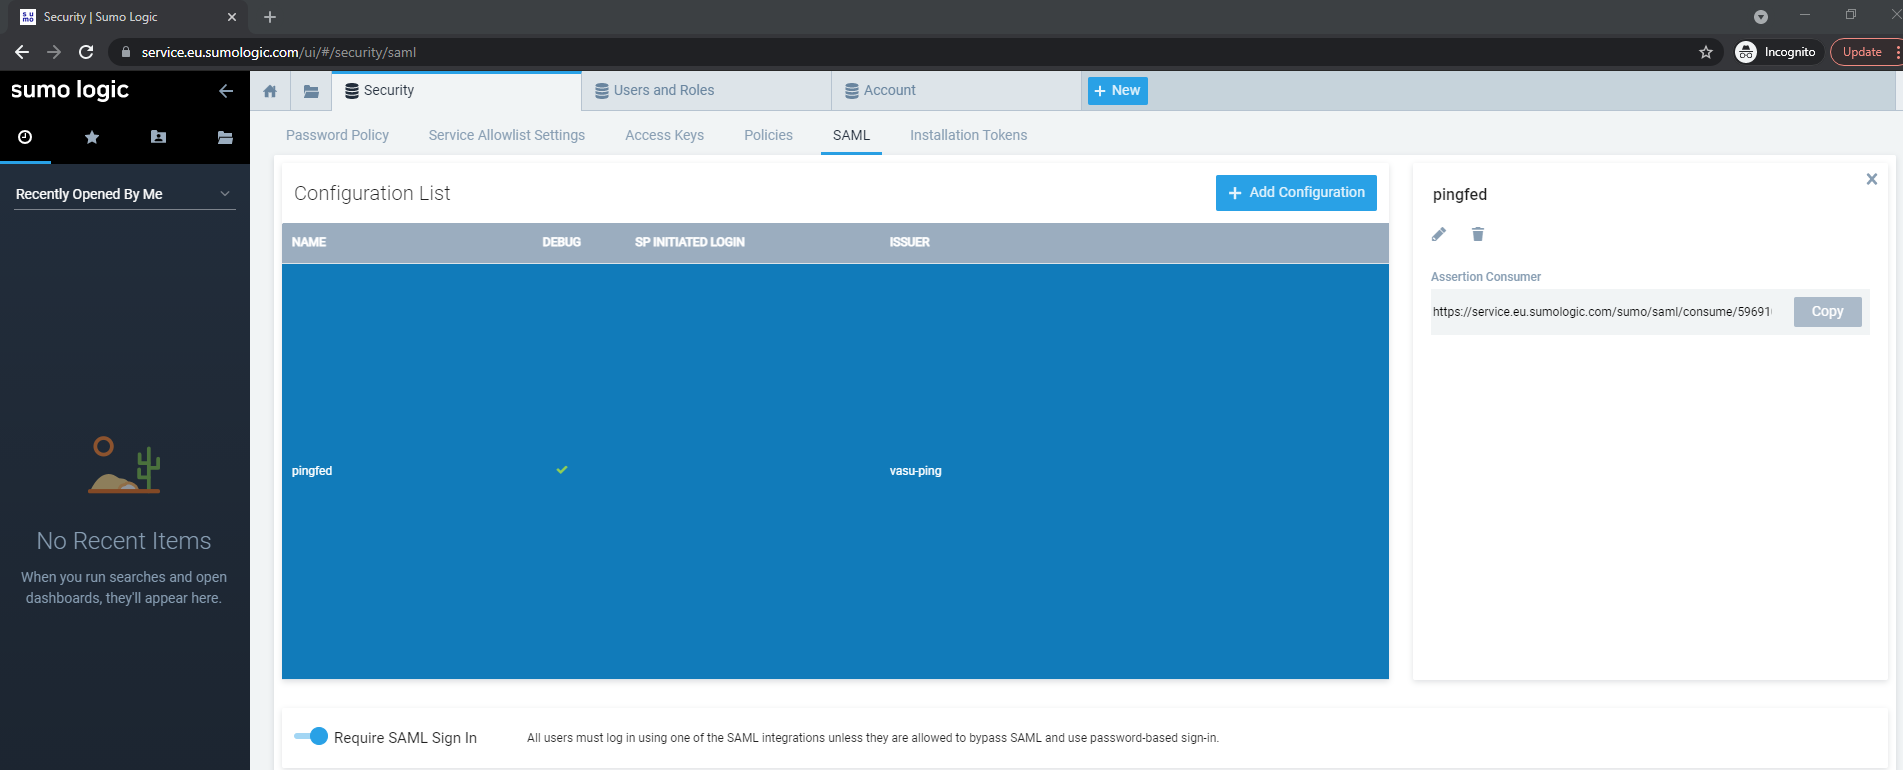
Select the pingfed configuration you have just created and copy the Assertion Consumer Service URL.
-
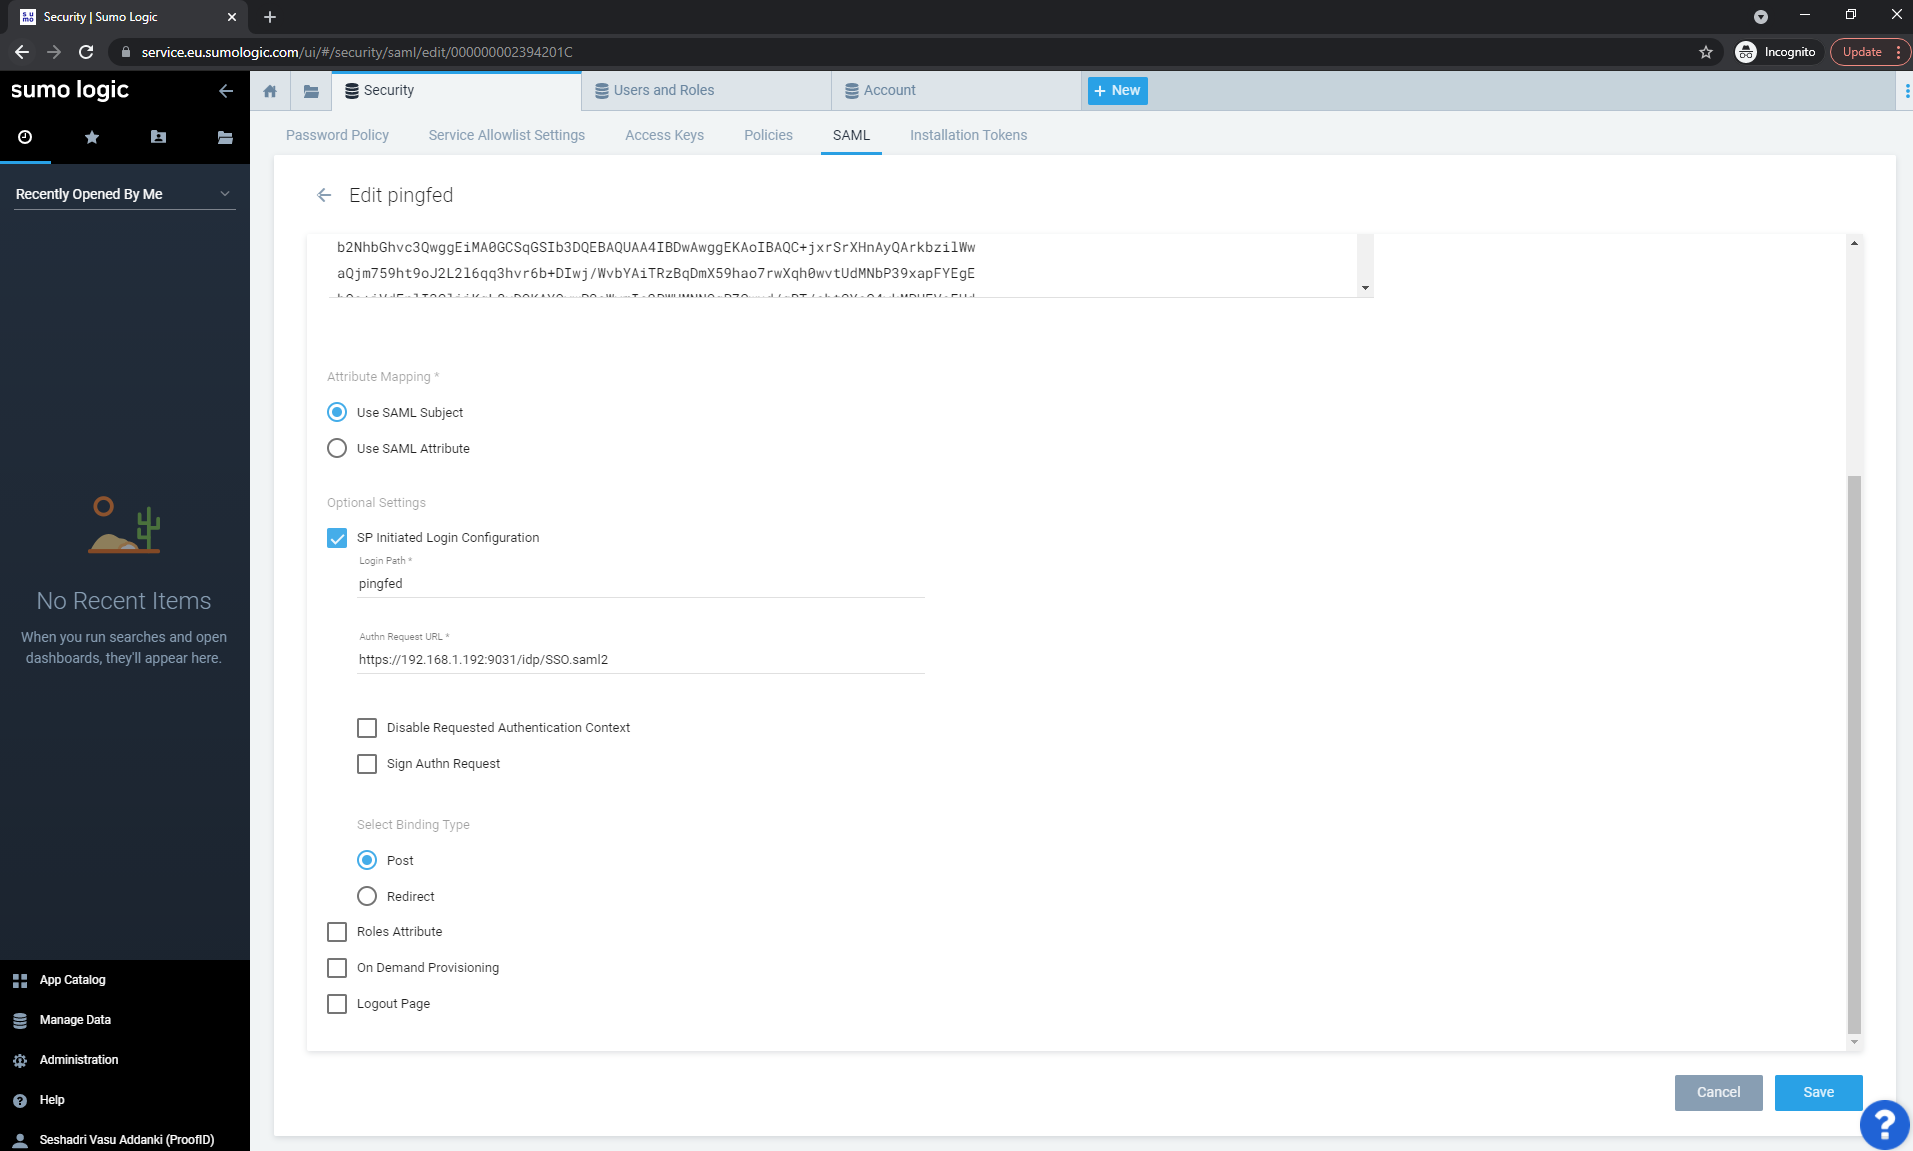
To enable SP-initiated SSO, select the pingfed configuration and click the Pencil icon above the ACS URL.
-
Select the SP Initiated Login Configuration check box and enter the following values:
-
Login Path: enter a unique identifier for your organization. You can specify any alphanumeric string (with no embedded spaces), provided that it is unique to your organization. (You can’t configure a Login Path that another Sumo customer has already configured).
-
Authn Request URL: enter the URL that the IdP has assigned for SumoLogic to submit SAML authentication requests to the IdP. For example,
https://idp-server-hostname:9031/sso/idp/SSO.saml2 -
Select Binding Type: Post.
-
-
Click Save.
-
Click the saved pingfed configuration again and make a note of the Authentication Request and EntityID URLs.
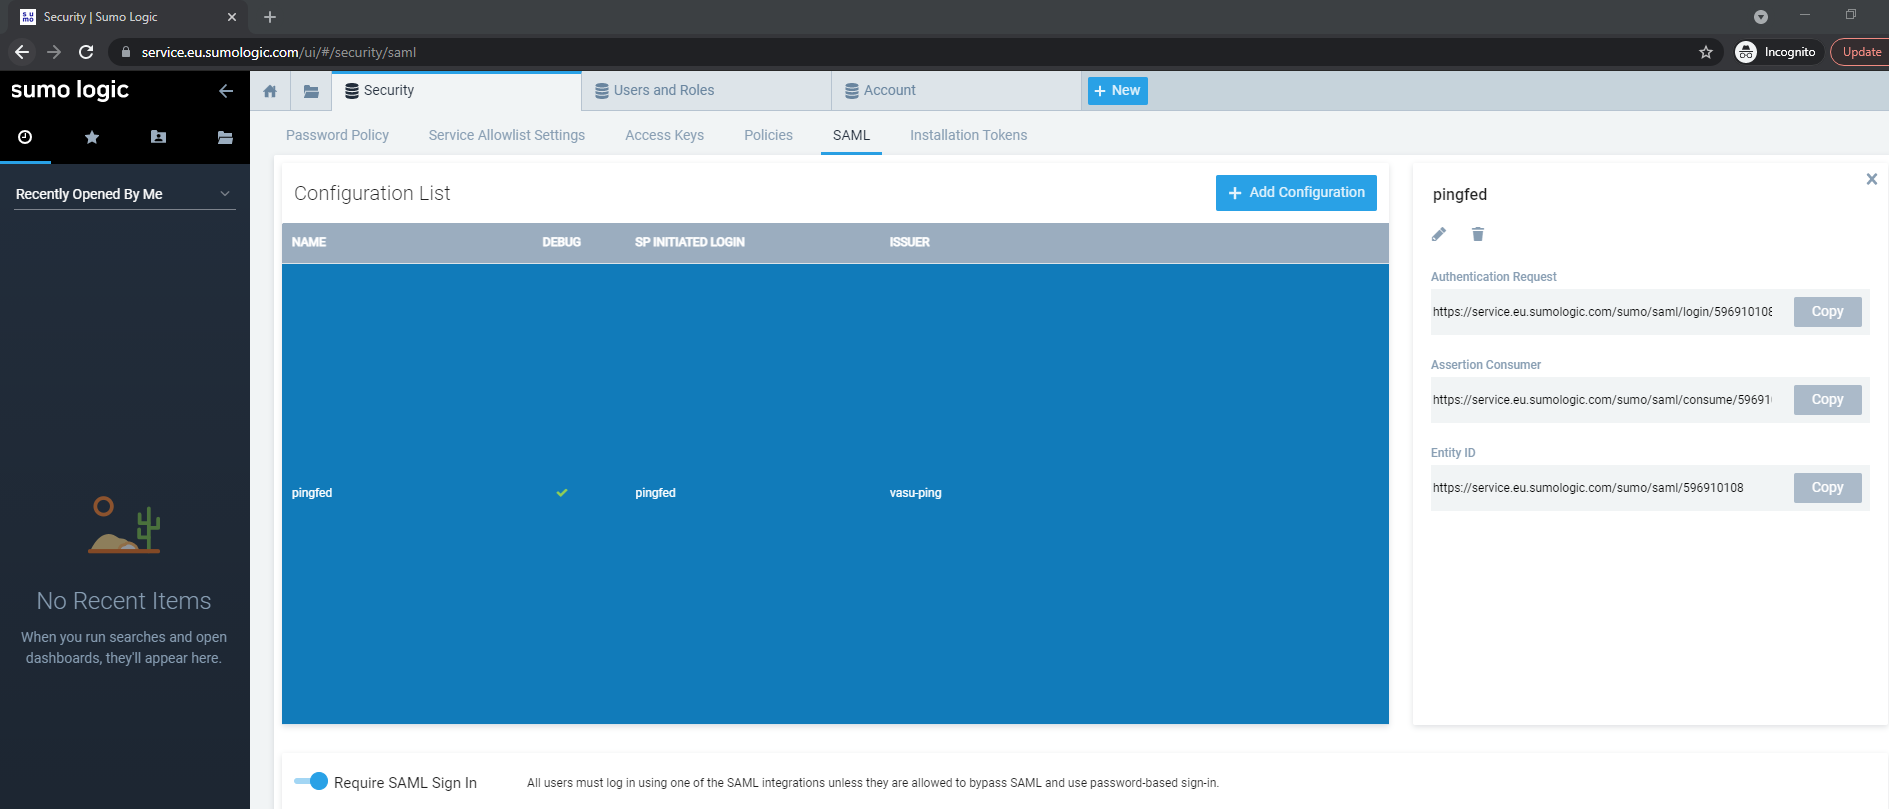
The SumoLogic connection configuration is now complete.
Update the ACS URL values in PingFederate
-
Sign on to the PingFederate administrative console.
-
Edit the SP connection for SumoLogic.
-
Set the Partner’s Entity ID (Connection ID) value to SumoLogic’s Entity ID that you copied previously.
-
Set Assertion Consumer Service URL : Endpoint URL to SumoLogic’s Assertion Consumer Service URL value.
-
Click Save.