Configuring SAML SSO with ServiceNow and PingOne for Enterprise
Learn how to configure SAML SSO with ServiceNow and PingOne for Enterprise
About this task
The following table details the required and optional attributes to be configured in the assertion attribute contract.
| Attribute Name | Description | Required / Optional |
|---|---|---|
NameID |
NameID and format is configurable in ServiceNow. This guide uses email. |
Required |
The following table details the references that are used within this guide that are environment specific. Replace these with the suitable value for your environment.
| Reference | Description |
|---|---|
|
The instance name for your ServiceNow tenant you want to integrate with PingOne for Enterprise. |
Create a PingOne for Enterprise application for ServiceNow
-
Sign on to PingOne for Enterprise and go to Applications → Application Catalog.
-
Search for
ServiceNowand then click the ServiceNow row.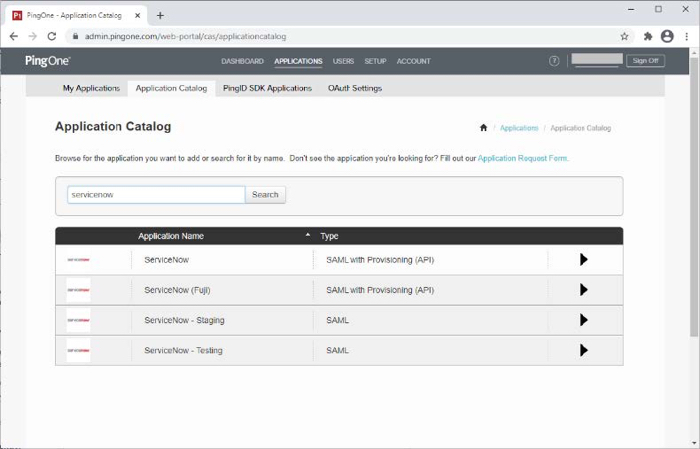
-
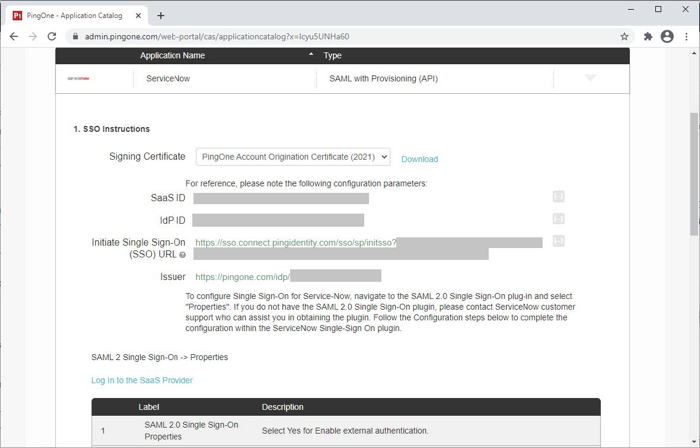
Click Setup.
-
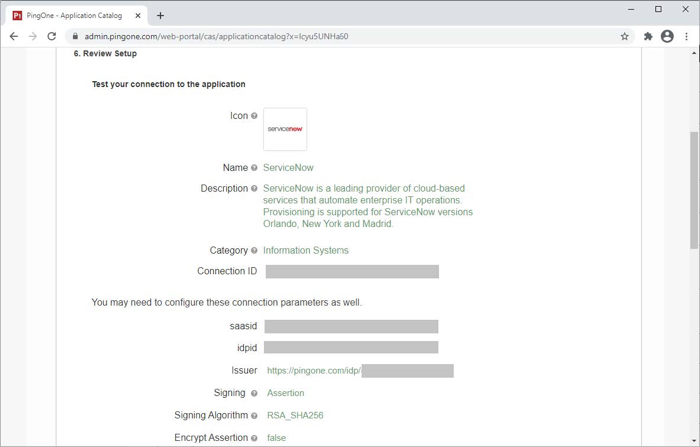
Review the steps and make a note of the PingOne SaaS ID, IdP ID, Single Sign-on URL, and Issuer values.
-
Click Continue to Next Step.
-
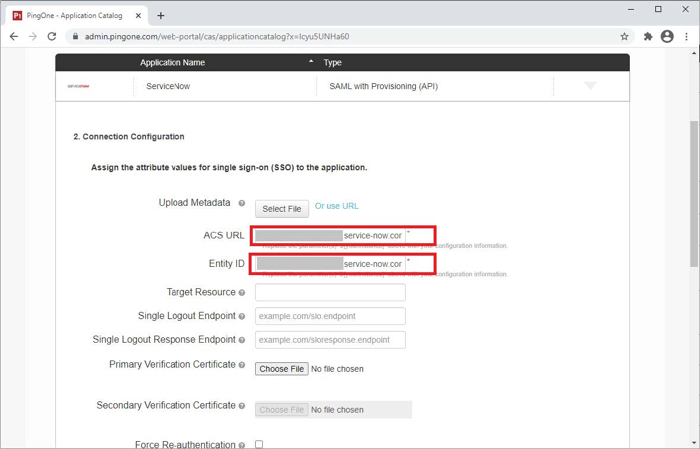
Verify the following:
-
ACS URL is set to
https://tenant.service-now.com/navpage.do. -
Entity ID is set to
https://tenant.service-now.com.
-
-
Click Continue to Next Step.
-
In the Attribute Mapping section, in the Identity Bridge Attribute or Literal Value column of the SAML_Subject row, select a suitable attribute, such as SAML_SUBJECT.
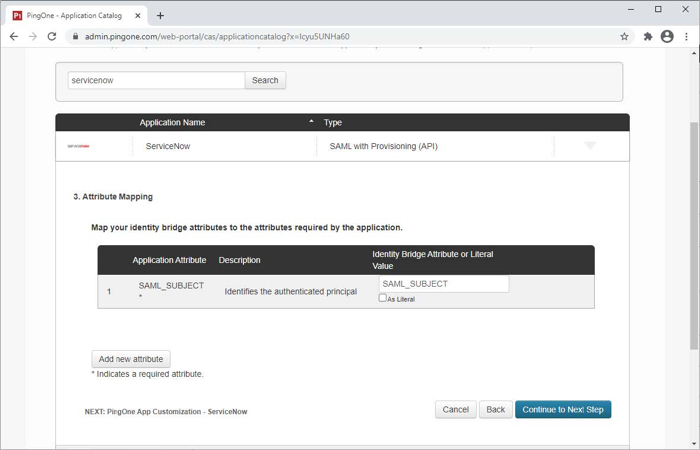
NameID is configurable in ServiceNow.
This guide assumes email is used and that SAML_SUBJECT contains the email address for the user in PingOne for Enterprise.
-
Click Continue to Next Step.
-
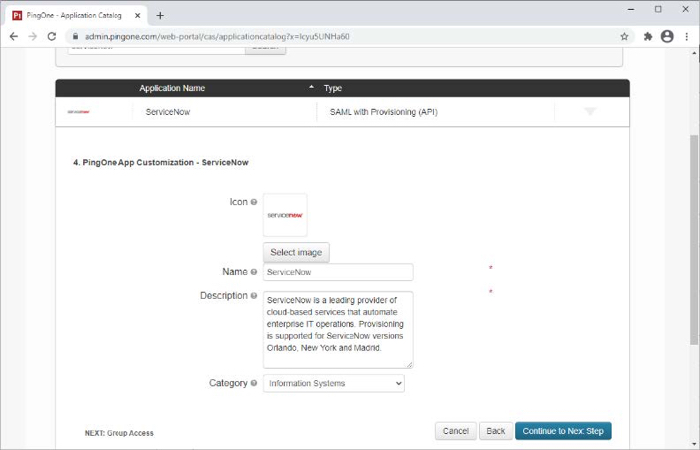
Update the Name, Description, and Category fields as required.
-
Click Continue to Next Step.
-
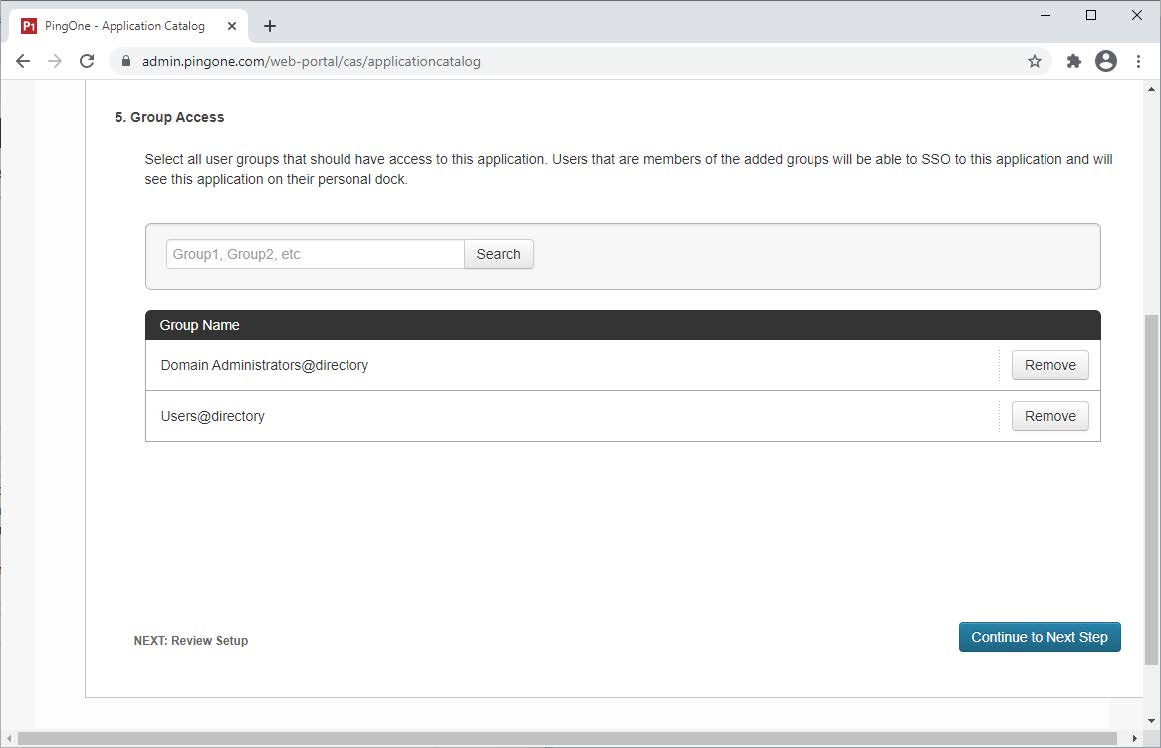
Add suitable user groups for the application.
-
Click Continue to Next Step.
-
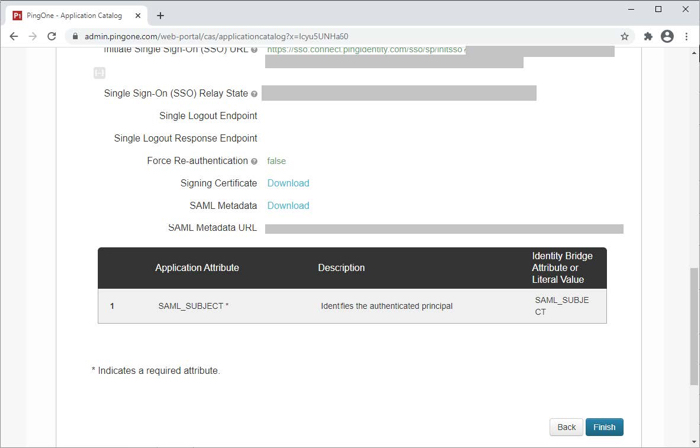
Review the settings.
-
Copy the Single Sign-On (SSO) URL value to a temporary location.
This is the IdP-initiated SSO URL that you can use for testing.
Make a note of the following values. You’ll use them later in the ServiceNow configuration:
-
PingOne for Enterprise Issuer
-
PingOne for Enterprise idpid
-
-
On the SAML Metadata line, click Download.
You will use this later for the ServiceNow configuration.
-
On the Signing Certificate line, click Download.
You will use this later for the ServiceNow configuration.
-
Click Finish.
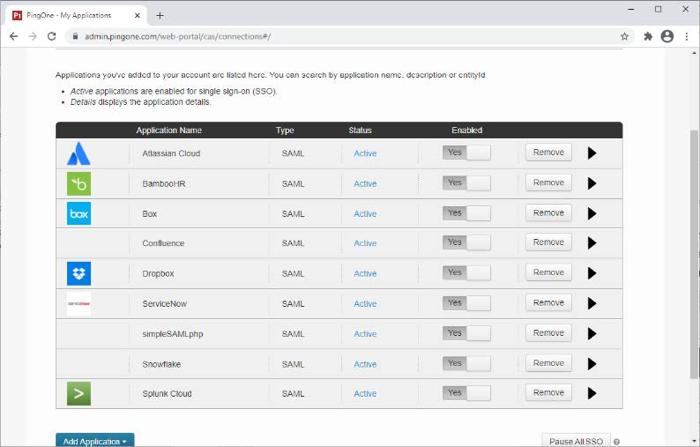
Configure the PingOne for Enterprise IdP connection for ServiceNow
-
Sign on to ServiceNow as an administrator.
-
Activate SAML 2.0:
-
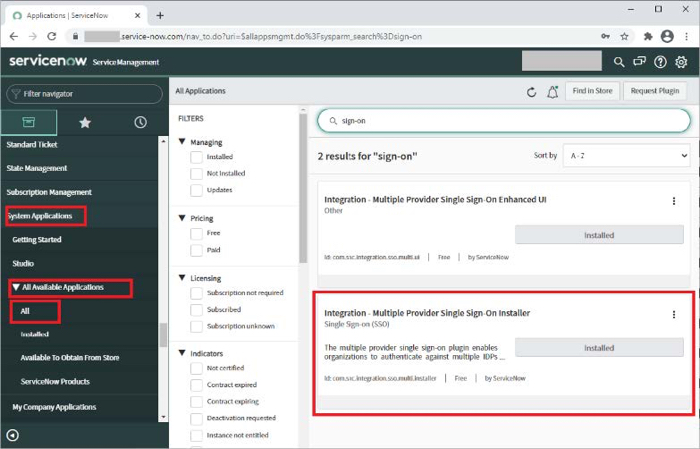
Go to System Applications.
-
Click All Available Applications.
-
Click All.
-
Locate the Integration - Multiple Provider Single Sign-On Installer plugin.
If you can’t find the plugin, you can request it from ServiceNow customer support.
-
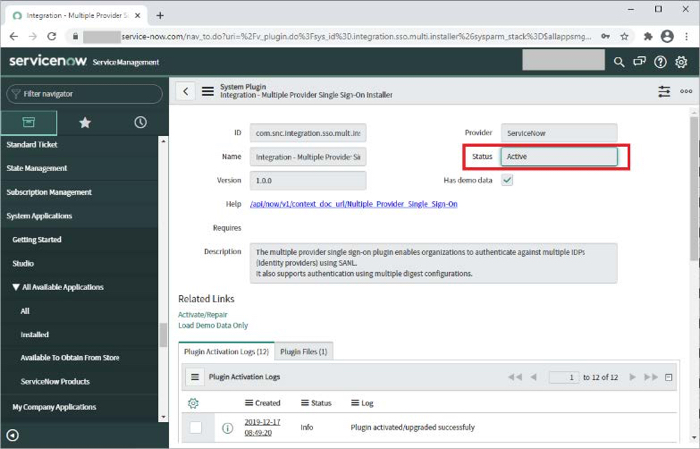
Check if the plugin is installed. If the plugin is not installed, click Install.
-
-
Configure a new identity provider:
-
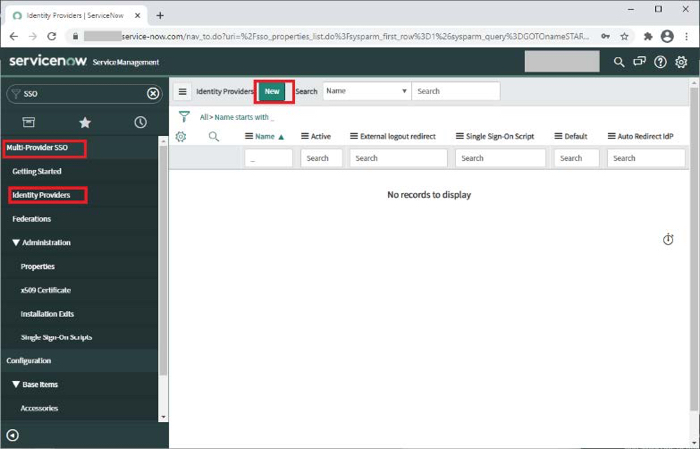
In the left navigation pane, select Multi-Provider SSO.
-
Click Identity Providers.
-
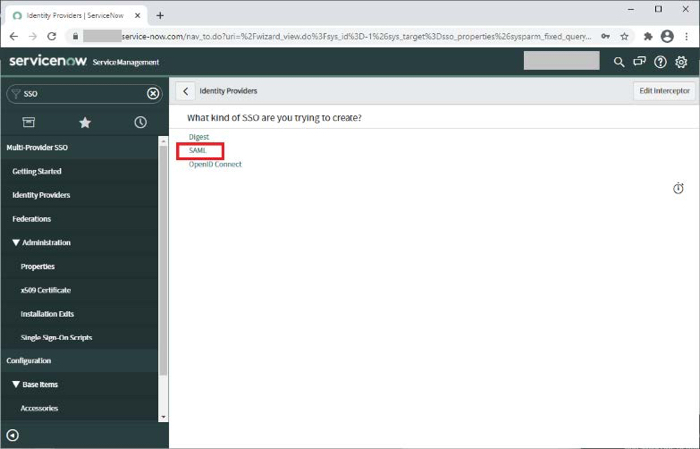
Click New.
-
Click SAML.
-
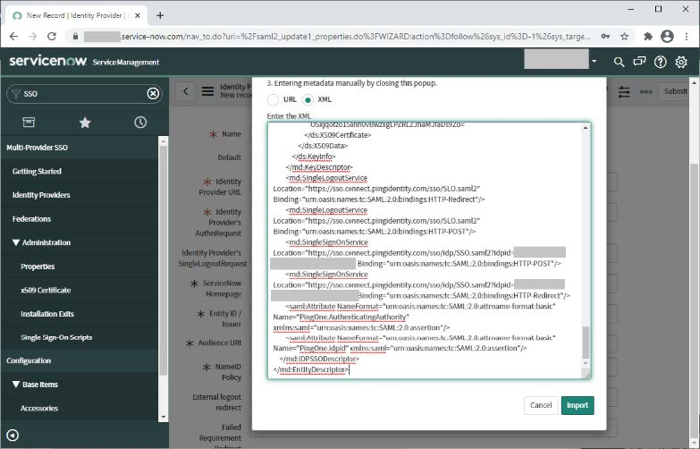
Click XML.
-
Paste the contents of the PingOne for Enterprise metadata file that you previously downloaded into the Enter the XML field.
-
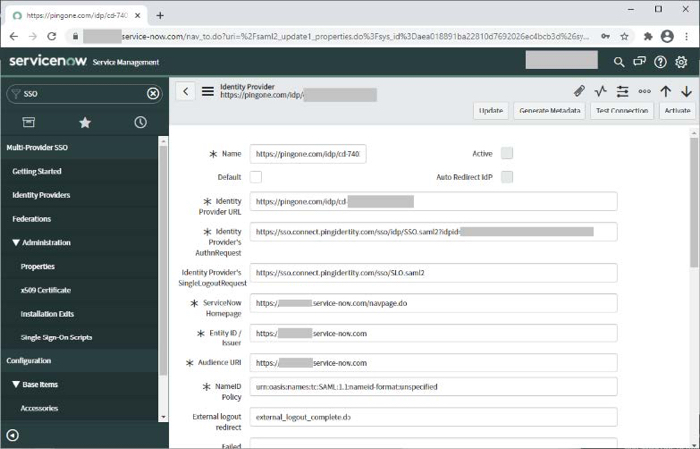
Update the NameID Policy to
urn:oasis:names:tc:SAML:1.1:nameid-format:unspecified. -
Click Update.
-
Click Test.
A browser window opens to validate the configuration. It prompts you to authenticate at the IdP and then sign out of the session. If successful, you can then activate the connection.
-
Click Activate.
If you receive an error stating that you must test the connection, something failed in the test. Validate the settings, and use the Script Debugger → Debug log to re-run the test to determine the cause of the failure.
-
Test the PingOne for Enterprise IdP-initiated SSO integration
-
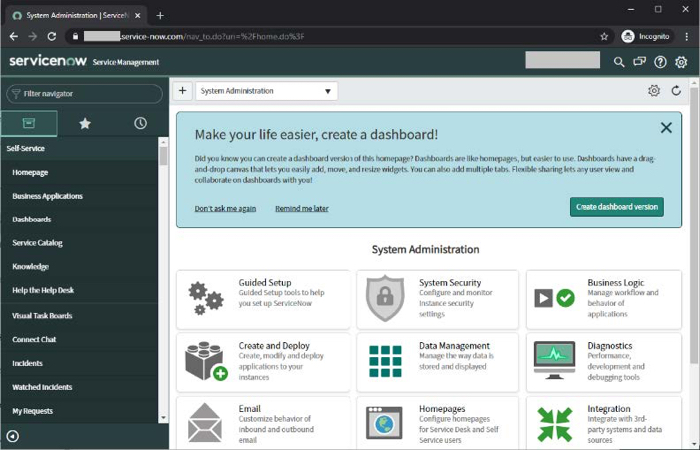
Go to the Single Sign-On (SSO) URL from the PingOne for Enterprise application configuration to perform IdP-initiated SSO.
For example,
https://sso.connect.pingidentity.com/sso/sp/initsso?saasid=saasid&idpid=idpid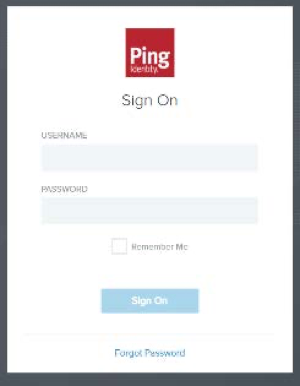
Test the PingOne for Enterprise SP-initiated SSO integration
-
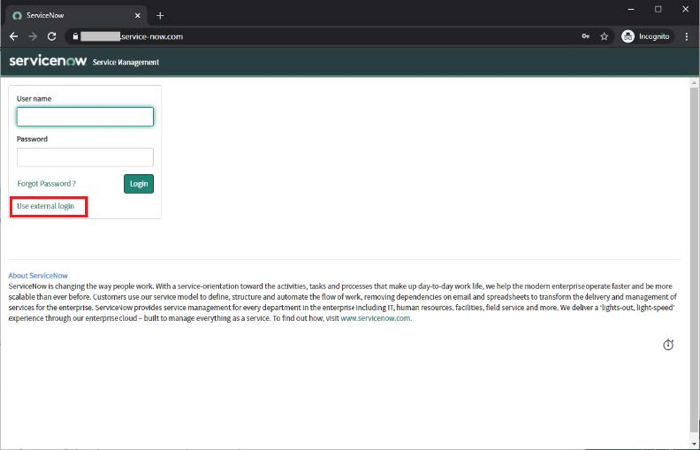
Go to your ServiceNow URL.
For example,
https://your-environment.service-now.com
-
Click Use external login.
-
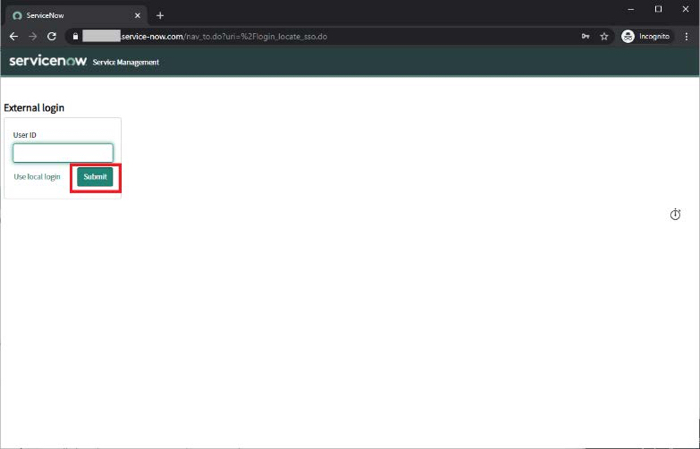
Click Submit.
-
Click Continue.
You’re redirected to PingOne for Enterprise for authentication.
-
After you’re redirected to PingOne for Enterprise, enter your PingOne username and password.

