Configuring SAML SSO with Atlassian Cloud and PingOne for Enterprise
About this task
The following table details the required and optional attributes to be configured in the assertion attribute contract.
| Attribute Name | Description | Required / Optional |
|---|---|---|
|
Email Address |
Required |
|
First Name |
Required |
|
Surname |
Required |
|
ID (not email) |
Required |
The following table details the references that are used within this guide that are environment specific. Replace these with the suitable value for your environment.
| Reference | Description |
|---|---|
TenantSSOID |
Tenant single sign-on (SSO) ID, retrieved from Atlassian Cloud SAML Single Sign-on configuration as part of EntityID and Assertion Consumer Service (ACS) URL. |
Create a PingOne for Enterprise Application for Atlassian Cloud
|
The following configuration is untested, and is provided as an example. Additional steps might be required. |
-
In Atlassian Cloud, go to Security → SAML Single Sign-on and sign on to Atlassian Cloud as an administrator.
-
Make a note of the Entity ID and ACS URL values.
-
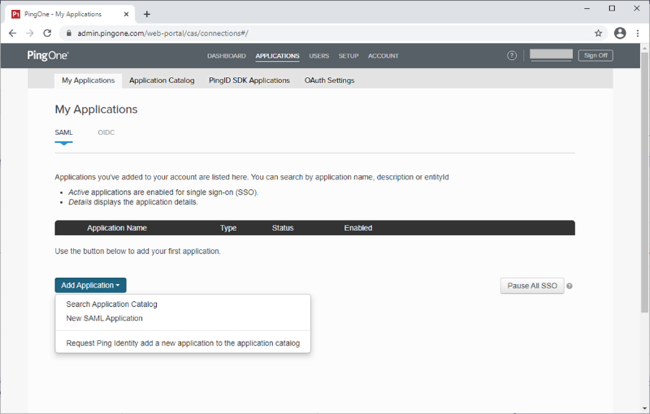
Sign on to PingOne for Enterprise and go to Applications → Application Catalog.
-
On the SAML tab, in the Add Application list, select Search Application Catalog.
-
Search for
Atlassianand then click the Atlassian Cloud row.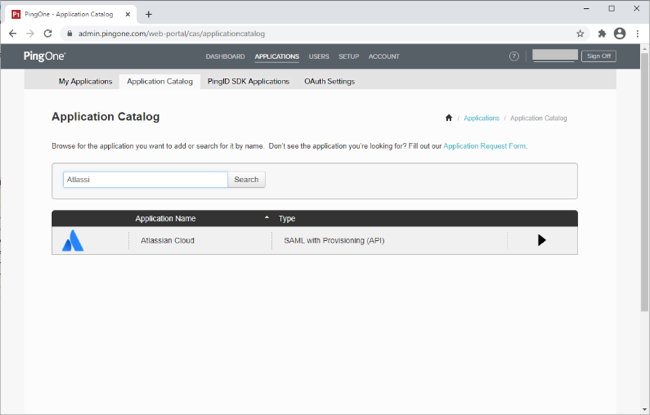
-
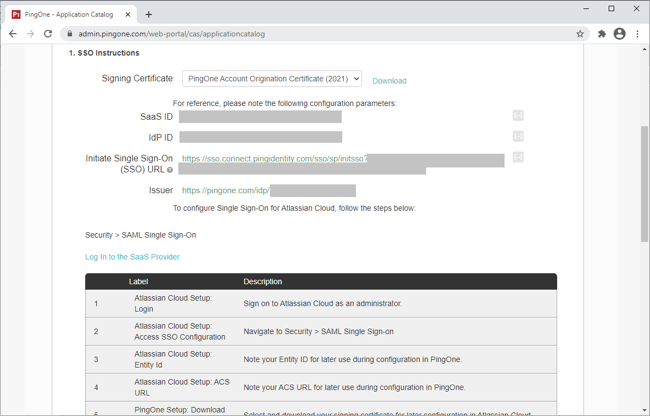
Click Setup.
-
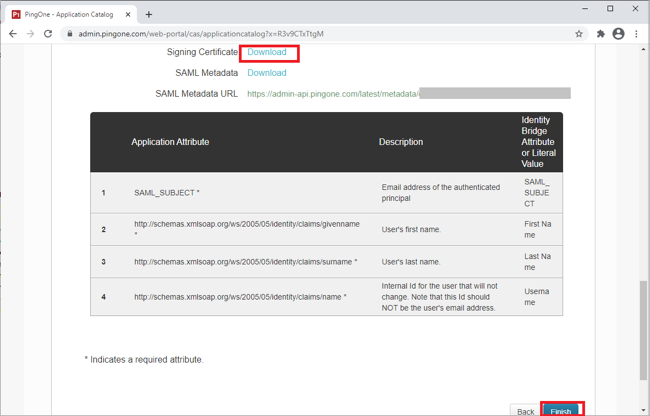
In the Signing Certificate list, select the appropriate signing certificate.
-
Review the steps, and make a note of the PingOne SaaS ID, IdP ID, Single Sign-On URL, and Issuer values shown.
-
Click Continue to Next Step.
-
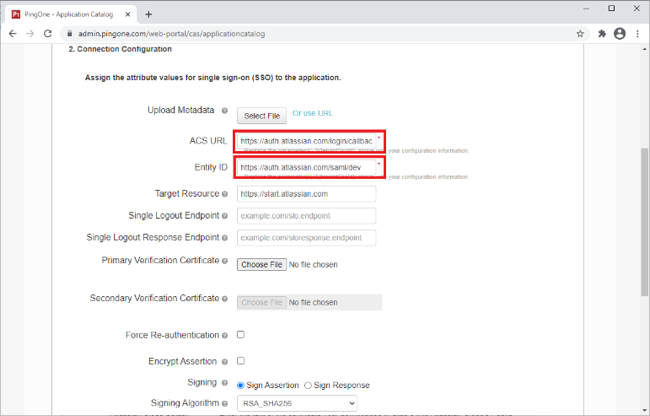
Enter the following.
Attribute Directions URL ACS URL
Enter the ACS URL from step 1b.
https://auth.atlassian.com/login/callback?connection=saml-tenantSSOID
Entity ID
Enter the Entity ID from step 1b.
https://auth.atlassian.com/saml/tenantSSOID
-
Click Continue to Next Step.
-
Configure the Attribute Mapping section.
Application Attribute Identity Bridge Attribute or Literal Value SAML_SUBJECT
Select a suitable attribute containing the email address.
givenname
Select a suitable attribute containing the user’s first name.
surname
Select a suitable attribute containing the user’s last name.
name
Select a suitable attribute containing the user’s unique ID.
This should not be the email address.
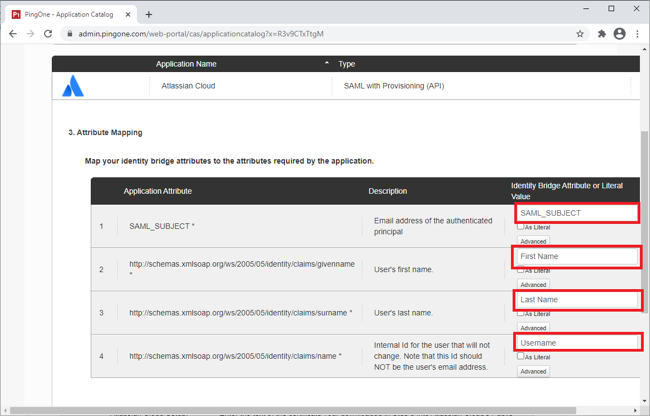
-
Click Continue to Next Step.
-
Update the Name, Description, and Category fields as required.
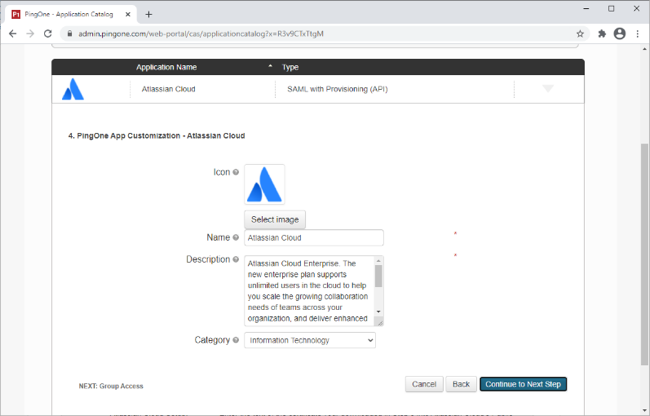
-
Click Continue to Next Step.
-
Add the user groups for the application.
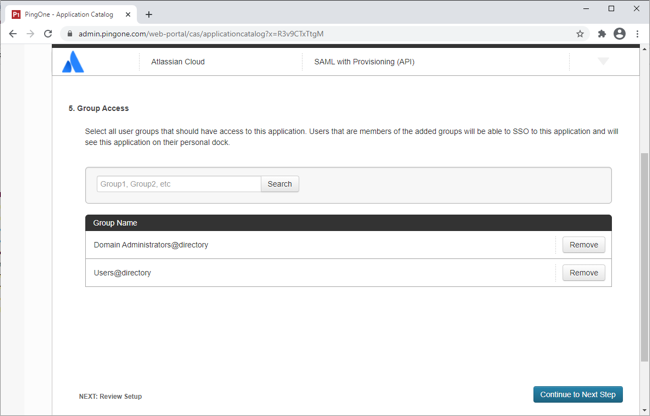
-
Click Continue to Next Step.
-
Review the settings.
-
Copy the Single Sign-On (SSO) URL value to a temporary location.
This is the IdP-initiated SSO URL that you can use for testing.
-
Make a note of the PingOne Issuer and PingOne idpid values.
You will use these in the Atlassian Cloud configuration.
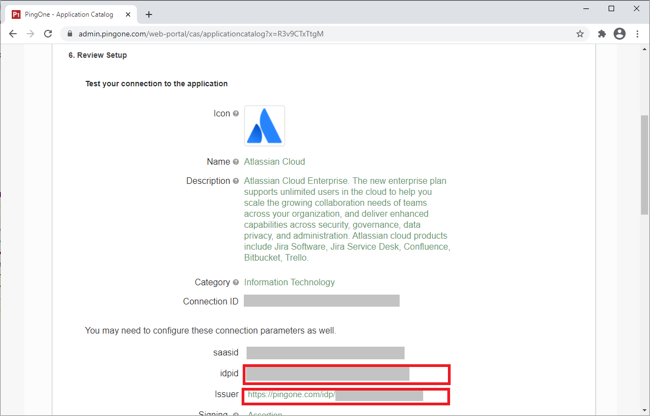
-
On the Signing Certificate line, click Download. Click Finish.
You will use this in the Atlassian Cloud configuration.
Result:
Configure the PingOne for Enterprise IdP connection for Atlassian Cloud
|
The following configuration is untested and is provided as an example. Additional steps might be required. |
-
In Atlassian Cloud, go to Security → SAML Single Sign-on and sign on to Atlassian Cloud as an administrator.
-
Click Add SAML Configuration.
-
Enter the following:
-
In the Identity Provider Entity ID field, enter the Issuer value from the PingOne for Enterprise configuration.
-
In the Identity Provider SSO URL field, enter
https://sso.connect.pingidentity.com/sso/idp/SSO.saml2?idpid=idpid, replacing idpid with the one from the PingOne for Enterprise configuration. -
In a text editor, open the certificate you downloaded during the PingOne for Enterprise configuration, and paste the contents of the certificate into the Public x509 Certificate field.
-
-
Click Save Configuration.