Configuring SAML SSO with Zendesk and PingFederate
Learn how to configure SAML SSO with Zendesk and PingFederate.
About this task
The following table details the required and optional attributes to be configured in the assertion attribute contract.
| Attribute Name | Description | Required / Optional |
|---|---|---|
|
Email Address |
Required |
The following table details the references that are used within this guide that are environment specific. Replace these with the suitable value for your environment.
| Reference | Description |
|---|---|
tenant |
Zendesk Tenant name |
Create the PingFederate service provider (SP) connection for Zendesk
-
Sign on to the PingFederate administrative console.
-
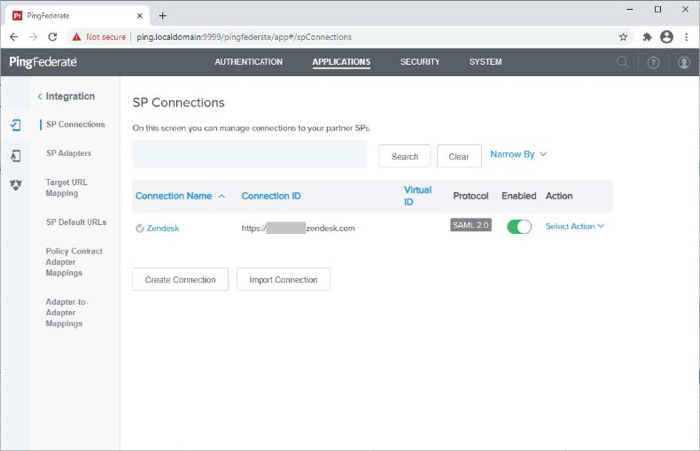
Using the following information, create an SP connection in PingFederate:
-
Set Partner’s Entity ID to
https://tenant.zendesk.com. -
Configure using Browser SSO profile SAML 2.0.
-
Enable the following SAML Profiles.
-
IdP-Initiated SSO
-
SP-Initiated SSO
-
-
In Assertion Creation → Attribute Contract Fulfillment, set the Subject Name Format to
urn:oasis:names:tc:SAML:1.1:nameid-format:emailAddress. -
In Assertion Creation → Attribute Contract Fulfillment, map the attribute SAML_SUBJECT to the attribute
mail. -
In Protocol Settings → Assertion Consumer Service URL, enter
https://tenant.zendesk.com/access/saml. -
In Protocol Settings → Allowable SAML Bindings, enable Redirect.
-
In Credentials, choose a suitable signing certificate and make sure the Include the certificate in the signature <KEYINFO> element check box is selected.
-
-
Export the metadata for the newly-created SP connection.
-
Export the signing certificate public key.
Configure the PingFederate IdP connection for Zendesk
-
Sign on to Zendesk as an administrator.
-
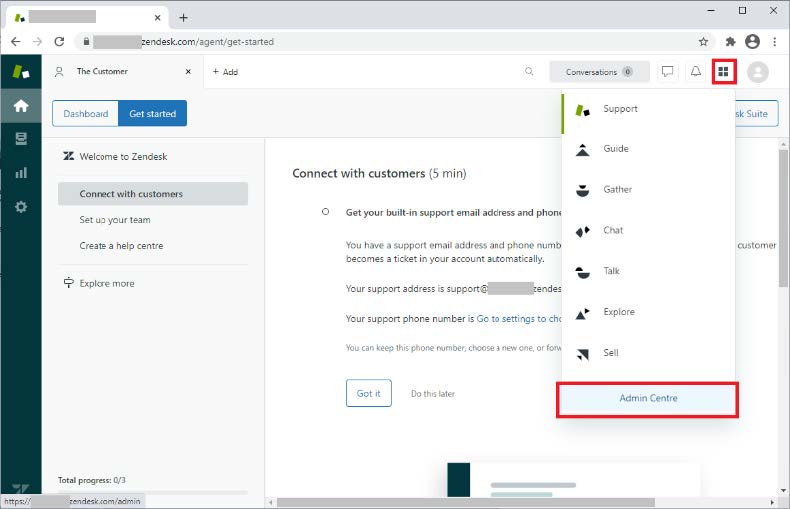
Click on the Products icon.
-
Click Admin Centre.
-
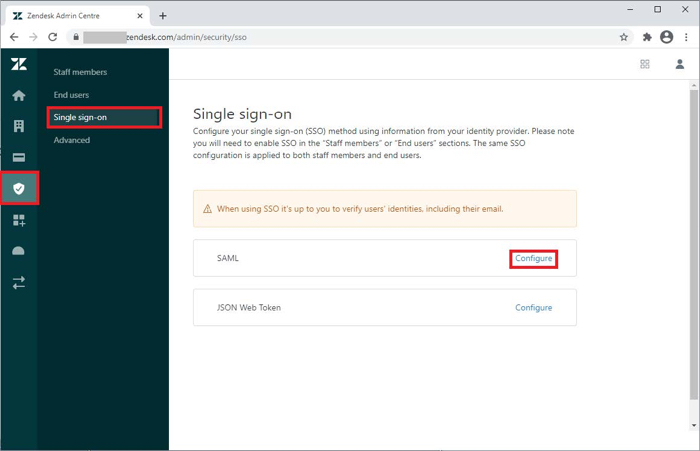
Click the Security icon.
-
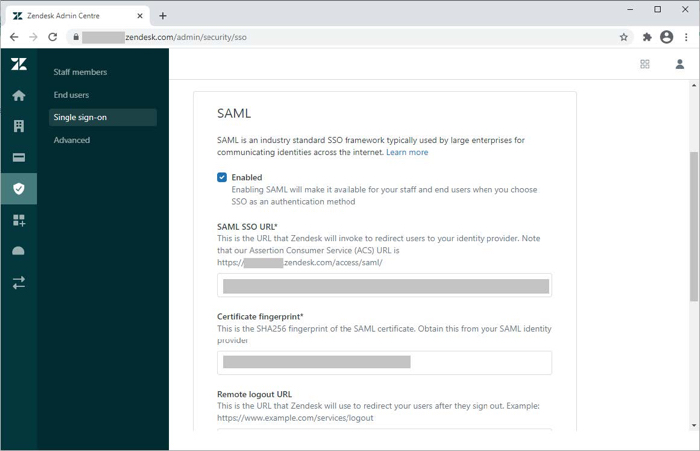
Click Single sign-on.
-
In the SAML SSO URL field, enter the SSO URL for your PingFederate environment configuration.
For example:
https://pinghostname/idp/SSO.saml2 -
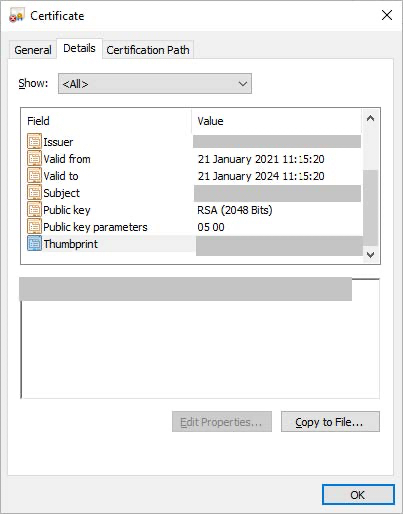
Open the Signing certificate you downloaded in the PingFederate SP configuration and copy the thumbprint to the Certificate fingerprint.
-
Select the Enabled check box.
-
Click Save.
-
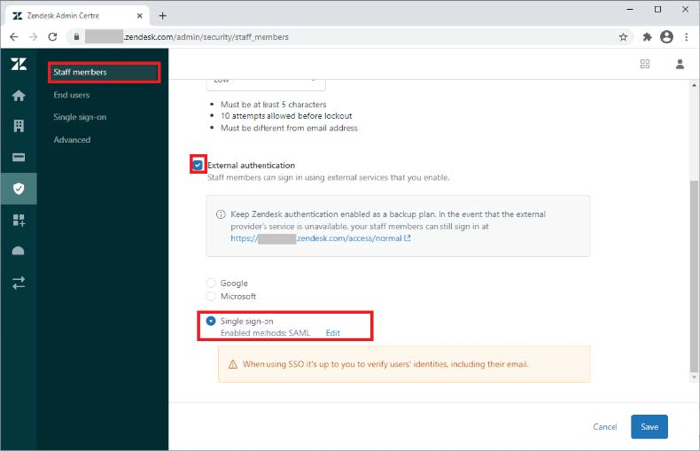
Enable external authentication for Staff members or End users as required.
The following example enables it for Staff members only.
-
Click the Security icon.
-
Click Staff members.
-
Select the External Authentication check box.
-
Click Single sign-on.
-
Click Save.
-
Test the integration
- For PingFederate IdP-initiated SSO
-
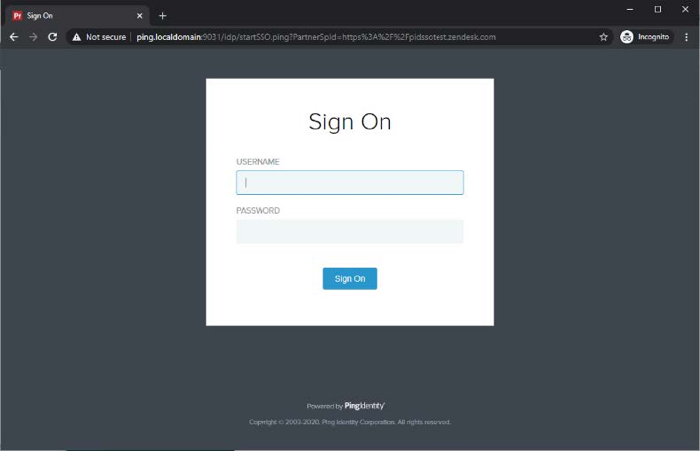
Go to the SSO Application Endpoint from the PingFederate application configuration to perform IdP-initiated SSO.
For example,
https://PingFederateHostname:PingFederatePort/idp/startSSO.ping?PartnerSpId=Zendesk.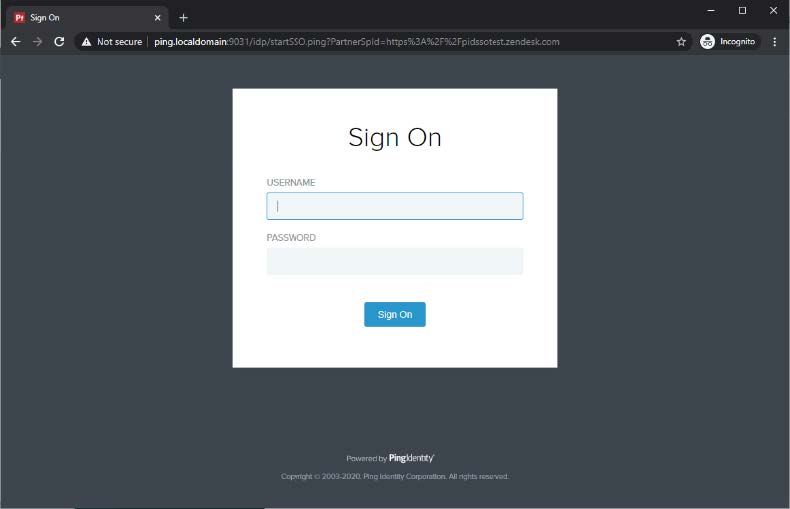
- For PingOne SP-initiated SSO
-
-
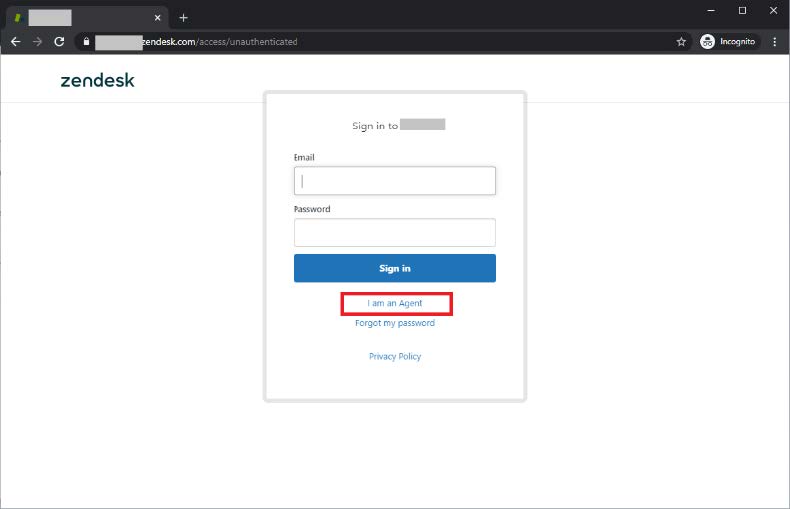
Go to the URL for your Zendesk tenant. For example,
https://tenant.zendesk.com.Because SSO is only enabled for Staff, you should see a sign on form.
-
Click I am an Agent to initiate SSO.
-