Using biometrics authentication for iPhone (legacy)
Authenticate using your device biometrics, such as fingerprint or Face ID, with the PingIDmobile app. Authentication varies slightly depending on your phone model, phone settings, and whether your device is locked or unlocked when sending the authentication request.
Before you begin
-
Register your biometrics on your device, such as fingerprints or Face ID.
-
Set up your iPhone for PingIDauthentication to authenticate using your device biometrics with PingID mobile app. For more information, see (legacy) Pairing PingID mobile app for iPhone (using a QR code or pairing code).
About this task
|
Biometrics authentication is only available if the option is enabled by your organization. |
Steps
-
Sign on to your account or access the application that requires authentication.
Result:
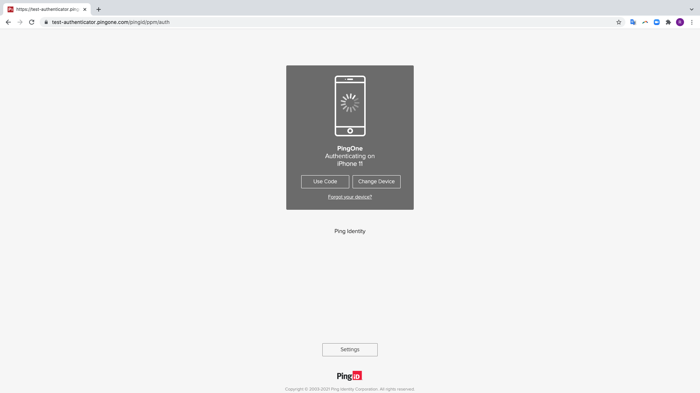
The Authenticating window appears and an authentication notification request is sent to your device.

-
Accept the authentication notification, depending on your mobile’s notification settings:
Choose from:
-
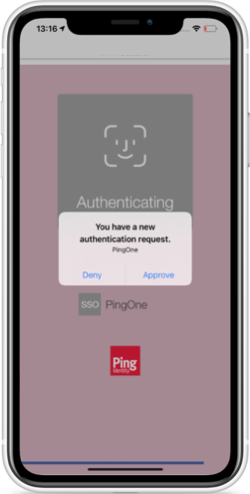
If your device is locked, long press the notification until it shows the option to approve or deny the request, and then tap Approve.
-
If your device is unlocked, pull down the notification until it shows the option to Approve or Deny the request, and then tap Approve.
If configured by your organization, you’ll see a map on the notification screen, showing the location, device type, and browser used by the device attempting to accessing your account or app. This can help you identify a fraudulent authentication attempt.
-
If your mobile phone is unlocked and PingID is open, you’ll be prompted to authenticate with your biometrics.
-
Face ID: Tap the message asking you to authorize scanning with Face ID, if prompted, or your face is scanned automatically.
-
Fingerprint: To scan your fingerprint, touch the Home button lightly.

-
-
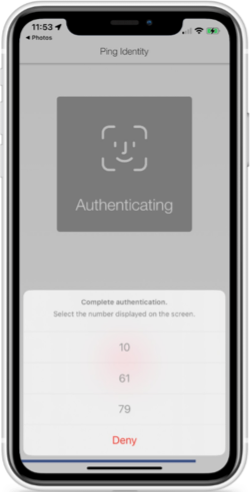
You might be asked to authenticate by number matching. If so, you’ll see a number on the Authentication screen and you’ll need to open PingID mobile app, and select the same number. If you don’t see the option, skip this step.

Result
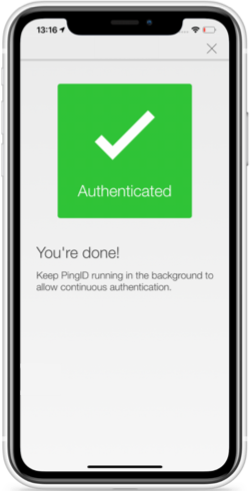
A green Authenticated message with a check mark appears, indicating successful authentication and your access is approved. You are automatically signed on to your application.
