Authenticating using your iPhone (VPN) (legacy)
This section covers the options available for authenticating to your VPN using your iPhone.
You can authenticate using the following options:
If your organization allows you to authenticate using more than one device type, you can also add a device and decide which device you want to use as your primary (default) authentication method. See Managing your devices.
The options available to you are defined by your organization’s policy.
Using swipe authentication for iPhone (VPN)
If you have the PingID app running on your mobile device and biometrics authentication is not enabled, you are prompted to swipe to authenticate.
Steps
-
From your web browser or application, sign on to your VPN:
-
Enter your username and password.
If you have more than one device and your organization policy allows, a message appears showing all of your devices in a numbered list.
-
For multiple devices only: enter the number of the device you want to use to authenticate.
-
Click Sign In.
Result:
A message displays requesting that you authenticate, and an authentication notification is sent to your device.
When you open PingID mobile app, update your location permissions to Allow all the time, if prompted to do so.
-
-
Depending on your notification settings, swipe to authenticate:
Choose from:
-
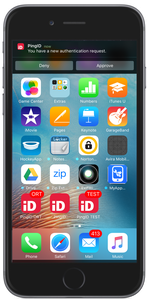
If your device is unlocked:
-
Tap the notification
-
Swipe to authenticate
-
-
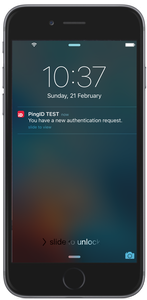
If your device is locked:
-
Swipe left to open the authentication notification and unlock the screen.
-
Swipe to authenticate.
-

-
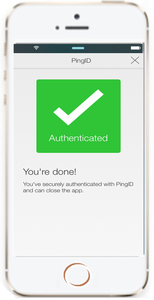
Result
Thee green Authenticated message with a check mark appears, indicating authentication is successful, and you are signed on to your VPN.
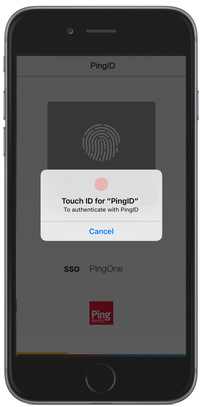
Using biometrics authentication for iPhone (VPN)
Authenticate with your device biometrics using the PingID mobile app.
Before you begin
-
Register biometrics on your device, such as fingerprints or Face ID.
-
Set up your mobile device for VPN authentication to authenticate using your device biometrics.
For more information, see (legacy) Pairing PingID mobile app for authenticating to your company’s VPN.
About this task
The authentication process might vary depending on whether your device is locked or unlocked when the authentication request is sent.
|
Biometrics authentication is only available if the option is enabled by your organization. |
Steps
-
From your web browser or application, sign on to your VPN:
-
Enter your username and password.
If you have more than one device and your organization’s policy allows, a message appears showing all of your devices in a numbered list.
-
For multiple devices only: enter the number of the device you want to use to authenticate.
-
Click Sign In.
Result:
A message displays requesting that you authenticate and an authentication notification is sent to your device.
When you open PingID mobile app, update your location permissions to Allow all the time, if prompted to do so.
-
-
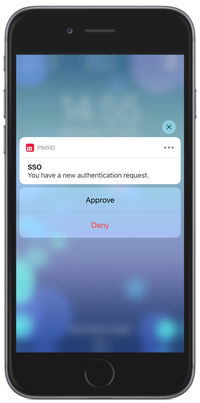
Depending on your notification settings, approve the authentication notification:
Choose from:
-
If your phone is unlocked:
-
Tap the notification banner, or tap Approve.
-
-
If your phone is locked:
-
Slide the message to the left and tap Approve.
-
If you do not have the slide to view option, swipe right to unlock the device.
Result:
The biometrics scan is activated and a message appears on your device prompting you to authenticate using your device biometrics.
-
-
-
Authenticate using your device biometrics:
Choose from:
-
Face ID: Tap the popup asking you to authorize scanning with Face ID, if prompted, and otherwise your face is scanned automatically.
-
Fingerprint: Touch the Home button lightly to scan your fingerprint.
Do not press hard on the Home button, as it can cancel the authentication action, rather than approve it.
Result:
The green Authenticated message appears with a check mark, indicating authentication is successful, and you are signed on to your VPN.
-
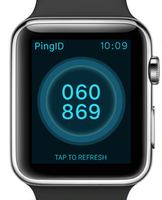
Enabling and disabling passcodes on your Apple watch
Enable the use of PingID one-time passcodes (OTPs) on your Apple watch.
About this task
If you have installed the PingID app on your device, the PingID Apple Watch app is automatically installed on your watch and you will start receiving notifications to your watch. You can also open the PingID app on your watch to receive a one-time passcode (OTP). If the Apple watch app is disabled, you will not be able to access a one-time passcode from your watch.
|
The Apple watch only receives notifications when your mobile device is locked, and the mobile device screen is in sleep mode. |
Steps
-
On your iPhone, tap the Watch app, and then tap PingID.
-
To enable or disable the app on your Apple watch, tap Show App on Apple Watch.
Result:
The PingID app is installed on your Apple watch, and the PingID icon appears.
-
To view the current one-time passcode, on your Apple watch, tap the PingID icon.
-
(Optional) To get a new passcode, tap Refresh.
Authenticating using a one-time passcode (VPN)
If you do not have internet access temporarily, you can still authenticate using the PingID mobile app by generating a one-time passcode (OTP).
About this task
The OTP is unique and can only be used once. Only the OTP that appears on your device at the time that you sign on to your account is valid for authentication.
|
If permitted by your organization’s policy, you can view and use the OTP. |
Steps
-
From your web browser or application:
-
Sign on to your VPN with your username and password.
If you have more than one device, and your organization policy allows it, a message displays showing all of your devices in a numbered list.
-
For multiple devices only: enter the number of the device you want to use to authenticate.
-
Click Sign In.
-
-
On your mobile device, open the PingID app to view the current OTP.
When you open PingID mobile app, update your location permissions to Allow all the time, if prompted to do so.
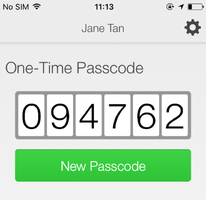
The OTP refreshes each time you open the PingID app. To generate a new OTP, tap New Passcode.
-
Enter the OTP into the text field. Click Sign In.
Result
After you have successfully authenticated, you are signed on to your VPN.
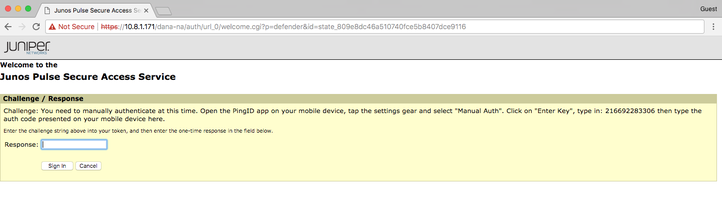
Authenticating manually (VPN)
When you sign on to your VPN, you might be asked to authenticate manually using the PingID mobile app.
Before you begin
To authenticate manually you need the following:
A device with the PingID mobile app 1.8 or later that is already paired with your account and with which you have successfully authenticated at least once.
About this task
You will not be asked to authenticate manually often, but be aware that authenticating manually is different than the normal sign on process.
Steps
-
Sign on to your VPN.
Result:
A Manual Authentication message appears, displaying a 12-digit key, and requests that you authenticate manually.
-
From your mobile device, open the PingID mobile app.
-
Tap the Gear icon (
 ) and select Manual Auth. Authenticate with your device biometrics, if required.
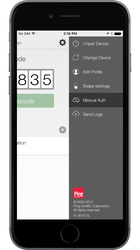
Result:
The Manual Authentication screen opens.
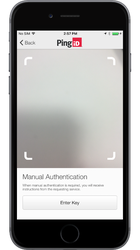
-
Tap Enter Key.
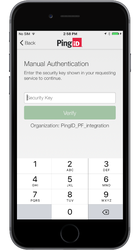
-
In the Security Key field, enter the 12-digit key displayed on the VPN sign on page, and tap Verify.
Result:
You receive an authentication code.
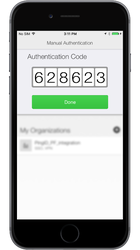
-
In the VPN Response field, enter the Authentication Code. Click Sign In.
Result:
You are successfully authenticated and signed on to your VPN.