Using biometrics authentication for Android (VPN)
Biometrics authentication is simple using a mobile device. Authentication varies slightly depending on your settings and whether your device is locked or unlocked when the authentication request sends.
Before you begin
-
Register your biometrics on your device.
-
Set up your mobile device for VPN authentication. See (legacy) Pairing PingID mobile app for authenticating to your company’s VPN.
About this task
|
Biometrics authentication is only available if your organization enables the option. The authentication process might vary slightly depending on the Android version and the notification settings on your device. The images shown here relate to a Samsung device. Actual implementation might vary according to device model. |
Steps
-
From your web browser or application:
-
Sign on to your VPN with your username and password.
-
Click Sign In.
Result:
If you have more than one device and your organization policy allows it, a message appears showing all of your devices in a numbered list.
-
For multiple devices only: enter the number of the device you want to use to authenticate and click Sign In.
Result:
A message displays requesting that you authenticate, and an authentication notification is sent to your device.
-
-
On your device, if a PingID notification is shown, approve the notification.
-
For Android version 10 and earlier, you must unlock your device to authenticate.
-
When opening PingID mobile app, update your location permissions to Allow all the time, if prompted to do so.
-
-
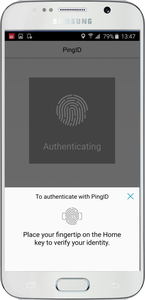
Scan your biometrics when prompted to do so.

Result
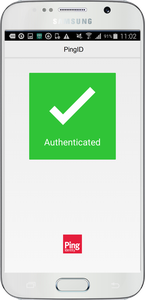
The green Authenticated message appears with a check mark, indicating authentication is successful. You are signed on to your VPN.
