Set the data sources
|
End of life for Autonomous Access After much consideration and extensive evaluation of our product portfolio, Ping Identity is discontinuing support for the Advanced Identity Cloud Autonomous Access product, effective October 31, 2024. To support our Autonomous Access customers, we’re offering migration assistance to PingOne Protect, an advanced threat detection solution that leverages machine learning to analyze authentication signals and detect abnormal online behavior. PingOne Protect is a well-established product, trusted by hundreds of customers worldwide. The end of life for Autonomous Access indicates the following:
For any questions, please contact Ping Identity Support for assistance. |
|
You can skip this section for Advanced Identity Cloud tenants. This section is presented for information only. Autonomous Access automatically uses an out-of-the-box data source, The out-of-the-box data source also does not require attribute mapping. You simply define the source on the Autonomous Access Advanced Identity Cloud UI (refer to Run training) when setting up your training run. 
If you do not have the |
|
Autonomous Access uses cloud storage data for its ML training runs and Elasticsearch data for its heuristic predictions. The Autonomous Access result journey node collects data and stores it in cloud storage and stores risky events in Elasticsearch. The general guidelines for customer data storage is as follows:
|
In general, you may have to define data sources for the following cases:
-
Demos. Customers who want to do a POC with their own data but are not current Advanced Identity Cloud customers may need to set up and define their own data sources. Typically, we load three months of access logs into a GCP data bucket and point to that location within the data source configuration presented below.
Verify the default data source
-
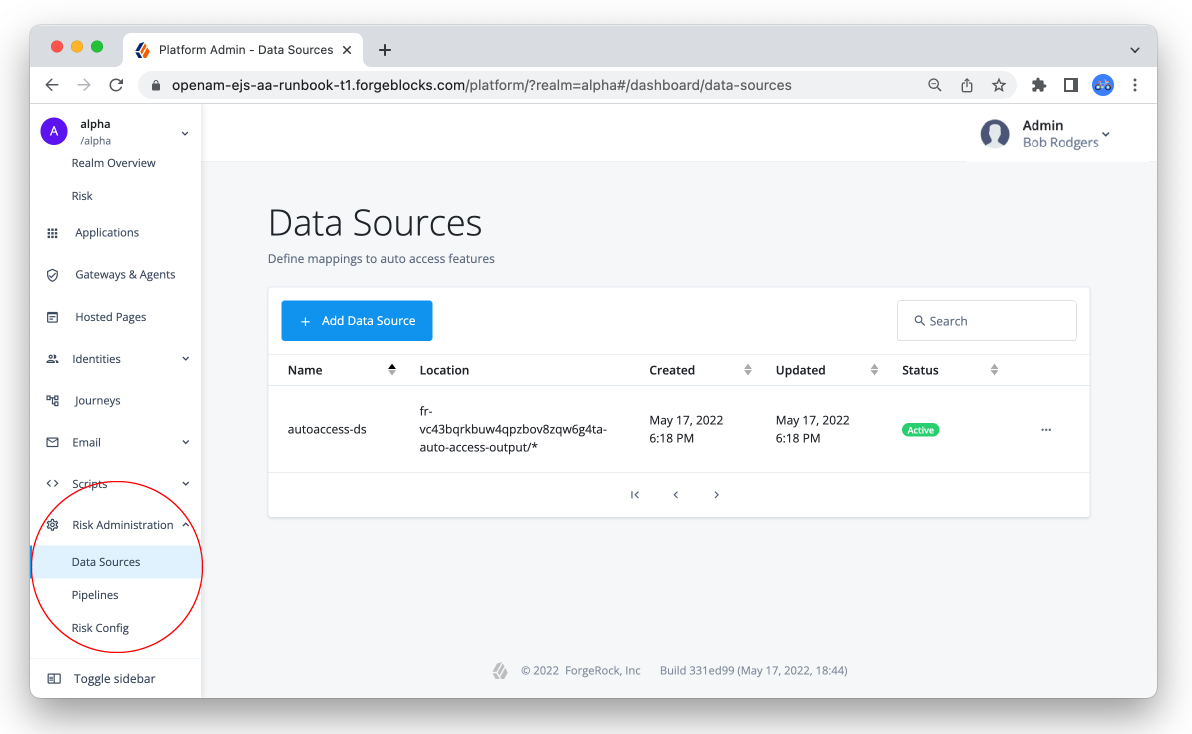
On the Autonomous Access UI, click Risk Administration > Data Sources.
-
Verify that the
autoaccess-dsis present and activated.
You do not have to set the mapping as it is configured already. Next, set the Risk Configuration.
Set the data source (if not using the default data source)
-
On the Autonomous Access UI, click Risk Administration > Data Sources.
-
On the Data Sources page, click Add Data Source.
-
On the Add Data Source dialog, select the data bucket in the Bucket Search field.
-
For Object Prefix, click Define from Prefix, and enter the following:
-
Name (of the Data Source). Add a descriptive name for the data source.
-
Bucket Name. Add the data bucket for the data source.
-
Prefix. Add a prefix.
-
-
Click Save. The new data source is displayed on the page. The Status column displays the current state of the data source.
-
At this stage, you need to set attribute mapping between your data source and the schema. Click the trailing dots, and select Create or Edit Mapping.
-
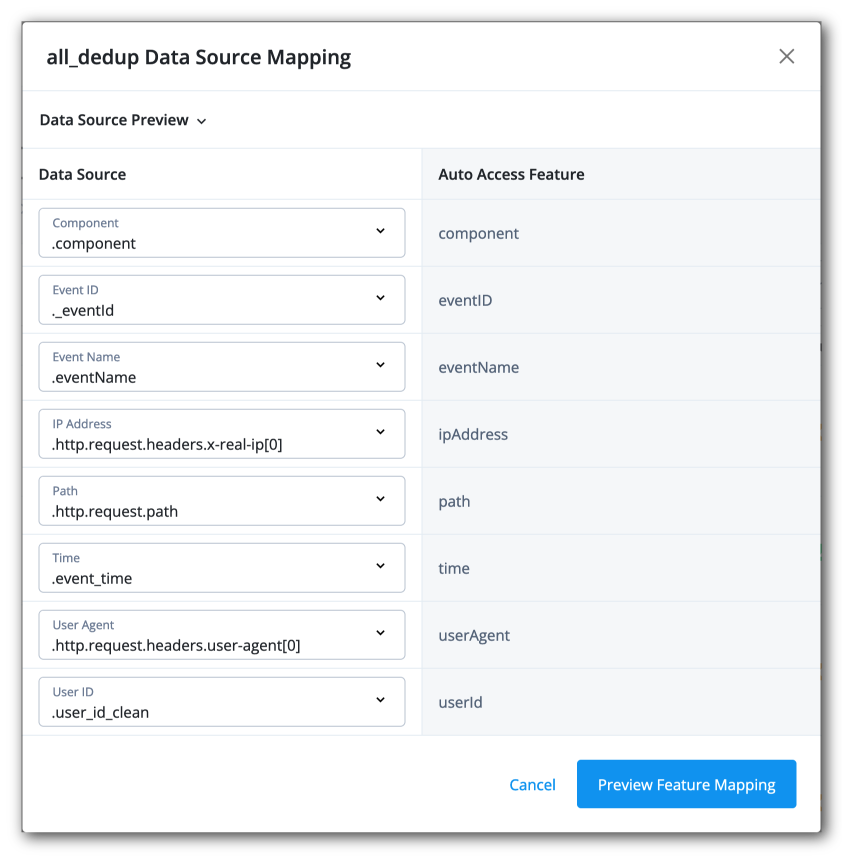
Under Data Source, select the attribute to map to the Auto Access feature. Repeat for as many attributes as you can. Note that you cannot add attributes to the list of attributes.
Display an example of a data source mapping.

-
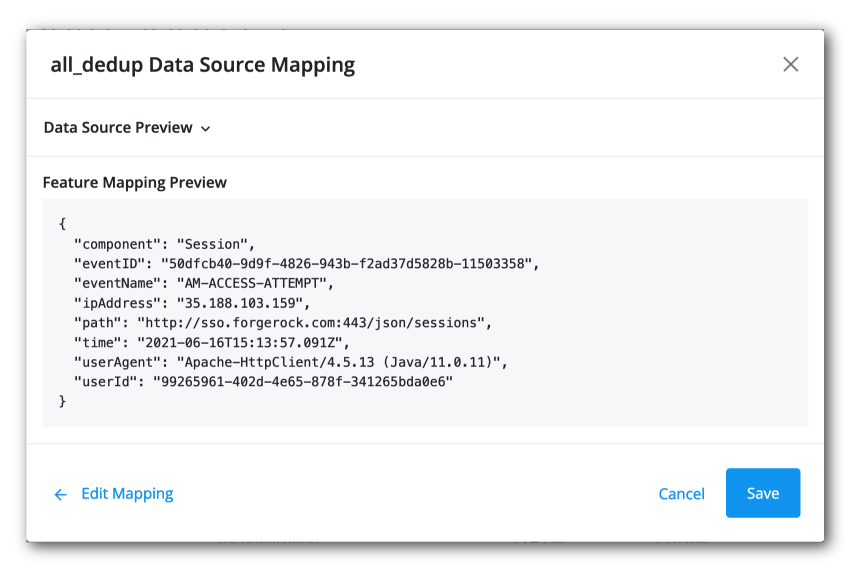
Click Preview Feature Mapping to review the mapping, and then click Save if satisfied.
Display an example of a data source mapping preview.

-
The data source will be in an
Inactivestate, you must now activate the data source to use it in the training run. Click the trailing dots, and selectActivate. The data source is now in an active state.You have successfully set up or confirmed your data source(s) and mappings. Next, you can set the Risk Configuration.