Manage pending access requests and request types
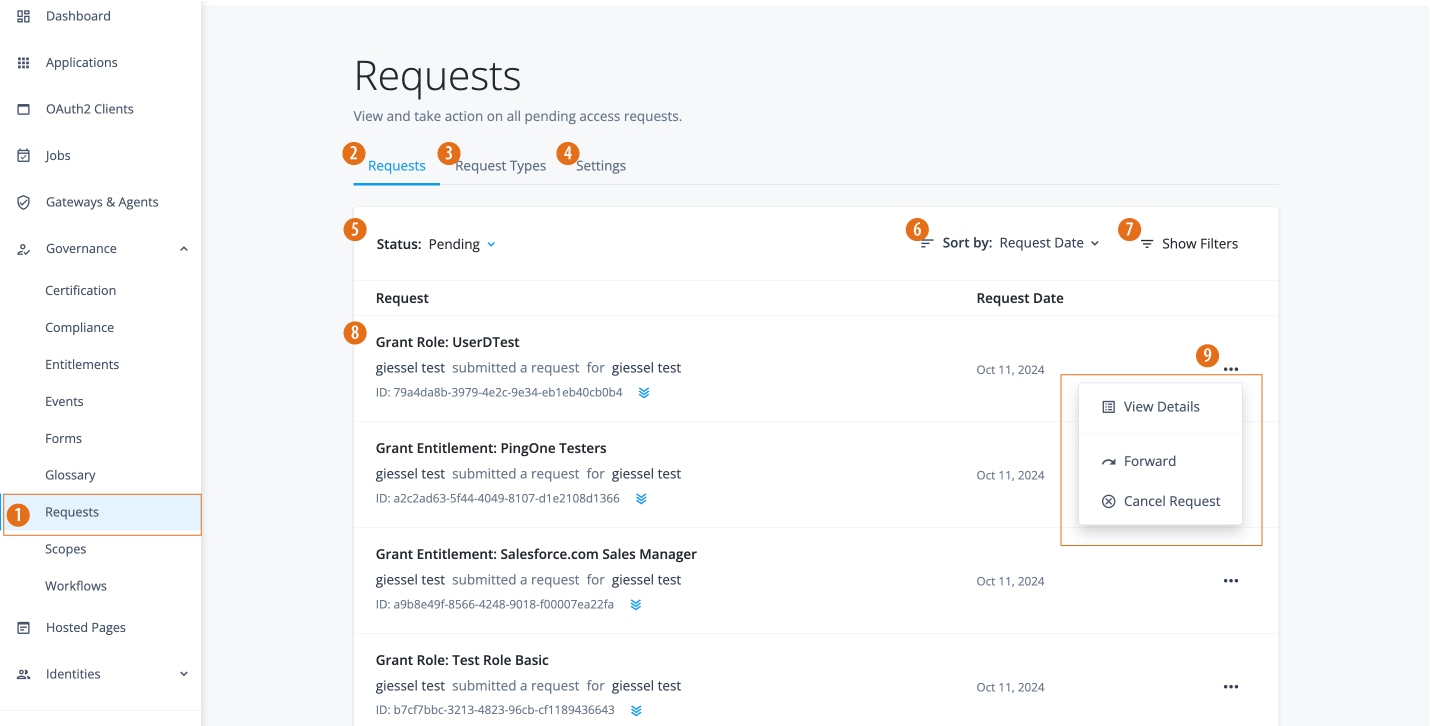
Identity Governance has updated its UI pages and added new functionality to manage pending access requests and request types.
There are two main kinds of request types: out-of-the-box and custom. Out-of-the-box refers to the set of default request types, such as:
-
applicationGrant
-
applicationRemove
-
entitlementGrant
-
entitlementRemove
-
roleGrant
-
roleRemove
Custom refers to those request types that you create using the Identity Governance UI or API.
Request types
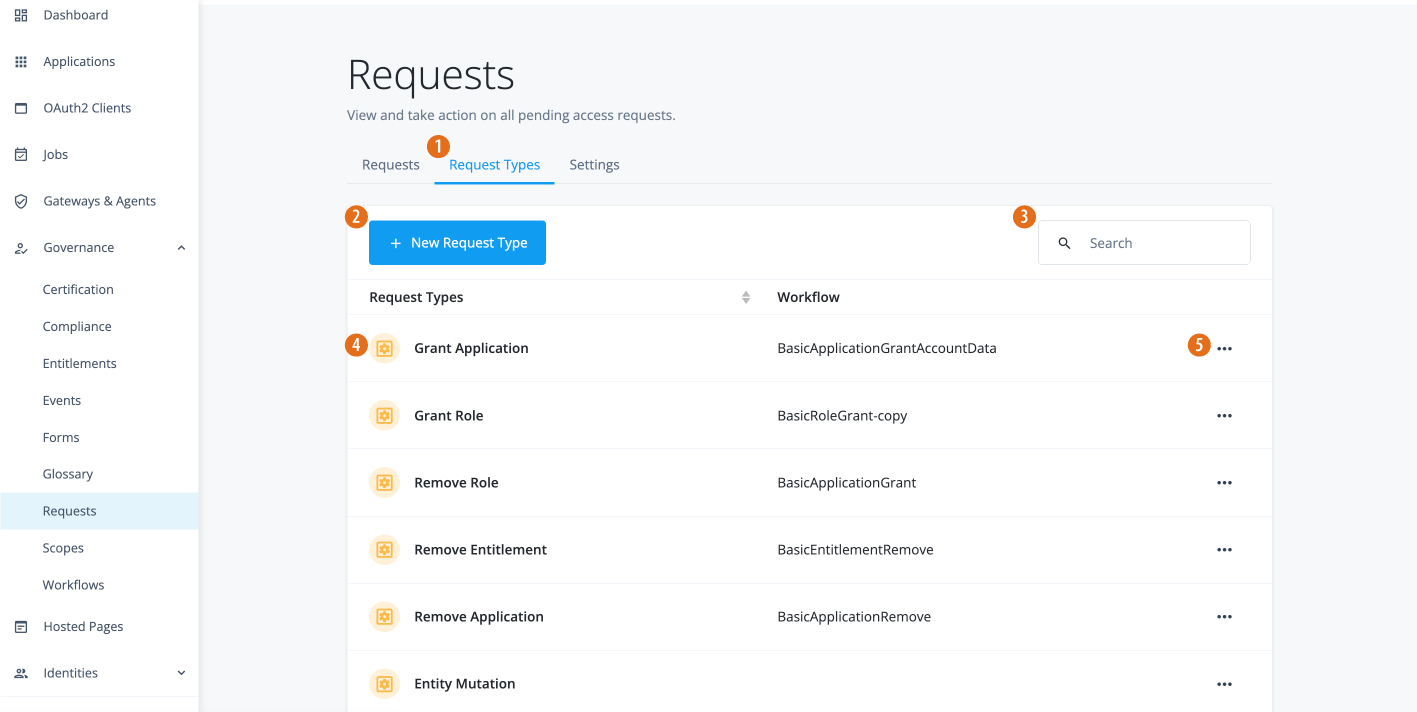
The Requests page lets Identity Governance administrators view a list of out-of-the-box and custom request types in a tenant environment, and create custom request types for use in workflows and forms.
Steps
-
In the Advanced Identity Cloud login UI, click Governance > Requests.
-
On the Requests page, click the Request Types tab.
-
View the list of out-of-the-box and custom request types.
-
Click ellipsis () > Edit the out-of-the-box request type. If the request type is custom, you have the option to Edit or Delete it.
-
-
Click New Request Type to create a custom request type.
-
On the New Request Type modal, enter the following:
Field Description Name
Enter a descriptive name for your form.
Description (optional)
Enter a general description for your form.
Workflow
Select a workflow to associate with the custom request type.
Enable validation
(Optional) Click to enable validation for the custom request type, and then enter your validation script.
Validation for out-of-the-box request types is view-only. Validation for custom request types is editable.
-
Click Save.
-
-
On the Request Type Details page, click the Properties tab.
-
Click New Property.
-
On the New Property modal, enter the following:
Field Description Name
Enter a descriptive name for the property.
Label
Enter a human-readable label for the property.
Type
Select a property type. Options are:
-
String
-
Number
-
Boolean
-
Object
Multi-valued
Click if the property is multi-valued.
Required
Click if you want the property to be required.
-
-
Click Save.
-
Repeat the steps to add another property.
-
Governance global request settings
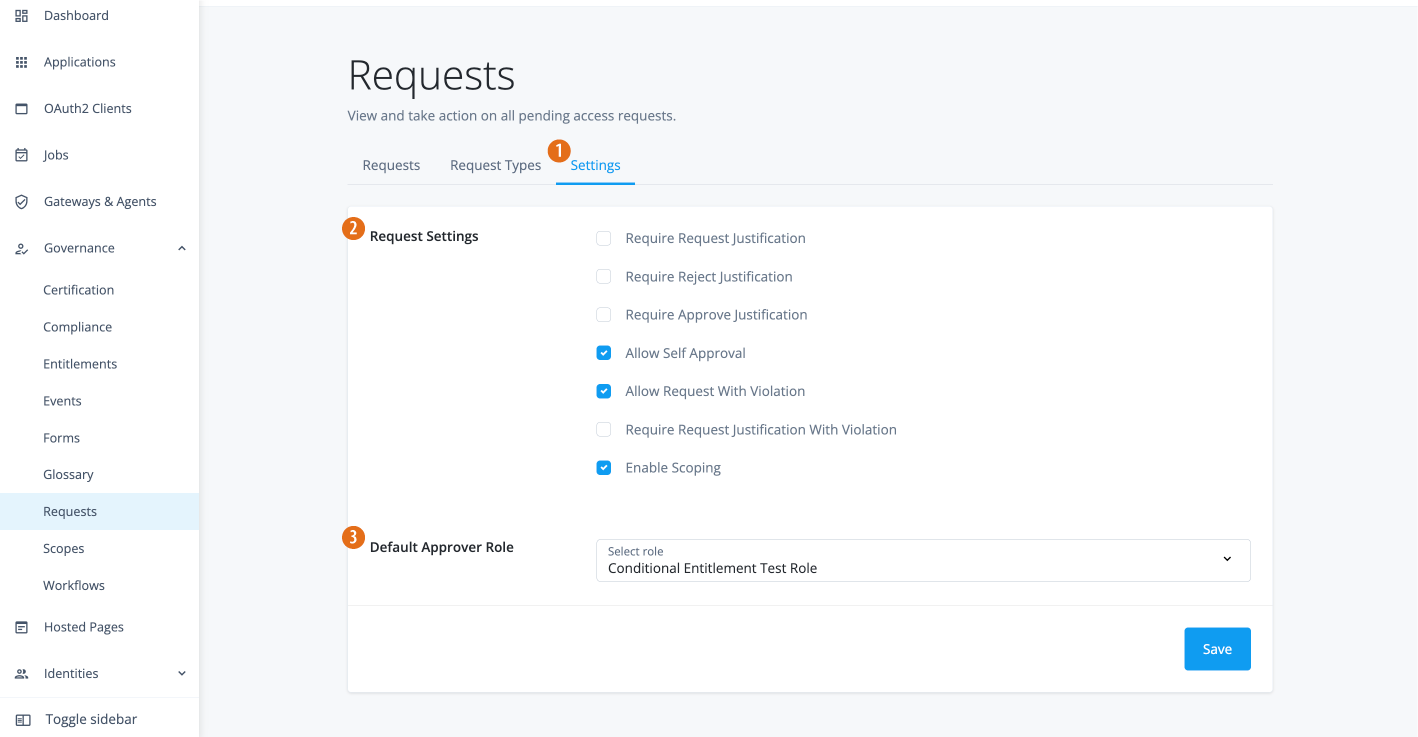
The Settings tab on the Requests page lets Identity Governance administrators view and edit global request settings tab.
Steps
-
In the Advanced Identity Cloud login UI, click Governance > Requests.
-
On the Requests page, click the Settings tab.
-
Click any of the following settings:
Property Type Require Request Justification
Boolean
Require Reject Justification
Boolean
Require Approve Justification
Boolean
Allow Self Approval
Boolean
Default Approver
Managed role approver
Allow Request With Violation
Boolean
Require Request Justification With Violation
Boolean
Enable Scoping
Boolean
-
On the Default Approver Role, select a default role for the approver.
-
Click Save.


