PingOne DaVinci API node
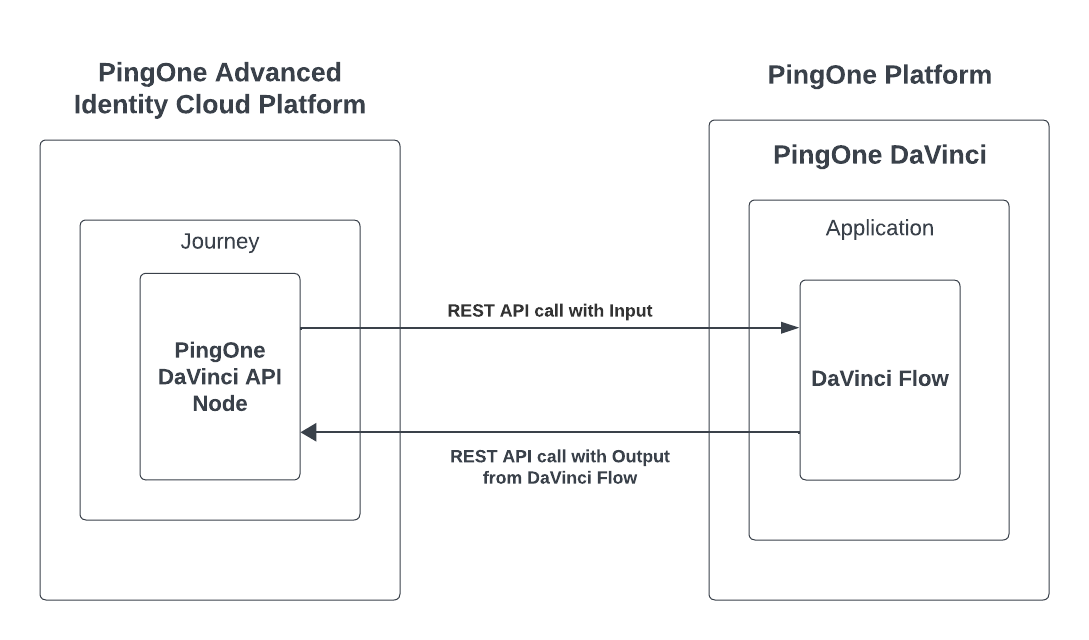
The PingOne DaVinci API node executes an API call to PingOne DaVinci to launch a specific DaVinci flow. This node lets an Advanced Identity Cloud journey trigger a PingOne DaVinci flow through the API integration method and does not render any front-end UI pages.
| This node is only effective for DaVinci flows without a UI component, as it is using the DaVinci flow API integration. |

To configure and use this node, Advanced Identity Cloud provides:
Compatibility
| Product | Compatible? |
|---|---|
Advanced Identity Cloud |
Yes |
PingAM (self-managed) |
Yes |
Ping Identity Platform (self-managed) |
Yes |
Setup
This procedure only covers the steps and nodes required to prepare a PingOne DaVinci flow for invoking the API. It assumes that the PingOne DaVinci flow has been created already.
Prepare the PingOne DaVinci flow
-
In PingOne DaVinci, go to the Flows tab.
-
Find the flow you need, and click Edit.
-
At the end of the Success Path, add an HTTP node to send a JSON success response.
-
At the end of the Failure Path, add an HTTP node to send a JSON error response.
-
-
Click Save.
-
Click Deploy.
Refer to the PingOne DaVinci: Configuring the Flow page for further details.
Configure the input schema
The PingOne DaVinci API node sends the journey node state to the PingOne DaVinci flow. You must configure the node state as an input parameter for the PingOne DaVinci flow.
-
Click Input Schema on the DaVinci flow canvas.
-
Click Add to add an input parameter.
-
In the Parameter Name field, enter nodeState.
-
In the Data Type field, select Object.
-
-
Click Save.
Create a PingOne DaVinci application
-
In PingOne DaVinci, go to the Applications tab.
-
Click Add Application. The Add Application modal opens.
-
In the Name field, enter a name for the application, and click [.label]#Create.
-
Find the application you need and click Edit.
-
On the General tab, note down the values for Company ID and API Key.
You’ll need these to configure the PingOne DaVinci API node parameters.
-
Go to the Flow Policy tab.
-
Click + Add Flow Policy.
-
In the Name field, enter a name for the flow policy.
-
In the Flow List, select your flow.
-
In the Version List, select the desired flow version.
-
-
Click Create Flow Policy. The Edit Your Weight Distribution modal opens.
-
Click Save Flow Policy.
-
Note down the Policy ID of your flow policy. You’ll need it to configure the PingOne DaVinci API node parameters.
Refer to the PingOne DaVinci: Create Application page for further details.
Configuration
The configurable properties for this node are:
| Property | Usage |
|---|---|
PingOne Service |
The ID of the PingOne Worker service for connecting to PingOne. |
Flow Policy ID |
The PingOne DaVinci Flow Policy configured for the specific flow. |
State Inputs |
A list of state inputs that will be passed to PingOne DaVinci, the DaVinci Flow input schema includes the node state parameter. This is a multi-value field to select specific node state attributes which are to be included in the API request to PingOne DaVinci. By default, the wildcard |
Outcomes
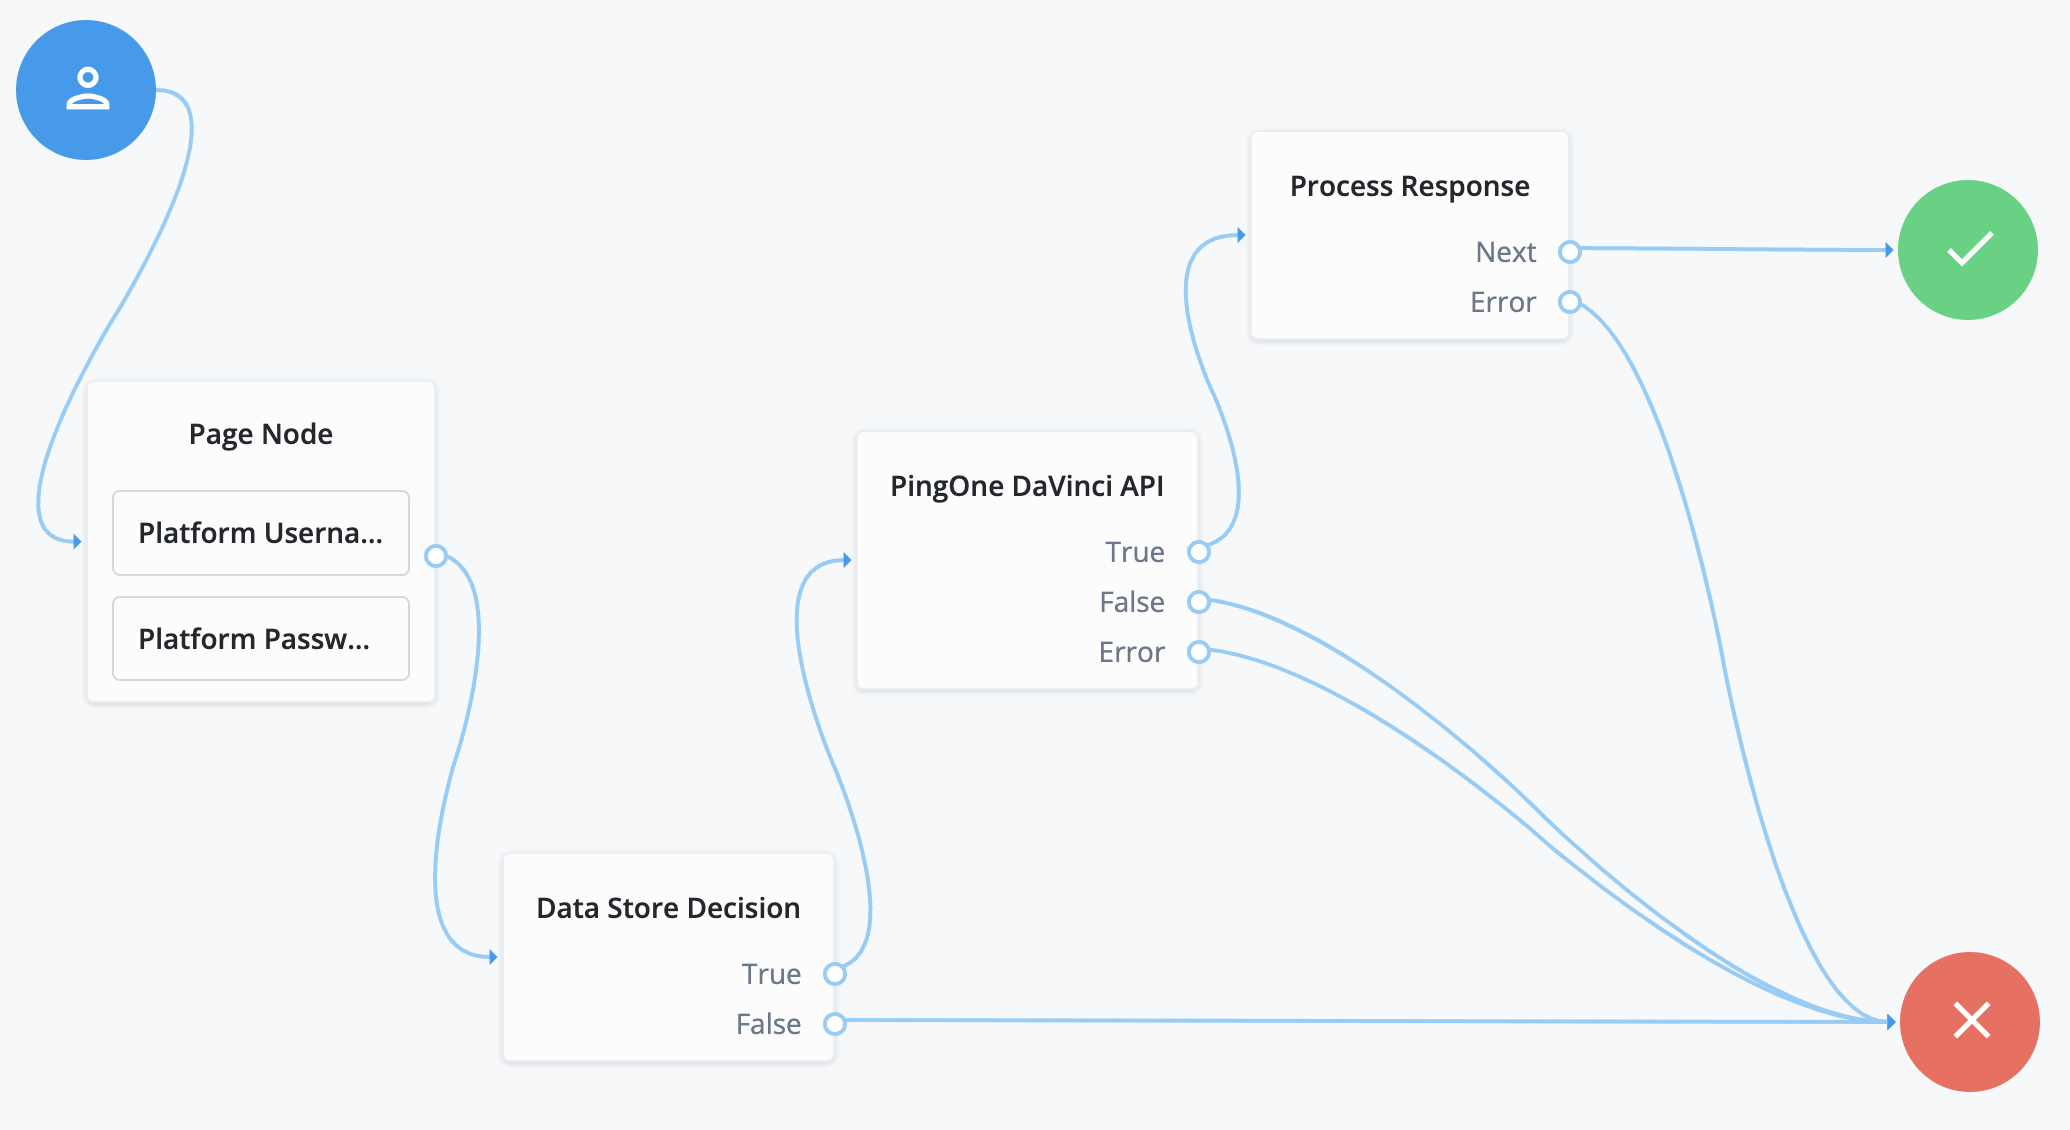
True-
The PingOne DaVinci flow executed and returned a Success response.
False-
The PingOne DaVinci flow executed and returned an Error response.
Error-
An error occurred causing the request to fail. Check the response code, response body, or logs to see more details of the error.
