Realm settings
Realms are administrative units that group configurations and identities together so that you can manage different sets of identities and applications within the same PingOne Advanced Identity Cloud tenant.
Each realm is fully self-contained and operates independently of other realms within a tenant; the identities and applications in one realm can’t access those in another realm.
A typical example of realm management is when a company divides its identities into two realms: one for employees and one for customers, each having a distinct set of identities and registered applications.
Manage realm settings
-
In the Advanced Identity Cloud admin console (upper left), open the Realm menu.
-
Go to Realm Settings > Details.
-
On the Details page:
-
The Status bar indicates whether the realm is Active or Inactive.
-
To take the realm out of service, click Deactivate.
When a realm is deactivated, users and devices contained in the realm will not be able to access its applications. Identity and app information is still registered to your identity platform. -
Name: The realm name is non-configurable.
-
(Optional) DNS Aliases: Alternative display names for the realm’s URL.
-
Use Client-based Sessions: Enable this option to allow signing and encryption of the JWT in the global session service.
-
-
To configure a custom domain name, click Custom Domains. Learn more in Custom domains.
When you’re satisfied with your changes, click Save.
Override realm authentication attributes
It’s useful to override realm authentication attributes when you want to adjust the core authentication properties of a realm. For example, you may want to extend the time limit for responding to an authentication verification email.
Under Native Consoles > Access Management, go to Authentication > Settings.
For detailed property information, learn more in Core authentication attributes.
Alpha and Bravo realms
The Alpha and Bravo realms are the two default realms that are included as part of an PingOne Advanced Identity Cloud tenant. These realms are configurable, unlike the top-level realm that Advanced Identity Cloud configures for tenant administrator identities.
|
Advanced Identity Cloud does not support more than two realms in the same tenant. |
The Alpha and Bravo realms are nearly identical, with the exception of delegated administration.
End-user sign-in
End users access their sign-in page using a URL that specifies the realm they belong to. For example:
-
Alpha realm end users: https://<tenant-env-fqdn>/am/XUI/?realm=alpha&authIndexType=service&authIndexValue=Login
-
Bravo realm end users: https://<tenant-env-fqdn>/am/XUI/?realm=bravo&authIndexType=service&authIndexValue=Login
Tenant administrators cannot authenticate using these realm-specific login URLs. Learn more in Sign on to a tenant admin console.
Delegated administration
In the Alpha realm, you can set up internal roles for delegated administration using a custom set of privilege attributes.You can then assign those internal roles to users so that Alpha realm users can act as delegated administrators and perform actions on the custom set of attributes specified by the role.
The Bravo realm does not support delegated administration.
Assign internal roles
You can assign the internal roles in two different ways using the Advanced Identity Cloud admin console:
-
To add an internal role to a user, go to Identities > Manage > Realm - Users. Select a user, then select the Authorization Roles tab, then click + Add Authorization Roles.
-
To add a user to an internal role, go to Identities > Manage > Internal Roles. Select a role, then select the Members tab, then click + Add Members.
In the Bravo realm, while you can set up internal roles for delegated administration, you cannot use them. Also, you cannot add a user to an internal role, and even though it appears possible to add an internal role to a user, this will not correctly link the user to the role. If you attempt this, the user will not be listed in the internal role Members tab.
The following table summarizes these differences:
| Action | Alpha Realm | Bravo Realm |
|---|---|---|
Create internal role for the purposes of delegated administration |
||
Add user to internal role |
||
Add internal role to user |
|
Custom domains
Access PingOne Advanced Identity Cloud through a customer-friendly URL by configuring a custom domain name. For example, replace the default forgerock.io domain with your own company name or brand.
Consider the following points when you customize a domain name:
-
You can set a custom domain name only at the realm level.
-
You can set multiple custom domain names per realm.
-
The Advanced Identity Cloud admin console continues to display the default tenant environment URL.
-
Don’t use your top-level domain name.
-
Wrong:
mycompany.com -
Right:
id.mycompany.com
-
-
Changing your custom domain name affects your end-user UIs and REST APIs.
Set up a custom domain in Advanced Identity Cloud
Configure a custom domain using the admin console
-
Choose one of these options:
-
If your custom domain relies on public DNS:
-
(Optional) Create a self-managed SSL certificate for your custom domain.
-
-
If your custom domain relies on private DNS or you route your HTTP traffic through a WAF service:
-
Submit a Backstage Support ticket to deactivate CNAME record verification. Learn more in Deactivate CNAME record verification for your custom domain.
-
Create a self-managed SSL certificate for your custom domain.
-
-
-
In the Advanced Identity Cloud admin console, go to Realm > Realm Settings > Custom Domain.
-
Click + Add a Custom Domain.
-
In the Add a Custom Domain dialog box, enter your domain name, then click Next.
The domain name must be unique, and must contain at least one period (dot).
Example:id.mycompany.com. -
Choose one of these options:
-
If your custom domain relies on public DNS:
-
In the Verify Domain Name Ownership dialog box, Advanced Identity Cloud provides the Host and Data information that you’ll use in the next step to prove that you own the domain you’ve named.
-
Create a CNAME record with your domain name registrar.
-
Return to the Verify the Domain Ownership dialog box, and click Verify.
-
-
If your custom domain relies on private DNS or you route your HTTP traffic through a WAF service:
-
In the Verify Domain Name Ownership dialog box, click Verify.
-
-
-
Configure the base URL source for the realm where the custom domain is to be used.
-
The custom domain should now be successfully configured:
-
If your custom domain relies on public DNS and you do not have a self-managed SSL certificate, Advanced Identity Cloud generates a Google-managed SSL certificate.
If your custom domain already has CAA records, you must add additional CAA records to ensure that Advanced Identity Cloud can generate Google-managed SSL certificates. Learn more in Specify the CAs that can issue your Google-managed certificate. -
The custom domain name is added to the realm settings.
-
The FDQN for your custom domain name is mapped to server defaults.
-
The custom domain name is added to the Redirection URIs field of the
end-user-uiOAuth 2.0 client. Learn more in Configure OAuth clients. -
Both tenant domain and custom domain URL paths work; however, this does not apply to the OIDC configuration discovery endpoint.
Examples:
-
For AM endpoint:
https://<tenant-env-fqdn>/am/json/realms/root/realms/alpha/authenticate
you can use:
https://id.mycompany.com/am/json/realms/root/realms/alpha/authenticate -
For IDM endpoint:
https://<tenant-env-fqdn>/openidm/managed/alpha_user/<uuid>
you can use:
https://id.mycompany.com/openidm/managed/alpha_user/<uuid>
-
-
-
Confirm that the custom domain is working as expected. Learn more in Check that a custom domain is working in your browser.
Configure a custom domain using ESVs
|
The option to configure a custom domain using ESVs has been removed from Advanced Identity Cloud. Instead, you can Configure a custom domain using the admin console in any environment without needing to configure ESVs and promote configuration. If you previously used ESVs to configure a custom domain, the ESV values have been migrated to normal UI input values and the custom domain still works as normal. |
Add a CNAME record to your custom domain
If your custom domain relies on public DNS, add a CNAME record to it so Advanced Identity Cloud can validate that you are the domain owner.
-
Sign in to the website for your domain name registrar.
-
Find the CNAME record for your domain. If you don’t already have a CNAME record for your domain, then follow the domain name provider’s instructions to create one.
-
In the CNAME record for your domain, enter the following values to create an alias from your custom domain to your Advanced Identity Cloud tenant domain:
-
In the host field, enter your custom domain FQDN; for example,
id.mycompany.com. -
In the data field, enter your Advanced Identity Cloud tenant FQDN; for example,
openam-mycompany.forgerock.io.
-
-
Follow the domain name provider’s instructions to complete the operation.
-
It may take up to 48 hours for domain name changes to propagate. Learn more in Check when CNAME domain name changes propagate.
Check when CNAME domain name changes propagate
If you add a CNAME record to your custom domain, you can use the following ways to check when the changes propagate:
-
Use a DNS checker website; for example https://dnschecker.org/all-dns-records-of-domain.php.
-
Use the
nslookupcommand-line tool:If you do not have nslookupinstalled, refer to https://command-not-found.com/nslookup to find installation instructions for your particular package manager.$ nslookup -q=cname id.mycompany.com(1) Server: fe80::ced4:2eff:fec3:40e%8 Address: fe80::ced4:2eff:fec3:40e%8#53 id.mycompany.com canonical name = openam-mycompany.forgeblocks.com.(2)1 Replace id.mycompany.comwith your custom domain FQDN.2 The output shows that the domain id.mycompany.comis an alias for the canonical nameopenam-mycompany.forgeblocks.com.
Deactivate CNAME record verification for your custom domain
If your custom domain relies on private DNS, or you route your HTTP traffic through a WAF service, open a support case to deactivate CNAME record verification.
-
Click Create a case.
-
Follow the steps in the case submission wizard by selecting your account and contract and answering questions about your tenant environments.
-
On the Please answer the following questions to help us understand the issue you’re facing page, enter the following details, and then click Next:
Field Value What product family is experiencing the issue?
Select PingOne Advanced Identity Cloud
What specific product is experiencing the issue?
Select Tenant Settings
What version of the product are you using?
Select NA
Which component is affected?
Select Custom Domains
-
On the Tell us about the issue page, enter the following details, and then click Next:
Field Value Provide a descriptive title for your issue
Enter
Disable CNAME record verification for a custom domain.Describe the issue below
Enter your custom domain FQDN.
-
Click Submit.
Configure the base URL source for a realm to support a custom domain
To support HTTP requests from a custom domain, the base URL source of the associated realm needs to be configured to retrieve the hostname, the server name, and the port number from incoming HTTP requests.
-
Go to Native Consoles > Access Management.
-
From the Realms menu, choose the realm that contains the custom domain name.
-
On the Services page, click Base URL Source to edit its configuration.
-
On the Base URL Source page, change the Base URL Source option to
Host/protocol from incoming request. -
Click Save Changes.
Check that a custom domain is working in your browser
-
To confirm that Advanced Identity Cloud is serving traffic over HTTPS (TLS) for your custom domain name, in a browser, go to your custom domain location. For example, go to
https://id.mycompany.com. -
To test hosted pages, use an incognito or private browser window to access an end-user URL. For example, access
https://id.mycompany.com/login/?authIndexType=service&authIndexValue=mytreename#/. -
If your custom domain relies on public DNS, it may take up to 48 hours for domain name changes to propagate. If you try to use the new domain name to access your website, error messages may display until the changes take effect. If error messages still display after 48 hours, make sure your Advanced Identity Cloud domain name settings are correct and match your CNAME record. Learn more in Check when CNAME domain name changes propagate.
Verify a custom domain in Google
If you use Google as a social login IDP, you must use your domain to configure the redirect URL fields of your OAuth 2.0 apps. This might create prompts from Google to verify your domain with your domain provider. For information about how to verify your domain, learn more in Verify your site ownership on the Google Search Console.
Access OIDC configuration discovery endpoint
When you configure a custom domain, the OIDC configuration discovery endpoint URL changes:
| Domain context | Endpoint URL | ||
|---|---|---|---|
Default domain |
|
||
Custom domain |
|
Configure the cookie domain for a custom domain
Learn more in Cookie domains.
Cookie domains
Advanced Identity Cloud lets you configure the cookie domains of your custom domains so you can control which applications have access to the cookies you create.
By default, when you add a custom domain to an environment, no cookie domain is set for it. You must explicitly configure its cookie domain to suit your deployment. You can configure it in these ways:
-
Set it to use a single subdomain (for example,
sso.mycompany.co.uk). This ensures cookies can be set or modified only by applications running on that subdomain. -
Set it to use more than one subdomain. This lets you set cookies on one subdomain (for example,
sso.mycompany.co.uk) but makes them available to an application running on a different subdomain (for example,banking.mycompany.co.uk). -
Set it to use a domain (for example,
mycompany.co.uk). This lets you set cookies at the domain level so they’re available to legacy applications yet to be migrated to Advanced Identity Cloud.
Learn how to set cookie domains in Manage cookie domains using the API.
| Advanced Identity Cloud always writes cookies to the default tenant environment FQDN of each of your environments. This is not configurable to ensure you retain access to your environments. |
Manage cookie domains using the API
You can find background information on cookie domains in PingOne Advanced Identity Cloud in Cookie domains.
Cookie domain API endpoint
Advanced Identity Cloud provides the Cookie Domains API endpoint to manage cookie domains.
Authenticate to the cookie domain API endpoint
To authenticate to the cookie domain API endpoint, use an access token created with the following scope:
| Scope | Description |
|---|---|
|
Full access to the cookie domain API endpoint. |
View cookie domains
Advanced Identity Cloud always writes cookies to your default tenant FQDN to ensure you retain access. Make a
GET request to the /environment/cookie-domain endpoint to view the other domains or subdomains
to where tenant environment writes cookies.
To view the cookie domain configuration in any tenant environment:
-
Get an access token created with the
fr:idc:cookie-domain:*scope. -
Get the cookie domain configuration from the
/environment/cookie-domainsendpoint:$ curl \ --request GET 'https://<tenant-env-fqdn>/environment/cookie-domains' \(1) --header 'Authorization: Bearer <access-token>' (2)shell1 Replace <tenant-env-fqdn> with the FQDN of your tenant environment. 2 Replace <access-token> with the access token. Show response
{
    "domains": [
        "sso.mycompany.co.uk",
        "banking.mycompany.co.uk"
    ]
}
json
Update cookie domains
Advanced Identity Cloud always writes cookies to your default tenant FQDN to ensure you retain access. Make a
PUT request to the /environment/cookie-domain endpoint to set or update the other domains or
subdomains where your tenant environment writes cookies.
To update the cookie domain configuration in any tenant environment:
-
Review the existing cookie domain configuration. Learn more in in View cookie domains.
-
Adapt the cookie domain configuration to suit your use case. Learn more in Cookie domains.
If you intend to remove a domain or subdomain from the configuration, you must first update any existing applications that rely on cookies set using that domain or subdomain. -
Get an access token created with the
fr:idc:cookie-domain:*scope. -
Replace the existing cookie domain configuration with the cookie domain configuration you adapted in step 2:
$ curl \ --request PUT 'https://<tenant-env-fqdn>/environment/cookie-domains' \(1) --header 'Authorization: Bearer <access-token>' \(2) --header 'Content-Type: application/json' \ --data '<cookie-domains-configuration>' (3)shell1 Replace <tenant-env-fqdn> with the FQDN of your tenant environment. 2 Replace <access-token> with the access token. 3 Replace <cookie-domains-configuration> with a JSON array of cookie domains; for example, the following configuration adds a new subdomain account.mycompany.co.ukto the configuration example used in View cookie domains.{ "domains": [ "sso.mycompany.co.uk", "banking.mycompany.co.uk", "account.mycompany.co.uk" ] }jsonShow response
{
    "domains": [
        "sso.mycompany.co.uk",
        "banking.mycompany.co.uk",
        "account.mycompany.co.uk"
    ]
}
json -
An asynchronous process updates the environment’s cookie domain configuration. This process can take up to 10 minutes to complete.
SSL certificates
Inbound connections
Ping Identity domains
PingOne Advanced Identity Cloud uses Google-managed SSL certificates to secure inbound traffic to the forgeblocks.com
and forgerock.io domains used by your tenant environments.
Custom domains
Google-managed SSL certificates (default)
If you use a custom domain to access Advanced Identity Cloud, by default a Google-managed SSL certificate is used to secure inbound traffic to the domain. The domain is added to the certificate’s Subject Alternative Name (SAN) field.
Self-managed SSL certificates
Advanced Identity Cloud offers you the choice of using a self-managed SSL certificate with your custom domain, in place of the default Google-managed SSL certificate.
You can create self-managed SSL certificates in two main ways:
-
Use a tenant-generated private key that is only accessible by the tenant itself. The tenant generates the CSR, and you install the resulting certificate on the same tenant. Learn more in:
-
Use a locally generated private key that you retain access to. You generate the CSR locally and install the resulting certificate on as many tenants as you need. Learn more in:
DV and EV certificates
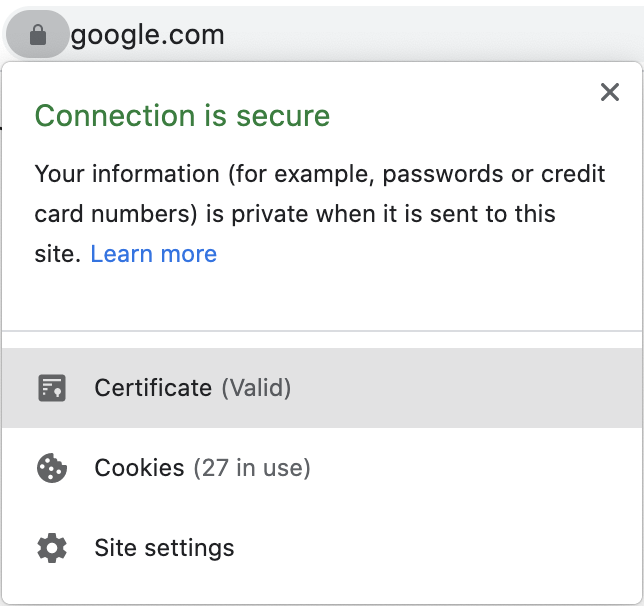
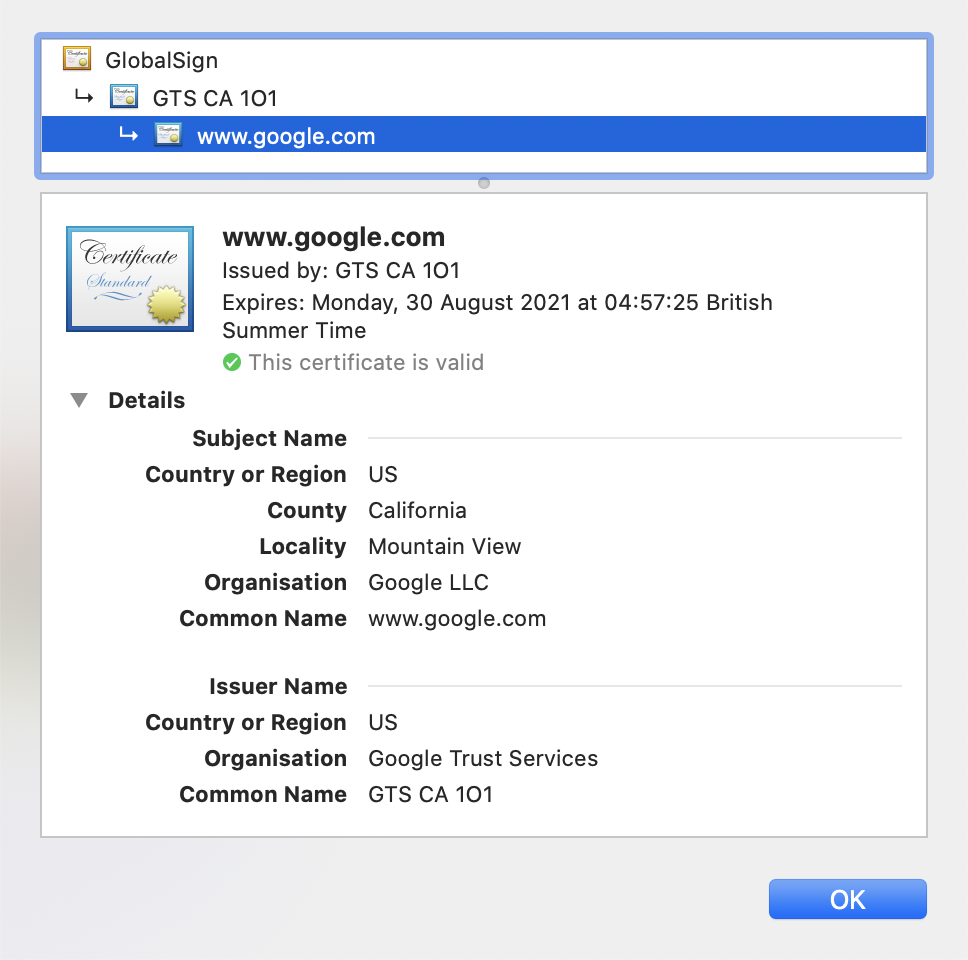
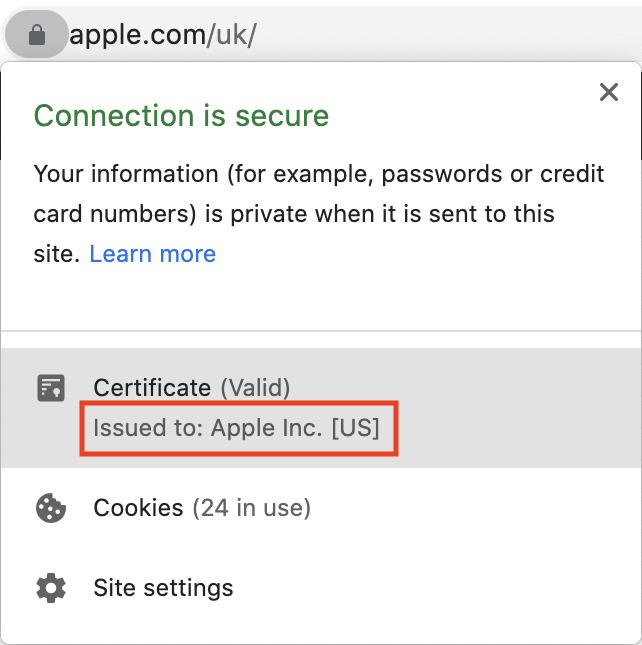
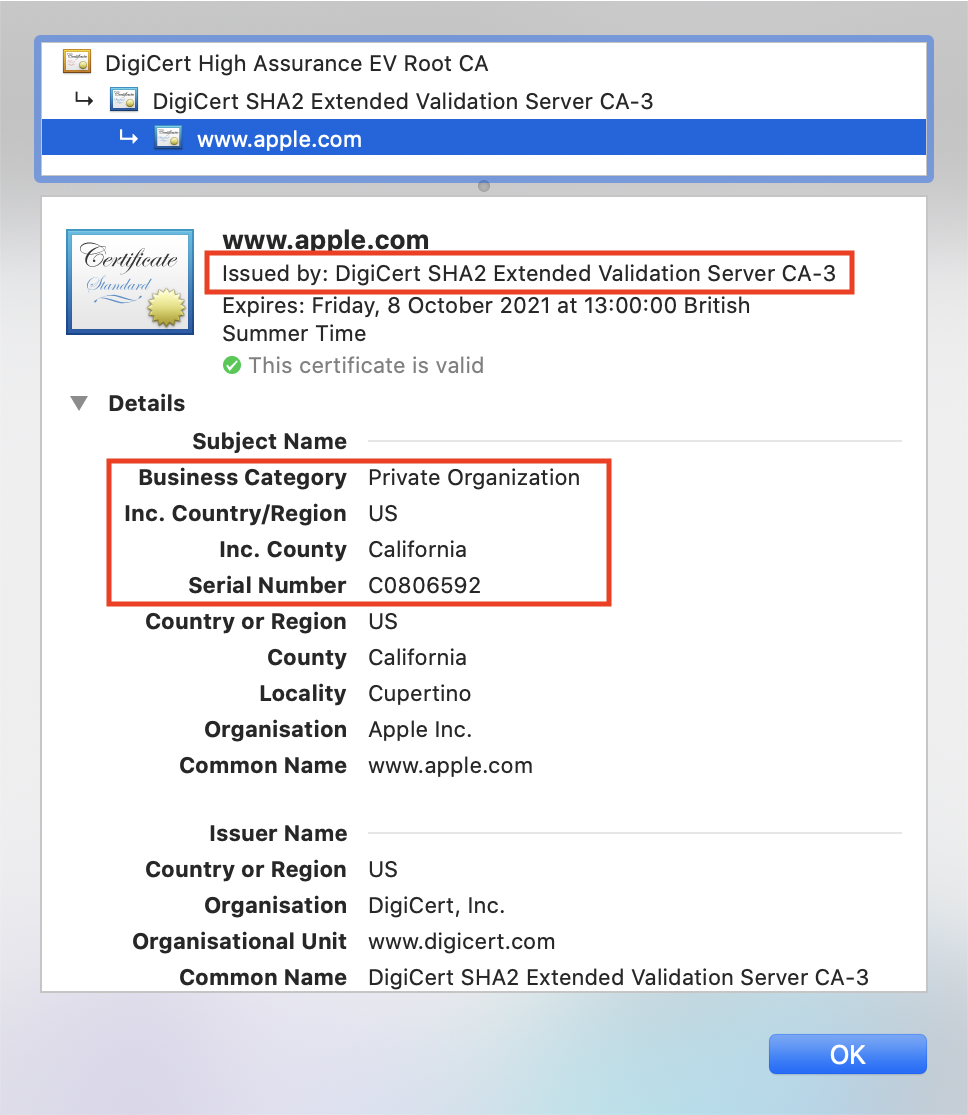
Providing your own Domain Validation (DV) or Extended Validation (EV) SSL certificate can give your end users extra confidence that your applications are secure. Most browser vendors have now removed the visual signals in the browser address bar that distinguished these certificates (green padlock, highlighted company name, highlighted https protocol). However, the additional EV certificate information is still available when you click the padlock in the browser address bar and inspect the certificate:
Standard SSL certificate: |
EV SSL certificate: |
|
|
Wildcard certificates
Wildcard certificates allow subdomains of the same domain to share a certificate in the following ways:
-
Within the same realm
-
Across different realms
-
Within the same realm and across different realms
For example, a certificate for the wildcard domain "*.example.com" could be shared between an Alpha realm using the subdomain "customers.example.com" and a Bravo realm using the subdomain "employees.example.com".
Similarly, the same certificate could be shared between subdomains "employees-emea.example.com" and "employees-apac.example.com" within the same Alpha or Bravo realm.
Outbound connections
Advanced Identity Cloud lets you secure outbound traffic from your tenant environments to your own network; for example, you may want to secure outbound emails from your Advanced Identity Cloud tenant environments to your on-premises SMTP server.
To do this, you supply your own CA or TLS certificates to ${forgerock.name}. ${forgerock.name} then adds the certificates into the trust store of your tenant environments. You can supply as many certificates as you need.
Send Ping Identity a CA or TLS certificate
-
Click Create a case.
-
Follow the steps in the case submission wizard by selecting your account and contract and answering questions about your tenant environments.
-
On the Please answer the following questions to help us understand the issue you’re facing page, enter the following details, and then click Next:
Field Value What product family is experiencing the issue?
Select PingOne Advanced Identity Cloud
What specific product is experiencing the issue?
Select Configuration
What version of the product are you using?
Select NA
-
On the Tell us about the issue page, enter the following details, and then click Next:
Field Value Provide a descriptive title for your issue
Enter
Add CA or TLS certificate to tenant trust storesDescribe the issue below
Enter a comma-separated list of FQDNs for your sandbox[1], development, UAT[2], staging, and production tenant environments.
-
Click Submit.
-
Upload the local file containing your certificate.
-
Ping Identity support confirms when the certificate has been imported into the trust stores of your tenant environments.
Manage SSL certificates using the API
You can find background information on self-managed SSL certificates in PingOne Advanced Identity Cloud in Self-managed SSL certificates.
Certificate API endpoints
To use the certificate API, learn more in the following Advanced Identity Cloud API endpoints:
-
CSRs API endpoint
-
Certificates API endpoint
Authenticate to certificate API endpoints
To authenticate to certificate API endpoints, use an access token created with one of the following scopes:
| Scope | Description |
|---|---|
|
Full access to certificate API endpoints. Use this scope to create, activate, deactivate, or delete certificates. |
|
Read-only access to certificate API endpoints. Use this scope if you only need to List certificates. |
Prerequisites
You need the openssl and jq command-line tools to run some of the commands. You can find installation instructions for your particular package manager in https://command-not-found.com/openssl and https://command-not-found.com/jq.
Create a certificate using a tenant-generated private key
You can create certificates using a private key the tenant generates for you and which is retained in the tenant. The benefit of this approach is there is no risk of accidentally leaking your private key as it never leaves the tenant. However, with this approach, you can only install a signed certificate on the same tenant from which you requested the CSR.
Step 1: Create a CSR using the certificate API
In this step, you create a certificate signing request (CSR). You’ll need this in the next step to create a self-signed certificate or to send to your preferred SSL certificate provider to create a CA-signed certificate.
-
Create a JSON payload of CSR information:
-
Adapt the following example configuration to suit your company:
{ "commonName": "www.pingidentity.com", (1) "organization": "Ping Identity Corporation", (1) "organizationalUnit": "IT", (1) "country": "US", (1) "streetAddress": "1001 17th Street", (1) "city": "Denver", (1) "postalCode": "80202", (1) "email": "example.user@pingidentity.com", (1) "businessCategory": "Private Organization", (2) "serialNumber": "3463471", (2) "jurisdictionCountry": "US", (2) "jurisdictionLocality": "Wilmington", (2) "jurisdictionState": "Delaware", (2) "subjectAlternativeNames": ["support.pingidentity.com", "labs.pingidentity.com"] (3) }json1 Configures the standard CSR fields. All standard fields are included for demonstration, but this is not strictly necessary. Consult your SSL certificate provider’s documentation for the minimum required fields. Remove any fields that are not used rather than include them with an empty value. 2 (Optional) Configures the EV CSR fields. All EV fields are included for demonstration, but only businessCategory,serialNumber, andjurisdictionCountryNameare required.3 (Optional) Configures the subject alternative names (SANs). SANs are domains the certificate will secure in addition to the commonName. Wildcards values in SAN domains are not permitted. -
Save your adapted configuration in a local file called
csr-payload.json.
-
-
In the tenant environment where you intend to install the certificate:
-
Get an access token created with the
fr:idc:certificate:*scope. -
Create a CSR using the
/environment/csrsendpoint:$ curl \ --request POST 'https://<tenant-env-fqdn>/environment/csrs' \ (1) --header 'Authorization: Bearer <access-token>' \ (2) --header 'Content-Type: application/json' \ --data "$(< csr-payload.json)" \ (3) > tee csr-result.json (4)shell1 Replace <tenant-env-fqdn> with the FQDN of your tenant environment. 2 Replace <access-token> with the access token. 3 The request body is populated with the output of csr-payload.json.4 The response is stored in a local file called csr-result.json.Show response
{ "algorithm": "SHA256-RSA", "createdDate": "2024-04-24T17:11:42Z", "id": "4f1caf97-bd2f-4d30-8e68-682fa10d27ff", (1) "request": "-----BEGIN CERTIFICATE REQUEST-----\nMIIDTTCCAjUCAQAwgbcxCzAJBgNVBAYTAlVTMQ8wDQYDVQQHEwZEZW52ZXIxGTAX\nBgNVB ... MUREqk/\ndSPgWeMMVFQwlmljkE+cvGl9L3f7aPgXtR6nxPS/oTSl\n-----END CERTIFICATE REQUEST-----\n", "subject": "CN=www.pingidentity.com,OU=IT,O=Ping Identity Corporation,STREET=1001 17th Street,L=Denver,C=US", "subjectAlternativeNames": [ "support.pingidentity.com", "labs.pingidentity.com" ] }json1 The CSR ID is represented by the idkey. You need this ID in a later step to update the CSR with the signed certificate. In this example, the CSR ID is4f1caf97-bd2f-4d30-8e68-682fa10d27ff. -
Extract the CSR from the
requestkey of the JSON object incsr-result.json:$ jq -r .request csr-result.json > csr.pemshell -
Review the contents of the CSR in
csr.pem:-
For an example of a CSR, learn more in PEM-formatted certificate examples.
-
To check the information in the CSR, learn more in Check a CSR.
-
-
Step 2: Generate a signed certificate and create a certificate chain
In this step, you create a CA-signed or self-signed certificate, then create a PEM-formatted certificate chain.
-
Create a certificate from the CSR in one of these ways:
-
CA-signed certificate:
Supply the CSR to your preferred SSL certificate provider so they can generate a CA-signed certificate. Your SSL certificate provider should provide you with a signed certificate and a CA certificate. They may also provide intermediary certificates. -
Self-signed certificate:
Use OpenSSL to create a custom CA certificate and a self-signed certificate.
-
-
Combine your signed certificate and CA certificate into a certificate chain and save it in the local file
chain.pem. If you used an SSL certificate provider, add any intermediary certificates intochain.pemtoo, inserted between your signed certificate and the CA certificate:$ cat cert.pem [inter.cert.pem ...] ca.cert.pem > chain.pemshellThe following is an example of what the certificate chain might look like:
-----BEGIN CERTIFICATE-----
content of your signed certificate
-----END CERTIFICATE-----
-----BEGIN CERTIFICATE-----
content of an optional intermediate CA certificate
-----END CERTIFICATE-----
-----BEGIN CERTIFICATE-----
content of a CA certificate
-----END CERTIFICATE-----
shell
Step 3: Install the certificate
In this step, you install the certificate in the tenant environment where you created the CSR request.
-
Create a JSON payload of certificate information:
-
Add the certificate chain to a JSON object:
$ jq -Rs '{certificate: .}' ./chain.pem > payload.jsonshellSummary of command:
-
Creates a JSON object using the
jqcommand. Learn more in Prerequisites. -
Adds a
certificatekey to the JSON object set with the contents ofchain.pemas a single line. -
Saves the JSON object in a local file called
payload.json.
-
-
The contents of
payload.jsonshould look something like this:{ "certificate": "-----BEGIN CERTIFICATE-----\ncontent of your signed certificate\n-----END CERTIFICATE-----\n-----BEGIN CERTIFICATE-----\ncontent of an optional intermediate CA certificate\n-----END CERTIFICATE-----\n-----BEGIN CERTIFICATE-----\ncontent of your CA certificate\n-----END CERTIFICATE-----\n" }json
-
-
In the tenant environment where you created the CSR request in step 1.2 and intend to install the certificate:
-
Get an access token created with the
fr:idc:certificate:*scope. -
Upload the certificate using the
/environment/csrsendpoint:$ curl \ --request PATCH 'https://<tenant-env-fqdn>/environment/csrs/<csr-id>' \(1) (2) --header 'Authorization: Bearer <access-token>' \(3) --header 'Content-Type: application/json' \ --data "$(< payload.json)" (4)shell1 Replace <tenant-env-fqdn> with the FQDN of your tenant environment. 2 Replace <csr-id> with the CSR ID you noted in step 1, 2b. 3 Replace <access-token> with the access token. 4 The request body is populated with the output of payload.json.Show response
{ "algorithm": "SHA256-RSA", "certificateID": "ccrt-d7bad9b1-65fa-48ce-b56a-bd320a75d477", (1) "createdDate": "2024-05-03T12:49:29Z", "id": "11c5419e-c5de-466d-a7e7-d65afbde1217", "request": "-----BEGIN CERTIFICATE REQUEST-----\nMIIDozCCAosCAQAwgbcxCzAJBgNVBAYTAlVTMQ8wDQYDVQQHEwZEZW52ZXIxGTAX\nBgNVB ... ABMyK1\nDVSVbrcuZMoxcnzZNynjGLe58iFS+ko=\n-----END CERTIFICATE REQUEST-----\n", "subject": "CN=www.pingidentity.com,OU=IT,O=Ping Identity Corporation,STREET=1001 17th Street,L=Denver,C=US", "subjectAlternativeNames": [ "support.pingidentity.com", "labs.pingidentity.com" ] }json1 The certificate ID is represented by the certificateIDkey. You need this ID to activate, deactivate, or delete the certificate. In this example, the certificate ID isccrt-d7bad9b1-65fa-48ce-b56a-bd320a75d477. -
Get the certificate information using the
/environment/certificatesendpoint:$ curl \ --request GET 'https://<tenant-env-fqdn>/environment/certificates/<certificate-id>' \(1) (2) --header 'Authorization: Bearer <access-token>' \(3) --header 'Content-Type: application/json'shell1 Replace <tenant-env-fqdn> with the FQDN of your tenant environment. 2 Replace <certificate-id> with the certificate ID you noted in the previous step. 3 Replace <access-token> with the access token. Show response
{ "active": false, (1) "expireTime": "2024-06-02T12:58:01Z", "id": "ccrt-d7bad9b1-65fa-48ce-b56a-bd320a75d477", (2) "issuer": "CN=Self-signing CA", "live": false, (3) "subject": "CN=www.pingidentity.com,OU=IT,O=Ping Identity Corporation,STREET=1001 17th Street,L=Denver,C=US,1.2.840.113549.1.9.1=#0c1d6578616d706c652e757365724070696e676964656e746974792e636f6d", "subjectAlternativeNames": [ "support.pingidentity.com", "labs.pingidentity.com" ], "validFromTime": "2024-05-03T12:58:01Z" }json1 The activekey is set tofalsewhich indicates that the certificate is not active. This is the default value for a new certificate.2 The certificate ID is represented by the idkey. This is the same ID as in thecertificateIDkey in the CSR response from the previous step.3 The livekey returns the valuefalse, which indicates the certificate is not installed in the environment’s load balancer. In the next step, you will set theactivekey totrue. This triggers an asynchronous process that installs the certificate in the environment’s load balancer. When the asynchronous process is complete, thelivekey returns the valuetrue. -
Activate the certificate to install it in the environment’s load balancer.
-
Create a certificate using a locally generated private key
You can create certificates using a private key you generate locally and retain access to. The benefit of this approach is once you have signed the certificate, you can install it with the private key on as many tenants as you need. However, to use this approach, you must have robust security practices when handling the private key.
Step 1: Create a CSR using the command line
In this step, you create a certificate signing request (CSR). You’ll need this in the next step to create a self-signed certificate or to send to your preferred SSL certificate provider to create a CA-signed certificate.
-
Create an OpenSSL CSR configuration file:
-
Adapt the following example configuration to suit your company:
[ req ] (1) prompt = no (2) distinguished_name = req_distinguished_name req_extensions = req_ext (5) [ req_distinguished_name ] # Standard CSR fields (3) commonName = www.pingidentity.com organizationName = Ping Identity Corporation organizationalUnitName = IT countryName = US streetAddress = 1001 17th Street localityName = Denver stateOrProvinceName = Colorado postalCode = 80202 emailAddress = example.user@pingidentity.com # EV CSR fields (4) businessCategory = Private Organization serialNumber = 3463471 jurisdictionCountryName = US jurisdictionLocalityName = Wilmington jurisdictionStateOrProvinceName = Delaware [ req_ext ] (5) subjectAltName = @alt_names [alt_names] (5) DNS.1 = support.pingidentity.com DNS.2 = labs.pingidentity.comini1 Configures the openssl reqcommand.2 Configures the openssl reqcommand to use the CSR values supplied in this configuration file instead of prompting for them.3 Configures the standard CSR fields. All standard fields are included for demonstration, but this is not strictly necessary. Consult your SSL certificate provider’s documentation for the minimum required fields. Remove any fields that are not used rather than include them with an empty value. 4 (Optional) Configures the EV CSR fields. All EV fields are included for demonstration, but only businessCategory,serialNumber, andjurisdictionCountryNameare required.5 (Optional) Configures the subject alternative names (SANs). SANs are domains the certificate will secure in addition to the commonName. Wildcard values in SAN domains are not permitted. -
Save your adapted configuration in a local file called
openssl-csr.conf.
-
-
Create a CSR:
-
Generate a CSR and private key pair using the configuration in
openssl-csr.conf:$ openssl req \ -nodes -newkey rsa:2048 \ -out csr.pem -keyout key.pem \ -config openssl-csr.confshell -
Review the CSR and private key, which are respectively in the local files
csr.pemandkey.pem:-
For examples of a CSR and private key, learn more in PEM-formatted certificate examples.
-
To check the information in the CSR, learn more in Check a CSR.
-
-
Step 2: Generate a signed certificate and create a certificate chain
In this step, you create a CA-signed or self-signed certificate, then create a PEM-formatted certificate chain.
-
Create a certificate from the CSR in one of these ways:
-
CA-signed certificate:
Supply the CSR to your preferred SSL certificate provider so they can generate a CA-signed certificate. Your SSL certificate provider should provide you with a signed certificate and a CA certificate. They may also provide intermediary certificates. -
Self-signed certificate:
Use OpenSSL to create a custom CA certificate and a self-signed certificate.
-
-
Combine your signed certificate and CA certificate into a certificate chain and save it in the local file
chain.pem. If you used an SSL certificate provider, add any intermediary certificates intochain.pemtoo, inserted between your signed certificate and the CA certificate:$ cat cert.pem [inter.cert.pem ...] ca.cert.pem > chain.pemshellThe following is an example of what the certificate chain might look like:
-----BEGIN CERTIFICATE-----
content of your signed certificate
-----END CERTIFICATE-----
-----BEGIN CERTIFICATE-----
content of an optional intermediate CA certificate
-----END CERTIFICATE-----
-----BEGIN CERTIFICATE-----
content of a CA certificate
-----END CERTIFICATE-----
shell
Step 3: Install the certificate and private key
In this step, you install the certificate and private key in your tenant environments.
-
Create a JSON payload of certificate information:
-
Add the certificate chain and private key to a JSON object:
$ (jq -Rs '{certificate: .}' ./chain.pem; jq -Rs '{privateKey: .}' ./key.pem) | jq -s add > payload.jsonshellSummary of command:
-
Creates a JSON object using the
jqcommand. Learn more in Prerequisites. -
Adds a
certificatekey to the JSON object set with the contents ofchain.pemas a single line. -
Adds a
privateKeykey to the JSON object set with the contents ofkey.pemas a single line. -
Saves the JSON object in a local file called
payload.json.
-
-
The contents of
payload.jsonshould look something like this:{ "certificate": "-----BEGIN CERTIFICATE-----\ncontent of your signed certificate\n-----END CERTIFICATE-----\n-----BEGIN CERTIFICATE-----\ncontent of an optional intermediate CA certificate\n-----END CERTIFICATE-----\n-----BEGIN CERTIFICATE-----\ncontent of your CA certificate\n-----END CERTIFICATE-----\n", "privateKey": "-----BEGIN ENCRYPTED PRIVATE KEY-----\ncontent of your private key\n-----END ENCRYPTED PRIVATE KEY-----\n" }json
-
-
In each tenant environment where you want to install the certificate:
-
Get an access token created with the
fr:idc:certificate:*scope. -
Upload the certificate using the
/environment/certificatesendpoint:$ curl \ --request POST 'https://<tenant-env-fqdn>/environment/certificates' \(1) --header 'Authorization: Bearer <access-token>' \(2) --header 'Content-Type: application/json' \ --data "$(< payload.json)" (3)shell1 Replace <tenant-env-fqdn> with the FQDN of your tenant environment. 2 Replace <access-token> with the access token. 3 The request body is populated with the output of payload.json.Show response
{ "active": false, (1) "expireTime": "2024-06-01T15:14:54Z", "id": "ccrt-134425bc-6203-48fe-bbef-b17792faf972", (2) "issuer": "CN=Self-signing CA", "live": false, (3) "subject": "SERIALNUMBER=3463471,CN=www.pingidentity.com,OU=IT,O=Ping Identity Corporation,POSTALCODE=80202,STREET=1001 17th Street,L=Denver,ST=Colorado,C=US,1.3.6.1.4.1.311.60.2.1.2=#130844656c6177617265,1.3.6.1.4.1.311.60.2.1.1=#130a57696c6d696e67746f6e,1.3.6.1.4.1.311.60.2.1.3=#13025553,2.5.4.15=#131450726976617465204f7267616e697a6174696f6e,1.2.840.113549.1.9.1=#0c1d6578616d706c652e757365724070696e676964656e746974792e636f6d", "subjectAlternativeNames": [ "support.pingidentity.com", "labs.pingidentity.com" ], "validFromTime": "2024-05-02T15:14:54Z" }json1 The activekey is set tofalse, which indicates the certificate is not active. This is the default value for a new certificate.2 The certificate ID is represented by the idkey. You need this ID to activate, deactivate, or delete the certificate. In this example, the certificate ID isccrt-134425bc-6203-48fe-bbef-b17792faf972.3 The livekey returns the valuefalse, which indicates the certificate is not installed in the environment’s load balancer. In the next step, you will set theactivekey totrue. This triggers an asynchronous process that installs the certificate in the environment’s load balancer. When the asynchronous process is complete, thelivekey returns the valuetrue. -
Activate the certificate to install it in the environment’s load balancer.
-
List certificates
List certificates to view all certificates in a tenant environment. Certificates can be active (installed in the environment’s load balancer) or inactive (not installed in the environment’s load balancer). The list includes any certificates the Ping Identity support team added to the environment.
In any tenant environment
-
Get an access token created with the
fr:idc:certificate:readscope. -
Get a list of certificates from the
/environment/certificatesendpoint:$ curl \ --request GET 'https://<tenant-env-fqdn>/environment/certificates' \(1) --header 'Authorization: Bearer <access-token>' \(2) --header 'Content-Type: application/json'shell1 Replace <tenant-env-fqdn> with the FQDN of your tenant environment. 2 Replace <access-token> with the access token. Show response
[
    {
        "active": false,
        "expireTime": "2024-06-01T15:14:54Z",
        "id": "ccrt-4ac300e5-7e0a-4d34-a42c-c41a076458da",
        "issuer": "CN=Self-signing CA",
        "live": false,
        "subject": "SERIALNUMBER=3463471,CN=www.pingidentity.com,OU=IT,O=Ping Identity Corporation,POSTALCODE=80202,STREET=1001 17th Street,L=Denver,ST=Colorado,C=US,1.3.6.1.4.1.311.60.2.1.2=#130844656c6177617265,1.3.6.1.4.1.311.60.2.1.1=#130a57696c6d696e67746f6e,1.3.6.1.4.1.311.60.2.1.3=#13025553,2.5.4.15=#131450726976617465204f7267616e697a6174696f6e,1.2.840.113549.1.9.1=#0c1d6578616d706c652e757365724070696e676964656e746974792e636f6d",
        "subjectAlternativeNames": [
            "support.pingidentity.com",
            "labs.pingidentity.com"
        ],
        "validFromTime": "2024-05-02T15:14:54Z"
    },
    {
        "active": false,
        "expireTime": "2024-06-02T12:58:01Z",
        "id": "ccrt-d7bad9b1-65fa-48ce-b56a-bd320a75d477",
        "issuer": "CN=Self-signing CA",
        "live": false,
        "subject": "CN=www.pingidentity.com,OU=IT,O=Ping Identity Corporation,STREET=1001 17th Street,L=Denver,C=US,1.2.840.113549.1.9.1=#0c1d6578616d706c652e757365724070696e676964656e746974792e636f6d",
        "subjectAlternativeNames": [
            "support.pingidentity.com",
            "labs.pingidentity.com"
        ],
        "validFromTime": "2024-05-03T12:58:01Z"
    }
]
json
Activate a certificate
Activate a certificate to install it in a tenant environment’s load balancer. If you activate more than one certificate at once, the environment’s load balancer will serve the most appropriate for the requested hostname. This lets you rotate certificates by installing and activating a new certificate before an older certificate expires.
In any tenant environment:
-
List the certificates in the environment and examine the response to find the ID of the certificate (represented as the JSON
idkey) you intend to activate. -
Get an access token created with the
fr:idc:certificate:*scope. -
Update the certificate by patching the JSON
activekey totrue:$ curl \ --request PATCH 'https://<tenant-env-fqdn>/environment/certificates/<certificate-id>' \(1) (2) --header 'Authorization: Bearer <access-token>' \(3) --header 'Content-Type: application/json' \ --data '{"active": true}' (4)shell1 Replace <tenant-env-fqdn> with the FQDN of your tenant environment. 2 Replace <certificate-id> with the certificate ID you found in step 1. 3 Replace <access-token> with the access token. 4 The request body is set with a new value for the JSON activekey (true).Show response
{
    "active": true,
    "expireTime": "2024-06-01T15:14:54Z",
    "id": "ccrt-134425bc-6203-48fe-bbef-b17792faf972",
    "issuer": "CN=Self-signing CA",
    "live": false,
    "subject": "SERIALNUMBER=3463471,CN=www.pingidentity.com,OU=IT,O=Ping Identity Corporation,POSTALCODE=80202,STREET=1001 17th Street,L=Denver,ST=Colorado,C=US,1.3.6.1.4.1.311.60.2.1.2=#130844656c6177617265,1.3.6.1.4.1.311.60.2.1.1=#130a57696c6d696e67746f6e,1.3.6.1.4.1.311.60.2.1.3=#13025553,2.5.4.15=#131450726976617465204f7267616e697a6174696f6e,1.2.840.113549.1.9.1=#0c1d6578616d706c652e757365724070696e676964656e746974792e636f6d",
    "subjectAlternativeNames": [
        "support.pingidentity.com",
        "labs.pingidentity.com"
    ],
    "validFromTime": "2024-05-02T15:14:54Z"
}
json -
An asynchronous process will automatically install the certificate in the environment’s load balancer. To check when the asynchronous process has completed, poll the
/environment/certificatesendpoint using the certificate ID until thelivekey in the response changes fromfalsetotrue:$ curl \ --request GET 'https://<tenant-env-fqdn>/environment/certificates/<certificate-id>' \(1) (2) --header 'Authorization: Bearer <access-token>' \(3) --header 'Content-Type: application/json'shell1 Replace <tenant-env-fqdn> with the FQDN of your tenant environment. 2 Replace <certificate-id> with the ID of the certificate you updated. 3 Replace <access-token> with the access token. When the asynchronous process has completed and installed the certificate in the environment’s load balancer, the response should look like this:
Show response
{
    "active": true,
    "expireTime": "2024-06-01T15:14:54Z",
    "id": "ccrt-134425bc-6203-48fe-bbef-b17792faf972",
    "issuer": "CN=Self-signing CA",
    "live": true,
    "subject": "SERIALNUMBER=3463471,CN=www.pingidentity.com,OU=IT,O=Ping Identity Corporation,POSTALCODE=80202,STREET=1001 17th Street,L=Denver,ST=Colorado,C=US,1.3.6.1.4.1.311.60.2.1.2=#130844656c6177617265,1.3.6.1.4.1.311.60.2.1.1=#130a57696c6d696e67746f6e,1.3.6.1.4.1.311.60.2.1.3=#13025553,2.5.4.15=#131450726976617465204f7267616e697a6174696f6e,1.2.840.113549.1.9.1=#0c1d6578616d706c652e757365724070696e676964656e746974792e636f6d",
    "subjectAlternativeNames": [
        "support.pingidentity.com",
        "labs.pingidentity.com"
    ],
    "validFromTime": "2024-05-02T15:14:54Z"
}
json
Deactivate a certificate
Deactivate a certificate to uninstall it from a tenant environment’s load balancer. If you deactivate all certificates in an environment, the load balancer will fall back to using a Google-managed certificate.
To deactivate a certificate, follow the instructions in Activate a certificate with the following changes:
-
In step 3, patch the JSON
activekey tofalse. -
In step 4, poll the
/environment/certificatesendpoint until thelivekey in the response changes fromtruetofalse.
Delete a certificate
Delete a certificate to permanently remove it from a tenant environment.
In any tenant environment:
-
List the certificates in the environment and examine the response to find the ID of the certificate you intend to delete, represented by the
idkey. -
If you have not done so already, deactivate the certificate to uninstall it from the environment’s load balancer.
-
Get an access token created with the
fr:idc:certificate:*scope. -
Delete the certificate:
$ curl \ --request DELETE 'https://<tenant-env-fqdn>/environment/certificates/<certificate-id>' \(1) (2) --header 'Authorization: Bearer <access-token>' \(3) --header 'Content-Type: application/json'shell1 Replace <tenant-env-fqdn> with the FQDN of your tenant environment. 2 Replace <certificate-id> with the certificate ID you found in step 1. 3 Replace <access-token> with the access token.
Manage SSL certificates using the admin console
You can find background information on self-managed SSL certificate in PingOne Advanced Identity Cloud in Self-managed SSL certificates.
Manage CSRs and certificates
The Advanced Identity Cloud admin console lets you manage your own CSRs and certificates using SSL configurations. There are broadly two types of SSL configuration:
-
Pending: The SSL configuration has been used to generate a private key and a CSR, but hasn’t been updated with a certificate yet.
-
Complete: The SSL configuration has been successfully updated with a certificate.
To manage SSL configurations:
-
In the Advanced Identity Cloud admin console, open the TENANT menu (upper right), then go to Tenant Settings > Global Settings > SSL Configurations.
-
The SSL Configurations page lists any SSL configurations, including any created using the API:
-
Pending SSL configurations display a Pending status and an Add Certificate button.
-
Complete SSL configurations display an Active, Inactive, Expires Soon, or Expired status and a certificate expiration date.
-
-
To create a new SSL configuration and CSR, follow the instructions in Step 1: Create a CSR.
-
Review any pending SSL configurations:
-
To continue the set up of a certificate using a pending SSL configuration, follow the instructions in:
-
To delete a pending SSL configuration:
-
Click its delete icon ()
-
In the Delete SSL Configuration? modal, click Delete.
-
-
-
Review any complete SSL configurations:
-
To renew a certificate:
-
Click the SSL configuration’s ellipsis icon (), then click Renew or View Details > Renew.
-
Follow the instructions in Step 1: Create a CSR.
-
-
To view information about a certificate:
-
Click the SSL configuration’s ellipsis icon (), then click View Details.
-
The Certificate Details modal displays basic information about the certificate:
-
Valid From: The valid-from date of the certificate.
-
Expires: The expiration date of the certificate.
-
Status: The status of the certificate (Active, Inactive, Expires Soon, or Expired).
-
Domains: The domains secured by the certificate.
-
Created: The creation date of the certificate’s CSR (only shown for tenant-generated CSRs).
-
-
-
To activate or deactivate a certificate:
-
To activate an inactive certificate, click the SSL configuration’s ellipsis icon (), then click Activate.
-
To deactivate an active certificate, click the SSL configuration’s ellipsis icon (), then click Deactivate.
It takes a few minutes for a certificate to be activated or deactivated in the environment’s load balancer.
-
-
To delete a certificate:
-
Click the SSL configuration’s ellipsis icon (), then click Delete.
-
In the Delete SSL Configuration? modal, click Delete.
-
-
Create a certificate using the admin console
You can create certificates using a private key the tenant generates for you and which is retained in the tenant. The benefit of this approach is there is no risk of accidentally leaking your private key as it never leaves the tenant. However, with this approach, you can only install a signed certificate on the same tenant from which you requested the CSR.
| The admin console supports creating a certificate only using a tenant-generated private key. To create a certificate using your own private key, use the API. Learn more in Create a certificate using a locally generated private key. |
Step 1: Create a CSR
In this step, you create a certificate signing request (CSR). You’ll need this in the next step to create a self-signed certificate or to send to your preferred SSL certificate provider to create a CA-signed certificate.
-
In the Advanced Identity Cloud admin console, open the TENANT menu (upper right), then go to Tenant Settings > Global Settings > SSL Configurations.
-
Click New SSL Configuration.
-
In the New SSL Configuration modal:
For CSR field definitions, learn more in CSR field reference. -
Enter a Primary Domain (CN).
-
(Optional) Add Subject Alternative Domains (SANs):
-
Click the button located to the right of the Primary Domain (CN) field to add a Subject Alternative Domain (SAN) field.
-
Enter a SAN in the new field.
-
Repeat the previous two steps to add as many SANs as you need.
-
-
Enter an Organization and a Country.
-
Select an Encryption Algorithm from RSA (default) or ECDSA.
-
(Optional) Add additional CSR fields:
-
Click Show additional settings to display additional CSR fields.
-
(Optional) Select Extended Validation Certificate if you intend to request an Extended Validation (EV) certificate from your preferred SSL certificate provider. When Extended Validation Certificate is selected, these additional CSR fields become mandatory:
-
Jurisdiction City
-
Jurisdiction Country
-
Jurisdiction State
-
Serial Number
-
Business Category
-
-
Enter as many additional CSR field values as you need, and if you checked Extended Validation Certificate in the previous step, enter the mandatory CSR field values.
-
-
Click Generate Certificate Signing Request. The New SSL Configuration modal closes and a success modal opens.
-
-
In the success modal:
-
Click the copy button () to copy the CSR content in the Certificate Signing Request field to your clipboard.
-
Transfer the CSR content in the clipboard to somewhere safe until you use it in the next step to create a certificate.
When you close the modal, the CSR content is not available again. -
Click Done to close the modal.
-
-
Confirm the new pending SSL configuration is in the list of SSL configurations.
Step 2: Generate a signed certificate and create a certificate chain
In this step, you create a CA-signed or self-signed certificate, then create a PEM-formatted certificate chain.
-
Create a certificate from the CSR in one of these ways:
-
CA-signed certificate:
Supply the CSR to your preferred SSL certificate provider so they can generate a CA-signed certificate. Your SSL certificate provider should provide you with a signed certificate and a CA certificate. They may also provide intermediary certificates. -
Self-signed certificate:
Use OpenSSL to create a custom CA certificate and a self-signed certificate.
-
-
Combine your signed certificate and CA certificate into a certificate chain and save it in the local file
chain.pem. If you used an SSL certificate provider, add any intermediary certificates intochain.pemtoo, inserted between your signed certificate and the CA certificate:$ cat cert.pem [inter.cert.pem ...] ca.cert.pem > chain.pemshellThe following is an example of what the certificate chain might look like:
-----BEGIN CERTIFICATE-----
content of your signed certificate
-----END CERTIFICATE-----
-----BEGIN CERTIFICATE-----
content of an optional intermediate CA certificate
-----END CERTIFICATE-----
-----BEGIN CERTIFICATE-----
content of a CA certificate
-----END CERTIFICATE-----
shell
Step 3: Install the certificate
In this step, you install the certificate in the tenant environment where you created the CSR request.
-
In the Advanced Identity Cloud admin console, open the TENANT menu (upper right), then go to Tenant Settings > Global Settings > SSL Configurations.
-
Find the pending SSL configuration that generated your CSR, then click Add Certificate.
-
In the Add Certificate modal:
-
Enter the certificate chain using one of these options:
-
Click Browse to select a local file that contains the certificate chain.
-
Paste the certificate chain content directly into the text field.
-
-
Click Add Certificate.
-
-
Confirm the SSL configuration is now fully configured and active.
It takes a few minutes for the certificate to be installed and activated in the environment’s load balancer.
SSL certificate utility tasks
Create a custom CA certificate and a self-signed certificate
-
Create a CSR and save it in a local file called
csr.pem: -
Create a CA certificate and private key:
-
Save the following OpenSSL configuration in a local file called
openssl-req-ca.conf:[ req ] (1) x509_extensions = x509_req_ext [ x509_req_ext ] (2) subjectKeyIdentifier = hash authorityKeyIdentifier = keyid:always,issuer basicConstraints = critical, CA:true keyUsage = critical, digitalSignature, cRLSign, keyCertSignini1 Configures the openssl reqcommand.2 Configures the openssl reqcommand when using thex509flag to create a CA certificate. -
Generate a CA certificate and private key:
$ openssl req \
-x509 -nodes -newkey rsa:2048 -sha256 -days 30 \
-out ca.cert.pem -keyout ca.key.pem \
-subj "/CN=Self-signing CA" \
-config openssl-req-ca.conf
shell -
Review the CA certificate and private key, which are respectively in the local files
ca.cert.pemandca.key.pem:-
For examples of a certificate and private key, learn more in PEM-formatted certificate examples.
-
To check the information in the certificate, learn more in Check a certificate.
-
-
-
Create a signed certificate:
-
Save the following OpenSSL configuration in a local file called
openssl-req-sign.conf:[ req ] (1) x509_extensions = x509_req_ext [ x509_req_ext ] (2) subjectKeyIdentifier = hash authorityKeyIdentifier = keyid:always keyUsage = critical, digitalSignature extendedKeyUsage = serverAuthini1 Configures the openssl reqcommand.2 Configures the openssl reqcommand when using thex509flag to sign a CSR. -
Generate a signed certificate using the CSR, the CA certificate and private key, and the configuration in
openssl-req-sign.conf:$ openssl req \ -x509 -nodes -sha256 -days 30 -copy_extensions copy \ -in csr.pem -out cert.pem -CA ca.cert.pem -CAkey ca.key.pem \ -config openssl-req-sign.confshell -
Review the certificate, which is in the local file
cert.pem:-
For an example of a certificate, learn more in PEM-formatted certificate examples.
-
To check the information in the certificate, learn more in Check a certificate.
-
-
Check a CSR
To check the information in a CSR, run this command:
$ openssl req -in <csr-filename> -noout -text (1)| 1 | Replace <csr-filename> with the name of the local file containing your CSR; for example, csr.pem. |
Show response
Certificate Request:
    Data:
        Version: 1 (0x0)
        Subject: CN = www.pingidentity.com, O = Ping Identity Corporation, OU = IT, C = US, street = 1001 17th Street, L = Denver, ST = Colorado, postalCode = 80202, emailAddress = example.user@pingidentity.com, businessCategory = Private Organization, serialNumber = 3463471, jurisdictionC = US, jurisdictionL = Wilmington, jurisdictionST = Delaware (1)
        Subject Public Key Info:
            Public Key Algorithm: rsaEncryption
                Public-Key: (2048 bit)
                Modulus:
                    00:df:cf:53:47:8b:6a:51:23:0c:b9:8d:65:31:13:
                    26:6b:65:05:46:50:64:2c:97:4b:21:ac:72:99:54:
                    0c:d9:44:f1:74:c8:cd:55:09:67:7f:a2:f9:47:e5:
                    d4:fb:ec:fd:e9:c5:fd:77:30:30:79:f4:86:a3:c1:
                    72:2e:92:ca:74:93:44:65:4d:6f:b1:09:36:8d:b2:
                    c5:97:16:5e:d2:0d:49:42:91:93:da:01:02:9d:cf:
                    c4:af:99:1e:1f:80:f9:61:ab:60:14:25:d5:91:a9:
                    8f:f3:86:01:a1:33:95:10:6c:2a:60:19:6c:49:87:
                    4c:6f:f5:16:b0:54:2a:95:e1:32:c2:bd:3b:92:06:
                    3a:07:61:fa:01:72:3e:ca:02:e6:db:73:6a:4a:e7:
                    7a:ea:24:a7:75:a6:3c:ab:16:e2:c2:52:db:61:2f:
                    df:22:5d:b7:8b:67:31:4a:44:12:7e:94:af:b5:78:
                    31:97:09:68:da:07:28:71:61:a4:8b:6f:ce:27:70:
                    07:d5:12:58:cf:d1:4b:a9:a3:25:c9:a2:3d:08:5e:
                    1c:b3:b3:54:eb:93:90:55:65:01:0f:13:24:da:b3:
                    32:50:bf:d4:c3:71:8f:3b:82:25:11:e7:67:44:dd:
                    69:71:13:b3:6a:86:d2:a4:7f:25:01:c0:8f:71:96:
                    16:75
                Exponent: 65537 (0x10001)
        Attributes:
            Requested Extensions:
                X509v3 Subject Alternative Name: (2)
                    DNS:support.pingidentity.com, DNS:labs.pingidentity.com
    Signature Algorithm: sha256WithRSAEncryption
    Signature Value:
        ab:6d:a7:14:8a:07:6b:69:c8:f7:e9:1f:ca:d3:d4:6d:53:ad:
        4e:f7:91:aa:ec:1a:50:a3:08:0d:05:41:eb:17:ab:c0:30:d6:
        53:2c:24:2f:d3:20:e8:7a:ae:d6:f9:81:a0:d2:a5:ad:44:24:
        35:51:c1:d8:2c:f6:32:d5:9b:35:64:4a:d0:76:47:8f:1e:7e:
        7d:fe:67:66:fd:a9:f0:c4:d4:18:37:a5:7b:50:af:25:34:76:
        14:ac:ba:e7:5a:40:eb:ba:cd:16:09:59:71:e4:88:ab:43:fb:
        ff:a1:8d:ae:5f:cc:62:1d:46:19:28:0a:74:fe:e3:59:e9:63:
        42:65:db:ef:14:29:53:03:53:8d:17:5f:b2:dd:b9:9d:27:fe:
        11:ec:44:07:ef:27:6c:8a:18:63:6c:7c:a4:f4:bb:2e:ee:d5:
        ae:4a:79:80:e0:24:6b:db:01:c1:03:6f:c8:6b:8b:c9:72:46:
        51:3b:a9:00:7a:c6:fc:28:60:8b:13:88:4c:1d:21:f2:19:de:
        c0:a2:99:78:40:74:af:4f:c2:62:3b:6e:d0:9a:12:b1:7a:54:
        2c:42:38:d8:f4:27:be:6e:0e:7f:40:ee:54:81:e2:63:da:95:
        84:33:a5:48:61:dd:88:10:41:cc:d8:62:e9:3a:61:85:7d:06:
55:04:19:ff| 1 | Check the subject contains the fields you entered for the CSR, particularly for EV certificates. |
| 2 | If you entered SANs for the CSR, check the SAN extension is present. |
Check a certificate
To check the information in a certificate, run this command:
$ openssl x509 -in <certificate-filename> -text -noout (1)| 1 | Replace <certificate-filename> with the name of the local file containing your certificate; for example, cert.pem. |
Show response
Certificate:
    Data:
        Version: 3 (0x2)
        Serial Number: 2 (0x2)
        Signature Algorithm: sha256WithRSAEncryption
        Issuer: CN = Self-signing CA
        Validity
            Not Before: May  2 12:07:51 2024 GMT
            Not After : Jun  1 12:07:51 2024 GMT (1)
        Subject: CN = www.pingidentity.com, C = US, ST = Colorado, L = Denver, O = Ping Identity Corporation, OU = IT (2)
        Subject Public Key Info:
            Public Key Algorithm: rsaEncryption
                Public-Key: (2048 bit)
                Modulus:
                    00:d0:52:11:d0:47:34:32:26:85:ae:c8:db:e1:59:
                    9c:88:07:e2:e1:08:65:6c:91:97:e4:e6:33:bb:4c:
                    24:ef:bd:c1:98:e7:c4:6b:6e:40:30:d5:ca:b8:f6:
                    d4:23:ae:4f:2a:e2:93:a3:dc:1b:76:dc:9f:ff:ad:
                    22:23:49:26:18:9e:90:f7:41:7c:7d:89:79:0b:ce:
                    b3:f6:e2:ce:e0:81:a6:d8:7a:e0:1a:5a:dd:7c:85:
                    ff:e8:5b:bc:e5:2a:0a:23:0e:69:cf:2b:fd:cf:7a:
                    d2:d8:5d:fa:61:7f:d5:ef:a0:9c:8a:6d:4c:74:6e:
                    98:36:38:3e:04:8e:f5:82:32:8c:5d:a8:f4:02:f3:
                    ad:54:f0:d9:11:8f:88:7f:0b:64:87:97:61:61:d9:
                    10:7f:54:53:49:e2:fd:90:e3:67:a2:b8:56:b4:7f:
                    4c:bc:d9:9c:33:96:8d:9a:c3:7c:85:58:47:02:38:
                    05:80:a6:e3:95:7c:4c:51:46:9f:d6:81:7e:56:12:
                    cf:35:be:01:57:15:65:f0:d4:9f:61:1f:ba:93:a5:
                    79:84:de:7a:ba:23:04:fa:9a:f4:99:16:60:0c:ef:
                    80:99:3c:fd:5d:af:09:8c:6e:02:2d:a8:02:01:bd:
                    b8:90:00:12:f8:c4:4c:a2:9c:71:e9:22:c4:89:19:
                    35:3f
                Exponent: 65537 (0x10001)
        X509v3 extensions:
            X509v3 Subject Key Identifier:
                7B:1D:14:C9:3C:4A:67:37:A2:E5:BE:B5:30:19:BE:EF:E6:08:B3:D6
            X509v3 Authority Key Identifier:
                6E:41:13:8E:26:E4:B0:7E:63:ED:07:0C:4E:2D:CD:FA:66:28:20:21
            X509v3 Key Usage: critical
                Digital Signature
            X509v3 Extended Key Usage:
                TLS Web Server Authentication
            X509v3 Subject Alternative Name: (3)
                DNS:support.pingidentity.com, DNS:labs.pingidentity.com
    Signature Algorithm: sha256WithRSAEncryption
    Signature Value:
        22:60:ab:f8:13:cd:af:36:62:06:c5:fe:d4:eb:4f:7e:17:d1:
        c9:c9:82:56:97:8e:d5:f1:55:33:64:d2:4f:7f:ab:75:e0:28:
        61:35:56:59:ed:7a:a5:a6:6c:94:e7:3c:e1:c5:9c:1c:9e:43:
        24:cd:49:f5:b9:d5:0e:81:2b:c5:03:1f:30:36:a3:97:cf:b4:
        f4:a1:55:d0:5d:d8:47:de:cf:f2:df:b9:6c:ff:a1:37:f2:61:
        98:5f:a6:d1:d9:2c:c2:f3:50:71:51:6b:95:ec:d1:be:b3:f1:
        9a:04:29:ad:62:f4:f5:e5:a7:7b:89:d5:a7:4c:4a:e5:88:eb:
        d5:d9:3a:5f:9c:97:01:79:00:dc:76:05:e4:f6:3a:74:61:aa:
        27:53:60:25:73:39:fd:0c:9b:bf:8e:61:32:59:f8:f3:d7:92:
        e4:e8:ba:b3:63:8b:59:b0:e2:16:06:3a:43:0b:ec:00:f8:ad:
        4d:fb:81:50:83:f1:87:f0:2d:91:09:43:3a:03:a2:13:00:db:
        0c:3e:9d:e5:53:9d:ac:ad:87:de:1a:25:5e:2e:c0:7c:17:fe:
        21:61:94:01:d3:3b:96:e7:83:0b:a9:d1:c8:0d:fa:03:93:0a:
        67:c5:8d:dd:ad:68:c6:7a:1d:5c:a5:df:cd:0b:d9:de:83:0f:
20:42:83:61| 1 | Check the expiry date. |
| 2 | Check the subject contains the fields you entered for the CSR, particularly for EV certificates. |
| 3 | If you entered SANs for the CSR, check the SAN extension is present. |
SSL certificate reference
CSR field reference
Standard CSR fields
| CSR field | CSR field IDs | Additional information | Examples |
|---|---|---|---|
|
Domain name that the SSL certificate is securing |
• www.pingidentity.com
3. Wildcard certificates are supported within the same tenant environment but not across different tenant environments. Learn more in Wildcard certificates.
|
|
|
Full name of company |
Ping Identity Corporation |
|
Organization Unit |
|
Company section or department |
IT |
|
Two-letter ISO-3166 country code |
US |
|
State/Province |
|
Colorado |
|
Street Address |
|
1001 17th Street |
|
City/Locality |
|
Denver |
|
Postal Code |
|
80202 |
|
Email Address |
|
example.user@pingidentity.com |
|
|
(Optional) Additional domain or domains that the SSL certificate is securing |
• support.pingidentity.com |
EV CSR fields
| CSR field | CSR field IDs | Additional information | Examples |
|---|---|---|---|
Business Category |
|
Possible values are: |
Private Organization |
Serial Number |
|
Serial number or registration number of incorporated company |
3463471 |
Jurisdiction of Incorporation |
|
Two-letter ISO-3166 country code |
US |
Jurisdiction of Incorporation |
|
(Optional) |
Delaware |
Jurisdiction of Incorporation |
|
(Optional) |
Wilmington |
PEM-formatted certificate examples
The contents of a PEM-formatted CSR, private key, and certificate should look something like these examples:
-
CSR example
-
Private key example
-
Certificate example
-----BEGIN CERTIFICATE REQUEST-----
MIIDTTCCAjUCAQAwgbcxCzAJBgNVBAYTAlVTMQ8wDQYDVQQHEwZEZW52ZXIxGTAX
BgNVBAkTEDEwMDEgMTd0aCBTdHJlZXQxIjAgBgNVBAoTGVBpbmcgSWRlbnRpdHkg
Q29ycG9yYXRpb24xCzAJBgNVBAsTAklUMR0wGwYDVQQDExR3d3cucGluZ2lkZW50
aXR5LmNvbTEsMCoGCSqGSIb3DQEJARYdZXhhbXBsZS51c2VyQHBpbmdpZGVudGl0
eS5jb20wggEiMA0GCSqGSIb3DQEBAQUAA4IBDwAwggEKAoIBAQCtQMavyinYUbzz
uIWq5HtqNE4lkO1kV+JzoIxXY5Ytr/ooyy0m3Xb8SycNGeA+X4eDeBuOX1LUOuSl
sOJYyf4mbHKirgojMJ4oj1ysv4DK2GTJOcAnsqXo5Hd+ahOxD8SLvta8S6qYo2ME
VnujZC0ghVi6+9Q11xavcsCLf3LnBe0oYZ7qUEyyNnx4KjvOpDhy+UH9LHvt7Cur
fOCM0l2guX5+VuRVgkHWOtIi3lIF64a9JSpTFY3Z+ikLlGCXtkCtSdSRMiEITpcR
RBYQkCjivF7xzQ0jipL/CtT7no4LWhy72dS3oyuTNeTtyPu8Mbk4EicnVzQtO5iL
xBK+AMv7AgMBAAGgUDBOBgkqhkiG9w0BCQ4xQTA/MD0GA1UdEQEB/wQzMDGCGHN1
cHBvcnQucGluZ2lkZW50aXR5LmNvbYIVbGFicy5waW5naWRlbnRpdHkuY29tMA0G
CSqGSIb3DQEBCwUAA4IBAQBCxK33xB9UTZRJi9Bi02HA06plcrHVdYONuZOSadP+
PdHYV6BoUMvCznzH6uzYdS+aEKrmVa2r6/4CvafvdcxRqTa0dtMAuVJBltlXjmoX
/+xU4rKXwlX1Y+05ZE7waskv4wnTryfE2eNsloiiZazu2zNsnk5MQouJTrLxSH2u
a3eG9B2Xg8H7tSu8tFuaiwdV+YamjG5qDVU8NRhs1JtQg9OJtCG907WQsN+eUys4
vem0rmJ/vI9djVLe2953N1or/gqC2s/0ZnxdsxfXgp4ChYPoxmIA1BEh8MUREqk/
dSPgWeMMVFQwlmljkE+cvGl9L3f7aPgXtR6nxPS/oTSl
-----END CERTIFICATE REQUEST----------BEGIN ENCRYPTED PRIVATE KEY-----
MIIFHDBOBgkqhkiG9w0BBQ0wQTApBgkqhkiG9w0BBQwwHAQIdwl71gz4G1UCAggA
MAwGCCqGSIb3DQIJBQAwFAYIKoZIhvcNAwcECGBfrYt/Ot8sBIIEyB+W3xwf7sbl
XsiQdmnI2ls8ynL0tnULGA404TayGgQIC+bChUdjiw7+n1gaSSfZQAB/nhsOCiuK
Ry9UL6k0ZvjOEyI1l2XEbBswpazh1MKfaqvuCME60O98ntbo+isP/fHzg1JBDYul
/yDFVNj9P7nGRHLdBXU3W9/5hMDzLf5HZSsLi9U4Nfcbs/asbKasHYVm88Qm/I9H
f34YPrwRGYyQCltRKQvNA5z3f8A4GmrXBeED/Incdjf3pxmf+birvzCfK1WYOwgl
J7SfWWKSj55leHvDBmfJcE4TlNDBme+BQ2lUtZ6yvLBzts32EpjqCR2oLwN9h47E
BE8bJjOJ3vEzUWsUxJbi0vkue42fnxFf3n70HemfYO8grQVFP3H2YyBKRC0Dwp2R
xPLldQ6TRFZvTyCxGsAlpo+En9tQHFMaS3RvWp2mWEGqHf0CaSb0aBdt/clbNsPd
HCX5EAghTxZAjWNRTmkihsg6HYXF1uWU6x1h0sZm/xhEEUebdFXFwoYX7tvRFIxp
OJdH+avLp7x33Oyt0jMmaCuZl3uDBnpjzxJT9TwhwSgm/dWBT0b9PPYfB1oPuMwg
pFBi7K9SUxgBSI6ZSISxuf0juFIkIo12ghB6gO6mWoCLC1qSCd0oL3ajP4kWIKBE
a8GIA3EruvF+bQleoHIs7mwOVKkmct59eLJ9UxZzIo6eaAJFJBWBeLGsKB2VyW+p
Fa6lR/mMDH0Jaoh4zMj+K4WVNUXoUoDCe+ERnAqTp0z97bHZDQn0qAdrP79Nh/To
KoD02s0dJl7sOPDso958DE/nP5NmEo46boLFi4NHZDxTxq70zVn1VPfxsXIgfaNA
lbBQu/i+3hjDxoosYMYhIUUYz4X6RzJaC425DFBsW4l8nzEGOhXxlRE8w4G/NgNT
L3JpeKX6tyYYHlNSD2KeSmIb5qC8dqZB640KSH2V6Set1/4sOGMzGtuVa6DYVAic
XtVY8gRy9+os5nsLvI8M9V0j+F/aI3tJ3gjws2eA3cIrbQxCmezsiRG3dt110voc
MDYOdns8jDdi6ViOVQFOQwgo7ekMmnUWuOYavdJXwnyBdT7Prlr1bLFerf4pLfKN
orBgdL1cwyvFjiSi59wbh65zGBvkMbcvvYwo8hh0G3NaST2Q4arLPaZdvpncjVD6
Dr12KFWrsPecg4HtlRVkedlew1De/s+KtIc+dhphL45MF2l9rnOe83tL8qMQI6qE
Q0bYvEOcqkNm0zEWyQCE/m6MpjvvUqS14RBspeIKI4lwvcEJ4jUnPMlmlxJ8EHtn
TfP4xx+KQ7/rjgFUq06qkLu34g3cY+BBzxb1BLSr7kykezU8Dl0qtQFlGUlFQNcC
1AxyB2YV38LfL4wUEF4SvOxQjhmHXQu+L0OApf/wQlKNkbyFR3JfEI+WiW0sQJ3d
PQQnCWorwiWYQXlImY7Zsb30AJOzVB3oX1Pt5NbyK35wUTTWT4kv+giK2SrfJqa0
90PabaDl6/H1h5ushRqmyZibLFIJaoEzR8+82wllHgJwu8NX3N7+Tgx9yCNX4+3r
SNkZ4QZiyo+n2kwvt20lWDCRTLZVXQkaTjqwdr8QZsqOBcmbdLdxv2ctf+umsjAS
Rv8K9FiTy5DNswa1ZE3jYA==
-----END ENCRYPTED PRIVATE KEY----------BEGIN CERTIFICATE-----
MIIDvDCCAqSgAwIBAgIBAjANBgkqhkiG9w0BAQsFADAaMRgwFgYDVQQDDA9TZWxm
LXNpZ25pbmcgQ0EwHhcNMjQwNTAyMTIwNzUxWhcNMjQwNjAxMTIwNzUxWjCBgTEd
MBsGA1UEAwwUd3d3LnBpbmdpZGVudGl0eS5jb20xCzAJBgNVBAYTAlVTMREwDwYD
VQQIDAhDb2xvcmFkbzEPMA0GA1UEBwwGRGVudmVyMSIwIAYDVQQKDBlQaW5nIElk
ZW50aXR5IENvcnBvcmF0aW9uMQswCQYDVQQLDAJJVDCCASIwDQYJKoZIhvcNAQEB
BQADggEPADCCAQoCggEBANBSEdBHNDImha7I2+FZnIgH4uEIZWyRl+TmM7tMJO+9
wZjnxGtuQDDVyrj21COuTyrik6PcG3bcn/+tIiNJJhiekPdBfH2JeQvOs/bizuCB
pth64Bpa3XyF/+hbvOUqCiMOac8r/c960thd+mF/1e+gnIptTHRumDY4PgSO9YIy
jF2o9ALzrVTw2RGPiH8LZIeXYWHZEH9UU0ni/ZDjZ6K4VrR/TLzZnDOWjZrDfIVY
RwI4BYCm45V8TFFGn9aBflYSzzW+AVcVZfDUn2EfupOleYTeerojBPqa9JkWYAzv
gJk8/V2vCYxuAi2oAgG9uJAAEvjETKKccekixIkZNT8CAwEAAaOBpDCBoTAdBgNV
HQ4EFgQUex0UyTxKZzei5b61MBm+7+YIs9YwHwYDVR0jBBgwFoAUbkETjibksH5j
7QcMTi3N+mYoICEwDgYDVR0PAQH/BAQDAgeAMBMGA1UdJQQMMAoGCCsGAQUFBwMB
MDoGA1UdEQQzMDGCGHN1cHBvcnQucGluZ2lkZW50aXR5LmNvbYIVbGFicy5waW5n
aWRlbnRpdHkuY29tMA0GCSqGSIb3DQEBCwUAA4IBAQAiYKv4E82vNmIGxf7U609+
F9HJyYJWl47V8VUzZNJPf6t14ChhNVZZ7XqlpmyU5zzhxZwcnkMkzUn1udUOgSvF
Ax8wNqOXz7T0oVXQXdhH3s/y37ls/6E38mGYX6bR2SzC81BxUWuV7NG+s/GaBCmt
YvT15ad7idWnTErliOvV2TpfnJcBeQDcdgXk9jp0YaonU2Alczn9DJu/jmEyWfjz
15Lk6LqzY4tZsOIWBjpDC+wA+K1N+4FQg/GH8C2RCUM6A6ITANsMPp3lU52srYfe
GiVeLsB8F/4hYZQB0zuW54MLqdHIDfoDkwpnxY3drWjGeh1cpd/NC9negw8gQoNh
-----END CERTIFICATE-----Gateways & agents
Integrate PingOne Advanced Identity Cloud with PingGateway and policy agents to secure access to your web resources.
PingGateway
PingGateway integrates your web applications, APIs, and microservices with Advanced Identity Cloud. PingGateway enforces security and access control without modifying your applications or the containers where they run—whether on premises, in a public cloud, or in a private cloud.
Based on reverse proxy architecture, PingGateway intercepts client requests and server responses. In this process, PingGateway enforces user or service authentication and authorization to HTTP traffic. Advanced Identity Cloud acts as the authentication and authorization provider.
PingGateway can also conduct deep analysis, then throttle and transform requests and responses when necessary.
Learn more in the PingGateway Guide for Advanced Identity Cloud. In particular, refer to these detailed instructions and examples:
Policy agents
Policy agents are PingAM add-on components. They operate as policy enforcement points (PEPs) for websites and applications.
Policy agents natively plug into web or applications servers. The agents intercept inbound requests to websites, and interact with AM to:
-
Ensure that clients provide appropriate authentication.
-
Enforce AM resource-based policies.
Use Web Agents to protect services and web resources hosted on a web or proxy server. Use Java Agents to protect resources hosted on application or portal servers.
Although both agents enforce authentication and authorization to protected resources, they differ in the way they derive policy decisions and enforce them.
For examples of how to transition from on-premises access management to Advanced Identity Cloud without changing the architecture of the agent-based model, learn more in these guides:
- Web Agent Example
- Java Agent Example
Password policy
Configure a password policy in PingOne Advanced Identity Cloud when you want a customized rule for creating valid sign-in passwords. The password policy applies to end users who sign in to your registered apps within a realm.
|
You can configure only one password policy per realm. |
By default, Advanced Identity Cloud password policy is set to the minimum security requirements established by the National Institute of Standards and Technology (NIST). Any changes you make to the password policy must conform to requirements contained in their guidelines. Learn more in NIST Digital Identity Guidelines.
Configure a password policy
-
In the Advanced Identity Cloud admin console, go to Security > Password Policy.
-
Choose the realm the password policy will apply to.
-
Edit password policy details.
Password length
When enabled, the policy requires a password with the specified minimum number of characters. No maximum.
Cannot include
Options to restrict the use of any of the following in the policy:
-
More than two consecutive characters (Example: aaaaaa)
-
Commonly-used passwords (Examples: qwerty or 12345678)
-
Values in certain user attributes. From the drop-down list, specify user attributes that cannot be used.
Must contain
When enabled, the policy requires the use of a specified 1–4 of the following:
-
Upper case letter
-
Lower case letter
-
Number
-
Space, pipe, or special character:
( ! " # $ % & ' ( ) * + , - . / : ; < = > ? @ [ \ ] ^ _ ` { } ~ ) .
Cannot reuse
When enabled, the policy restricts the end user from reusing the specified number of previously set passwords.
Force password change
When enabled, the policy forcibly expires each end-user password after the specified number of days, months, or years have elapsed from when the password was set.
To handle expired passwords in an end-user journey, use theExpiredoutcome in the Identity Store Decision node.Refer to the considerations in Force end-user password changes before using this policy setting. -
-
Click Save.
Force end-user password changes
You can combine a password policy and the Identity Store Decision node to expire end-user passwords in a journey; the Force password change policy setting lets you define an expiry time interval, which is measured for each end user from when their password was last set.
If you are introducing such a policy for the first time, you may want to process your end users in batches in order to improve messaging about the changes. The following sections describe two high-level strategies to achieve this.
|
If you are considering forcing your end users to change their passwords, review the NIST Digital Identity Guidelines. In particular, NIST no longer recommends scheduled password changes; learn more in Usability Considerations by Authenticator Type. The NIST guidelines are continually refined, so you should keep them in mind when setting password policy. |
Strategy 1: Target segments of end users
Adapt the end-user login journey to use dynamic groups or user properties to target a segment of end users to reset their password.
Advantage: You can segment users any way you like. For example, you may have a set of end users who could struggle with a password reset. You could add a property to each end user in the set and initially exclude end users with that property from a password reset. Then, at a later time, remove the exclusion when support is available for those end users.
Disadvantage: Creating new dynamic groups with large numbers of end users can incur a significant performance cost.
Strategy 2: Target oldest passwords first
Adapt the end-user login journey to target all end users to reset their password, but initially set a very long expiry time interval to target the oldest passwords first. Then periodically reduce the expiry time interval to eventually target all passwords.
Advantage: This strategy segments end users by the date of their last password reset. Additionally, end users with the oldest passwords are targeted first.
Password timestamps
Password timestamps let you view or query when a user password was last changed and when it is set to expire.
If you have this feature enabled, the following timestamp fields and properties are available:
| Field name on the user page | Property name in the managed object configuration |
|---|---|
Password Last Changed Time |
|
Password Expiration Time |
|
To enable or check the status of the feature, learn more in Feature enablement.
passwordLastChangedTimecurl \
--header "Authorization: Bearer <token>" \
--header "Accept-API-Version: resource=1.0" \
--request GET \
"https://<tenant-env-fqdn>/openidm/managed/realm-name_user?_queryFilter=passwordLastChangedTime%20ge%20%222024-01-01T21:22:06.274Z%22&_fields=_id"
{
"result": [
{
"_id": "453a73a9-3f50-4b04-8115-f3915fd1dd89",
"_rev": "fa876a46-82e6-4a11-a3f4-6b4919815ea4-5851"
}
],
...
}Journeys
PingOne Advanced Identity Cloud comes with pre-configured end-user journeys. A journey is an end-to-end workflow invoked by an end user or device. Advanced Identity Cloud provides templates for common end-user journeys; for example, account registration and sign-in.
The following table describes how you can configure journeys to customize the authentication experience for end users.
| Task | Resources |
|---|---|
Modify the layout and appearance of journeys. |
Use the Advanced Identity Cloud hosted pages. |
Modify the journey templates. |
|
Create a custom journey. |
Start with a blank canvas when you want to build a custom journey, and drag and drop nodes from the nodes list. |
Set a default journey. |
Configure Advanced Identity Cloud to display a default journey to end users. |
Create journeys based on device context. |
Use the Ping SDKs to configure device profiling authentication. |
Customize the outcome of an authentication journey with JavaScript. |
Use the auth scripting editor to create and manage scripts that run during the course of the authentication journey. You can create and include script types such as the following: Learn more in auth script types. |
Configure an application journey |
Associate an authentication journey with a SAML 2.0 app or an OAuth 2.0/OIDC app to let users authenticate with a specific journey as part of the federation process. Learn more in: |
Always run journeys |
When you create a journey, you have the option to configure the journey to always run. This setting lets you enforce journeys to always run regardless of any existing user sessions or whether the journey is initiated over REST or by redirect. Enable this option when you create custom journeys. |
Authentication templates
Login
Create a basic Login journey for end users to authenticate and sign in to an app or service with a username and password.
-
In the Advanced Identity Cloud admin console, go to Journeys > Login.
-
Hover over the journey schematic, and click Edit.
-
Enter information for each node in the journey:
-
To test the journey, copy the Preview URL, and paste the URL into a browser using Incognito mode.
-
When you’re satisfied with your journey, click Save.
Learn more about the Login journey in Login with self-service.
|
If you implement account lockout using the Account Lockout node, it creates a persistent lockout on user accounts. User accounts can be unlocked by a tenant administrator. Advanced Identity Cloud also supports configurable persistent and duration account lockout. Learn more in Account lockout. |
Device profiling
Use the ForgeRock SDK to create journeys that let inanimate objects authenticate based on device context. Cell phones and smartwatches are examples of devices that have their own identities. Device context provides Advanced Identity Cloud with information about how or where a device is used to authenticate.
For detailed instructions, learn more in Configure device profiling authentication.
User self-service templates
Registration
Create a registration journey to let end users create their own account for an app or service.
-
In the Advanced Identity Cloud admin console, go to Journeys > Registration.
-
Hover over the journey schematic, and click Edit.
-
Enter information for each node in the journey:
Learn about all available nodes in Nodes for journeys.
-
To test the journey, copy the Preview URL, and paste the URL into a browser using Incognito mode.
-
When you’re satisfied with your journey, click Save.
Learn more about the Registration journey in User self-registration.
Progressive profile
Create a Progressive Profile journey to trigger a conditional event in the journey.
The default journey triggers a reminder to set preferences for receiving news and special offers. The reminder is displayed only if the end user logs in three times without selecting preferences. If the end user makes no selection, the reminder expires and is not displayed again. If the end user selects one or more options, the preferences get set in the end user’s profile.
-
In the Advanced Identity Cloud admin console, go to Journeys > Progressive Profile.
-
Hover over the journey schematic, and click Edit.
-
Enter information for each node in the journey:
Learn about all available nodes in Nodes for journeys.
-
To test the journey, copy the Preview URL, and paste the URL into a browser using Incognito mode.
-
When you’re satisfied with your journey, click Save.
Learn more about the Progressive Profile journey in Progressive profile.
Update password
Create an Update Password journey to let end users change their passwords. End users may be required to change passwords at regular intervals or if a password is compromised.
-
In the Advanced Identity Cloud admin console, go to Journeys > Update Password.
-
Hover over the journey schematic, and click Edit.
-
Enter information for each node in the journey:
Learn about all available nodes in Nodes for journeys.
-
To test the journey, copy the Preview URL, and paste the URL into a browser using Incognito mode.
-
When you’re satisfied with your journey, click Save.
Learn more about the Update Password journey in Password updates.
Reset password
Create a Reset Password journey to let end users change their existing passwords. End users typically reset their passwords when they’ve forgotten the password they set.
-
In the Advanced Identity Cloud admin console, go to Journeys > Reset Password.
-
Hover over the journey schematic, and click Edit.
-
Enter information for each node in the journey:
Learn about all available nodes in Nodes for journeys.
-
To test the journey, copy the Preview URL, and paste the URL into a browser using Incognito mode.
-
When you’re satisfied with your journey, click Save.
Learn more about the Reset Password journey in Password reset.
Forgotten username
Create a Forgotten Username journey to let end users retrieve their username from their user account data.
-
In the Advanced Identity Cloud admin console, go to Journeys > Forgotten Username.
-
Hover over the journey schematic, and click Edit.
-
Enter information for each node in the journey:
Learn about all available nodes in Nodes for journeys.
-
To test the journey, copy the Preview URL, and paste the URL into a browser using Incognito mode.
-
When you’re satisfied with your journey, click Save.
Learn more about the Forgotten Username journey in Username recovery.
Custom journeys
Create a custom journey when none of the ready-to-use templates suits your needs.
-
In the Advanced Identity Cloud admin console, click Journeys.
-
Click + New Journey.
-
Enter journey details:
-
Name: Name to display in the Journeys list.
-
Identity Object: Identifier for the user or device to authenticate.
-
(Optional) Description: Summarize end user interaction.
-
(Optional) Tags: For organizing journeys to make them easier to find.
-
-
(Optional) Enable journey options:
-
Default journey for end users: Sets this journey as the default.
-
Override theme: Specify a custom theme for this journey.
-
Inner Journey: Prevent the journey from being used outside of its parent journey.
Learn more in Disable direct access through a child journey. -
Run journey for all users regardless of current session: Configure the journey to execute regardless of any existing user sessions or whether the journey is initiated over REST or by redirect. Always running a journey doesn’t necessarily require the user to authenticate every time.
For example, if you configure an authentication journey to first check for a valid session and a known device profile, the user could proceed directly to the successful outcome as long as they pass the checks. Alternatively, configure a journey to require multi-factor authentication every time.
You can’t configure a journey to always run when it’s set as the default journey.
Also, to prevent unexpected behavior in the authentication flow, don’t configure a journey to always run when it’s mapped to the default ACR.
Learn more in Configure an authentication journey to always run.
-
-
(Optional) To override the default theme for the realm, select the Override theme checkbox, then select a theme from the Theme list.
-
(Optional) Select the Inner Journey checkbox to allow the journey to run only inside another journey. This prevents end users from directly accessing the journey in the Advanced Identity Cloud login UI.
-
Click Create journey.
-
Use the journey editor to create your custom journey.
Drag nodes from the palette and arrange them on the blank canvas. -
Provide information for each node, and connect nodes.
Learn about all available nodes in Nodes for journeys.
-
To test the journey, copy the Preview URL, and paste the URL into a browser using Incognito mode.
-
When you’re satisfied with your journey, click Save.
Default journey
Advanced Identity Cloud displays the default journey to end users when they access a default webpage URL. For example, application webpages commonly display a sign-in link. When the end user clicks the link, the Login journey is invoked by default.
Set a default end-user journey as follows:
-
Set a new journey as the default:
-
In the Advanced Identity Cloud admin console, click Journeys > New Journey.
-
On the New Journey page, enable the option Default journey for end users.
-
-
Set an existing journey as the default:
-
In the Advanced Identity Cloud admin console, click Journeys to view the list of journeys.
-
Select a journey, and click and Set as default.
-
Deactivate journeys
Deactivate a journey to prevent end users using it to authenticate. If you deactivate it, you can reactivate it at any time.
For example, if you are building a new journey in your development environment and you need to run a promotion, you can deactivate the journey prior to the promotion so that there’s no risk of the journey being discovered and used by end users in your upper environments and potentially allowing insecure access. You can activate the journey in your development environment again after a promotion.
Ping Identity recommends you deactivate any default journeys not in use. Learn more in Deactivate unused or insecure journeys.
-
In the Advanced Identity Cloud admin console, go to Journeys to view the existing journeys list.
-
Find the journey.
-
Click its More () menu:
-
To deactivate the journey, choose Deactivate, then in the Deactivate Journey dialog, click Deactivate.
-
To activate the journey, choose Activate.
-
You can also deactivate and activate a journey using the More () menu in the journey editor.
Duplicate journeys
Duplicate a journey to preserve a template for future use. For example, if you are testing a journey, start with a duplicate. Give the duplicate journey a unique name.
Create a duplicate journey in the following ways:
-
Click Journeys to view the existing journeys list. Find the template name. Then, click its More () menu, and choose Duplicate.
-
In the Journey editor, click More (), and choose Duplicate.
Export journeys
You can export journeys, including all dependencies like nodes, inner journeys, and scripts of any type apart from library scripts.
Use this feature to export journeys from one environment, such as a development environment, to another.
-
In the Advanced Identity Cloud admin console, go to Journeys.
-
Check the checkbox beside one or more journeys.
-
Click Export.
-
View the information on the Export Journeys page.
-
Click Export.
Import journeys
You can import journeys, including all dependencies such as nodes, inner journeys, and scripts, and scripts of any type apart from library scripts.
Use this feature to import a journey from one environment, such as a development environment, to another.
-
In the Advanced Identity Cloud admin console, go to Journeys, and click Import.
-
Download or skip back up:
-
Download a backup of your existing journeys so that you can restore them in case of error or unexpected behavior during or after import:
-
To view the backup summary, click Show backup summary.
-
Click Download Backup.
-
-
Skip the download:
-
Click Skip Backup.
-
In the dialog box, click Skip Backup again.
-
-
-
Configure the import:
-
On the Import Journeys page, browse to and select a JSON file that contains the journey’s configurations to import.
-
Select the identity object that the journey authenticates.
-
In the Conflict Resolution section, choose how the system resolves import conflicts:
-
Overwrite all conflicts (default)
-
Manually pick conflict resolution
-
-
Click Next.
-
Review the information on the Import Summary page.
-
Click Start Import.
-
On the Import Complete page, click Done.
-
Delete journeys
Deleting a journey is a permanent operation. You won’t be able to retrieve it after it’s deleted.
Delete a journey in the following ways:
-
In the Advanced Identity Cloud admin console, go to Journeys, and check the checkbox beside one or more journeys. Click Delete Journeys.
-
In the Journey editor, click More (), and choose Delete.
| You can’t delete a journey if it’s referenced by a SAML 2.0 app or an OAuth 2.0 client. |
Debug Advanced Identity Cloud end-user journeys
You can debug end-user journeys in your PingOne Advanced Identity Cloud development environment as you create them. By setting a journey to debug mode, you can view information stored in shared, transient, and secure state, as you navigate the journey. This lets you confirm that information is being passed correctly from node to node in the journey.
Enable debug mode
Enable debug mode to log debug information as you navigate a journey.
-
In the Advanced Identity Cloud admin console, go to Journeys, and select a journey.
-
Hover over the journey schematic, and click Edit.
-
In the journey editor, click the debug button
 (on the top right of the toolbar). The Debug panel opens.
 -
In the Debug panel, enable Debug mode.
-
Select Enable Debug Popup to display debug logs as you navigate the journey. Learn more in view debug information in a popup window.
-
Click Save to save your journey with debug mode enabled.
|
View debug information in a pop-up window
View debug log output in a separate pop-up window, as you navigate a journey.
-
In the Advanced Identity Cloud admin console:
-
In the journey editor, copy the end-user journey URL from the Preview URL field (on the right, above the top toolbar).
-
In a new incognito browser window (or a separate browser):
-
Go to the end-user journey URL that you copied in the previous step.
-
The browser window displays an initial debug step.
-
If the browser blocks the pop-up window, unblock it:
-
For Chrome, follow the instructions under the "Allow pop-ups and redirects from a site" section in this support article: https://support.google.com/chrome/answer/95472.
-
For other supported browsers, consult the browser documentation.
-
-
Refresh the browser window. The pop-up window should now appear.
-
Arrange the windows so that they are both clearly visible.
-
Navigate the journey in the browser window, and monitor the debug output for each step in the pop-up window.
-
Shared, transient, and secure state
- Shared state
-
Used by nodes to store non-sensitive information required during the authentication flow.
- Transient state
-
Used by nodes to store sensitive information that Advanced Identity Cloud encrypts on round trips to the client.
- Secure state
-
Used by nodes to store decrypted transient state.
|
When debug mode is enabled, debug nodes are temporarily inserted between each journey node. Because debug nodes can change the state of node information, inserting them between journey nodes can cause a problems if a journey node expects to access node information in a specific state. For example, if a journey node adds a password to secure state, and the following debug node reads that password from secure state, the password is moved to transient state. Then, if the next journey node expects the password to be in secure state, and tries to read it from there, an error occurs. |
passwordExpirationTime is an unindexed virtual property that can’t be queried. To achieve the same outcome, query on passwordLastChangedTime while taking the expiration period into account.