DaVinci tutorial for Android
This tutorial walks you through updating a provided sample app so that it connects to a PingOne tenant to authenticate a user using the PingOne sign-on with sessions DaVinci flow.
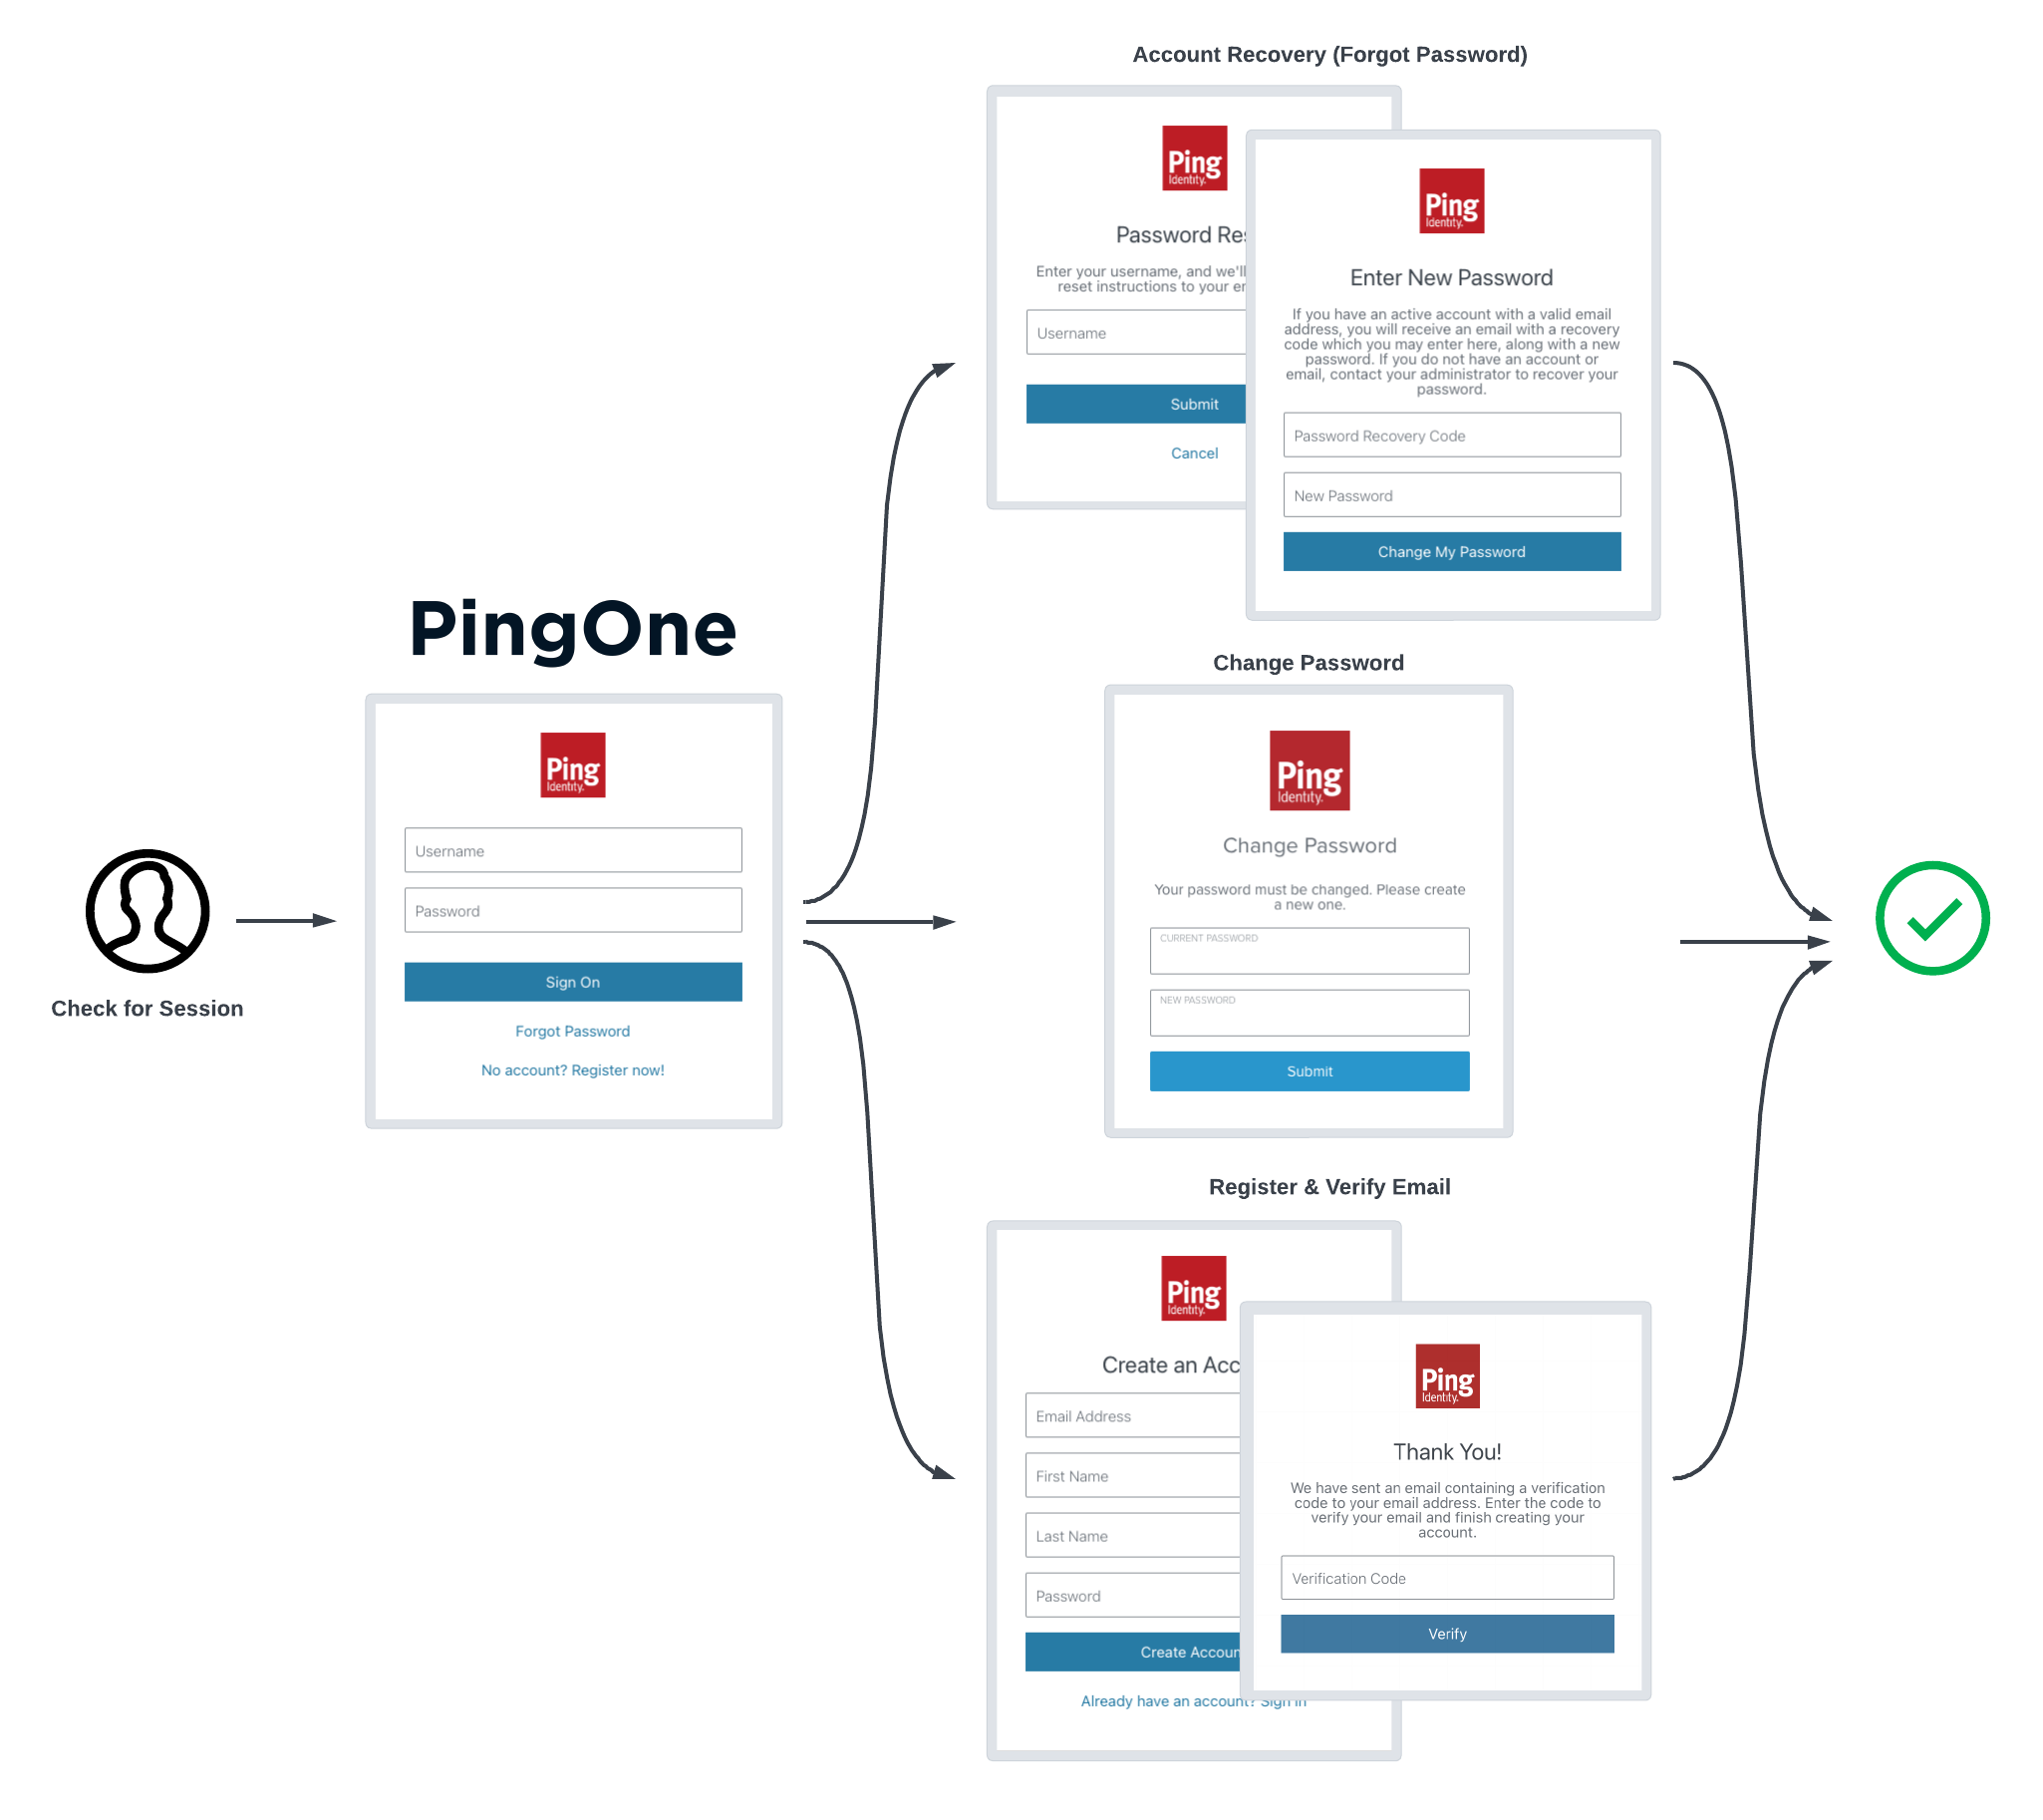
This flow allows users to register, authenticate, and verify their email address with PingOne. It combines the PingOne Sign On and Password Reset flow, which allows users to reset or recover their passwords, with the PingOne Registration and Email Verification flow, which allows users to register and verify their email. In addition, this flow checks for an active user session before prompting for authentication.
You will implement code that:
-
Configures the app with the connection settings for your PingOne instance.
-
Starts a DaVinci flow
-
Renders UI depending on the type of node encountered in the flow
-
Returns responses to each node encountered
-
Gets an access token for the user on completion of the flow
-
Gets the user’s details from PingOne, such as their full name and email address
-
Logs the user out of PingOne
Before you begin
To successfully complete this tutorial refer to the prerequisites and compatibility requirements in this section.
The tutorial also requires a configured server.
Compatibility
- PingOne
-
-
Your PingOne instance must have DaVinci enabled.
-
This tutorial only supports the PingOne sign-on with sessions DaVinci flow.
-
- Android
-
The sample app is compatible with Android API levels 24 (Android 7) to 35 (Android 15)
Prerequisites
- Android Studio
-
You can download the latest version for free from https://developer.android.com/studio/.
Server configuration
Task 1. Create an OAuth 2.0 application in PingOne
To register a public OAuth 2.0 client application in PingOne for use with the ForgeRock SDKs for Android and iOS, follow these steps:
-
Log in to your PingOne administration console.
-
In the left panel, navigate to Applications > Applications.
-
Next to the Applications label, click the plus icon ().
PingOne displays the Add Application panel.
-
In Application Name, enter a name for the profile, for example
sdkNativeClient -
Select Native as the Application Type, and then click Save.
-
On the Configuration tab, click the pencil icon ().
-
In Grant Type, select the following values:
Authorization CodeRefresh Token -
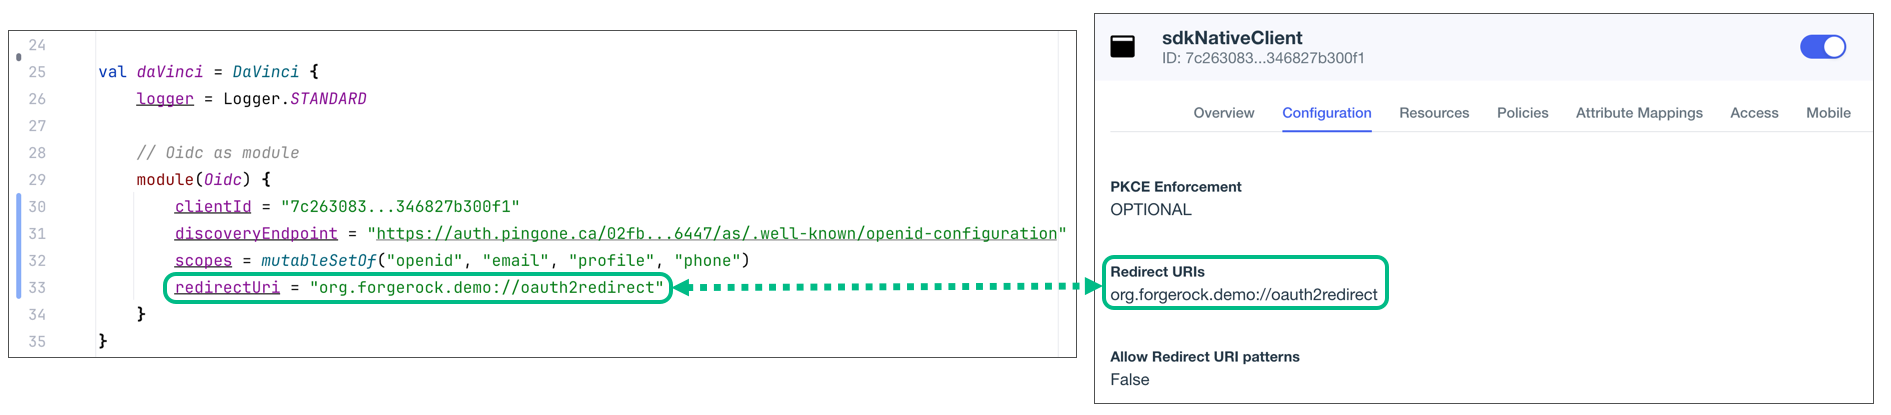
In Redirect URIs, enter the following value:
org.forgerock.demo://oauth2redirect -
In Token Endpoint Authentication Method, select
None. -
Click Save.
-
-
On the Resources tab, next to Allowed Scopes, click the pencil icon ().
-
In Scopes, select the following values:
emailphoneprofileSDK Revoke ResourceThe openidscope is selected by default.The result resembles the following:
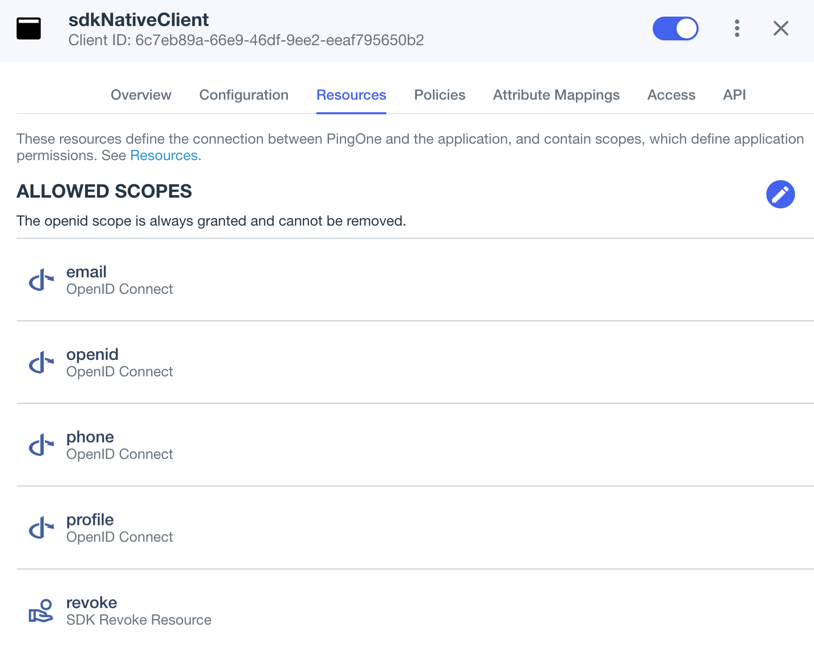 Figure 2. Adding scopes, including the custom "revoke" scope to an application.
-
-
On the Policies tab, click the pencil icon () to configure the DaVinci authentication policies for the application. PingOne policies are not supported.
Applications that have no authentication policy assignments use the environment’s default authentication policy to authenticate users.
-
To clear all PingOne policies, click Deselect all PingOne Policies.
-
In the confirmation message, click Continue.
-
On the DaVinci Policies tab, select the compatible policies that you want to apply to the application.
The SDK currently is only compatible with the PingOne - Sign On and Registration flow and its subflows.
-
Click Save.
PingOne applies the first policy in the list.
-
-
Click Save.
-
Enable the OAuth 2.0 client application by using the toggle next to its name:
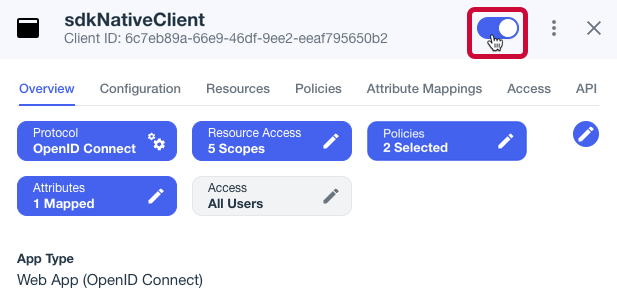 Figure 3. Enable the application using the toggle.
The application is now configured to accept client connections from and issue OAuth 2.0 tokens to native mobile applications.
Task 2. Get configuration values from PingOne
You will need some of the property values from the client profile you created to configure the SDKs:
-
Log in to your PingOne administration console.
-
In the left panel, click Applications.
-
Select the OAuth 2.0 application profile you created for the application.
-
On the Configuration tab, expand the URLs section, and make a note of the following values:
OIDC Discovery EndpointClient ID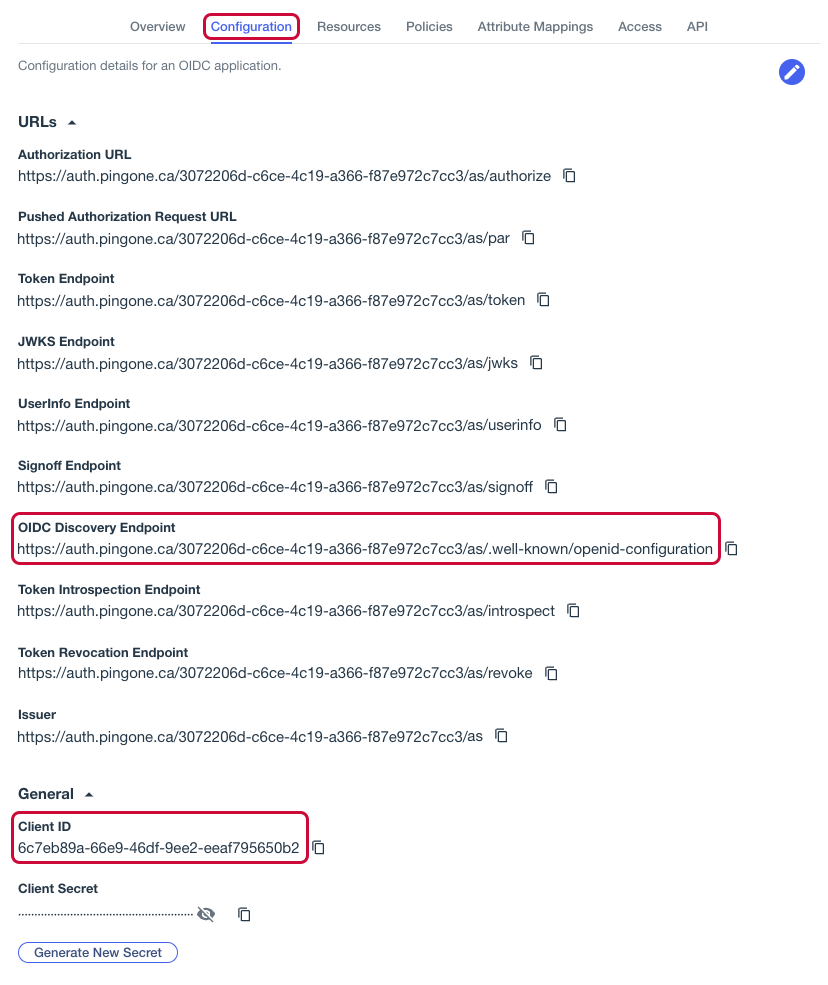 Figure 4. Obtaining values from the OIDC application profile in PingOne.
Step 1. Downloading the sample app
You need to download source code from the SDK sample apps repo.
-
In a web browser, navigate to the SDK sample apps repository.
-
Download the source code using one of the following methods:
- Download a ZIP file
-
-
Click Code, and then click Download ZIP.
-
Extract the contents of the downloaded ZIP file to a suitable location.
-
- Use a Git-compatible tool to clone the repo locally
-
-
Click Code, and then copy the HTTPS URL.
-
Use the URL to clone the repository to a suitable location.
For example, from the command-line you could run:
git clone https://github.com/ForgeRock/sdk-sample-apps.git.gitshell
-
The result of these steps is a local folder named sdk-sample-apps.
Step 2. Preparing the sample project
In this section you open the sample project in Android Studio, and view the integration points in the TODO pane.
-
In Android Studio, click Open, navigate to the
sdk-sample-appsfolder that has the downloaded sample source code in, and then click Open.Android Studio opens and loads the DaVinci tutorial project.
-
In the Project pane, navigate to samples > app.
-
On the View menu, select Tool Windows, and then click TODO.
The sample code is annotated with
TODOcomments to help you locate the integration points, where code changes are required.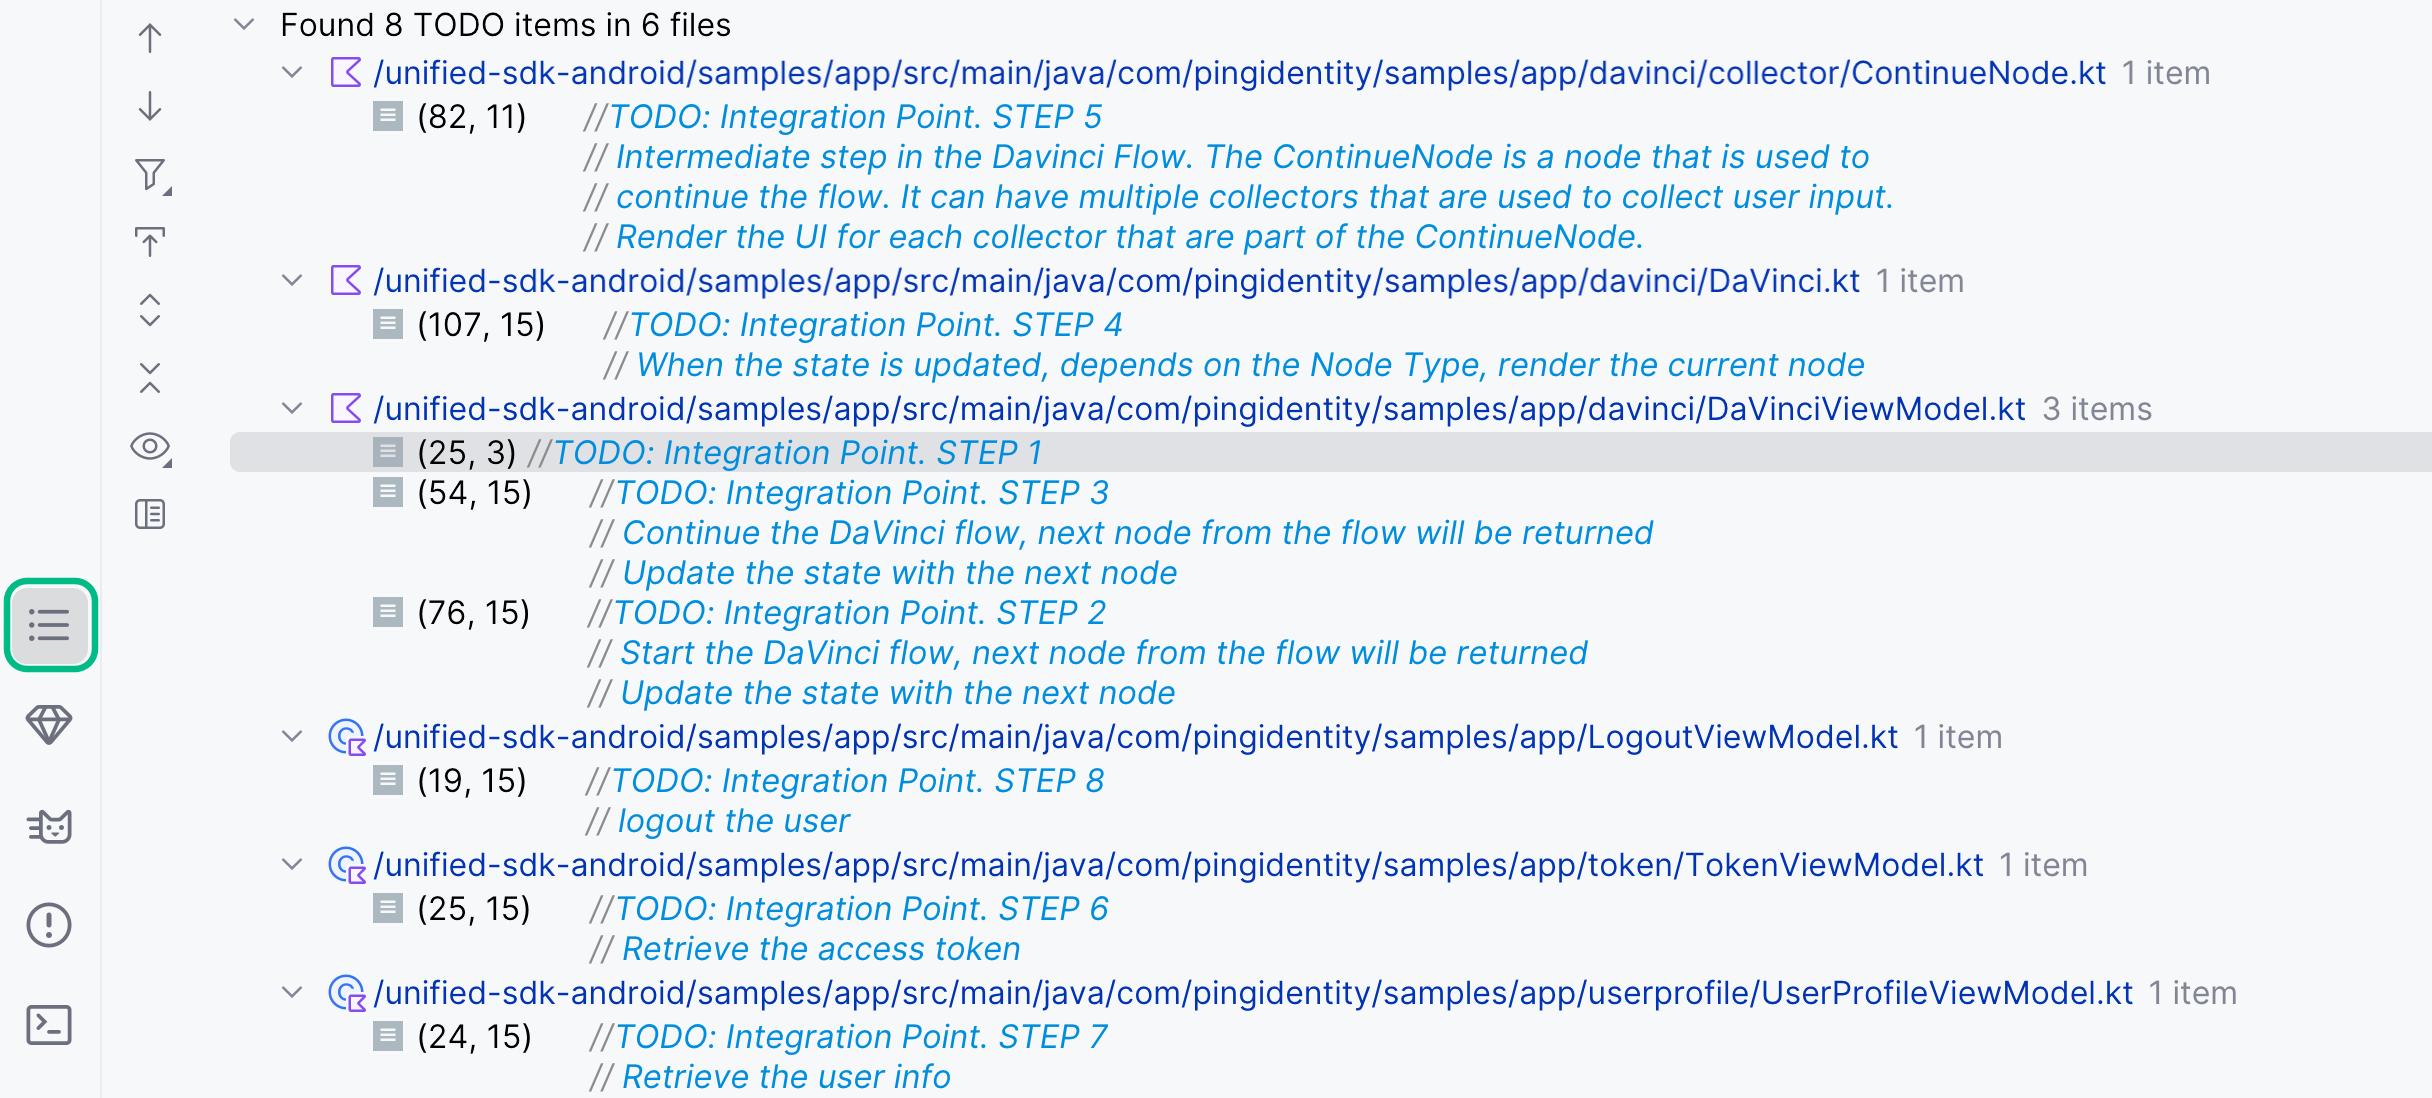 Figure 5. Integration points annotated with
TODOcomments
Step 3. Adding code to the sample
In this section you visit each integration point in the sample app to understand how to complete a DaVinci flow, including handling the different nodes and their collectors, obtaining an access token and user information, and finally signing out of the session.
-
In the TODO pane, double-click the STEP 1 line.
Android Studio opens
DaVinciViewModel.kt:DaVinciViewModel.kt//TODO: Integration Point. STEP 1 val daVinci = DaVinci { logger = Logger.STANDARD // Oidc as module module(Oidc) { clientId = "<Client ID>" discoveryEndpoint = "<Discovery Endpoint>" scopes = mutableSetOf("<scope1>", "<scope2>", "…") redirectUri = "<Redirect URI>" } }kotlinThis snippet initializes the
DaVincimodule, and leverages the OpenID Connect (OIDC) module to configure the settings to connect to your PingOne instance.-
Replace <Client ID> with the ID of the client you are connecting to in PingOne.
Example:
clientId = "6c7eb89a-66e9-ab12-cd34-eeaf795650b2"Refer to Task 2. Get configuration values from PingOne for instructions of where to find this value.
-
Replace <Discovery Endpoint> with the OIDC Discovery Endpoint value from the client you are connecting to in PingOne.
Example:
discoveryEndpoint = "https://auth.pingone.ca/3072206d-c6ce-ch15-m0nd-f87e972c7cc3/as/.well-known/openid-configuration"Refer to Task 2. Get configuration values from PingOne for instructions of where to find this value.
-
In the
scopesproperty, add the scopes you want to assign users who complete authentication using the client.Example:
scopes = mutableSetOf("openid", "email", "profile") -
Replace <Redirect URI> with the application ID of your sample app, followed by
://oauth2redirect.Example:
redirectUri = "org.forgerock.demo://oauth2redirect"The
redirectUrivalue you use must exactly match one of the Redirect URIs value you enter in the native OAuth 2.0 application you created earlier. -
Optionally, delete the
TODOcomment to remove it from the list.
The result resembles the following:
DaVinciViewModel.ktval daVinci = DaVinci { logger = Logger.STANDARD // Oidc as module module(Oidc) { clientId = "6c7eb89a-66e9-ab12-cd34-eeaf795650b2" discoveryEndpoint = "https://auth.pingone.ca/3072206d-c6ce-ch15-m0nd-f87e972c7cc3/as/.well-known/openid-configuration" scopes = mutableSetOf("openid", "email", "profile") redirectUri = "org.forgerock.demo://oauth2redirect" } }kotlin -
-
In the TODO pane, double-click the STEP 2 line.
Android Studio opens
DaVinciViewModel.kt:DaVinciViewModel.kt//TODO: Integration Point. STEP 2 // Start the DaVinci flow, next node from the flow will be returned // Update the state with the next node /* val next = daVinci.start() state.update { it.copy(prev = next, node = next) } */kotlinThis snippet calls
start()to start the DaVinci flow, and assigns the returned node to the variablenext.It also updates the app’s state to store the response as both
prevandnode.-
Uncomment the highlighted text.
-
Optionally, delete the
TODOcomment to remove it from the list.
-
-
In the TODO pane, double-click the STEP 3 line.
Android Studio opens
DaVinciViewModel.kt:DaVinciViewModel.kt//TODO: Integration Point. STEP 3 // Continue the DaVinci flow, next node from the flow will be returned // Update the state with the next node /* val next = current.next() state.update { it.copy(prev = current, node = next) } */kotlinThis snippet calls
next()to continue the DaVinci flow, by proceeding to the next available node. It assigns the newly returned node to the variablenext.It also updates the app’s state to store the new response as
node, and the current node asprev.-
Uncomment the highlighted text.
-
Optionally, delete the
TODOcomment to remove it from the list.
-
-
In the TODO pane, double-click the STEP 4 line.
Android Studio opens
DaVinci.kt:DaVinci.kt//TODO: Integration Point. STEP 4 // Render the current node depending on its type /* when (val node = state.node) { is ContinueNode → { Render(node = node, onNodeUpdated, onStart) { onNext(node) } } is FailureNode → { Log.e("DaVinci", node.cause.message, node.cause) Render(node = node) } is ErrorNode → { Render(node) // Render the previous node if (state.prev is ContinueNode) { Render(node = state.prev, onNodeUpdated, onStart) { onNext(state.prev) } } } is SuccessNode → { LaunchedEffect(true) { onSuccess?.let { onSuccess() } } } else → {} } */kotlinThis snippet watches for a change in state, and takes an action based on the ode type returned by DaVinci.
For example, if it is a
FailureNodelog an error message. If the node is aContinueNodethat continues the flow, call the render function to display the necessary fields on the screen.-
Uncomment the highlighted text.
-
Optionally, delete the
TODOcomment to remove it from the list.
-
-
In the TODO pane, double-click the STEP 5 line.
Android Studio opens
ContinueNode.kt:ContinueNode.kt//TODO: Integration Point. STEP 5 // Intermediate step in the Davinci Flow. The ContinueNode is a node that is used to // continue the flow. It can have multiple collectors that are used to collect user input. // Render the UI for each collector that are part of the ContinueNode. /* continueNode.collectors.forEach { when (it) { is FlowCollector → { hasAction = true FlowButton(it, onNext) } is PasswordCollector → { Password(it, onNodeUpdated) } is SubmitCollector → { hasAction = true SubmitButton(it, onNext) } is TextCollector → Text(it, onNodeUpdated) } } */kotlinThis snippet handles the various collectors that are returned by the current node.
Loop through all of the collectors in the node and render an appropriate field in your app.
For example, this snippet handles text and password fields, and two types of button, a submit and a flow type.
-
Uncomment the highlighted text.
-
Optionally, delete the
TODOcomment to remove it from the list.
-
-
In the TODO pane, double-click the STEP 6 line.
Android Studio opens
TokenViewModel.kt:TokenViewModel.kt//TODO: Integration Point. STEP 6 // Retrieve the access token /* User.user()?.let { when (val result = it.token()) { is Failure → { state.update { it.copy(token = null, error = result.value) } } is Success → { state.update { it.copy(token = result.value, error = null) } } } } ?: run { state.update { it.copy(token = null, error = null) } } */kotlinThis snippet gets called when the flow reaches a
SuccessNodeand gets an access token on behalf of the authenticated user.-
Uncomment the highlighted text.
-
Optionally, delete the
TODOcomment to remove it from the list.
-
-
In the TODO pane, double-click the STEP 7 line.
Android Studio opens
UserProfileViewModel.kt:UserProfileViewModel.kt//TODO: Integration Point. STEP 7 // Retrieve the user info /* User.user()?.let { user → when (val result = user.userinfo(false)) { is Result.Failure → state.update { s → s.copy(user = null, error = result.value) } is Result.Success → state.update { s → s.copy(user = result.value, error = null) } } } */kotlinThis snippet gets the user’s info from DaVinci, for example their preferred name for display within the sample app.
-
Uncomment the highlighted text.
-
Optionally, delete the
TODOcomment to remove it from the list.
-
-
In the TODO pane, double-click the STEP 8 line.
Android Studio opens
LogoutViewModel.kt:LogoutViewModel.kt//TODO: Integration Point. STEP 8 // logout the user /* User.user()?.logout() */kotlinThis snippet calls the
logout()function on theUserobject to sign the user out of the app, and end their session in DaVinci.-
Uncomment the highlighted text.
-
Optionally, delete the
TODOcomment to remove it from the list.
-
You are now ready to run the sample app on a real or simulated Android device.
Step 4. Test the sample app
After updating the code, you can now run the sample app on a connected or simulated Android device.
-
Add or connect a device to Android Studio.
Learn more about devices in Android Studio in the Android Developer documentation:
-
On the Run menu, click Run 'samples.app'.
Android Studio starts the sample application on the simulated or connected device.
The app automatically starts the DaVinci flow:
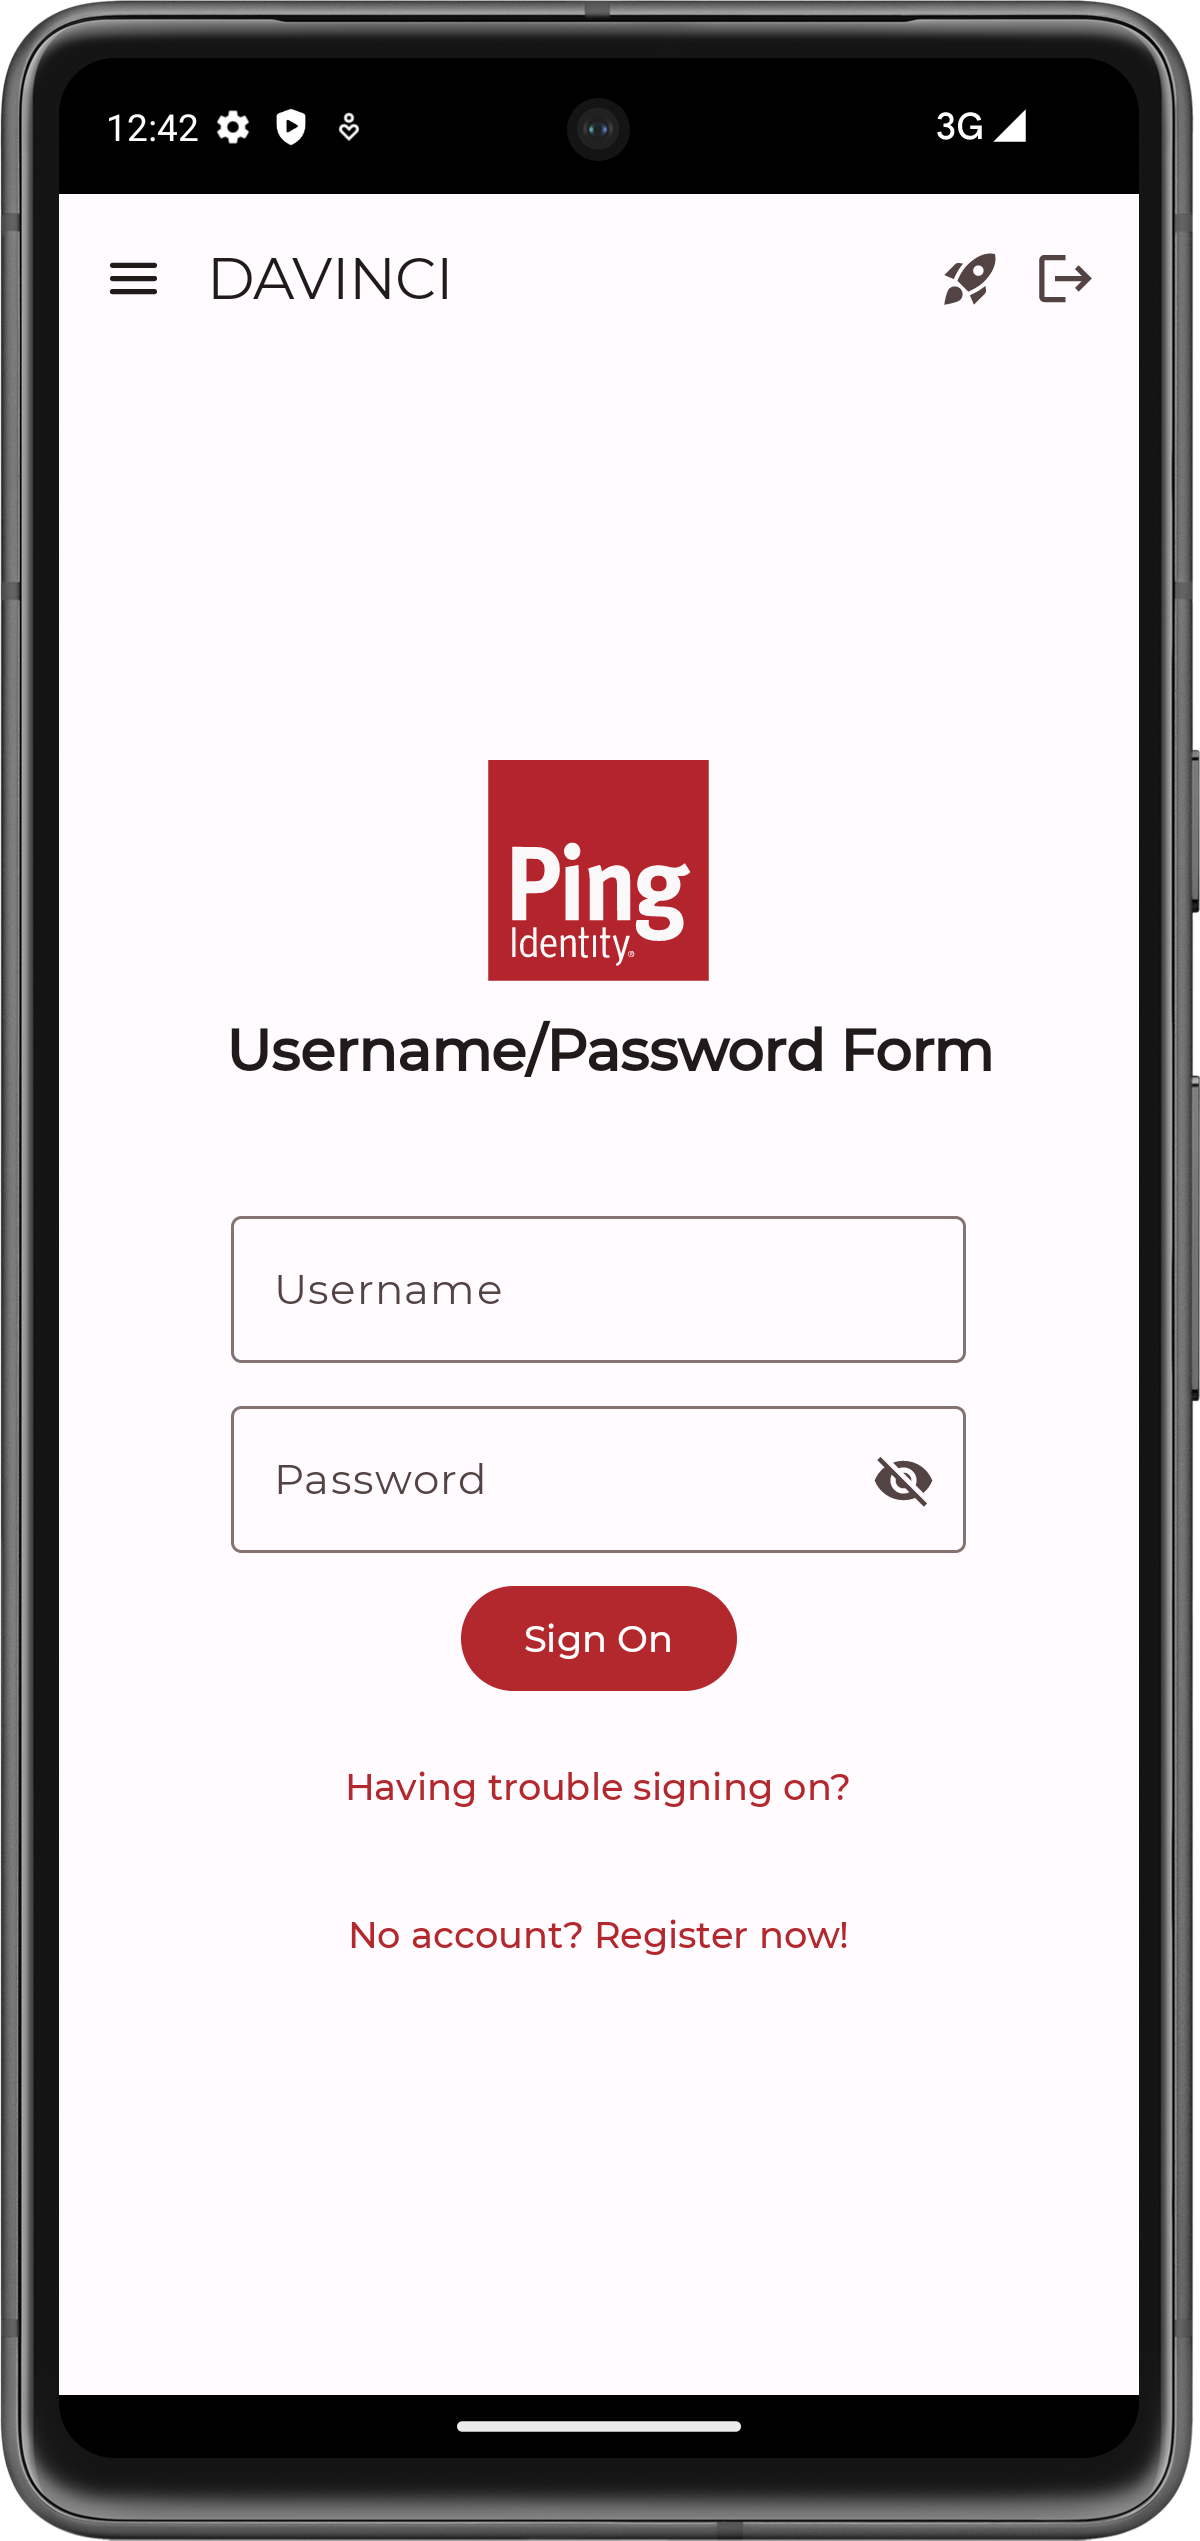 Figure 6. The DaVinci sample app first screen with fields and buttons.
 -
Optionally, to register a new identity in PingOne, tap the No Account? Register now! link.
This link is an example of a FlowButton.The app displays the registration screen:
The DaVinci sample app registration screen. image::sdks:davinci:davinci-sample-register-en.png[alt="The DaVinci sample app registration screen", width=350]
-
Enter the details of the new identity, and then click Save.
The app creates the new identity in PingOne and returns to the sign on screen.
-
-
Enter the username and password of a PingOne identity, and then click Sign On.
The app sends the credentials to PingOne for validation, and on success displays the user’s info:
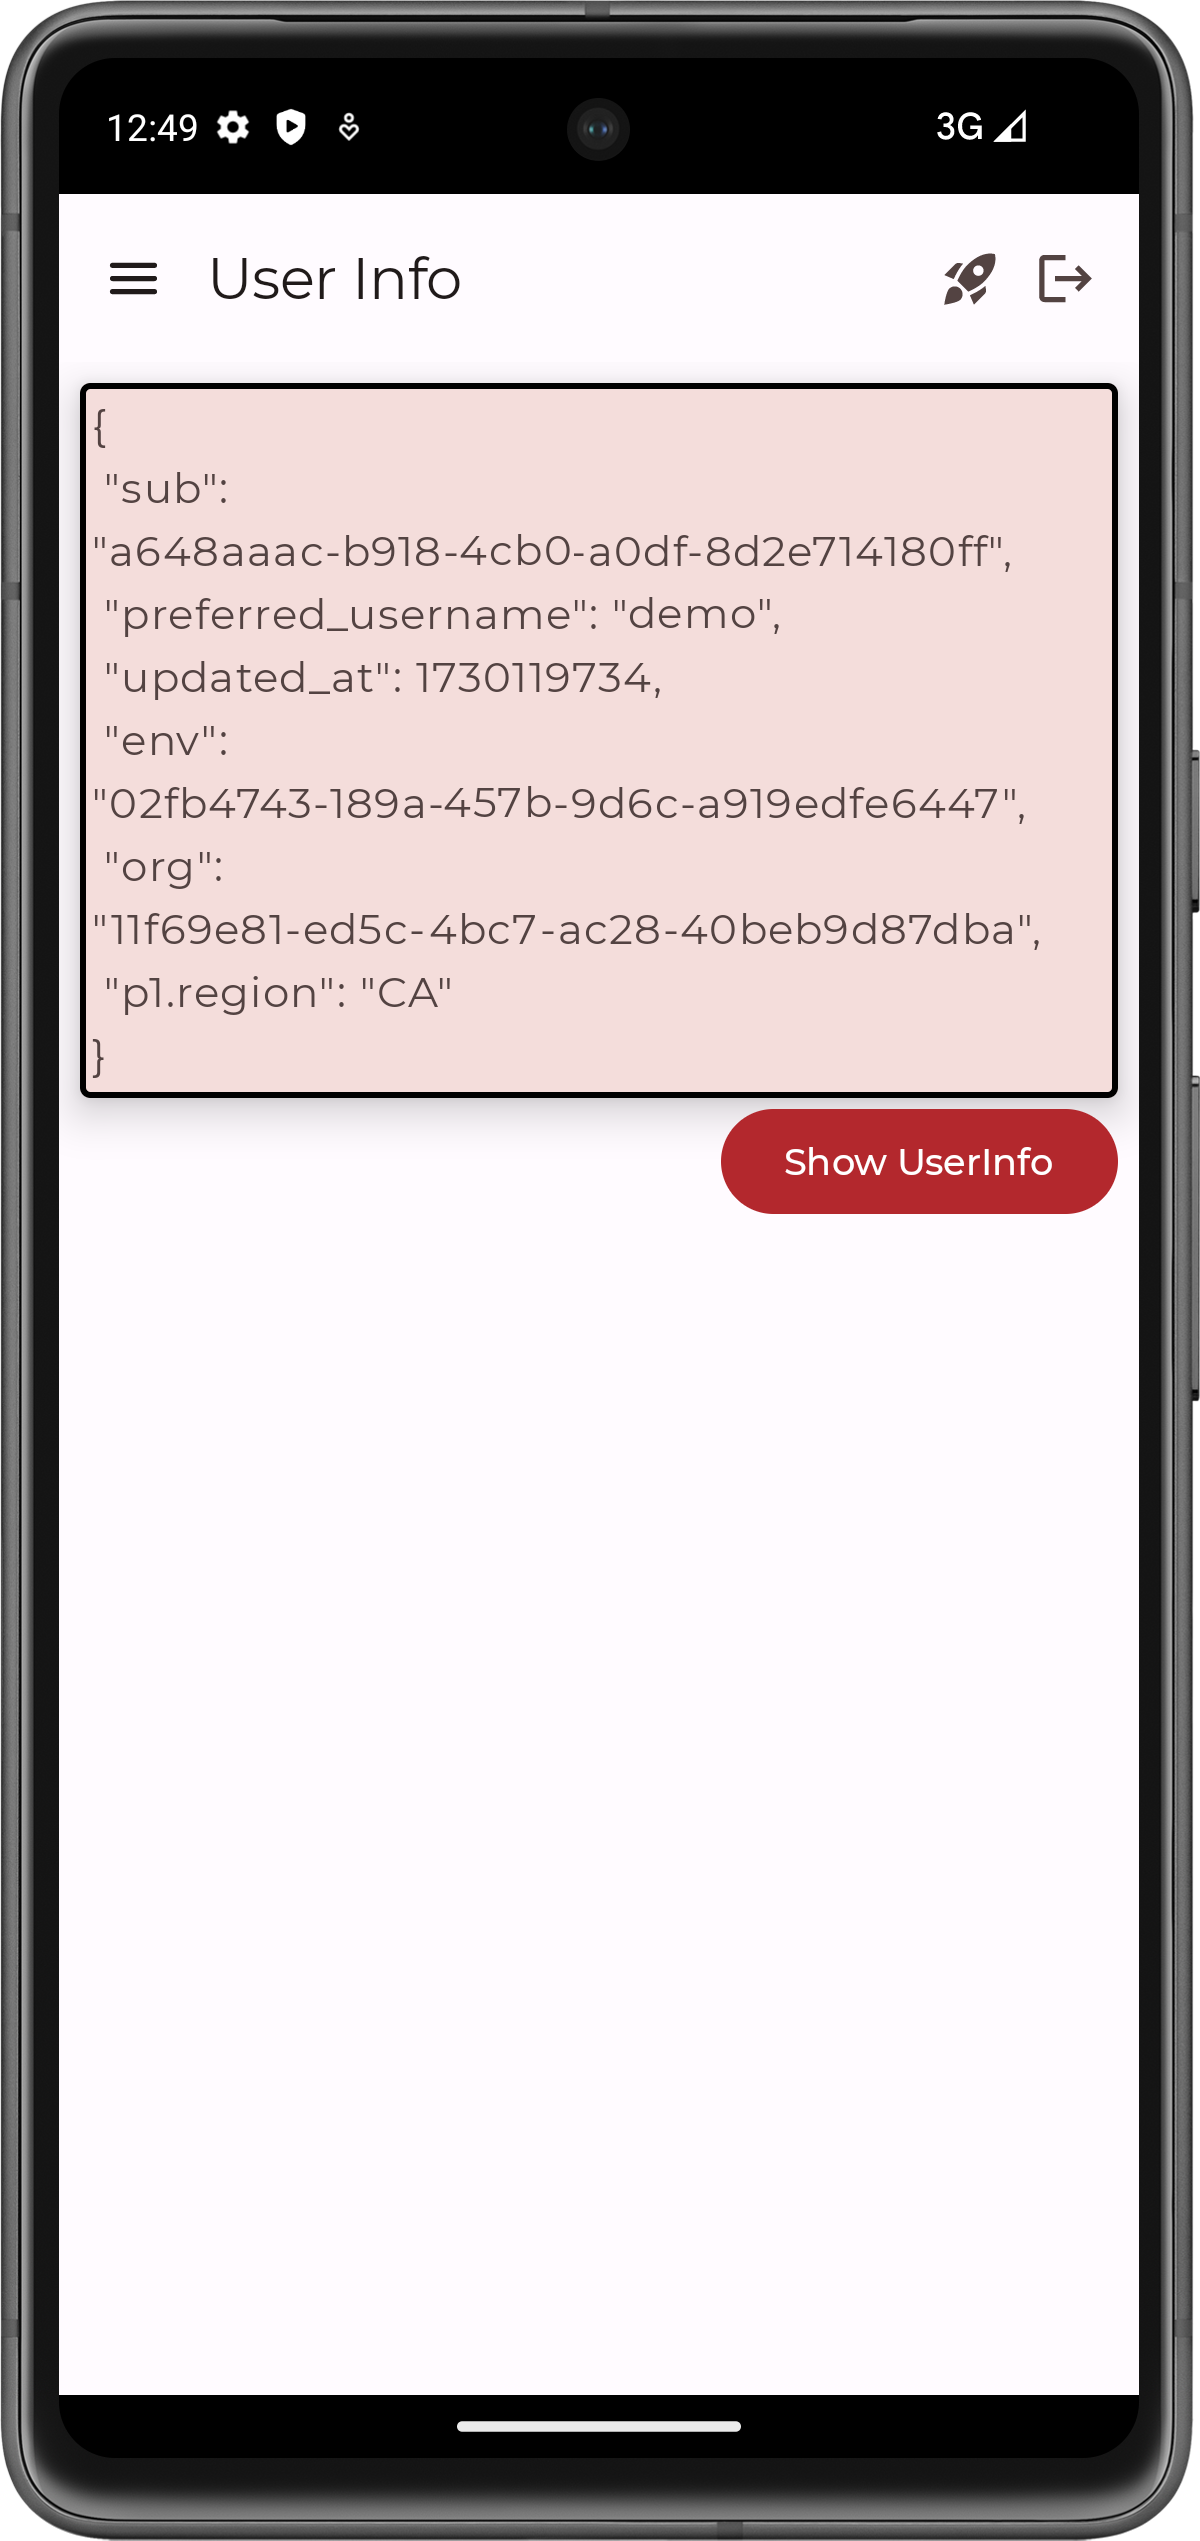 Figure 7. The DaVinci sample app displaying user info
 -
Tap the menu () icon, and then tap Show Token.
The app shows the access token obtained on behalf of the user.
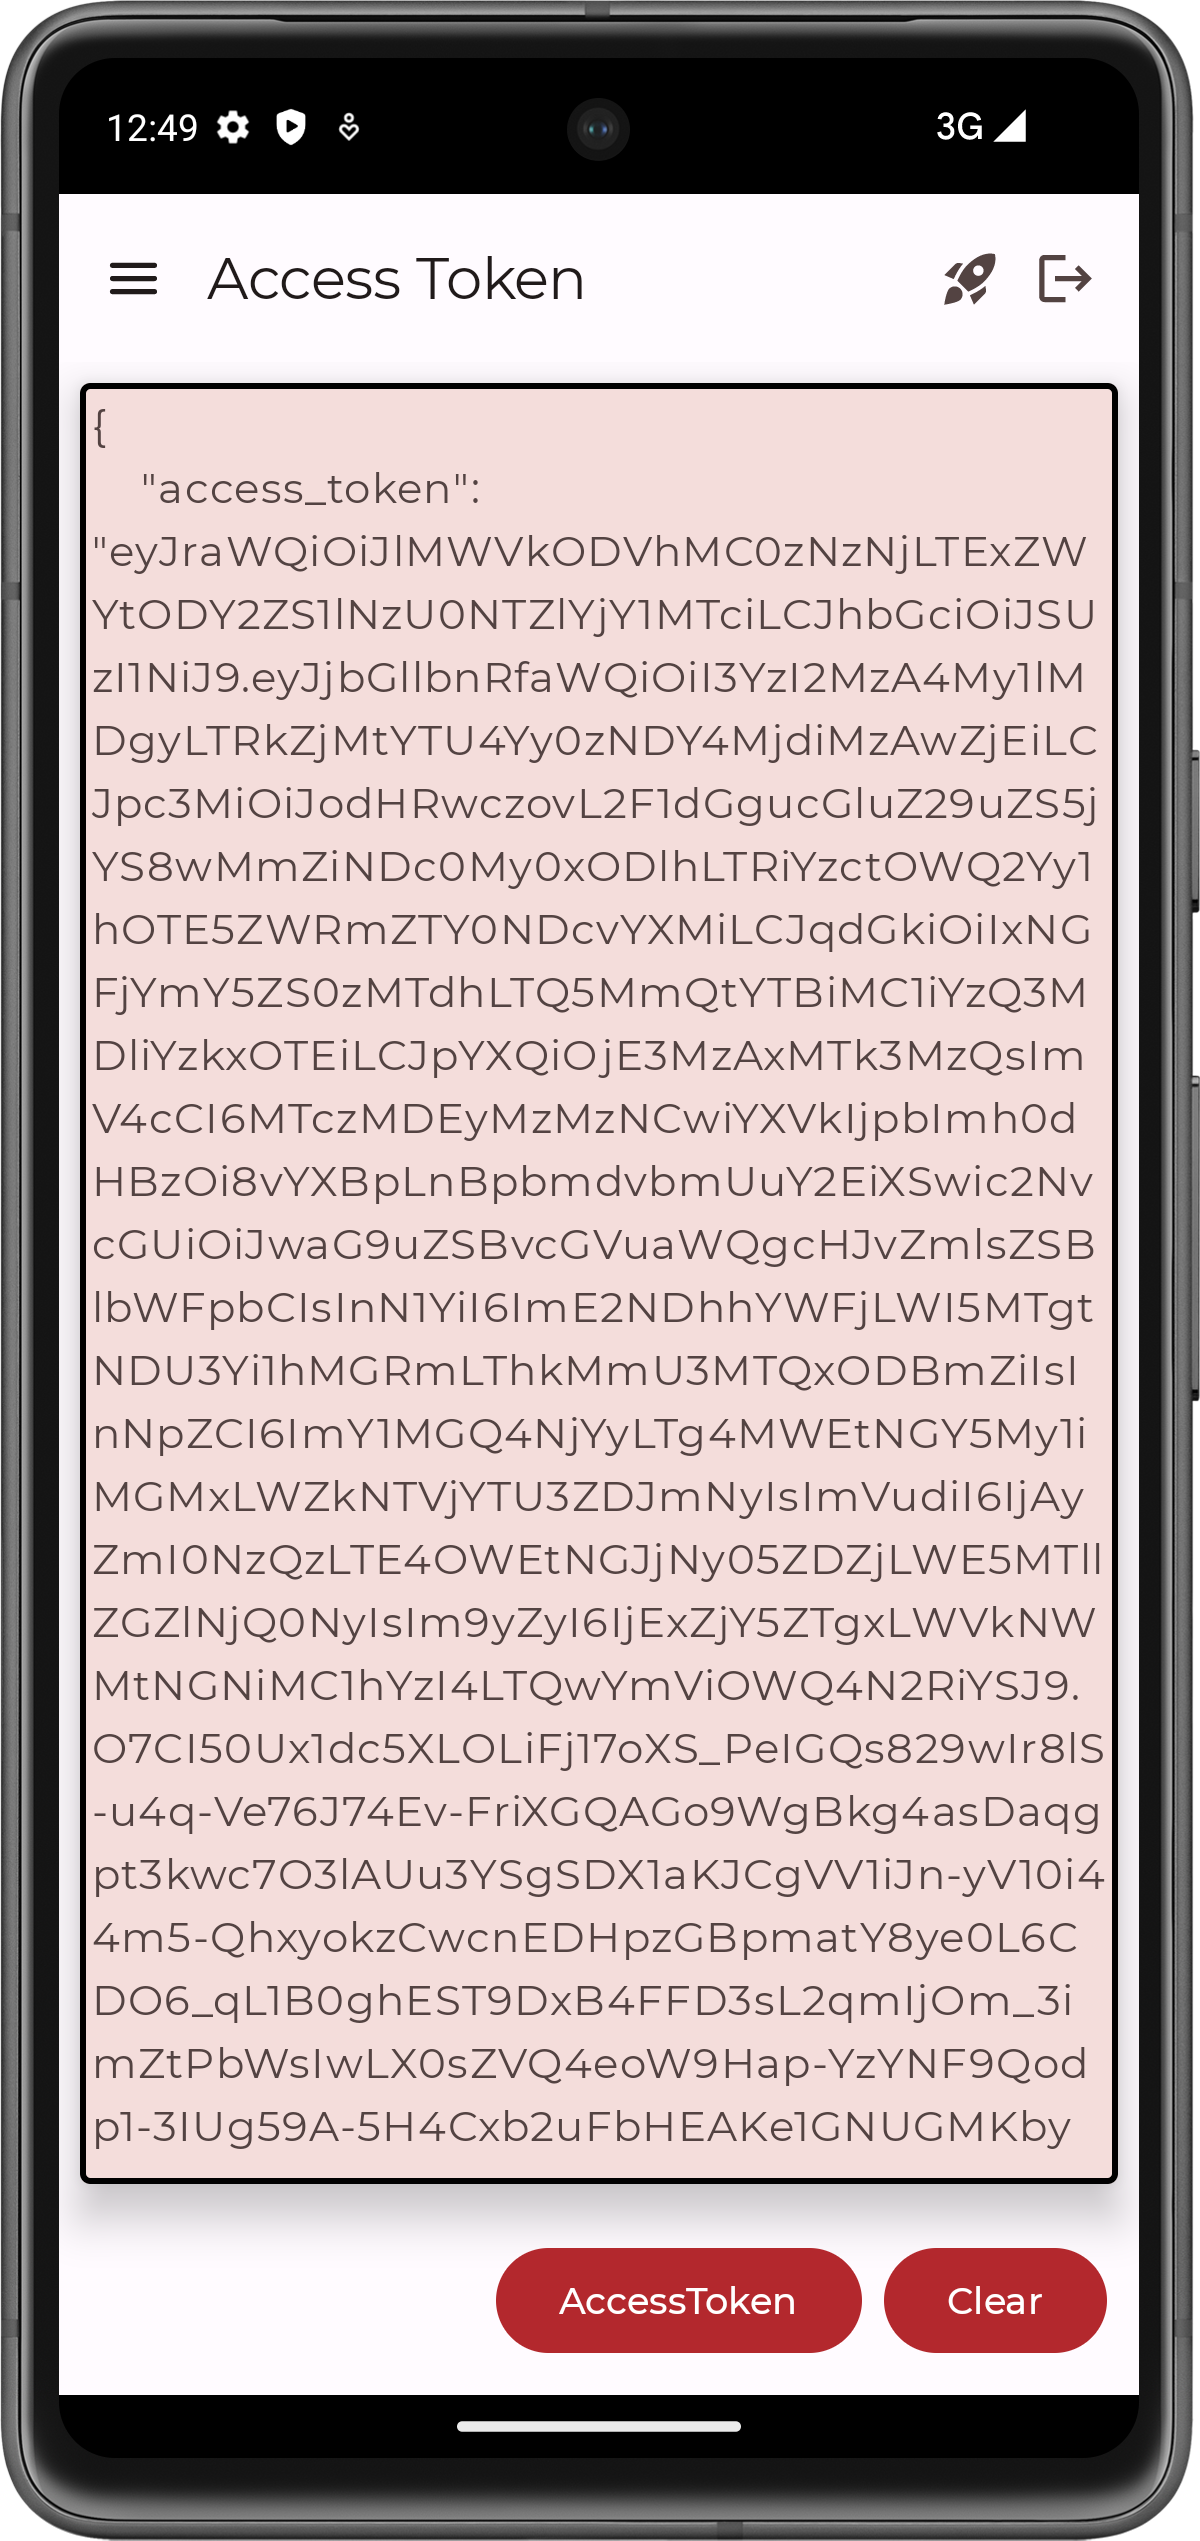 Figure 8. The DaVinci sample app displaying a user’s access token
 -
Tap the menu () icon, and then tap Logout.
The app revokes the existing tokens and ends the session in PingOne.
Troubleshooting
This section contains help if you encounter an issue running the sample code.
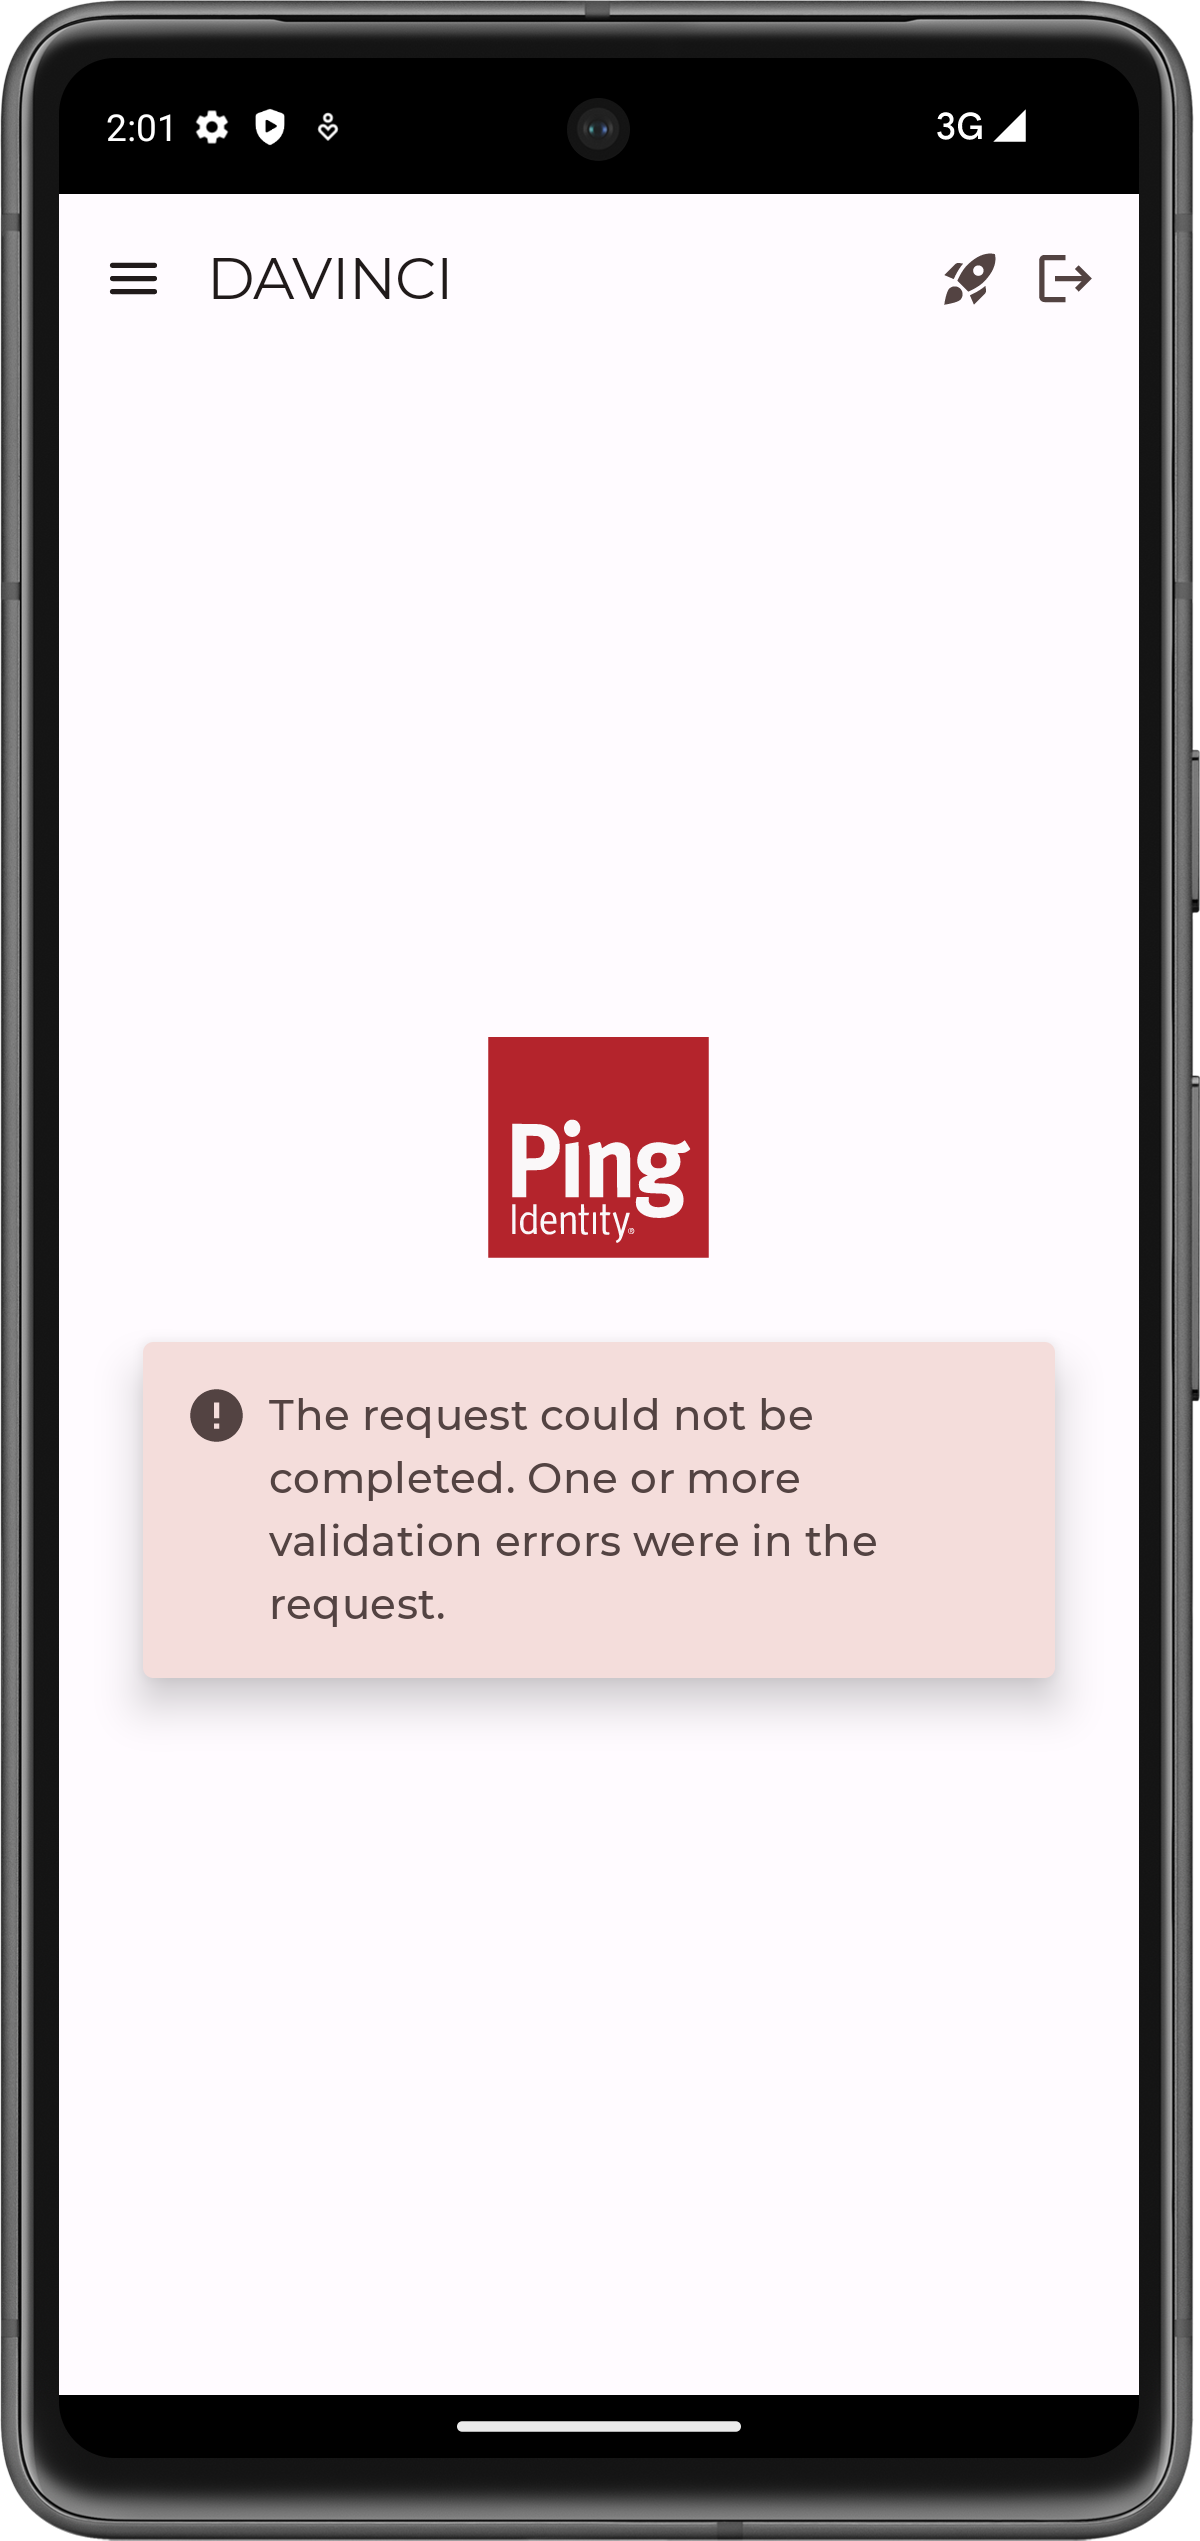
What can cause validation errors in the request?
When starting the app you might see an error message as follows:
The request could not be completed. One or more validation errors were in the request.
The Logcat pane in Android Studio often contains additional information about the error:
{
  "id" : "2a72bf00-5f20-4b78-a7d0-ad8d95e9b11b",
  "code" : "INVALID_DATA",
  "message" : "The request could not be completed. One or more validation errors were in the request.",
  "details" : [
    {
      "code" : "INVALID_VALUE",
      "target" : "redirect_uri",
      "message" : "Redirect URI mismatch"
    }
  ]
}In this case the cause is Redirect URI mismatch.
Ensure that your redirectUri value in com/pingidentity/samples/app/davinci/DaVinciViewModel.kt exactly matches one of the values you entered in the Redirect URIs field in your OAuth 2.0 application in PingOne: