Before you begin
To successfully complete this tutorial refer to the prerequisites in this section.
The tutorial also requires a configured PingOne instance.
Compatibility
- Android
-
This sample requires at least Android API 23 (Android 6.0)
- Java
-
This sample requires at least Java 8 (v1.8).
Prerequisites
- Android Studio
-
Download and install Android Studio, which is available for many popular operating systems.
- An Android emulator or physical device
-
To try the quick start application as you develop it, you need an Android device. To add a virtual, emulated Android device to Android Studio, refer to Create and manage virtual devices, on the Android Developers website.
Server configuration
This tutorial requires you to configure your PingOne server as follows:
Task 1. Create a demo user
The samples and tutorials in this documentation often require that you have an identity set up so that you can test authentication.
To create a demo user in PingOne, follow these steps:
-
Log in to your PingOne administration console.
-
In the left panel, navigate to Directory > Users.
-
Next to the Users label, click the plus icon ().
PingOne displays the Add User panel.
-
Enter the following details:
-
Given Name =
Demo -
Family Name =
User -
Username =
demo -
Email =
demo.user@example.com -
Population =
Default -
Password =
Ch4ng3it!
-
-
Click Save.
Task 2. Register a public OAuth 2.0 client
To register a public OAuth 2.0 client application in PingOne for use with the Ping (ForgeRock) SDKs for Android and iOS, follow these steps:
-
Log in to your PingOne administration console.
-
In the left panel, navigate to Applications > Applications.
-
Next to the Applications label, click the plus icon ().
PingOne displays the Add Application panel.
-
In Application Name, enter a name for the profile, for example
sdkNativeClient -
Select Native as the Application Type, and then click Save.
-
On the Configuration tab, click the pencil icon ().
-
In Grant Type, select the following values:
Authorization CodeRefresh Token -
In Redirect URIs, enter the following value:
org.forgerock.demo://oauth2redirect -
In Token Endpoint Authentication Method, select
None. -
In the Advanced Settings section, enable Terminate User Session by ID Token.
-
Click Save.
-
-
On the Resources tab, next to Allowed Scopes, click the pencil icon ().
-
In Scopes, select the following values:
emailphoneprofileThe openidscope is selected by default.The result resembles the following:
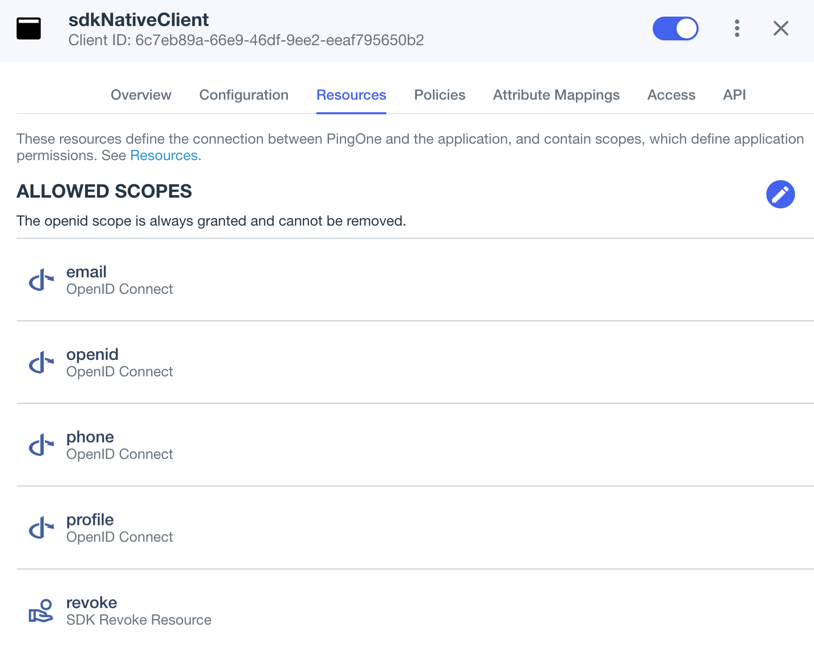 Figure 1. Adding scopes to an application.
-
-
Optionally, on the Policies tab, click the pencil icon () to select the authentication policies for the application.
Applications that have no authentication policy assignments use the environment’s default authentication policy to authenticate users.
If you have a DaVinci license, you can select PingOne policies or DaVinci Flow policies, but not both. If you do not have a DaVinci license, the page only displays PingOne policies.
To use a PingOne policy:
-
Click Add policies and then select the policies that you want to apply to the application.
-
Click Save.
PingOne applies the policies in the order in which they appear in the list. PingOne evaluates the first policy in the list first. If the requirements are not met, PingOne moves to the next one.
For more information, see Authentication policies for applications.
To use a DaVinci Flow policy:
-
You must clear all PingOne policies. Click Deselect all PingOne Policies.
-
In the confirmation message, click Continue.
-
On the DaVinci Policies tab, select the policies that you want to apply to the application.
-
Click Save.
PingOne applies the first policy in the list.
-
-
Click Save.
-
Enable the OAuth 2.0 client application by using the toggle next to its name:
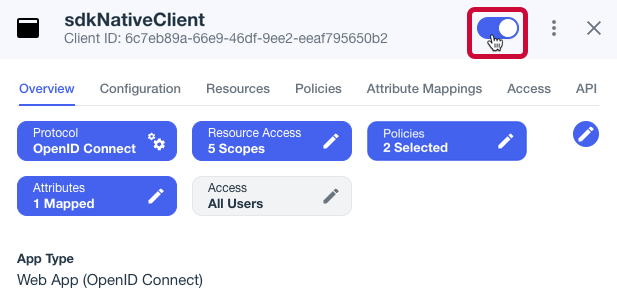 Figure 2. Enable the application using the toggle.
The application is now configured to accept client connections from and issue OAuth 2.0 tokens to the Android and iOS PingOne example applications and tutorials covered by this documentation.