Step 3. Configure connection properties
In this step, you configure the sample application to connect to your PingOne Protect instance and start DaVinci flows.
Optionally, you can configure the API backend application, so you can create and modify the todo items. The API backend app demonstrates introspecting the access tokens issued to the client application, and granting or refusing access to the todo items based on the response.
Configuring the sample client app
In this step, you configure the sample app to connect to the authentication flow you created when setting up your server configuration.
-
Copy the
.env.examplefile in thesdk-sample-apps/javascript/reactjs-todo-davincifolder and save it with the name.envwithin this same directory. -
Open the
.envfile and edit the property values to match the settings you configured in previous steps:API_URL=$API_URL DEBUGGER_OFF=true DEVELOPMENT=$DEVELOPMENT PORT=$PORT WEB_OAUTH_CLIENT=$WEB_OAUTH_CLIENT SCOPE="openid profile email phone name" WELLKNOWN_URL=$WELLKNOWN_URL-
Optionally, in the API_URL property, enter the URL and port number on which you are running the API backend server.
For example,
http://localhost:9443The backend API sample is not required to test authentication with this app.
-
In the PORT property, enter the port number on which to run the sample app.
For example,
8443 -
In WEB_OAUTH_CLIENT, property, enter the ID of the client you are connecting to in PingOne.
Example:
WEB_OAUTH_CLIENT="6c7eb89a-66e9-ab12-cd34-eeaf795650b2"Refer to Get configuration values from PingOne for instructions of where to find this value.
-
In the SCOPE property, enter the scopes you want to assign users who complete authentication using the client, separated by spaces.
Example:
SCOPE="openid profile email address" -
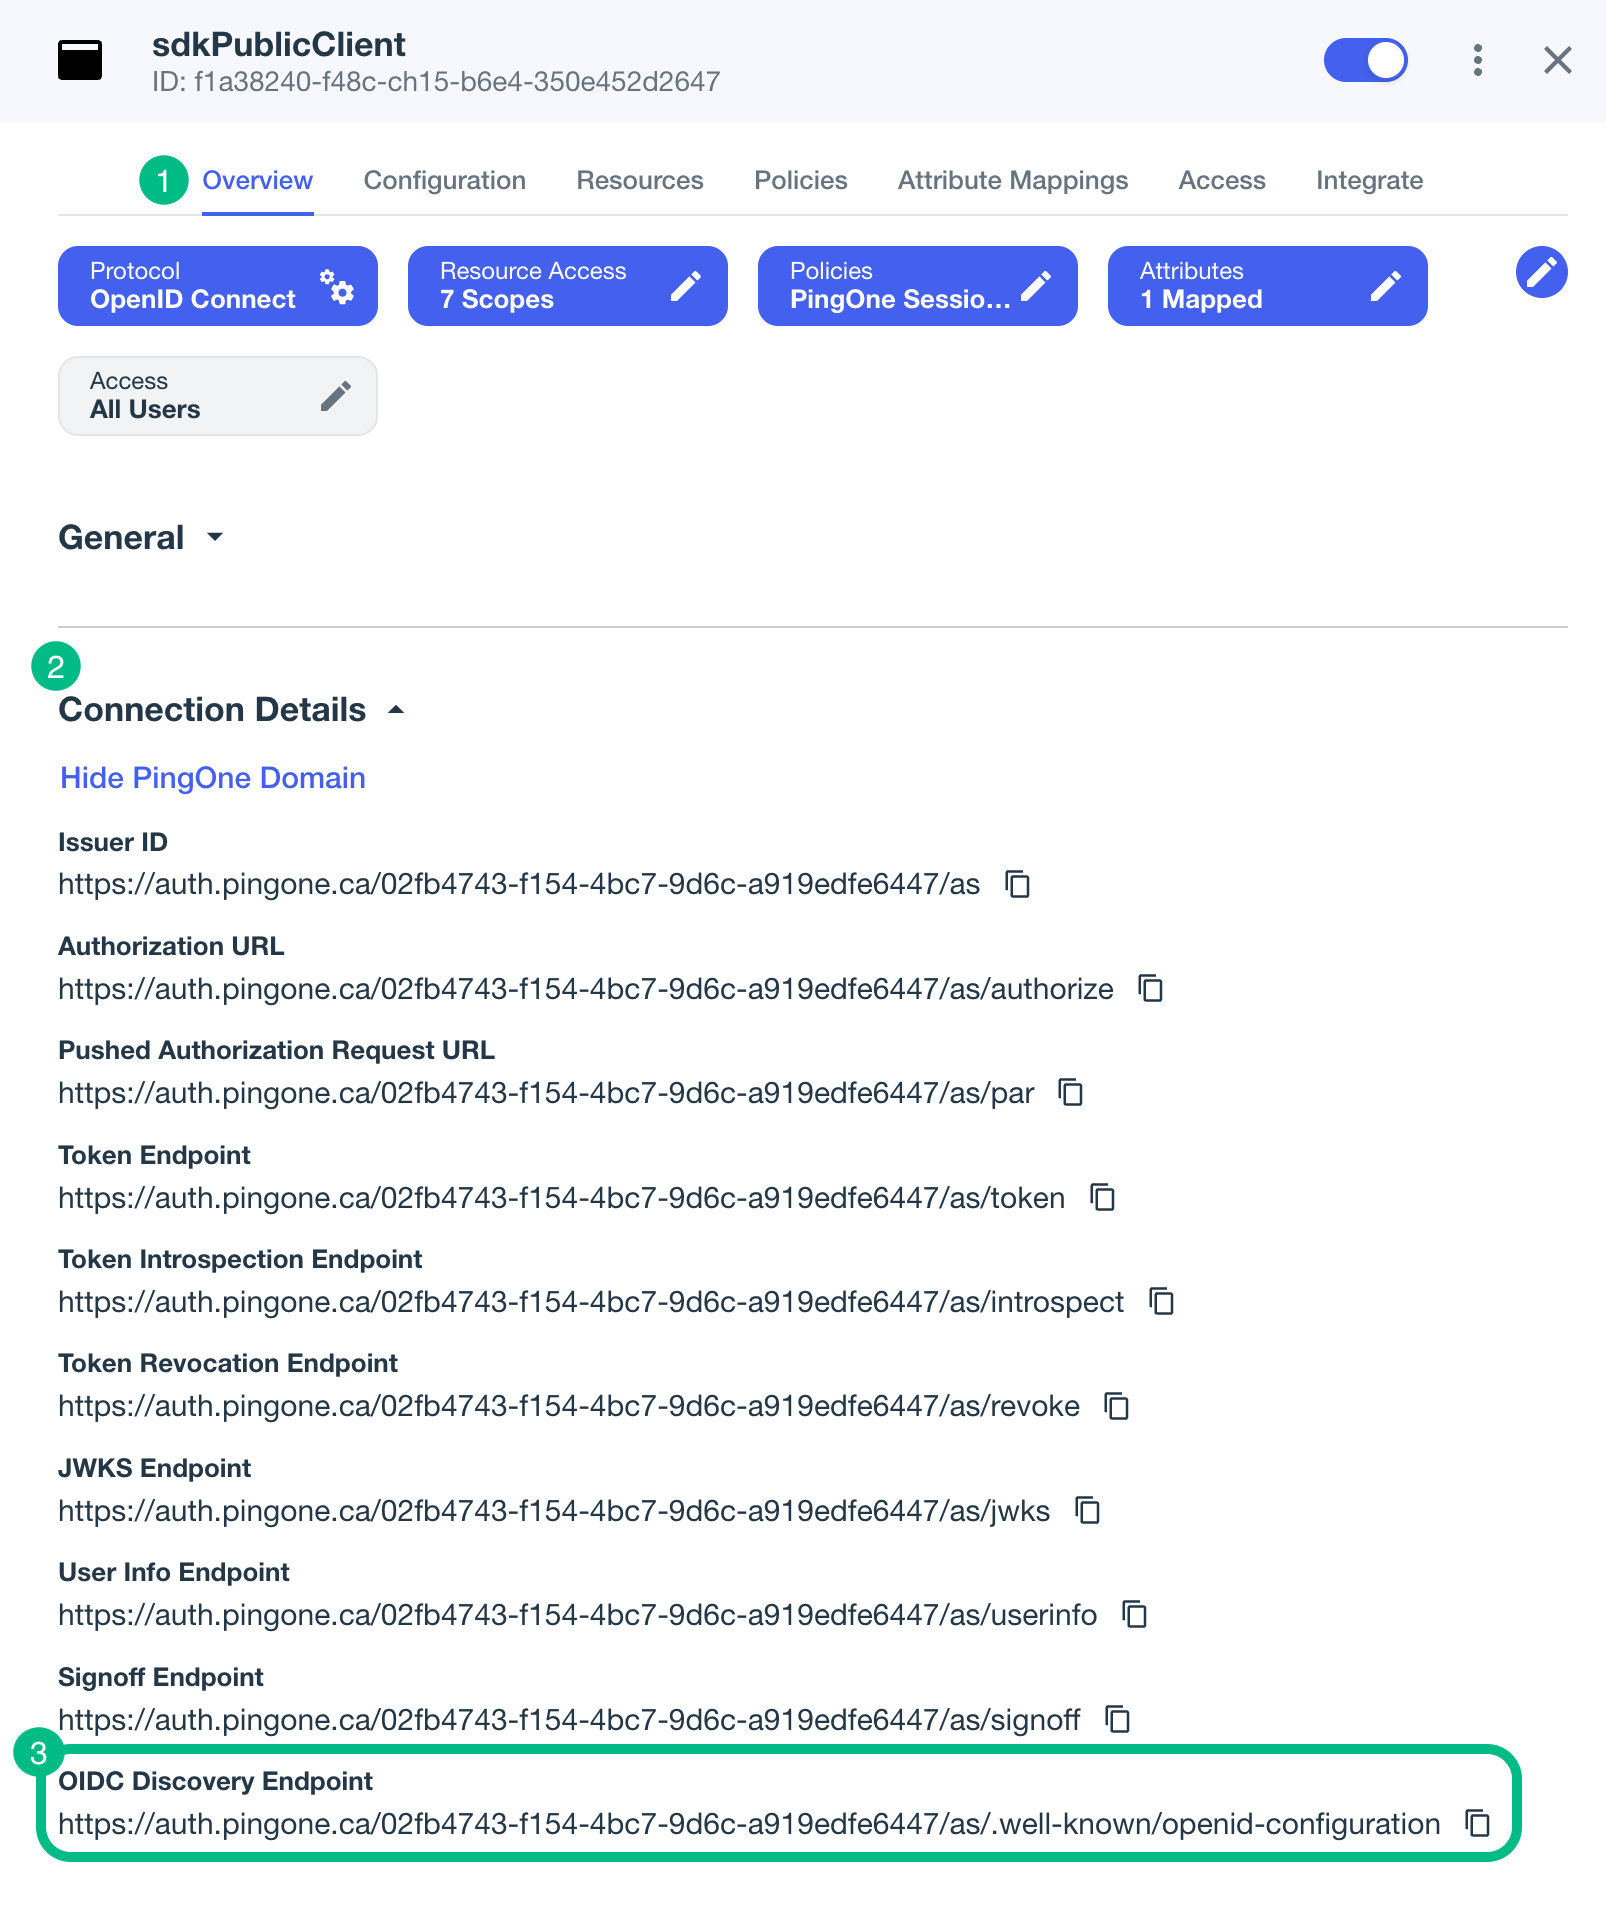
In the WELLKNOWN_URL property, enter the OIDC Discovery Endpoint value from the client you are connecting to in PingOne.
Example:
WELLKNOWN_URL = "https://auth.pingone.ca/3072206d-c6ce-ch15-m0nd-f87e972c7cc3/as/.well-known/openid-configuration"How do I find my PingOne .well-known URL?
To find the
.well-knownendpoint for an OAuth 2.0 client in PingOne:-
Log in to your PingOne administration console.
-
Go to Applications > Applications, and then select your OAuth 2.0 client.
For example, sdkPublicClient.
-
On the Overview tab, expand the Connection Details section, and then copy the OIDC Discovery Endpoint value.
-
The result resembles the following:
API_URL=http://localhost:9443 DEBUGGER_OFF=true DEVELOPMENT=$DEVELOPMENT PORT=8443 WEB_OAUTH_CLIENT="6c7eb89a-66e9-ab12-cd34-eeaf795650b2" SCOPE="openid profile email address" WELLKNOWN_URL="https://auth.pingone.ca/3072206d-c6ce-ch15-m0nd-f87e972c7cc3/as/.well-known/openid-configuration" -
Configuring the sample backend API app (optional)
This optional step configures a simple Node.js server app that provides create, read, update, and delete (CRUD) operations for the todo items.
The backend API app requires access to the same public client that you create earlier, so that it can introspect tokens issued by it.
To configure the backend API app:
-
Copy the
.env.examplefile in thesdk-sample-apps/todo-apifolder and save it with the name.envwithin this same directory. -
Open the
.envfile and edit the property values to match the settings you configured in previous steps:SERVER_TYPE=$SERVER_TYPE # 'AIC' or 'PINGONE' SERVER_URL=$SERVER_URL # AM URL for AIC or PingOne base URL with env ID for PingOne PORT=$PORT REALM_PATH=$REALM_PATH # 'alpha' or 'beta' for AIC server type. Not used for PingOne. REST_OAUTH_CLIENT=$REST_OAUTH_CLIENT # Confidential client ID for AIC or WebApp public client ID for PingOne REST_OAUTH_SECRET=$REST_OAUTH_SECRET # Confidential client secret for AIC. Not used for PingOne.-
In the SERVER_TYPE property, enter
PINGONE. -
In the SERVER_URL property, enter the base URL of the authentication endpoint for your instance, followed by the environment ID.
For example, in the Canada region, your server URL value might be
https://auth.pingone.ca/3072206d-c6ce-ch15-m0nd-f87e972c7cc3Do not use the console URL (
https://console.pingone.ca) or app URL (https://apps.pingone.ca) for this property. -
In the PORT property, enter the port on which the API backend server will run.
For example,
9443. -
In REST_OAUTH_CLIENT, property, enter the ID of the same public client you used for the client application earlier.
Example:
REST_OAUTH_CLIENT="6c7eb89a-66e9-ab12-cd34-eeaf795650b2" -
Leave the REALM_PATH and REST_OAUTH_SECRET properties with their default values, they are not required when using PingOne as your authorization server.
The result resembles the following:
SERVER_TYPE='PINGONE' SERVER_URL='https://auth.pingone.ca/3072206d-c6ce-ch15-m0nd-f87e972c7cc3' PORT=9443 REALM_PATH=$REALM_PATH # Not used for PingOne. REST_OAUTH_CLIENT='6c7eb89a-66e9-ab12-cd34-eeaf795650b2' REST_OAUTH_SECRET=$REST_OAUTH_SECRET # Not used for PingOne. -