OpenID Connect 1.0 (OIDC)
These pages cover concepts, configuration, and usage procedures for working with OpenID Connect 1.0 (OIDC) and Advanced Identity Cloud.
Configuration
Configure the OAuth 2.0 authorization server to act as an OpenID provider.
Dynamic client registration
Discover how clients can register and manage their information dynamically.
OpenID Connect flows
Discover the OIDC flows and how to implement them.
Authentication requirements
Set requirements for authentication during OIDC flows.
Scopes and claims
Learn about OIDC claims and how to request them.
OpenID Connect endpoints
Endpoints exposed when Advanced Identity Cloud acts as an OpenID Provider.
Name changes for ForgeRock products
Product names changed when ForgeRock became part of Ping Identity. Learn more in New name for ForgeRock Identity Cloud.
Advanced Identity Cloud as OIDC provider
An OAuth 2.0 authentication server that implements OpenID Connect (OIDC) is referred to as an OpenID provider (OP). An OAuth 2.0 client that uses OIDC is also referred to as a relying party (RP).
In its role as an OP, Advanced Identity Cloud returns ID tokens to relying parties. Because OIDC extends OAuth 2.0, when Advanced Identity Cloud is configured as an OP it can also return access and refresh tokens to relying parties.
|
Before configuring OIDC on your tenant, ensure you are familiar with the OAuth 2.0 standards and the Advanced Identity Cloud implementation of OAuth 2.0. |
OIDC concepts
OIDC is an identity layer built on top of OAuth 2.0. It lets clients verify the identity of a user based on the authentication performed by OAuth 2.0 authorization servers. It also lets clients obtain profile information about the user over REST.
The following sequence diagram demonstrates the basic OIDC flow:

OIDC clients can register with the OP and manage their client data dynamically.
To let clients discover an end user’s OP, its endpoints and how to interact with it, Advanced Identity Cloud supports the OpenID Connect Discovery 1.0 specification.
OAuth 2.0 or OIDC?
The OAuth 2.0 and OIDC standards were both created for users who need to interact with a third party service; however, they aim to solve different problems. This topic compares OAuth 2.0 and OIDC functionality and the actors in the implementation of both standards.
| OAuth 2.0 | OIDC | |
|---|---|---|
Purpose |
Gives users a way to authorize a service to access and use a subset of their data on their behalf in a secure way. Users must agree to provide access under the service’s terms and conditions; for example, how long the service has access to their data and what the data is used for. |
Gives users a way to authenticate to a service by providing it with a subset of their data in a secure way. Because OIDC extends OAuth 2.0, users can authorize a relying party to collect a subset of their data (usually information stored in the user’s profile) from a third party. The service then uses this data to authenticate the user and provide its services. The user can therefore use the relying party’s services even if they have never created an account with the relying party. |
Use cases |
Use cases are generic and can be tailored to many needs. A common example is a user allowing a photo print service access to a third-party server hosting their pictures, so the photo print service can print them. |
The most common scenario is using social media credentials to log in to a third-party service provider. |
Tokens |
Access and refresh tokens |
ID tokens |
Role of scopes |
Scopes limit the information that can be shared with the service or what the service can do with the data.
For example, the OAuth 2.0 scopes are not data and are not related to user data in any way. |
Scopes can be mapped to specific user data.
For example, Advanced Identity Cloud maps the Claims are returned as part of the ID token.
In some cases, additional claims can be requested in a call to the For more information about how Advanced Identity Cloud maps user profile attributes to claims, refer to Claims. |
| OIDC actor | OAuth 2.0 actor | Description |
|---|---|---|
End user |
Resource owner (RO) |
The owner of the information the application needs to access. The end user who wants to use an application through an existing identity provider account, without signing up to and creating credentials for yet another web service. |
Relying party (RP) |
Client |
The third-party that needs to know the identity of the end user to provide their services. For example, a delivery company or a shopping site. |
OpenID provider (OP) |
Authorization server (AS) Resource server (RS) |
A service that has the end user’s consent to provide the RP with access to some of its user information. OIDC defines unique identification for an account (subject identifier + issuer identifier). The RP can use this identification as a key to the user profile. In the case of an online mail application, the key could be used to access the user’s mailboxes and related account information. In the case of an online shopping site, the key could be used to access personalized offerings, account, shopping cart, and so on. The key makes it possible to serve users as if they had local accounts. Advanced Identity Cloud can act as the OP to authenticate end users and provide RPs with information about the users in the form of an OIDC token. |
Advanced Identity Cloud and OIDC
This section describes Advanced Identity Cloud’s implementation of OIDC, including the supported grant types and standards.
Grant types
-
Authorization code
-
Authorization code with PKCE
-
Backchannel request
-
Implicit
-
Hybrid
-
Hybrid with PKCE
For details, refer to OIDC grant flows.
Standards
This section lists supported OIDC standards.
Session management and logout
Relying parties can:
-
Track whether end users are logged in at the provider using an invisible iframe and the HTML 5 postMessage API.
-
Initiate end user logout at the provider using an endpoint.
Advanced Identity Cloud can also send logout tokens to relying parties when authenticated sessions linked to ID tokens become invalid. Learn more in OIDC authenticated sessions.
Discovery and dynamic client registration
OIDC defines how a relying party can discover the OP and the corresponding OIDC configuration for an end user. The discovery mechanism relies on WebFinger to get the information, based on the end user’s identifier. The server returns the information in JSON Resource Descriptor (JRD) format.
For details, refer to OIDC discovery and Dynamic client registration.
Mobile Connect
Mobile Connect extends OIDC to let mobile phones be used as authentication devices. This allows mobile network operators to act as identity providers.
For details, refer to GSMA Mobile Connect.
OIDC discovery
To let relying parties (or clients) discover the OP for an end user, Advanced Identity Cloud supports the OpenID Connect Discovery 1.0 specification. In addition to discovering the OP for an end user, the relying party can request the OP configuration.
Advanced Identity Cloud exposes the following REST endpoints for discovering the URL of the OP and its configuration:
Discovery relies on the WebFinger protocol to
discover information about people and other entities, using standard HTTP methods.
WebFinger uses Well-Known URIs,
which defines the path prefix /.well-known/ for the URLs defined by OIDC discovery.
When the relying party has discovered the URL of the OP, it can register with the OP dynamically. For test purposes, or if it suits your environment better, you can also register clients manually.
The /.well-known/webfinger endpoint is disabled by default. To enable it, follow these steps:
-
Under Native Consoles > Access Management, go to Realms > Realm Name > Services > OAuth2 Provider > OpenID Connect.
-
Enable OIDC Provider Discovery.
-
Save your changes.
The discovery endpoint now allows searches for users within this realm only. Repeat these steps in other realms, as required.
Security considerations
Advanced Identity Cloud provides the following security mechanisms to ensure that OIDC ID tokens are properly protected against malicious attackers:
-
TLS
-
Digital signatures
-
Token encryption
When you are designing a security mechanism, take into account the points developed in the section on Security Considerations in the OpenID Connect Core 1.0 incorporating errata set 1 specification.
OIDC requires that network messages are protected with Transport Layer Security (TLS).
For additional information, refer to the OAuth 2.0 Security considerations.
Token storage location
OIDC and OAuth 2.0-related services are stateless in Advanced Identity Cloud, unless otherwise indicated; they do not hold any token information locally.
Access and refresh tokens can be stored in the CTS token store or presented to clients as JWTs; however, OIDC tokens and session information are managed in the following way:
-
ID tokens are always presented as JWTs.
-
OIDC sessions are always stored in the CTS token store.
For more information about how to configure access and refresh token storage, refer to Token storage.
OIDC provider configuration
You can configure the Advanced Identity Cloud OAuth 2.0 provider service to act as an OpenID provider (OP).
To do so, configure the OAuth 2.0 provider service then refer to OIDC-specific configuration.
OIDC-specific configuration
To set the OAuth 2.0 provider configuration, under Native Consoles > Access Management, go to Realms > Realm Name > Services > OAuth2 Provider.
Refer to the OAuth2 Provider reference section for details on each configuration property.
| Task | Resources | ||
|---|---|---|---|
Configure the public keys for the provider OPs sign ID tokens so that clients can ensure their authenticity. Advanced Identity Cloud exposes the URI where clients can check the signing public keys to verify the ID token signatures. |
N/A |
||
Enable the OIDC Provider Discovery endpoint The discovery endpoint is enabled by default. Enable the endpoint if your clients need to discover the URL of the OP for a given user. |
|||
Configure pairwise subject types for dynamic registration To provide different values to the Also, change the default value of the Subject Identifier Hash Salt field on the same tab.
|
N/A |
||
Specify whether Advanced Identity Cloud should return scope-derived claims in the ID token Scope-derived claims, such as those returned when requesting the |
|||
Configure how Advanced Identity Cloud maps scopes to claims and user profile attributes Use scripts to map user profile attributes to claims and scopes. |
|||
Configure the OP for dynamic application registration and management Advanced Identity Cloud supports several methods of dynamic application registration. You can also register applications manually. |
|||
Add authentication requirements to ID tokens Require end users to satisfy specific authentication rules or conditions when authenticating to the OP, such as using a specific authentication journey. |
|||
Configure Advanced Identity Cloud for GSMA Mobile Connect Configure the OAuth 2.0 authorization server to act as a Mobile Connect provider. |
|||
Configure the OP to encrypt ID tokens and logout tokens By default, ID tokens and backchannel logout tokens are signed. If these tokens carry sensitive information about your end users, consider encrypting them. |
Encrypt ID tokens and backchannel logout tokens
Advanced Identity Cloud supports encrypting ID tokens and backchannel logout tokens to protect them against tampering attacks, outlined in the JSON Web Encryption specification (RFC 7516).
ID tokens and backchannel logout tokens share the same encryption configuration. You encrypt both or none.
-
Go to Realms > Realm Name > Applications > OAuth 2.0 > Client Name.
-
On the Signing and Encryption tab, select Enable ID Token Encryption.
-
In the Id Token Encryption Algorithm field, enter the algorithm Advanced Identity Cloud will use to encrypt ID tokens and backchannel logout tokens:
Supported encryption algorithms
-
A128KW– AES Key Wrapping with 128-bit key derived from the client secret. -
A192KW– AES Key Wrapping with 192-bit key derived from the client secret. -
A256KW– AES Key Wrapping with 256-bit key derived from the client secret. -
RSA-OAEP– RSA with Optimal Asymmetric Encryption Padding (OAEP) with SHA-1 and MGF-1. -
RSA-OAEP-256– RSA with OAEP with SHA-256 and MGF-1. -
RSA1_5– RSA with PKCS#1 v1.5 padding (not recommended). -
dir– Direct encryption with AES using the hashed client secret. -
ECDH-ES– Elliptic Curve Diffie-Hellman -
ECDH-ES+A128KW– Elliptic Curve Diffie-Hellman + AES Key Wrapping with 128-bit key. -
ECDH-ES+A192KW– Elliptic Curve Diffie-Hellman + AES Key Wrapping with 192-bit key. -
ECDH-ES+A256KW– Elliptic Curve Diffie-Hellman + AES Key Wrapping with 256-bit key. -
X25519– Elliptic Curve Diffie-Hellman with Curve25519. -
X448– Elliptic Curve Diffie-Hellman with Curve448.
Only the
P-256,P-384, andP-521curves are supported. -
-
In the ID Token Encryption Method field, enter the method Advanced Identity Cloud will use to encrypt ID tokens and backchannel logout tokens:
Supported encryption methods
-
A128CBC-HS256– AES 128-bit in CBC mode using HMAC-SHA-256-128 hash (HS256 truncated to 128 bits) -
A192CBC-HS384– AES 192-bit in CBC mode using HMAC-SHA-384-192 hash (HS384 truncated to 192 bits) -
A256CBC-HS512– AES 256-bit in CBC mode using HMAC-SHA-512-256 hash (HS512 truncated to 256 bits) -
A128GCM– AES 128-bit in GCM mode -
A192GCM– AES 192-bit in GCM mode -
A256GCM– AES 256-bit in GCM mode
-
-
If you select an RSA encryption algorithm, perform one of the following actions:
-
Enter the public key in the ID Token Encryption Public Key field.
-
Enter a JWK set in the Json Web Key field.
-
Enter a URI containing the public key in the Json Web Key URI field.
-
-
If you selected an ECDH-ES encryption algorithm, perform one of the following actions:
-
Enter a JWK set in the Json Web Key field.
-
Enter a URI containing the public key in the Json Web Key URI field.
-
-
If you select an algorithm other than RSA or ECDH-ES, select the Core tab and do either of the following:
-
Store the private key/secret in the Client secret field.
-
Set a Secret Label Identifier and store the secret in a secret store.
Advanced Identity Cloud uses the Secret Label Identifier to create a specific secret label for each OAuth 2.0 client. The secret label takes the form
am.applications.oauth2.client.identifier.secretwhere identifier is the value of Secret Label Identifier.The identifier can only contain alphanumeric characters
a-z,A-Z,0-9, and periods (.). It can’t start or end with a period.If you set a Secret Label Identifier and Advanced Identity Cloud finds a matching secret in a secret store, the Client secret is ignored.
-
|
Claims
OIDC relies on claims to provide information about the end user to relying parties.
A claim is a piece of information about the end user (user attribute) that the relying party or client uses to provide a service.
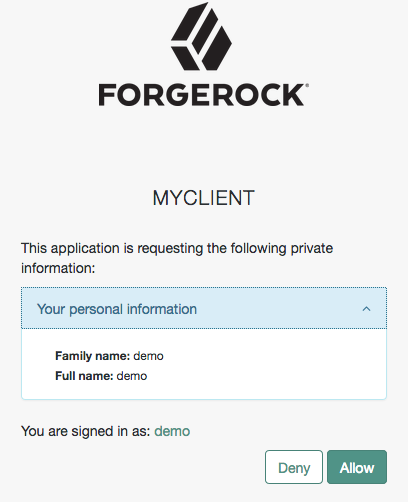
Consider a page that lets an end user register using their Google account information instead of providing the information themselves. The page requests a set of claims about the end user from Google and uses the information in those claims to set up the account without the user’s interaction.
If the user agrees to share access to their claims, OpenID providers can return them in two ways:
-
As key-value pairs in the ID token
-
By making them available at the
userinfoendpoint
Part of implementing OIDC in your environment is deciding which claims are safe to travel in the ID token and which ones require the client to access the endpoint.
ID tokens contain additional claims that aren’t related to user information directly,
but that are relevant to the flow, the relying party, or the authorization server.
These claims are similar to those contained in access tokens; for example, iss, aud, exp, and others.
For more information, refer to the following sections of the OIDC specification:
|
Advanced Identity Cloud supports Normal Claims, as specified in section 5.6 of the specification. Advanced Identity Cloud doesn’t support the optional Aggregated Claims and Distributed Claims. |
When Advanced Identity Cloud is configured as an authorization server, scopes don’t relate to data.
For example, Facebook has an OAuth 2.0 scope named read_stream.
Advanced Identity Cloud returns allowed scopes in the access token, but it doesn’t associate any data with them.
When Advanced Identity Cloud is configured as an OpenID provider, scopes can relate to data in a user profile by using one or more claims.
Because each claim represents an attribute from the user profile, Advanced Identity Cloud displays the actual data the relying party will receive if the end user consents to sharing it:
Advanced Identity Cloud maps scopes and profile data to claims using a script configured in the OAuth 2.0 provider service.
By default, the script maps several user profile attributes to the profile scope:
| Claim | User profile attribute |
|---|---|
|
|
|
|
|
|
|
|
|
|
After a successful flow, the OpenID provider returns an ID token with the relevant claims. For security reasons, Advanced Identity Cloud does not return scope-derived claims in the ID token by default.
Request claims in ID tokens
Sometimes you may need the provider to return scope-derived claims in the ID token. For example, when claims are related to authentication conditions or rules the end user must satisfy before being redirected to particular resources.
You can configure Advanced Identity Cloud to return all scope-derived claims in the ID token, or just the ones specified in the request:
-
To configure the provider to return all scope-derived claims in the ID token, go to Native Consoles > Access Management > Realms > Realm Name > Services > OAuth2 Provider > Advanced OpenID Connect and enable Always Return Claims in ID Tokens.
This option is disabled by default because of the security concerns of returning claims that may contain sensitive user information.
-
To configure the provider to include specific scope-derived claims in the ID token, go to Native Consoles > Access Management > Realms > Realm Name > Services > OAuth2 Provider > Advanced OpenID Connect and enable Enable "claims_parameter_supported". Specify the required claims in the
claimsparameter.
Voluntary and essential claims in the claims parameter
Claims specified using the claims parameter can be voluntary or essential:
-
Essential. The relying party specifies the claims that are necessary to ensure a good end user experience.
For example, to provide personalized services, the relying party may require the end user’s phone number to send them an SMS.
-
Voluntary. The relying party specifies the claims that are useful but not required to provide services to the end user.
For more information, refer to Demonstrate authentication requirements.
Clients can retrieve additional claims from the /oauth2/userinfo endpoint.
The OAuth 2.0 provider’s Supported Claims field restricts the claims that can be granted in ID tokens, but not the claims a client can register with during dynamic client registration.
You can also use this field to configure how Advanced Identity Cloud presents the claims in the consent screen. By default, the UI doesn’t display scope-derived claims in the consent screen. You can configure the claims to display.
Configure claims in the Advanced Identity Cloud consent screen
Configure how claims appear in the consent screen as described in Manage consent.
You can enter claims as simple strings or pipe-separated strings
representing the internal claim name, locale, and localized description.
For example: name|en|Your full name.
If you omit the description, the claim doesn’t display in the consent page. This may be useful when the client requires claims that aren’t meaningful to the end user.
Client-level configuration overrides the configuration set at the provider level.
Dynamic client registration
Advanced Identity Cloud supports dynamic registration. RFC 7591 OAuth 2.0 Dynamic Client Registration Protocol and OpenID Connect Dynamic Client Registration 1.0 describe the dynamic registration options for OAuth 2.0 and OpenID Connect client applications.
Advanced Identity Cloud returns an error when a dynamic client registration request payload includes incorrect information or specifies unsupported signing and encryption algorithms. For example, if a public client requests symmetric signing or encryption, the request results in an error because public clients cannot have a client secret to use for symmetric encryption.
Dynamic registration options
- Open registration
-
The application registers its profile without an access token.
Advanced Identity Cloud generates
client_idandclient_secretvalues. Advanced Identity Cloud ignores any values provided in the profile for these properties.You can use this method to develop and test client registration. This method does not limit the number of client registrations. If you use it in production, also require a software statement.
- Registration with an access token
-
The application registers its profile with an access token for authorization.
The specification does not describe how the client obtains the access token. You register an initial OAuth 2.0 client application manually, and use this application to obtain the access token on behalf of the client requesting registration.
To register the
logo_uri,client_uri, andpolicy_urithe access token must include a special scope; default:dynamic_client_registration. - Registration with a software statement
-
The application registers its profile with a software statement.
A software statement is a JSON Web Token (JWT) that holds registration claims about the client, such as its issuer and redirection URIs.
A software statement is issued by a software publisher. The software publisher encrypts and signs the claims in the software statement.
You store software publisher details in a software publisher profile. The software publisher profile identifies the issuer included in software statements. It provides access to the secret or the keys to decrypt software statement JWTs and to verify their signatures. When the client registers dynamically with a software statement, Advanced Identity Cloud uses the software publisher profile to determine whether it can trust the software statement.
The protocol specification does not describe how the client obtains the software statement JWT. Advanced Identity Cloud expects the software publisher to construct the JWT according to the settings in its profile.
Enable dynamic client registration
| Option | Create or update... |
|---|---|
Open registration |
|
Registration with an access token |
|
Registration requires a software statement JWT |
OAuth 2.0 provider settings
To enable open registration and registration with a software statement, update the OAuth 2.0 provider configuration for the realm:
-
Under Native Consoles > Access Management, go to Realms > Realm Name > Services > OAuth2 Provider and switch to the Client Dynamic Registration tab.
-
To allow open registration without an access token, enable Allow Open Dynamic Client Registration.
-
To require a software statement to register, enable Require Software Statement for Dynamic Client Registration, and edit the Required Software Statement Attested Attributes list to include all the required claims.
-
Save your work.
-
To change the scopes a client can register, switch to the Advanced tab and update the Client Registration Scope Allowlist field.
-
Save your work.
For additional details, refer to the Client dynamic registration reference.
Client profile for access tokens
To enable dynamic registration with an access token, manually register a service application to provide the access tokens:
-
In the Advanced Identity Cloud admin console, go to Applications and select + Custom Application.
-
Select the sign-in method as OIDC - OpenId Connect and application type as Service.
-
Provide the client application details; for example:
- Name
-
registration-service - Owners
-
<application-owner> - Client ID
-
registration-service - Client Secret
-
mySecret
-
Under Sign On > General Settings, add the special scope:
- Scopes
-
dynamic_client_registration
If the string for the special scope is not the default, use the scope specified in the OAuth 2.0 provider configuration Client Dynamic Registration > Scope to give access to dynamic client registration field.
-
Save your work.
Software publisher profile
To enable dynamic registration with a software statement JWT, register a software publisher:
-
Under Native Consoles > Access Management, go to Realms > Realm Name > Applications > OAuth 2.0 > Software Publisher and click Add Software Publisher Agent.
-
Add the basic settings as necessary before you click Create:
- Agent ID
-
Required identifier for the profile.
- Software publisher secret
-
Secret required when the publisher uses HMAC symmetric encryption for the JWTs.
- Software publisher issuer
-
Required issuer identifier to match the
issclaim in JWTs.
-
Configure the appropriate security settings:
-
If you provide the JSON Web Key (JWK) by URI rather than by value, where the Public key selector is
JWKs_URI, Advanced Identity Cloud must access the JWKs when processing registration requests. -
If the publisher uses symmetric encryption, where the Software statement signing Algorithm is
HS256,HS384, orHS512, the Software publisher secret must match thekvalue in the JWK.
-
-
Save your work.
The software publisher provides client applications using dynamic registration with a valid software statement JWT. Valid software statement JWTs must have:
-
All the required claims listed in the OAuth 2.0 provider’s Required Software Statement Attested Attributes.
-
An issuer (
iss) claim matching a publisher profile’s Software publisher issuer.
These constraints apply to software statement JWTs:
-
Compressed JWTs must not be larger than 32 KiB (32768 bytes) when uncompressed.
-
Advanced Identity Cloud ignores keys specified in JWT headers, such as
jkuandjwe.
Registration examples
Review the following dynamic client registration examples.
The client must read and store the dynamic registration response. The response includes important information about the client, such as:
-
The generated client ID and the generated client secret for confidential clients.
You cannot choose the client ID or client secret when registering an application dynamically.
-
The URL and access token required to update the client profile.
Open registration
The following example depends on an update to OAuth 2.0 provider settings. Once you have enabled Allow Open Dynamic Client Registration, register a client dynamically.
Include a client_name in the payload as the human-readable name to display to resource owners:
$ curl \
--request POST \
--header 'Content-Type: application/json' \
--data '{
  "redirect_uris": ["https://client.example.com/callback"],
  "client_name#en": "My Client",
  "client_name#ja-Jpan-JP": "\u30AF\u30E9\u30A4\u30A2\u30F3\u30C8\u540D",
  "client_uri": "https://client.example.com/"
}' \
'https://<tenant-env-fqdn>/am/oauth2/realms/root/realms/alpha/register'Show the response
{
  "authorization_signed_response_alg": "RS256",
  "request_object_encryption_alg": "",
  "introspection_encrypted_response_alg": "RSA-OAEP-256",
  "client_uri": "https://client.example.com/",
  "default_max_age": 1,
  "application_type": "web",
  "introspection_encrypted_response_enc": "A128CBC-HS256",
  "introspection_signed_response_alg": "RS256",
  "client_name#en": "My Client",
  "userinfo_encrypted_response_enc": "",
  "registration_client_uri": "https://<tenant-env-fqdn>/am/oauth2/realms/root/realms/alpha/register?client_id=<generated-client-id>",
  "client_type": "Confidential",
  "userinfo_encrypted_response_alg": "",
  "registration_access_token": "<generated-registration-access-token>",
  "client_id": "<generated-client-id>",
  "token_endpoint_auth_method": "client_secret_basic",
  "userinfo_signed_response_alg": "",
  "public_key_selector": "x509",
  "scope": "address phone openid profile email",
  "require_pushed_authorization_requests": false,
  "authorization_code_lifetime": 0,
  "client_secret": "<generated-client-secret>",
  "user_info_response_format_selector": "JSON",
  "tls_client_certificate_bound_access_tokens": false,
  "backchannel_logout_session_required": false,
  "id_token_signed_response_alg": "RS256",
  "default_max_age_enabled": false,
  "token_intro_response_format_selector": "JSON",
  "subject_type": "public",
  "grant_types": ["authorization_code"],
  "jwt_token_lifetime": 0,
  "id_token_encryption_enabled": false,
  "redirect_uris": ["https://client.example.com/callback"],
  "jwks_cache_miss_cache_time": 60000,
  "jwks_cache_timeout": 3600000,
  "client_name#ja-jpan-jp": "クライアント名",
  "id_token_encrypted_response_alg": "RSA-OAEP-256",
  "id_token_encrypted_response_enc": "A128CBC-HS256",
  "client_secret_expires_at": 0,
  "access_token_lifetime": 0,
  "refresh_token_lifetime": 0,
  "scopes": ["address", "phone", "openid", "profile", "email"],
  "request_object_signing_alg": "",
  "response_types": ["code"]
}OpenID Connect clients must include these claims in the JSON registration data:
-
The
openidscope; for example,"scopes": ["profile", "openid"]. -
The
id_tokenresponse type; for example,"response_types": ["code", "id_token code"].
Registration with an access token
The following example depends on a Client profile for access tokens.
-
Use the registration service client to get an access token:
$ curl \
--request POST \
--user 'registration-service:mySecret' \
--data 'grant_type=client_credentials' \
--data 'scope=dynamic_client_registration' \
'https://<tenant-env-fqdn>/am/oauth2/realms/root/realms/alpha/access_token'
{
  "access_token": "<access-token>",
  "scope": "dynamic_client_registration",
  "token_type": "Bearer",
  "expires_in": 3596
}
bash -
Register a client dynamically with the access token as authorization.
Include a
client_namein the payload as the human-readable name to display to resource owners.$ curl \ --request POST \ --header 'Content-Type: application/json' \ --header 'Authorization: Bearer <access-token>' \ --data '{ "redirect_uris": ["https://client.example.com/callback"], "client_name#en": "My Client", "client_name#ja-Jpan-JP": "\u30AF\u30E9\u30A4\u30A2\u30F3\u30C8\u540D", "client_uri": "https://client.example.com/" }' \ 'https://<tenant-env-fqdn>/am/oauth2/realms/root/realms/alpha/register'bashShow the response
{ "request_object_encryption_alg": "", "default_max_age": 1, "application_type": "web", "client_name#en": "My Client", "registration_client_uri": "https://<tenant-env-fqdn>/am/oauth2/register?client_id=<generated-client-id>", "client_type": "Confidential", "userinfo_encrypted_response_alg": "", "registration_access_token": "<generated-registration-access-token>", "client_id": "<generated-client-id>", "token_endpoint_auth_method": "client_secret_basic", "userinfo_signed_response_alg": "", "public_key_selector": "x509", "authorization_code_lifetime": 0, "client_secret": "<generated-client-secret>", "user_info_response_format_selector": "JSON", "id_token_signed_response_alg": "HS256", "default_max_age_enabled": false, "subject_type": "public", "jwt_token_lifetime": 0, "id_token_encryption_enabled": false, "redirect_uris": ["https://client.example.com/callback"], "client_name#ja-jpan-jp": "クライアント名", "id_token_encrypted_response_alg": "RSA1_5", "id_token_encrypted_response_enc": "A128CBC_HS256", "client_secret_expires_at": 0, "access_token_lifetime": 0, "refresh_token_lifetime": 0, "request_object_signing_alg": "", "response_types": ["code"] }jsonOpenID Connect clients must include these claims in the JSON registration data:
-
The
openidscope; for example,"scopes": ["profile", "openid"]. -
The
id_tokenresponse type; for example,"response_types": ["code", "id_token code"].
-
Registration with a software statement
The following example depends on an update to OAuth 2.0 provider settings, a Software publisher profile, and an encrypted software statement JWT:
-
Configure the OAuth 2.0 provider:
This example uses open registration with a software statement. The OAuth 2.0 provider has these settings enabled:
-
Allow Open Dynamic Client Registration
-
Require Software Statement for Dynamic Client Registration
If you leave Allow Open Dynamic Client Registration disabled, use an access token as authorization for the registration request, as demonstrated in Registration with an access token.
-
-
Configure the software publisher account.
The software publisher for this example has the following profile settings:
- Agent ID
-
My Software Publisher - Software publisher secret
-
secret - Software publisher issuer
-
https://publisher.example.com - Software statement signing Algorithm
-
HS256 - Public key selector
-
JWKs - Json Web Key
-
{"keys":[{"kty":"oct","k":"secret","alg":"HS256"}]}Notice that the value is a key set rather than a single key.
-
Prepare the software statement.
The plaintext payload of the software statement JWT in this example is the following:
{ "sub": "registrar@example.com", "name": "My Client", "iat": 1675246194, "exp": 1675249794, "iss": "https://publisher.example.com", "redirect_uris": ["https://client.example.com/callback"] }jsonWhen you try the example, use current values for the
iat(issued at) andexp(expiration time) claims.The JWT header is
{"alg":"HS256","typ":"JWT"}, and the secret issecret.The resulting encrypted JWT is as follows with lines folded for readability:
eyJhbGciOiJIUzI1NiIsInR5cCI6IkpXVCJ9
.eyJzdWIiOiJyZWdpc3RyYXJAZXhhbXBsZS5jb20iLCJuYW1lIjoiSm9obiBE
b2UiLCJpYXQiOjE2NzUyNDYxOTQsImV4cCI6MTY3NTI0OTc5NCwiaXNzIjoia
HR0cHM6Ly9wdWJsaXNoZXIuZXhhbXBsZS5jb20iLCJyZWRpcmVjdF91cmlzIj
pbImh0dHBzOi8vY2xpZW50LmV4YW1wbGUuY29tL2NhbGxiYWNrIl19
.7_3nu39GtTTz_RPKZMjj1JuwWWTgeE4Iqx7p3-cfiPg
none -
Register a client dynamically with the software statement JWT:
$ curl \ --request POST \ --header 'Content-Type: application/json' \ --data '{ "redirect_uris": ["https://client.example.com/callback"], "client_name#en": "My Client", "client_name#ja-Jpan-JP": "\u30AF\u30E9\u30A4\u30A2\u30F3\u30C8\u540D", "client_uri": "https://client.example.com/", "software_statement": "eyJhbGciOiJIUzI1NiIsInR5cCI6IkpXVCJ9.eyJzdWIiOiJyZWdpc3RyYXJAZXhhbXBsZS5jb20iLCJuYW1lIjoiSm9obiBEb2UiLCJpYXQiOjE2NzUyNDYxOTQsImV4cCI6MTY3NTI0OTc5NCwiaXNzIjoiaHR0cHM6Ly9wdWJsaXNoZXIuZXhhbXBsZS5jb20iLCJyZWRpcmVjdF91cmlzIjpbImh0dHBzOi8vY2xpZW50LmV4YW1wbGUuY29tL2NhbGxiYWNrIl19.7_3nu39GtTTz_RPKZMjj1JuwWWTgeE4Iqx7p3-cfiPg" }' \ 'https://<tenant-env-fqdn>/am/oauth2/realms/root/realms/alpha/register'bashShow the response
{ "authorization_signed_response_alg": "RS256", "request_object_encryption_alg": "", "introspection_encrypted_response_alg": "RSA-OAEP-256", "client_uri": "https://client.example.com/", "default_max_age": 1, "application_type": "web", "introspection_encrypted_response_enc": "A128CBC-HS256", "introspection_signed_response_alg": "RS256", "client_name#en": "My Client", "userinfo_encrypted_response_enc": "", "registration_client_uri": "https://<tenant-env-fqdn>/am/oauth2/realms/root/realms/alpha/register?client_id=<generated-client-id>", "client_type": "Confidential", "userinfo_encrypted_response_alg": "", "registration_access_token": "<generated-registration-access-token>", "client_id": "<generated-client-id>", "token_endpoint_auth_method": "client_secret_basic", "userinfo_signed_response_alg": "", "software_statement": "eyJhbGciOiJIUzI1NiIsInR5cCI6IkpXVCJ9.eyJzdWIiOiJyZWdpc3RyYXJAZXhhbXBsZS5jb20iLCJuYW1lIjoiSm9obiBEb2UiLCJpYXQiOjE2NzUyNDYxOTQsImV4cCI6MTY3NTI0OTc5NCwiaXNzIjoiaHR0cHM6Ly9wdWJsaXNoZXIuZXhhbXBsZS5jb20iLCJyZWRpcmVjdF91cmlzIjpbImh0dHBzOi8vY2xpZW50LmV4YW1wbGUuY29tL2NhbGxiYWNrIl19.7_3nu39GtTTz_RPKZMjj1JuwWWTgeE4Iqx7p3-cfiPg", "public_key_selector": "x509", "scope": "address phone openid profile email", "require_pushed_authorization_requests": false, "authorization_code_lifetime": 0, "client_secret": "<generated-client-secret>", "user_info_response_format_selector": "JSON", "tls_client_certificate_bound_access_tokens": false, "backchannel_logout_session_required": false, "id_token_signed_response_alg": "RS256", "default_max_age_enabled": false, "token_intro_response_format_selector": "JSON", "subject_type": "public", "grant_types": ["authorization_code"], "jwt_token_lifetime": 0, "id_token_encryption_enabled": false, "redirect_uris": ["https://client.example.com/callback"], "jwks_cache_miss_cache_time": 60000, "jwks_cache_timeout": 3600000, "client_name#ja-jpan-jp": "クライアント名", "id_token_encrypted_response_alg": "RSA-OAEP-256", "id_token_encrypted_response_enc": "A128CBC-HS256", "client_secret_expires_at": 0, "access_token_lifetime": 0, "refresh_token_lifetime": 0, "scopes": ["address", "phone", "openid", "profile", "email"], "request_object_signing_alg": "", "response_types": ["code"] }jsonOpenID Connect clients must include these claims in the JSON registration data:
-
The
openidscope; for example,"scopes": ["profile", "openid"]. -
The
id_tokenresponse type; for example,"response_types": ["code", "id_token code"].
-
Manage client profiles
The JSON response to a successful dynamic registration request contains the following fields:
registration_client_uri-
The endpoint for reading and updating the client profile, including the generated client ID as a query parameter.
registration_access_token-
The generated access token to authorize reading and updating the client profile.
Make sure your client application stores the dynamic registration response, including these values. Your application needs them to read and update its client profile.
Read a client profile
To read a client profile, send an HTTP GET request
to the registration_client_uri with the registration_access_token for authorization:
$ curl \
--request GET \
--header 'Authorization: Bearer <generated-registration-access-token>' \
"https://<tenant-env-fqdn>/am/oauth2/realms/root/realms/alpha/register?client_id=<generated-client-id>"Show the response
{
  "authorization_signed_response_alg": "RS256",
  "request_object_encryption_alg": "",
  "introspection_encrypted_response_alg": "RSA-OAEP-256",
  "client_uri": "https://client.example.com/",
  "default_max_age": 1,
  "application_type": "web",
  "introspection_encrypted_response_enc": "A128CBC-HS256",
  "introspection_signed_response_alg": "RS256",
  "client_name#en": "My Client",
  "userinfo_encrypted_response_enc": "",
  "client_type": "Confidential",
  "userinfo_encrypted_response_alg": "",
  "token_endpoint_auth_method": "client_secret_basic",
  "userinfo_signed_response_alg": "",
  "client_id": "<generated-client-id>",
  "public_key_selector": "x509",
  "scope": "openid address phone email profile",
  "require_pushed_authorization_requests": false,
  "authorization_code_lifetime": 0,
  "client_secret": "<generated-client-secret>",
  "user_info_response_format_selector": "JSON",
  "tls_client_certificate_bound_access_tokens": false,
  "backchannel_logout_session_required": false,
  "id_token_signed_response_alg": "RS256",
  "default_max_age_enabled": false,
  "token_intro_response_format_selector": "JSON",
  "subject_type": "public",
  "grant_types": ["authorization_code"],
  "jwt_token_lifetime": 0,
  "id_token_encryption_enabled": false,
  "redirect_uris": ["https://client.example.com/callback"],
  "jwks_cache_miss_cache_time": 60000,
  "jwks_cache_timeout": 3600000,
  "client_name#ja-jpan-jp": "クライアント名",
  "id_token_encrypted_response_alg": "RSA-OAEP-256",
  "id_token_encrypted_response_enc": "A128CBC-HS256",
  "client_secret_expires_at": 0,
  "access_token_lifetime": 0,
  "refresh_token_lifetime": 0,
  "scopes": ["openid", "address", "phone", "email", "profile"],
  "request_object_signing_alg": "",
  "response_types": ["code"]
}The response does not contain the registration_client_uri or the registration_access_token.
Update a client profile
When an application updates its client profile rather than registering again dynamically, it retains the current client ID and client secret.
The update request body replaces the current client profile settings subject to the these conditions:
-
Updates cannot change any of the following settings:
-
client_id_issued_at -
client_secret -
client_secret_expires_at -
registration_access_token -
registration_client_uri
-
-
Missing settings are set to their default values.
-
Settings with unrecognized names are silently ignored.
-
If the client profile includes a software statement JWT, it must be valid and current.
-
A successful update returns a new registration access token to use going forward.
To update a client profile, send an HTTP PUT request to the registration_client_uri
with the registration_access_token for authorization and the request body specifying the new settings.
The following example updates the scope and grant_types settings:
$ curl \
--request PUT \
--header 'Authorization: Bearer <generated-registration-access-token>' \
--data '{
  "client_name#en": "My Client",
  "client_name#ja-jpan-jp": "クライアント名",
  "client_id": "<generated-client-id>",
  "client_secret": "<generated-client-secret>",
  "client_uri": "https://client.example.com/",
  "scope": "openid profile",
  "grant_types": ["authorization_code", "implicit"],
  "redirect_uris": ["https://client.example.com/callback"]
}' \
'https://<tenant-env-fqdn>/am/oauth2/realms/root/realms/alpha/register?client_id=<generated-client-id>'Show the response
{
  "authorization_signed_response_alg": "RS256",
  "request_object_encryption_alg": "",
  "introspection_encrypted_response_alg": "RSA-OAEP-256",
  "client_uri": "https://client.example.com/",
  "default_max_age": 1,
  "application_type": "web",
  "introspection_encrypted_response_enc": "A128CBC-HS256",
  "introspection_signed_response_alg": "RS256",
  "client_name#en": "My Client",
  "userinfo_encrypted_response_enc": "",
  "client_type": "Confidential",
  "userinfo_encrypted_response_alg": "",
  "registration_access_token": "<generated-registration-access-token>",
  "client_id": "<generated-client-id>",
  "token_endpoint_auth_method": "client_secret_basic",
  "userinfo_signed_response_alg": "",
  "public_key_selector": "x509",
  "scope": "openid profile",
  "require_pushed_authorization_requests": false,
  "authorization_code_lifetime": 0,
  "client_secret": "<generated-client-secret>",
  "user_info_response_format_selector": "JSON",
  "tls_client_certificate_bound_access_tokens": false,
  "backchannel_logout_session_required": false,
  "id_token_signed_response_alg": "RS256",
  "default_max_age_enabled": false,
  "token_intro_response_format_selector": "JSON",
  "subject_type": "public",
  "grant_types": ["authorization_code", "implicit"],
  "jwt_token_lifetime": 0,
  "id_token_encryption_enabled": false,
  "redirect_uris": ["https://client.example.com/callback"],
  "jwks_cache_miss_cache_time": 60000,
  "jwks_cache_timeout": 3600000,
  "client_name#ja-jpan-jp": "クライアント名",
  "id_token_encrypted_response_alg": "RSA-OAEP-256",
  "id_token_encrypted_response_enc": "A128CBC-HS256",
  "access_token_lifetime": 0,
  "refresh_token_lifetime": 0,
  "scopes": ["openid", "profile"],
  "request_object_signing_alg": "",
  "response_types": ["code"]
}The registration_access_token in the response reflects the new value to use going forward.
Delete a client profile
To remove a client profile, send an HTTP DELETE request
to the registration_client_uri with the registration_access_token for authorization:
$ curl \
--request DELETE \
--header 'Authorization: Bearer <generated-registration-access-token>' \
'https://<tenant-env-fqdn>/am/oauth2/realms/root/realms/alpha/register?client_id=<generated-client-id>'A successful request returns an HTTP 204 No Content response.
Authorization grants and active tokens associated with the client remain valid until they expire.
OIDC client authentication
OIDC clients use the authentication methods described in Client application authentication.
OIDC clients must set the authentication method in their profile. In the Advanced Identity Cloud admin console, go to Applications > Client ID > Sign On > General Settings > Show advanced settings > Authentication and select the method in the Token Endpoint Authentication Method drop-down list:
| Method | Description |
|---|---|
|
The client sends its credentials in an HTTP Basic |
|
The client sends its credentials as When a client authenticates with form parameters,
the server can store POST data on the user-agent in an |
|
The client is public and does not authenticate. Public clients do not authenticate even if the authentication method is different from |
|
The client sends its credentials as a JSON Web Token (JWT). |
|
The client uses a self-signed certificate for mutual TLS authentication. |
|
The client uses a CA-signed certificate for mutual TLS authentication. |
OIDC grant flows
These pages describe supported OpenID Connect (OIDC) flows and how to implement them.
Decide which flow is best based on the relying party (RP):
| RP | Grant | Description |
|---|---|---|
The RP is a web application running on a server. |
The OpenID provider (OP) uses the user-agent to transport the authorization code the RP exchanges for tokens. Use the same grant with Proof Key for Code Exchange (PKCE) when possible. |
|
The RP is a native application or a single-page application (SPA); for example, a desktop or mobile application, or a JavaScript application. |
The RP cannot communicate securely with the OP, so the authorization code can be intercepted by malicious users. The PKCE standard mitigates against interception attacks. |
|
The RP knows the end user’s identifier and gains consent through a separate authentication device, such as a mobile phone with an authenticator application. |
The RP does not interact directly with the end user; instead it initiates a backchannel request to the end user’s authentication device to gather consent for the operation. For example, a smart speaker gets consent from its registered end user after receiving a voice request to transfer money to a third party. |
|
The RP is an SPA. |
The OpenID provider (OP) uses the user-agent to transport tokens, exposing them to the end user and other parties. When possible, use the authorization code grant with PKCE instead. |
|
The RP gets an ID token immediately and later gets an access token. |
The OpenID provider (OP) uses the user-agent to transport the authorization code and initial tokens. Use PKCE with this flow when possible. |
Backchannel request grant
Use the backchannel request grant for client-initiated backchannel authentication (CIBA).
CIBA lets a relying party (RP), the consumption device, get an end user’s consent without redirection through the end user’s browser. Instead, the end user authenticates and grants consent through an authentication device such as an authenticator application or a mobile banking application on the user’s mobile phone.
Advanced Identity Cloud applies the guidelines suggested by the OpenID Financial-grade API (FAPI) Working Group to implement CIBA.
The backchannel flow

-
The RP has a user identifier and requires the end user’s consent. It prepares a signed Json Web Token (JWT).
-
The RP sends an HTTP POST request with the signed JWT to Advanced Identity Cloud, the OpenID provider (OP).
-
The OP validates the signature using the RP’s public key and verifies the JWT. If the JWT is valid, the OP returns an
auth_req_idand a polling interval. -
The RP polls the OP with the
auth_req_id, waiting for the end user’s authorization. If the RP does not respect the polling interval, the OP returns an error. -
The OP sends a push notification with the
binding_messageto request the end user’s authorization. -
The end user authorizes the request with the authorization gesture on their authentication device; for example, the user clicks a button in their authenticator application or provides their fingerprint.
-
The OP returns an access token and an ID token to the RP.
The RP can use the ID token subject ID claim as the end user’s identity.
-
If the RP requires additional claims, it sends a request to the /oauth2/userinfo endpoint with the access token for authorization.
-
If the access token is valid, the
/oauth2/userinfoendpoint returns any additional claims.The RP can use the subject ID and the additional claims to identify the end user.
Prepare for CIBA
Configure the service
-
Create a journey such as the following:
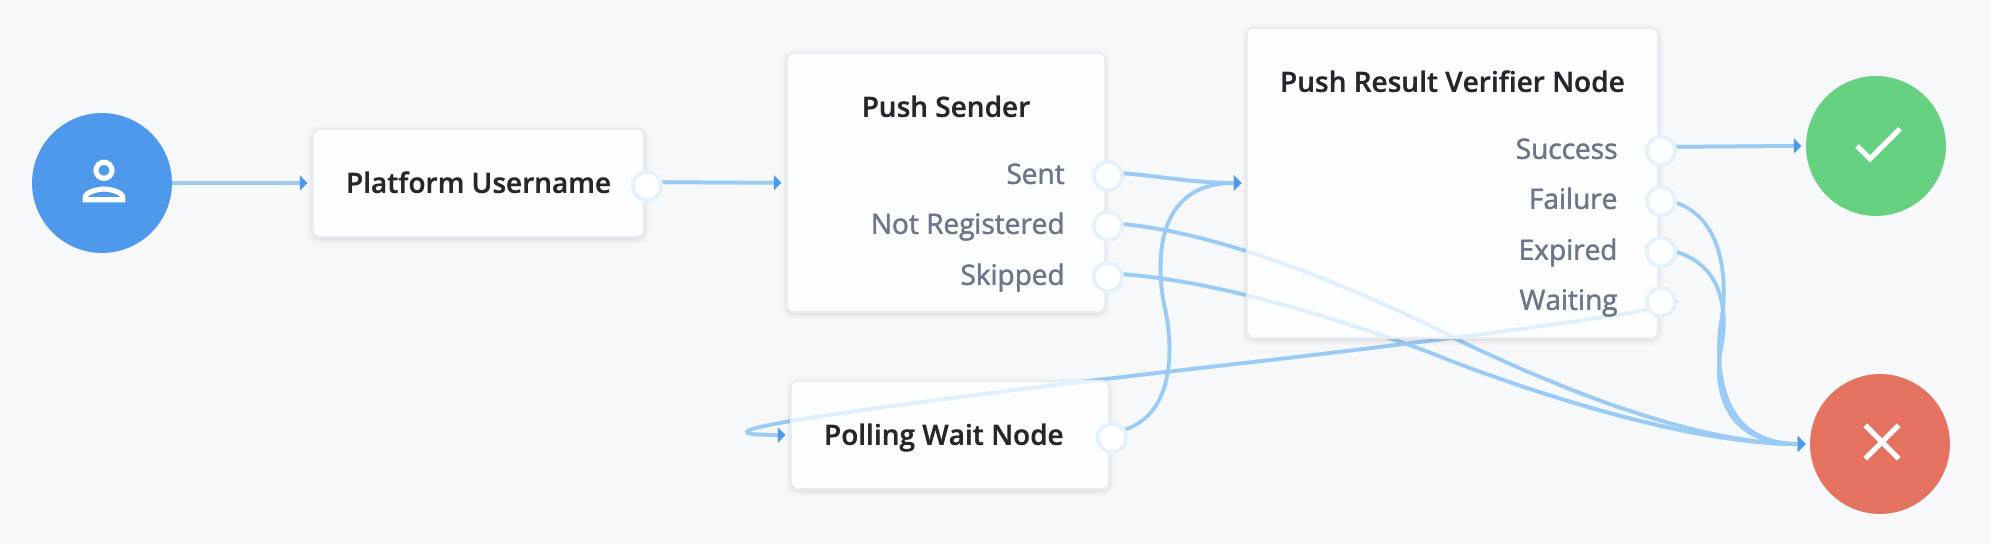
The journey uses these nodes:
For details, refer to Push authentication journeys.
-
Under Native Consoles > Access Management, go to Realms > Realm Name > Services > OAuth2 Provider > Advanced and make sure the Grant Types field includes
Back Channel Request.Save any changes you make.
-
Associate the journey with incoming
acr_values:-
Switch to the Advanced OpenID Connect tab of the OAuth 2.0 provider configuration.
-
In the OpenID Connect acr_values to Auth Chain Mapping box:
-
Set the Key to the value that will be passed in through the
acr_valuesclaim of the incoming CIBA request. -
Set the Value to the name of your journey.
-
Click Add.
-
-
Save your changes.
For more information, refer to The
acrclaim. -
Register an RP
-
In the Advanced Identity Cloud admin console, create an application owner profile and record the username and password.
-
Register the RP as a client application.
-
In the Advanced Identity Cloud admin console, go to Applications and select + Custom Application.
-
Select the sign-in method as OIDC - OpenId Connect and application type as Web.
-
Create the application with the following settings, depending on your RP:
- Name
-
<human-readable-name> - Owners
-
<application-owner> - Client ID
-
<rp-client-id>(must match theissin the RP’s signed JWTs) - Client Secret
-
<rp-client-secret>
-
Switch to the Sign On tab and under General Settings, set the scopes:
- Scopes
-
openid
profile
-
Save your changes.
-
-
Configure access to the RP’s public keys so Advanced Identity Cloud can verify JWT signatures:
-
Under Show advanced settings > Signing and Encryption, choose the Public key selector.
-
Depending on the Public key selector value you chose, set one of the other fields appropriately.
-
Save your changes.
For example:
-
Set Public key selector
JWKs_URIand Json Web Key URI to the URL where the RP publishes its keys.This method simplifies key rotation as Advanced Identity Cloud rereads the keys periodically.
-
Set Public key selector to
JWKsand set Json Web Key to a JWK set similar to the following:{ "keys": [ { "kty": "EC", "use": "sig", "crv": "P-256", "kid": "myCIBAKey", "x": "m0CkpWpZyGu-FLRLjCGBVGC7Fwm5vGt8Lm3HhYU4ylg", "y": "U8NMtO-C2c3yhu2I_ApAELttmaittfPNPQaIJxvTCHk", "alg": "ES256" } ] }jsonYou can store more than one key in the JWK set.
-
Get an auth request ID
Follow these steps as RP to get a CIBA authentication request ID:
-
Prepare a signed JWT with the required claims in the payload:
Claim Description Example acr_valuesA string identifying the mechanism for the end user to provide authorization.
"acr_values": "push"audA string or array of strings indicating the intended audience of the JWT. Must include the authorization server OAuth 2.0 endpoint.
"aud": "https://<tenant-env-fqdn>/am/oauth2"binding_messageA short (100 character max.) string message to display to the user when obtaining authorization.
For push notification, messages must:
-
Begin with a letter, number, or punctuation mark.
-
Not include line breaks or control characters.
"binding_message": "Allow ExampleBank to transfer £50 from 'Main' to 'Savings'? (EB-0246326)"expThe expiration time in seconds since January 1, 1970 UTC. An expiration time more than 30 minutes in the future causes a
JWT expiration time is unreasonableerror message."exp": 1675681183id_token_hintAn ID token identifying the principal and subject of the JWT (the end user).
Required when not using
login_hint."id_token_hint": "<id-token>"issThe unique identifier of the JWT issuer; must match the client ID in the application profile.
"iss": "myCIBAClient"login_hintA string identifying the principal and subject of the JWT (the end user).
Required when not using
id_token_hint."login_hint": "a0325ea4-9d9b-4056-931b-ab64704cc3da"scopeA string holding a space-separated list of the requested scopes; must include
openid."scope": "openid profile"For example:
{ "aud": "https://<tenant-env-fqdn>/am/oauth2/realms/root/realms/alpha", "binding_message": "Allow ExampleBank to transfer £50 from 'Main' to 'Savings'? (EB-0246326)", "acr_values": "push", "exp": 1675681183, "iss": "<rp-client-id>", "login_hint": "<end-user-id>", "scope": "openid profile" }jsonAdvanced Identity Cloud ignores keys specified in JWT headers, such as
jkuandjweand uses the keys specified in the RP profile to verify the JWT signature. -
-
Send an HTTP POST to the /oauth2/bc-authorize endpoint with the signed JWT in the payload:
$ curl \ --request POST \ --user '<rp-client-id>:<rp-client-secret>' \ --data 'request=<signed-jwt>' \ 'https://<tenant-env-fqdn>/am/oauth2/realms/root/realms/alpha/bc-authorize'bashAdvanced Identity Cloud returns a JSON object with the
auth_req_idvalue:{ "auth_req_id": "<auth-req-id>", "expires_in": 600, "interval": 2 }jsonAdvanced Identity Cloud sends a push notification with the
binding_messageto the end user.
Exchange an auth request ID for tokens
To get an access token and ID token as the RP, poll the /oauth2/access_token endpoint with HTTP POST requests having the following parameters:
-
grant_type=urn:openid:params:grant-type:ciba -
auth_req_id=<auth-req-id>
For example:
$ curl \
--request POST \
--user '<rp-client-id>:<rp-client-secret>' \
--data 'grant_type=urn:openid:params:grant-type:ciba' \
--data 'auth_req_id=<auth-req-id>' \
'https://<tenant-env-fqdn>/am/oauth2/realms/root/realms/alpha/access_token'The response depends on the end user and the polling interval:
-
After the end user has authorized the operation, Advanced Identity Cloud returns an ID token and an access token:
{
  "access_token": "<access-token>",
  "refresh_token": "<refresh-token>",
  "scope": "openid profile",
  "id_token": "<id-token>",
  "token_type": "Bearer",
  "expires_in": 3599
}
json -
Before the end user authorizes the operation, Advanced Identity Cloud returns an HTTP 400 Bad Request status:
{ "error_description": "End user has not yet been authenticated", "error": "authorization_pending" } -
The auth ID response includes a polling
interval. The RP must waitintervalseconds before retrying the request (default: two seconds). If the RP does not wait long enough between retries, Advanced Identity Cloud returns an HTTP 400 Bad Request status:{ "error_description": "The polling interval has not elapsed since the last request", "error": "slow_down" }
Additional OIDC claims
An RP can request additional claims about the end user with the access token at the /oauth2/userinfo endpoint:
$ curl \
--request GET \
--header "Authorization Bearer <access-token>" \
"https://<tenant-env-fqdn>/am/oauth2/realms/root/realms/alpha/userinfo"
{
  "name": "<end-user-display-name>",
  "family_name": "<end-user-family-name>",
  "given_name": "<end-user-given-name>",
  "sub": "<end-user-id>",
  "subname": "<end-user-id>"
}Hybrid grant
- Endpoints
OpenID Connect (OIDC) authentication using the hybrid flow lets a relying party (RP) choose when to request access and ID tokens.
The hybrid grant flow is a two-step process:
-
The RP first requests a code and tokens by setting the response type:
Response type OpenID provider (OP) returns code id_tokenAn authorization code and an ID token
code tokenAn authorization code and an access token
code token id_tokenAn authorization code, and access token, and an ID token
Advanced Identity Cloud returns the code and the requested tokens in the fragment of the redirection URL.
-
After the first request but before the authorization code expires (default: 120 seconds), the RP makes a second request to exchange the authorization code for additional tokens.
|
Follow these security recommendations when implementing the hybrid flow:
|

-
The end user wants to access services the RP provides. The RP requires an account to provide access to the services.
The end user makes a request to the RP to access their information stored at the OP.
-
To access the end user’s information at the OP, the RP needs authorization from the end user. The RP redirects the end user’s browser...
-
...to the OP.
-
The OP authenticates the end user, confirms resource access, and gathers consent if necessary.
-
On success, the OP redirects the end user to the RP.
-
The OP appends an authorization code and tokens to the URL fragment.
-
The RP stores the authorization code for future use and validates the ID token to get the subject ID.
-
With the ID token, the RP provides services to the end user.
-
Before the authorization code expires, the RP exchanges it for an access token, which the RP can use to get more information about the end user.
-
Advanced Identity Cloud returns an access token.
-
The RP sends a request to the /oauth2/userinfo endpoint with the access token for authorization.
-
If the access token is valid, the
/oauth2/userinfoendpoint returns any additional claims.The RP can use the subject ID and the additional claims to identify the end user.
Demonstrate the flow
Prepare the demonstration
Complete these steps to prepare the hybrid flow demonstration:
-
Create an application owner profile and record the username and password.
-
Register a client application.
-
In the Advanced Identity Cloud admin console, go to Applications and select + Custom Application.
-
Select the sign-in method as OIDC - OpenId Connect and application type as Web.
-
Create the application, providing the following details:
- Name
-
myClient - Owners
-
<application-owner> - Client ID
-
myClient - Client Secret
-
mySecret
-
Switch to the Sign On tab and under General Settings, set these fields to have the following values:
- Sign-in URLs
-
https://www.example.com:443/callback - Scopes
-
openid
profile - Grant Types
-
Authorization Code
Implicit
-
Click Show advanced settings and under Access, add these settings:
- Response Types
-
code id_token
code token
code token id_token
-
Under Token Lifetimes, update this setting as appropriate for your use case:
- Authorization code lifetime (seconds)
-
Default: 120
-
Save your changes.
-
-
Create an end user profile and record the username and password.
Get a code and an ID token using a browser
-
As RP, browse to the /oauth2/authorize endpoint with at least the following parameters:
-
client_id:
myClient -
response_type:
code id_token -
scope:
openid profile -
redirect_uri:
https://www.example.com:443/callback
For example:
https://<tenant-env-fqdn>/am/oauth2/realms/root/realms/alpha/authorize \ ?client_id=myClient \ &response_type=code%20id_token \ &scope=openid%20profile \ &state=abc123 \ &nonce=123abc \ &redirect_uri=https://www.example.com:443/callbackThe URL is split and spaces added for readability purposes.
The
scopeparameter is optional if default values are configured in the authorization server or the client.The
stateandnonceparameters are optional and included to protect against CSRF attacks. -
-
Sign in as the end user and grant consent if necessary.
Advanced Identity Cloud redirects to the
redirect_uri. -
Inspect the URL in the browser:
https://www.example.com:443/callback#code=<authorization-code>&id_token=<id-token>...
Get a code and an ID token using REST
-
Authenticate as the end user:
$ curl \
-i \
--request POST \
--header "Content-Type: application/json" \
--header "X-OpenAM-Username: <end-user-id>" \
--header "X-OpenAM-Password: <end-user-password>" \
--header "Accept-API-Version: resource=2.0, protocol=1.0" \
'https://<tenant-env-fqdn>/am/json/realms/root/realms/alpha/authenticate'
{
  "tokenId": "<tokenId>",
  "successUrl": "/enduser/?realm=/alpha",
  "realm": "/alpha"
}
bash -
As RP, make an HTTP POST request to the /oauth2/authorize endpoint with the following parameters:
-
scope:
openid profile -
response_type:
code id_token -
client_id:
myClient -
csrf:
<tokenId> -
redirect_uri:
https://www.example.com:443/callback -
decision:
allow
For example:
$ curl \ --dump-header - \ --request POST \ --cookie "<session-cookie-name>=<tokenId>" \ --data "scope=openid profile" \ --data "response_type=code id_token" \ --data "client_id=myClient" \ --data "csrf=<tokenId>" \ --data "redirect_uri=https://www.example.com:443/callback" \ --data "state=abc123" \ --data "nonce=123abc" \ --data "decision=allow" \ "https://<tenant-env-fqdn>/am/oauth2/realms/root/realms/alpha/authorize"bashThe URL is split and spaces added for readability purposes.
The
scopeparameter is optional if default values are configured in the authorization server or the client.The
stateandnonceparameters are optional and included to protect against CSRF attacks.Advanced Identity Cloud returns an HTTP 302 response with the code and ID token in the redirection URL fragment:
HTTP/1.1 302 Found
...
Location: https://www.example.com:443/callback#code=<authorization-code>&id_token=<id-token>...
...
http -
Exchange the code for an access token
Choose one of the following options:
-
Use the authorization code grant to exchange an authorization code for an access token.
-
Use the authorization code grant with PKCE to exchange an authorization code for an access token.
Additional OIDC claims
An RP can request additional claims about the end user with the access token at the /oauth2/userinfo endpoint:
$ curl \
--request GET \
--header "Authorization Bearer <access-token>" \
"https://<tenant-env-fqdn>/am/oauth2/realms/root/realms/alpha/userinfo"
{
  "name": "<end-user-display-name>",
  "family_name": "<end-user-family-name>",
  "given_name": "<end-user-given-name>",
  "sub": "<end-user-id>",
  "subname": "<end-user-id>"
}OIDC authenticated sessions
Logging in to the OpenID provider and obtaining tokens are established processes in the OpenID specification; however, keeping the relying party informed of the session’s validity is not as straightforward. The authenticated session in Advanced Identity Cloud is unavailable to the relying party. The only information the relying party has is the expiration time of the ID token, which might be undesirable.
To solve this problem, Advanced Identity Cloud supports the following OIDC specifications:
Session management
The OIDC session management 1.0 draft series defines a mechanism for a relying party (RP) to:
-
Get an OpenID provider (OP) to confirm whether an OIDC session is valid based on an ID token.
-
Terminate an authenticated session with the OP. For example, when the user signs out.
The process is transparent to the end user.
An RP uses a hidden <iframe> to get the session state from the OP and take action when the state changes.
Advanced Identity Cloud supports these drafts of the specification:
Each version uses different endpoints to achieve the same result.
Session management draft 10
Draft 10 does not specify any session-related endpoints. Advanced Identity Cloud’s implementation of Draft 10 depends on these endpoints:
- /oauth2/authorize
-
Retrieve session state.
- /json/sessions
-
Terminate an authenticated session.
Draft 10 flow
To check session state, create an <iframe> in your RP
whose src attribute targets the /oauth2/authorize endpoint with the required parameters.
The user-agent sends the tenant session cookie with the request.

For example, a public client RP called myClient uses the following <iframe src> URL to request session state:
https://<tenant-env-fqdn>/am/oauth2/realms/root/realms/alpha/authorize \
?client_id=myClient \
&response_type=none \
&id_token_hint=<id-token> \
&redirect_uri=https://www.example.com:443/callback \
&prompt=noneThe query string parameters include these settings:
prompt=none-
Do not display user interaction pages to the end user.
id_token_hint=<id-token>-
The ID token to validate against the authenticated session.
response_type=none-
Do not issue a token in the response.
The following table lists the responses:
| Advanced Identity Cloud responses | Request with redirect_uri |
Request without redirect_uri |
|---|---|---|
Valid session |
Redirect to |
Return HTTP 204 No Content. |
Invalid session |
Redirect to |
Return HTTP 400 Bad Request and redirect to a page that displays a message such as
|
The RP’s <iframe> and the redirect_uri page must process any errors;
for example, by redirecting the end user to sign in.
Enable draft 10 support
To enable draft 10 support for a realm, configure the OAuth 2.0 provider:
-
Under Native Consoles > Access Management, go to Realms > Realm Name > Services > OAuth2 Provider.
-
Switch to the Advanced tab and add
none|org.forgerock.oauth2.core.NoneResponseTypeHandlerto the Response Type Plugins settings. -
Save your changes.
To enable draft 10 support in the RP client profile:
-
In the Advanced Identity Cloud admin console, go to Applications > Client ID > Sign On > General Settings > Show advanced settings.
-
In Access > Response Types, add
none. -
Save your changes.
Session management draft 05
Draft 05 defines two endpoints for session management. These endpoints are no longer present in draft 10:
- /oauth2/connect/checkSession
-
Retrieve session state.
- /oauth2/connect/endSession
-
Terminate an authenticated session and redirect to a post-logout page.
Enable draft 05 support
The /oauth2/connect/checkSession endpoint serves as the check_session_iframe URL.
To enable draft 05 support in the RP client profile:
-
In the Advanced Identity Cloud admin console, go to Applications > Client ID > Sign On > General Settings > Show advanced settings.
-
In Session Management > Client Session URI, add the URL the RP uses as the
<iframe src>URL. -
Save your work.
Disable session management
By default, the Advanced Identity Cloud OP supports draft 05 without additional configuration.
To disable session management support for a realm, configure the OAuth 2.0 provider:
-
Under Native Consoles > Access Management, go to Realms > Realm Name > Services > OAuth2 Provider > Advanced OpenID Connect.
-
Clear Enable Session Management.
-
Save your changes.
This also disables backchannel logout.
Backchannel logout
OpenID Connect Back-Channel Logout 1.0 defines how an OpenID provider (OP) sends logout tokens to relying parties (RPs) when an authenticated session terminates.
With backchannel logout, the OP communicates directly with the RP, bypassing the end user’s browser. This mechanism fits when multiple RPs get ID tokens with the same authenticated session and when the end user is no longer at the RP. For each RP, the OP posts a logout token to the RP’s backchannel logout URL. The RP validates the logout token, clearing any state associated with the session, end user, and issuer, and responds to the OP with the outcome.
For each logout request,
Advanced Identity Cloud records an AM-BACK-CHANNEL-LOGOUT audit event message in the am-activity logs:
{
  "...": "...",
  "eventName": "AM-BACK-CHANNEL-LOGOUT",
  "operation": "Sent logout request to https://rp.example.com/logout, which responded with HTTP code 200."
}If the RP responds, the message indicates the HTTP status code from the response. If the request times out, the message indicates there was no response.

Limitations
Backchannel logout has the following limitations:
-
It requires server-side sessions.
-
Advanced Identity Cloud must be acting as the OP; it does not support backchannel logout when acting as an RP.
The logout token
2.4 Logout Token defines the format as a JSON Web Token (JWT) with standard claims:
{
  "aud": "backchannelConfidentialClient", (1)
  "sub": "a0325ea4-9d9b-4056-931b-ab64704cc3da", (2)
  "auditTrackingId": "cb52bc45-549d-4a9c-86cc-20d7500e333b-91288", (3)
  "iss": "https://<tenant-env-fqdn>/am/oauth2/realms/root/realms/alpha", (4)
  "cause": "CLIENT_LOGOUT", (5)
  "exp": 1731318726, (6)
  "iat": 1677065743, (7)
  "jti": "1cd8805d-6fc0-4699-a33f-a75d45b24e9e", (8)
  "events": { (9)
    "http://schemas.openid.net/event/backchannel-logout": {}
  },
  "sid": "mTNo042FCiPkgAJKjdjgCvBWvVYTB1d+zreDBnZAqvM=" (10)
}| 1 | The audience of the logout token. The RP having requested one or more ID tokens with the terminated user session. |
| 2 | The subject of the logout token; the end user whose session terminated. The logout token subject claim matches the ID token subject claim(s). |
| 3 | (Non-standard) The unique audit identifier for this token. |
| 4 | The OP issuing the logout token. |
| 5 | (Non-standard) Why the user session terminated, included only if the reason is known:
|
| 6 | The logout token expiration time. |
| 7 | The logout token creation time. |
| 8 | The logout token’s unique identifier. |
| 9 | A JSON object with a http://schemas.openid.net/event/backchannel-logout field, marking the JWT as a logout token.
The value of the field is always an empty JSON object ({}). |
| 10 | A session ID identifying the end user’s session and the RP.
The sid in the logout token matches the sid in the related ID token.
The RP can use this for cleanup.
If one RP has multiple ID tokens issued with the same authenticated session, they all share the same sid.
If multiple RPs have ID tokens issued with the same authenticated session, the sid is different for each RP.
When an authenticated session terminates, Advanced Identity Cloud posts a logout token to each RP.
The logout token includes the claim when Backchannel Logout Session Required is enabled
in the RP client profile.
ID tokens include the sid when backchannel logout is enabled for the realm (default). |
Enable backchannel logout
You configure backchannel logout in the OAuth 2.0 provider service for the realm and in the client profile of each RP.
Provider configuration
By default, the OAuth 2.0 provider supports backchannel logout without additional configuration.
You can optionally configure ID token encryption.
To disable backchannel logout support for a realm:
-
Under Native Consoles > Access Management, go to Realms > Realm Name > Services > OAuth2 Provider > Advanced OpenID Connect.
-
Clear Enable Session Management.
-
Save your changes.
This also disables <iframe>-based session management.
RP configuration
RPs registering dynamically can provide the following settings during registration. To enable backchannel logout in an RP client profile manually:
-
Under Native Consoles > Access Management, go to Realms > Realm Name > Applications > OAuth 2.0 > Clients > Client ID > OpenID Connect.
-
In the Back Channel Logout URI field, add the RP’s logout URL.
The logout URL can use an HTTP or HTTPS scheme, and may contain a port, a path, or query parameters; for example,
https://rp.example.com:8443/logout. -
If the logout token must contain the session ID (
sid), enable Backchannel Logout Session Required. -
Save your changes.
Authentication requirements
A relying party (RP) can have different authentication requirements for different protected resources. For example, a financial services provider accepts username and password authentication to create an account, but requires multi-factor authentication to download bank account statements.
Advanced Identity Cloud lets you associate requirements with authentication journeys. RPs specify the authentication requirements in their requests, and Advanced Identity Cloud uses the associations to authenticate the end user with the requested journey and honor the requirements.
Advanced Identity Cloud communicates the honored requirements by optionally returning claims in ID tokens. It uses the following standard claims:
-
An authentication context class reference (
acr) claim holds a case-sensitive string identifying the class of authentication methods or procedures the authentication process satisfied. For example, an identifier for the authentication journey the end user completed successfully. -
An authentication method references (
amr) claim holds a JSON array of strings identifying the authentication methods satisfied. For example, an indication the end user has authenticated with a username-password combination and a one-time password.
The acr claim
The acr claim holds a case-sensitive string you configure in the OAuth 2.0 provider service.
Advanced Identity Cloud maps acr keys to authentication journeys to avoid directly exposing the journey names.
Advanced Identity Cloud doesn’t add the acr claim to ID tokens by default.
The RP must request authentication contexts and Advanced Identity Cloud must authenticate the end user.
The acr claims can be voluntary or essential.
Voluntary claims
RPs request voluntary acr claims for optional authentication mechanisms to improve the user experience.
They do this in one of the following ways:
-
Specify the authentication mechanism in the
acr_valuesparameter for a request to the/oauth2/authorizeendpoint. -
Specify the authentication mechanisms in the JSON format
claimsparameter for a request to the/oauth2/authorizeendpoint. -
Rather than specifying the mechanisms in the request, rely on Default ACR values in the RP client profile.
Find the field in the Advanced Identity Cloud admin console under Applications > Client ID > Sign On > General Settings > Show advanced settings > Authentication.
The default
acrvalues are the keys of the mapping set when you Configureacrclaims. The JSON response from the /oauth2/.well-known/openid-configuration endpoint lists the keys asacr_values_supportedstrings; for example:"acr_values_supported": ["username-password"]
Any mechanisms the RP specifies in the request override the default
acrvalues.
Essential claims
RPs request essential acr claims for required authentication mechanisms.
RPs request essential acr claims by specifying the authentication mechanisms in the JSON format
claims parameter for a request to the /oauth2/authorize endpoint.
Essential claims resemble, but are unrelated to, step-up authentication.
Configure acr claims
-
Under Native Consoles > Access Management, go to Realms > Realm Name > Services > OAuth2 Provider > Advanced OpenID Connect.
-
Enable Enable "claims_parameter_supported" to let RPs request
acrclaims using theclaimsparameter. -
In the OpenID Connect acr_values to Auth Chain Mapping box, map keys to authentication journey identifiers.
The following example maps
username-passwordto the Login journey:
The acr-key mapped to the journey Advanced Identity Cloud uses to authenticate the end user becomes the value of the
acrclaim in the resulting ID token. -
Save your changes.
Request processing
When an RP requests authentication contexts, Advanced Identity Cloud initially determines the requested journey.
It uses the first context for which it has a valid mapping.
For example, if the RP requests push otp username-password
and Advanced Identity Cloud has mappings only for otp and username-password,
Advanced Identity Cloud chooses otp to authenticate the end user.
The following table describes how Advanced Identity Cloud processes the request:
| Scenario | Voluntary claims result | Essential claims result |
|---|---|---|
The end user isn’t authenticated. |
Authenticate with the requested journey. |
Authenticate with the requested journey. |
The end user is authenticated with the requested journey. |
Don’t reauthenticate. |
Reauthenticate with the requested journey. On success, delete the original session and create a new session. |
The end user is authenticated with a different journey. |
Reauthenticate with the requested journey. On success, delete the original session and create a new session. |
|
The request specifies an unmapped |
Continue the grant flow without returning an error. |
Return an error and redirect to the |
After authenticating the end user, Advanced Identity Cloud returns an ID token whose acr claim has one of the following values:
0(zero)-
The RP requested an unmapped voluntary claim.
acr-key-
The end user authenticated with the journey mapped to the acr-key.
If authentication involves more than one journey, the acr-key reflects the last mapped journey.
The amr claim
The amr claim holds an array of strings identifying families of authentication methods.
You can map an amr session property to amr values using the Set Session Properties node.
Then update the user info claims script to retrieve the amr values mapped to the amr session property.
When the end user authenticates with a journey using the node, Advanced Identity Cloud includes the amr claim in the ID token it
issues.
Configure amr claims
Configure an authentication journey
-
Update an authentication journey to include the Set Session Properties node, for example, update the
acrclaims journey. -
On the Set Session Properties node, configure a key to identify the
amrvalues, for exampleamr.As its value, enter a string to identify the authentication method satisfied. For example,
otp.Example: Configure the amr session property
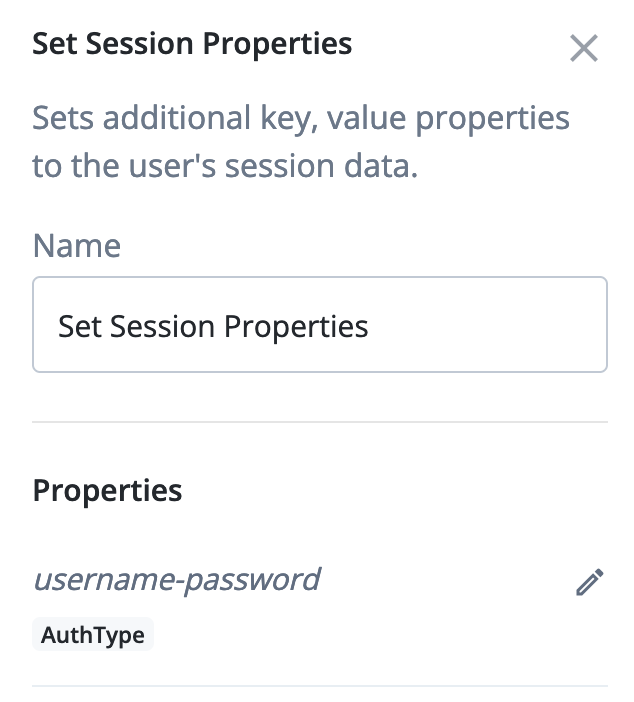
-
Save your changes.
Configure the user info claims script
This task describes how to create a new script to retrieve the amr values mapped to the amr session property.
-
In the Advanced Identity Cloud admin console, go to Scripts > Auth Scripts > + New Script, and create a new OIDC Claims script.
-
Name the script
Demo OIDC claims. -
Edit the default JavaScript as follows:
Add the
amrclaim details before thereturn computedClaims;line. For example:if (session !== null && session !== undefined) { var amrValues = [session.getProperty("amr")]; computedClaims.put("amr", amrValues) } return computedClaims;javascript -
Save your changes.
The new user info claims script is now ready to retrieve amr values mapped to the amr session property.
Allowlist the session property
Provide access to the amr session property to allow it to be output in the ID token.
-
Under Native Consoles > Access Management, select Realms > alpha > Services > Session Property Whitelist Service.
-
Add
amrto the Allowlisted Session Property Names field. -
Save your changes.
Configure the OAuth2 provider to use the user info claims script
Perform this task to set up an OAuth2 provider to use your script.
-
Configure the OAuth 2.0 provider service and ensure the following properties are set:
- OIDC Claims Plugin Type
-
SCRIPTED - OIDC Claims Script
-
Demo OIDC claims
-
Save your changes.
Configure the provider to return claims in the ID token
Perform this task to configure the OAuth2 provider to always return scope-derived claims in the ID token.
| This option is disabled by default because of the security concerns of returning claims that may contain sensitive user information. Learn more in Request claims in ID tokens. |
-
Under Native Consoles > Access Management, select Realms > alpha > Services > OAuth2 Provider > Advanced OpenID Connect.
-
Enable Always Return Claims in ID Tokens.
-
Save your changes.
Demonstrate authentication requirements
Demonstrate the process with an RP that uses the Implicit grant:
-
Create an end user profile and record the username and password.
-
Optionally configure
amrclaims. -
Configure
acrclaims to map your duplicate journey to theusername-passwordclaim.
Create an RP profile
Register a custom OIDC application with the following settings:
| Setting | Value |
|---|---|
Application Type |
Web |
Name |
|
Sign On > General Settings > Sign-in URLs |
|
Sign On > General Settings > Grant Types |
Add |
Sign On > General Settings > Scopes |
|
Request voluntary claims
-
Open a new tab in your browser.
-
Paste a URL with the
acr_valuesparameter to request voluntary claims into the new browser tab.The following URL requests an ID token with the implicit grant:
https://<tenant-env-fqdn>/am/oauth2/realms/root/realms/alpha/authorize?acr_values=username-password&client_id=myClient&response_type=id_token&scope=openid%20profile&redirect_uri=https://www.example.com:443/callback&nonce=abc123&state=123abc -
Authenticate as the end user.
Advanced Identity Cloud redirects to the application sign-in URL (
redirect_uri) with theid_tokenin the fragment. -
Extract the ID token from the sign-in URL.
-
Decode the ID token to display the
acrclaim:{ "...": "...", "acr": "username-password" }jsonThe
amrclaim is also displayed in the decoded token if you configuredamrclaims, for example:"amr": [ "otp" ],json
Request essential claims
-
Define and URL-encode the essential claims parameter value.
Essential claims requesting
username-password:{"id_token":{"acr":{"essential":true,"values":["username-password"]}}}jsonURL-encoded value:
%7B%22id_token%22%3A%7B%22acr%22%3A%7B%22essential%22%3Atrue%2C%22values%22%3A%5B%22username-password%22%5D%7D%7D%7D
-
Paste a URL with the encoded
claimsparameter to request essential claims into the new browser tab.The following URL requests an ID token with the implicit grant:
https://<tenant-env-fqdn>/am/oauth2/realms/root/realms/alpha/authorize?claims=%7B%22id_token%22%3A%7B%22acr%22%3A%7B%22essential%22%3Atrue%2C%22values%22%3A%5B%22username-password%22%5D%7D%7D%7D&client_id=myClient&response_type=id_token&scope=openid%20profile&redirect_uri=https://www.example.com:443/callback&nonce=abc123&state=123abc&prompt=loginThe
promptsetting forces the end user to authenticate explicitly regardless of any implied consent.When you request essential claims, Advanced Identity Cloud authenticates the end user again. Learn more in Request processing.
Advanced Identity Cloud redirects to the application sign-in URL (
redirect_uri) with theid_tokenin the fragment. -
Extract the ID token from the sign-in URL.
-
Decode the ID token to display the
acrclaim:{ "...": "...", "acr": "username-password" }json
GSMA Mobile Connect
GSMA Mobile Connect is an application of OpenID Connect (OIDC). It enables mobile phones to serve as authentication devices independently of the service and the device.
Mobile Connect offers a standard way for Mobile Network Operators (MNOs) to act as general-purpose identity providers. It offers a range of Levels of Assurance (LoAs) and profile data to Mobile Connect-compliant service providers.
Mobile Connect roles
In a Mobile Connect deployment, Advanced Identity Cloud can play the following roles:
- The OpenID provider
-
The provider implements the Mobile Connect Profile as part of the Service Provider (Identity Gateway interface).
The OpenID provider responds to a successful authorization request with all the required fields and the optional
expires_infield. Advanced Identity Cloud supports the mandatory ID Token properties. The relying party must use theexpires_invalue instead of specifyingmax_ageas a request parameter.Advanced Identity Cloud returns the standard
userinfoclaims and theupdated_atproperty. Theupdated_atproperty holds the time last updated as seconds since January 1, 1970 UTC. - The authenticator
-
The authenticator implements the Mobile Connect Profile as part of the Identity Gateway (Authenticators interface).
The authenticator makes users authenticate at the appropriate LoA. A service provider can request LoAs without regard to the implementation. The Identity Gateway includes a claim in the ID Token to indicate the LoA achieved.
LoA support
Advanced Identity Cloud maps LoAs to an authentication mechanism:
-
A service provider acting as a relying party requests a LoA with the
acr_valuesparameter. -
Advanced Identity Cloud returns the corresponding
acrclaim in the ID token.
LoA support:
-
1(low—little or no confidence) -
2(medium—some confidence, as in single-factor authentication) -
3(high—high confidence, as in multi-factor authentication)
LoA support does not include support for 4, which involves digital signatures.
The dtbs authorization parameter is not supported.
Configure Mobile Connect
Configure the OAuth 2.0 provider OIDC authentication context settings to return acr and amr claims in the ID tokens.
For details, refer to Authentication requirements.
Authorization parameters
You must use the authorization code grant to request ID tokens.
| Request parameter | Supported? | Description |
|---|---|---|
|
Yes |
The OpenID Connect authentication context class reference values. For details, refer to The |
|
Yes |
A unique string identifier for the application making the request. |
|
Yes |
A string value specifying the user interface display. |
|
No |
Data to be signed. LoA 4 is not supported. |
|
Yes |
A string specifying the ID used to log in. Set the |
|
Yes |
A string linking the client session with the ID token to mitigate against replay attacks. Required for Mobile Connect. |
|
Yes |
The URI to return the end user to after authorization is complete;
must match the |
|
Yes |
A string specifying the response expected from the authorization server; use |
|
Yes |
A string specifying the permissions the client application requests from the end user. Separate scopes with spaces. Required: Optional: |
|
Yes |
A string value to maintain state between the request and the callback. Required for Mobile Connect. |
ID token uses
ID tokens can also serve as session cookies and as policy subjects.
As session cookies
You can enable trusted client applications to use ID tokens as session cookies for calls to REST endpoints.
-
Clients must get the ID token with the authorization code grant flow.
-
Clients can use refresh tokens to get a new ID token, but the authenticated session lifetime still applies.
When the authenticated session expires, even a valid ID token is no longer a valid session cookie. The end user must reauthenticate to get a new authenticated session.
To enable trusted clients to use ID tokens as session cookies:
-
Under Native Consoles > Access Management, go to Realms > Realm Name > Services > OAuth2 Provider > Advanced OpenID Connect.
-
In the Authorized OIDC SSO Clients field, add the client IDs for all trusted clients.
These trusted clients act with the full authority of the end user.
-
Save your changes.
As policy subjects
An ID token can serve as a subject condition for policies validating the token’s claims.
For example, a policy can validate that the token audience belongs to a specific group of applications
by checking the aud claim to ensure it includes samplePolicySet.
Policy evaluation only validates the claims, not the ID token. Validate the ID token before making the policy evaluation request.
To configure a policy that validates claims, define a subject condition with the OpenID Connect/Jwt Claim type.
Example
The following example shows a policy evaluation request with an ID token as a session cookie and as a subject:
$ curl \
--request POST \
--header "Content-Type: application/json" \
--header "Accept-API-Version: protocol=1.0,resource=2.0" \
--header "<session-cookie-name>: <id-token>" \
--data '{
  "resources": ["https://www.example.com:8443/index.html"],
  "subject": {
    "ssoToken": "<id-token>"
  },
  "application": "samplePolicySet"
}' \
"https://<tenant-env-fqdn>/am/json/realms/root/realms/alpha/policies?_action=evaluate"OIDC 1.0 endpoints
Your applications can use the following OpenID Connect (OIDC) endpoints:
| Endpoint | Description | Advanced Identity Cloud is the... |
|---|---|---|
Retrieve information about an authenticated end user
(UserInfo endpoint);
requires a valid token with at least the |
Provider |
|
Validate an unencrypted ID token (Advanced Identity Cloud-specific endpoint). |
Provider |
|
Retrieve OpenID Connect session information (session management endpoint). |
Provider |
|
Terminate an OpenID Connect session (session management endpoint). |
Provider |
|
Register, read, or delete a client profile (dynamic client registration endpoint) |
Provider |
|
Let a client application discover the OpenID provider URL of an end user (WebFinger discovery endpoint). |
Provider |
|
Let a relying party discover the OpenID provider configuration. |
Provider |
|
Retrieve the OpenID provider’s public keys to verify client-side token signatures or to encrypt OIDC JWTs in requests. |
Provider |
|
Retrieve Advanced Identity Cloud client public keys for providers to encrypt ID tokens and verify signatures. |
Relying party |
Many OAuth 2.0 endpoints also support OIDC. For reference documentation, refer to:
/oauth2/userinfo
The /oauth2/userinfo endpoint is the OpenID Connect (OIDC)
UserInfo endpoint.
Use this endpoint to request claims about the authenticated end user.
Specify the realm in the request URL; for example:
https://<tenant-env-fqdn>/am/oauth2/realms/root/realms/alpha/userinfoTo access the endpoint, use an access token from an OIDC grant flow as the bearer token. The endpoint returns claims based on the scopes granted for the access token as in the following example:
$ curl \
--request GET \
--header "Authorization: Bearer <access-token>" \
"https://<tenant-env-fqdn>/am/oauth2/realms/root/realms/alpha/userinfo"
{
  "name": "Babs Jensen",
  "family_name": "Jensen",
  "given_name": "Babs",
  "sub": "a0325ea4-9d9b-4056-931b-ab64704cc3da",
  "subname": "a0325ea4-9d9b-4056-931b-ab64704cc3da"
}Response signing and encryption
The default response is a plain JSON object.
Advanced Identity Cloud also supports responding with a signed JSON Web Token (JWT) or signed and encrypted JWT.
JWT responses include the aud and iss claims.
To enable signing and encryption, follow these steps:
-
In the Advanced Identity Cloud admin console, go to Applications > Client ID > Sign On > General Settings > Show advanced settings > Endpoint Response Formats and select the response type in the User info response format drop-down list.
-
Save your work.
Configure signing and encryption under Native Consoles > Access Management:
-
To add settings for a single client application, go to Realms > Realm Name > Applications > OAuth 2.0 > Clients > Client ID > Signing and Encryption and configure the following properties:
- User info signed response algorithm
-
No default
- User info encrypted response algorithm
-
No default
- User info encrypted response encryption algorithm
-
Default:
A128CBC-HS256
-
To restrict the possible settings for the clients in the realm, edit the settings under Realms > Realm Name > Services > OAuth2 Provider > Advanced OpenID Connect.
-
Save your work.
For details, refer to the OAuth 2.0 provider reference documentation for advanced OIDC settings.
/oauth2/idtokeninfo
The /oauth2/idtokeninfo endpoint is an Advanced Identity Cloud-specific endpoint.
Use this endpoint to validate unencrypted ID tokens and to retrieve claims in the token.
Specify the realm in the request URL; for example:
https://<tenant-env-fqdn>/am/oauth2/realms/root/realms/alpha/idtokeninfoSupported parameters
The ID token information endpoint supports the following parameters:
| Parameter | Description | Required |
|---|---|---|
|
Comma-separated list of claims to return from the ID token. |
Yes |
A signed JSON Web Token (JWT) to use as client credentials. |
Yes, for JWT profile authentication |
|
The type of assertion, |
Yes, for JWT profile authentication |
|
Uniquely identifies the application making the request. |
Yes, when authentication is required (default) |
|
The password for a confidential client. |
Yes, when authenticating with Form parameters (HTTP POST) |
|
|
The ID token to validate. |
Yes |
By default, the client must authenticate to use the endpoint. Optionally disable this in the OAuth 2.0 provider configuration. Under Native Consoles > Access Management, go to Realms > Realm Name > Services > OAuth2 Provider > Advanced OpenID Connect and disable Idtokeninfo Endpoint Requires Client Authentication.
Token validation
Advanced Identity Cloud validates the tokens based on rules in the OpenID Connect Core specification. Token validation includes the following steps:
-
Extract the first
aud(audience) claim from the ID token.This step depends on the
client_idparameter to identify the client and validate theaudclaim. -
Extract the
realmclaim, if present, and use it to look up the client profile.Validation returns an error if no client profile exists.
-
Verify the signature of the ID token.
This validation step depends on these client profile settings:
ID Token Signing Algorithm (default:
RS256)
Public key selector (default:JWKs_URI) -
Verify the following claims:
aud(audience)
exp(expiration)
iat(issued at)
iss(issuer)
nbf(not before, if set)
This endpoint does not check whether the ID token was revoked with the /oauth2/connect/endSession endpoint.
Examples
The following example returns all ID token claims:
$ curl \
--request POST \
--user myClient:mySecret \
--data 'id_token=id-token' \
"https://<tenant-env-fqdn>/am/oauth2/idtokeninfo"
{
  "at_hash": "PZg5xZsIlFtRSfg8MAWhWg",
  "sub": "a0325ea4-9d9b-4056-931b-ab64704cc3da",
  "auditTrackingId": "2e5c7611-4a61-4001-8739-f714d43e9da2-881454",
  "subname": "a0325ea4-9d9b-4056-931b-ab64704cc3da",
  "iss": "https://<tenant-env-fqdn>/am/oauth2/realms/root/realms/alpha",
  "tokenName": "id_token",
  "given_name": "Babs",
  "sid": "+buKyDp+Fbc0/Rkd0OqsfdKy7ZY0nWvcsEetikX+eTc=",
  "aud": "myClient",
  "c_hash": "FP5Nj162jgycmtEeRjVQ-A",
  "acr": "0",
  "org.forgerock.openidconnect.ops": "gkQOcZ1F3ZFdYPd6TiGIgr6scH0",
  "s_hash": "bKE9UspwyIPg8LsQHkJaiQ",
  "azp": "myClient",
  "auth_time": 1676360741,
  "name": "Babs Jensen",
  "realm": "/alpha",
  "exp": 1676364398,
  "tokenType": "JWTToken",
  "iat": 1676360798,
  "family_name": "Jensen"
}Use the optional claims parameter to return specific claims as in the following example:
$ curl \
--request POST \
--user myClient:mySecret \
--data 'id_token=id-token' \
--data 'claims=sub,exp,realm' \
"https://<tenant-env-fqdn>/am/oauth2/idtokeninfo"
{
  "sub": "a0325ea4-9d9b-4056-931b-ab64704cc3da",
  "exp": 1676364398,
  "realm": "/alpha"
}If you request a claim that does not exist, no error occurs; Advanced Identity Cloud omits the claim from the response.
/oauth2/connect/checkSession
The /oauth2/connect/checkSession endpoint is defined in
OpenID Connect Session Management 1.0 - draft 5.
A relying party client creates an invisible iframe
with the URL to the endpoint as the src attribute of the iframe tag.
Use the endpoint to accept HTML5 postMessage requests from the iframe,
and to generate postMessage requests to the iframe with the end user’s login status.
For details on checking session state, refer to Session management.
Do not specify the realm in the request URL; for example:
https://<tenant-env-fqdn>/am/oauth2/connect/checkSession/oauth2/connect/endSession
The /oauth2/connect/endSession endpoint is defined in
OpenID Connect Session Management 1.0 - draft 5.
Use this endpoint to terminate authenticated sessions. Learn more in Session management.
To find the URL for this endpoint, read the end_session_endpoint field of the
well-known configuration endpoint for the realm:
$ curl https://<tenant-env-fqdn>/am/oauth2/realms/root/realms/alpha/.well-known/openid-configuration
{
  "...": "...",
  "end_session_endpoint": "https://<tenant-env-fqdn>/am/oauth2/realms/root/realms/alpha/connect/endSession",
  "...": "..."
}Supported parameters
The end session endpoint supports the following query parameters:
| Parameter | Description | Required |
|---|---|---|
Uniquely identifies the application making the request. This parameter is not compliant with the specification. |
Yes, when the ID token is encrypted |
|
Previously issued ID token identifying the authenticated session. |
Yes |
|
|
Redirect to this URI after logout. This must match one of the values in the Sign-out URLs setting of the client profile. By default, this profile setting is empty. To update the setting in the Advanced Identity Cloud admin console, go to Applications > Client ID > Sign On. |
No |
The post_logout_redirect_uri parameter determines the result on successful logout:
-
If included, Advanced Identity Cloud redirects to the specified location.
-
If omitted, Advanced Identity Cloud returns HTTP 204 No Content to indicate the end user logged out.
Example
Advanced Identity Cloud deletes the authenticated session when the user successfully logs out and is redirected to the post logout URL:
$ curl \
--dump-header - \
--request GET \
'https://<tenant-env-fqdn>/am/oauth2/realms/root/realms/alpha/connect/endSession?id_token_hint=id-token&post_logout_redirect_uri=https://www.example.com/signout'
HTTP/2 302
...
location: https://www.example.com/signout
content-length: 0
.../oauth2/register
The /oauth2/register endpoint is defined in:
Use this endpoint to create, read, update, and delete client application profiles.
Specify the realm in the request URL; for example:
https://<tenant-env-fqdn>/am/oauth2/realms/root/realms/alpha/registerThe endpoint supports the following HTTP methods:
POST-
Create a client profile.
GET-
Read a client profile.
PUT-
Update a client profile.
DELETE-
Delete a client profile.
Advanced Identity Cloud requires configuration to allow dynamic registration. For details, refer to Dynamic client registration.
/.well-known/webfinger
The /.well-known/webfinger endpoint is described in
OpenID Connect Discovery 1.0 incorporating errata set 1.
Use it to discover the OpenID provider for an end user.
Do not specify the realm in the request URL; for example:
https://<tenant-env-fqdn>/am/.well-known/webfingerThis endpoint is disabled by default. For details, refer to OIDC discovery.
Supported parameters
The discovery endpoint supports the following parameters:
| Parameter | Description | Required |
|---|---|---|
|
The Advanced Identity Cloud realm to query for the user profile. |
No |
|
The URI identifying the type of service. |
Yes; use |
|
The URL-encoded subject of the request.; one of:
The The |
Yes |
Example
$ curl \
'https://<tenant-env-fqdn>/am/.well-known/webfinger?resource=acct%3Abjensen%40example.com&rel=http%3A%2F%2Fopenid.net%2Fspecs%2Fconnect%2F1.0%2Fissuer'
{
  "subject": "acct:bjensen@example.com",
  "links": [{
    "rel": "http://openid.net/specs/connect/1.0/issuer",
    "href": "https://<tenant-env-fqdn>/am/oauth2/realms/root/realms/alpha"
  }]
}/oauth2/.well-known/openid-configuration
The OpenID provider configuration endpoint is defined in OpenID Connect Discovery 1.0.
Use this to discover the provider settings. For details, refer to OIDC discovery.
Specify the realm in the request URL; for example:
$ curl https://<tenant-env-fqdn>/am/oauth2/realms/root/realms/alpha/.well-known/openid-configurationShow output
{
  "request_parameter_supported": true,
  "pushed_authorization_request_endpoint": "https://<tenant-env-fqdn>/am/oauth2/realms/root/realms/alpha/par",
  "introspection_encryption_alg_values_supported": ["ECDH-ES+A256KW", "ECDH-ES+A192KW", "RSA-OAEP", "ECDH-ES+A128KW", "RSA-OAEP-256", "A128KW", "A256KW", "ECDH-ES", "dir", "A192KW"],
  "claims_parameter_supported": false,
  "introspection_endpoint": "https://<tenant-env-fqdn>/am/oauth2/realms/root/realms/alpha/introspect",
  "issuer": "https://<tenant-env-fqdn>/am/oauth2/realms/root/realms/alpha",
  "id_token_encryption_enc_values_supported": ["A256GCM", "A192GCM", "A128GCM", "A128CBC-HS256", "A192CBC-HS384", "A256CBC-HS512"],
  "userinfo_encryption_enc_values_supported": ["A256GCM", "A192GCM", "A128GCM", "A128CBC-HS256", "A192CBC-HS384", "A256CBC-HS512"],
  "authorization_endpoint": "https://<tenant-env-fqdn>/am/oauth2/realms/root/realms/alpha/authorize",
  "authorization_encryption_alg_values_supported": ["ECDH-ES+A256KW", "ECDH-ES+A192KW", "RSA-OAEP", "ECDH-ES+A128KW", "RSA-OAEP-256", "A128KW", "A256KW", "ECDH-ES", "dir", "A192KW"],
  "introspection_encryption_enc_values_supported": ["A256GCM", "A192GCM", "A128GCM", "A128CBC-HS256", "A192CBC-HS384", "A256CBC-HS512"],
  "claims_supported": [],
  "rcs_request_signing_alg_values_supported": ["PS384", "ES384", "RS384", "HS256", "HS512", "ES256", "RS256", "HS384", "ES512", "PS256", "PS512", "RS512"],
  "token_endpoint_auth_methods_supported": ["client_secret_post", "private_key_jwt", "self_signed_tls_client_auth", "tls_client_auth", "none", "client_secret_basic"],
  "tls_client_certificate_bound_access_tokens": true,
  "response_modes_supported": ["fragment", "jwt", "form_post.jwt", "form_post", "fragment.jwt", "query", "query.jwt"],
  "backchannel_logout_session_supported": true,
  "token_endpoint": "https://<tenant-env-fqdn>/am/oauth2/realms/root/realms/alpha/access_token",
  "response_types_supported": ["code token id_token", "code", "code id_token", "device_code", "id_token", "code token", "token", "token id_token"],
  "authorization_encryption_enc_values_supported": ["A256GCM", "A192GCM", "A128GCM", "A128CBC-HS256", "A192CBC-HS384", "A256CBC-HS512"],
  "revocation_endpoint_auth_methods_supported": ["client_secret_post", "private_key_jwt", "self_signed_tls_client_auth", "tls_client_auth", "none", "client_secret_basic"],
  "request_uri_parameter_supported": true,
  "grant_types_supported": ["implicit", "urn:ietf:params:oauth:grant-type:saml2-bearer", "refresh_token", "password", "client_credentials", "urn:ietf:params:oauth:grant-type:device_code", "authorization_code", "urn:openid:params:grant-type:ciba", "urn:ietf:params:oauth:grant-type:uma-ticket", "urn:ietf:params:oauth:grant-type:jwt-bearer"],
  "version": "3.0",
  "userinfo_endpoint": "https://<tenant-env-fqdn>/am/oauth2/realms/root/realms/alpha/userinfo",
  "require_request_uri_registration": true,
  "code_challenge_methods_supported": ["plain", "S256"],
  "id_token_encryption_alg_values_supported": ["ECDH-ES+A256KW", "ECDH-ES+A192KW", "RSA-OAEP", "ECDH-ES+A128KW", "RSA-OAEP-256", "A128KW", "A256KW", "ECDH-ES", "dir", "A192KW"],
  "authorization_signing_alg_values_supported": ["PS384", "RS384", "EdDSA", "ES384", "HS256", "HS512", "ES256", "RS256", "HS384", "ES512", "PS256", "PS512", "RS512"],
  "request_object_signing_alg_values_supported": ["PS384", "ES384", "RS384", "HS256", "HS512", "ES256", "RS256", "HS384", "ES512", "PS256", "PS512", "RS512"],
  "request_object_encryption_alg_values_supported": ["ECDH-ES+A256KW", "ECDH-ES+A192KW", "ECDH-ES+A128KW", "RSA-OAEP", "RSA-OAEP-256", "A128KW", "A256KW", "ECDH-ES", "dir", "A192KW"],
  "rcs_response_signing_alg_values_supported": ["PS384", "ES384", "RS384", "HS256", "HS512", "ES256", "RS256", "HS384", "ES512", "PS256", "PS512", "RS512"],
  "introspection_signing_alg_values_supported": ["PS384", "RS384", "EdDSA", "ES384", "HS256", "HS512", "ES256", "RS256", "HS384", "ES512", "PS256", "PS512", "RS512"],
  "check_session_iframe": "https://<tenant-env-fqdn>/am/oauth2/realms/root/realms/alpha/connect/checkSession",
  "scopes_supported": ["address", "phone", "openid", "profile", "fr:idm:*", "am-introspect-all-tokens", "email"],
  "backchannel_logout_supported": true,
  "acr_values_supported": [],
  "request_object_encryption_enc_values_supported": ["A256GCM", "A192GCM", "A128GCM", "A128CBC-HS256", "A192CBC-HS384", "A256CBC-HS512"],
  "rcs_request_encryption_alg_values_supported": ["ECDH-ES+A256KW", "ECDH-ES+A192KW", "RSA-OAEP", "ECDH-ES+A128KW", "RSA-OAEP-256", "A128KW", "A256KW", "ECDH-ES", "dir", "A192KW"],
  "userinfo_signing_alg_values_supported": ["ES384", "HS256", "HS512", "ES256", "RS256", "HS384", "ES512"],
  "require_pushed_authorization_requests": false,
  "rcs_response_encryption_enc_values_supported": ["A256GCM", "A192GCM", "A128GCM", "A128CBC-HS256", "A192CBC-HS384", "A256CBC-HS512"],
  "userinfo_encryption_alg_values_supported": ["ECDH-ES+A256KW", "ECDH-ES+A192KW", "RSA-OAEP", "ECDH-ES+A128KW", "RSA-OAEP-256", "A128KW", "A256KW", "ECDH-ES", "dir", "A192KW"],
  "end_session_endpoint": "https://<tenant-env-fqdn>/am/oauth2/realms/root/realms/alpha/connect/endSession",
  "rcs_request_encryption_enc_values_supported": ["A256GCM", "A192GCM", "A128GCM", "A128CBC-HS256", "A192CBC-HS384", "A256CBC-HS512"],
  "revocation_endpoint": "https://<tenant-env-fqdn>/am/oauth2/realms/root/realms/alpha/token/revoke",
  "rcs_response_encryption_alg_values_supported": ["ECDH-ES+A256KW", "ECDH-ES+A192KW", "ECDH-ES+A128KW", "RSA-OAEP", "RSA-OAEP-256", "A128KW", "A256KW", "ECDH-ES", "dir", "A192KW"],
  "token_endpoint_auth_signing_alg_values_supported": ["PS384", "ES384", "RS384", "HS256", "HS512", "ES256", "RS256", "HS384", "ES512", "PS256", "PS512", "RS512"],
  "jwks_uri": "https://<tenant-env-fqdn>/am/oauth2/realms/root/realms/alpha/connect/jwk_uri",
  "subject_types_supported": ["public", "pairwise"],
  "id_token_signing_alg_values_supported": ["PS384", "ES384", "RS384", "HS256", "HS512", "ES256", "RS256", "HS384", "ES512", "PS256", "PS512", "RS512"],
  "registration_endpoint": "https://<tenant-env-fqdn>/am/oauth2/realms/root/realms/alpha/register"
}/oauth2/connect/jwk_uri
This endpoint is defined in OpenID Connect Discovery 1.0.
Use it to get the OpenID provider’s public keys as a JSON Web Key (JWK) document.
Public keys are for asymmetric encryption. Symmetric key algorithms, such as direct encryption
and AES key wrapping encryption, use the client secret, and HMAC-based algorithms use the
secret mapped to the am.services.oauth2.stateless.signing.HMAC label. Clients
don’t need to check the JWK URI endpoint for these algorithms.
Use the public keys to:
-
Verify client-side token and ID token signatures.
-
Encrypt JWTs in requests to the OpenID provider.
Get the public keys
-
Find the JWK URI for the realm:
$ curl https://<tenant-env-fqdn>/am/oauth2/realms/root/realms/alpha/.well-known/openid-configuration { "...": "...", "jwks_uri": "https://<tenant-env-fqdn>/am/oauth2/realms/root/realms/alpha/connect/jwk_uri", "...": "..." }bashYou can configure this URL under Native Consoles > Access Management for environments that centralize secrets. Go to Realms > Realm Name > Services > OAuth2 Provider > Advanced OpenID Connect and refer to the Remote JSON Web Key URL setting.
-
Get the JWK document from the URL:
$ curl https://<tenant-env-fqdn>/am/oauth2/realms/root/realms/alpha/connect/jwk_uribashShow output
{
  "keys": [{
    "kty": "RSA",
    "kid": "MYv/TlhD38w0GVgX3sohEWb6th0=",
    "use": "sig",
    "x5t": "k9hH5MSeIX4uJel1Fm9sCj3dzL4",
    "x5c": ["MIIDXzCCAkegAwIBAgIEQd+MMTANBgkqhkiG9w0BAQsFADBgMQswCQYDVQQGEwJVSzEQMA4GA1UECBMHQnJpc3RvbDEQMA4GA1UEBxMHQnJpc3RvbDESMBAGA1UEChMJRm9yZ2VSb2NrMRkwFwYDVQQDExByc2Fqd3RzaWduaW5na2V5MB4XDTIzMDExOTEyMjgyOVoXDTMzMDExNjEyMjgyOVowYDELMAkGA1UEBhMCVUsxEDAOBgNVBAgTB0JyaXN0b2wxEDAOBgNVBAcTB0JyaXN0b2wxEjAQBgNVBAoTCUZvcmdlUm9jazEZMBcGA1UEAxMQcnNhand0c2lnbmluZ2tleTCCASIwDQYJKoZIhvcNAQEBBQADggEPADCCAQoCggEBAJJQEAULAN7o/KE5Z5UYdYx/ygiEZBFidklr4UsZM3kePNvtCj07sGWQN1+z0vKQhdY+SCZoamCvUEGWZWyd0vJ8nCLBkNBJ33IFyDCsNMUlV9dEG+POYCrZ3TIshacyRBd7P/BJnTkdMItDrHHBD3l0xuDMKg+9AYJ0VN5AQXo7QJeLaEF1y0zu7C7CcjWgNjcaeZv6xgHzIt8ymKhd16zYXNIQBEvTWogHpBSpgTJcfUSymwAsTzrp+58ajqoTqQVRVr5I7rm3UiSnbZhU6Jo3H9QTZmIfAcDachTPHoG+nv7C+P7wK3EekJZ73Ur9CFjdIoS39fsLWth+LVLOTC8CAwEAAaMhMB8wHQYDVR0OBBYEFOGC/Ohfg0Cm5zVeQimMP3De6ZUbMA0GCSqGSIb3DQEBCwUAA4IBAQCNBeB9lpisaYBQdt3cM9F1PeA99llbqPVLpiZOOhSX+iPMjfijhr7Y/f23YRMRiLVSTuMzJrNCX2CZhUqBCF8TkbWz4/ahyEKJ3VbdJOde3LfZqzw0Jjh3fnWqOa2L0IehvKd4F+m7iRpZ8T6bYaKMU/t0TLQraOiO3w7zKLY1AlQxlXq4yMVqCuwvpAEF/eT7sKrjR8fE7o8NMnpU/Kc7hxi1GiUZHyqSBKKpAYRlJnDgc0+4jw/UUZW4fK0xcnHlZMntAGevTIMQ+r9GrRZAB2L3gqnlyBp1DIQnnm71wZk4AtpNm5xAS7rETdUlqkFn+LjoR+oIogI9RG25/wir"],
    "n": "klAQBQsA3uj8oTlnlRh1jH_KCIRkEWJ2SWvhSxkzeR482-0KPTuwZZA3X7PS8pCF1j5IJmhqYK9QQZZlbJ3S8nycIsGQ0EnfcgXIMKw0xSVX10Qb485gKtndMiyFpzJEF3s_8EmdOR0wi0OsccEPeXTG4MwqD70BgnRU3kBBejtAl4toQXXLTO7sLsJyNaA2Nxp5m_rGAfMi3zKYqF3XrNhc0hAES9NaiAekFKmBMlx9RLKbACxPOun7nxqOqhOpBVFWvkjuubdSJKdtmFTomjcf1BNmYh8BwNpyFM8egb6e_sL4_vArcR6QlnvdSv0IWN0ihLf1-wta2H4tUs5MLw",
    "e": "AQAB"
  }, {
    "kty": "RSA",
    "kid": "DrIvwoQHwRVcHHRFbSL9ZmhzjyU=",
    "use": "sig",
    "x5t": "fbzc7G87EHyhLjU-2y9Dpe_kN64",
    "x5c": ["MIIDZzCCAk+gAwIBAgIEO1Q8YDANBgkqhkiG9w0BAQsFADBkMQswCQYDVQQGEwJVSzEQMA4GA1UECBMHQnJpc3RvbDEQMA4GA1UEBxMHQnJpc3RvbDESMBAGA1UEChMJRm9yZ2VSb2NrMR0wGwYDVQQDExRyb290cnNhand0c2lnbmluZ2tleTAeFw0yMzAxMTkxMjI4MzdaFw0zMzAxMTYxMjI4MzdaMGQxCzAJBgNVBAYTAlVLMRAwDgYDVQQIEwdCcmlzdG9sMRAwDgYDVQQHEwdCcmlzdG9sMRIwEAYDVQQKEwlGb3JnZVJvY2sxHTAbBgNVBAMTFHJvb3Ryc2Fqd3RzaWduaW5na2V5MIIBIjANBgkqhkiG9w0BAQEFAAOCAQ8AMIIBCgKCAQEAoLZ/A+akMJya3gKesHQNYP80rd8zSY6bpXqyMiWruTtnZ46KzWva1TlT384G0OvufMlILsx7j+/0uzkn9QwIb9RGYsJBy5zM+kS8N4m2qesoCBjWPFVqHqh/aCs4T2P78JvRyNq3hZ6lKJBgbsjzZNbFBxIReXjdJjSb85Wzivxn+bvVIrxUWHmeOznBR4yc5qeHEHef/l+ohD0mTn5dfsGJAXHNUpnqumvODQIU44BCnjpESoPauXGmkUKvJEQNFsTpA/npNHQHaHFQ5ZG/qjYBIo+LIX1TByZDo2Wsy/SkkXRnirUAZAZBRvg9NnLhk1gW0rCmK/hiQUfnjGORzQIDAQABoyEwHzAdBgNVHQ4EFgQUYfATQgXWdJzrvZqUzYhSZ31GEigwDQYJKoZIhvcNAQELBQADggEBAC92yt/0VP2jYXlSnNxSUAOyi7CwpwRXvkaPLgoDtNcuLHcQ8gcDpf8KjfLgc/cntBQAx3GBzAmtZmWBLRezioZMpcOtHyr+QC+TAtXwgM9t0LJZs1d0G8DOlgutItUIj5XRGfdedWOfFTbZpcqPxyTrDMN/TJ2+vMTxeLNiknxXMxIfUhMPJxRGCouppjeS1iMScNEHz4+zLdZUUngVwDvyB7qiqCHVcga8Mjy0S/weSnhwygL9tIB2yMLP9SR/R6Levy7FlMN5PUo0OzosAXgW+T5sGdXNV1AEOm47CDPm18sKsFCfTE+bS7ocUDka9y1XUNOMF/5l8f3EdyeTuUU="],
    "n": "oLZ_A-akMJya3gKesHQNYP80rd8zSY6bpXqyMiWruTtnZ46KzWva1TlT384G0OvufMlILsx7j-_0uzkn9QwIb9RGYsJBy5zM-kS8N4m2qesoCBjWPFVqHqh_aCs4T2P78JvRyNq3hZ6lKJBgbsjzZNbFBxIReXjdJjSb85Wzivxn-bvVIrxUWHmeOznBR4yc5qeHEHef_l-ohD0mTn5dfsGJAXHNUpnqumvODQIU44BCnjpESoPauXGmkUKvJEQNFsTpA_npNHQHaHFQ5ZG_qjYBIo-LIX1TByZDo2Wsy_SkkXRnirUAZAZBRvg9NnLhk1gW0rCmK_hiQUfnjGORzQ",
    "e": "AQAB"
  }, {
    "kty": "EC",
    "kid": "s7OzLXANBDUW8Myo0I1yQeCcuAc=",
    "use": "sig",
    "x5t": "CtmuzY0XUHBnGM7DAkY20Jgs9RU",
    "x5c": ["MIIByTCCAW2gAwIBAgIERJnPgjAMBggqhkjOPQQDAgUAMFkxCzAJBgNVBAYTAlVLMRAwDgYDVQQIEwdCcmlzdG9sMRAwDgYDVQQHEwdCcmlzdG9sMRIwEAYDVQQKEwlGb3JnZVJvY2sxEjAQBgNVBAMTCXJvb3RlczI1NjAeFw0yMzAxMTkxMjI4MzhaFw0zMzAxMTYxMjI4MzhaMFkxCzAJBgNVBAYTAlVLMRAwDgYDVQQIEwdCcmlzdG9sMRAwDgYDVQQHEwdCcmlzdG9sMRIwEAYDVQQKEwlGb3JnZVJvY2sxEjAQBgNVBAMTCXJvb3RlczI1NjBZMBMGByqGSM49AgEGCCqGSM49AwEHA0IABDV9wD5qzexs4+d9V6lCpr2125aa0sBBKSI0rOke5qH59jjNumIqdE3Jkl1JD3Z7+T97Ks9yLpOGdMyuDGD7Lw2jITAfMB0GA1UdDgQWBBQgb74nT1QSaZTfNEcP+V9HtwvecTAMBggqhkjOPQQDAgUAA0gAMEUCIDFIRiNz/MYoiTt6ekzhJkfcTqoxGaI3KSXdi4kpe/CKAiEAmHH3RmJvvzDU2wL3gfmz6Dbh/z12dM2pHuKfx5Oxng8="],
    "x": "NX3APmrN7Gzj531XqUKmvbXblprSwEEpIjSs6R7mofk",
    "y": "9jjNumIqdE3Jkl1JD3Z7-T97Ks9yLpOGdMyuDGD7Lw0",
    "crv": "P-256"
  }, {
    "kty": "EC",
    "kid": "Vk1FaV5otMm1mCT0KV11xT8FcOE=",
    "use": "sig",
    "x5t": "-rTXPQRN3T911Ptndy0mEYzIiUM",
    "x5c": ["MIIByjCCAW2gAwIBAgIELtQUtjAMBggqhkjOPQQDAgUAMFkxCzAJBgNVBAYTAlVLMRAwDgYDVQQIEwdCcmlzdG9sMRAwDgYDVQQHEwdCcmlzdG9sMRIwEAYDVQQKEwlGb3JnZVJvY2sxEjAQBgNVBAMTCWVzMjU2dGVzdDAeFw0yMzAxMTkxMjI4MzNaFw0zMzAxMTYxMjI4MzNaMFkxCzAJBgNVBAYTAlVLMRAwDgYDVQQIEwdCcmlzdG9sMRAwDgYDVQQHEwdCcmlzdG9sMRIwEAYDVQQKEwlGb3JnZVJvY2sxEjAQBgNVBAMTCWVzMjU2dGVzdDBZMBMGByqGSM49AgEGCCqGSM49AwEHA0IABIN/4K0xJ9/pbB4c9FrFaof+Qn3LB0FSk+HX74QlZCQV56HVQX/EKYybQ6Obxh3u+2d6nXtZaefT3i8wr2eHXQejITAfMB0GA1UdDgQWBBRldniKHv9Iw5blbdv83JwG4PVUJDAMBggqhkjOPQQDAgUAA0kAMEYCIQCjr6KY7x8UCC64WFUPI/aP29fVRxU+eAr3NEcfjhcLFwIhAJJN84FQ1zfwv3OWTO8LgGVRs1vnJk+KnFqNiCR78TKF"],
    "x": "g3_grTEn3-lsHhz0WsVqh_5CfcsHQVKT4dfvhCVkJBU",
    "y": "56HVQX_EKYybQ6Obxh3u-2d6nXtZaefT3i8wr2eHXQc",
    "crv": "P-256"
  }, {
    "kty": "EC",
    "kid": "zNgTfu5cYR6ZSbHLPGvukpGxwcY=",
    "use": "sig",
    "x5t": "AgVJFiiEJ_mvdlHua8ln7GdsvFc",
    "x5c": ["MIICBzCCAYqgAwIBAgIELvvnwTAMBggqhkjOPQQDAgUAMFkxCzAJBgNVBAYTAlVLMRAwDgYDVQQIEwdCcmlzdG9sMRAwDgYDVQQHEwdCcmlzdG9sMRIwEAYDVQQKEwlGb3JnZVJvY2sxEjAQBgNVBAMTCXJvb3RlczM4NDAeFw0yMzAxMTkxMjI4MzhaFw0zMzAxMTYxMjI4MzhaMFkxCzAJBgNVBAYTAlVLMRAwDgYDVQQIEwdCcmlzdG9sMRAwDgYDVQQHEwdCcmlzdG9sMRIwEAYDVQQKEwlGb3JnZVJvY2sxEjAQBgNVBAMTCXJvb3RlczM4NDB2MBAGByqGSM49AgEGBSuBBAAiA2IABN6cQkzM/6Os4RyVhYkbDi0jxdWxArduHofBvBylM9WZDhz5/U8bTXj6UhiRhdK04rLxmHlC7MUEZqAMsfh946mHzYEYO/nx9d3D1UNnVOaQLZljHAAhPgvekGw5IsE/m6MhMB8wHQYDVR0OBBYEFNaDy6uHT0Ibd4LXw2u0vpIjQ7IBMAwGCCqGSM49BAMCBQADaQAwZgIxAJ/1IPrcke2l3syjXfNQ29/6RGDGXcUrHrJZlVdukyz4agFmN45Tu8W9bSy0FRDLSwIxAMrJ8qPxXnEaByOo/sD+t5GkyKlCu9xlNs7p8beAnREWeSM5u9uMdO6uqXOC7WCstg=="],
    "x": "3pxCTMz_o6zhHJWFiRsOLSPF1bECt24eh8G8HKUz1ZkOHPn9TxtNePpSGJGF0rTi",
    "y": "svGYeULsxQRmoAyx-H3jqYfNgRg7-fH13cPVQ2dU5pAtmWMcACE-C96QbDkiwT-b",
    "crv": "P-384"
  }, {
    "kty": "EC",
    "kid": "igSqgQx2wx1F187ufOGT5wWM8j0=",
    "use": "sig",
    "x5t": "tVMwgfvP7QHEExZdxthK7koyO-Q",
    "x5c": ["MIICBzCCAYqgAwIBAgIEe8AuITAMBggqhkjOPQQDAgUAMFkxCzAJBgNVBAYTAlVLMRAwDgYDVQQIEwdCcmlzdG9sMRAwDgYDVQQHEwdCcmlzdG9sMRIwEAYDVQQKEwlGb3JnZVJvY2sxEjAQBgNVBAMTCWVzMzg0dGVzdDAeFw0yMzAxMTkxMjI4MzRaFw0zMzAxMTYxMjI4MzRaMFkxCzAJBgNVBAYTAlVLMRAwDgYDVQQIEwdCcmlzdG9sMRAwDgYDVQQHEwdCcmlzdG9sMRIwEAYDVQQKEwlGb3JnZVJvY2sxEjAQBgNVBAMTCWVzMzg0dGVzdDB2MBAGByqGSM49AgEGBSuBBAAiA2IABAXFfBc3njCvEMTpJ1V9Z4gNFpPrQ5PvXMrrwkudfZFtHKX5yh+1jXvluzVjyE8bYyGrGdI15I43p2M8ndkc172b6JFXObe3UTDGBQ6wgLlQId/lINg2/b07dBKihMYNyKMhMB8wHQYDVR0OBBYEFJRHSSDilIKZJSrApiChJYdCD35QMAwGCCqGSM49BAMCBQADaQAwZgIxAJz/Ly5iwXU86LEG21d8Flc2x5kYplEMp6LNVryrkHl8MZtqyOi8FN9o4AEO+NBgWgIxAO7N/feVYcf/z/fr7itPh36jXwfgrwuBTjkeD6Z7FOxjcBW/4bv+YvU5FLkfMk/5sw=="],
    "x": "BcV8FzeeMK8QxOknVX1niA0Wk-tDk-9cyuvCS519kW0cpfnKH7WNe-W7NWPITxtj",
    "y": "IasZ0jXkjjenYzyd2RzXvZvokVc5t7dRMMYFDrCAuVAh3-Ug2Db9vTt0EqKExg3I",
    "crv": "P-384"
  }, {
    "kty": "EC",
    "kid": "kEhluv9X13opjgFSKMBRE4EEjXk=",
    "use": "sig",
    "x5t": "p7w9otFuu1-ENpumFYLFHVG984o",
    "x5c": ["MIICUTCCAbCgAwIBAgIEBg1ErTAMBggqhkjOPQQDAgUAMFkxCzAJBgNVBAYTAlVLMRAwDgYDVQQIEwdCcmlzdG9sMRAwDgYDVQQHEwdCcmlzdG9sMRIwEAYDVQQKEwlGb3JnZVJvY2sxEjAQBgNVBAMTCXJvb3RlczUxMjAeFw0yMzAxMTkxMjI4MzlaFw0zMzAxMTYxMjI4MzlaMFkxCzAJBgNVBAYTAlVLMRAwDgYDVQQIEwdCcmlzdG9sMRAwDgYDVQQHEwdCcmlzdG9sMRIwEAYDVQQKEwlGb3JnZVJvY2sxEjAQBgNVBAMTCXJvb3RlczUxMjCBmzAQBgcqhkjOPQIBBgUrgQQAIwOBhgAEAJXY9YQASxZOEd+wCcLqv8tgUAgON441OMkw2jrwRLUFJI1Ea0OH7T+d5NBvAaBaQVtnTSz5vKF1CkBmJ0bEjPi5AWQKhmiYasEe10leO9JHCAjkCdzOmyywBSP1xcmtj4FnAG37m4xBS280bne9JRDxLIB9xUbU2EtdMm4ACVVmAmF7oyEwHzAdBgNVHQ4EFgQU1uoPEjS5YEokAunQ5bjKfG6pH58wDAYIKoZIzj0EAwIFAAOBjAAwgYgCQgCpY3EmdV2gc7ueaR4PeAIUSp1oKZOA1F2oCwIhsCMdhZQ0MX3g417EiZNEuw1BXw/X09parjlmRcIJYF1xqrNyewJCAX1g6Hr+er5EemcibCroG6iTZWwKP5wtsMwez3IUNJvL1y7M/9e4hMlavoH5YH8qwMUx3jW9IK97wgfYjF660+5l"],
    "x": "AJXY9YQASxZOEd-wCcLqv8tgUAgON441OMkw2jrwRLUFJI1Ea0OH7T-d5NBvAaBaQVtnTSz5vKF1CkBmJ0bEjPi5",
    "y": "AWQKhmiYasEe10leO9JHCAjkCdzOmyywBSP1xcmtj4FnAG37m4xBS280bne9JRDxLIB9xUbU2EtdMm4ACVVmAmF7",
    "crv": "P-521"
  }, {
    "kty": "EC",
    "kid": "Rrrq9yW/SWBRaUu8b/Y1XE8sTJo=",
    "use": "sig",
    "x5t": "nknxGS3FgRImILz7D9WkLtUjw8E",
    "x5c": ["MIICUDCCAbCgAwIBAgIEfalB2jAMBggqhkjOPQQDAgUAMFkxCzAJBgNVBAYTAlVLMRAwDgYDVQQIEwdCcmlzdG9sMRAwDgYDVQQHEwdCcmlzdG9sMRIwEAYDVQQKEwlGb3JnZVJvY2sxEjAQBgNVBAMTCWVzNTEydGVzdDAeFw0yMzAxMTkxMjI4MzRaFw0zMzAxMTYxMjI4MzRaMFkxCzAJBgNVBAYTAlVLMRAwDgYDVQQIEwdCcmlzdG9sMRAwDgYDVQQHEwdCcmlzdG9sMRIwEAYDVQQKEwlGb3JnZVJvY2sxEjAQBgNVBAMTCWVzNTEydGVzdDCBmzAQBgcqhkjOPQIBBgUrgQQAIwOBhgAEAK5lS4amgq+TTYzzRAT3FqNx6tekRYk+26Y0p1cHSVV8a/ity0id860YwfUDYmrHE2jqAWJcw/dUt/mTlkMNo5SiAUOr2lANh8oklFBpHxT0PZFnDIj7pJZh634LJLP6wJBS60rgkQJgautJFWi1TubsJSBUfF4A/eWnljnZ0ZBJk5oyEwHzAdBgNVHQ4EFgQUAv5x0hRmIlGMvE9LR/SFUokpUIswDAYIKoZIzj0EAwIFAAOBiwAwgYcCQgCyoKbFcDPVne7z6SNEOIF4+sgjPmKuA3ldnno7UGLFiOaQD2MOs4YeZxBRjoyuKkdE0af1NUwgE7BhpcoHPHaGSQJBPeqfWxeUwiVSWLX4w5vTQ52z5GZTiJ0CcJR+9IxGLfvmOX1vEcf1eLEbFvSl9QDPdMEVCdCkFiOwl7xXI4rFttw="],
    "x": "AK5lS4amgq-TTYzzRAT3FqNx6tekRYk-26Y0p1cHSVV8a_ity0id860YwfUDYmrHE2jqAWJcw_dUt_mTlkMNo5Si",
    "y": "AUOr2lANh8o--klFBpHxT0PZFnDIj7pJZh634LJLP6wJBS60rgkQJgautJFWi1TubsJSBUfF4A_eWnljnZ0ZBJk5",
    "crv": "P-521"
  }, {
    "kty": "RSA",
    "kid": "VDxi9hGYuVbDoq51t5IwcQFABGc=",
    "use": "enc",
    "x5t": "6_iP-K76eLLL-uYQxf354ab_4Zg",
    "x5c": ["MIIDTTCCAjWgAwIBAgIEGpMm4jANBgkqhkiG9w0BAQsFADBXMQswCQYDVQQGEwJVSzEQMA4GA1UECBMHQnJpc3RvbDEQMA4GA1UEBxMHQnJpc3RvbDESMBAGA1UEChMJRm9yZ2VSb2NrMRAwDgYDVQQDEwdyb290cnNhMB4XDTIzMDExOTEyMjg0MloXDTMzMDExNjEyMjg0MlowVzELMAkGA1UEBhMCVUsxEDAOBgNVBAgTB0JyaXN0b2wxEDAOBgNVBAcTB0JyaXN0b2wxEjAQBgNVBAoTCUZvcmdlUm9jazEQMA4GA1UEAxMHcm9vdHJzYTCCASIwDQYJKoZIhvcNAQEBBQADggEPADCCAQoCggEBAJ4T8vYf5PNvXr24MxUBCvoL6XHDAQATdCsFc9MTRwYXZq91OzkSuSUi8yyPbgWBVA28UWdZ7WILAFYdPYH7MdVuBQtFnLTrAc2CkkHRmRGgTXfXu9bB4cdKO5Mu+q8fsXVSjW07dQdTH2gPmzFCRa6nZt3WgXOy6v92wrf3IlcRPkcVPSFstBVA+8NtsCbTx+cx8weI8b19BPvk48rWY1wMWDuFMr7ZdNKT2TBgrW9WJWl0hItBmFBP6ocCWW/2/kD4kibzlL0Sh8bjkdDHfUti/o8XautqA6E4Eq/qukSWLpyS+O7O0SoFoRaaK2runKePdwZYJO1hcTj2PUjE3M8CAwEAAaMhMB8wHQYDVR0OBBYEFFk7PS1vpDxAQkEpQq/CaNONbVJ/MA0GCSqGSIb3DQEBCwUAA4IBAQCZ0g9sshKzqbQzeEpvDvV1u+Pb8lvUu/Vsc0Xzv75sDFzwO23EdocaSb5l4lmQrtOxXlntgqcrOHNjGSvh7dMzBfoWdz2HE58m7w0mBWMGo5MxwUL3AW1R3tj+0I//18zd7COtg5h+xd+LlVgIdilu5CzL+vpr4jzq/073iFS2l6n3rE+48AM5sa/6B/vWDl06PPrtKHQeKb2Cv/6NoLIMGQ9rMeIgts9yBCu9wj5JvhAhIqd8JbmiLEVEKsQsIDtGlZxjmEAL5vx7Y2OxYzzv5H5HCAoQ/2YuXtiy3sPKmfnrlgNS6dfslzbqNAKWypwV0GArA7p9rF3pqpiZEvyJ"],
    "n": "nhPy9h_k829evbgzFQEK-gvpccMBABN0KwVz0xNHBhdmr3U7ORK5JSLzLI9uBYFUDbxRZ1ntYgsAVh09gfsx1W4FC0WctOsBzYKSQdGZEaBNd9e71sHhx0o7ky76rx-xdVKNbTt1B1MfaA-bMUJFrqdm3daBc7Lq_3bCt_ciVxE-RxU9IWy0FUD7w22wJtPH5zHzB4jxvX0E--TjytZjXAxYO4Uyvtl00pPZMGCtb1YlaXSEi0GYUE_qhwJZb_b-QPiSJvOUvRKHxuOR0Md9S2L-jxdq62oDoTgSr-q6RJYunJL47s7RKgWhFporau6cp493Blgk7WFxOPY9SMTczw",
    "e": "AQAB"
  }, {
    "kty": "RSA",
    "kid": "psCC6uRbKBVcNTyFtuJFVNb26rI=",
    "use": "enc",
    "x5t": "KtkFu6I45dMRcibibl1-IQn2Jvw",
    "x5c": ["MIIDRzCCAi+gAwIBAgIELhfI4zANBgkqhkiG9w0BAQsFADBUMQswCQYDVQQGEwJVSzEQMA4GA1UECBMHQnJpc3RvbDEQMA4GA1UEBxMHQnJpc3RvbDESMBAGA1UEChMJRm9yZ2VSb2NrMQ0wCwYDVQQDEwR0ZXN0MB4XDTIzMDExOTEyMjgzMFoXDTMzMDExNjEyMjgzMFowVDELMAkGA1UEBhMCVUsxEDAOBgNVBAgTB0JyaXN0b2wxEDAOBgNVBAcTB0JyaXN0b2wxEjAQBgNVBAoTCUZvcmdlUm9jazENMAsGA1UEAxMEdGVzdDCCASIwDQYJKoZIhvcNAQEBBQADggEPADCCAQoCggEBAI4aa02Lgy7sHkkJj+8wSUuruq1dZTAHujNSaDRXVoFVDQgQOeYTrc1VoN0GK2Q7nn3kib1mohzaW7rlD9LB7cP2e2e56dHi1VViPBowZ2uCQZ09sA4yqzH8ed8HlpgwHeBLp/ahFU9WyA+TnYqRsaGe0EMj2q3QQ78fte1AIkWSiscTiR2X0A9xU0fnxy0okomECosEmFEFA7xOTEmy2Nov4VdrScGAemf6xO3U3jHqxbpAG2Yrm+1YZ6DMfXlXChgncmZuL2eY7X9Ng5N9swjxpXQPhDBm7qjNbUmFPwNACrmT19lc3dm3R1LqIsJK/sr/rFUOOTI1BfdVSSKLcCAwEAAaMhMB8wHQYDVR0OBBYEFFWUtlIpEssnvClgxK458NUc+SVLMA0GCSqGSIb3DQEBCwUAA4IBAQBrRsjifKGxL3wjVh2Fh8ilMHpf3rfOcDQqehokVvnCZFGabCGX818s9jRJVU61AnOqqgw3tBRSzr1VzEz/LvMHBqXvtZdrZgtO4EyD2qK/+aFj5DZRZeCS3v+5BPJbwLN9fPixJ+LqtQRw98aiWhOVaVLOWZDb7Nli1HOBfCatkeXuOw8ZwOhN4fVNkidwzGka3tng1OzU5fjLUBx1IFhDJaRw0nOOcOBaT51+4Ac+bbjXtt+UzGYCmZT0kOa7wK0MQtl783s/VGf2LCme5GGzqoDEbvyR1fxvtM8/h/WDw8xr+QF+i0GddYMOxRIyHpl1TM8YhN9W1nVGsdXg4HQs"],
    "n": "jhprTYuDLuweSQmP7zBJS6u6rV1lMAe6M1JoNFdWgVUNCBA55hOtzVWg3QYrZDuefeSJvWaiHNpb77uuUP0sHtw_Z7Z7np0eLVVWI8GjBna4JBnT2wDjKrMfx53weWmDAd4Eun9qEVT1bID5OdipGxoZ7QQyPardBDvx-17UAiRZKKxxOJHZfQD3FTR-fHLSiSiYQKiwSYUQUDvE5MSbLY2i_hV2tJwYB6Z_rE7dTeMerFukAbZiub7VhnoMx9eVcKGCdyZm4vZ5jtf02Dk32zCPGldA-EMGbuqM1tSYU_A0AKuZPX2Vzd2bdHUuoiwkr-yv-sVQ45MjUF91VJIotw",
    "e": "AQAB"
  }]
}
json
Display all algorithms and key types
By default, as recommended by the JSON Web Key specification,
each key ID (kid) in the JWK matches a unique secret.
Each kid has one key type and one associated algorithm.
You can configure the endpoint to display multiple keys for a kid as different keys in the JWK.
With this setting, a kid no longer uniquely identifies a secret:
-
Under Native Consoles > Access Management, go to Realms > Realm Name > Services > OAuth2 Provider > Advanced OpenID Connect.
-
Enable Include all kty and alg combinations in jwks_uri.
-
Save your changes.
-
Verify the results by getting the JWK document.
/oauth2/connect/rp/jwk_uri
This endpoint is similar to the /oauth2/connect/jwk_uri endpoint defined in OpenID Connect Discovery 1.0. It exposes the public keys for Advanced Identity Cloud acting as a relying party; for example, in a Social authentication scenario.
Use this endpoint to get the relying party public keys as a JSON Web Key (JWK) document. For details about how to use this endpoint at your OpenID provider, refer to the provider’s documentation.
The provider can use the public keys to:
-
Encrypt ID tokens issued to Advanced Identity Cloud.
-
Verify signatures on JWTs in requests from Advanced Identity Cloud.
-
Decrypt client authentication JWTs from Advanced Identity Cloud.
Specify the realm in the request URL; for example:
$ curl https://<tenant-env-fqdn>/am/oauth2/realms/root/realms/alpha/connect/rp/jwk_uriShow output
{
"keys": [{
"kty": "RSA",
"kid": "VDxi9hGYuVbDoq51t5IwcQFABGc=",
"use": "enc",
"x5t": "6_iP-K76eLLL-uYQxf354ab_4Zg",
"x5c": ["MIIDTTCCAjWgAwIBAgIEGpMm4jANBgkqhkiG9w0BAQsFADBXMQswCQYDVQQGEwJVSzEQMA4GA1UECBMHQnJpc3RvbDEQMA4GA1UEBxMHQnJpc3RvbDESMBAGA1UEChMJRm9yZ2VSb2NrMRAwDgYDVQQDEwdyb290cnNhMB4XDTIzMDExOTEyMjg0MloXDTMzMDExNjEyMjg0MlowVzELMAkGA1UEBhMCVUsxEDAOBgNVBAgTB0JyaXN0b2wxEDAOBgNVBAcTB0JyaXN0b2wxEjAQBgNVBAoTCUZvcmdlUm9jazEQMA4GA1UEAxMHcm9vdHJzYTCCASIwDQYJKoZIhvcNAQEBBQADggEPADCCAQoCggEBAJ4T8vYf5PNvXr24MxUBCvoL6XHDAQATdCsFc9MTRwYXZq91OzkSuSUi8yyPbgWBVA28UWdZ7WILAFYdPYH7MdVuBQtFnLTrAc2CkkHRmRGgTXfXu9bB4cdKO5Mu+q8fsXVSjW07dQdTH2gPmzFCRa6nZt3WgXOy6v92wrf3IlcRPkcVPSFstBVA+8NtsCbTx+cx8weI8b19BPvk48rWY1wMWDuFMr7ZdNKT2TBgrW9WJWl0hItBmFBP6ocCWW/2/kD4kibzlL0Sh8bjkdDHfUti/o8XautqA6E4Eq/qukSWLpyS+O7O0SoFoRaaK2runKePdwZYJO1hcTj2PUjE3M8CAwEAAaMhMB8wHQYDVR0OBBYEFFk7PS1vpDxAQkEpQq/CaNONbVJ/MA0GCSqGSIb3DQEBCwUAA4IBAQCZ0g9sshKzqbQzeEpvDvV1u+Pb8lvUu/Vsc0Xzv75sDFzwO23EdocaSb5l4lmQrtOxXlntgqcrOHNjGSvh7dMzBfoWdz2HE58m7w0mBWMGo5MxwUL3AW1R3tj+0I//18zd7COtg5h+xd+LlVgIdilu5CzL+vpr4jzq/073iFS2l6n3rE+48AM5sa/6B/vWDl06PPrtKHQeKb2Cv/6NoLIMGQ9rMeIgts9yBCu9wj5JvhAhIqd8JbmiLEVEKsQsIDtGlZxjmEAL5vx7Y2OxYzzv5H5HCAoQ/2YuXtiy3sPKmfnrlgNS6dfslzbqNAKWypwV0GArA7p9rF3pqpiZEvyJ"],
"n": "nhPy9h_k829evbgzFQEK-gvpccMBABN0KwVz0xNHBhdmr3U7ORK5JSLzLI9uBYFUDbxRZ1ntYgsAVh09gfsx1W4FC0WctOsBzYKSQdGZEaBNd9e71sHhx0o7ky76rx-xdVKNbTt1B1MfaA-bMUJFrqdm3daBc7Lq_3bCt_ciVxE-RxU9IWy0FUD7w22wJtPH5zHzB4jxvX0E—TjytZjXAxYO4Uyvtl00pPZMGCtb1YlaXSEi0GYUE_qhwJZb_b-QPiSJvOUvRKHxuOR0Md9S2L-jxdq62oDoTgSr-q6RJYunJL47s7RKgWhFporau6cp493Blgk7WFxOPY9SMTczw",
"e": "AQAB"
}, {
"kty": "RSA",
"kid": "DrIvwoQHwRVcHHRFbSL9ZmhzjyU=",
"use": "sig",
"x5t": "fbzc7G87EHyhLjU-2y9Dpe_kN64",
"x5c": ["MIIDZzCCAk+gAwIBAgIEO1Q8YDANBgkqhkiG9w0BAQsFADBkMQswCQYDVQQGEwJVSzEQMA4GA1UECBMHQnJpc3RvbDEQMA4GA1UEBxMHQnJpc3RvbDESMBAGA1UEChMJRm9yZ2VSb2NrMR0wGwYDVQQDExRyb290cnNhand0c2lnbmluZ2tleTAeFw0yMzAxMTkxMjI4MzdaFw0zMzAxMTYxMjI4MzdaMGQxCzAJBgNVBAYTAlVLMRAwDgYDVQQIEwdCcmlzdG9sMRAwDgYDVQQHEwdCcmlzdG9sMRIwEAYDVQQKEwlGb3JnZVJvY2sxHTAbBgNVBAMTFHJvb3Ryc2Fqd3RzaWduaW5na2V5MIIBIjANBgkqhkiG9w0BAQEFAAOCAQ8AMIIBCgKCAQEAoLZ/A+akMJya3gKesHQNYP80rd8zSY6bpXqyMiWruTtnZ46KzWva1TlT384G0OvufMlILsx7j+/0uzkn9QwIb9RGYsJBy5zM+kS8N4m2qesoCBjWPFVqHqh/aCs4T2P78JvRyNq3hZ6lKJBgbsjzZNbFBxIReXjdJjSb85Wzivxn+bvVIrxUWHmeOznBR4yc5qeHEHef/l+ohD0mTn5dfsGJAXHNUpnqumvODQIU44BCnjpESoPauXGmkUKvJEQNFsTpA/npNHQHaHFQ5ZG/qjYBIo+LIX1TByZDo2Wsy/SkkXRnirUAZAZBRvg9NnLhk1gW0rCmK/hiQUfnjGORzQIDAQABoyEwHzAdBgNVHQ4EFgQUYfATQgXWdJzrvZqUzYhSZ31GEigwDQYJKoZIhvcNAQELBQADggEBAC92yt/0VP2jYXlSnNxSUAOyi7CwpwRXvkaPLgoDtNcuLHcQ8gcDpf8KjfLgc/cntBQAx3GBzAmtZmWBLRezioZMpcOtHyr+QC+TAtXwgM9t0LJZs1d0G8DOlgutItUIj5XRGfdedWOfFTbZpcqPxyTrDMN/TJ2+vMTxeLNiknxXMxIfUhMPJxRGCouppjeS1iMScNEHz4+zLdZUUngVwDvyB7qiqCHVcga8Mjy0S/weSnhwygL9tIB2yMLP9SR/R6Levy7FlMN5PUo0OzosAXgW+T5sGdXNV1AEOm47CDPm18sKsFCfTE+bS7ocUDka9y1XUNOMF/5l8f3EdyeTuUU="],
"n": "oLZ_A-akMJya3gKesHQNYP80rd8zSY6bpXqyMiWruTtnZ46KzWva1TlT384G0OvufMlILsx7j-_0uzkn9QwIb9RGYsJBy5zM-kS8N4m2qesoCBjWPFVqHqh_aCs4T2P78JvRyNq3hZ6lKJBgbsjzZNbFBxIReXjdJjSb85Wzivxn-bvVIrxUWHmeOznBR4yc5qeHEHef_l-ohD0mTn5dfsGJAXHNUpnqumvODQIU44BCnjpESoPauXGmkUKvJEQNFsTpA_npNHQHaHFQ5ZG_qjYBIo-LIX1TByZDo2Wsy_SkkXRnirUAZAZBRvg9NnLhk1gW0rCmK_hiQUfnjGORzQ",
"e": "AQAB"
}, {
"kty": "RSA",
"kid": "MYv/TlhD38w0GVgX3sohEWb6th0=",
"use": "sig",
"x5t": "k9hH5MSeIX4uJel1Fm9sCj3dzL4",
"x5c": ["MIIDXzCCAkegAwIBAgIEQd+MMTANBgkqhkiG9w0BAQsFADBgMQswCQYDVQQGEwJVSzEQMA4GA1UECBMHQnJpc3RvbDEQMA4GA1UEBxMHQnJpc3RvbDESMBAGA1UEChMJRm9yZ2VSb2NrMRkwFwYDVQQDExByc2Fqd3RzaWduaW5na2V5MB4XDTIzMDExOTEyMjgyOVoXDTMzMDExNjEyMjgyOVowYDELMAkGA1UEBhMCVUsxEDAOBgNVBAgTB0JyaXN0b2wxEDAOBgNVBAcTB0JyaXN0b2wxEjAQBgNVBAoTCUZvcmdlUm9jazEZMBcGA1UEAxMQcnNhand0c2lnbmluZ2tleTCCASIwDQYJKoZIhvcNAQEBBQADggEPADCCAQoCggEBAJJQEAULAN7o/KE5Z5UYdYx/ygiEZBFidklr4UsZM3kePNvtCj07sGWQN1+z0vKQhdY+SCZoamCvUEGWZWyd0vJ8nCLBkNBJ33IFyDCsNMUlV9dEG+POYCrZ3TIshacyRBd7P/BJnTkdMItDrHHBD3l0xuDMKg+9AYJ0VN5AQXo7QJeLaEF1y0zu7C7CcjWgNjcaeZv6xgHzIt8ymKhd16zYXNIQBEvTWogHpBSpgTJcfUSymwAsTzrp+58ajqoTqQVRVr5I7rm3UiSnbZhU6Jo3H9QTZmIfAcDachTPHoG+nv7C+P7wK3EekJZ73Ur9CFjdIoS39fsLWth+LVLOTC8CAwEAAaMhMB8wHQYDVR0OBBYEFOGC/Ohfg0Cm5zVeQimMP3De6ZUbMA0GCSqGSIb3DQEBCwUAA4IBAQCNBeB9lpisaYBQdt3cM9F1PeA99llbqPVLpiZOOhSX+iPMjfijhr7Y/f23YRMRiLVSTuMzJrNCX2CZhUqBCF8TkbWz4/ahyEKJ3VbdJOde3LfZqzw0Jjh3fnWqOa2L0IehvKd4F+m7iRpZ8T6bYaKMU/t0TLQraOiO3w7zKLY1AlQxlXq4yMVqCuwvpAEF/eT7sKrjR8fE7o8NMnpU/Kc7hxi1GiUZHyqSBKKpAYRlJnDgc0+4jw/UUZW4fK0xcnHlZMntAGevTIMQ+r9GrRZAB2L3gqnlyBp1DIQnnm71wZk4AtpNm5xAS7rETdUlqkFn+LjoR+oIogI9RG25/wir"],
"n": "klAQBQsA3uj8oTlnlRh1jH_KCIRkEWJ2SWvhSxkzeR482-0KPTuwZZA3X7PS8pCF1j5IJmhqYK9QQZZlbJ3S8nycIsGQ0EnfcgXIMKw0xSVX10Qb485gKtndMiyFpzJEF3s_8EmdOR0wi0OsccEPeXTG4MwqD70BgnRU3kBBejtAl4toQXXLTO7sLsJyNaA2Nxp5m_rGAfMi3zKYqF3XrNhc0hAES9NaiAekFKmBMlx9RLKbACxPOun7nxqOqhOpBVFWvkjuubdSJKdtmFTomjcf1BNmYh8BwNpyFM8egb6e_sL4_vArcR6QlnvdSv0IWN0ihLf1-wta2H4tUs5MLw",
"e": "AQAB"
}]
}