About Identity Governance
|
Advanced Identity Cloud add-on capability
Contact your Ping Identity representative if you want to add PingOne® Identity Governance to your Advanced Identity Cloud subscription. |
Identity Governance lets you administer and manage end user access to applications and data across your company to support corporate and regulatory compliance. Identity Governance uses onboarded target applications when reviewing identity data.
With Identity Governance, you can:
-
Create and manage policies and policy rules, allowing end users to manage segregation of duties (SoD) violations.
-
Allow end users to gain access to the resources they need through access requests.
-
Review (certify) end users' access in onboarded target applications through access certifications, event-based certification, and access reviews.
-
Manage access requests by configuring workflows, end-to-end UI-based sequence of tasks that results in the approval or rejection of an access request.
-
Aggregate permissions into Advanced Identity Cloud to view user privileges in onboarded target applications using entitlements.
-
Attach custom attributes to applications, entitlements, and roles that you can use to extend the data you review using governance glossary attributes.
|
Ping Identity does not support Identity Governance actions for users authenticated in the Bravo realm of a tenant. Configuring Identity Governance in both Alpha and Bravo realms can cause issues since Identity Governance is not realm-aware. This may result in users gaining unauthorized access to customer data across realms and features. To avoid these issues, Ping Identity recommends setting up an Advanced Identity Cloud instance for your workforce/Identity Governance use cases using only the Alpha realm and another instance for your CIAM use cases using one or both realms depending on application. Contact your Ping Identity representative to discuss your particular deployment options. |
To access Identity Governance administration functions in Advanced Identity Cloud, you must be a tenant administrator.
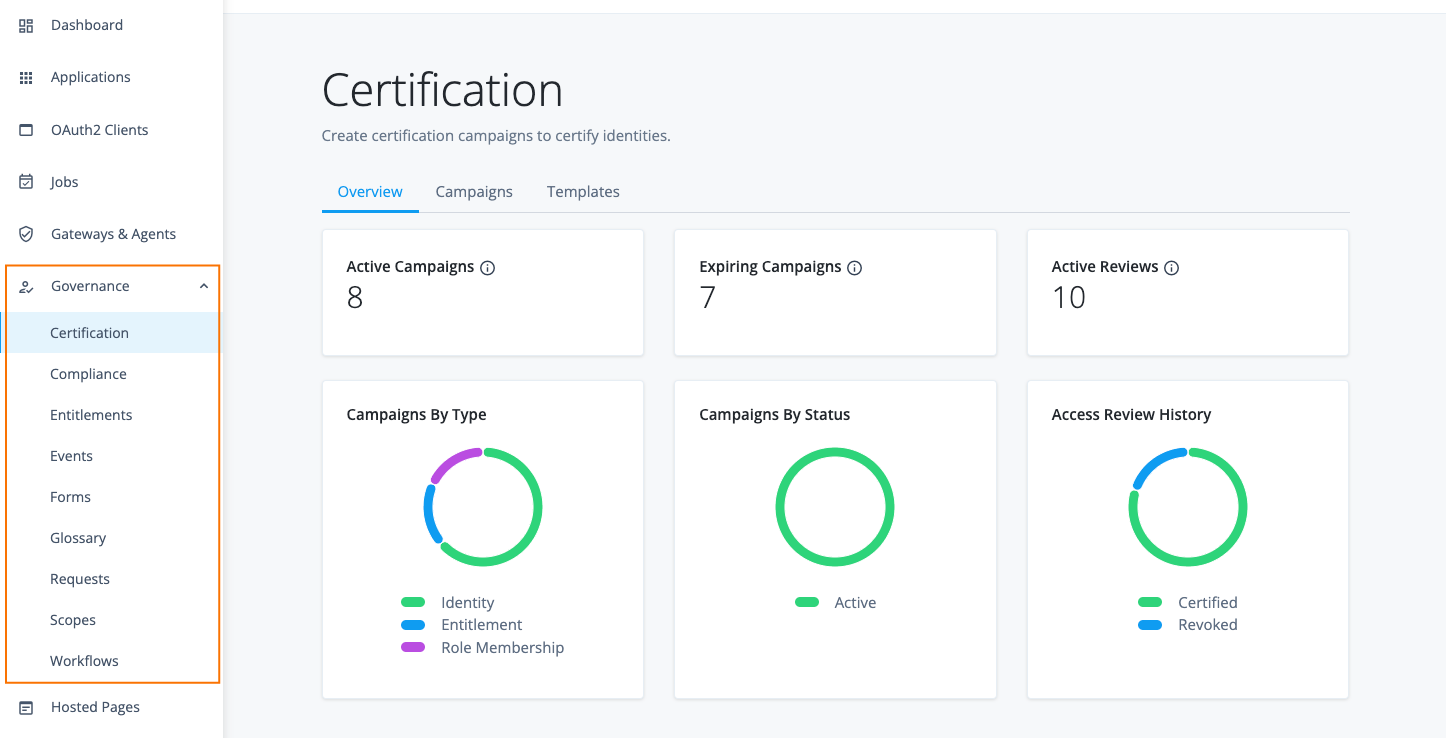
When you purchase Identity Governance, the Governance-related menu items are added to the left navigation pane:
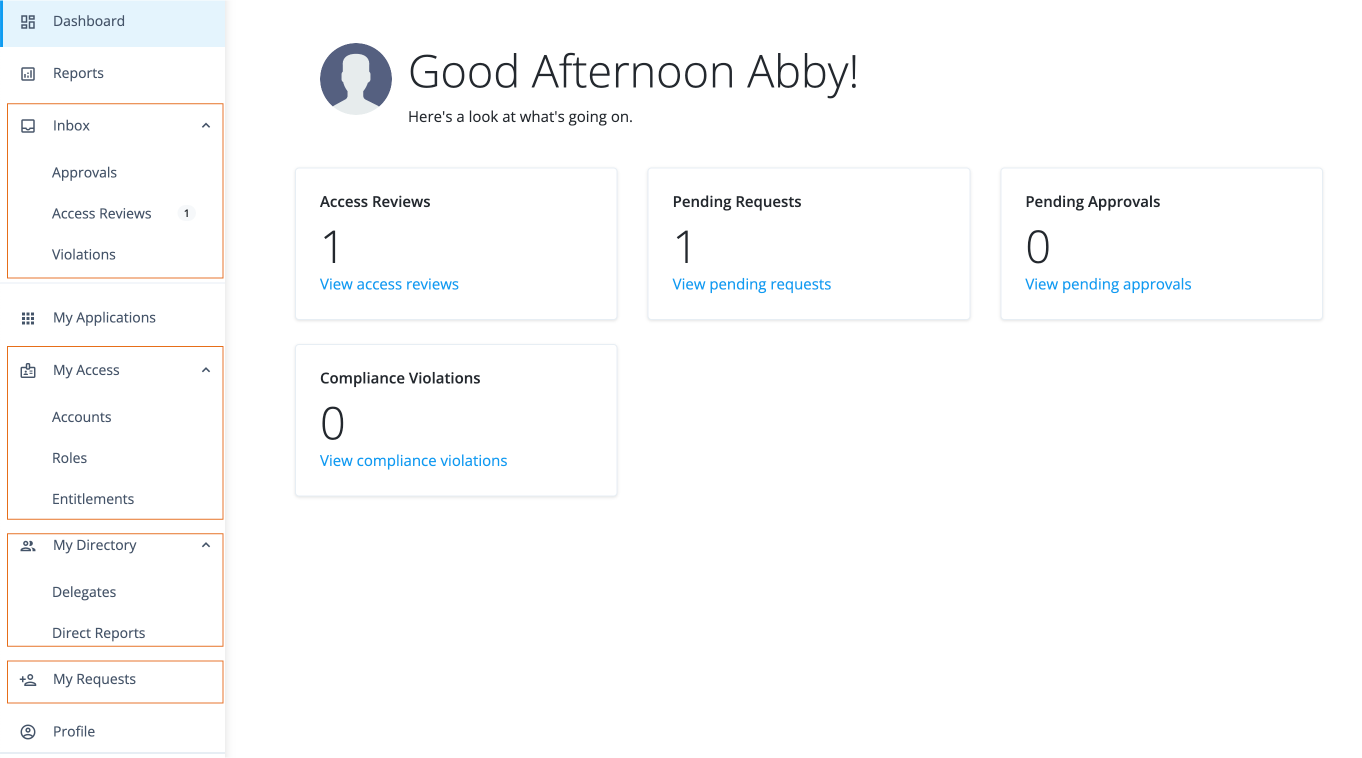
Additional menu items are also added to the End-user pages.
Configure compliance policies
Identity Governance enables centralized management of end-user access to resources throughout your company ensuring corporate and regulatory compliance.
Identity Governance implements an internal control process, also known as segregation of duties (SoD), to prevent the granting of privileges to a single individual in situations where conflict of interest could arise. For example, end users responsible for authorizing financial transactions should be different from those users responsible for reconciling, recording, or reviewing these transactions.
To implement SoD, Identity Governance uses policies consisting of policy rules, which outline the conditions for conflicting entitlements during end user access requests. You can also schedule policy scans on a regular basis to catch any policy violations.
Identity Governance also provides workflow nodes to handle SoD violations, letting you grant an exception for the violation, reject the violation, or remediate any conflicting entitlements. When Identity Governance detects non-compliant access requests, whether due to error or fraudulent activity, it marks them as violations and displays them on the Violations page. Identity Governance also displays all allowed violations on the Exceptions page.
View policies
-
In the Advanced Identity Cloud admin console, click Governance > Compliance. The Policies page appears with a list of policies. If no policies are present, the page displays a New Policy button.
View policy details
Identity Governance provides a policy details page, where you can add or edit the policy rules, schedule policy scans, review or forward policy violations, and review any policy exceptions.
-
In the Advanced Identity Cloud admin console, click Governance > Compliance.
-
On the Policies page, click the ellipsis () for a policy, and then click Edit. The policy details page appears.
Add policies rules
Policy rules set the criteria for violation conditions, specify who the criteria applies to, outline decision options, determine scan types, and manage the lifecycles of violations.
-
In the Advanced Identity Cloud admin console, click Governance > Compliance.
-
Click the Policy Rules tab, and then click New Rule.
-
On the New Policy Rule page, enter the policy rule details, and then click Next:
Field Description Name
Enter a name for your policy rule. Follow any naming convention established by your company.
Description
Optional. Enter a general description for the new policy.
Owner
Select a policy owner for this new policy rule.
Risk Score
Assign a risk score for this rule. The range is 0–100. For example, a high risk score could be 80–100 for a rule.
Mitigating Control
Optional. Enter instructions on what to do if a violation is unavoidable.
Control URL
Optional. Enter a URL link to a reference site, such as an internal corporate policy page.
#Correction Advice
Optional. Enter instructions on how to correct the violation(s).
-
On the Violation Condition page, do the following:
-
Use the filter to set your initial violation conditions. When done, click , and then click Add Rule or Add Group.
Field Description Select entitlements if
AnyorAllconditions are met.Select either Any or All.
Select a property
Values could include the following, depending on your glossary items:
-
Description
-
Display Name
-
Entitlement Owner
-
Requestable
Connector
Values include:
-
contains
-
is
-
starts with
-
ends with
Attribute Value
Enter an attribute.
-
-
Next, enter a condition that
cannot conflict withthe previous condition. When done, click , and then click Add Rule or Add Group. Click Next:Field Description Select entitlements if
AnyorAllconditions are met.Select either Any or All.
Select a property
Values include:
-
Description
-
Display Name
-
Entitlement Owner
-
Requestable
Connector
Values include:
-
contains
-
is
-
starts with
-
ends with
Attribute Value
Enter an attribute.
-
-
-
On the Applies To page, select the end users for whom this policy applies. When done, click Next. Values include:
Field Description Applies to
Options are:
-
All users -
A single user -
Users matching a filter. Create a filtered condition to match users.
-
-
On the Settings page, select the policy rule settings:
Field Description Violation Owner
Confirm the violation owner of the policy rule. Select an alternate owner if necessary.
Decision Options
Select the option to allow or grant a temporary exception to retain access:
-
Enable Allow: Click to allow an end user to retain their violating access permanently.
-
Enable Exception: Click to allow a user to be granted temporary exception to retain access. If you select this option, additional properties are displayed:
-
Exception Duration: Enter a number (in days) for the maximum duration for the exception.
-
Require a justification when allowing exceptions. Click to this option to always require a justification for the exception.
-
Scan Types
At least one value must be checked. Values include:
-
Preventative: Click to enforce rule during access request and provisioning. When this property is enabled, the end user sees a warning message when trying to request for a non-compliant entitlement.
Granting access to these entitlement(s) will result in a Segregation of Duties (SoD) violation.
-
Detective: Click to enforce rule during compliance scans.
Violation Lifecycle
Select the settings for the violation life cycle:
-
When a violation is found: Select a setting if a violation is found. Options are:
-
Do nothing. Click to leave the violation as-is with no corrective action. The violation’s owner must decide what to do with the violation and take corrective action.
-
Launch Violation Workflow. Select the workflow to launch when a rule violation is triggered.
-
-
Violations Expire: Select what happens when a violation expires. Options are:
-
Never. Never expire the violation automatically.
-
After a specified time. Enter the number of day(s) after which the violations expire.
-
-
When violation expires: Determines what happens when a violation expires. Options are:
-
Close violation. Closes the expired violation.
The conflicting entitlements still remain with the user. -
Create a new violation. Create a new violation.
-
Do nothing. Violation expires and no action is taken.
The conflicting entitlements still remain with the user.
-
-
-
Click Save.
Edit policy rules
-
In the Advanced Identity Cloud admin console, click Governance > Compliance.
-
On the Policies page, click Policy Rules.
-
Click a policy rule. Change any aspect of a policy rule. Click Save to keep your changes.
Add policies
-
In the Advanced Identity Cloud admin console, click Governance > Compliance.
-
On the Policies page, click New Policy.
-
On the New Policy modal, enter the following, and when completed, click Next.
Field Description Name
Enter a name for your policy. Follow any naming convention established by your company.
Description
Optional. Enter a general description for the new policy.
Policy Owner
Select a policy owner for this new policy.
-
On the New Policy modal, select the one or more rules to add to this policy.
-
Click Save. The new policy appears on the Policies page in an
Activestatus.
Edit policies
The Policies tab provides options to duplicate, edit, or delete a policy.
-
In the Advanced Identity Cloud admin console, click Governance > Compliance.
-
On the Policies page, click the ellipsis () for a policy, and then click Edit.
-
Make any changes, and then click Save.
Field Description Status
Options are:
-
If the status is
Active, click Deactivate to disable the policy if needed. -
If the status is
Inctive, click Activate to enable the policy.
Name
Change the policy name.
Description
Optional. Add or change the description for the policy.
Policy Owner
Change the policy owner if necessary.
-
Schedule policy scans
You can schedule policy scans to search for any compliance violations.
-
In the Advanced Identity Cloud admin console, click Governance > Compliance.
-
On the Policies page, click the ellipsis () for a policy, and then click Edit.
-
Click the Scans tab. Set the scan schedule, and then click Save. The options are:
Field Description Edit Schedule
Options are:
-
Enter a number and time values:
hour(s),day(s),week(s), ormonth(s). -
Click Set a Start Tie, and click the date and time to start a scan.
Repeat
Options are:
-
Enter the number of times to run a scan.
-
Click Until specific date, and click the end date and time for the scans.
-
Click Indefinitely.
-
-
Click Simulate Scan to run a simulation. This feature helps to check if your policy rules are correctly configured but does not create any violation objects used in the system.
-
Click Run Scan to run a scan. The scan generates violation objects and reports any violations to the policy.
View violations
Identity Governance Violations page displays the compliance violations found during the policy scans. You (administrators) can only view violations, forward a violation to another authorized end user (i.e., violation owners), view the violation’s activity history, or add a comment.
-
In the Advanced Identity Cloud admin console, click Governance > Compliance > Violations to view all violations found during the scans.
Filter violations page
Identity Governance’s Violations page provides a filtering option for its page.
-
In the Advanced Identity Cloud admin console, click Governance > Compliance > Violations.
-
Click the filter list icon (), do any of the following:
-
Rule: Select the rule on the drop-down list.
-
User: Select All Users, or select a specific user.
-
From: Enter a starting date in a date range, or click the calendar icon () for the start date.
-
To: Enter an end date in a date range, or click the calendar icon () for the end date.
-
Customize columns on the Violations page
Identity Governance’s Violations page provides a column customization option to display the properties based on your settings.
-
In the Advanced Identity Cloud admin console, click Governance > Compliance > Violations.
-
Click the view column icon (), the columns are ordered from top to bottom and displayed from left to right on the page. Do any of the following:
-
In Active Columns, click and drag the column down or up to reorder the columns on the page.
-
In Available Columns, click any property to display in Active Columns.
-
Click the trash can icon () to remove the column from the page. In Available Columns, clear the selected column to remove the property from the Active Columns.
-
Click Apply to save your changes. Your settings appear immediately.
-
View violations details
Administrators can only view the violation details, forward to a violations owner, view the activity history on the violation, or add a comment.
-
In the Advanced Identity Cloud admin console, click Governance > Compliance.
-
Click Violations.
-
On the Violations page, click a violation to view its details.
-
On the specific violations page, review the Details page:
Field Description User
Displays the user associated with the violation.
Rule Name
Displays the rule name associated with the violation.
Rule Description
Displays the description for the rule.
Rule Owner
Displays the rule owner.
Status
Displays the status of the violation:
in-progressorcompleted.Conflicts
Click View Conflicts to view the conflicting entitlements causing the violation.
Risk Level
Displays the associated risk level of the violation.
Mitigating Control
Review instructions for mitigating the conflict.
Control Url
Displays the URL for corporate compliance policies.
Correction Advice
Displays any advice to correct the conflicts.
-
Click Activity to view a history of all actions related to the violation.
-
Click Comments to view any comments related to the violation or to add a comment.
-
View exceptions
Identity Governance Exceptions page displasy the compliance exceptions granted to any violation. You can filter the search by user and rule.
-
In the Advanced Identity Cloud admin console, click Governance > Compliance > Exceptions to view all "active" violation exceptions.
Once an exception has expired or has been closed, the exception no longer appears on the page.
Filter exceptions page
Identity Governance’s Exceptions page provides a filtering option.
-
In the Advanced Identity Cloud admin console, click Governance > Compliance > Exceptions.
-
Click the filter list icon (), do any of the following:
-
Rule: Select the rule on the drop-down list.
-
User: Select All Users, or select a specific user.
-
From: Enter a starting date in a date range, or click the calendar icon () for the start date.
-
To: Enter an end date in a date range, or click the calendar icon () for the end date.
-
Customize columns on the Exceptions page
Identity Governance’s Exceptions page provides a column customization option to display the properties based on your settings.
-
In the Advanced Identity Cloud admin console, click Governance > Compliance > Exceptions.
-
Click the view column icon (), the columns are ordered from top to bottom and displayed from left to right on the page. Do any of the following:
-
In Active Columns, click and drag the column down or up to reorder the columns on the page.
-
In Available Columns, click any property to display in Active Columns.
-
Click the trash can icon () to remove the column from the page. In Available Columns, clear the selected column to remove the property from the Active Columns.
-
Click Apply to save your changes. Your settings appear immediately.
-
View exceptions detail
-
In the Advanced Identity Cloud admin console, click Governance > Compliance > Exceptions.
-
On the Exceptions page, click an exception to view its details.
-
On the specific exceptions page, review the Details page:
Field Description User
Displays the user associated with the violation.
Rule Name
Displays the rule name associated with the violation.
Rule Description
Displays the description for the rule.
Rule Owner
Displays the rule owner.
Status
Displays the status of the violation:
in-progressorcompleted.Conflicts
Click View Conflicts to view the conflicting entitlements causing the violation.
Risk Level
Displays the associated risk level of the violation.
Mitigating Control
Review instructions for mitigating the conflict.
Control Url
Displays the URL for corporate compliance policies.
Correction Advice
Displays any advice to correct the conflicts.
-
Click Activity to view a history of the exception.
-
Click Comments to view or add any comments related to the exception.
-
Manage violations
Any end user authorized as a violation owner can view and take action on violations. Actions include viewing the violating entitlements, revoke the violation, allow an exception, extend or revoke the exception.
View violations
-
In the Advanced Identity Cloud end-user UI, click Inbox > Violations. All violations found during the scans or forwarded to the end user are displayed.
Allow violations
When a violations owner allows a violation, they create an exception. The Exceptions page displays all active exceptions.
-
In the Advanced Identity Cloud end-user UI, click Inbox > Violations.
-
Select a violation, and then click Allow.
-
On the Allow an exception modal, enter the following, and click Allow when complete:
Field Description Rule Violated
Displays the rule and description associated with the violation.
View Details
Click to display the violation details.
Allow an exception
Select an options:
-
Forever. Allow the exception to exist without an expiration date.
-
Until Specified Date. Click to set an expiration date for the exception. Click Date and select a date on the calendar.
-
Justification. Enter a justification for the exception. If you clicked the Require a justification when allowing exceptions on the policy rule settings, end users are required to enter an exception reason.
-
Revoke violations
When a violations owner opens their violations, they have the option to revoke the violation. Identity Governance displays two sets of entitlements: one set of entitlements existing for the end user; the other set, the conflicting entitlements. You can click one set of entitlements to revoke, which moves them to the cart on the right.
-
In the Advanced Identity Cloud end-user UI, click Inbox > Violations.
-
Select a violation, and then click Allow.
-
On the Allow an exception modal, enter the following, and click Revoke Entitlements when complete:
Field Description User
Displays the user and user’s email address.
Rule Violated
Displays the rule and description associated with the violation.
View Details
Click to display the violation details.
How to Fix
Displays any instructions entered when configuring the policy rule.
Entitlements (Number)
Displays the existing entitlement(s) on the left.
-
Click Revoke all to revoke the entitlement(s). The entitlements appear in the right pane.
Conflicting Entitlements (Number)
Displays the conflicting entitlement(s) on the right.
-
Click Revoke all to revoke the entitlements. The entitlements appear in the right page.
Justification
Enter a justification for revoking the entitlement(s).
Entitlements to Revoke (right pane)
Displays the selected entitlement(s) to revoke.
-
Forward violations
-
In the Advanced Identity Cloud end-user UI, click Inbox > Violations.
-
Click ellipsis () and click Forward.
-
On the Forward Violation modal. Select or enter the following:
Field Description Forward this violation to
Select one of the following:
-
Another user. Forward to another end user, and select in the Forward to menu.
-
Users with assigned role. Forward to another end user with the selected role in the Forward to menu.
Comment
Enter a comment as to why the violation is being forwarded.
OK
Click to forward the violation. The end user receives an email notification for the forwarded violation.
-
View exceptions
The Exceptions page displayed all allowed violations, or exceptions.
-
In the Advanced Identity Cloud end-user UI, click Inbox > Violations > Exceptions.
Extend exceptions
Violation owners can extend an exception on the Exceptions page.
-
In the Advanced Identity Cloud end-user UI, click Inbox > Violations > Exceptions.
-
On the Extend Exception modal, select or enter the following:
Field Description Rule Violated
Displays the policy rule, description, and the date of the exception associated with the violation.
View Details
Click to display the violation details.
Extend Exception
Select an options:
-
Forever. Allow the exception to exist without an expiration date.
-
Until Specified Date. Click to set an expiration date for the exception. Click Date and select a date on the calendar.
-
Justification. Enter a justification for the exception.
-
-
Click Extend. The Exception page displays the updated expiration date.
Certify access using templates and campaigns
In Identity Governance, certifying access means reviewing the data and access a user has, such as access to applications, the accounts in those applications, and more.
Steps to certify access
To certify access for users, you must:
-
Create templates — Allows you to configure the data you want to certify.
-
Run campaigns — After you create a template and are ready to kick off the review process, create a campaign.
-
Certify data and access by end users — After you start a campaign, the template-defined end users (certifiers) receive notifications to review the data. The certifiers' review of the data is referred to as an access review.
Certifications tab
Certifications and related features can be found by selecting Certification from the left navigation bar in the Advanced Identity Cloud admin console.
Three tabs display under Certification:
Overview tab
To access the Overview tab, from the Advanced Identity Cloud admin console, go to Certification > Overview.
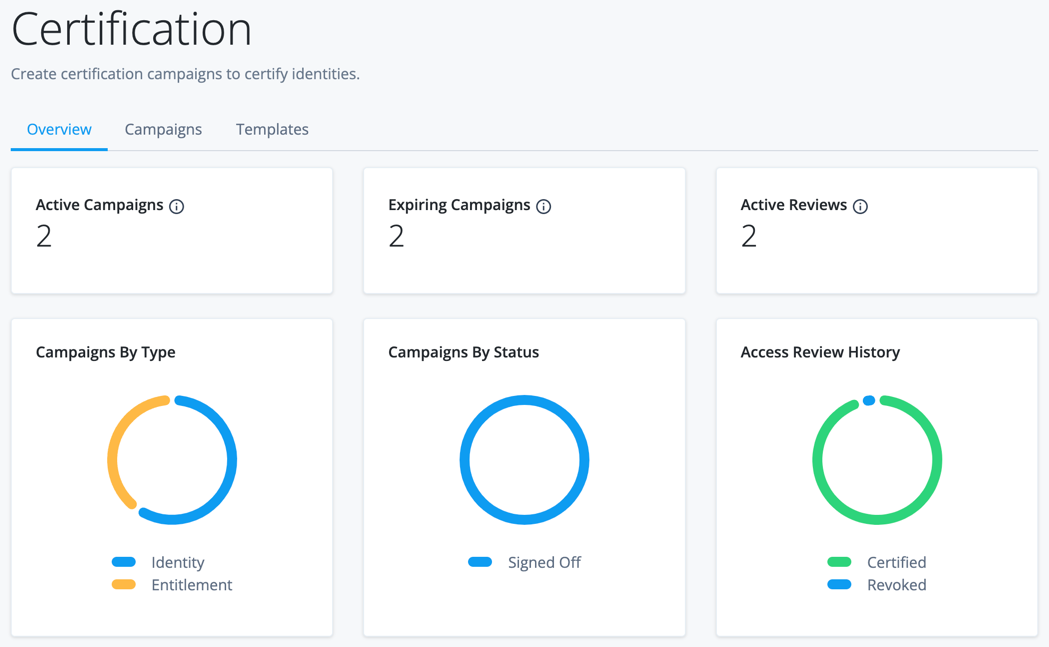
The Overview landing page displays various metrics that allow you to view items such as campaign status, active reviews, and campaigns by type.
You can hover your cursor over the charts to view the data details.
| Data Element | Description |
|---|---|
Active Campaigns |
The number of campaigns currently in progress. |
Expiring Campaigns |
The number of campaigns that expire in the next two weeks. |
Active Reviews |
The total amount of line items in access reviews that are in progress. A line item is a record for a certifier to review. For example, the user Barbara Jensen’s record that details their access to a particular application is a line item. |
Campaigns By Type |
A breakdown of the varying types of certifications. |
Campaigns By Status |
A breakdown of certifications by status. |
access review History |
The number of line items certified versus revoked from campaigns. |
Example of certifying access
As an example of certifying access, let’s say you want to know what applications a specific user, Barbara Jenson, has access to. You may want to do this for a couple of reasons; increasing your company’s security landscape by ensuring users have accurate, appropriate access, or to comply with organizational, industry, or governmental policies. Barbara Jensen has an account and access to an application, called App A.
With Identity Governance, perform the following actions to achieve this:
-
Configure and assign end users (certifiers) in your company to review Barbara’s access to App A using templates.
-
Kick off the data review using campaigns. Campaigns are the active processes, where certifiers review the data. In this case, it is Barbara’s data. Certifiers are assigned to review the data in a campaign.
-
Certifiers review Barbara’s data and either certify (allow) or revoke (remove) the access to App A.
Configure data to review using templates
Templates are the first step in certifying access for users.
Templates are the underlying configurations of certifying access and define the data to review, who is responsible for the review, and when the data needs to be reviewed (on a periodic or ad hoc basis).
Often, organizations need to review the same data multiple times a year to ensure access is accurate. Templates make the certification process easier by saving the configuration settings used in the data review process.
Manage (create, duplicate, edit, or delete) templates on the Templates tab and schedule each campaign to run at a specific interval (if desired).
You can run templates on an ad-hoc or scheduled basis.
View saved templates
To view saved templates, from the Advanced Identity Cloud admin console, click Certification > Templates tab. The page displays saved templates.
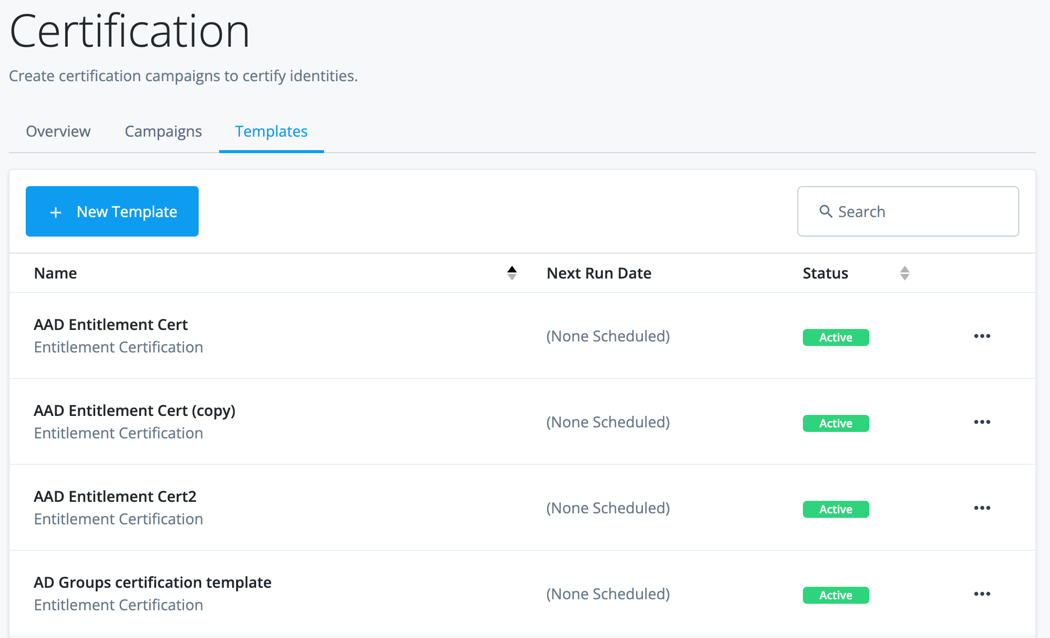
| Field | Description |
|---|---|
Name |
The name of the template. |
Next run date |
A date displays when the template is configured to run according to a schedule. If the template runs ad-hoc, then (None Scheduled) displays. |
Status |
A template can be in one of the following states:
The general sequence of states are Creating → Unused → Active. |
Which certification template to choose?
Identity Governance provides various certification templates to choose from. The underlying business objective you want to achieve determines which template type you choose.
Refer to the following scenarios when determining which template type to choose:
-
You want to review the template to certify or revoke access to applications (accounts). You can specify to review the entitlements or roles a user has. The primary certifier (reviewer) of the certification should be users' managers.
Identity Entitlement assignment Role membership Notes Not every user has entitlements. If you want to review the applications users have access to, and include those users who don’t have entitlements, choose the identity certification.
-
You want to review to certify or revoke specific entitlements assigned to users in target applications. The primary certifier of the certification should be entitlement owners.
Identity Entitlement assignment Role membership Notes The entitlement assignment certification is the best choice in this scenario. It provides entitlement owners the ability to review the access users have to their entitlements.
-
You want to review the template to certify or revoke a user’s role memberships. The primary certifier of the certification should be role owners.
Identity Entitlement assignment Role membership Notes The role membership certification is the best choice in this scenario as it provides the ability to review roles and users who are assigned to roles in Advanced Identity Cloud.
Create templates
Before you create a template, consider creating custom governance glossary attributes to enhance the data for onboarded target applications, entitlements, or roles. This will assist with template filtering and business decisions.
To create a template:
-
Navigate to the Certification > Templates tab.
-
Click + New Template.
-
Select the template type:
-
Identity certification — Review and certify user accounts, entitlements, and access a user has on some or all applications. Primary reviewers are the users' managers, a single user, or users assigned to a role.
-
Entitlement assignment certification — Review and certify entitlements and the users who have access to entitlements in target applications. Primary reviewers are entitlement owners, a single user, or users assigned to a role.
-
Role membership certification — Review and certify role memberships and the users who have access to roles in Advanced Identity Cloud. Primary reviewers are role owners, a single user, or users assigned to a role.
-
-
Click Next.
To continue setting up the template you select, click on the preceding links in step 3.
Modify templates
You can modify various template items:
-
From the Advanced Identity Cloud admin console, go to Certification > Template tab.
-
Locate the template and click the ellipsis (...) to perform various actions:
To view additional templates, click the caret icons at the bottom of the table. Field Description Duplicate
Duplicate the template details to create a new template, and edit/modify as needed. The characters (copy) are appended to the newly duplicated template.
View Details
This option displays if the template has been run at least once. It provides a read-only view into the configurations on the template. After you run a template, you cannot change the configuration settings.
Edit Template
This option displays if you create the template, but never run it to create a campaign. In this case, you can edit/modify the template configuration.
Activate templates
Activate a template to kick off the review process (a campaign).
You can activate a template by:
-
Creating a schedule when you define the template.
-
Adding a schedule to the template after you define the template.
-
Running the template on an ad-hoc basis.
To activate a template:
-
From the Advanced Identity Cloud admin console, go to Certification > Template tab.
-
Locate the template and click to perform various actions:
To view additional templates, click the caret icons at the bottom of the table. Action Field Run Now
This activates the template and kicks off the review process (campaign). When selected, the active campaign displays in the Campaigns tab.
When you create a template, if you select Run on a schedule under the When to Certify section. The campaign runs on the set schedule and display on the Campaigns tab at the specified interval. Schedule Campaign
This option displays if you did not configure a schedule when creating the template. This creates a run schedule for the template.
Edit Schedule
This option displays if you did configure a schedule when creating the template, but you would like to modify the existing schedule.
Delete a template
To delete an existing template:
-
From the Advanced Identity Cloud admin console, go to Certification > Template tab.
-
Locate the template, click , and click Delete. This action cannot be undone.
| You can only delete templates in the Creating or Unused states. This action cannot be undone. |
Identity certification
Select an identity certification type to certify user accounts and entitlements for specific applications.
To review information about templates, refer to Create templates.
|
You must populate the Display Name Attribute on the target application User entity object in the Details tab. This allows each account pulled into Advanced Identity Cloud to display with a human-readable name. This is required for the data to properly display when a certifier (reviewer) reviewers their certification. Perform the following:
The following video shows an example: |
The following table lists the areas to configure for each campaign template type:
| Section | Description |
|---|---|
General details of the template, such as the name, description, and a default certifier. |
|
The items to be certified. |
|
The cadence in which the review process is kicks off (campaign). |
|
The end users responsible for certifying the items in the campaign. |
|
Optional. Set up email notifications based on various events that take place during the certification process. |
|
Optional. Various configurations to allow during the campaign, such as bulk actions on line items or self-certification. |
|
Summary of configured sections. |
Details
This section includes basic information about the template, such as the display name, description, owner, and staging process.
To complete this section, do the following:
-
From the Advanced Identity Cloud admin console, click Certification > Templates > + New Template.
-
Select Identity Certification.
-
Click Next.
-
Complete the following fields:
Field Description Name
The display name for the campaign. This campaign name displays on both the certifications tab and the end-user tasks dashboard.
You can define a date variable in the name of the campaign to know which campaign kicks off. Identity Governance uses moment.js to format the date.
For example, if you have a campaign scheduled to run every two weeks, appending the date to the name lets you know which campaign you are working on. The campaign name can include the date (year, month, day), time (hour, minute), and time of day (AM/PM):
Campaign name — {{YYYY-MM-DD-hh:mma}}When you kick off the template into a campaign, an example of the name is:
Campaign name — 2023-12-12-08:18pmNOTE: Once the campaign kicks off you cannot modify the name. Description
Enter a general description for the campaign. Your company should follow a descriptive convention to describe each of your campaign.
This field is limited to 1000 characters. Campaign Owner
Enter the owner of the campaign. Only campaign owners can fully control their campaigns, including certification decisions, certifier assignment changes, sign off, and more.
Enable Campaign Staging
Enable staging to set up the campaign in the system but not activate it in production. This option allows compliance officers to preview a campaign before it is activated and exposed to end users. Compliance officers can inspect and review the content, decision items, and other details to determine whether to activate or delete it.
-
Click Next.
What to Certify
This sections lets you define the items to certify, including the organizations, users, applications, accounts, and entitlements.
To complete this section, do the following:
-
Complete the following fields:
Field Description Organizations
Filter any generated certification by organization. This feature only appears for identity certification campaigns.
-
All organizations
Include child organization
Click to include any suborganizations in the campaign.
Users
Certify one of the following:
-
All users
-
A single user
-
Users matching a filter — Create a filter to certify select users.
Accounts, Entitlements, Roles
Select at least one of the following:
-
Certify User Accounts.
-
Certify User Entitlements.
-
Certify User Roles.
Applications
Certify one of the following:
-
All applications
-
Specific applications — If you select this, an additional box displays to select which Applications to certify.
-
Applications matching a specific filter — Create a filter to certify specific applications.
If you create a governance glossary attribute and enhance the target application(s) with the attribute, you can filter on attribute(s) you create. For more information, refer to Create an application glossary attribute.
Accounts
Displays if you selected
Certify User Accounts.-
Select All accounts in selected applications if you selected Certify User Accounts.
Entitlements
Displays if you selected
Certify User Accounts.-
Certify one of the following if you selected Certify User Entitlements:
-
All entitlements
-
Entitlements matching a filter — Create a filter to certify specific entitlements.
If you create a governance glossary attribute and populate the attribute you create on the onboarded entitlement(s), you can filter on the attribute(s) you create. For more information, refer to Create an entitlement glossary attribute.
Roles
Displays if you selected
Certify User Roles.Certify one of the following if you selected Certify User Roles:
-
All roles
-
Roles matching a filter — Create a filter to certify specific roles.
If you create a governance glossary attribute and populate the attribute you create on roles, you can filter on the attribute(s) you create. For more information, refer to Create a role glossary attribute.
Exclude access granted only from a role
Enabled by default.
Excludes account and entitlement line items that are granted only through a role.
Identity Governance cannot certify or revoke an application or entitlement from an end user when they’re granted access through a role; therefore, excluding these line items can help reduce unnecessary information in the certification. For more information, refer to Decisions change based on how you grant access.
Exclude dynamically granted role memberships
Displays if you selected
Certify User Roles.Enabled by default if you are creating a role membership certification.
Exclude role line items that are granted to an end user through a condition.
Identity Governance can’t certify or revoke an end user being a member of a role through a condition; therefore, excluding these line items can help reduce unnecessary information in the certification. For more information, refer to Decisions change based on how you grant access.
(Optional) Show advanced filters
To certify accounts based on properties from the last certification decision made on a line item from the drop-down, select Filter by last certification decision.
A line item is a particular record for a certifier to review. For example, the user Barbara Jensen’s record that details their access to a particular application is a line item.
-
-
Click Next.
When to Certify
The When to Certify section lets the administrator specify when to kick off the review process (campaign) and what to do in the event the campaign expires.
To complete this section, do the following:
-
Complete the following fields:
Field Description Schedule
Define whether the template will kick off on a periodic basis. If selected, input various choices to define the schedule.
Check the Run on a schedule box to define a schedule for the template.
Options include:
-
Run Every - Run the certification every specified number of days, weeks, months, or years.
-
Start - Specify a start time when this campaign kicks off for the first time.
-
End - Run the certification on its defined periodic basis until this date is reached.
Campaign Duration
Specify the amount of time each access review (campaign) has before expiration. You can specify the duration in days, weeks, months, or years.
When Campaign Expires
Select a behavior to handle the open access review (campaign) line items when the campaign expires:
-
Close open items - Complete the items using the given information after the campaign expires. The administrator can select what decision to add to the item (certify, revoke, and allow exception to) and when that decision takes effect. The decision can take effect immediately or after a duration (in days).
-
Reassign to - Select a given user or role that the access review (campaign) is reassigned to after the expiration date. The campaign will not be closed.
-
Do Nothing - No action will be taken, and the line items will remain in progress.
-
-
Click Next.
Who will Certify
This section allows you to specify the users that review and make decisions about the items you defined in the What to Certify section.
To complete this section, do the following:
-
Complete the following fields:
Field Description Certifier Type
Specify who can review and certify user access by selecting one of the following:
-
User — Select a single user to review and make a decision on every record. When you select this, a Select user box displays. Select the user who will certify the campaign.
-
Role — Select a role that allows any of its members to review every record. When you select this, a Select a role box displays. Select a role from the list of the created roles in Advanced Identity Cloud.
-
Manager — The user’s manager becomes the certifier of their data (also known as a line item).
-
Organization Admin - Select an administrator for an organization who can certify their data.
Enable default certifiers
Select a certifier to assign in case an access review (campaign) line item is not assigned a certifier. For example, if the manager is the certifier and the user has no manager defined, then the default certifier will be assigned the access review for this user.
-
-
Click Next.
Notifications
This optional section allows you to send email notifications when one or more campaign events are triggered. For example, when a campaign is about to expire or when a certifier is reassigned.
To complete this section, do the following:
-
Define an email template for each selected notification. Each notification requires an associated email template. From the left navigation pane in the Advanced Identity Cloud admin console, go to Email > Templates. For more information, refer to Email templates.
There are preset email templates created for certification templates. Use these as a base, copy the email template, and customize them to suit your needs. To reference variables in your email templates for Identity Governance, the object is nested an additional level. The following table shows how to access these objects:
Item Usage User attributes
Use the syntax
object.user.userAttribute.Use the attributes available from the email template screen. For more information, refer to Email templates.
Manager attributes
Use the syntax
object.manager.managerAttribute.Use the attributes available from the email template screen. For more information, refer to Email templates.
If the manager is the certifier type in the Who will Certify section, use the same user attributes in the managerAttribute. For example, if you need to reference a user’s manager within the email, then use this object.Campaign attributes
Use the syntax
object.campaign.campaignAttribute.Available attributes are
nameandtype. -
Select any of the notification types:
Field Description Send initial notification
Send a notification any time a certifier is assigned to a line item.
Send reassign notification
Send to a new certifier when a line item in an access review (campaign) is reassigned or forwarded to them.
Send expiration notification
Send a reminder notification to the certifiers before a campaign expires. Select the number of days, before the campaign expires, to send the reminder.
To illustrate the expiration notification mechanism:
If the notification is set for three days prior to expiration, reviewers will receive an email when the campaign is three days away from the expiration date. If the deadline is extended by a week, the expiration date of the notification will be recalculated and sent three days before the new deadline, regardless of any previously sent notifications.
Send reminders
Send a notification to remind certifiers to take action on access review (campaign) line items. Select the number of days, weeks, months, or years to send the reminder.
Enable escalation
Send an escalation notification to specific recipients that certifiers have not completed their actions on a campaign. When selected, an additional Escalation Owner box displays. Select the number of days, weeks, months, or years and the user to send the escalation to.
-
Click Next.
Additional options
This optional section allows you to configure other options for a campaign, such as performing bulk certifications or reassigning tasks to another user or group.
To complete this section, do the following:
-
Complete the following optional fields:
Field Description Allow self-certification
Allows select individuals to certify their own data.
The options to choose from are:
-
All certifiers - Users who are certifying the access review (campaign) can certify their own access.
-
Owners and administrators - Users who are campaign owners or tenant administrators can certify their own access.
Enable line item reassignment and delegation
Allow the certifier to reassign or forward a line item to another user.
When you select this box, you can choose the following options:
-
Forward - Allow certifiers to forward their access review (campaign) to another certifier. When forwarding an access review, other certifiers are removed from the access review in its entirety. For more information, refer to forward line items.
-
Reassign - Select the privileges the current certifier can assign to the new certifier:
-
Add Comment
-
Make Decision
-
Reassign/Forward
-
Sign off
For context on how you use this as a certifier, refer to reassign line items.
-
Require justification on revoke
Require a mandatory comment or reason for the revocation.
Require justification on exception
Require a mandatory comment or reason for any allowed exception.
Allow exceptions
Allow certifiers to continue to certify line items assigned to them after the campaign expires. Select a duration in days, months, weeks, or years.
Allow bulk-decisions
Allow certifiers to make line item decisions in bulk.
This includes:
-
Making a decision (certify, revoke, exception).
-
If Enable line item reassignment and delegation is enabled, then you can bulk Reassign and/or Forward line items.
As an administrator, most access reviews require an in-depth look on each line item. This is to ensure accuracy of each item. Bulk-decisions allow for a certifier to make a decision on many items at once, which could lead to inaccurate data. Use caution when selecting this option. Allow partial sign-off
Allow a certifier to sign-off on an access review before their assigned line items have a decision made on them.
Process remediation
Revokes the end user’s access in the target application when a certifier revokes (denies) the line item. Select a workflow to run either immediately after revocation of access or after a duration.
To ensure end-user access is removed when revoking a line item, you must enable this property. -
-
Click Next.
Summary
The Summary section is the final section in creating a template. It gives a breakdown of each section in the template, allowing for a review.
Summary steps:
-
Review each section.
-
Click Save to complete the certification template.
Under the What to Certify review section, ensure that the Total Decision Items is greater than 0. If you identify that this is 0, this means that the template did not identify items to be certified. Therefore, if you create the campaign off of the template, the system will immediately cancel the campaign. If you identify this to be 0, go back to the What to Certify section and adjust your settings.
Entitlement assignment certification
Select an entitlement assignment certification type to certify the entitlements users have in specific applications.
Certifiers review the accounts and entitlements a user has in every onboarded target applications. When certifying, if the entitlement line item, and the line item has the decision of revoke, then the entitlement the user has in the application will be removed when the certification is signed-off.
To review information about templates, refer to Create templates.
|
You must populate the Display Name Attribute on the target application User entity object in the Details tab. This allows each account pulled into Advanced Identity Cloud to display with a human-readable name. This is required for the data to properly display when a certifier (reviewer) reviewers their certification. Perform the following:
The following video shows an example: |
The following table lists the areas to configure for each campaign template type:
| Section | Description |
|---|---|
General details of the template, such as the name, description, and a default certifier. |
|
The items to be certified. |
|
The cadence in which the review process is kicks off (campaign). |
|
The end users responsible for certifying the items in the campaign. |
|
Optional. Set up email notifications based on various events that take place during the certification process. |
|
Optional. Various configurations to allow during the campaign, such as bulk actions on line items or self-certification. |
|
Summary of configured sections. |
Details
This section includes basic information about the template, such as the display name, description, owner, and staging process.
To complete this section, do the following:
-
From the Advanced Identity Cloud admin console, click Certification > Templates > + New Template.
-
Select Entitlement Assignment Certification.
-
Click Next.
-
Complete the following fields:
Field Description Certification Name
The display name for the certification. This certification name displays on both the certifications tab and the end-user tasks dashboard.
Define a date variable in the name of the certification to know which campaign kicks off. Identity Governance uses moment.js to format the date.
For example, if you have a certification that is scheduled to run every two weeks, appending the date to the name lets you know which campaign you are working on.
For example, the certification name can include the date (year, month, day), time (hour, minute), and time of day (AM/PM):
Campaign name — {{YYYY-MM-DD-hh:mma}}When you kick off a template into a campaign, an example of the name is:
Campaign name — 2023-12-12-08:18pmOnce the campaign kicks off you cannot modify the name. Description
Enter a general description for the certification. Your company should follow a descriptive convention to describe each of your certifications.
This field is limited to 1000 characters. Certification Owner
Enter the owner of the certification. Only certification owners can fully control their certifications, including certification decisions, certifier assignment changes, sign off, and more.
Enable Campaign Staging
Enable certification staging to set up the certification in the system but not activate it in production. This option allows compliance officers to preview a certification before it is activated and exposed to end users. Compliance officers can inspect and review the content, decision items, and other details to determine whether to activate or delete it.
-
Click Next.
What to Certify
This section lets you define the items to certify, including the users, applications, accounts, and entitlements.
To complete this section, do the following:
-
Complete the following fields:
Field Description Entitlements
Certify one of the following:
-
All entitlements
-
Entitlements matching a filter — Create a filter to certify specific entitlements.
If you create a governance glossary attribute and enhance the onboarded entitlement(s) with the attribute, you can filter on the attribute(s) you create.
For more information, refer to the Manage governance glossary.
Applications
Certify one of the following:
-
All applications
-
Specific applications — If you select this, an additional box is displayed to select which Applications to certify.
-
Applications matching a specific filter — Create a filter to certify specific applications.
If you create a governance glossary attribute and enhance the target application(s) with the attribute, you can filter on the attribute(s) you create. For more information, refer to the Manage governance glossary.
Users
Certify one of the following:
-
All users
-
A single user
-
Users matching a filter — Create a filter to certify select users.
Exclude access granted only from a role
Enabled by default.
Excludes entitlement line items that are granted only through a role.
Identity Governance cannot certify or revoke an entitlement from an end user when they’re granted access through a role; therefore, excluding these line items can help reduce unnecessary information in the certification. For more information, refer to Decisions change based on how you grant access.
(Optional) Show advanced filters
To certify accounts based on properties from the last certification decision made on a line item from the drop-down, select Filter by last certification decision.
A line item is a particular record for a certifier to review. For example, the user Barbara Jensen’s record that details their access to a particular application is a line item.
-
-
Click Next.
When to Certify
The When to Certify section lets the administrator specify when to kick off the review process (campaign) and what to do in the event the campaign expires.
To complete this section, do the following:
-
Complete the following fields:
Field Description Schedule
Define whether the template will kick off on a periodic basis. If selected, input various choices to define the schedule.
Check the Run on a schedule box to define a schedule for the template.
Options include:
-
Run Every - Run the certification every specified number of days, weeks, months, or years.
-
Start - Specify a start time when this campaign kicks off for the first time.
-
End - Run the certification on its defined periodic basis until this date is reached.
Campaign Duration
Specify the amount of time each access review (campaign) has before expiration. You can specify the duration in days, weeks, months, or years.
When Campaign Expires
Select a behavior to handle the open access review (campaign) line items when the campaign expires:
-
Close open items - Complete the items using the given information after the campaign expires. The administrator can select what decision to add to the item (certify, revoke, and allow exception to) and when that decision takes effect. The decision can take effect immediately or after a duration (in days).
-
Reassign to - Select a given user or role that the access review (campaign) is reassigned to after the expiration date. The campaign will not be closed.
-
Do Nothing - No action will be taken, and the line items will remain in progress.
-
-
Click Next.
Who will Certify
This section allows you to specify the users that review and make decisions about the items you defined in the What to Certify section.
To complete this section, do the following:
-
Complete the following fields:
Field Description Certifier Type
Specify who can review and certify user access by selecting one of the following:
-
User — Select a single user to review and make a decision on every record. When you select this, a Select user box displays. Select the user who will certify the campaign.
-
Role — Select a role that allows any of its members to review every record. When you select this, a Select a role box displays. Select a role from the list of the created roles in Advanced Identity Cloud.
-
Entitlement Owner — The individual who manages the entitlement.
Enable default certifiers
Select a certifier to assign in case an access review (campaign) line item is not assigned a certifier. For example, if the manager is the certifier and the user has no manager defined, then the default certifier will be assigned the access review for this user.
-
-
Click Next.
Notifications
This optional section allows you to send email notifications when one or more campaign events are triggered. For example, when a campaign is about to expire or when a certifier is reassigned.
To complete this section, do the following:
-
Define an email template for each selected notification. Each notification requires an associated email template. From the left navigation pane in the Advanced Identity Cloud admin console, go to Email > Templates. For more information, refer to Email templates.
There are preset email templates created for certification templates. Use these as a base, copy the email template, and customize them to suit your needs. To reference variables in your email templates for Identity Governance, the object is nested an additional level. The following table shows how to access these objects:
Item Usage User attributes
Use the syntax
object.user.userAttribute.Use the attributes available from the email template screen. For more information, refer to Email templates.
Manager attributes
Use the syntax
object.manager.managerAttribute.Use the attributes available from the email template screen. For more information, refer to Email templates.
If the manager is the certifier type in the Who will Certify section, use the same user attributes in the managerAttribute. For example, if you need to reference a user’s manager within the email, then use this object.Campaign attributes
Use the syntax
object.campaign.campaignAttribute.Available attributes are
nameandtype. -
Select any of the notification types:
Field Description Send initial notification
Send a notification any time a certifier is assigned to a line item.
Send reassign notification
Send to a new certifier when a line item in an access review (campaign) is reassigned or forwarded to them.
Send expiration notification
Send a reminder notification to the certifiers before a campaign expires. Select the number of days, before the campaign expires, to send the reminder.
To illustrate the expiration notification mechanism:
If the notification is set for three days prior to expiration, reviewers will receive an email when the campaign is three days away from the expiration date. If the deadline is extended by a week, the expiration date of the notification will be recalculated and sent three days before the new deadline, regardless of any previously sent notifications.
Send reminders
Send a notification to remind certifiers to take action on access review (campaign) line items. Select the number of days, weeks, months, or years to send the reminder.
Enable escalation
Send an escalation notification to specific recipients that certifiers have not completed their actions on a campaign. When selected, an additional Escalation Owner box displays. Select the number of days, weeks, months, or years and the user to send the escalation to.
-
Click Next.
Additional options
This optional section allows you to configure other options for a campaign, such as performing bulk certifications or reassigning tasks to another user or group.
To complete this section, do the following:
-
Complete the following optional fields:
Field Description Allow self-certification
Allows select individuals to certify their own data.
The options to choose from are:
-
All certifiers - Users who are certifying the access review (campaign) can certify their own access.
-
Owners and administrators - Users who are campaign owners or tenant administrators can certify their own access.
Enable line item reassignment and delegation
Allow the certifier to reassign or forward a line item to another user.
When you select this box, you can choose the following options:
-
Forward - Allow certifiers to forward their access review (campaign) to another certifier. When forwarding an access review, other certifiers are removed from the access review in its entirety. For more information, refer to forward line items.
-
Reassign - Select the privileges the current certifier can assign to the new certifier:
-
Add Comment
-
Make Decision
-
Reassign/Forward
-
Sign off
For context on how you use this as a certifier, refer to reassign line items.
-
Require justification on revoke
Require a mandatory comment or reason for the revocation.
Require justification on exception
Require a mandatory comment or reason for any allowed exception.
Allow exceptions
Allow certifiers to continue to certify line items assigned to them after the campaign expires. Select a duration in days, months, weeks, or years.
Allow bulk-decisions
Allow certifiers to make line item decisions in bulk.
This includes:
-
Making a decision (certify, revoke, exception).
-
If Enable line item reassignment and delegation is enabled, then you can bulk Reassign and/or Forward line items.
As an administrator, most access reviews require an in-depth look on each line item. This is to ensure accuracy of each item. Bulk-decisions allow for a certifier to make a decision on many items at once, which could lead to inaccurate data. Use caution when selecting this option. Allow partial sign-off
Allow a certifier to sign-off on an access review before their assigned line items have a decision made on them.
Process remediation
Revokes the end user’s access in the target application when a certifier revokes (denies) the line item. Select a workflow to run either immediately after revocation of access or after a duration.
To ensure end-user access is removed when revoking a line item, you must enable this property. -
-
Click Next.
Summary
The Summary section is the final section in creating a template. It gives a breakdown of each section in the template, allowing for a review.
Summary steps:
-
Review each section.
-
Click Save to complete the certification template.
Under the What to Certify review section, ensure that the Total Decision Items is greater than 0. If you identify that this is 0, this means that the template did not identify items to be certified. Therefore, if you create the campaign off of the template, the system will immediately cancel the campaign. If you identify this to be 0, go back to the What to Certify section and adjust your settings.
Role membership certification
Select a role membership certification to certify or revoke user’s role memberships using a template.
Certifiers review roles a user has in Advanced Identity Cloud. When certifying, if the role line item has the decision of revoke, then Identity Governance removes the role when the certification is signed-off.
|
Before creating a role membership certification template, assign a role owner to each role in Advanced Identity Cloud. Role owners are the individuals responsible for the role, for example, the members of the role and metadata. To assign a role owner:
|
The following table lists the areas to configure for each campaign template type:
| Section | Description |
|---|---|
General details of the template, such as the name, description, and a default certifier. |
|
The items to be certified. |
|
The cadence in which the review process is kicks off (campaign). |
|
The end users responsible for certifying the items in the campaign. |
|
Optional. Set up email notifications based on various events that take place during the certification process. |
|
Optional. Various configurations to allow during the campaign, such as bulk actions on line items or self-certification. |
|
Summary of configured sections. |
Details
This section includes basic information about the template, such as the display name, description, owner, and staging process. To add basic template information, do the following:
-
From the Advanced Identity Cloud admin console, click Certification > Templates > + New Template.
-
Select Role Membership Certification.
-
Click Next.
-
Complete the following fields:
Field Description Certification Name
The display name for the certification. This certification name displays on both the certification tab and the end-user task dashboard.
Define a date variable in the name of the certification to know which campaign kicks off. Identity Governance uses moment.js to format the date.
For example, if you have a certification that’s scheduled to run every two weeks, appending the date to the name lets you know which campaign you are working on. The certification name can include the date (year, month, day), time (hour, minute), and time of day (AM/PM):
Campaign name — {{YYYY-MM-DD-hh:mma}}When you kick off a template into a campaign, an example of the name is:
Campaign name — 2023-12-12-08:18pmOnce you start the campaign for the first time, you cannot change the template name. Description
Enter a general description for the certification. Your company should follow a convention to describe each of your certifications.
This field is limited to 1000 characters. Certification Owner
Enter the owner of the certification. Only certification owners can fully control their certifications, including certification decisions, certifier assignment changes, sign off, and more.
Enable Campaign Staging
Enable certification staging to set up the certification in the system but not activate it in production. This option allows compliance officers to preview a certification before it’s activated and exposed to end users. Compliance officers can inspect and review the content, decision items, and other details to decide whether to activate or delete the campaign.
-
Click Next.
What to Certify
This section lets you define which roles or users to certify.
To define which users and roles to certify:
-
Complete the following fields:
Field Description Roles
Certify one of the following:
-
All roles
-
Roles matching a filter — Create a filter to certify specific roles.
If you create a governance glossary attribute and enhance roles with the attribute, you can filter on the attribute(s) you create.
For more information, refer to the Manage governance glossary.
Users
Certify one of the following:
-
All users
-
A single user
-
Users matching a filter — Create a filter to certify select users.
Exclude dynamically granted role memberships
Enabled by default.
Exclude role line items that are granted to an end user through a condition.
Identity Governance can’t certify or revoke an end user being a member of a role through a condition; therefore, excluding these line items can help reduce unnecessary information in the certification. For more information, refer to Decisions change based on how you grant access.
(Optional) Show advanced filters
To certify accounts based on properties from the last certification decision made on a line item from the drop-down, select Filter by last certification decision.
A line item is a particular record for a certifier to review.
-
-
Click Next.
When to Certify
The When to Certify section lets the administrator specify when to kick off the review process (campaign) and what to do in the event the campaign expires.
To complete this section, do the following:
-
Complete the following fields:
Field Description Schedule
Define whether the template will kick off on a periodic basis. If selected, input various choices to define the schedule.
Check the Run on a schedule box to define a schedule for the template.
Options include:
-
Run Every - Run the certification every specified number of days, weeks, months, or years.
-
Start - Specify a start time when this campaign kicks off for the first time.
-
End - Run the certification on its defined periodic basis until this date is reached.
Campaign Duration
Specify the amount of time each access review (campaign) has before expiration. You can specify the duration in days, weeks, months, or years.
When Campaign Expires
Select a behavior to handle the open access review (campaign) line items when the campaign expires:
-
Close open items - Complete the items using the given information after the campaign expires. The administrator can select what decision to add to the item (certify, revoke, and allow exception to) and when that decision takes effect. The decision can take effect immediately or after a duration (in days).
-
Reassign to - Select a given user or role that the access review (campaign) is reassigned to after the expiration date. The campaign will not be closed.
-
Do Nothing - No action will be taken, and the line items will remain in progress.
-
-
Click Next.
Who will Certify
This section allows you to specify the users that review and make decisions about the items you defined in the What to Certify section.
To define who will certify the certification:
-
Complete the following fields:
Field Description Certifier Type
Specify who can review and certify user access by selecting one of the following:
-
User — Select a single user to review and make a decision on every record. When you select this, a Select user box displays. Select the user who will certify the campaign.
-
Role — Select a role that allows any of its members to review every record. When you select this, a Select a role box displays. Select a role from the list of the created roles in Advanced Identity Cloud.
-
Role Owner — The individual who manages the role. For more information, refer to add role owner.
Enable default certifiers
Select a certifier to assign in case an access review (campaign) line item isn’t assigned a certifier. For example, if the role owner is the certifier and the role has no role owner defined, then Identity Governance assigns the specified default certifier to the access review for the role.
-
-
Click Next.
Notifications
This optional section allows you to send email notifications when one or more campaign events are triggered. For example, when a campaign is about to expire or when a certifier is reassigned.
To complete this section, do the following:
-
Define an email template for each selected notification. Each notification requires an associated email template. From the left navigation pane in the Advanced Identity Cloud admin console, go to Email > Templates. For more information, refer to Email templates.
There are preset email templates created for certification templates. Use these as a base, copy the email template, and customize them to suit your needs. To reference variables in your email templates for Identity Governance, the object is nested an additional level. The following table shows how to access these objects:
Item Usage User attributes
Use the syntax
object.user.userAttribute.Use the attributes available from the email template screen. For more information, refer to Email templates.
Manager attributes
Use the syntax
object.manager.managerAttribute.Use the attributes available from the email template screen. For more information, refer to Email templates.
If the manager is the certifier type in the Who will Certify section, use the same user attributes in the managerAttribute. For example, if you need to reference a user’s manager within the email, then use this object.Campaign attributes
Use the syntax
object.campaign.campaignAttribute.Available attributes are
nameandtype. -
Select any of the notification types:
Field Description Send initial notification
Send a notification any time a certifier is assigned to a line item.
Send reassign notification
Send to a new certifier when a line item in an access review (campaign) is reassigned or forwarded to them.
Send expiration notification
Send a reminder notification to the certifiers before a campaign expires. Select the number of days, before the campaign expires, to send the reminder.
To illustrate the expiration notification mechanism:
If the notification is set for three days prior to expiration, reviewers will receive an email when the campaign is three days away from the expiration date. If the deadline is extended by a week, the expiration date of the notification will be recalculated and sent three days before the new deadline, regardless of any previously sent notifications.
Send reminders
Send a notification to remind certifiers to take action on access review (campaign) line items. Select the number of days, weeks, months, or years to send the reminder.
Enable escalation
Send an escalation notification to specific recipients that certifiers have not completed their actions on a campaign. When selected, an additional Escalation Owner box displays. Select the number of days, weeks, months, or years and the user to send the escalation to.
-
Click Next.
Additional options
This optional section allows you to configure other options for a campaign, such as performing bulk certifications or reassigning tasks to another user or group.
To complete this section, do the following:
-
Complete the following optional fields:
Field Description Allow self-certification
Allows select individuals to certify their own data.
The options to choose from are:
-
All certifiers - Users who are certifying the access review (campaign) can certify their own access.
-
Owners and administrators - Users who are campaign owners or tenant administrators can certify their own access.
Enable line item reassignment and delegation
Allow the certifier to reassign or forward a line item to another user.
When you select this box, you can choose the following options:
-
Forward - Allow certifiers to forward their access review (campaign) to another certifier. When forwarding an access review, other certifiers are removed from the access review in its entirety. For more information, refer to forward line items.
-
Reassign - Select the privileges the current certifier can assign to the new certifier:
-
Add Comment
-
Make Decision
-
Reassign/Forward
-
Sign off
For context on how you use this as a certifier, refer to reassign line items.
-
Require justification on revoke
Require a mandatory comment or reason for the revocation.
Require justification on exception
Require a mandatory comment or reason for any allowed exception.
Allow exceptions
Allow certifiers to continue to certify line items assigned to them after the campaign expires. Select a duration in days, months, weeks, or years.
Allow bulk-decisions
Allow certifiers to make line item decisions in bulk.
This includes:
-
Making a decision (certify, revoke, exception).
-
If Enable line item reassignment and delegation is enabled, then you can bulk Reassign and/or Forward line items.
As an administrator, most access reviews require an in-depth look on each line item. This is to ensure accuracy of each item. Bulk-decisions allow for a certifier to make a decision on many items at once, which could lead to inaccurate data. Use caution when selecting this option. Allow partial sign-off
Allow a certifier to sign-off on an access review before their assigned line items have a decision made on them.
Process remediation
Revokes the end user’s access in the target application when a certifier revokes (denies) the line item. Select a workflow to run either immediately after revocation of access or after a duration.
To ensure end-user access is removed when revoking a line item, you must enable this property. -
-
Click Next.
Summary
The Summary section is the final section in creating a template. It gives a breakdown of each section in the template, allowing for a review.
Summary steps:
-
Review each section.
-
Click Save to complete the certification template.
Under the What to Certify review section, ensure that the Total Decision Items is greater than 0. If you identify that this is 0, this means that the template did not identify items to be certified. Therefore, if you create the campaign off of the template, the system will immediately cancel the campaign. If you identify this to be 0, go back to the What to Certify section and adjust your settings.
Kick off data review process using campaigns
Campaigns are the second step in certifying access for users.
Once you create a template, and you are ready to start the review process, create a campaign.
After you start a campaign, the end users (certifiers), that are defined in the template, are notified to start reviewing the data. The process of certifiers reviewing data is called an access review.
When you kick off a campaign, through the ad-hoc (one time) run under the Templates tab or through the schedule set in the template, the Certification tab displays the certification.
The following video shows an example:
To access campaigns, from the Advanced Identity Cloud admin console, click Certification > Campaigns tab.
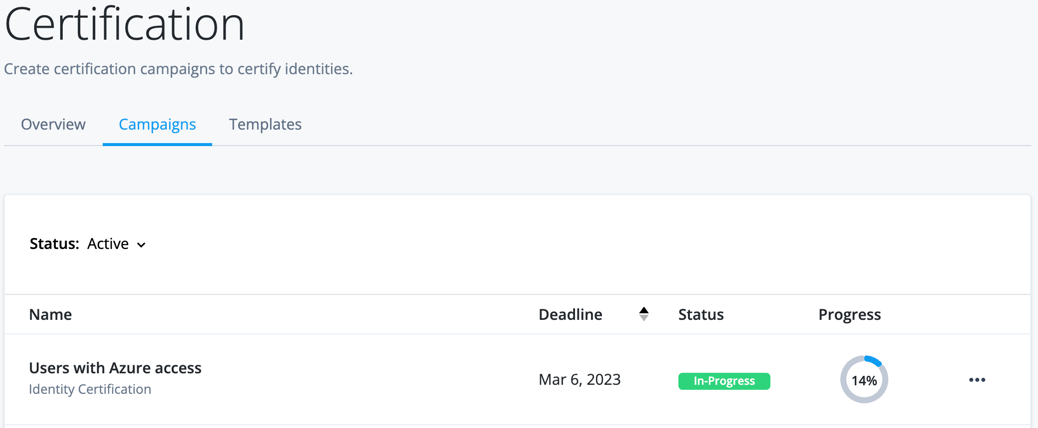
View campaigns
The landing page/modal on the Campaigns tab displays Active campaigns.
To view campaigns that have a specific status, such as Closed or Canceled, click the Status drop-down and filter the status.
| To view additional campaigns, click the caret icons at the bottom of the table. |
Campaign statuses to filter
| Status | Description |
|---|---|
Active |
The campaign is in progress. In the Status column, this includes the In-progress, Expiring and Overdue states.
|
Expired |
The campaign expired. Advanced Identity Cloud triggers this status when you select When to Certify > When certification expires > Close open items > immediately in the template. |
Cancelled |
This campaign was canceled manually and is no longer in progress. In certain situations when there is an error creating the campaign from the template, a campaign might automatically go into this state. |
Completed |
The campaign finished as expected with no issues. |
Staged |
The campaign is staged and is not active. For more information, refer to the details section of creating a template. |
Campaign landing page columns
The campaigns listed on the landing page of the Campaigns tab consists of a table with various columns.
| Field | Description | ||
|---|---|---|---|
Name |
The name of the campaign. This name is generated from the template. |
||
Deadline |
The campaign completion date. |
||
Status |
The state the campaign is in. Refer to Campaign statuses to filter for more information. |
||
Progress |
The percent complete of the campaign.
|
| To filter a column, click the up/down icon (where applicable). |
Update deadline of campaign
The deadline (expiration) of a campaign can be updated once a campaign is ran.
To update the deadline:
-
From the Advanced Identity Cloud admin console, click Certifications.
-
Select the Campaigns tab.
-
Click next to the campaign to update the deadline.
-
Enter a new date.
-
Click Save.
View details of campaign
From the Campaigns tab on the landing page, click the desired campaign to view more details.
The data the page displays depends on the certification type in the template.
The selected campaign includes two tabs:
Details tab
The Details tab includes graphical information about the campaign. For example, the percentage of completeness or the reviews currently in progress.
The information is broken out into various cards. The following table shows the various information by card.
Campaign details page
| Card/Title | Description |
|---|---|
Status |
Provides information about when the campaign expires. You can select Cancel Campaign to cancel the campaign. If the campaign status is Staged, you can select Activate to kick-off the campaign. |
Campaign Details |
Shows the percentage of the campaign complete, including the number of reviews completed versus the total amount of reviews, as well as general information about the campaign:
|
Users |
Pie chart. The number of new users versus previously certified users in the campaign. |
Decisions Breakdown |
Pie chart. A breakdown of the decisions made in the campaign by certifiers (certified, revoked, exception). |
Access by Application |
Pie chart. The number of accounts by application to be certified in the campaign. |
Users with no email address |
Numerical. The number of users that do not have an email address on their profile. |
Certifiers with no email address |
Numerical. The number of certifiers (reviewers) that do not have an email address on their profile. |
Access reviews tab
The Access Reviews tab contains information on the certifiers in the campaign. The certifiers could be an individual or a role. This includes the progress they have made on their reviews, as well as the ability to view the items each certifier is responsible for.
By default, the page displays the certifiers who are reviewing the access review, which is in the Active state.
To view other statuses, select the Status drop-down:
| Status | Description |
|---|---|
Active |
The certifier has line items on the campaign that do not have a decision made on them. A line item is a record for a certifier to review. For example, the user Barbara Jensen’s record that details their access to a particular application is a line item. |
Expired |
The campaign has passed its deadline and the certifier has line items that do not have a decision made on them. |
Completed |
The certifier has reviewed and made decisions on the line items assigned to them in their access review and signed off. |
You can use the search icon to search for a specific campaign by its name.
There are three columns in the Access Reviews tab:
-
Certifier — The individual or users assigned to a role responsible for a part of the campaign.
-
Status — The status of the campaign.
-
Progress — The progress the certifier has made in their reviews.
To view the percentage and number of items that are complete, hover over the progress icon.
Click the arrow icon on Certifier to filter alphabetically (ascending or descending).
To view additional features, such as forwarding a certifier’s items to another person or end users assigned to a role, click to the right of the table.
| To gain a detailed view of the items left for a certifier, click on their record in the table. The drilled-down view is the same view a certifier utilizes when completing their items for the campaign. For more information on this view, refer to Certify data using access reviews. |
Cancel existing campaign
You can only cancel a campaign that is in the Active state (which includes the states Expiring and Overdue). For more information, refer to Campaign statuses to filter.
There are two ways to cancel a campaign:
-
When viewing campaigns from the Certifications > Campaigns landing page:
-
Click next to the campaign.
-
Click Cancel.
-
Click Cancel Campaign.
-
-
In the drill-down campaign view:
-
Click into a campaign.
-
Click Cancel Campaign.
-
Click Cancel Campaign again in the confirmation screen.
-
Certify data using access reviews
Access reviews are the final step of certifying access for users.
After you kick off the data review process in a campaign, the data defined for review is sent to the end users you define in the template.
The process of end users certifying the data assigned to them is called an access review.
Notes on access reviews:
-
An access review consists of one or more line items or records to review and certify.
-
An end user who has an access review is considered a reviewer of the certification, also called a certifier.
-
Multiple certifiers can be assigned to review the same data.
-
When an end user is designated as a reviewer from a campaign, it displays under Inbox > Access Reviews or in the Dashboard landing page.
-
You define the certifiers when you create a template and kick off a campaign. A reviewer can also be added through forwarding or reassignment by certifiers and administrators.
-
Certifiers can change the decision a previous certifier made for a line item; however, changes cannot be made to a campaign after a decision is set and the campaign is signed off (completed). Additional changes require remediation through another campaign.
For example, if one certifier decides to certify the access for a line item, but another certifier decides to revoke access for it after, then the last certifier’s decision is the decision that prevails.
-
For more information on how access reviews display to certifiers in the end-user UI, refer to End-user pages.
Quick links
As there are various features that become enabled or disabled for end user access reviews depending on the configurations in the template, the following is a table to quick links in this page.
Details
| Item | Description |
|---|---|
A landing screen that shows access reviews that are assigned to an end user. This includes an explanation of the access review landing page columns. |
|
The screen where end users complete the access review of the line items for a campaign. A line item is a record for a certifier to review. For example, the user Barbara Jensen’s record that details their access to a particular application is a line item. This includes:
|
|
Filter campaign items that display data in different ways. |
|
Rearrange or hide the table columns. |
|
Provide a comment on a line item in the access review. Use cases include:
|
|
Make a decision to either certify access, revoke access, or provide an exception to access for a specified duration (you must enable the configurations in the template). |
|
View other reviewers assigned to a line item in the access review. |
|
An end user can reassign an item that is assigned to them and define the permissions of the new assignee. There are two ways to reassign a line item: |
|
Remove prior reviewers and assign the line item to another individual(s). Full permissions on the item are given to the forwarded individual(s). There are two ways to forward a line item: |
|
Perform a bulk line item certification. Not recommended for every campaign as this will bypass much needed manual oversight on each item. |
View access review tasks
To view the access review tasks, from the Advanced Identity Cloud end-user UI, click Inbox > Access Reviews.
The landing screen on Access Reviews is a view of the active campaigns that have a task assigned to an end user.
To view campaigns that have a specific status, such as Closed or Canceled, click the Status drop-down and filter the status.
| To view additional tasks, click the caret icons at the bottom of the table. |
Campaign statuses to filter
| Status | Description |
|---|---|
Active |
The campaign is in progress. In the Status column, this includes the In-progress, Expiring and Overdue states.
|
Expired |
The campaign expired. Advanced Identity Cloud triggers this status when and end user selects When to Certify > When certification expires > Close open items > immediately in the template. |
Completed |
The campaign finished as expected with no issues. |
Access reviews landing page columns
The campaigns listed on the landing page of the Access Reviews tab consists of a table with various columns.
| Field | Description | ||
|---|---|---|---|
Name |
The name of the campaign. This name is generated from the template. |
||
Deadline |
The date in which the campaign must be completed. |
||
Status |
The state the campaign is in. Refer to Campaign statuses to filter for more information. |
||
Progress |
The percent complete of the campaign.
|
| To filter a column, click the up/down icon. |
To view additional features, such as forwarding a certifier’s items to another person or end users assigned to a role, click to the right of the table.
View individual access review line items
For an end user to review the line items they need to certify, click an access review (campaign).
The top section of the screen shows information about the access review including:
-
The Status metric shows the percentage of items to complete, as well as a numeric value of items that are complete versus the total amount of items.
-
The Decisions pie chart is shows the number of records certified versus revoked.
-
The Deadline is the campaign completion date. Click the View campaign details to view additional information such as the description of the campaign and the campaign owner.
Access review task columns
| The following columns can change depending on the certification type and configuration options in the template. |
The columns in the line items table are:
| Field | Description |
|---|---|
User |
The user in Advanced Identity Cloud. |
Application |
The onboarded application the user has access to. |
Account |
The account in the application that correlates to a user in Advanced Identity Cloud. |
Entitlement |
The entitlement in the application the user has granted. |
Flags |
Information about how access was given. One or more of these flags can display on a line item:
|
Comment |
Comments that have been made on a record in a campaign. A number above the comment icon indicates the amount of comments left. |
Decision |
The action taken on a record in a certification. Options are:
|
|
To view information about a line item, click on the item under the column. For example, to review a user’s information in Advanced Identity Cloud for an identity certification type, click the user’s name and a modal window pops up displaying the information for review. The same is true for each single item in a row. The following video shows an example: |
| To view additional line items in the access review, click the caret icon at the bottom of the table. |
High-level reviewer steps
The following are typical steps when an end user certifies line items in an access review (campaign):
-
Click into a record and review information by clicking into each item in the row.
-
Add a comment if necessary (or mandatory if the campaign requires it).
-
Make a decision by selecting Certify access, Revoke access, or Allow an exception. The last reviewer on the item to make a decision is the decision that will prevail for the item.
-
Repeat steps 1-3 for each line item in the table.
-
Once an end user certifies every record, click Sign-off. Once this takes place, no changes can be made to the campaign as it acts as the final decision on a certification.
If Allow partial sign-off is enabled in the Additional Options section of the campaign template, then the line items do not have to be completed before the task can be signed off. A gradual fashion can be used whereas a subset of the items can be signed off and the other items can be completed at a later date. For more information on setting these configurations in the template, refer to additional options. The following video shows an example:
| These steps may vary depending on the configurations made in the template. For example, if bulk actions is enabled, then the certifier has the ability to make a decision for the items in the table at once. Additionally, the task could be reassigned or forwarded. |
Subsequent sections display various functions of the certifier process in detail.
Filter and group items
End users can filter and group items to make them more manageable when certifying.
The following video shows an example:
Filter items
Certifiers can manipulate the data presented on an access review.
To filter the items, click on the filter icon in the top right of the line items table. Once selected, there are two ways to filter:
-
By decision: Filter the table by the decision made on a line item, either Certified, Revoked, Exception Allowed, or No Decision.
-
By item attributes: Filter the table by a particular column item, such as a user. Click the item to filter on, then enter the appropriate value in the additional box that is displayed.
Group items
Grouping items aggregates duplicate information.
For example, if a user has four entitlements, the campaign items table displays this as four separate records. In grouping by fields, the entitlements display as a sub-table under a record, reducing the redundancy of reviewing the same record’s information.
To group the items, click the Group By icon above the Filter icon.
When end users select an object to group by, for example, Account, the view of the table changes splitting the screen in half.
|
If an end user selects multiple items in the What to Certify, such as accounts and entitlements, they can navigate between the various items. |
Customize table columns
An end user can modify the columns presented in the line items table.
For example, they may want to display additional user properties.
To customize columns:
-
Click the view column icon ().
-
Under Available Columns, click each section and select or deselect the columns to display.
-
Under Active Columns, rearrange the order of the columns by clicking the drag icon () and dragging each column to the desired order.
To delete an Active Column, click the delete icon (). -
Click Apply.
Add comment
Certifiers can leave a comment in an access review.
The comment could vary in nature due to a number of reasons:
-
A justification for the decision being made.
-
A comment about why the item is being reassigned.
-
A comment about why the item is being forwarded.
-
A comment from another certifier if there are multiple certifier on the line item(s).
| An auto-generated comment is created when an item is forwarded or reassigned. |
To add a comment:
-
To get to the comment box either:
-
Click the comment icon box.
-
Click next the item to comment on and click the Add Comment.
-
-
Enter the comment.
-
Click Add Comment.
| Once a comment has been made and added to a line item, it cannot be removed. |
Make a decision (certify)
A decision is an action a certifier makes on a line item in an access review.

A certifier can do one of the following:
-
To Certify (keep) access, click the green checkmark icon.
-
To Revoke (deny) access, click the circle-backslash icon. After selecting this, a mandatory comment box displays to the certifier in which they must enter a reason for revoking the line item.
When the campaign is signed off, if the Process remediation configuration option is enabled in the Additional Options section of the template, then the line item will be removed from the onboarded application.
-
The clock icon is disabled unless you explicitly enable exceptions by marking Allow Exceptions (under Additional Options) as allowed.
You can also specify the duration for exceptions under Additional Options. For more information, refer to additional options.
A certifier can only make a decision once per line item, no matter the number of certifiers. The decision made by the last certifier on a line item is the decision that prevails. After an access review (campaign) is signed off, a decision cannot be modified.
Decisions change based on how you grant access
Depending on the certification type and how an end user is given access to a resource, the decisions a certifier can take on a line item changes:
| How you grant access | Cert type | Notes | ||
|---|---|---|---|---|
To an application or entitlement via a role. |
Identity |
Identity Governance cannot certify or revoke the line item if you assign an end user to an application or entitlement using a role. To remove the user from the application or entitlement, remove them from the role.
|
||
In the What to Certify
section of the template, you select to certify |
Identity |
Identity Governance cannot certify or revoke an end user being a member of a role through a condition. To remove the end user from the role, update them to no longer meet the condition. |
||
To an entitlement via a role. |
Entitlement |
Identity Governance cannot certify or revoke the line item if you assign an end user to an entitlement using a role. To remove an end user from an entitlement, when they’re granted access through a role, remove them from the role. |
||
Through a role with a condition. |
Role membership |
Identity Governance cannot certify or revoke an end user being a member of a role through a condition. To remove the end user from the role, update them to no longer meet the condition. |
For each situation, the following UI elements change:
-
The Revoke and Allow an Exception decisions are disabled.
-
The Certify text changes to Acknowledge.
-
The line item cannot be used with bulk certify.
View other certifiers
For each line item in the access review, certifiers have the ability to view the other certifiers. To view the certifiers, click next to the item and click View Reviewers.
From here an end user has the ability to:
Edit certifier privileges
| To edit the privileges a certifier has, you must enable the configuration setting Enable line item reassignment > Reassign in the Additional Options section of the template. |
To edit the permissions of a certifier on a line item:
-
Click next to the line item and click View Reviewers.
-
End users locate the certifier they would like to modify and click > Edit.
-
Select/deselect the privileges on the certifier.
-
Click Save.
Reassign an item
End users reassign a line item by adding another certifier to review the item. When a certifier adds another certifier, they specify the privileges of the certifier.
| To reassign an item, you must enable the configuration setting Enable line item reassignment > Reassign in the Additional Options section of the template. For more information, refer to additional options. |
There are two ways to reassign an item:
Reassign from view reviewers screen
-
On the item, click > View Reviewers.
-
Click + Add a Reviewer.
-
Select to add either Add a user or Add a role to the line item.
-
Search for the individual or role and select it.
-
Select the privileges that the new end user or role will have on the line item. The privileges you can add are:
-
View — Allows another end user to view the line item.
-
Comment — Allows another end user to leave a comment on the line item.
-
Decide — Allows another end user to make a decision on the line item.
-
Assign/Forward — Allows another end user to reassign or forward the line item.
-
Sign off — Allows another end user to sign-off on the line item.
You can only select a privilege if enabled from the template under the Additional Options section. Therefore, the options listed above are subject to change. For more information, refer to additional options.
-
-
Click Reassign.
Reassign from bulk reassign
| The option for bulk certify and reassign must first be enabled in the Additional Options section of the template before bulk reassign can be utilized. For more details, refer to Bulk certify items. |
-
After selecting more than one item, click the Actions drop-down that shows and select Reassign.
-
In the modal, choose to reassign to Another user or to Users with assigned role to the line item.
-
Search for the individual or role and select it.
-
Select the privileges that the user or role will have on the line item. The privileges you can add are:
-
View — Allows a user to view the line item.
-
Comment — Allows a user to leave a comment on the line item.
-
Decide — Allows a user to make a decision on the line item.
-
Forward — Allows a user to reassign or forward the line item.
-
Sign off — Allows a user to sign-off on the line item.
You will only be able to select a privilege if allowed from the template under the additional options section. Therefore, the options listed above are subject to change.
-
-
Click Reassign.
Forward an item
When end users forward a line item in an access review, the end user removes prior certifiers and assigns the line item to another end user or role. The new certifier(s) have full permissions on the line item.
| To forward a line item, you must enable the configuration setting Enable line item reassignment > Forward in the Additional Options section of the template. |
There are two ways to forward an item:
Individual forwarding
-
On the line item, click > Forward.
-
In the modal, choose to forward the line item to Another user or to Users with assigned role.
-
Search for the individual or role.
-
End users leave a comment as to why they are forwarding the line item.
-
Click Forward Item.
Bulk forwarding
| The option for bulk certify and forward must first be enabled in the Additional Options section of the certification campaign template before bulk reassign can be utilized. For more details, refer to Bulk certify items. |
-
Select more than one item via the checkbox next to the items in the left of the certification items table or check the Select All box.
-
Click the Actions drop-down that is displayed.
-
Select Forward.
-
A modal window is displayed.
-
Select if the line items should be forwarded to Another user or Users with assigned role.
-
Search for the individual or role.
-
End users leave a comment as to why they are forwarding the line items.
-
Click Forward Item.
Bulk certify items
The bulk certification of line items allow for many items to undergo the certification process at once instead of one-by-one. This configuration setting is not enabled by default and should be used with caution. Most access reviews require an in-depth look into the accuracy of data and bulk certification circumvents this.
| To bulk certify line items, you must enable the configuration setting Allow Bulk Decisions in the Additional Options section of the template. For more information, refer to additional options. |
Once the bulk certify option is enabled, checkboxes display to the left of the line items table. Additionally, a Select drop-down button displays at the top left of the campaign items table.
When end users select one or more items via the checkboxes, or they select All items (in the drop-down button of Select), an additional Actions drop-down button displays. End users click this button to view actions they can make in a bulk fashion.
| Under the Select drop-down button, end users can choose to select All items that under review, All on this page, or Deselect all items. |
The items that display under the Actions button vary depending on if the configuration settings that you enable in the template, but can include:
-
Certify
-
Revoke
-
Allow an exception
-
Reassign
-
Forward
Certify access by event
Administrators have the ability to configure certifications triggered by specific governance events. This process, known as event-based certification, provides faster certification resolution compared to scheduled campaigns spanning several weeks or months that involve multiple applications, complex rules, and hundreds of reviewers.
Event-based certifications runs an identity certification for any user that triggers the following events:
-
User create. Advanced Identity Cloud detects when a user has been created.
-
User modify. Advanced Identity Cloud detects when an existing user has been modified.
-
Attribute change. Advanced Identity Cloud detects changes in an existing user’s account attributes.
-
User delete/deactivate. Advanced Identity Cloud detects if a user’s account has been deleted or deactivated.
Events tab
To access the Events tab, from the Advanced Identity Cloud admin console, go to Governance > Events.
| If you have no events configured in the system, the message "There are no events to show" appears with a New Event button on the page. |
Create a new event
-
On the Advanced Identity Cloud admin console, click Governance > Events.
-
Click New Event. You will have the option to create the following:
Edit an event
-
On the Advanced Identity Cloud admin console, click Governance > Events.
-
Select an event, and then click ellipsis ().
-
Click Edit, and make any changes to your event settings.
-
Click Save when done.
Activate or deactivate an event
-
On the Advanced Identity Cloud admin console, click Governance > Events.
-
Select an event, and then click ellipsis ().
-
Click Activate to set the event active in the system. The green
Activelabel appears in theStatuscolumn. -
To deactivate an active event:
-
Select an event, and then click ellipsis ().
-
Click Deactivate.
-
On the
Deactivate Event?modal, click Deactivate. TheInactivelabel appears in theStatuscolumn.
-
Certification event
The Advanced Identity Cloud admin console provides simple steps to set up a certification event using the campaign template format.
The following table lists the sections that you must follow to set up a certification event template.
| Section | Description |
|---|---|
Create a new certification event. |
|
Type of event trigger. |
|
Type of action to take when the trigger occurs. |
|
General event details of the template. |
|
Certification campaign details. |
|
Items to be certified. |
|
Duration of the certification event. |
|
Users who will certify the event. |
|
Optional. Email notifications options. |
|
Optional. Various configurations to allow during the certification. |
|
Summary of your selected sections. |
Create a new certification event
-
On the Advanced Identity Cloud admin console, click Governance > Events.
-
On the Governance Events page, click New Event. The New Event modal appears.
Event trigger
This section sets the type of event trigger for your workflow.
-
On the New Event modal, select an event trigger:
-
User created. Trigger an action when a user is created.
-
User updated. Trigger an action when a user is updated.
-
-
Click Next.
Event action
This section sets the type of action for your certification when the event is triggered.
-
On the New Event modal, review the event actions, and click Certification:
-
Certification. Trigger a certification campaign when an event occurs.
-
Workflow. Trigger a workflow when an event occurs.
-
-
Click Next.
Event details
-
On the Event Details modal, complete the following fields, and click Next.
Field Description Event Name
Display name for the event.
Event Description
Optional. Enter a general description for the event. Your company should follow a descriptive convention to describe each of your events.
Event Owners
Enter the owner(s) of the event. Only owners can fully control their events, including event decisions, event assignment changes, sign off, and more.
Trigger for
Determine the users for which to apply the trigger. Options are:
-
All users. Trigger for all users in your system.
-
A subset of users. Trigger for a subset of users in your system. This option opens a filter to set up your users.
Event filter
-
Event campaign details
This section sets the campaign details for your certification when the event is triggered.
-
On the New Certification Event modal, complete the following fields, and click Next.
Field Description Name
Display name for the campaign.
Description
Optional. Enter a general description for the certification campaign. Your company should follow a descriptive convention to describe each of your events.
Campaign Owner
Enter the owner(s) of the certification campaign event. Only certification owners can fully control their certifications, including certification decisions, certifier assignment changes, sign off, and more.
What to certify
This section defines what to certify as part of this campaign.
-
On the New Certification Event modal, select any or all of the following:
-
Accounts — The user accounts in the external applications.
-
Entitlements — The authorization (privileges) the user has in the external applications.
-
Roles — The Advanced Identity Cloud roles a user is a member of.
Depending on your selection, the estimated total of applications, accounts, and entitlements subject to this certification are displayed at the bottom of the page:
-
If you selected Accounts: Applications and accounts totals are displayed.
-
If you selected Entitlements: Applications and entitlements totals are displayed.
-
If you selected Roles: Roles totals are displayed.
-
-
-
Complete the following fields, and click Next.
Field Description Applications
Certify one of the following:
-
All applications
-
Specific applications — If you select this, an additional box displays to select which Applications to certify.
-
Applications matching a specific filter — Create a filter to certify specific applications.
Accounts
Displays if you select Accounts in step 1. Select one of the following:
-
All accounts in selected applications.
-
Accounts matching a filter - Create a filter for accounts that match the filter.
Entitlements
Displays if you select Entitlements in step 1.
Certify one of the following:
-
All entitlements
-
Entitlements matching a filter — Create a filter to match specific entitlements.
If you create a governance glossary attribute and populate the attribute you create on the onboarded entitlement(s), you can filter on the attribute(s) you create. For more information, refer to Create an entitlement glossary attribute.
Roles
Displays if you select Roles in step 1.
Certify one of the following:
-
All roles
-
Roles matching a filter — Create a filter to certify specific roles.
If you create a governance glossary attribute and populate the attribute you create on roles, you can filter on the attribute(s) you create. For more information, refer to Create a role glossary attribute.
Exclude access granted only from a role
Displays if you select
AccountsorEntitlementsin step 1. Excludes account and entitlement line items that are granted only through a role. Enabled by default.Identity Governance cannot certify or revoke an application or entitlement from an end user when they are granted access through a role; therefore, excluding these line items can help reduce unnecessary information in the certification. For more information, refer to Decisions change based on how you grant access.
Filter by last certification decision
Set a filter when one of the following conditions are met. The decision properties are:
-
Campaign ID
-
Completion date[.label]
-
Status
-
Decision
Click to add the rule to your filter.
-
Duration
The Duration section lets the administrator specify when to kick off the review process (campaign) and what to do in the event the campaign expires.
-
Complete the following fields, and click Next.
Field Description Duration
Specify the amount of time each access review (campaign) has before expiration. You can specify the duration in days, weeks, months, or years.
When Campaign Expires
Select a behavior to handle the open access review (campaign) line items when the campaign expires:
-
Close <selection> open items - Complete the items using the given information after the campaign expires. The administrator can select what decision to add to the item (
certify,revoke, andallow exception to) and when that decision takes effect. The decision can take effectimmediatelyorafter a duration(in days). -
Reassign to - Select a given user or role that the access review (campaign) is reassigned to after the expiration date. The campaign will not be closed.
-
Do Nothing - No action will be taken, and the line items will remain in progress.
-
Who will Certify
This section allows you to specify the users that review and make decisions about the items you defined in the What to Certify section.
-
Complete the following fields, and click Next.
Field Description Certifier Type
Specify who can review and certify user access by selecting one of the following:
-
User — Select a single user to review and make a decision on every record. When you select this, a Select user box displays. Select the user who will certify the campaign.
-
Role — Select a role that allows any of its members to review every record. When you select this, a Select a role box displays. Select a role from the list of the created roles in Advanced Identity Cloud.
-
Manager — The user’s manager becomes the certifier of their data (also known as a line item).
Enable default certifiers
Select a certifier to assign in case an access review (campaign) line item is not assigned a certifier. For example, if the manager is the certifier and the user has no manager defined, then the default certifier will be assigned the access review for this user.
-
Notifications
This optional section allows you to send email notifications when one or more campaign events are triggered. For example, when a campaign is about to expire or when a certifier is reassigned.
-
Define an email template for each selected notification. Each notification requires an associated email template.
-
From the left navigation pane in the Advanced Identity Cloud admin console, go to Email > Templates. For more information, refer to Email templates.
There are preset email templates created for certification templates. Use these as a base, copy the email template, and customize them to suit your needs.
-
-
Select any of the notification types, and then click Next.
Field Description Send initial notification
Send a notification any time a certifier is assigned to a line item.
Send reassign notification
Send to a new certifier when a line item in an access review (campaign) is reassigned or forwarded to them.
Send expiration notification
Send a reminder notification to the certifiers before a campaign expires. Select the number of days, before the campaign expires, to send the reminder.
Send reminders
Send a notification to remind certifiers to take action on access review (campaign) line items. Select the number of days, weeks, months, or years to send the reminder.
Enable escalation
Send an escalation notification to specific recipients that certifiers have not completed their actions on a campaign. When selected, an additional Escalation Owner box displays. Select the number of days, weeks, months, or years and the user to send the escalation to.
Additional options
This optional section allows you to configure other options for a campaign, such as performing bulk certifications or reassigning tasks to another user or group.
-
Complete the following optional fields, and then click Next.
Field Description Allow self-certification
Allows select individuals to certify their own data.
The options to choose from are:
-
All certifiers - Users who are certifying the access review (campaign) can certify their own access.
-
Owners and administrators - Users who are campaign owners or tenant administrators can certify their own access.
Enable line-item reassignment and delegation
Allow the certifier to reassign or forward a line item to another user.
When you select this box, you can choose the following options:
-
Forward - Allow certifiers to forward their access review (campaign) to another certifier. When forwarding an access review, other certifiers are removed from the access review in its entirety. For more information, refer to forward line items.
-
Reassign - Select the privileges the current certifier can assign to the new certifier:
-
Add Comment
-
Make Decision
-
Reassign/Forward
-
Sign off
For context on how you use this as a certifier, refer to reassign line items.
-
Require justification on revoke
Require a justification when revoking.
Require justification on exception
Require a justification for an exception.
Allow exceptions
Allow certifiers to continue to certify line items assigned to them after the campaign expires. Select a duration in days, months, weeks, or years.
Allow bulk-decisions
Allow certifiers to make line item decisions in bulk.
This includes:
-
Making a decision (certify, revoke, exception).
-
If Enable line item reassignment and delegation is enabled, then you can bulk Reassign and/or Forward line items.
As an administrator, most access reviews require an in-depth look on each line item. This is to ensure accuracy of each item. Bulk-decisions allow for a certifier to make a decision on many items at once, which could lead to inaccurate data. Use caution when selecting this option. Allow partial sign-off
Allow a certifier to sign-off on an access review before their assigned line items have a decision made on them.
Process remediation
Revokes the end user’s access in the target application when a certifier revokes (denies) the line item. Select a workflow to run either immediately after revocation of access or after a duration.
To ensure end-user access is removed when revoking a line item, you must enable this property. -
Summary
The Summary section is the final section in creating a template. It gives a breakdown of each section in the template, allowing for a review.
Summary steps:
-
Review each section.
-
Click Save to complete the template. Your event appears on the Events page.
Under the What to Certify review section, ensure that the Total Decision Items is greater than 0. If you identify that this is 0, this means that the template did not identify items to be certified. Therefore, if you create the campaign off of the template, the system will immediately cancel the campaign. If you identify this to be 0, go back to the What to Certify section and adjust your settings.
Workflow event
The Advanced Identity Cloud admin console provides simple steps to set up a workflow event using the campaign template format.
The following table lists the sections that you must follow to set up a workflow event template.
| Section | Description |
|---|---|
Create a new workflow event. |
|
Type of event trigger. |
|
Type of action to take when the trigger occurs. |
|
General event details of the template. |
|
Summary of your selected sections. |
Create a new workflow event
-
On the Advanced Identity Cloud admin console, click Governance > Events.
-
On the Governance Events page, click New Event. The New Event modal appears.
Event trigger
This section sets the type of event trigger for your workflow.
-
On the New Event modal, select an event trigger:
-
User created. Trigger an action when a user is created.
-
User updated. Trigger an action when a user is updated.
-
-
Click Next.
Event action
This section sets the type of action for your workflow when the event is triggered.
-
On the New Event modal, review the event actions, and click Workflow:
-
Certification. Trigger a certification campaign when an event occurs.
-
Workflow. Trigger a workflow when an event occurs.
-
-
Click Next.
Event details
-
On the Event Details modal, complete the following fields, and click Next.
Field Description Event Name
Display name for the event.
Event Description
Optional. Enter a general description for the event. Your company should follow a descriptive convention to describe each of your events.
Event Owners
Enter the owner(s) of the event. Only owners can fully control their events, including event decisions, event assignment changes, sign off, and more.
Trigger for
Determine the users for which to apply the trigger. Options are:
-
All users. Trigger for all users in your system.
-
A subset of users. Trigger for a subset of users in your system. This option opens a filter to set up your users.
Event filter
-
Workflow details
This section sets the details for your workflow when the event is triggered.
-
On the New Workflow Event modal, complete the following fields, and click Next.
Field Description Workflow
Select the workflow from the list.
Workflow Variables
Optional. Specify variables to pass to the event, and its value. Click to add the variable.
Certify access by organization
Companies that host business partners, suppliers, or non-employees on a single platform can configure organizations to differentiate the type of users. Identity Governance provides a way for companies to allow their business partners to certify access for their users.
|
Certifying access by organization is only available for non-event based identity certification templates. |
You can set up your organizations and organization admins on the Advanced Identity Cloud admin console. Refer to Organizations. When you have created an organization, you can add or import members and set the organization admins on the Administrators tab.
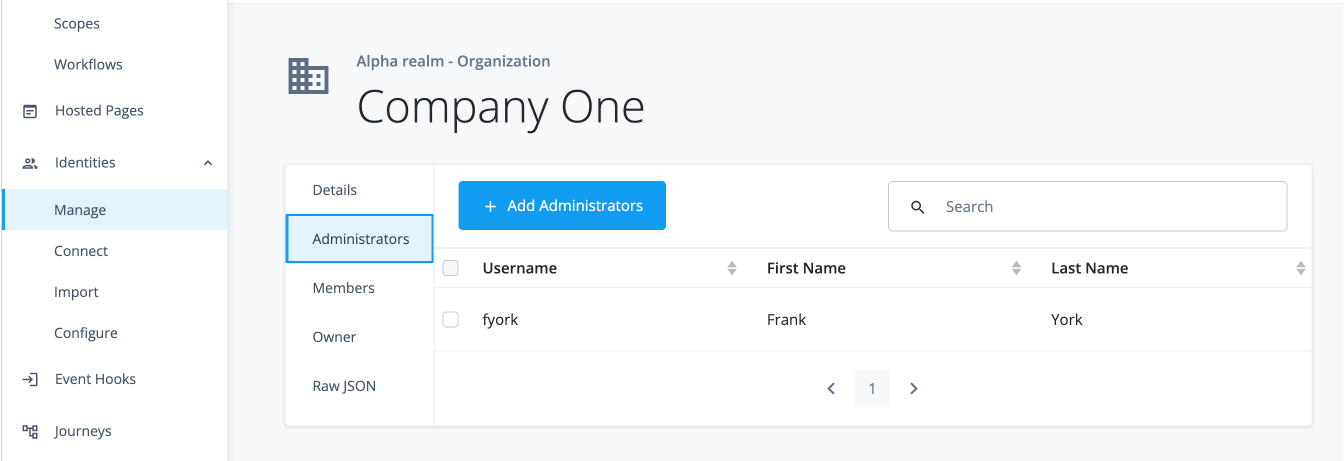
When creating an identity certification template, select your organization and child organizations on the What to Certify page.
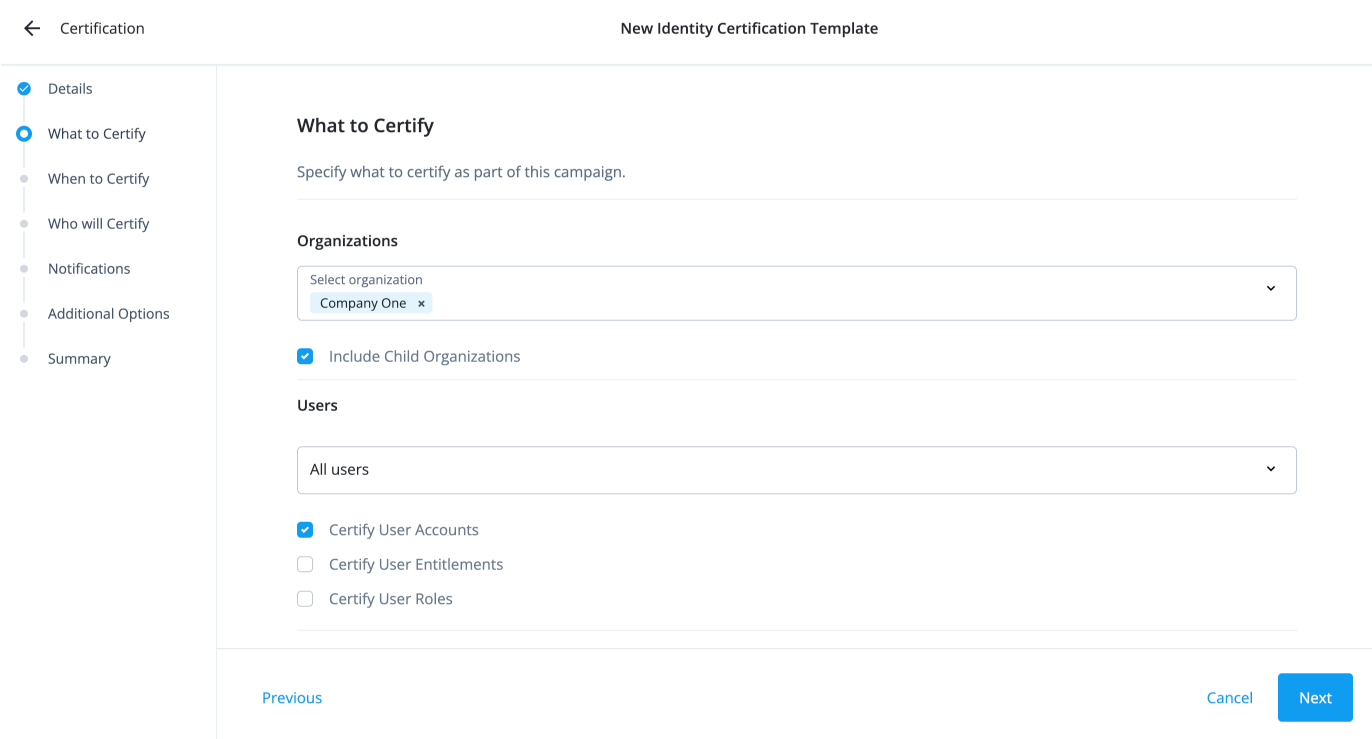
On the Who will Certify page, select Organization Admin as the Certifier Type.
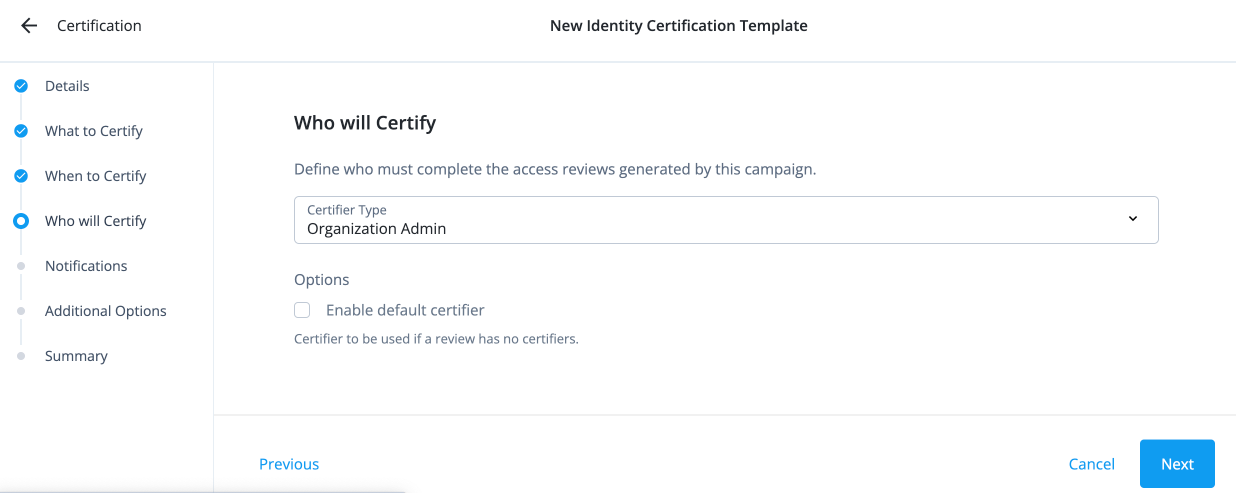
When end users from a partner organization submit access requests, the organization’s administrators are responsible for reviewing and approving these requests.
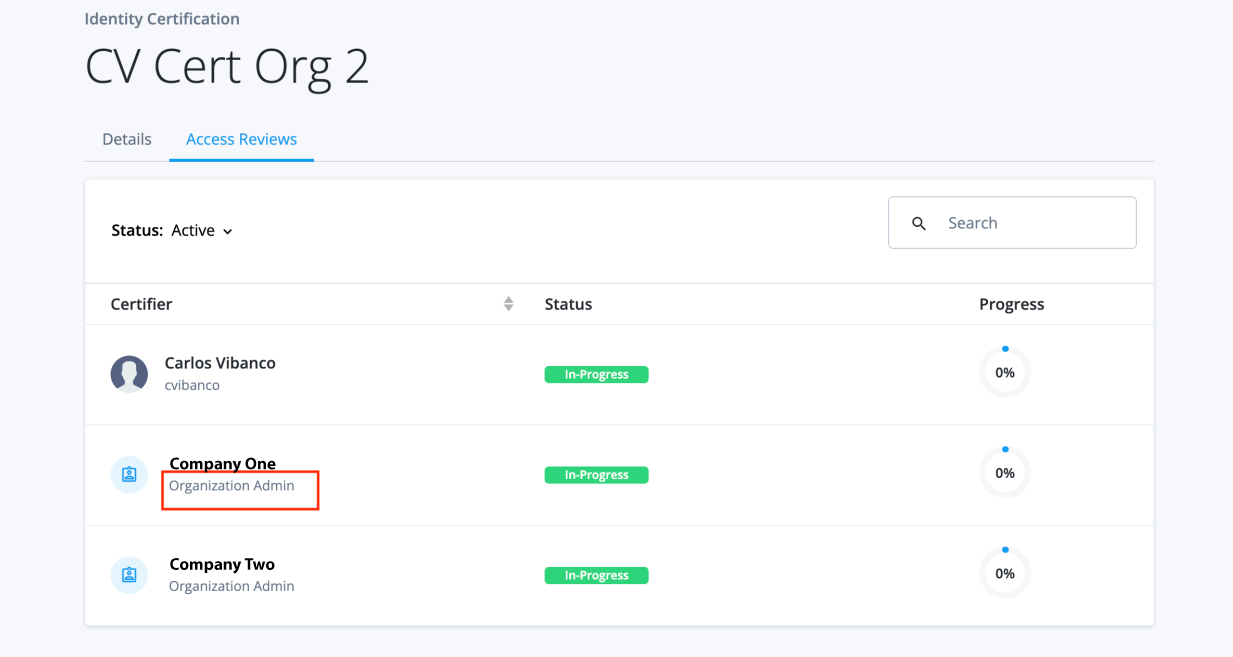
Manage access requests
In Identity Governance, end users can request access to resources, such as target applications, entitlements, or roles.
You define the resources end users can request by adding them to the access catalog.
An organization works with access requests as follows:
-
An Identity Governance administrator who can configure access requests. This includes defining which resources end users can request in the access catalog.
-
After an administrator defines requestable resources in the access catalog, end users submit requests to gain or remove (managers only) access to resources using the end user UI.
-
Approvers approve or deny access requests — End users configured as the approver (designated owner) to review and approve or reject the request. The items that display to the approver are known as request items.
Configure access requests
Before end users can request access to resources in Advanced Identity Cloud, you must:
Configure scoping rules to resources
Identity Governance allows you to centrally manage end-user access to resources across your company using scopes. Scoping refers to the rules defining who can access which resource. Once a resource has been granted, a delegated administrator or user is expected to control who can do what. The main goals of scoping are:
-
Controlling resources that are available to a user.
-
Controlling which end users a user can see.
-
Controlling the actions a user can take either on the resource or the user.
Administrators can create and manage filtering rules to ensure users have access to only the resource required.
Enable scopes
By default, scopes are disabled in Identity Governance. You can enable scopes globally across the Identity Governance configuration settings using the config API.
Use PUT iga/commons/config/iga_global with a payload of enableScoping:true:
In the this example, replace <access-token> with an access token created with the fr:iga:* service account scope. Learn more in Get an access token.
|
curl \
--request PUT \
--header "Authorization Bearer <access-token>" \
--header "Content-Type: application/json" \
--header "Accept-API-Version: resource=1.0" \
--data '{
  "enableScoping": true
}'
"https://<tenant-env-fqdn>/iga/commons/config/iga_global"
View scopes
-
On the Advanced Identity Cloud admin console, click Governance > Scopes. The page appears with a list of scopes. If no scopes are present, the page displays a New Scopes button.
Add scopes
-
On the Advanced Identity Cloud admin console, click Governance > Scopes.
-
Click the New Scopes.
-
On the New Scope Details page, enter the scope details, and then click Next:
Field Description Name
Enter a name for your scope. Follow any naming convention established by your company.
Description (Optional)
Enter a general description for the new scope.
-
On the New Scope Applies to page, do the following:
-
Use the filter to define which users should have this scope. Select or enter the properties, and then click to add the filter.
Field Description Select entitlements if
AnyorAllconditions are met.Select either Any or All.
Select a property
Values include:
-
_id
-
accountStatus
-
city
-
cn
-
country
-
descriptions
-
frIndexedDate[1-5]
-
frIndexedString[1-5]
-
frUnindexedDate[1-5]
-
frUnindexedString[1-5]
-
givenName
-
mail
-
password
-
passwordExpirationTime
-
passwordLastChangedTie
-
postalAddress
-
postalCode
-
profileImage
-
sn
-
stateProvince
-
telephoneNumber
-
userName
Connector
Values include:
-
contains
-
does not contain
-
is
-
is not
-
starts with
-
ends with
Attribute Value
Enter an attribute.
-
-
Click Next to continue.
-
-
On the New Scope Access page, select the applications, entitlements and/or roles resources which users are allowed to access:
Field Description Applications
Select one of the following:
-
All Applications
-
Applications matching a filter. The page displays a filter to match the applications.
Entitlements
Select one of the following:
-
All Entitlements
-
Entitlements matching a filter. The page displays a filter to match the entitlements.
Roles
Select one of the following:
-
All Roles
-
Roles matching a filter. The page displays a filter to match the roles.
-
Click Save. The Scopes page displays the new scope.
-
Edit scopes
-
On the Advanced Identity Cloud admin console, click Governance > Scopes.
-
On the Scopes page, click the ellipsis () for a policy, and then click Edit to change any aspect of a scope.
-
Click Save to keep your changes.
-
Click Deactivate to disable the scope, or click Activate to enable the scope for use.
-
Click Remove to remove the rule from the policy.
-
Define resources that can be requested
By default, end users in Advanced Identity Cloud can only request
access to a resource
marked as Requestable in the access catalog.
You can make applications, entitlements, and roles requestable in Identity Governance.
| Authoritative applications are not requestable and are limited to read-only access. These apps onboard new identities, modify existing identities, or remove identities when needed. When there is a requirement to both read from and write to an application like a directory service, customers can define two apps: one authoritative and the other targeted for non-authoritative purposes. |
Applications
To make applications requestable:
-
From the Advanced Identity Cloud admin console, go to Applications.
-
Select an application. The application must be a target application.
-
In the Details tab, toggle the Requestable box.
-
For every target application you desire to be requestable, repeat steps 2-3.
Add owners to resources
Before an end user can request access to a resource, you must associate it to an owner. Owners are the individual(s) responsible for monitoring who has access to the resource.
When an end user requests access to a resource, Identity Governance sends the request to the owner(s) for approval.
In access requests, the owner is referred to as the approver. When the owner approves the access request, Identity Governance provisions the resource to the end user.
Application owners
To assign owners to applications in Advanced Identity Cloud:
-
From the Advanced Identity Cloud admin console, go to Applications.
-
Select an application. The application must be a target application.
-
In the Details tab, click the Owners field, and add as many owners as you desire.
-
Repeat steps 2-3 for every target application.
Entitlement owners
After you load entitlements into Advanced Identity Cloud, they display in the Entitlements section.
To assign owners to entitlements in Advanced Identity Cloud:
-
From the Advanced Identity Cloud admin console, go to Entitlements.
-
Select an entitlement.
-
In the Details tab, click the Entitlement Owner field, and select an owner.
-
Repeat steps 2-3 for every entitlement.
Optionally, create and configure glossary attributes
Governance glossary attributes enable you to attach custom attributes to applications, entitlements, or roles.
When configuring resources that your end users can request access to, consider creating searchable governance glossary attributes. These attributes enable end users to filter and select a resource when requesting access.
Example of using glossary attributes with access requests
An example of using a governance glossary attribute would be to assign a risk level to each role, indicating the level of sensitivity associated with the resources granted to end users. This risk level attribute lets end users efficiently filter and search for roles based on their desired risk level when requesting access.
-
From the Advanced Identity Cloud admin console, click Glossary.
-
Click Role > + Role Glossary Item.
-
Enter the following values:
Field Value Name
riskLevelDisplay Name
Risk LevelDescription
The level of risk associated with granting this resource to a user.
The higher the risk, the more sensitive the resource.
Type
StringEnumerated Values
Enable and create the following in the text and value fields:
-
Low -
Medium -
High
Show advanced settings > Searchable
Enable. This enables the end user to search and filter on the attribute when requesting access to the role. -
-
Click Save.
-
Populate each role in Advanced Identity Cloud with either
Low,Medium, orHigh.To do this, navigate to Manage > Alpha realm - Roles and populate newly created role attribute
Risk Level.
Configure access requests for other end users
Identity Governance provides the ability for end users to enter requests for other end users. Administrators can configure if all end users can see all other end users, all users can see only a subset of other end users, or only managers can see their direct reports.
To accomplish the ability to enter access requests for other end users,
administrators must give end users an internal role with view privileges and
configure read access to attributes (userName, givenName, sn, and mail) to other end users.
While organization owners and administrators get these privileges from the
PingIDM configuration targeted to only their organization’s members, other end users
outside of the organization do not have access to these privileges. As a result,
end users only see List is empty when clicking Other Users and
not be able to select any end users.
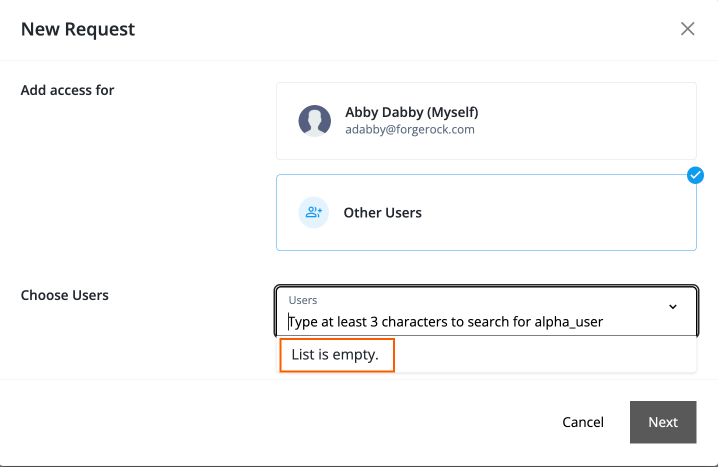
There are three use cases available to set up other end users:
Use case 1: Configure all end users to see all other end users
To configure Identity Governance so that end users can see all other end users, you can add
an internal role with view privileges and set the userName, givenName, sn, and mail
attributes to read access.
-
Create a new internal role:
-
On the Advanced Identity Cloud admin console, log in to Advanced Identity Cloud as a tenant administrator.
-
Click Identities > Manage > Internal Roles > New Internal Role.
-
On the New Internal role modal, enter the following:
-
Name. Enter a descriptive name for the internal role.
-
Description. Optional. Enter a description for the internal role.
-
-
Click Next.
-
-
Set the internal role permissions:
-
On the Internal role permissions modal, select Alpha realm - Users.
-
Click Add. The permissions for View, Create, Update, and Delete are displayed.
-
Keep View selected.
-
For attribute permissions, click Show advanced.
-
Click set all attributes, and select None.
-
For the following attributes, set the permission to
Read:-
userName -
givenName -
sn -
mail
-
-
Click Next.
Details
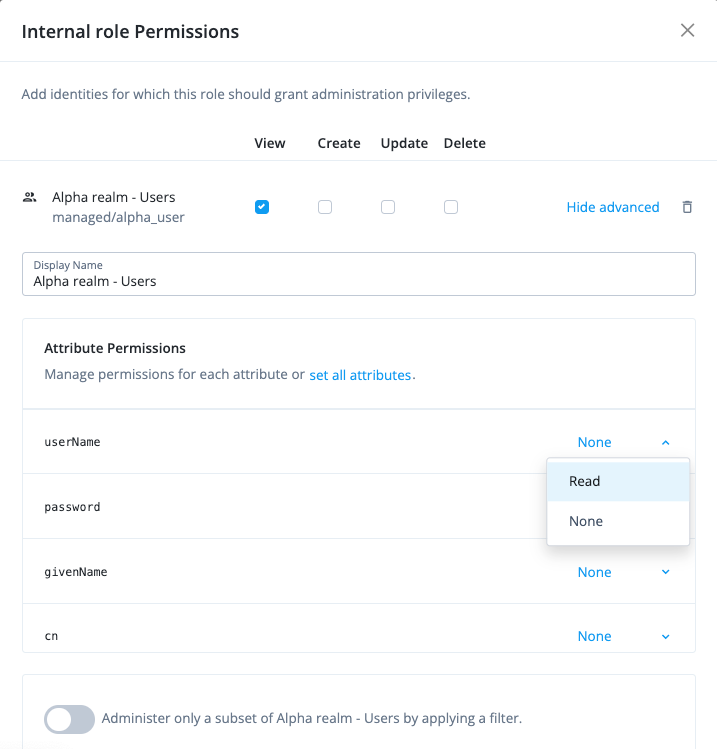
-
-
Configure a filter for the role:
-
On the Dynamic internal role Assignment modal, click A conditional filter for this role.
-
On the filter, select the following properties:
-
Select Any. Specifies when to apply the rule if the conditions are met.
-
Select an attribute like Username.
-
Select is present. Specifies the existence of the property or not.
-
-
Click Next.
Details
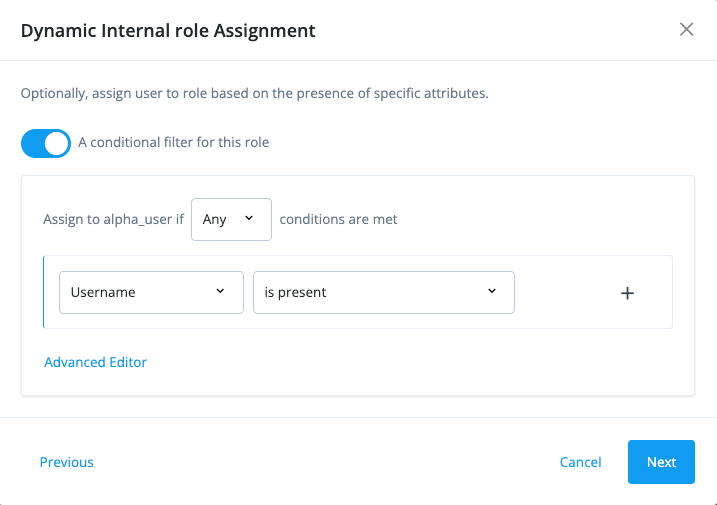
-
-
Set an time constraint on the internal role:
-
On the Time Constraint modal, leave the default as-is.
-
Click Save. The new internal role is created. All users will now have the ability to see all other end users.
Details
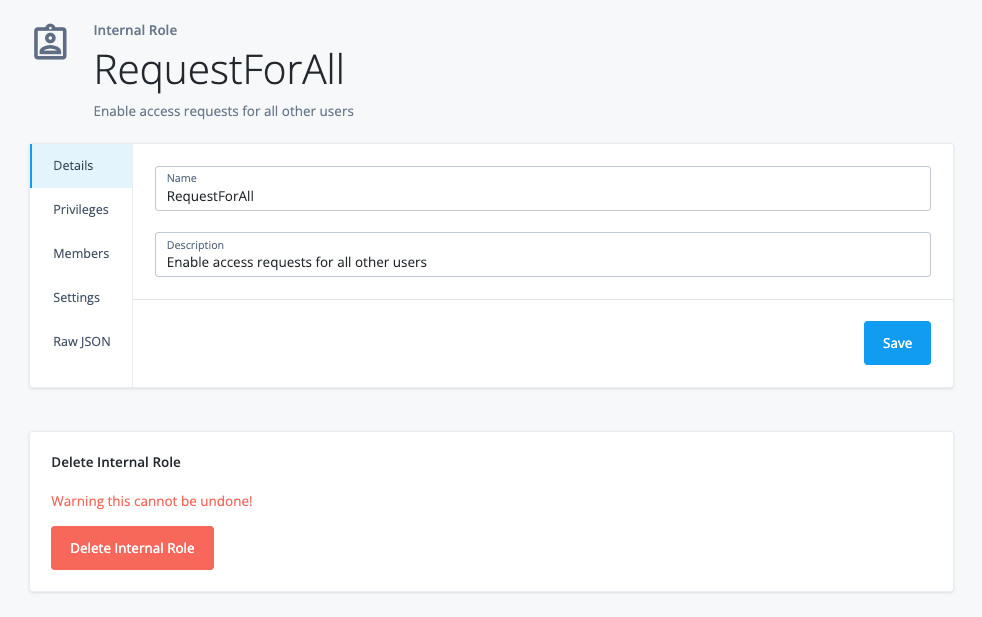
The one side effect to this procedure is that the end user’s UI displays
Alpha Realm - useron the left navigation bar, which can be useful as a company-wide address book or when you want to add attributes, such astelephoneNumber.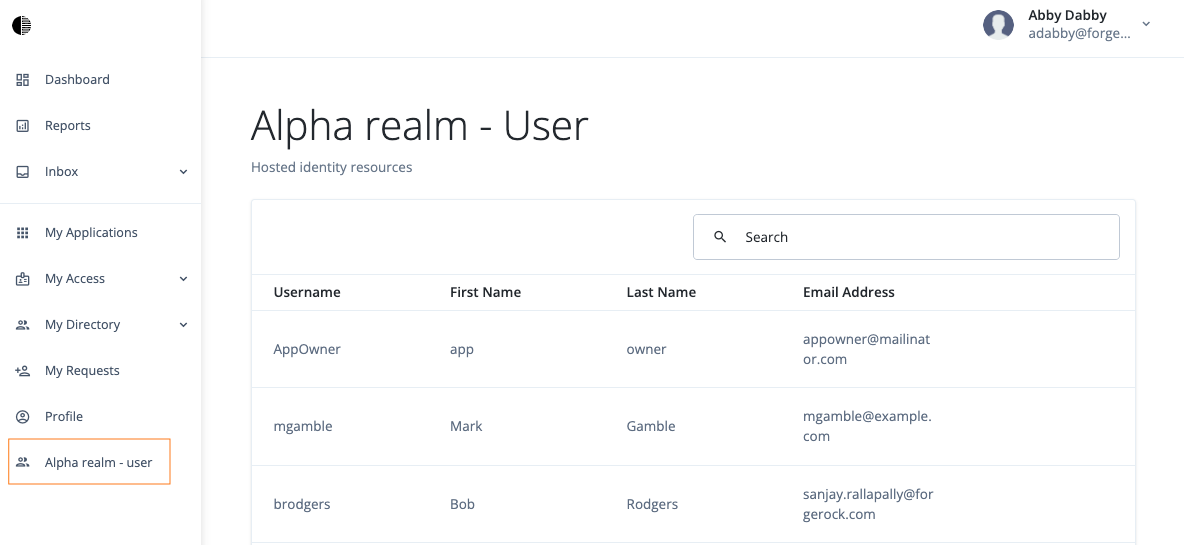
-
Use case 2: Configure all end users to see a subset of other end users
This case is when you want the end users to see a subset of end users that match
an attribute, such as department or city.
-
Repeat the steps 1–2 in Use case 1: Configure all end users to see all other end users.
-
Configure a filter for the role:
-
On the Dynamic internal role Assignment modal, click A conditional filter for this role.
-
On the filter, select the following properties:
-
Select Any. Specifies when to apply the rule if the conditions are met.
-
Select City. An attribute name.
-
Select is. Specifies the relationship between the attribute and its value.
-
Enter {{attribute}}. Curly braces indicates that the end user’s current property. For example, you can use
{{city}}indicating the end user’scityof work be included in the decision. This filter rule enables the manager to make requests for any other end users whosecitymatches the manager’scityproperty. If you want to specify end users in a different city from the manager’s city, you can use, for example,{{Denver}}to indicate the manager can see direct reports located inDenver.
-
-
Click , and then click Add Rule.
-
Click Next.
Details

-
Use case 3: Configure only managers to request for their directs
The third use case is to configure the system so that only managers can request for their direct reports. One solution is to use a multivalued attribute to hold the value of the manager ID for each user.
-
On the Advanced Identity Cloud admin console, log in to Advanced Identity Cloud as a tenant administrator.
-
Create a managed object. A managed object is an identity-related data object managed in the IDM admin console:
-
Click Native Console > Identity Management.
-
On the Quick Start page, click Configure on the top navigation bar, and then select Managed Objects.
-
On the Managed Objects page, click Alpha_user.
-
Scroll down, and click the pencil icon () next to frindexedMultivalued1 to edit it.
-
On the frindexedMultivalued1 page, enter the following values:
Field Value Readable Titles
Enter
managerID.Description
Enter a description of the managed object.
Show advanced options.
Click the link to display more options.
Viewable
Click to disable it.
User Editable
Click to disable it.
Virtual
Click to enable it.
-
Click Save.
Details
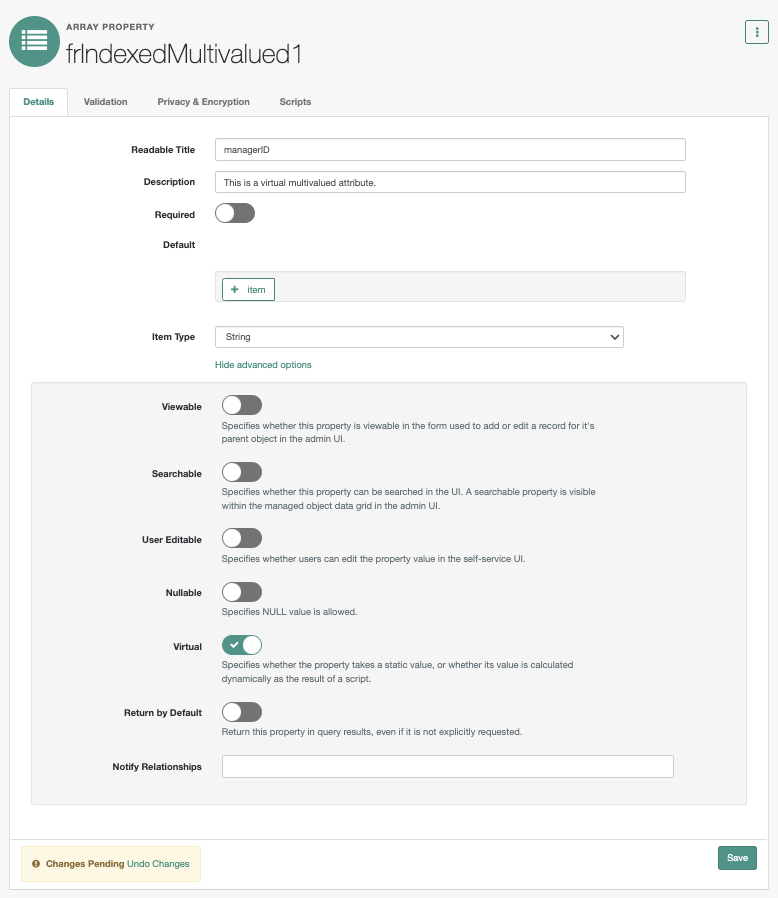
-
Click the Query Configuration tab, enter the following, and then click Save.
Field Value Referenced Relationship Fields
Enter
["manager"].Referenced Object Fields
Enter the referenced object,
_id.Flatten Properties
Click to enable it.
Details
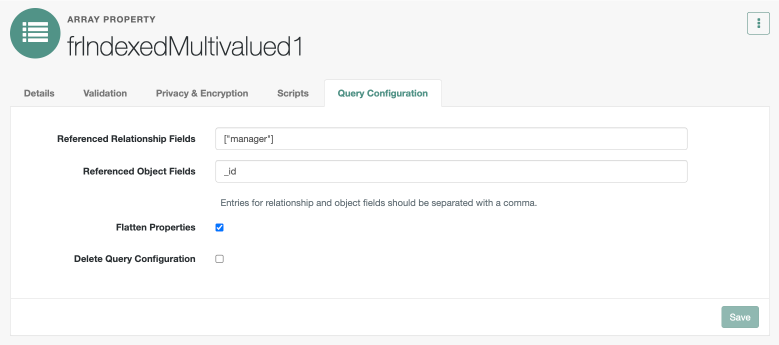
-
-
Now, set up a manager on each end user using a relationship-derived virtual property (RDVP). RDVPs are calculated based on relationships and relationship notifications. Here we create an RDVP to query end users ("reports") who have a manager expressed in the
_idproperty. Learn more in Relationship-derived virtual properties.Create a new internal role called
RequestDirects:-
On the Advanced Identity Cloud admin console, log in to Advanced Identity Cloud as a tenant administrator.
-
Click Identities > Manage > Internal Roles > New Internal Role.
-
On the New Internal role modal, enter the following, and then click Next.
-
Name. Enter a descriptive name for the internal role. Enter
RequestDirects. -
Description. Optional. Enter a description for the internal role.
-
-
-
Set the internal role permissions:
-
On the Internal role permissions modal, select Alpha realm - Users.
-
Click Add. The permissions for View, Create, Update, and Delete are displayed.
-
Keep View selected.
-
For attribute permissions, click Show advanced.
-
Click set all attributes, and select None.
-
For the following attributes, set the permission to
Read:-
userName -
givenName -
sn -
mail
-
-
Click Administer only a subset of Alpha realm - Users by applying a filter.
-
Click Advanced Editor, and enter
/frIndexedMultivalued3 eq "{{_id}}".-
Click Next.
Details
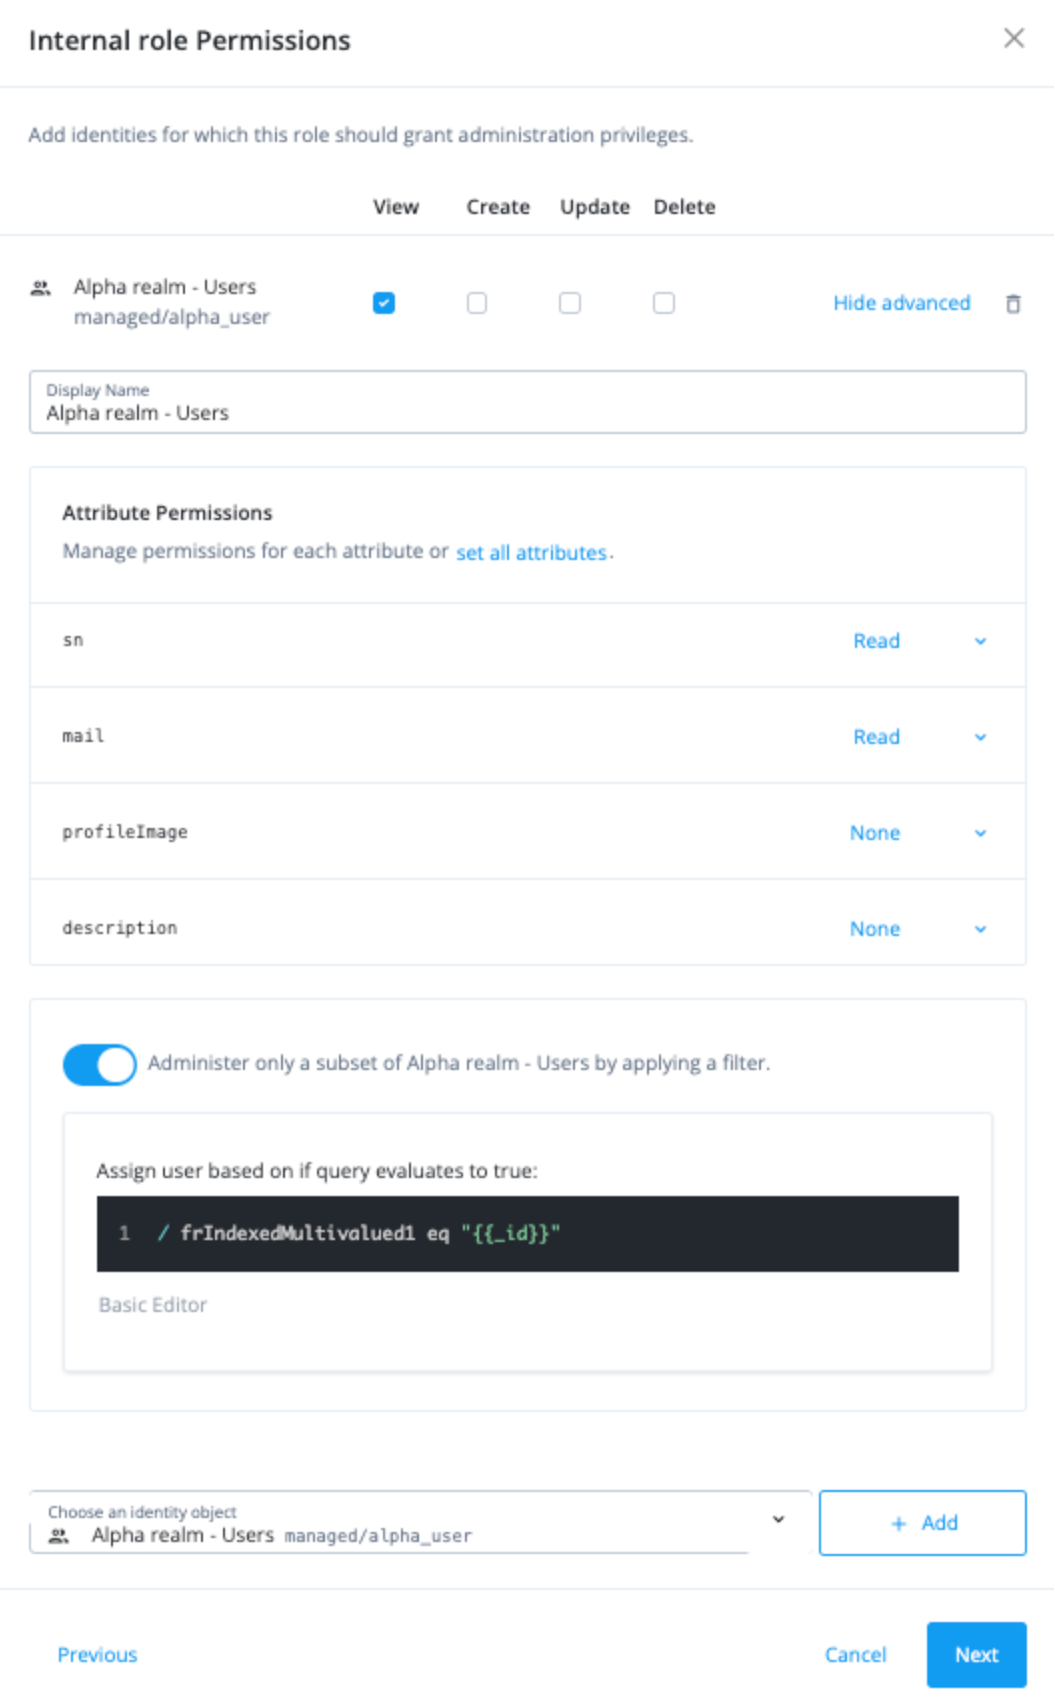
-
-
On the Dynamic Internal role Assignment modal, click Next.
-
On the Time Constraint modal, click Save.
-
-
Create an RDVP and make it queryable:
-
Click Native Console > Identity Management.
-
On the Quick Start page, click Configure on the top navigation bar, and then select Managed Objects.
-
On the Managed Objects page, click Alpha_user.
-
Scroll down, and pencil icon () next to frindexedMultivalued2 to edit it..
-
-
On the frindexedMultivalued2, enter the following values:
-
Readable Titles:
reportsIDs -
Description: Enter a description of the managed object.
-
-
Click Show advanced options.
-
Click Viewable to disable it.
-
Click User Editable to disable it.
-
Click Virtual to enable it. We are using
frIndexedMultivalued2as a virtual RDVP.Details
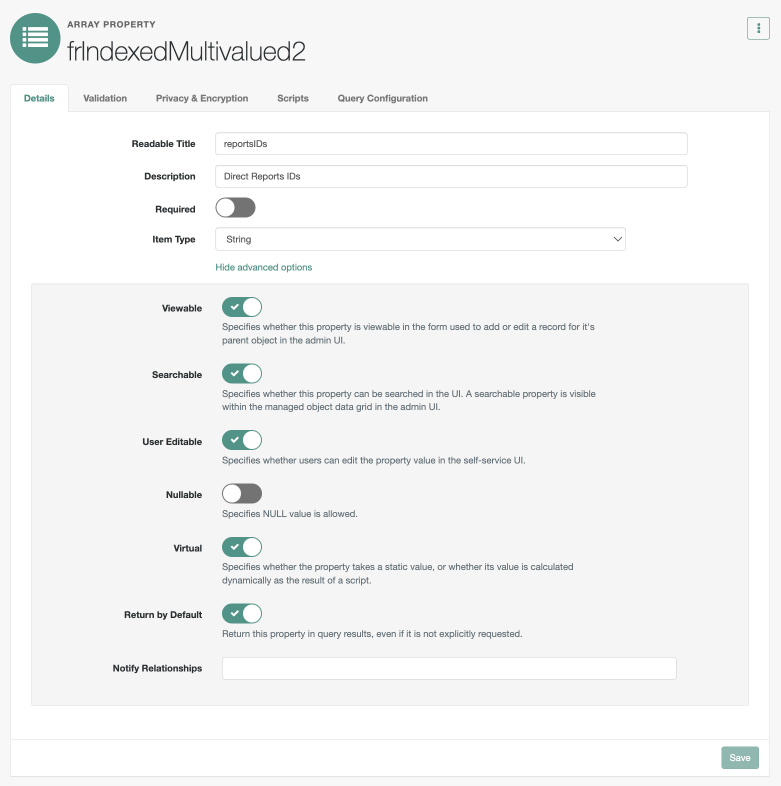
-
-
Click Query Configuration.
-
In the Referenced Relationship Fields, enter
["reports"]. This relationship property is used to calculate the RDVP. -
In the Referenced Object Fields, enter
_id. This property is used to hold the returned value when the RDVP is calculated. In this example, this would be_id. -
Click Flatten Properties to enable it.
-
Click Save. The Managed Object created message appears.
-
-
Reset the
RequestDirectsinternal role:-
Click Manage Identities > Internal Roles > RequestDirects.
-
On the RequestDirects modal, click Privileges.
-
Click the ellipsis icon () next to the [.label]#View privilege.
-
On the Edit Privilege modal, click Show advanced, and then click Advanced Editor.
-
In the Assign user based on if query evaluates to true: field, enter the condition
/frIndexedMultivalued2 pr. -
Click Save. The new RDVP allows an end-user’s direct reports to be updated virtually whenever the RDVP is recalculated due to a change.
Details
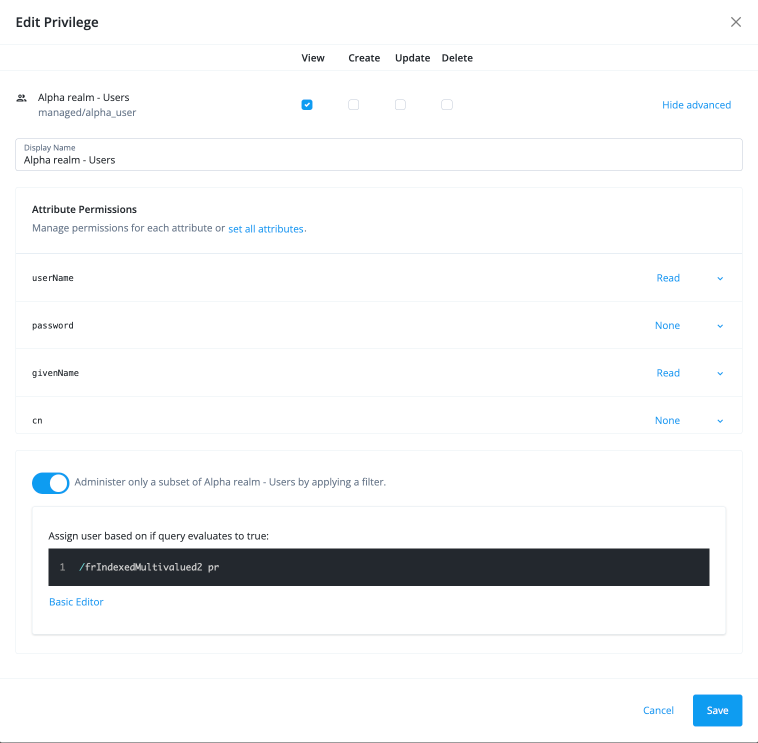
-
Manage pending access requests and request types
Identity Governance has updated its UI pages and added new functionality to manage pending access requests and request types.
There are two main kinds of request types: out-of-the-box and custom. Out-of-the-box refers to the set of default request types, such as:
-
applicationGrant
-
applicationRemove
-
entitlementGrant
-
entitlementRemove
-
roleGrant
-
roleRemove
Custom refers to those request types that you create using the Identity Governance UI or API.
Request types
The Requests page lets Identity Governance administrators view a list of out-of-the-box and custom request types in a tenant environment, and create custom request types for use in workflows and forms.
Steps
-
In the Advanced Identity Cloud login UI, click Governance > Requests.
-
On the Requests page, click the Request Types tab.
-
View the list of out-of-the-box and custom request types.
-
Click ellipsis () > Edit the out-of-the-box request type. If the request type is custom, you have the option to Edit or Delete it.
-
-
Click New Request Type to create a custom request type.
-
On the New Request Type modal, enter the following:
Field Description Name
Enter a descriptive name for your form.
Description (optional)
Enter a general description for your form.
Workflow
Select a workflow to associate with the custom request type.
Enable validation
(Optional) Click to enable validation for the custom request type, and then enter your validation script.
Validation scripts for out-of-the-box request types are view-only. Validation scripts for custom request types are editable.
-
Click Save.
-
-
On the Request Type Details page, click the Properties tab.
-
Click New Property.
-
On the New Property modal, enter the following:
Field Description Name
Enter a descriptive name for the property.
Label
Enter a human-readable label for the property.
Type
Select a property type. Options are:
-
String
-
Number
-
Boolean
-
Object
Multi-valued
Click if the property is multi-valued.
Required
Click if you want the property to be required.
-
-
Click Save.
-
Repeat the steps to add another property.
-
Governance global request settings
The Settings tab on the Requests page lets Identity Governance administrators view and edit global request settings tab.
Steps
-
In the Advanced Identity Cloud login UI, click Governance > Requests.
-
On the Requests page, click the Settings tab.
-
Click any of the following settings:
Property Type Require Request Justification
Boolean
Require Reject Justification
Boolean
Require Approve Justification
Boolean
Allow Self Approval
Boolean
Default Approver
Managed role approver
Allow Request With Violation
Boolean
Require Request Justification With Violation
Boolean
Enable Scoping
Boolean
-
On the Default Approver Role, select a default role for the approver.
-
Click Save.
Request to remove access
Managers can remove access from their direct reports through a remove access request for accounts (applications), roles, and entitlements.
When a manager submits the remove access request, the approver(s) of the resource approve or reject the remove access request.
To submit a remove access request:
-
Sign on to the Advanced Identity Cloud end-user UI and navigate to My Directory > Direct Reports.
For more information on this screen, refer to direct reports.
-
Click any of the following tabs:
-
Accounts (applications)
-
Entitlements
-
Roles — For roles, if the Assignment column has the value of rule-based, you cannot request to revoke the role.
-
-
Click the ellipsis icon () next to the desired resource, and click Revoke.
-
Next, fill out the following fields:
-
Justification — Enter a reason for revoking access to the selected resources.
-
Priority — Select one of the following:
The priority levels don’t affect how Identity Governance processes requests. your company determines the value assigned to the request. -
Low
-
Medium
-
High
-
-
Apply Expiration Date — Optional. Expire (cancel) the remove access request if the approver(s) haven’t approved or rejected it by the specified date.
-
-
Click Submit Request.
Review request items using the admin UI
The Identity Governance admin console provides a UI page, mirroring the end-user UI, to track all requests, workflows, and approval tasks. Administrators can carry out the following tasks:
-
Forward approval task
-
Cancel requests
Requests UI
On the Advanced Identity Cloud admin console, click Governance > Requests.
View request details
The Details page displays the request type, application, and other details specific to the request. The page is identical to that of the end-user UI page with the Details, Tracking, and Comments tabs, except with the addition of a Task tab, available only to administrators.
-
On the Requests UI, click a request in a row to view the details. You can also click the ellipsis (), and then click View Details.
View request tasks
-
On a selected requests page, click a request.
-
On the View Details page, click the Tasks tab.
Forward to another user or role
If the owner is unable to make a decision on their assigned access request due to insufficient information or other reasons, they can forward the request item request to one or more users assigned to a specific role.
To forward a request item to another user or role:
-
Click the desired request to view the details.
-
Click Forward.
-
Select one of the following:
-
Another user — Forward the item to a single user.
-
Users with assigned role — Forward the item to users in a role.
Every user within the role can make a decision on the item; however, once a decision is reached, the assigned request item is considered complete.
-
-
Select the user or role to which to assign the item.
-
Enter a comment as to why the item is being forwarded.
-
Click Forward.
Request access to resources
After you configure access requests, end users can request access to resources on the Advanced Identity Cloud end-user UI. An end user can request access to resources for themselves or for others. They can also request access to multiple resources in the same request.
Access request landing page
The access request landing page displays the access requests an end user submits for themselves and for others.
Learn more about how to sign on to the Advanced Identity Cloud end-user UI in end-user screens.
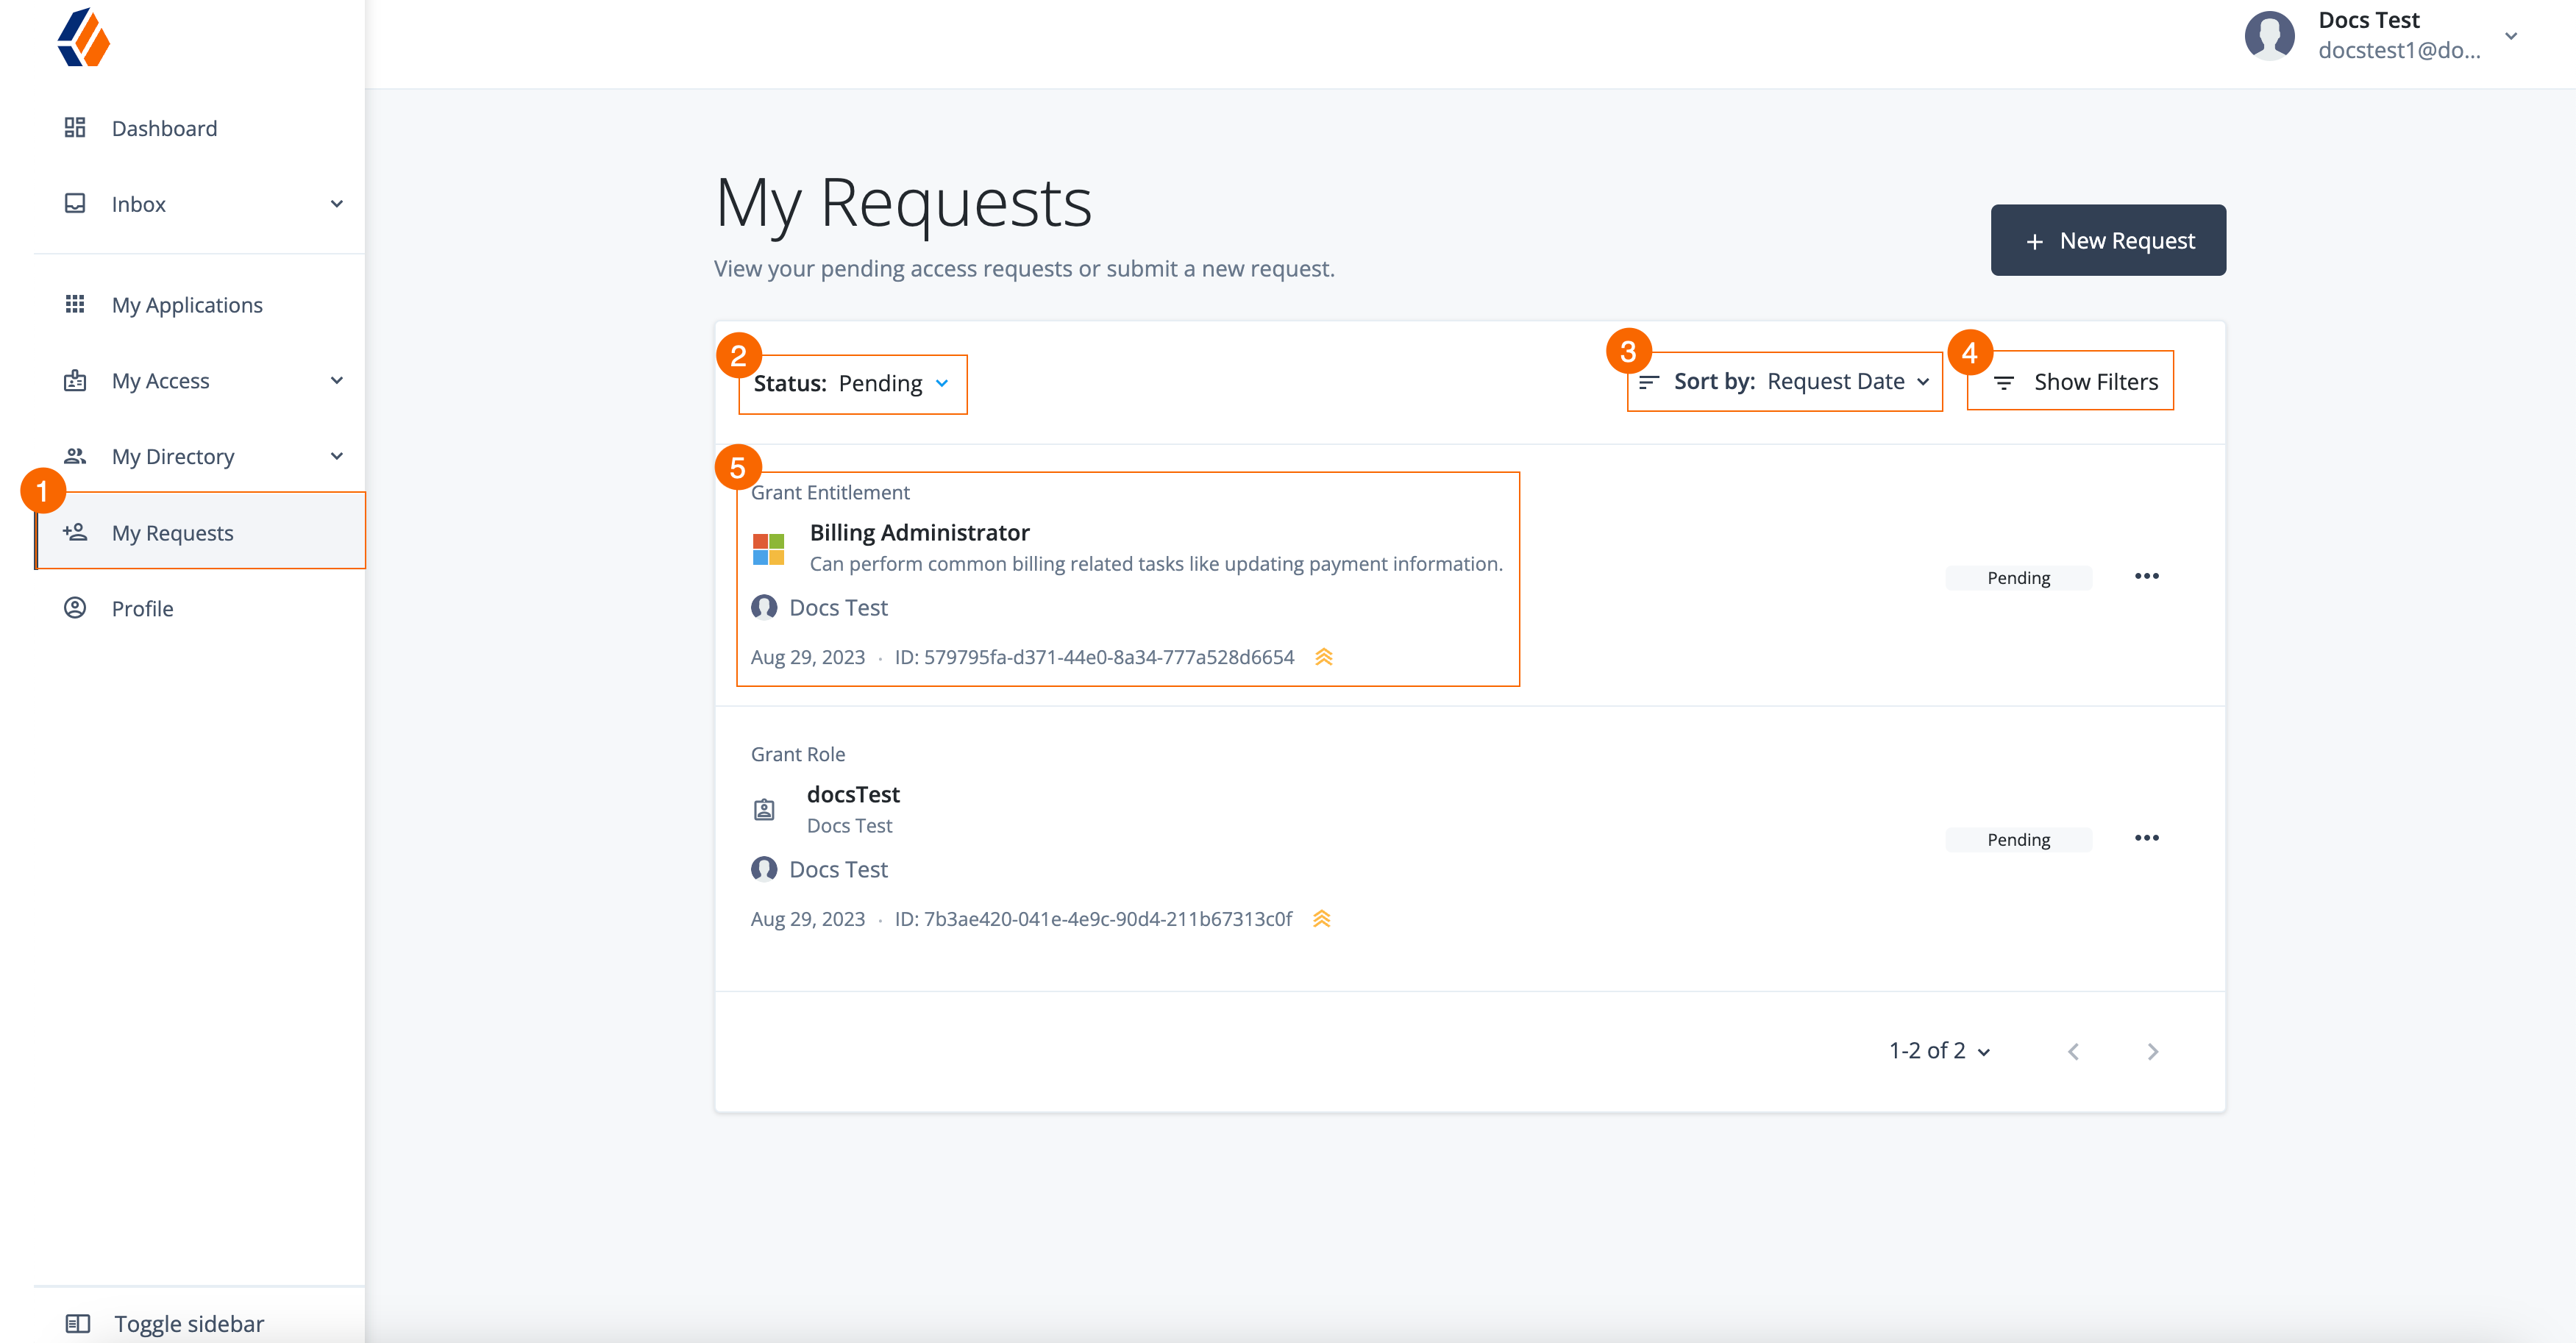
-
1 Click My Requests from the Advanced Identity Cloud end-user UI to display the access requests landing page.
-
2 Filter access requests by status:
-
Pending — The access request is pending approval by the approver(s).
-
Completed — The approver has either
ApprovedorRejectedthe request. Click a request to view the approver’s decision. -
Canceled — Requests that expire or you cancel.
-
-
3 Click Sort By and sort the request by an attribute in ascending or descending order.
-
4 Click Show Filters to filter by attributes or priority. An end user sets the priority when they create the request.
-
5 To view the details of a submitted request, click the request.
Create request
There are many options an end user can select when creating a request.
The following sections breakout the request process for readability purposes.
Start request
-
From the access request landing page, click + New Request.
-
Select one of the following:
-
Myself — Create a request for yourself.
-
Other Users — Select up to 10 users to submit a request for.
-
-
Click Next.
A page to select resources displays.
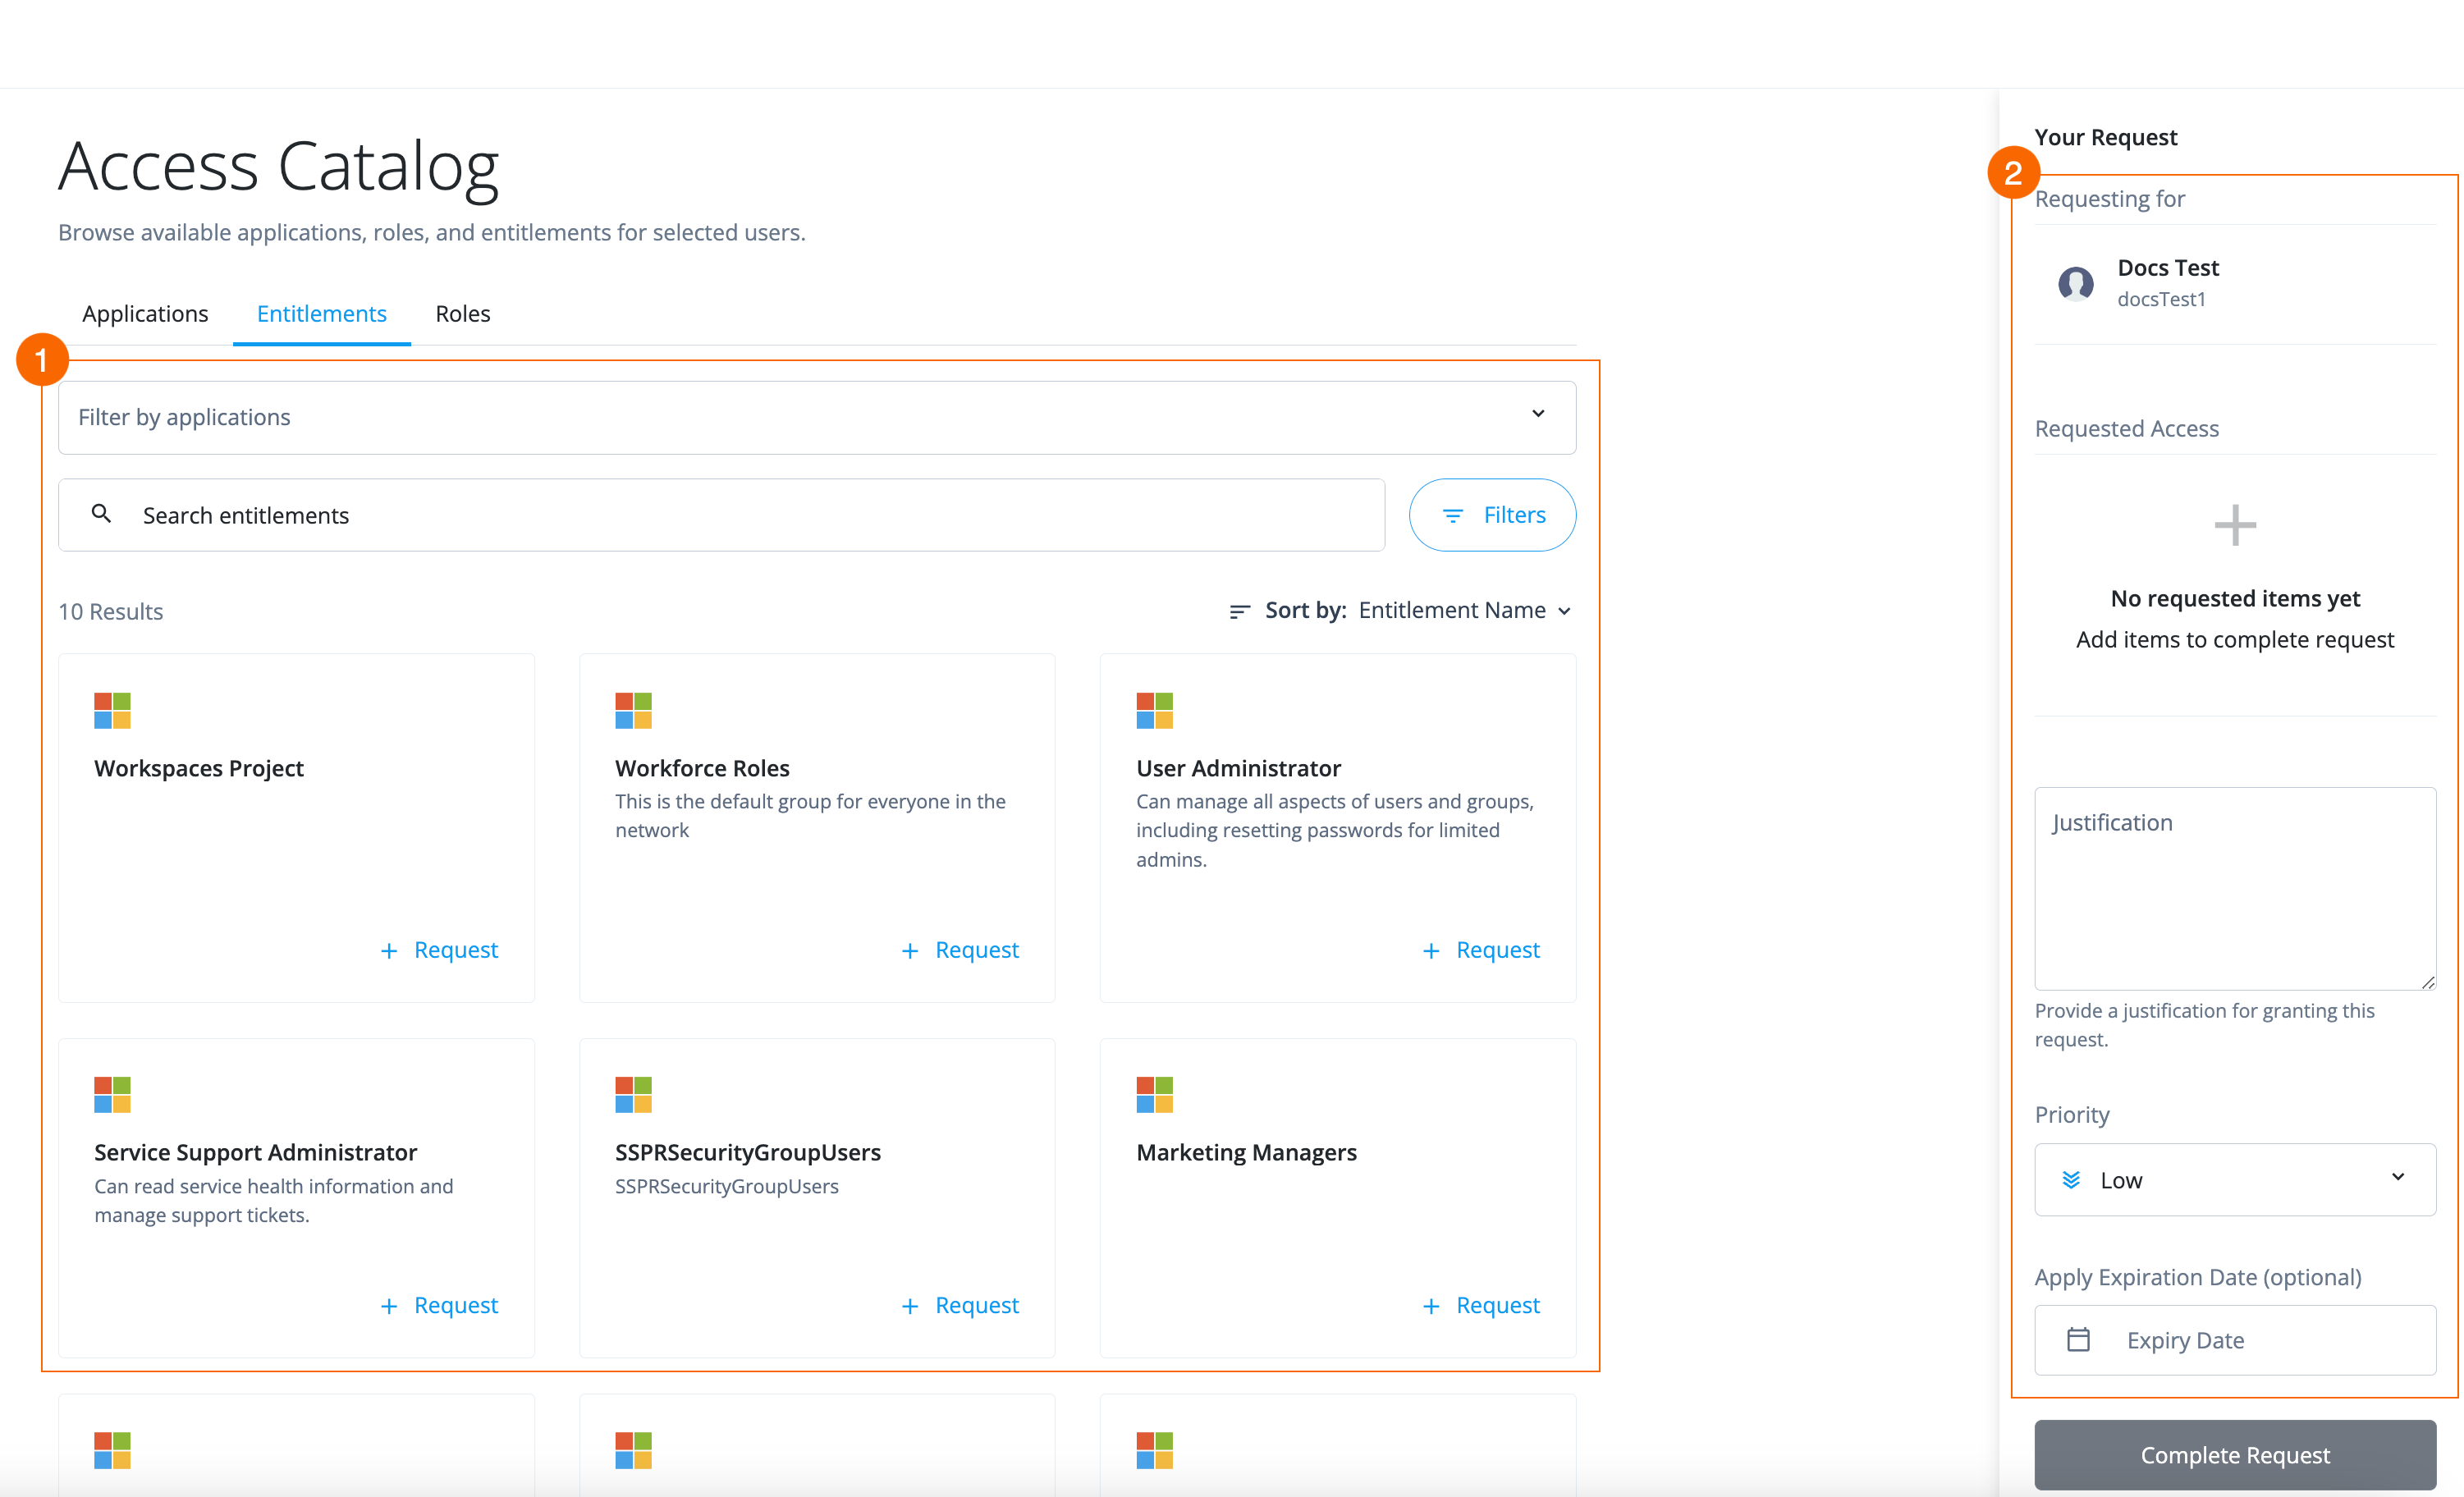
-
1 Search, sort, and select resources to add to the access request.
-
2 End users review current access and the resources they’ve selected, add a justification for the access, set a priority of the request, and optionally add an expiration date.
Select resources
End users can select a combination of up to 10 applications, entitlements, and/or roles in the same request.
There are three types of resources: applications, entitlements, and roles.
On each tab, an end user can:
-
Search for a resource in the search bar.
-
Filter on resources using attributes.
For more information, refer to create and configure glossary attributes.
-
Sort returned results by owner or resource name in ascending or descending order.
The following steps explore going through each resource tab to select which resources an end user wants. However, it isn’t necessary to click through each resource tab.
To select resources:
-
From the Applications tab, click + Request next to each application to search for and select the desired applications.
If an end user selects a resource they already have access to or if the request is in a pending state, an error code is generated:
The following user(s) either already have the requested item assigned or in
a pending request. Choose another item to request for the selected user(s).
The message also appears if other users are submitting on behalf of the end user.
-
Click the Entitlements tab. Entitlements are specific privileges in applications.
-
Search for and select desired entitlements. To do this, click + Request next to each entitlement.
Select applications in the Filter by application field to display entitlements that pertain to a specific application. -
Click the Roles tab.
-
Search for and select desired roles. To do this, click + Request next to each role.
Enter request details and submit request
The request details pane is where an end user reviews the resources selected in the request and enters information, such as justification.
-
In the right pane, under Requesting for, click the user(s) name to view their current access.
-
Under Requested Access, review the resources selected.
-
Fill out the following fields:
-
Justification — Enter a reason for requesting access to the selected resources.
-
Priority — Select one of the following:
The priority levels bear no meaning in Identity Governance. your company determines the value assigned to the request. -
Low
-
Medium
-
High
-
-
Apply Expiration Date — Optional. Expire (cancel) the access request if it isn’t approved or rejected by the approver(s) by the specified date.
For example, an end user might need access to a resource by the end of the week, and if they don’t get the access by that time, then they don’t need the permission anymore.
-
-
Click Complete Request. The end user is redirected to the access request landing page.
After the end user submits a request, a Request IDdisplays on each resource the end user requests access to. TheRequest IDtracks the request from the end user requesting access to the approver approving or rejecting access.
Add comments to request
-
On the access request landing page, click the request to which you want to add a comment.
-
On the request page, click the Comments tab.
-
Click + Add Comment.
-
Enter comment.
-
Click Add Comment.
Cancel pending request
-
On the access request landing page, click the request you want to cancel.
-
Click Cancel Request.
-
Click Cancel Request again to confirm cancellation.
Assign access privileges to identities
Identity Governance requires end users to have permissions through an internal role to access an identity. For example, if an end user submits a role access request but lacks the required privileges, the role owner attribute displays a UUID instead of the role owner’s name. This occurs because the end user doesn’t have read access to the identity. The solution is to create an internal role with the read privileges to the identity and assign the internal role to the end user.
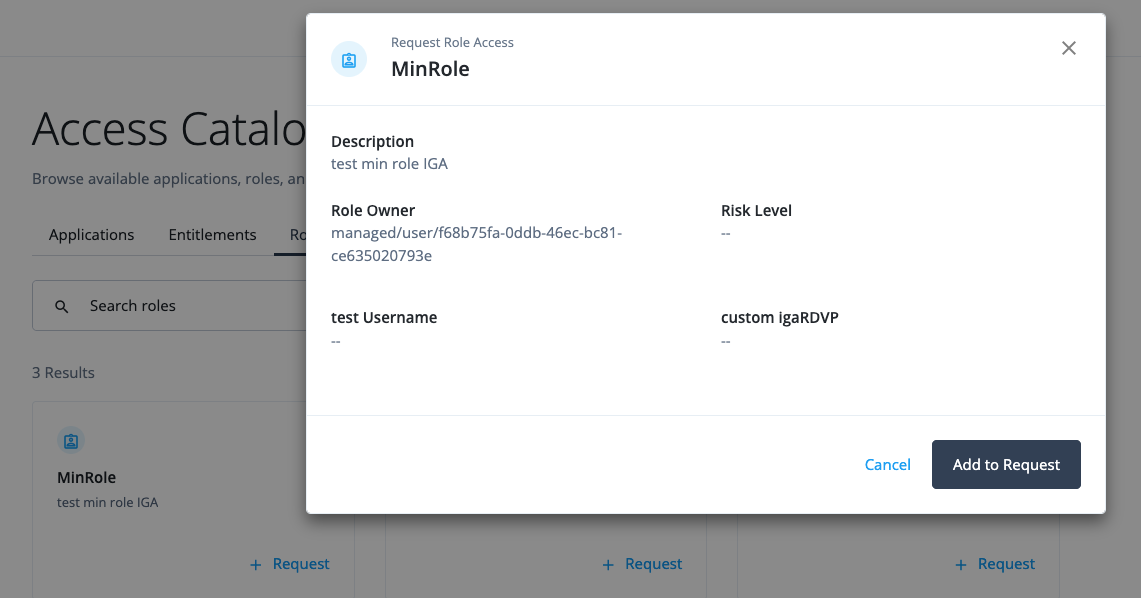
To create an internal role and assign it to the end user:
-
In the Advanced Identity Cloud admin console, select Identities > Manage > Internal Roles.
-
Click New Internal Role.
-
In the New Internal role modal, enter the following and click Next:
-
Name: Enter a name for the internal role.
-
Description (optional): Add a description for the internal role.
-
-
In the Internal role Permissions modal, select Alpha realm - Users managed/alpha_user and click Next.
-
In the Dynamic Internal role Assignment modal, click Next.
-
In the Time Constraint modal, click Save.
-
On your internal role page, select Privileges > Add Privileges.
-
In the Add Privileges modal, select Alpha realm - Users managed/alpha_user and click Add.
-
Click Show advanced.
-
In the Attribute Permissions section, select set all attributes and select None to set all permissions to
None. -
Click Read for the following attributes:
-
userName
-
givenName
-
sn
If you are granting privileges for the
Alpha Realm - RolesorAlpha Realm - Organizationsidentity, setReadaccess for thenameattribute instead of theuserName,givenName, andsnattributes.
-
-
Click Save.
-
-
On the internal role page, select Members > Add Members.
-
In the Add Members modal, select the end user and click Save.
-
-
When the end user enters an access request for a role, they see the role owner information:
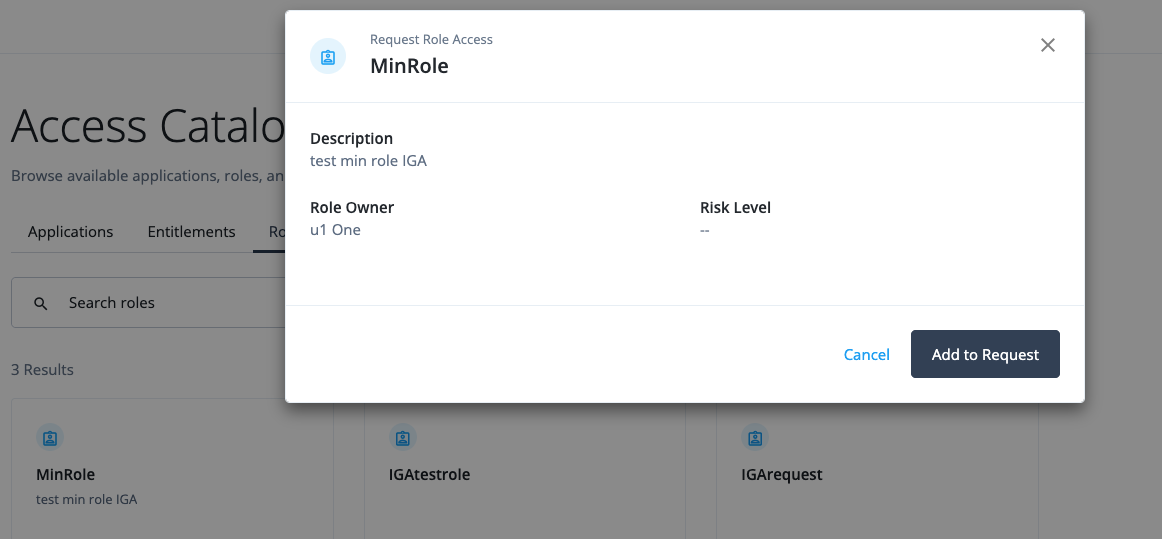
Review request items (End user UI)
When an end user submits an access request, designated owners (approvers) must grant approval for the provisioning of resources.
The items on which approvers review and make decisions are referred to as request items.
Approvers review and make decisions on items referred to as request items in the Advanced Identity Cloud end-user UI. For more information, refer to End-user pages.
Sign on to the Advanced Identity Cloud end-user UI and navigate to Inbox > Approvals.
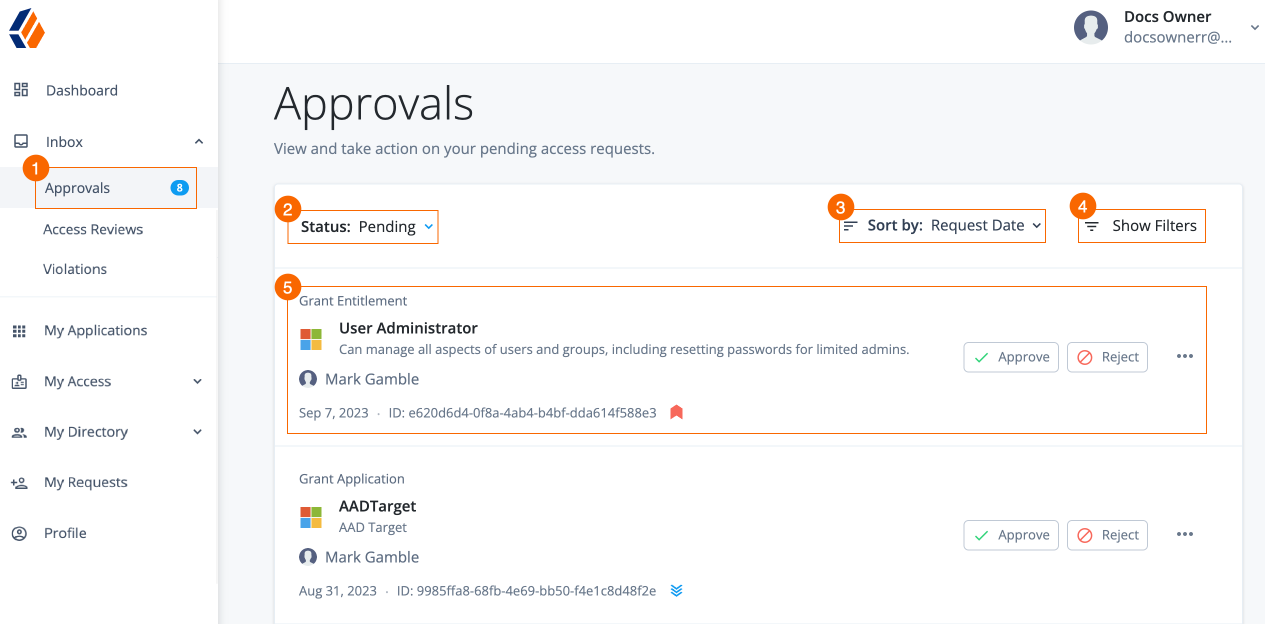
-
1 Click Inbox > Approvals from the Advanced Identity Cloud end-user UI to display the access requests landing page.
-
2 Filter submitted request items by status:
-
Pending — The items are pending review.
-
Completed — The approver reviewed the items and made a decision (approve or reject).
-
-
3 Click Sort By, and sort the items by an attribute in ascending or descending order.
-
4 Click Show Filters to filter by attributes or priority. An end user sets the priority when they create the access request.
-
5 Click on the item to view the details of the request.
Access request types
End users and managers can submit different access request types, such as removing and adding access requests.
The access request type breaks out the request items displayed to approvers.
The following table describes the access request types:
| Access request type | Description |
|---|---|
Grant Application |
End user requests access to an application. |
Remove Application |
End user’s manager requests to remove an application from an end user. |
Grant Role |
End user requests access to an Advanced Identity Cloud provisioning role. |
Remove Role |
End user’s manager requests to remove a role from an end user. |
Grant Entitlement |
End user requests access to an entitlement (an additional privilege inside an application). |
Remove Entitlement |
End user’s manager requests to remove an entitlement from an end user. |
|
The access request type is indicated at the top of each request item. 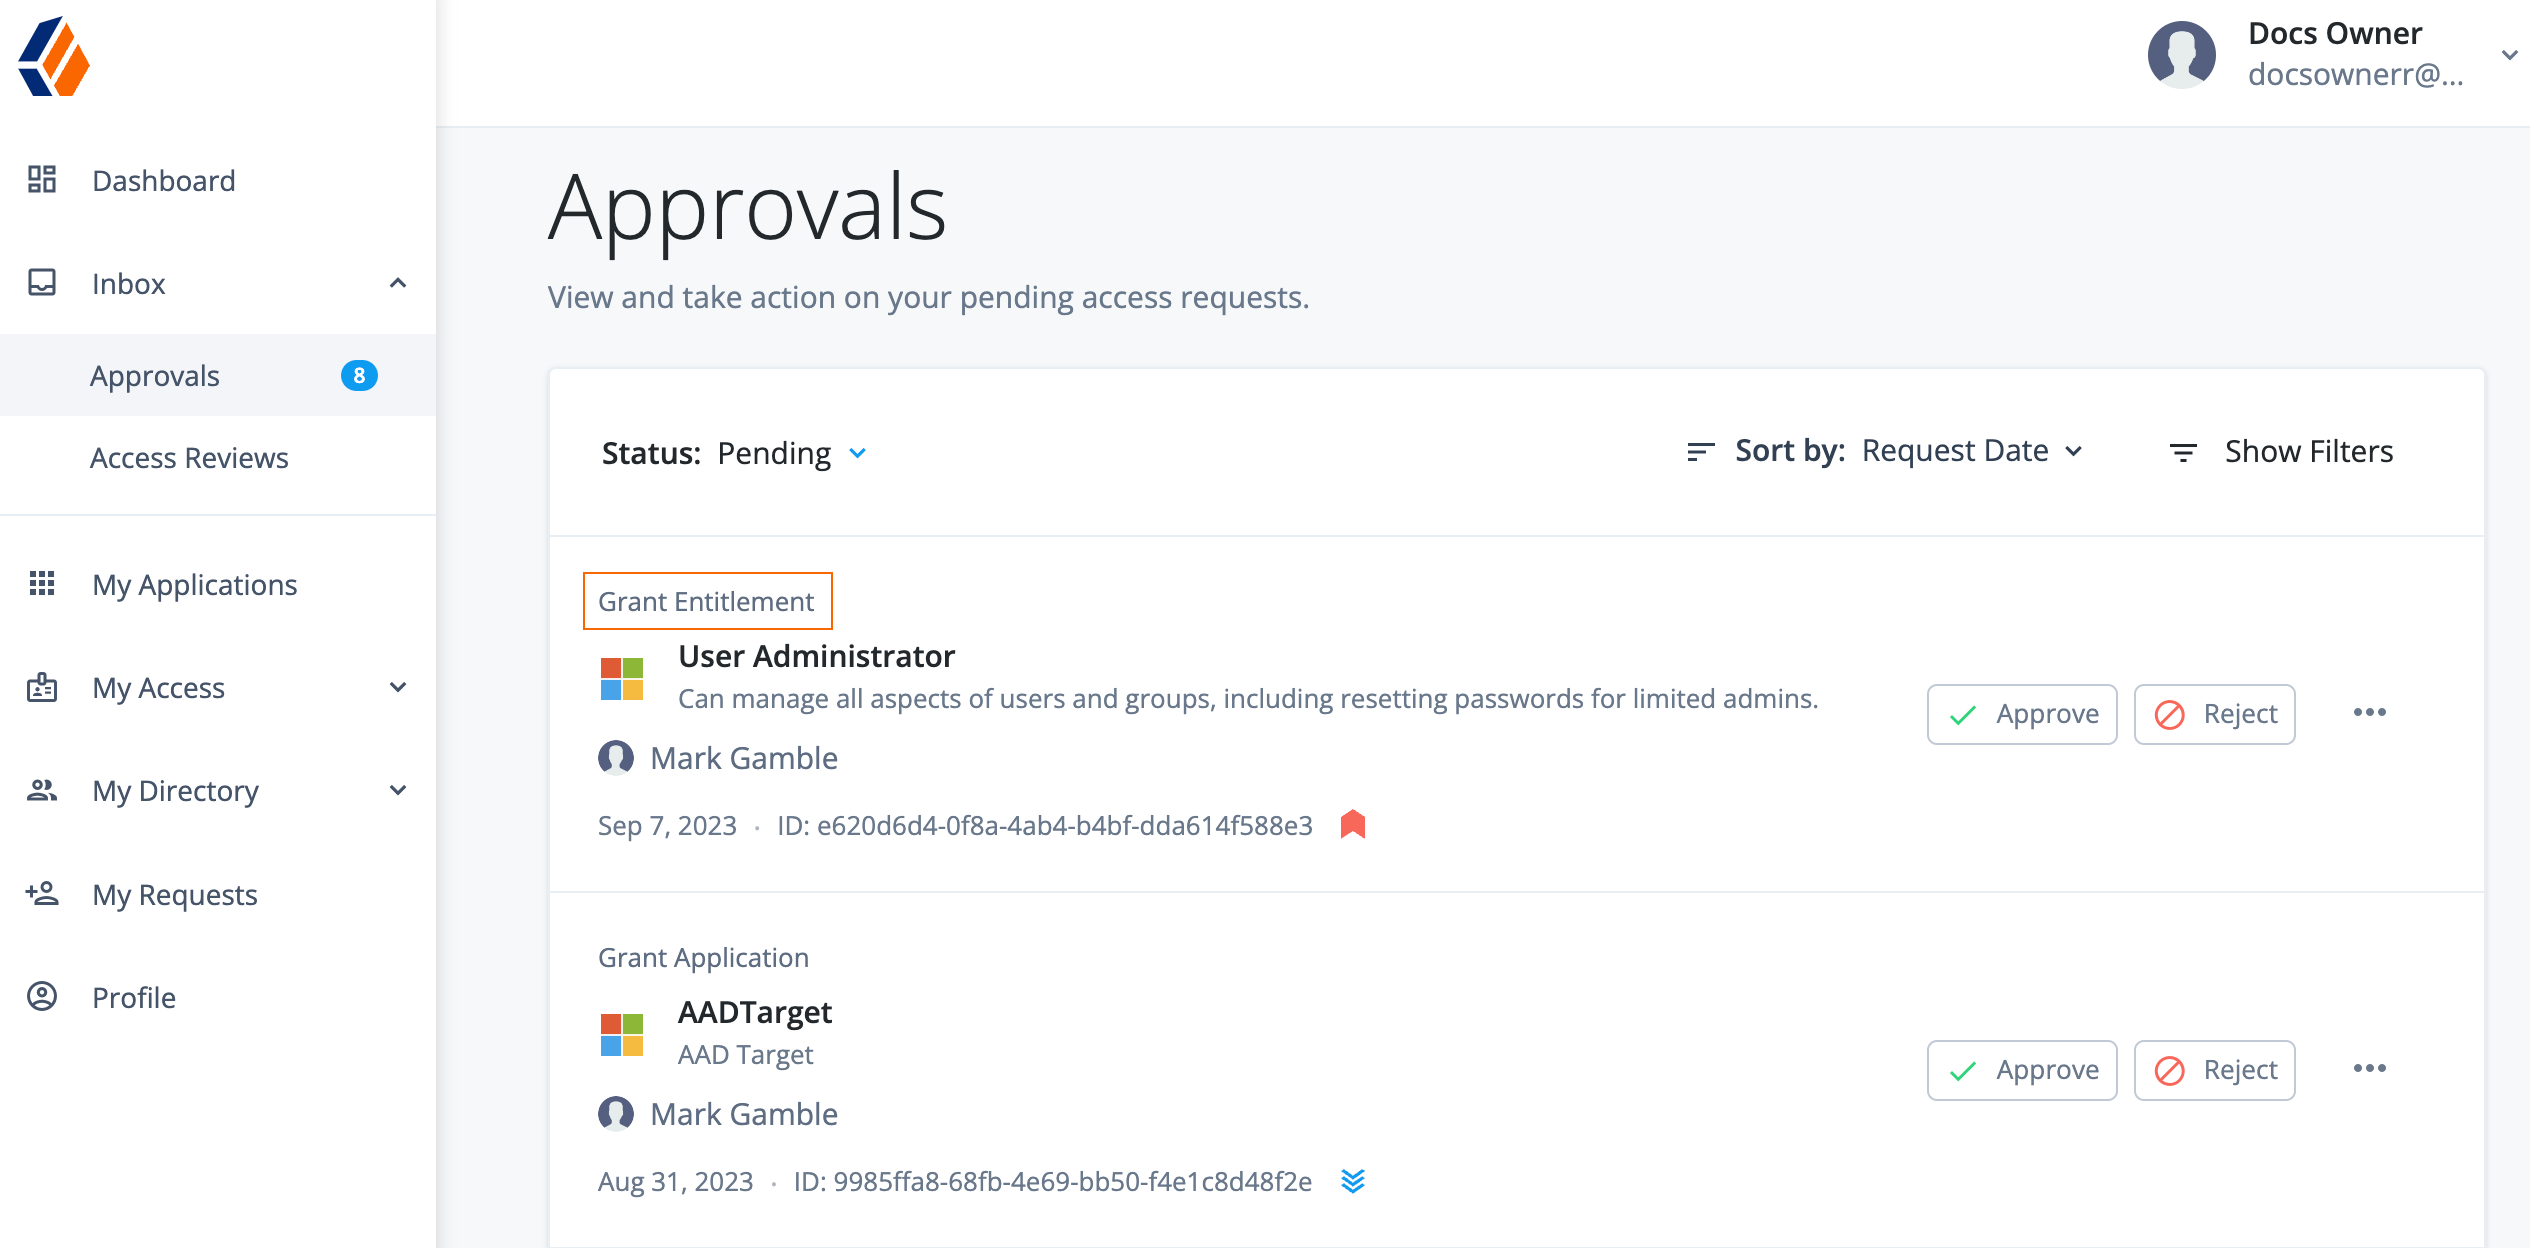
|
|
When end users enter an entitlement request, end users will see a warning message if the request results in a Segregation of Duties (SoD) violation.
End users can click View Details to review the entitlements on the Violations Found modal. The end user has the option to click Submit with Violation or Close the modal. |
Approve, reject, or forward a request item
The access request details of a request item include the requested resource(s), justification, and submission date.
Click a request item to view the details and take action, such as approve or reject.
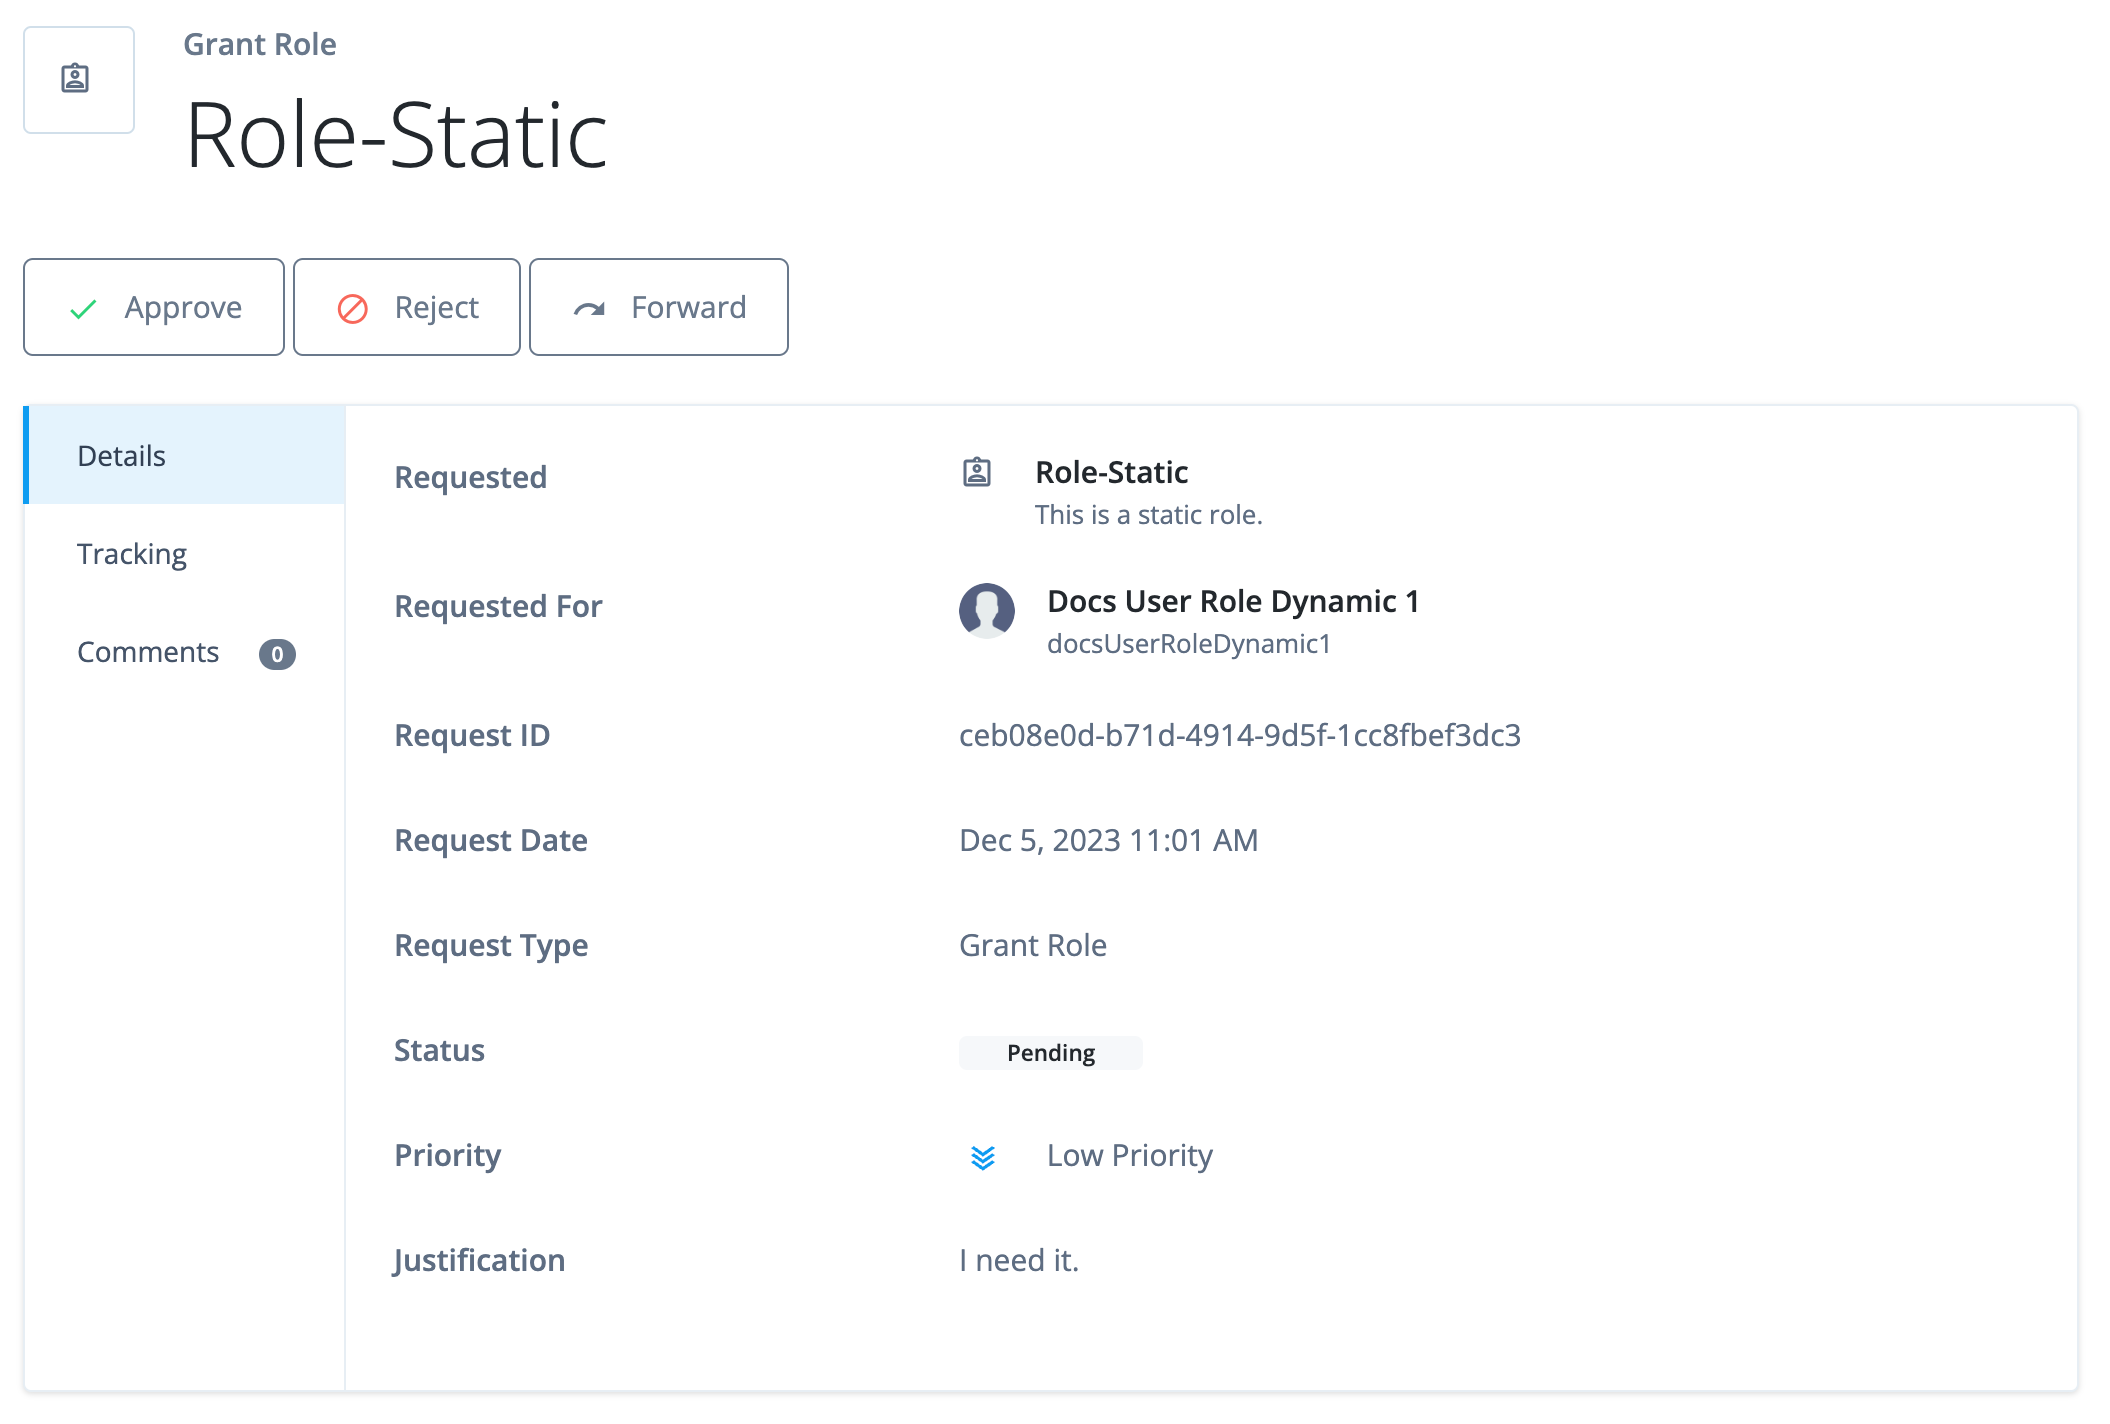
Approve item
-
Click the desired item to view the details.
-
Optional. Add a comment to the request:
-
Click the Comments tab, then click + Add Comment.
-
Enter a comment, and then click Add Comment to save it.
-
-
Click Approve.
-
Click Approve again to confirm the approval of the resource.
Identity Governance provisions the resource to the end user.
Reject item
-
Click the desired item to view the details.
-
Optional. Add a comment to the request:
-
Click the Comments tab, then click [.label]# + Add Comment#.
-
Enter a comment, and then click + Add Comment.
-
-
Click Reject.
-
Enter a justification as to why the request is being rejected.
-
Click Reject.
Forward to another user or role
If the owner is unable to make a decision on their assigned access request due to insufficient information or other reasons, they can approve the request item request to one or more users assigned to a specific role.
To forward a request item to another user or role:
-
Click desired request to view the details.
-
Click Forward.
-
Select one of the following:
-
Another user — Forward the item to a single user.
-
Users with assigned role — Forward the item to users in a role.
Every user within the role can make a decision on the item. However, once a decision is reached, the assigned request item is considered complete.
-
-
Select the user or role to assign the item to.
-
Enter a comment as to why the item is being forwarded.
-
Click Forward.
Governance fulfillment tasks
Identity Governance has updated its end-user UI pages and added new functionality to manage pending fulfillment tasks. Fulfillment tasks are those assigned to a user to manually complete an access request.
When the end user clicks the Tasks link, they can view the list of pending tasks requiring manual completion.
Manage workflows
When you configure access requests, you can implement workflows, an end-to-end sequence of Identity Governance actions that result in either approving or rejecting an access request. You can configure workflows using the Advanced Identity Cloud’s workflow editor or REST APIs.
Workflows give complete flexibility over all access request types by allowing you to define custom workflow definitions. For example, when an end user requests access to an application, you can specify the actions Identity Governance takes for the access request to be approved or rejected.
These actions could include:
-
Requiring more than one approval for the request. You could require an end user’s manager and the application owner to approve the request before Identity Governance provisions access to the end user.
-
If the access request is rejected, send an email to the end user stating their access request has been denied.
|
The out-of-the-box Identity Governance workflows do not currently support the approval of
custom request types, like event-based requests.
In this case, you can use workflows with custom scripted nodes that can
handle event-based situations, such as |
Access request types
Identity Governance provides six out-of-the-box workflows for each access request type.
The following table displays the different access request types and out-of-the-box workflows:
| Access request type | Workflow name | Description |
|---|---|---|
Grant Application |
|
Request access to an application. |
Remove Application |
|
Request to remove access to an application for an end user. |
Grant Entitlement |
|
Request access to an entitlement (additional privilege inside an application). |
Remove Entitlement |
|
Request to remove access to an entitlement from an end user. |
Grant Role |
|
Request access to an Advanced Identity Cloud provisioning role. |
Remove Role |
|
Request to remove access to a role from an end user. |
Create workflows using the workflow editor
To manage workflows, from the Advanced Identity Cloud admin console, go to Workflows.
There is a default published workflow for each access request type.
Workflow editor canvas
When you click a workflow, a blank workflow canvas appears with workflow nodes in the left pane, which you can drag-and-drop onto the canvas.
View workflow in JSON
For technical users, Identity Governance provides the ability to view and download workflows using JSON. From the workflow editor canvas, toggle JSON. If you want to export the workflow JSON, click ellipsis (), and then Export. You can make adjustments and re-import the JSON into Identity Governance.
|
If you are exporting an out-of-box workflow, Identity Governance pulls the UUID of the users or roles from the environment and uses it in the JSON file. Make sure to reset or update the approver values in the Approver node in the JSON. |
Workflow nodes
When you define a workflow, you specify each task through a node.
Identity Governance provides several nodes that allow you to customize your workflow.
For information on how to place nodes in a workflow, refer to workflow editor canvas.To use an If/else node or Switch node, you must set outcomes in the script.
| For a comprehensive example of using the following nodes, refer to Workflow use cases. |
Approval node
Requires a user’s input in the workflow. Define:
-
User(s) to approve the access request
-
What to do when the request expires. The end user defines the expiration when they create the access request.
-
Notifications to send.
Outcomes
-
Approved -
Reject
Evaluation continues along the Approved outcome path
if any of the defined approvers approve the request.
Evaluation continues along the Reject outcome path if any of the defined
approvers reject the request.
Properties
| Property | Usage | ||
|---|---|---|---|
Approvers |
Select user(s) that must approve the access request.
|
||
Form |
Select dynamic forms or choose a specific form to present to the reviewer.
|
||
Expiration Settings |
The end user defines the expiration when they create the access request. Select one of the following:
|
||
Notification Settings |
Select which email notifications to send. By default all notifications are enabled. Select any of the following:
|
Fulfillment node
The Fulfillment node assigns a fulfillment task to users, requiring them to
manually complete of a governance task. In this case, an authorized user reviews
the task details and marks it as complete. Workflows using the fulfillment node
should also include flows to suspend the process while waiting for a response.
Administrators can use the Fulfillment node in chain tasks or used in conjunction with the Switch node to implement serial or parallel flows.
The Fulfillment node enables the complete orchestration of end-to-end lifecycles and event-driven flows.
Properties
| Property | Usage | ||
|---|---|---|---|
Reviewers |
Select user(s) that must approve the access request.
|
||
Form |
Allow dynamic form selection or choose a specific form to present to the reviewer.
|
||
Expiration Settings |
The end user defines the expiration when they create the access request. Select one of the following:
|
||
Notification Settings |
Select which email notifications to send. By default all notifications are enabled. Select any of the following:
|
If/else node
| To use this node, there must be a preceding Script node that sets at least one outcome. |
Also referred to as an exclusive gateway, this node has the
outcomes validationSuccess and ValidationFailure.
Once a condition evaluates to true, the node stops evaluating and takes that
outcome.
Outcomes
-
validationSuccess -
validationFailure
Evaluation continues along the validationSuccess outcome path when
the defined condition is met.
Evaluation continues along the validationFailure outcome path when
the defined condition is met.
Properties
| Property | Usage |
|---|---|
Outcomes |
Specify which outcome (defined in a preceding Script node) meets the condition. Set the following properties:
|
Switch node
| You must precede this node with a Script node that sets two or more outcomes. |
The Switch node (also referred to as an inclusive gateway) lets you script two or more conditional outcomes. Any or all conditions can be true.
The Switch node and If/else node both evaluate conditions. However, the Switch node continues evaluating conditions after one condition is met.
Properties
| Property | Usage | ||
|---|---|---|---|
Name |
The name of the node.
|
||
Outcomes |
Specify the outcome paths based on the output of the preceding Script node.
|
Require multiple approvals in parallel
You can use a Switch node to evaluate multiple paths instead of nesting multiple If/else nodes. However, you can also use a Switch node to send multiple approval paths in parallel. For example, you can send an approval to the role owner of a role and to an end user’s manager at the same time. Only when both approvals are approved can the workflow proceed.
To achieve this:
-
There must be a proceeding Script node before the Switch node.
-
A switch node must set two or more outcomes with their respective scripts set to
true. -
Each outcome of the Switch node routes to an Approval node.
-
The
Approveoutcome of each Approval node must route to an additional Switch node. -
The additional Switch node must only have one outcome with the script set to
true.

You can find a detailed example of using a Switch node for parallel paths in Role grant workflow example.
Script node
Write custom logic in a workflow with the Script node.
The logic you write depends on the task you are trying to achieve.
For example, you can write a script to set parameters to deny an access request, or you can write a script that sets outcomes you can use in conjunction with an If/else node or Switch node.
Outcomes
Single outcome path; however, you will often set outcomes in the script that you will use with the If/else node or Switch node.
Properties
| Property | Usage |
|---|---|
Script |
Define your custom logic by writing a JavaScript script.
|
Accessing access request-related data in scripts
When an access request is created, the relevant data is stored in a request object. The data accessible through the script node varies depending on the type of access request. For example, an application grant workflow contains information about the application whereas a role grant workflow contains information about the role.
Potential scenarios
|
The following scenarios reference the request object. To view all properties available in the request object, use the REST API endpoint Identity Governance attributes can be referenced using PingIDM functions,
such as reading a resource using |
For an application grant request, grab the application ID and name submitted in the request:
var content = execution.getVariables();                                                     1
var requestId = content.get('id');
var app = null;
var applicationName = null;

var requestObj = openidm.action('iga/governance/requests/' + requestId, 'GET', {}, {});     2
applicationId = requestObj.application.id;
app = openidm.read("managed/alpha_application/" + applicationId);                           3
applicationName = app.name; 4-
1 To leverage the workflow process variables from when the request was created, grab the variables and put them into the
contentvariable. For an access request, the only variable passed is theid. -
2 Obtain information about the access request using a
/governanceendpoint. -
3 Using the
openidm.readfunction, grab all data associated to the application and store it in a local variable,app. -
4 Grab the application name.
For an application grant request, grab the value of the custom created glossary attribute, riskLevel:
var content = execution.getVariables();                                                             1
var requestId = content.get('id');
var appId = null;
var appGlossary = null;
var riskLevel = null;

var requestObj = openidm.action('iga/governance/requests/' + requestId, 'GET', {}, {});             2
appId = requestObj.application.id;
appGlossary = openidm.action('iga/governance/application/' + appId + '/glossary', 'GET', {}, {});   3
riskLevel = appGlossary.riskLevel; 4-
1 To leverage the workflow process variables from when the request was created, grab the variables and put them into the
contentvariable. For an access request, the only variable passed is theid. -
2 Obtain information about the access request using a
/governance/requestsendpoint. -
3 Using the application
idgrabbed from theiga/governance/requestsendpoint, obtain information about the glossasry attributes for the application using theiga/governance/applicationendpoint. -
4 Grab the glossary attribute,
riskLevel, and store it in a local variable,riskLevel. The glossary nameriskLevelcomes from the name that you define when you create a glossary attribute.
For an application grant, access the requester user properties. In this scenario, access the frIndexedString1 property which correlates to a user’s line of business (LOB):
var content = execution.getVariables();                                                     1
var requestId = content.get('id');
var user = null;
var lineOfBusiness = null;

var requestObj = openidm.action('iga/governance/requests/' + requestId, 'GET', {}, {});     2

user = openidm.read("managed/alpha_user/" + requestObj.user.id);                            3

lineOfBusiness = user.frIndexedString1; 4-
1 To leverage the workflow process variables from when the request was created, grab the variables and put them into the
contentvariable. For an access request, the only variable passed is theid. -
2 Obtain information about the access request using a
iga/governance/requestsendpoint. -
3 Using the
openidm.readfunction, put the user;s data into therequestervariable. -
4 Grab line of business the user is in, which is stored in the property
frIndexedString1.
For an entitlement grant request, grab the entitlement ID and name submitted in the request:
var content = execution.getVariables();                                                     1
var requestId = content.get('id');
var requestObj = null;
var entitlementName = null;
var entitlementId = null;

requestObj = openidm.action('iga/governance/requests/' + requestId, 'GET', {}, {});         2
entitlementName = requestObj.descriptor.idx./entitlement.displayName;                       3
entitlementId = requestObj.assignment.id; 4-
1 To leverage the workflow process variables from when the request was created, grab the variables and put them into the
contentvariable. For an access request, the only variable passed is theid. -
2 Obtain information about the access request using a
iga/governance/requestsendpoint. -
3 Grab the entitlement name from
requestObj. Theentitlement.displayNameis derived from the display name attribute on the application’s entitlement object. For more information, refer to populate entitlement object display name. -
4 Grab the entitlement
idfrom therequestObj.The assignment.idis unique whereas theentitlement.idisn’t. The entitlement object is raw data from the application. Applications with the sameentitlement.idcan cause collisions if you referenceentitlement.idin your scripts. Therefore, make sure to reference theassignment.idwhen you want to reference an entitlement.
For a role grant request, grab the role ID and name submitted in the request:
var content = execution.getVariables();                                                 1
var requestId = content.get('id');
var requestObj = null;
var roleId = null;
var role = null;
var roleName = null;

requestObj = openidm.action('iga/governance/requests/' + requestId, 'GET', {}, {});     2
roleId = requestObj.role.id;
role = openidm.read("managed/alpha_role/" + roleId);                                    3
roleName = role.name; 4-
1 To leverage the workflow process variables from when the request was created, grab the variables and put them into the
contentvariable. For an access request, the only variable passed is theid. -
2 Obtain information about the access request using a
iga/governance/requestsendpoint. -
3 Using the
openidm.readfunction, grab all data associated to the role and store it in a local variable,role. -
4 Grab the role name.
Violation node
Assigns a compliance violation task to users. Workflows using the Violation node can better route violation handling in your company.
You can use the node in chain tasks or used in conjunction with the Switch node to implement serial or parallel flows.
Properties
| Property | Usage |
|---|---|
Name |
Violation Task |
Actors |
Select user(s) who acts on the violation.
|
Expiration Settings |
Define what to do when the violation expires. Options are:
|
Notification Settings |
Select which email notifications to send. By default all notifications are enabled. Select any of the following:
|
Email node
You can add an email node to your Identity Governance workflow that sends an email using a notification template.
Properties
| Property | Usage |
|---|---|
Name |
Add a display name for the email node. |
Notification Template |
Select a notification template for the email. To view an email template on the Identity Cloud analytics dashboard, go to: Email > Templates.
|
Message substitution |
Pass message variables into your email node template. You can use the Message substitution field to pass in a variable:
|
Copy and edit the default workflows
The default workflows cannot be edited to preserve its original functionality and behavior. However, you can create a copy of any default workflow and modify the draft version to fit your needs.
Copy and edit your default workflow
-
In the Advanced Identity Cloud admin console, click Governance > Workflows.
-
Select a default workflow, click Create Duplicate.
-
In the Workflow Details modal, enter a name (also referred to as
workflow ID) for your workflow copy, and click Save. For example,MyApplicationGrant-copy. -
For your workflow draft, make any changes to the workflow or its nodes, and when ready, click Save.
-
Click Publish to activate it.
-
Using curl, make an API call to update the request type with the new workflow ID (for example,
MyApplicationGrant-copy.)curl --location --request PATCH \ --header 'Authorization: Bearer <access-token>' \ --header 'Content-Type: application/json' \ --data '[ { "operation": "replace", "field": "/workflow/id", "value": "<new workflow id>" } ]' \ 'http://<env>.forgeblocks.com/iga/governance/requestTypes/<requestType>?_useLowLevelApi=true'where the
requestTypeis one of the following:-
applicationGrant
-
applicationRemove
-
entitlementGrant
-
entitlementRemove
-
roleGrant
-
roleRemove
-
Modify default workflow email templates
Identity Governance creates default email templates for access request-related features. For example, the Approval node references the default access request email templates.
| You can create your own email templates and update the email templates the Approval node uses for notifications. |
-
From the Advanced Identity Cloud admin console, go to Email > Templates.
-
View the following email templates and modify as necessary:
Some access request email templates use configurations set in the workflow definition for an access request type. The Notes column indicates if a template uses configurations. Email template name Description Request AssignedInitial email to the approver(s) of a resource when an end user submits an access request.
Request ReassignedEmail to the new assignee when an approver forwards a request item.
Request EscalatedEmail to an individual assigned as the escalation point of contact.
Request ReminderEmail to the approver(s) as a reminder that they have a request item to act on.
Request ExpiredEmail to the approver(s) when a request item expires. The end user defines the expiry of the access request when they submit the access request.
-
For each email template:
-
Click the desired template.
-
View the contents of the email.
-
If you want, update the email subject and body. Learn more about customizing email templates at Email templates.
To reference access request information in a variable in an email template, use syntax similar to the following:
request.user.userNameThe variables you can reference depend on your tenant’s configurations; therefore, they’re specific to your company.
To reference available attributes from the Advanced Identity Cloud admin console, go to Email > Template > Select template > Variables.
-
Create workflows using REST APIs
Identity Governance stores and saves workflow configurations in JSON format. You can manage the default workflow definitions for each access request type using REST APIs.
| For an example of a JSON file, refer to Workflow use cases. |
Steps to manage workflow definitions using REST API
-
Retrieve the current default workflow configurations for access request types using
/auto/orchestration/definition(GET).Save a copy of the default workflow for the access request type in case of an error with your updated workflow JSON file. -
Modify the default workflow to suit your needs.
-
Create a new default workflow definition for an access request type in a
draftstate using/auto/orchestration/definition?_action=create(POST).Each access request type can only contain one workflow definition in the
draftandpublishstates. One can exist in thedraftstate and thepublishstate. -
Validate the workflow definition before publishing using
/auto/orchestration/definition?_action=validate(POST). -
Publish the workflow definition from its
draftstate using/auto/orchestration/definition?_action=publish(POST).You cannot delete workflow definitions in the published state. -
Repeat steps 1 - 5 for each access request type desired.
Learn about workflow APIs in pingoneaic:identity-governance:rest-api/endpoints/rest-iga.adoc#rest-api-workflow.
Workflow use cases
This section presents workflow use cases featuring workflow nodes. For detailed information on each node, refer to Workflow nodes.
This section covers the following workflows use cases:
Application grant workflow
In this example, an administrator wants to create an application grant workflow that:
-
Requires the manager to approve the request. If an administrator sends a request, the request is auto-approved.
-
If approved, check what line of business (LOB) the application is in.
-
Based on the LOB, the workflow requires a separate approver to approve the request.
Assumptions
-
Each application has an application owner. You populate this value for each target application.
-
You create an application glossary attribute LOB, and populate the LOB for each application. For this scenario, the LOBs are:
-
Sales -
Finance -
Human Resources
-
-
Your end users have a manager assigned to them. An administrator populates this property and it isn’t modifiable by the end user.
Example

-
1 Use a Script node to do a context check for the request.
Click to display the request context check script
/*
Script nodes are used to invoke APIs or execute business logic.
You can invoke governance APIs or IDM APIs.
You can find details in Manage workflows.

Script nodes should return a single value and should have the
logic enclosed in a try-catch block.

Example:
try {
  var requestObj = openidm.action('iga/governance/requests/' + requestId, 'GET', {}, {});
  applicationId = requestObj.application.id;
}
catch (e) {
  failureReason = 'Validation failed: Error reading request with id ' + requestId;
}
*/
var content = execution.getVariables();
var requestId = content.get('id');
var context = null;
var skipApproval = false;
var lineItemId = false;
try {
  var requestObj = openidm.action('iga/governance/requests/' + requestId, 'GET', {}, {});
  if (requestObj.request.common.context) {
    context = requestObj.request.common.context.type;
    lineItemId = requestObj.request.common.context.lineItemId;
    if (context == 'admin') {
      skipApproval = true;
    }
  }
}
catch (e) {
  logger.info("Request Context Check failed "+e.message);
}

logger.info("Context: " + context);
execution.setVariable("context", context);
execution.setVariable("lineItemId", lineItemId);
execution.setVariable("skipApproval", skipApproval);
js -
2 Use an IF/ELSE node to set the context gateway for auto approval or standard approval based on a manager review.
-
3 Use the Script node to run any auto approvals:
Click to display the auto approval script
var content = execution.getVariables();
var requestId = content.get('id');
var context = content.get('context');
var lineItemId = content.get('lineItemId');
var queryParams = {
  "_action": "update"
}
try {
  var decision = {
      "decision": "approved",
      "comment": "Request auto-approved due to request context: " + context
  }
  openidm.action('iga/governance/requests/' + requestId, 'POST', decision, queryParams);
}
catch (e) {
  var failureReason = "Failure updating decision on request. Error message: " + e.message;
  var update = {'comment': failureReason, 'failure': true};
  openidm.action('iga/governance/requests/' + requestId, 'POST', update, queryParams);
}
js -
4 Using an Approval node, the manager of the end user must approve the request.
-
5 If approved, a Script node checks the application glossary attribute
lineOfBusiness(LOB) and sets the outcome based on the LOB of the application. Based on the outcome, the Switch node evaluates the LOB.Click to display check LOB script
var content = execution.getVariables();
var requestId = content.get('id');
var requestObj = null;
var appId = null;
var appGlossary = null;
var lob = null;

try {
  requestObj = openidm.action('iga/governance/requests/' + requestId, 'GET', {}, {});
  appId = requestObj.application.id;
  }
  catch (e) {
	logger.info("Validation failed: Error reading application grant request with id " + requestId);
  }

try {
  appGlossary = openidm.action('iga/governance/application/' + appId + '/glossary', 'GET', {}, {});
  lob = appGlossary.lineOfBusiness || "default";
  execution.setVariable("lob", lob);
}
catch (e) {
  logger.info("Could not retrieve glossary with appId " + appId + " from application grant request ID " + requestId);
}
js -
3 If the LOB is:
-
sales— An Approval node requires members of the roleSales App Approverto approve the request. -
finance— An Approval node requires members ot the foleFinance App Approverto approve the request. -
humanResources— An Approval node requires members of the roleHuman Resources App Approverto approve the request. -
null— An Approval node requires the application owner to approve the request.
-
-
7 If the required approvals are met, a Script node runs a validation check.
Click to display app grant validation script
logger.info("Running application grant request validation"); var content = execution.getVariables(); var requestId = content.get('id'); var failureReason = null; var applicationId = null; var app = null; try { var requestObj = openidm.action('iga/governance/requests/' + requestId, 'GET', {}, {}); applicationId = requestObj.application.id; } catch (e) { failureReason = "Validation failed: Error reading request with id " + requestId; } // Validation 1 - Check application exists if (!failureReason) { try { app = openidm.read('managed/alpha_application/' + applicationId); if (!app) { failureReason = "Validation failed: Cannot find application with id " + applicationId; } } catch (e) { failureReason = "Validation failed: Error reading application with id " + applicationId + ". Error message: " + e.message; } } // Validation 2 - Check the user does not already have application granted // Note: this is done at request submission time as well, the following is an example of how to check user's accounts if (!failureReason) { try { var user = openidm.read('managed/alpha_user/' + requestObj.user.id, null, [ 'effectiveApplications' ]); user.effectiveApplications.forEach(effectiveApp => { if (effectiveApp._id === applicationId) { failureReason = "Validation failed: User with id " + requestObj.user.id + " already has effective application " + applicationId; } }) } catch (e) { failureReason = "Validation failed: Unable to check effective applications of user with id " + requestObj.user.id + ". Error message: " + e.message; } } if (failureReason) { logger.info("Validation failed: " + failureReason); } execution.setVariable("failureReason", failureReason);jsIf any Approval node has the
Rejectoutcome, a Script node denies the request.Click to display reject request script
logger.info("Rejecting request");

var content = execution.getVariables();
var requestId = content.get('id');

logger.info("Execution Content: " + content);
var requestIndex = openidm.action('iga/governance/requests/' + requestId, 'GET', {}, {});
var decision = {'outcome': 'denied', 'status': 'complete', 'decision': 'rejected'};
var queryParams = { '_action': 'update'};
openidm.action('iga/governance/requests/' + requestId, 'POST', decision, queryParams);
js -
8 If the If/Else node outcome is:
-
validationSuccess— A Script node provisions the application to the end user.Click to display auto provisioning script
logger.info("Auto-Provisioning");

var content = execution.getVariables();
var requestId = content.get('id');
var failureReason = null;

try {
  var requestObj = openidm.action('iga/governance/requests/' + requestId, 'GET', {}, {});
  logger.info("requestObj: " + requestObj);
}
catch (e) {
  failureReason = "Provisioning failed: Error reading request with id " + requestId;
}

if(!failureReason) {
  try {
    var request = requestObj.request;
    var payload = {
      "applicationId": request.common.applicationId,
      "startDate": request.common.startDate,
      "endDate": request.common.endDate,
      "auditContext": {},
      "grantType": "request"
    };
    var queryParams = {
      "_action": "add"
    }

    logger.info("Creating account: " + payload);
    var result = openidm.action('iga/governance/user/' + request.common.userId + '/applications' , 'POST', payload,queryParams);
  }
  catch (e) {
    failureReason = "Provisioning failed: Error provisioning account to user " + request.common.userId + " for application " + request.common.applicationId + ". Error message: " + e.message;
  }

  var decision = {'status': 'complete', 'decision': 'approved'};
  if (failureReason) {
    decision.outcome = 'not provisioned';
    decision.comment = failureReason;
    decision.failure = true;
  }
  else {
    decision.outcome = 'provisioned';
  }

  var queryParams = { '_action': 'update'};
  openidm.action('iga/governance/requests/' + requestId, 'POST', decision, queryParams);
  logger.info("Request " + requestId + " completed.");
}
js -
validationFailure— A Script node doesn’t provision the application to the end user.Click to display validation failure script
var content = execution.getVariables();
var requestId = content.get('id');
var failureReason = content.get('failureReason');

var decision = {'outcome': 'not provisioned', 'status': 'complete', 'comment': failureReason, 'failure': true, 'decision': 'approved'};
var queryParams = { '_action': 'update'};
openidm.action('iga/governance/requests/' + requestId, 'POST', decision, queryParams);
js
-
|
Download the JSON file for this workflow here. Learn more about how to import or export workflows in workflow editor canvas. |
Entitlement grant workflow
In this example, an administrator wants to create an entitlement grant workflow that:
-
An entitlement owner must approve the request. If an administrator sends a request, the request is auto-approved.
-
If approved, check if the entitlement is marked as
privileged.Companies can define what privilegedmeans in the glossary. However, in most cases, aprivilegedentitlement gives administrative rights to sensitive data, such as view access to quarterly reports before public release. -
If the entitlement is privileged or null, the end user’s manager must approve the request.
Assumptions
-
Each entitlement has an entitlement owner.
-
You create a boolean entitlement glossary attribute ,
isPrivileged. This attribute is populated for each entitlement. -
Your end users have a manager assigned to them. An administrator populates this property and isn’t modifiable by the end user.
Example

-
1 Use a Script node to do a context check for the request.
Click to display the request context check script
/*
Script nodes are used to invoke APIs or execute business logic.
You can invoke governance APIs or IDM APIs.
Learn more in Manage workflows.

Script nodes should return a single value and should have the
logic enclosed in a try-catch block.

Example:
try {
  var requestObj = openidm.action('iga/governance/requests/' + requestId, 'GET', {}, {});
  applicationId = requestObj.application.id;
}
catch (e) {
  failureReason = 'Validation failed: Error reading request with id ' + requestId;
}
*/
var content = execution.getVariables();
var requestId = content.get('id');
var context = null;
var skipApproval = false;
var lineItemId = false;
try {
  var requestObj = openidm.action('iga/governance/requests/' + requestId, 'GET', {}, {});
  if (requestObj.request.common.context) {
    context = requestObj.request.common.context.type;
    lineItemId = requestObj.request.common.context.lineItemId;
    if (context == 'admin') {
      skipApproval = true;
    }
  }
}
catch (e) {
  logger.info("Request Context Check failed "+e.message);
}

logger.info("Context: " + context);
execution.setVariable("context", context);
execution.setVariable("lineItemId", lineItemId);
execution.setVariable("skipApproval", skipApproval);
js -
2 Use an IF/ELSE node to set the context gateway.
-
3 Use the Script node to run an auto approval:
Click to display the auto approval script
var content = execution.getVariables();
var requestId = content.get('id');
var context = content.get('context');
var lineItemId = content.get('lineItemId');
var queryParams = {
  "_action": "update"
}
var lineItemParams = {
  "_action": "updateRemediationStatus"
}
try {
  var decision = {
      "decision": "approved",
      "comment": "Request auto-approved due to request context: " + context
  }
  openidm.action('iga/governance/requests/' + requestId, 'POST', decision, queryParams);
}
catch (e) {
  var failureReason = "Failure updating decision on request. Error message: " + e.message;
  var update = {'comment': failureReason, 'failure': true};
  openidm.action('iga/governance/requests/' + requestId, 'POST', update, queryParams);
}
js -
4 Using an Approval node, the entitlement owner must approve the request.
-
5 Use a Script node to check the value of the entitlement glossary attribute
isPrivilegedand set the outcome.Click to display the entitlement privileged script
var content = execution.getVariables();
var requestId = content.get('id');
var requestObj = null;
var entId = null;
var entGlossary = null;
var entPriv = null;

//Check entitlement exists and grab entitlement info
try {
  requestObj = openidm.action('iga/governance/requests/' + requestId, 'GET', {}, {});
  entId = requestObj.assignment.id;
}
catch (e) {
  logger.info("Validation failed: Error reading entitlement grant request with id " + requestId);
}
//Check glossary for entitlement exists and grab glossary info
try {
  entGlossary = openidm.action('iga/governance/resource/' + entId + '/glossary', 'GET', {}, {});
  // Sets entPriv based on the glossary contents, if present, otherwise defaults to true
  entPriv = (entGlossary.hasOwnProperty("isPrivileged")) ? entGlossary.isPrivileged : true;
  //Sets entPriv based on glossary contents, if present, otherwise defaults to false
  //entPriv = !!entGlossary.isPrivileged;
  execution.setVariable("entPriv", entPriv);
}
catch (e) {
  logger.info("Could not retrieve glossary with entId " + entId + " from entitlement grant request ID " + requestId);
}
js -
6 Use a switch node to route outcomes based on the script. If the outcome is:
-
privileged(entPriv==true) — An additional Approval node requires the end user’s manager to approve the request. -
notPrivileged(entPriv==false`) — An additional approval isn’t required.
-
-
7 If the required approvals are met, the Script node runs a validation check.
Click to display the entitlement grant validation script
logger.info("Running entitlement grant request validation"); var content = execution.getVariables(); var requestId = content.get('id'); var failureReason = null; var applicationId = null; var assignmentId = null; var app = null; var assignment = null; var existingAccount = false; try { var requestObj = openidm.action('iga/governance/requests/' + requestId, 'GET', {}, {}); applicationId = requestObj.application.id; assignmentId = requestObj.assignment.id; } catch (e) { failureReason = "Validation failed: Error reading request with id " + requestId; } // Validation 1 - Check application exists if (!failureReason) { try { app = openidm.read('managed/alpha_application/' + applicationId); if (!app) { failureReason = "Validation failed: Cannot find application with id " + applicationId; } } catch (e) { failureReason = "Validation failed: Error reading application with id " + applicationId + ". Error message: " + e.message; } } // Validation 2 - Check entitlement exists if (!failureReason) { try { assignment = openidm.read('managed/alpha_assignment/' + assignmentId); if (!assignment) { failureReason = "Validation failed: Cannot find assignment with id " + assignmentId; } } catch (e) { failureReason = "Validation failed: Error reading assignment with id " + assignmentId + ". Error message: " + e.message; } } // Validation 3 - Check the user has application granted if (!failureReason) { try { var user = openidm.read('managed/alpha_user/' + requestObj.user.id, null, [ 'effectiveApplications' ]); user.effectiveApplications.forEach(effectiveApp => { if (effectiveApp._id === applicationId) { existingAccount = true; } }) } catch (e) { failureReason = "Validation failed: Unable to check existing applications of user with id " + requestObj.user.id + ". Error message: " + e.message; } } // Validation 4 - If account does not exist, provision it if (!failureReason) { if (!existingAccount) { try { var request = requestObj.request; var payload = { "applicationId": applicationId, "startDate": request.common.startDate, "endDate": request.common.endDate, "auditContext": {}, "grantType": "request" }; var queryParams = { "_action": "add" } logger.info("Creating account: " + payload); var result = openidm.action('iga/governance/user/' + request.common.userId + '/applications' , 'POST', payload,queryParams); } catch (e) { failureReason = "Validation failed: Error provisioning new account to user " + request.common.userId + " for application " + applicationId + ". Error message: " + e.message; } } } if (failureReason) { logger.info("Validation failed: " + failureReason); } execution.setVariable("failureReason", failureReason);jsIf any Approval node has the
Rejectoutcome, a Script node denies the request.Click to display the reject request script
logger.info("Rejecting request");

var content = execution.getVariables();
var requestId = content.get('id');

logger.info("Execution Content: " + content);
var requestIndex = openidm.action('iga/governance/requests/' + requestId, 'GET', {}, {});
var decision = {'outcome': 'denied', 'status': 'complete', 'decision': 'rejected'};
var queryParams = { '_action': 'update'};
openidm.action('iga/governance/requests/' + requestId, 'POST', decision, queryParams);
js -
8 If the
If/elsenode outcome is:-
validationFlowSuccess— A Script node provisions the application to the end user.Click to display the auto provisioning script
logger.info("Auto-Provisioning");

var content = execution.getVariables();
var requestId = content.get('id');
var failureReason = null;

try {
  var requestObj = openidm.action('iga/governance/requests/' + requestId, 'GET', {}, {});
  logger.info("requestObj: " + requestObj);
}
catch (e) {
  failureReason = "Provisioning failed: Error reading request with id " + requestId;
}

if(!failureReason) {
  try {
    var request = requestObj.request;
    var payload = {
      "entitlementId": request.common.entitlementId,
      "startDate": request.common.startDate,
      "endDate": request.common.endDate,
      "auditContext": {},
      "grantType": "request"
    };
    var queryParams = {
      "_action": "add"
    }

    var result = openidm.action('iga/governance/user/' + request.common.userId + '/entitlements' , 'POST', payload,queryParams);
  }
  catch (e) {
    failureReason = "Provisioning failed: Error provisioning entitlement to user " + request.common.userId + " for entitlement " + request.common.entitlementId + ". Error message: " + e.message;
  }

  var decision = {'status': 'complete', 'decision': 'approved'};
  if (failureReason) {
    decision.outcome = 'not provisioned';
    decision.comment = failureReason;
    decision.failure = true;
  }
  else {
    decision.outcome = 'provisioned';
  }

  var queryParams = { '_action': 'update'};
  openidm.action('iga/governance/requests/' + requestId, 'POST', decision, queryParams);
  logger.info("Request " + requestId + " completed.");
}
js -
validationFlowFailure— A Script node doesn’t provision the application to the end user.Click to display the validation failure script
var content = execution.getVariables();
var requestId = content.get('id');
var failureReason = content.get('failureReason');

var decision = {'outcome': 'not provisioned', 'status': 'complete', 'comment': failureReason, 'failure': true, 'decision': 'approved'};
var queryParams = { '_action': 'update'};
openidm.action('iga/governance/requests/' + requestId, 'POST', decision, queryParams);
js
-
|
Download the JSON file for this workflow here. For information on how to import or export workflows, refer to workflow editor canvas. |
Role grant workflow
In this example, an administrator wants to create a role grant workflow that:
-
Checks the risk level of the role.
-
Separate approvals are required based on the risk level. Specifically, if the risk level is
high, send two approvals, in parallel, to the end user’s manager and the role owner.
Assumptions
-
Each role has a role owner.
-
You create a role glossary attribute (string with enumerated value),
riskLevel, that has the following values:-
low -
medium -
highFor each role, this attribute is populated.
-
-
Your end users have a manager assigned to them. An administrator populates this property and isn’t modifiable by the end user.
Example
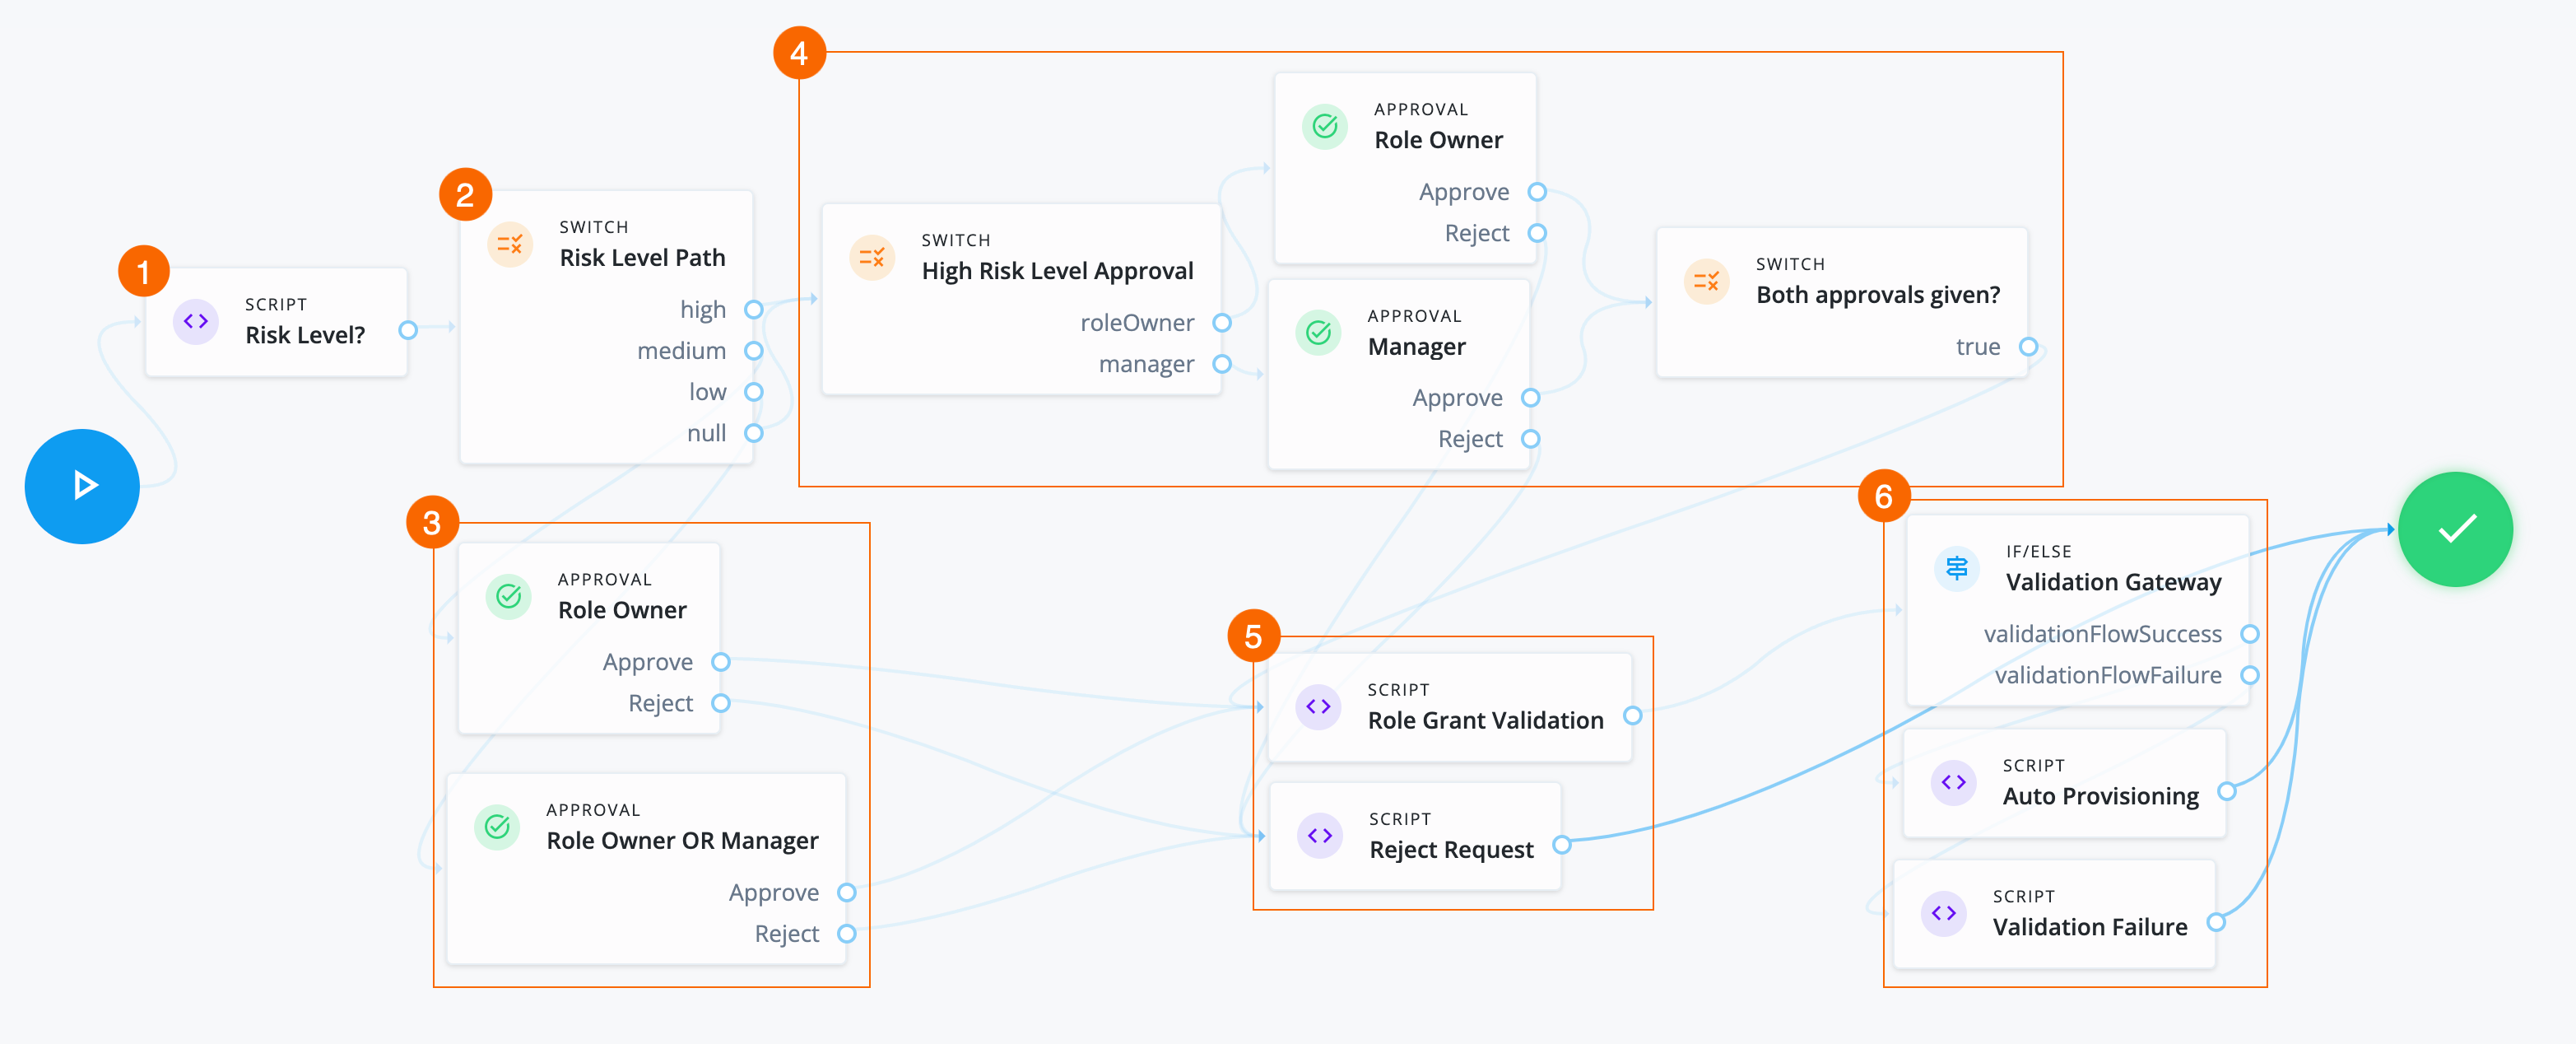
-
1 A Script node checks the value of the role glossary attribute
riskLeveland sets outcomes.Click to display risk level script
var content = execution.getVariables();
var requestId = content.get('id');
var requestObj = null;
var roleId = null;
var roleGlossary = null;
var riskLevel = null;

try {
  requestObj = openidm.action('iga/governance/requests/' + requestId, 'GET', {}, {});
  riskId = requestObj.risk.id;
}
catch (e) {
  logger.info("Validation failed: Error reading role grant request with id " + requestId);
}

try {
  roleGlossary = openidm.action('iga/governance/role/' + roleId + '/glossary', 'GET', {}, {});
  riskLevel = roleGlossary.riskLevel;
  execution.setVariable("riskLevel", riskLevel);
}
catch (e) {
  logger.info("Could not retrieve glossary with roleId " + roleId + " from role grant request ID " + requestId);
}
js -
2 A Switch node determines the path to take based on the Script node.
-
3 If the risk level is:
-
low— An Approval node requires either the role owner or the end user’s manager to approve the request. -
medium— An Approval node requires the role owner to approve the request.
-
-
4 If the risk level is
highornullthen:-
A Switch node sends two approval tasks in parallel.
-
An Approval node requires the role owner to approve the request.
-
An Approval node requires the end user’s manager to approve the request.
-
A closing Switch node waits for both approvals before proceeding to provision the role.
-
-
5 If the required approvals are met, a Script node runs a validation check.
Click to display the Role Grant Validation script
logger.info("Running role grant request validation"); var content = execution.getVariables(); var requestId = content.get('id'); var failureReason = null; var roleId = null; var role = null; try { var requestObj = openidm.action('iga/governance/requests/' + requestId, 'GET', {}, {}); roleId = requestObj.role.id; } catch (e) { failureReason = "Validation failed: Error reading request with id " + requestId; } // Validation 1 - Check role exists if (!failureReason) { try { role = openidm.read('managed/alpha_role/' + roleId); if (!role) { failureReason = "Validation failed: Cannot find role with id " + roleId; } } catch (e) { failureReason = "Validation failed: Error reading role with id " + roleId + ". Error message: " + e.message; } } if (failureReason) { logger.info("Validation failed: " + failureReason); } execution.setVariable("failureReason", failureReason);jsIf any Approval node has the
Rejectoutcome, a Script node denies the request.Click to display Reject Request script
logger.info("Rejecting request");

var content = execution.getVariables();
var requestId = content.get('id');

logger.info("Execution Content: " + content);
var requestIndex = openidm.action('iga/governance/requests/' + requestId, 'GET', {}, {});
var decision = {'outcome': 'denied', 'status': 'complete', 'decision': 'rejected'};
var queryParams = { '_action': 'update'};
openidm.action('iga/governance/requests/' + requestId, 'POST', decision, queryParams);
js -
6 If the If/else node outcome is:
-
validationFlowSuccess— A Script node provisions the application to the end user.Click to display Auto Provisioning script
logger.info("Auto-Provisioning");

var content = execution.getVariables();
var requestId = content.get('id');
var failureReason = null;

try {
  var requestObj = openidm.action('iga/governance/requests/' + requestId, 'GET', {}, {});
  logger.info("requestObj: " + requestObj);
}
catch (e) {
  failureReason = "Provisioning failed: Error reading request with id " + requestId;
}

if(!failureReason) {
  try {
    var request = requestObj.request;
    var payload = {
      "roleId": request.common.roleId,
      "startDate": request.common.startDate,
      "endDate": request.common.endDate,
      "auditContext": {},
      "grantType": "request"
    };
    var queryParams = {
      "_action": "add"
    }

    var result = openidm.action('iga/governance/user/' + request.common.userId + '/roles' , 'POST', payload,queryParams);
  }
  catch (e) {
    failureReason = "Provisioning failed: Error provisioning role to user " + request.common.userId + " for role " + request.common.roleId + ". Error message: " + e.message;
  }

  var decision = {'status': 'complete', 'decision': 'approved'};
  if (failureReason) {
    decision.outcome = 'not provisioned';
    decision.comment = failureReason;
    decision.failure = true;
  }
  else {
    decision.outcome = 'provisioned';
  }

  var queryParams = { '_action': 'update'};
  openidm.action('iga/governance/requests/' + requestId, 'POST', decision, queryParams);
  logger.info("Request " + requestId + " completed.");
}
js -
validationFlowFailure— A Script node doesn’t provision the application to the end user.Click to display Validation Failure script
var content = execution.getVariables();
var failureReason = content.get('failureReason');

var decision = {'outcome': 'not provisioned', 'status': 'complete', 'comment': failureReason, 'failure': true, 'decision': 'approved'};
var queryParams = { '_action': 'update'};
openidm.action('iga/governance/requests/' + requestId, 'POST', decision, queryParams);
js
-
|
Download the JSON file for this workflow here. Learn more about how to import or export workflows in workflow editor canvas. |
Role remove workflow
In this example, an administrator wants to create a workflow that:
-
Handles a normal role removal access request.
-
Includes a context check for administrator-submitted requests.
-
Skips the the approval task process and runs auto-approval and auto-deprovisioning scripts if the context check passes.
Assumptions
-
Each role has a role owner.
-
Notification settings and email templates exist.
-
Make sure to catch any error/failure conditions.
Example

-
1 The Script node invokes the APIs and checks the context. If the context is
adminorcertification, it skips the manual approval process.Click to display request context check script
var content = execution.getVariables();
var requestId = content.get('id');
var context = null;
var skipApproval = false;

try {
  var requestObj = openidm.action('iga/governance/requests/' + requestId, 'GET', {}, {});
  if (requestObj.request.common.context) {
    context = requestObj.request.common.context.type;
    if (context === 'admin' || context === 'certification') {
      skipApproval = true;
    }
  }
}
catch (e) {}

logger.info("Context: " + context);
execution.setVariable("context", context);
execution.setVariable("skipApproval", skipApproval);
js -
2 The Approval node assigns an approval task to users and roles. The node chains tasks in conjunction with a Switch node to implement serial or parallel flows.
Click to display the approval task properties
Item Description Name
Approval TaskApprovers
Two options are available:
-
Add users and roles manually, such as
Role Ownerand defineApprovertype-
Approve
-
Reject
-
Forward
-
Modify
-
Comment
-
-
Define users using a script:
Form
Select a form to present to the reviewer:
-
Dynamic form selection. This selection is typically used for basic out-of-the-box workflows, like
BasicApplicationGrantand others. -
Choose a form. This selection is typically used for custom request type forms.
Expiration Settings
Options are:
-
Reject request
-
Reassign request
-
Do nothing
Notification Settings
Options are:
-
Assignment notification and email templates, such as
requestAssigned. -
Reassignment notification and email templates, such as
requestReassigned. -
Assignee reminders and email templates, such as
requestReminder.-
Sends every number of time periods, such as
3 day(s).
-
-
Escalation notifications and email templates, such as
requestEscalated.-
Send every number of day(s), such as
5 day(s). -
Send to
Send escalation totoUser, and selectUser.
-
-
Expiration notification and email templates, such as
requestExpired.-
Send the notification on the configured number of days before expiration.
-
-
-
3 Invokes the auto-approval script if
scriptApprovalis true.Click to display auto-approval script
var content = execution.getVariables();
var requestId = content.get('id');
var context = content.get('context');
var queryParams = {
  "_action": "update"
}

try {
  var decision = {
      "decision": "approved",
      "comment": "Request auto-approved due to request context: " + context
  }
  openidm.action('iga/governance/requests/' + requestId, 'POST', decision, queryParams);
}
catch (e) {
  var failureReason = "Failure updating decision on request. Error message: " + e.message;
  var update = {'comment': failureReason, 'failure': true};
  openidm.action('iga/governance/requests/' + requestId, 'POST', update, queryParams);
}
js -
4 Runs a
RejectRequestscript whenApproval tasknode returns areject.Click to display
RejectRequestscriptlogger.info("Rejecting request"); var content = execution.getVariables(); var requestId = content.get('id'); logger.info("Execution Content: " + content); var requestIndex = openidm.action('iga/governance/requests/' + requestId, 'GET', {}, {}); var decision = {'outcome': 'denied', 'status': 'complete', 'decision': 'rejected'}; var queryParams = { '_action': 'update'}; openidm.action('iga/governance/requests/' + requestId, 'POST', decision, queryParams);js -
5 Run Auto Deprovisioning script.
Click to display the auto deprovisioning script
logger.info("Auto-Deprovisioning"); var content = execution.getVariables(); var requestId = content.get('id'); var failureReason = null; try { var requestObj = openidm.action('iga/governance/requests/' + requestId, 'GET', {}, {}); logger.info("requestObj: " + requestObj); } catch (e) { failureReason = "Deprovisioning failed: Error reading request with id " + requestId; } if(!failureReason) { try { var request = requestObj.request; var payload = { "roleId": request.common.roleId, "startDate": request.common.startDate, "endDate": request.common.endDate, "auditContext": {}, "grantType": "request" }; var queryParams = { "_action": "remove" } var result = openidm.action('iga/governance/user/' + request.common.userId + '/roles' , 'POST', payload,queryParams); } catch (e) { failureReason = "Deprovisioning failed: Error deprovisioning role to user " + request.common.userId + " for role " + request.common.roleId + ". Error message: " + e.message; } var decision = {'status': 'complete', 'decision': 'approved'}; if (failureReason) { decision.outcome = 'not provisioned'; decision.comment = failureReason; decision.failure = true; } else { decision.outcome = 'provisioned'; } var queryParams = { '_action': 'update'}; openidm.action('iga/governance/requests/' + requestId, 'POST', decision, queryParams); logger.info("Request " + requestId + " completed."); }js
|
Download the JSON file for this workflow here. Learn more about how to import or export workflows in workflow editor canvas. |
Violation workflow
In this example, an administrator creates a workflow that:
-
Processes a single violation task.
-
If the violation outcome is
Remediate, it remediates the violation, validates the result, and removes the entitlements. -
If the violation outcome is
Allow, it creates an exception. -
If the violation outcome is
expiration, it goes to a manual decision via the Fulfillment node. -
If the end user tasked with the manual fulfillment approves of the various outcomes, the workflow is complete.
-
If the end user tasked with the manual fulfillment denies the resulting outcomes, the workflow calls a reject requests script, and loops back for another manual confirmation.
Example
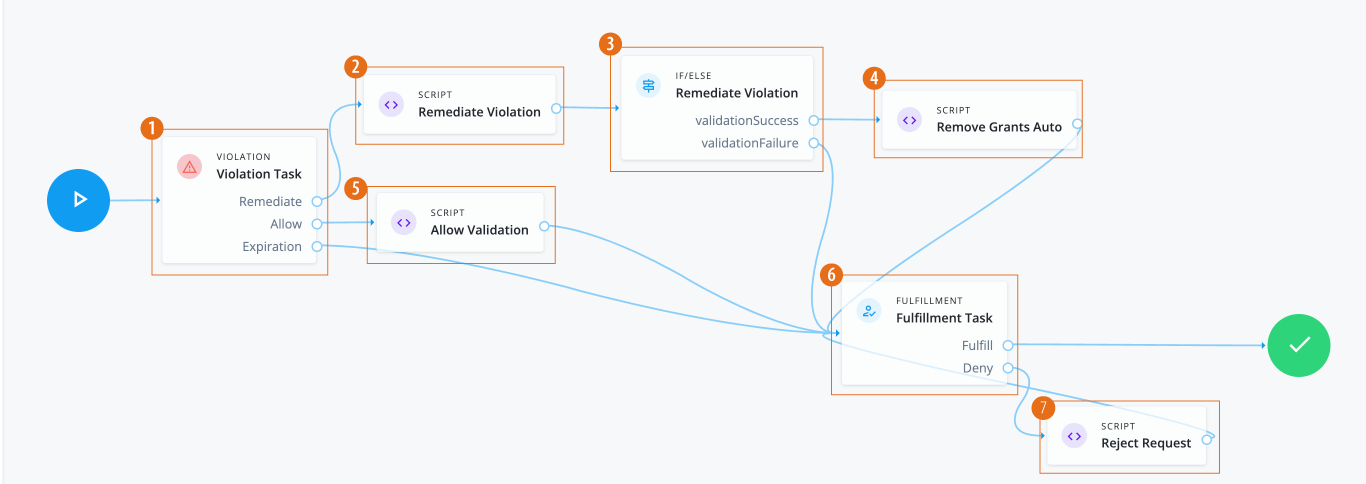
-
1 The Violation node routes the violation to the appropriate outcome. Options are:
Remediate,Allow, andExpiration. -
2 The Remediate Violation Script node gets the context information for the violation and sets the
remediationResponse.Click to display Remediate Violation script
logger.info("Remediating violation"); var content = execution.getVariables(); var violationId = content.get('id'); var remediation = content.get('remediation'); logger.info("Remediating violation - violationId: " + violationId + ', remediation payload: ' + remediation); var remediationContent = null; var remediationResponse = openidm.action('iga/governance/violation/' + violationId + '/remediate', 'POST', remediation); logger.info("Remediating response: " + remediationResponse); remediationContent = remediationResponse.decision.remediation; execution.setVariable("remediation", remediationContent);js -
3 The Remediate Violation IF/ELSE node routes successful validations to an auto remove script node and validation failures to a failure handling node.
-
4 The Remove Grants Auto script node removes the entitlement grants that caused the violation.
Click to display Auto Remove Entitlement Grants script
logger.info("Removing grants automatically"); var content = execution.getVariables(); var violationId = content.get('id'); var failureReason = null; var phaseName = content.get('phaseName'); var violationObj; logger.info("Removing entitlement grants for violation " + violationId + " with phase name " + phaseName); try { violationObj = openidm.action('iga/governance/violation/lookup/' + violationId, 'GET', {}, {}); } catch (e) { failureReason = "Removing entitlement grants failed: Error reading violation with id " + violationId + ". Error message: " + e.message; } if (!failureReason) { var remediation = violationObj.decision.remediation; var failedDeprovisioning = false; var deprovisionedIds = []; for(var grant of violationObj.violatingAccess) { if (!remediation.grantIds.includes(grant.compositeId)) { continue; } var userId = violationObj.user.id; logger.info("Removing entitlement grant: " + grant.compositeId + ", user: " + userId + ", violation: " + violationId); try { var payload = { entitlementId: grant.assignment.id }; logger.info('Payload to remove grant: ' + JSON.stringify(payload)); var queryParams = { "_action": "remove" } var result = openidm.action('iga/governance/user/' + userId + '/entitlements', 'POST', payload,queryParams); execution.setVariables(result); logger.info("Deprovisioned " + grant.assignment.id + " successfully, user " + userId + + ", violation: " + violationId); deprovisionedIds.push(grant.compositeId); } catch (e) { failureReason = failureReason + ". Removing grants failed: Error deprovisioning entitlement" + grant.assignment.id + " from user. Error message: " + e.message + "."; failedDeprovisioning = true; } } if (!failedDeprovisioning) { openidm.action('iga/governance/violation/' + violationId + '/remediation/status/complete', 'POST', {}); } else { failureReason = failureReason + ". Grants removed: " + deprovisionedIds; } } if (failureReason) { var update = { 'comment': failureReason }; openidm.action('iga/governance/violation/' + violationId + '/comment', 'POST', update, {}); }js -
5 The Allow Violation script node logs the information. If a failure arises, Identity Governance posts the failure with the reason.
Click to display Allow Violation script node
logger.info("Allowing violation"); var content = execution.getVariables(); var violationId = content.get('id'); var phaseName = content.get('phaseName'); logger.info("Violation to be allowed: " + violationId + " with phase name " + phaseName); var failureReason = null; try { var allowResponse = openidm.action('iga/governance/violation/' + violationId + '/allow', 'POST', {}); logger.info("Violation " + violationId + " was allowed successfully.");} catch (e) { failureReason = "Failed allowing violation with id " + violationId + ". Error message: " + e.message; } if (failureReason) { var update = { "comment": failureReason }; try { openidm.action('iga/governance/violation/' + violationId + '/phases/' + phaseName + '/comment', 'POST', update, {}); } catch (e) { openidm.action('iga/governance/violation/' + violationId + '/comment', 'POST', update, {}); } }js -
6 The Fulfillment node requests a manual completion of the task by an authorized end user, typically during review time. If successful, the task is fulfilled, and the workflow is complete.
-
7 The Reject Request script node retrieves the
requestID, logs the rejection, and sends a reject request.Click to display Reject Request script
logger.info("Rejecting request");

var content = execution.getVariables();
var requestId = content.get('id');

logger.info("Execution Content: " + content);
var requestIndex = openidm.action('iga/governance/requests/' + requestId, 'GET', {}, {});
var decision = {'outcome': 'denied', 'status': 'complete', 'decision': 'rejected'};
var queryParams = { '_action': 'update'};
openidm.action('iga/governance/requests/' + requestId, 'POST', decision, queryParams);
js
|
Download the JSON file for this workflow here. Learn more about how to import or export workflows in workflow editor canvas. |
User create event workflow - send email
In this example, an administrator creates a workflow that:
-
Sends an email notification to the new user when a user create event occurs.
-
Copies their manager, as well, if present.
Example

-
1 The Script node sends email to the new user and cc’s to the user’s manager.
Click to display send email script
logger.info("Running user create event role workflow - send email");

var content = execution.getVariables();
var requestId = content.get('id');

// Read event user information from request object
try {
  var requestObj = openidm.action('iga/governance/requests/' + requestId, 'GET', {}, {});
  var userObj = requestObj.request.common.blob.after;
  var userDisplayName = userObj.givenName + " " + userObj.sn + " (" + userObj.userName + ")";
  var body = {
    subject: "New user created: " + userDisplayName,
    to: userObj.mail,
    body: "New user created: " + userDisplayName + ".",
    object: {}
  };
  if (userObj && userObj.manager && userObj.manager.mail) {
    body.cc = userObj.manager.mail
  };
  openidm.action("external/email", "send", body);
}
catch (e) {
  logger.info("Unable to send new user creation email");
}

// Update event request as final
var decision = {'status': 'complete', 'outcome': 'fulfilled', 'decision': 'approved'};
var queryParams = { '_action': 'update'};
openidm.action('iga/governance/requests/' + requestId, 'POST', decision, queryParams);
logger.info("Request " + requestId + " completed.");
js
|
Download the JSON file for this workflow here. Learn more about how to import or export workflows in workflow editor canvas. |
User create event workflow - catalog lookup
In this example, an administrator creates a workflow that:
-
Submits a request to add the
Data AnalystandSecurityroles to a newly created user when a user create event occurs. -
Looks up the two roles in the catalog.
Example
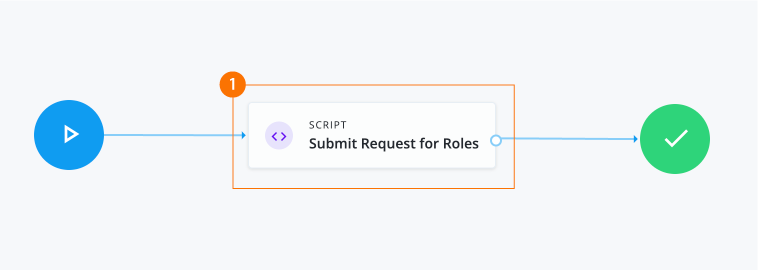
-
1 The Script node looks up two roles in the catalog. If the roles are present in the catalog, the script generates a request for roles.
Click to display
Submit Request for Rolesscriptlogger.info("Running user create event role workflow"); var content = execution.getVariables(); var requestId = content.get('id'); var failureReason = null; var userObj = null; var userId = null; // Read event user information from request object try { var requestObj = openidm.action('iga/governance/requests/' + requestId, 'GET', {}, {}); userObj = requestObj.request.common.blob.after; userId = userObj.userId; } catch (e) { failureReason = "Validation failed: Error reading request with id " + requestId; } // Define roles to request var roleNames = [ "Data Analyst", "Security" ]; // Look up roles in catalog var operand = []; for (var index in roleNames) { operand.push({operator: "EQUALS", operand: { targetName: "role.name", targetValue: roleNames[index] }}) } var body = { targetFilter: {operator: "OR", operand: operand}}; var catalog = openidm.action("iga/governance/catalog/search", "POST", body); var catalogResults = catalog.result; // Define request catalogs key var catalogBody = []; for (var idx in catalogResults) { var catalog = catalogResults[idx]; catalogBody.push({type: "role", id: catalog.id}) } // Define request payload var requestBody = { priority: "low", accessModifier: "add", justification: "Request submitted on user creation.", users: [ userId ], catalogs: catalogBody }; // Create requests try { openidm.action("iga/governance/requests", "POST", requestBody, {_action: "create"}) } catch (e) { failureReason = "Unable to generate requests for roles"; } // Update event request as final var decision = failureReason ? {'status': 'complete', 'outcome': 'cancelled', 'decision': 'rejected', 'comment': failureReason, 'failure': true} : {'status': 'complete', 'outcome': 'fulfilled', 'decision': 'approved'}; var queryParams = { '_action': 'update'}; openidm.action('iga/governance/requests/' + requestId, 'POST', decision, queryParams); logger.info("Request " + requestId + " completed.");js
|
Download the JSON file for this workflow here. Learn more about how to import or export workflows in workflow editor canvas. |
User create event workflow - request two roles
In this example, an administrator creates a workflow that submits a separate request to add two roles to the newly created user. The script is triggered when a user create event occurs.
Example

-
1 The Script node gets a user ID from the event request and returns the user object.
Click to display
Get User ID from event requestscriptlogger.info("Get User Id From Event Request: UserCreateEventWithSteps"); var content = execution.getVariables(); var requestId = content.get('id'); // Read event user information from request object try { var requestObj = openidm.action('iga/governance/requests/' + requestId, 'GET', {}, {}); var userObj = requestObj.request.common.blob.after; execution.setVariable("userId", userObj.userId); } catch (e) { execution.setVariable("failureState", "Validation failed: Error reading request with id " + requestId); }js -
2 The Script node makes a call to create the request. The payload contains two catalog IDs for the
Data AnalystandSecurityroles.Click to display
Submit request for rolesscriptlogger.info("Submit Role Requests: UserCreateEventWithSteps"); var content = execution.getVariables(); var userId = content.get('userId'); var failureState = content.get('failureState'); // Define request payload if (!failureState) { var requestBody = { priority: "low", accessModifier: "add", justification: "Request submitted on user creation: UserCreateEventWithSteps.", users: [ userId ], catalogs: [ { type: "role", id: "b9224b9ae535c9eab3f493dc206ac689dc9f6733b417d0def37f8969bef3e95dad7c812e4585056f698c7b3eb15c970dfa939eca8217741af187978359af13df"}, { type: "role", id: "e7ec51656c6f5ca297d82772a681e3069d8a7c24c04f15afaa8060856e17ad6e76f88bdeb635d4dc8c3d8faa462f376189322e85df379ae0721fcb2d28d1a222"} ] }; // Create requests try { openidm.action("iga/governance/requests", "POST", requestBody, {_action: "create"}) } catch (e) { execution.setVariable("failureState", "Unable to generate requests for roles"); } }js -
3 The Script node completes the request.
Click to display
Finalize requestscriptlogger.info("Finalize Request: UserCreateEventWithSteps"); var content = execution.getVariables(); var requestId = content.get('requestId'); var failureState = content.get('failureState'); if (!failureState) { try { // Update event request as final var decision = {'status': 'complete', 'outcome': 'fulfilled', 'decision': 'approved'} var queryParams = { '_action': 'update'}; openidm.action('iga/governance/requests/' + requestId, 'POST', decision, queryParams); logger.info("Request " + requestId + " completed."); } catch (e) { execution.setVariable("failureState", "Unable to finalize request."); } }js -
4 The Script node handles any failures.
Click to display
Failure handlerscriptlogger.info("Failure Handler: UserCreateEventWithSteps"); var content = execution.getVariables(); var requestId = content.get('requestId'); var failureReason = content.get('failureReason'); // Update event request as final if (failureReason) { var decision = {'status': 'complete', 'outcome': 'cancelled', 'decision': 'rejected', 'comment': failureReason, 'failure': true} var queryParams = { '_action': 'update'}; openidm.action('iga/governance/requests/' + requestId, 'POST', decision, queryParams); logger.info("Request " + requestId + " completed."); }jsThe User create event workflow - send email, User create event workflow - catalog lookup, and User create event workflow - request two roles examples present
User createevent workflows. However, you can also adjust the workflows forUser updateevents. For example, in theUser createexamples, the user object returns the current or after state of the user:var userObj = requestObj.request.common.blob.afterjsUpdate events also have access to the before (or pre-update) state by referencing the object, which you can also use in your scripts.
var userObj = requestObj.request.common.blob.beforejs
|
Download the JSON file for this workflow here. Learn more about how to import or export workflows in workflow editor canvas. |
User offboarding workflow
In this example, an administrator creates a workflow that triggers a series of offboarding tasks when a user update occurs, such as a status, manager, or department change.
The offboarding tasks include:
-
Setting up a replacement user ID for the inactive user. Depending on the case, the replacement user is the manager or former manager.
-
Setting up a replacement user ID as a delegate for the inactive user.
-
Replacing all instances of other users delegating to the inactive user with replacement user ID.
-
Replacing the inactive user with the replacement user ID as an app owner.
-
Replacing the inactive user with the replacement user ID as an entitlements owner.
-
Replacing the inactive user with the replacement user ID as a role owner.
-
Replacing the inactive user with the replacement user ID as an access request approver.
-
Replacing the inactive user with the replacement user ID as a violations approver.
Assumptions
-
Human Resources confirms the user’s change in status, manager, or department and has activated offboarding tasks to stakeholders.
Example
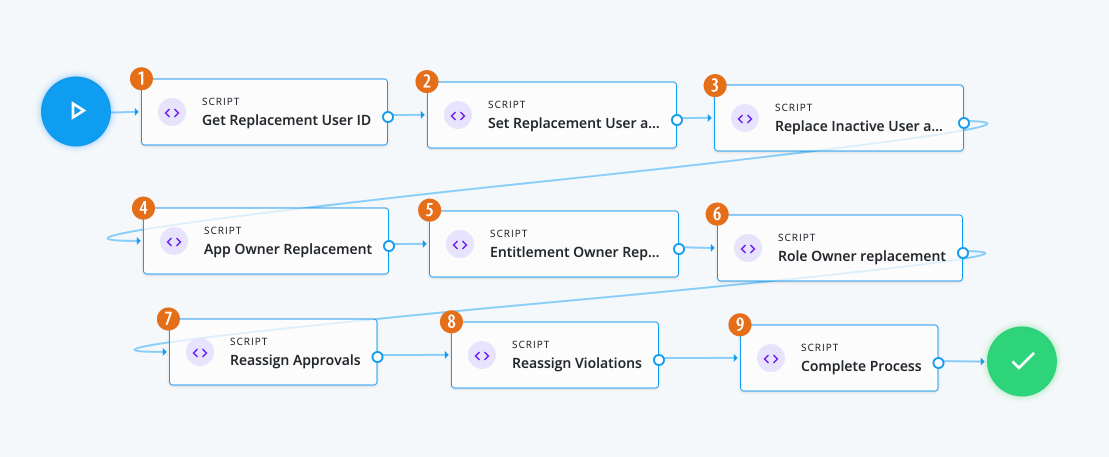
-
1 The Script node reads the event user information, including manager data from the request object.
Click to display the Get Replacement User ID script
// Insert logic to set ID of user who will be replacing inactive user
logger.info("Getting ID of user who will be replacing inactive user.");

var content = execution.getVariables();
var requestId = content.get('id');

// Read event user information from request object
try {
  var requestObj = openidm.action('iga/governance/requests/' + requestId, 'GET', {}, {});
  var previousUserObj = requestObj.request.common.blob.before;
  var currentUserObj = requestObj.request.common.blob.after;
  var userId = currentUserObj.id;
  var replacementId = null;

  // Check current value of manager, or previous manager if not present, to find a replacement user ID
  if (currentUserObj && currentUserObj.manager) {
    replacementId = currentUserObj.manager.id;
  }
  else if (previousUserObj && previousUserObj.manager) {
    replacementId = previousUserObj.manager.id;
  }

  execution.setVariable('userId', userId);
  execution.setVariable('replacementId', replacementId);
}
catch(e) {
  logger.info("Unable to get replacement user ID for inactive user " + userId);
}
js -
2 The Script node adds the replacement user as a delegate for the inactive user so that they can act on their tasks.
Click to display Set Replacement User as Inactive User script
// Adding the Replacement User as a delegate for the Inactive User so that they will be able to act on their tasks
var content = execution.getVariables();
var userId = content.get('userId');
var replacementId = content.get('replacementId');

// Read event user information from request object
try {
  if (replacementId) {
    logger.info("Adding " + replacementId + " as inactive user " + userId + "'s delegate");
    var payload = { proxyIds: [ "managed/user/" + replacementId ]};
    var proxyUpdate = openidm.action('iga/governance/user/' + userId + '/set-proxy', 'POST', payload, {});
    logger.info("Added " + replacementId + " as a delegate for inactive user " + userId);
  }
}
catch(e) {
  logger.info("Unable to add delegate for inactive user " + userId);
}
js -
3 The Script node replaces all instances of other users delegating to the inactive user with the replacement user.
Click to display the Replace Inactive User as delegate script
// Replacing all instances of others delegating to the inactive user with replacement user
// Before script: User A and User B both delegate to inactive User
// After script: User A and User B both delegate to replacement User

var content = execution.getVariables();
var userId = content.get('userId');
var replacementId = content.get('replacementId');

try {
  if (replacementId) {
    logger.info("Replacing instances of users delegating to inactive user " + userId + " with " + replacementId);

    // Get the list of users delegating to inactive user
    var inactiveUser = openidm.query("managed/alpha_user/" + userId + '/taskPrincipals', { _queryFilter: 'true' }, [ '_refResourceId' ]);
    var usersDelegatingToInactiveUser = inactiveUser.result;

    // Set the payloads
    var removePayload = { proxyIds: [ "managed/user/" + userId ]};
    var addPayload = { proxyIds: [ "managed/user/" + replacementId ]};

    // For each delegate, remove the inactive user and add the replacement user
    for (var i = 0; i < usersDelegatingToInactiveUser.length; i++) {
      var delegatingUserId = usersDelegatingToInactiveUser[i]._refResourceId;
      openidm.action("iga/governance/user/" + delegatingUserId + "/remove-proxy", "POST", removePayload, {});
      openidm.action("iga/governance/user/" + delegatingUserId + "/set-proxy", "POST", addPayload, {});
    }
    logger.info("Replaced instances of users delegating to inactive user " + userId + " with " + replacementId);
  }
}
catch(e) {
  logger.info("Unable to replace instances of users delegating to inactive user " + userId + " with " + replacementId);
}
js -
4 The Script node invokes the APIs and executes business logic.
Click to display the App Owner Replacement script
/*
Script nodes are used to invoke APIs or execute business logic.
You can invoke governance APIs or IDM APIs.
Refer to https://backstage.forgerock.com/docs/idcloud/latest/identity-governance/administration/workflow-configure.html for more details.

Script nodes should return a single value and should have the
logic enclosed in a try-catch block.

Example:
try {
  var requestObj = openidm.action('iga/governance/requests/' + requestId, 'GET', {}, {});
  applicationId = requestObj.application.id;
}
catch (e) {
  failureReason = 'Validation failed: Error reading request with id ' + requestId;
}
*/

var content = execution.getVariables();
  var userId = content.get('userId');
  var replacementId = content.get('replacementId');
  var queryFilter =  {"_queryFilter": "true"}
  var removeBody = [];
  var addBody = [];

  var applications = openidm.query('managed/alpha_user/' + userId + '/ownerOfApp', queryFilter, []);

  for(var app of applications['result']){
    removeBody.push({
      "operation": "remove",
      "field": "/ownerOfApp",
      "value": {
          "_ref": app._ref,
          "_refProperties": {
              "_id": app._id,
              "_rev": app._rev
          },
          "_refResourceCollection": "managed/alpha_application",
          "_refResourceId": app._refResourceId
      }
  })
    addBody.push({
      "operation": "add",
      "field": "ownerOfApp/-",
      "value": {
          "_ref": app._ref,
          "_refProperties": {}
      }
    })
  }
  openidm.patch('managed/alpha_user/'+ userId, null, removeBody)
  openidm.patch('managed/alpha_user/'+ replacementId, null, addBody)
js -
5 The Script node replaces the entitlement owner.
Click to display the Entitlement Owner Replacement script
/*
Script nodes are used to invoke APIs or execute business logic.
You can invoke governance APIs or IDM APIs.
Refer to https://backstage.forgerock.com/docs/idcloud/latest/identity-governance/administration/workflow-configure.html for more details.

Script nodes should return a single value and should have the
logic enclosed in a try-catch block.

Example:
try {
  var requestObj = openidm.action('iga/governance/requests/' + requestId, 'GET', {}, {});
  applicationId = requestObj.application.id;
}
catch (e) {
  failureReason = 'Validation failed: Error reading request with id ' + requestId;
}
*/
var content = execution.getVariables();
  var userId = content.get('userId');
  var replacementId = content.get('replacementId');
  var targetFilter =  {"targetFilter": {
      "operator": "EQUALS",
      "operand": {
          "targetName": "entitlementOwner.id",
          "targetValue": userId
      }
  }}

  var entitlements = openidm.action('iga/governance/resource/search', 'POST', targetFilter, {});

  for(var entitlement of entitlements['result']){
    var body = openidm.action('iga/governance/resource/' + entitlement.id + '/glossary', 'GET', {}, {})
    body.entitlementOwner = "managed/user/" + replacementId;
    openidm.action('iga/governance/resource/' + entitlement.id + '/glossary', 'PUT', body, {})
  }
js -
6 The Script node replaces the role owner.
Click to display the Role Owner Replacement script
/*
Script nodes are used to invoke APIs or execute business logic.
You can invoke governance APIs or IDM APIs.
Refer to https://backstage.forgerock.com/docs/idcloud/latest/identity-governance/administration/workflow-configure.html for more details.

Script nodes should return a single value and should have the
logic enclosed in a try-catch block.

Example:
try {
  var requestObj = openidm.action('iga/governance/requests/' + requestId, 'GET', {}, {});
  applicationId = requestObj.application.id;
}
catch (e) {
  failureReason = 'Validation failed: Error reading request with id ' + requestId;
}
*/

var content = execution.getVariables();
  var userId = content.get('userId');
  var replacementId = content.get('replacementId');
  var targetFilter =  {"targetFilter": {
      "operator": "EQUALS",
        "operand": {
            "targetName": "glossary.idx./role.roleOwner",
            "targetValue": "managed/user/"+ userId
      }
  }}

  var results = openidm.action('iga/governance/catalog/search', 'POST', targetFilter, {});

  for(var result of results['result']){
    var body = openidm.action('iga/governance/role/' + result.role.id + '/glossary', 'GET', {}, {})
    body.roleOwner = "managed/user/" + replacementId;
    openidm.action('iga/governance/role/' + result.role.id + '/glossary', 'PUT', body, {})
  }
js -
7 The Script node reassigns approvals.
Click to display the Reassign Approvals script
/*
Script nodes are used to invoke APIs or execute business logic.
You can invoke governance APIs or IDM APIs.
Refer to https://backstage.forgerock.com/docs/idcloud/latest/identity-governance/administration/workflow-configure.html for more details.

Script nodes should return a single value and should have the
logic enclosed in a try-catch block.

Example:
try {
  var requestObj = openidm.action('iga/governance/requests/' + requestId, 'GET', {}, {});
  applicationId = requestObj.application.id;
}
catch (e) {
  failureReason = 'Validation failed: Error reading request with id ' + requestId;
}
*/

var content = execution.getVariables();
var userId = content.get('userId');
var replacementId = content.get('replacementId');
var targetFilter =  {
  "targetFilter": {
        "operator": "AND",
        "operand": [
            {
                "operator": "EQUALS",
                "operand": {
                    "targetName": "decision.actors.active.id",
                    "targetValue": "managed/user/" + userId
                }
            },
            {
                "operator": "EQUALS",
                "operand": {
                    "targetName": "decision.status",
                    "targetValue": "in-progress"
                }
            }
        ]
    }
}

var results = null
var params = {
  "_pageSize": 100,
  "_pageNumber": 0
}
do{
  results= openidm.action('iga/governance/requests/search', 'POST', targetFilter, params);

  for(var result of results['result']){
    var phaseName = null;
    var actors = [];
    for(var user of result.decision.actors.active){
      if(user.id === "managed/user/"+ userId){
        phaseName = user.phase;
        actors.push({"id": "managed/user/" + replacementId, "permissions": user.permissions})
      }
    }
    for(var user of result.decision.actors.active){
      if(user.phase === phaseName && user.id !== "managed/user/"+ userId){
        actors.push({"id": user.id, "permissions": user.permissions})
      }
    }
    var body = { "updatedActors": actors  };
    if(phaseName){
      openidm.action('/iga/governance/requests/' + result.id + '/phases/' + phaseName + '/reassign', 'POST', body, {})
    }
  }
}
while (results.result.length > 0)
js -
8 The Script node reassigns violations.
Click to display the Reassign Violations script
/*
Script nodes are used to invoke APIs or execute business logic.
You can invoke governance APIs or IDM APIs.
Refer to https://backstage.forgerock.com/docs/idcloud/latest/identity-governance/administration/workflow-configure.html for more details.

Script nodes should return a single value and should have the
logic enclosed in a try-catch block.

Example:
try {
  var requestObj = openidm.action('iga/governance/requests/' + requestId, 'GET', {}, {});
  applicationId = requestObj.application.id;
}
catch (e) {
  failureReason = 'Validation failed: Error reading request with id ' + requestId;
}
*/

logger.info('Script Task 3');

logger.info('User Task');

var content = execution.getVariables();
var userId = content.get('userId');
var replacementId = content.get('replacementId');
var targetFilter =  {
  "targetFilter": {
        "operator": "AND",
        "operand": [
            {
                "operator": "EQUALS",
                "operand": {
                    "targetName": "decision.actors.active.id",
                    "targetValue": "managed/user/" + userId
                }
            },
            {
                "operator": "EQUALS",
                "operand": {
                    "targetName": "decision.status",
                    "targetValue": "in-progress"
                }
            }
        ]
    }
}
var results = null
var params = {
  "_pageSize": 10,
  "_pageNumber": 0
}
do{
results = openidm.action('iga/governance/violation/search', 'POST', targetFilter, params);
if(results['result'].length > 0){
    for(var result of results['result']){
      var phaseName = null;
      var actors = [];
      for(var user of result.decision.actors.active){
        if(user.id === "managed/user/"+ userId){
          phaseName = user.phase;
          actors.push({"id": "managed/user/" + replacementId, "permissions": user.permissions})
        }
      }
      for(var user of result.decision.actors.active){
        if(user.phase === phaseName && user.id !== "managed/user/"+ userId){
          actors.push({"id": user.id, "permissions": user.permissions})
        }
      }
      var body = { "updatedActors": actors  };
      if(phaseName){
        openidm.action('/iga/governance/violation/' + result.id + '/phases/' + phaseName + '/reassign', 'POST', body, {})
      }
    }
  }
}
while(results.result.length > 0)
js -
9 The Script node completes the process and sets the ID of the user, replacing the inactive user.
Click to display the Complete Process script
// Insert logic to set ID of user who will be replacing inactive user
logger.info("Completing request workflow.");

var content = execution.getVariables();
var requestId = content.get('id');

// Read event user information from request object
try {
  var requestObj = openidm.action('iga/governance/requests/' + requestId, 'GET', {}, {});
  var decision = {'status': 'complete', 'decision': 'approved', 'outcome': 'fulfilled'};
  var queryParams = { '_action': 'update'};
  openidm.action('iga/governance/requests/' + requestId, 'POST', decision, queryParams);
  logger.info("Request " + requestId + " completed.");
}
catch(e) {
  logger.info("Error finalizing user inactive workflow")
}
js
|
Download the JSON file for this workflow here. Learn more about how to import or export workflows in workflow editor canvas. |
Workflow using custom request type and form
In this example, an administrator wants to create a custom request type called Create New User to add new employees or contractors
to the system. Administrators or form creators need to carry out the following tasks:
After these tasks, the approver receives the request and can start processing the approval.
Assumptions
-
Each application has an application owner. You populate this value for each target application.
-
You have designated an end user or a test user who can approve the request.
-
You have configured notifications to the end user or test user properly to receive the emails.
Example
Task 1: Create a custom request type
The initial task is to create a custom request type, Create New User that lets an administrator easily add a new user to the system.
The Create New User request type has the following nonmodifiable properties:
-
userName. Username of the new user.
-
givenName. First name of the new user.
-
sn. Last name of the new user.
-
mail. Email address of the new user.
-
Create a custom request type called
createUserusing the API. Enter the following command using curl to create your custom request type:Details
curl --location 'http://<hostname>/iga/governance/requestTypes' \
--header 'Authorization: Bearer <access-token>' \
--header 'Content-Type: application/json' \
--data '{
    "id": "createNewUser",
    "schemas": {
        "custom": [
            {
                "_meta": {
                    "type": "system",
                    "displayName": "Create User",
                    "properties": {
                        "userName": {
                            "isRequired": true,
                            "isInternal": false,
                            "isMultiValue": false,
                            "display": {
                                "name": "User Name",
                                "isVisible": true,
                                "order": 1,
                                "description": "The userName of the new user"
                            }
                        },
                        "givenName": {
                            "isRequired": true,
                            "isInternal": false,
                            "isMultiValue": false,
                            "display": {
                                "name": "First Name",
                                "isVisible": true,
                                "order": 2,
                                "description": "The first name of the new user"
                            }
                        },
                        "sn": {
                            "isRequired": true,
                            "isInternal": false,
                            "isMultiValue": false,
                            "display": {
                                "name": "Last Name",
                                "isVisible": true,
                                "order": 3,
                                "description": "The last name of the new user"
                            }
                        },
                        "mail": {
                            "isRequired": true,
                            "isInternal": false,
                            "isMultiValue": false,
                            "display": {
                                "name": "Email Address",
                                "isVisible": true,
                                "order": 4,
                                "description": "The email address of the new user"
                            }
                        }
                    }
                },
                "properties": {
                    "userName": {
                        "type": "text"
                    },
                    "givenName": {
                        "type": "text"
                    },
                    "sn": {
                        "type": "text"
                    },
                    "mail": {
                        "type": "text"
                    }
                }
            }
        ]
    },
    "workflow": {
        "id": "createNewUser",
        "type": "bpmn"
    },
    "validation": {
        "source": "var validation = {\"errors\" : [], \"comments\" : []}; if (request.custom.userName == undefined || request.custom.givenName == undefined || request.custom.sn == undefined ||  request.custom.mail == undefined) { validation.errors.push(\"Must include all of userName, givenName, sn, and mail fields.\");} validation;"
    },
    "custom": true,
    "displayName": "Create User",
    "uniqueKeys": [
        "custom.userName"
    ],
    "notModifiableProperties": []
}'
-
Task 2: Create a form for the custom request type
Using the admin console
-
In the Advanced Identity Cloud admin console, click Governance > Forms.
-
On the New Form modal, click Custom request form, and then click Next.
-
On the Custom request form modal, enter the following:
Field Description Form
Enter a descriptive name for your form.
Description (optional)
Enter a general description for your form.
Request Type (optional)
Select a custom request type from the list. In this example, select Create User.
You can only assign one form to each request type. Use this form for request creation
Click this option to make this form available to the end user when creating new requests of this request type. If unchecked, the request type only provides form field key suggestions during the form design process. For this example, leave this checkbox unchecked.
Once you create your form, you can go back and make edits to any of the previous form settings by clicking the ellipsis() in the top right, and then click Settings.
-
Use the Forms editor to create a form for your custom request type. For example, drag-and-drop four text fields onto the canvas for the fields and label them:
User Name,E-mail address,First Name, andLast Name.-
On the Forms editor canvas, drag-and-drop the Text node to the canvas, and fill in the properties in the right pane for the
User Namefield:User name text field properties
Field Description Key
Enter the key for the text string. You can retrieve this key from the curl step under the
schemasentry. For example, entercustom.userNameas the key.Label
Enter a general label for this text field. For example, enter
User Name.Description
Enter help text for the text field. The description appears below your text field.
Required
Click if this text field is required. In this example, click Required.
Read Only
Click to make the field non-editable.
Provide Default Value
Click Provide Default Value to assign a default value for this text field. In this example, skip this step.
Columns
Enter the number of columns for this text field. Values are from 1 to 12. For this example, enter
6.Offset
Enter the number of columns to offset from the left for this text field. Values are from 0 to 11. For this example, enter
0.Use validation
Click if you want to validate the text field using a regular expression. In this example, skip this step.
Regex
Enter a regular expression to validate the text field.
Error message
Enter an error message when the regular expression fails.
-
On the Forms editor canvas, drag-and-drop the Text node to the canvas, and fill in the properties in the right pane for the
E-mail addressfield:E-mail address text field properties
Field Description Key
Enter the key for the text string. You can retrieve this key from the curl step under the
schemasentry. For example, entercustom.mailas the key.Label
Enter a general label for this text field. For example, enter
E-mail address.Description
Enter help text for the text field. The description appears below your text field.
Required
Click if this text field is required. In this example, click Required.
Read Only
Click to make the field non-editable.
Provide Default Value
Click Provide Default Value to assign a default value for this text field. In this example, skip this step.
Columns
Enter the number of columns for this text field. Values are from 1 to 12. For this example, enter
6.Offset
Enter the number of columns to offset from the left for this text field. Values are from 0 to 11. For this example, enter
0.Use Validation
Click if you want to validate the text field using a regular expression. In this example, skip this step.
Regex
Enter a regular expression to validate the text field.
Error message
Enter an error message when the regular expression fails.
-
On the Forms editor canvas, drag-and-drop the Text node to the canvas, and fill in the properties in the right pane for the
First Namefield:First name text field properties
Field Description Key
Enter the key for the text string. You can retrieve this key from the curl step under the
schemasentry. For example, entercustom.givenNameas the key.Label
Enter a general label for this text field. For example, enter
First Name.Description
Enter help text for the text field. The description appears below your text field.
Required
Click if this text field is required. In this example, click Required.
Read Only
Click to make the field non-editable.
Provide Default Value
Click Provide Default Value to assign a default value for this text field. In this example, skip this step.
Columns
Enter the number of columns for this text field. Values are from 1 to 12. For this example, enter
6.Offset
Enter the number of columns to offset from the left for this text field. Values are from 0 to 11. For this example, enter
0.Use validation
Click if you want to validate the text field using a regular expression. In this example, skip this step.
Regex
Enter a regular expression to validate the text field.
Error message
Enter an error message when the regular expression fails.
-
On the Forms editor canvas, drag-and-drop the Text node to the canvas, and fill in the properties in the right pane for the
Last Namefield:Last name text field properties
Field Description Key
Enter the key for the text string. You can retrieve this key from the curl step under the
schemasentry. For example, entercustom.snas the key.Label
Enter a general label for this text field. For example, enter
Last Name.Description
Enter help text for the text field. The description appears below your text field.
Required
Click if this text field is required. In this example, click Required.
Read Only
Click to make the field non-editable.
Provide Default Value
Click Provide Default Value to assign a default value for this text field. In this example, skip this step.
Columns
Enter the number of columns for this text field. Values are from 1 to 12. For this example, enter
6.Offset
Enter the number of columns to offset from the left for this text field. Values are from 0 to 11. For this example, enter
0.Use validation
Click if you want to validate the text field using a regular expression. In this example, skip this step.
Regex
Enter a regular expression to validate the text field.
Error message
Enter an error message when the regular expression fails.
-
-
Click Save.
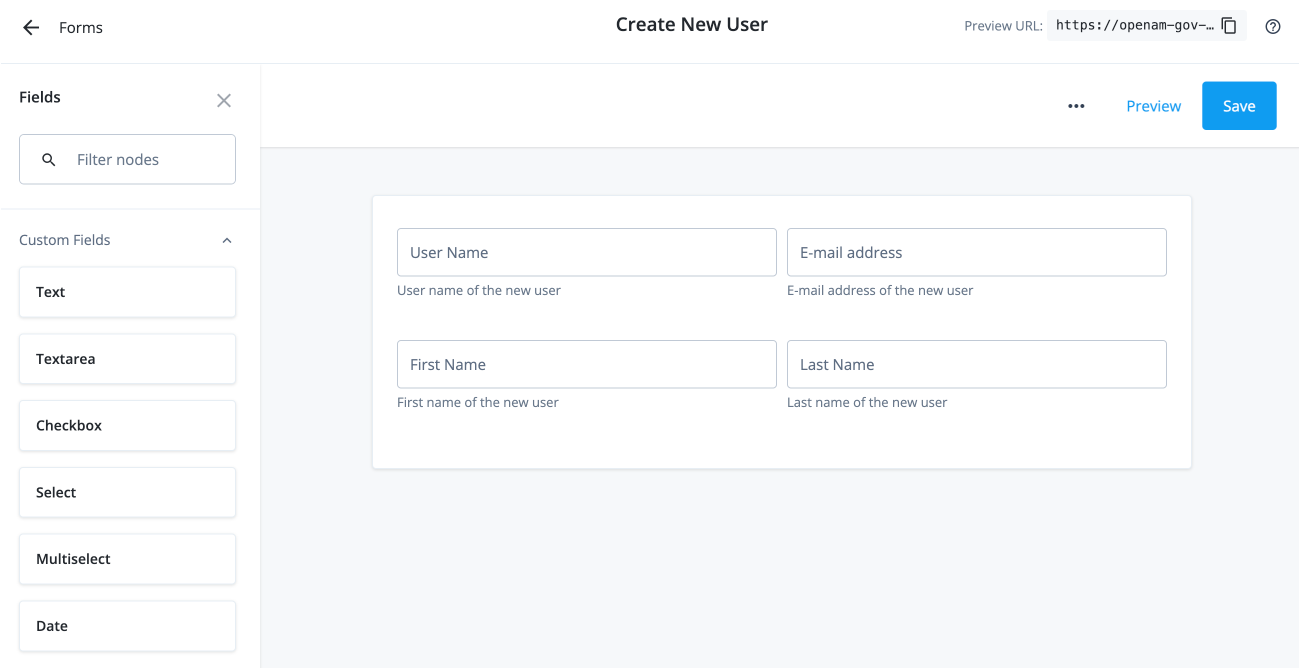
Using the API
-
Enter the following curl command to create your form for the custom request type:
Details
curl --location 'http://<hostname>/iga/governance/requestForms' \ --header 'Authorization: Bearer <access-token>' \ --header 'Content-Type: application/json' \ --data '{ "name": "Create New User", "type": "request", "description": "Form for creation of a new user", "categories": { "applicationType": null, "objectType": null, "operation": "create" }, "form": { "fields": [ { "id": "dd155b12-fb27-44e5-b4d6-476587b31a71", "model": "custom.userName", "type": "string", "label": "User Name", "description": "User name of the new user", "validation": { "required": true }, "layout": { "columns": 6, "offset": 0 } }, { "id": "88c73e69-86b1-453f-878b-527ceddeccf4", "model": "custom.mail", "type": "string", "label": "E-mail address", "description": "E-mail address of the new user", "validation": { "required": true }, "layout": { "columns": 6, "offset": 0 } }, { "id": "683892f9-2c13-41c7-a1cc-fcf38d7d0183", "model": "custom.givenName", "type": "string", "label": "First Name", "description": "First name of the new user", "validation": { "required": true }, "layout": { "columns": 6, "offset": 0 } }, { "id": "76fd5526-2ade-42a9-9b03-b6899e65aa31", "model": "custom.sn", "type": "string", "label": "Last Name", "description": "Last name of the new user", "validation": { "required": true }, "layout": { "columns": 6, "offset": 0 } } ] } }' -
Enter the following curl command to assign the form to the custom request type.
Details
curl --location 'http://<hostname>/iga/governance/requestFormAssignments?_action=assign' \
--header 'Authorization: Bearer <access-token>' \
--header 'Content-Type: application/json' \
--data '{
    "formId": "b309b500-112c-4e6d-b832-a902f91362a3",
    "objectId": "requestType/createNewUser"
}'
Task 3: Create a workflow to use the custom request type and form
Create a new workflow called Create New User to use the custom request type and form.
|
Download the JSON file for this workflow here. Learn more about how to import or export workflows in workflow editor canvas. |
Task 4: Submit the custom request
You can enter a curl command to submit a Create New User request.
curl --location 'https://<hostname>/iga/governance/requests/createNewUser' \
--header 'Authorization: Bearer <access-token>' \
--header 'Content-Type: application/json' \
--data-raw '{
    "custom": {
        "userName": "acabby",
        "givenName": "Amy",
        "sn": "Cabby",
        "mail": "amy.cabby@example.com"
    }
}'
Example Response
{
  "id": "d289d1dd-b376-4860-a3d9-db3dd29702b2",
  "requester": {
    "givenName": "Joe",
    "id": "managed/teammember/ce6ef368-c050-4131-bc07-32aa4f58a785",
    "mail": "joe.admin@example.com",
    "sn": "Admin",
    "userName": "jadmin"
  },
  "requestType": "createNewUser",
  "request": {
    "custom": {
      "userName": "acabby",
      "givenName": "Amy",
      "sn": "Cabby",
      "mail": "amy.cabby@example.com"
    },
    "_rev": 1,
    "common": {
      "isDraft": false,
      "context": {
        "type": "request"
      }
    }
  },
  "decision": {
    "status": "in-progress",
    "decision": null,
    "type": "request",
    "outcome": null,
    "startDate": "2024-09-09T15:53:49+00:00",
    "completionDate": null,
    "deadline": null,
    "comments": [],
    "actors": {
      "active": [
        {
          "givenName": "Frank",
          "id": "managed/teammember/ce6ef368-c050-4131-bc07-32aa4f58a785",
          "mail": "frank.york@exampe.com",
          "sn": "York",
          "userName": "fyork",
          "permissions": {
            "approve": false,
            "comment": true,
            "modify": false,
            "forward": false,
            "reject": false,
            "cancel": false,
            "fulfill": false,
            "deny": false
          }
        }
      ],
      "inactive": [],
      "actorTags": [
        "activeId=managed%2Fteammember%2Fce6ef368-c050-4131-bc07-32aa4f58a785&phase=",
        "phase=&activeId=managed%2Fteammember%2Fce6ef368-c050-4131-bc07-32aa4f58a785"
      ]
    }
  }
}
Approver Task: Process the request
-
Once the administrator submits the request, the approver (for example, "Frank York") receives a notification email.

-
The approver logs in to the Advanced Identity Cloud end-user UI and clicks Pending Approvals.
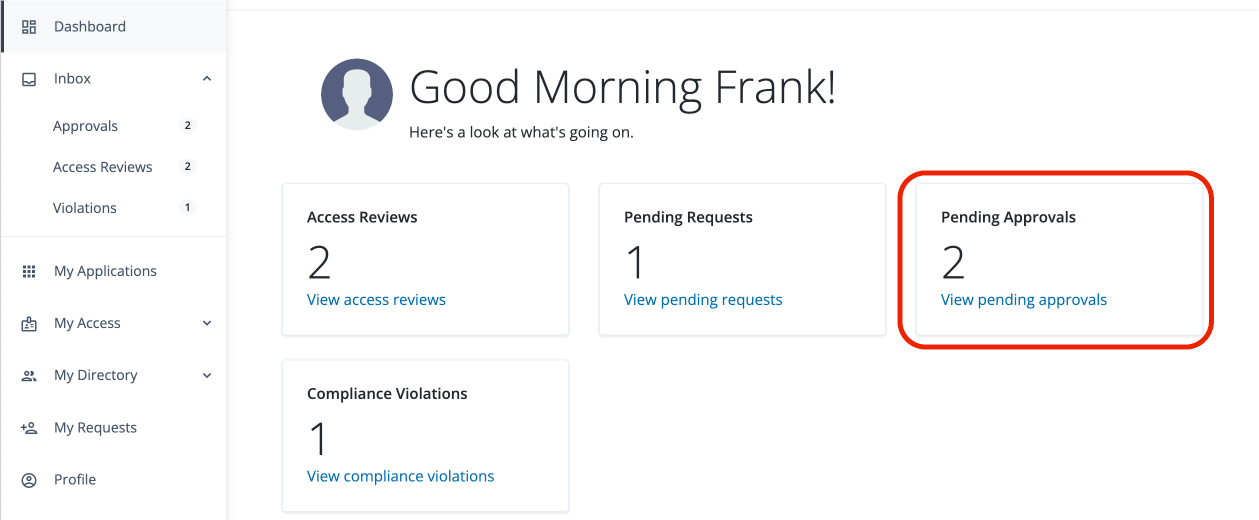
-
The approver can carry out different tasks: click Approve, Reject, or ellipsis () to Forward, Add Comment, or View Details.
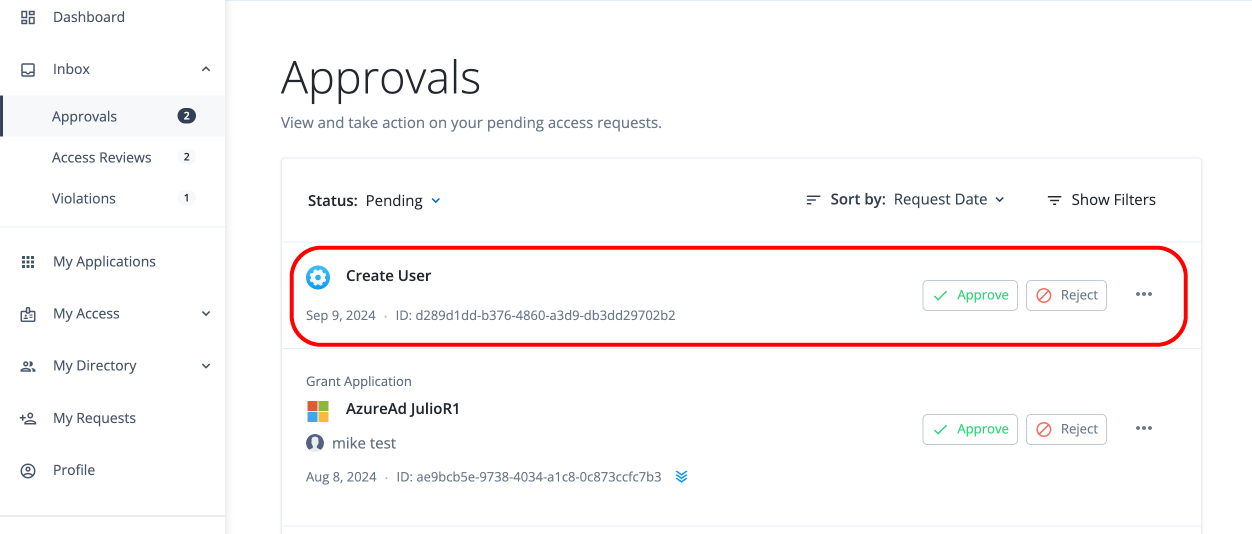
-
The approver clicks View Details.
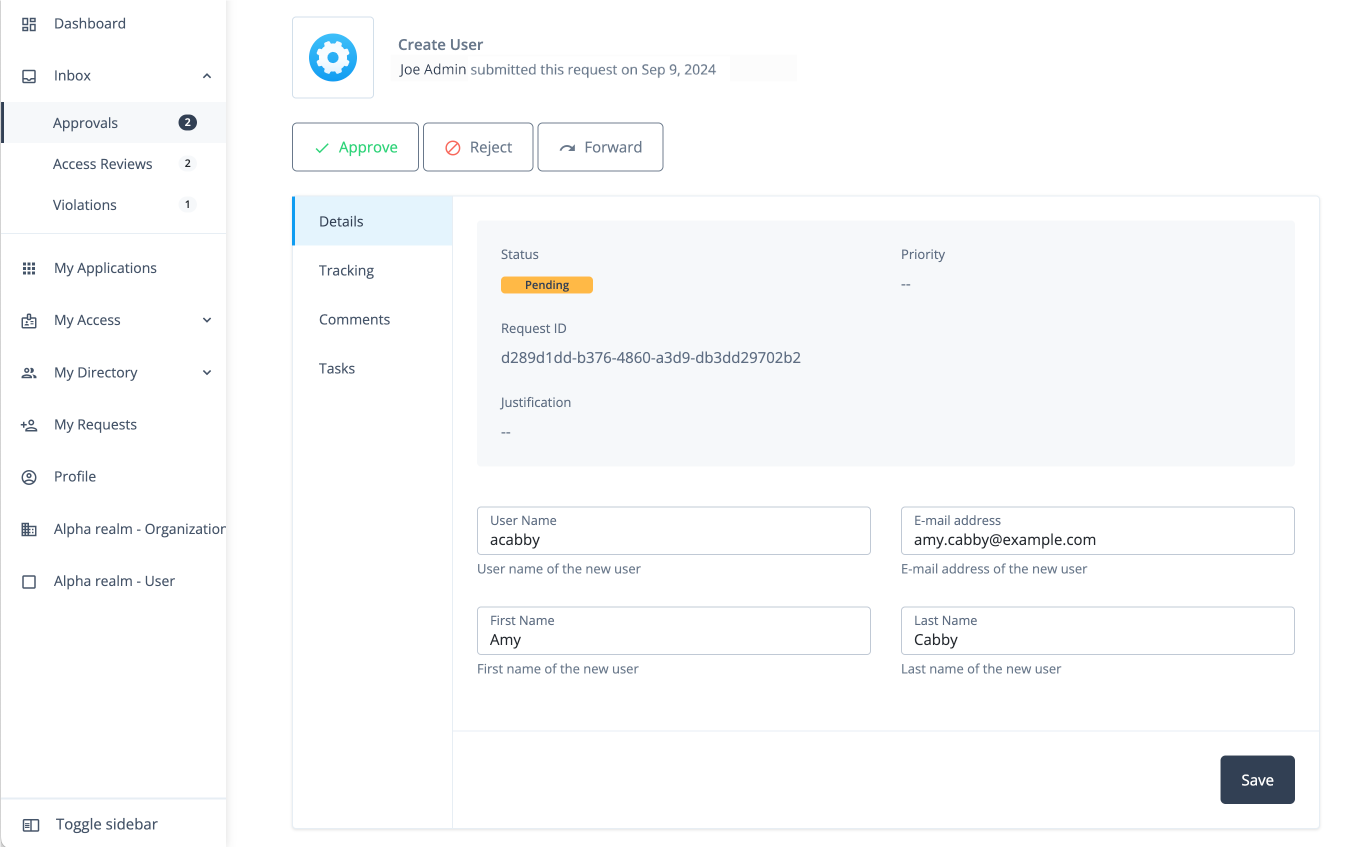
Workflow to create an Organization custom request type and form
In this example, an administrator wants to create a custom request type called Create Organization to add new organizations
to the system. Administrators and form creators need to carry out the following tasks:
After these tasks, the approver receives the request and can start reviewing it.
Assumptions
-
You have designated an end user who can function as an approver and review the request.
-
You have configured notification emails to alert the approver of incoming requests.
Example
Task 1: Create an organization request type
The initial task is to create a custom request type, Create Organization that lets an administrator easily add a new organization to the system.
-
Create a custom request type called
Create Organizationusing the API. Enter the following command using curl to create your custom request type:Details
curl --location 'http://<hostname>/iga/governance/requestTypes' \ --header 'Authorization: Bearer <access-token>' \ --header 'Content-Type: application/json' \ --data '{ "id": "createOrganization", "schemas": { "common": [ { "_meta": { "type": "system", "displayName": "commonRequest", "properties": { "justification": { "isRequired": false, "isInternal": true, "display": { "name": "Justification", "isVisible": true, "order": 3, "description": "The reason for the request" } }, "externalRequestId": { "isRequired": false, "isInternal": true, "isChangable": false, "display": { "name": "External Request ID", "isVisible": true, "order": 4, "description": "The external ID for the request" } }, "requestIdPrefix": { "isRequired": false, "isInternal": true, "display": { "name": "Request ID prefix", "isVisible": true, "order": 5, "description": "Prefix for the request ID" } }, "isDraft": { "isRequired": false, "isInternal": true }, "priority": { "isRequired": false, "display": { "name": "Priority", "isVisible": true, "order": 6, "description": "The priority of the reqeust" }, "text": { "defaultValue": "low" } }, "expiryDate": { "isRequired": false, "isInternal": true, "display": { "name": "Request expiration date", "isVisible": true, "order": 7, "description": "User provided date on which the request will cancel" } }, "context": { "isRequired": false, "isInternal": true, "isMultiValue": false, "display": { "name": "Context", "isVisible": true, "order": 1, "description": "The context of the request" } }, "workflowId": { "isRequired": false, "isInternal": true, "isChangable": false, "display": { "name": "BPMN workflow ID", "isVisible": true, "order": 7, "description": "The ID key of the BPMN workflow" } }, "blob": { "isRequired": false, "isInternal": true } } }, "properties": { "justification": { "type": "text" }, "externalRequestId": { "type": "text" }, "requestIdPrefix": { "type": "text" }, "isDraft": { "type": "boolean" }, "priority": { "type": "text" }, "expiryDate": { "type": "text" }, "context": { "type": "object" }, "workflowId": { "type": "text" }, "blob": { "type": "object" } } } ], "custom": [ { "_meta": { "type": "system", "displayName": "Create Organization", "properties": { "name": { "isRequired": true, "isInternal": false, "isMultiValue": false, "display": { "name": "Name", "isVisible": true, "order": 1, "description": "The name of the organization" } }, "description": { "isRequired": false, "isInternal": false, "isMultiValue": false, "display": { "name": "Description", "isVisible": true, "order": 2, "description": "The description of the organization being created" } }, "parent": { "isRequired": false, "isInternal": false, "isMultiValue": false, "display": { "name": "Parent Organization", "isVisible": true, "order": 3, "description": "The ID of the parent organization for this organization" } }, "admins": { "isRequired": false, "isInternal": false, "isMultiValue": true, "display": { "name": "Organization Administrators", "isVisible": true, "order": 4, "description": "The IDs of the users who will be this organization’s admins" } }, "includeSelfAdmin": { "isRequired": false, "isInternal": false, "isMultiValue": false, "display": { "name": "Include Self as Admin", "isVisible": true, "order": 4, "description": "If selected, include requester as an organization admin" } } } }, "properties": { "name": { "type": "text" }, "description": { "type": "text" }, "parent": { "type": "text" }, "admins": { "type": "text" }, "includeSelfAdmin": { "type": "boolean" } } } ] }, "workflow": { "id": "createOrganization", "type": "bpmn" }, "validation": { "source": "var validation = {\"errors\" : [], \"comments\" : []}; if (request.custom.name == undefined) { validation.errors.push(\"Must include all name field.\");} validation;" }, "custom": true, "displayName": "Create Organization", "uniqueKeys": [ "custom.name" ], "notModifiableProperties": [] }'
Task 2: Create a form for the organization request type
-
In the Advanced Identity Cloud admin console, click Governance > Forms.
-
On the New Form modal, click Custom request form, and then click Next.
-
On the Custom request form modal, enter the following:
Field Description Form
Enter a descriptive name for your form. In this example, enter:
Create Organization.Description (optional)
Enter a general description for your form. In this example, enter:
Form used to create a new organization.Request Type (optional)
Click and select a request type for the form. In this example, enter:
Create Organization.You can only assign one form to each request type. Use this form for request creation
Click this option to make this form available to the end user when creating new requests of this request type. If unchecked, the request type only provides form field key suggestions during the form design process. For this example, leave this checkbox unchecked.
Once you create your form, you can go back and make edits to any of the previous form settings by clicking the ellipsis() in the top right, and then click Settings.
-
Use the Forms editor to create a form for your custom request type. For example, drag-and-drop five form fields onto the canvas for the fields and label them:
-
On the Forms editor canvas, drag-and-drop the Text node to the canvas, and fill in the properties in the right pane for the
Organization Namefield:Organization nametext field propertiesField Description Key
Enter the key for the text string. You can retrieve this key from the example in Task 1 under the
schemasentry. For example, entercustom.nameas the key.Label
Enter a general label for this text field. For example, enter
User Name.Description
Enter help text for the text field. The description appears below your text field. Enter
Name of the organization.Required
Click if this text field is required. In this example, click Required.
Read Only
Click to make the field non-editable. In this example, skip this step.
Provide Default Value
Click Provide Default Value to assign a default value for this text field. In this example, skip this step.
Columns
Enter the number of columns for this text field. Values are from 1 to 12. For this example, use the default (12 columns).
Offset
Enter the number of columns to offset from the left for this text field. Values are from 0 to 11. For this example, use the default (
0).Use validation
Click if you want to validate the text field using a regular expression. In this example, skip this step.
-
On the Forms editor canvas, drag-and-drop the Textarea node to the canvas, and fill in the properties in the right pane for the
Descriptionfield:Descriptiontextarea field propertiesField Description Key
Enter the key for the text string. You can retrieve this key from the example in Task 1 under the
schemasentry. For example, entercustom.descriptionas the key.Label
Enter a general label for this text field. For example, enter
Description.Description
Enter help text for the text field. The description appears below your text field.
Required
Click if this text field is required. In this example, skip this step.
Read Only
Click to make the field non-editable. In this example, skip this step.
Provide Default Value
Click Provide Default Value to assign a default value for this text field. In this example, skip this step.
Columns
Enter the number of columns for this text field. Values are from 1 to 12. For this example, use the default (12 columns).
Offset
Enter the number of columns to offset from the left for this text field. Values are from 0 to 11. For this example, use the default (
0).Use Validation
Click if you want to validate the text field using a regular expression. In this example, skip this step.
-
On the Forms editor canvas, drag-and-drop the Select node to the canvas, and fill in the properties in the right pane for the
Parent Organizationfield:Parent OrganizationSelect field propertiesField Description Key
Enter the key for the text string. You can retrieve this key from the example in Task 1 under the
schemasentry. For example, entercustom.parentas the key.Label
Enter a general label for this text field. For example, enter
Parent Organization (optional).Description
Enter help text for the text field. The description appears below your text field.
Required
Click if this text field is required. In this example, skip this step.
Read Only
Click to make the field non-editable. In this example, skip this step.
Options
Click one of the following to populate the Select field entries: Enumerated or Object.
-
Click Enumerated to manually set enumerated values in the Select field.
-
Click the icon.
-
On the Add Option modal, do the following:
-
Value: enter a value for the option field. For example, if you want to add a menu of administrators, go Identities > Manage. Search for an administrator to pull up their information. On the user’s page, click Raw JSON. Copy the user’s id, for example,
94080e61-f6a5-4bd0-bfc4-d26d6ae5c1b8and enter the ID into the Value field. -
Label: enter a label for the option field. Enter the user’s name, for example,
Cleo Patrascu. -
Click Selected by default to make the option a default enumerated value for the field.
-
Click Add.
-
Repeat the steps to add additional users.
-
-
Click Object to get a list of options taken from the API.
-
Select one of the following object types:
-
User
-
Role
-
Organization
-
Application
-
Entitlement
For example, if you want to create a
Parent Organizationselect field, select Organization. -
-
Click Save.
-
Provide Default Value
Click Provide Default Value to assign a default value for this text field. In this example, skip this step.
Columns
Enter the number of columns for this text field. Values are from 1 to 12. In this example, use the default (12).
Offset
Enter the number of columns to offset from the left for this text field. Values are from 0 to 11. For this example, enter
0.Use validation
Click if you want to validate the text field using a regular expression. In this example, skip this step.
Regex
Enter a regular expression to validate the text field.
Error message
Enter an error message when the regular expression fails.
-
-
On the Forms editor canvas, drag-and-drop the Select node to the canvas, and fill in the properties in the right pane for the
Organization Adminsfield:Organization AdminsSelect field propertiesField Description Key
Enter the key for the text string. You can retrieve this key from the example in Task 1 under the
schemasentry. For example, entercustom.adminsas the key.Label
Enter a general label for this text field. For example, enter
Organization Admins (optional).Description
Enter help text for the text field. The description appears below your text field.
Required
Click if this text field is required. In this example, skip this step.
Read Only
Click to make the field non-editable. In this example, skip this step.
Options
Click one of the following to populate the Select field entries: Enumerated or Object.
-
Click Enumerated to manually set enumerated values in the Select field.
-
Click the icon.
-
On the Add Option modal, do the following:
-
Value: enter a value for the option field. For example, if you want to add a menu of administrators, go Identities > Manage. Search for an administrator to pull up their information. On the user’s page, click Raw JSON. Copy the user’s id, for example,
94080e61-f6a5-4bd0-bfc4-d26d6ae5c1b8and enter the ID into the Value field. -
Label: enter a label for the option field. Enter the user’s name, for example,
Cleo Patrascu. -
Click Selected by default to make the option a default enumerated value for the field.
-
Click Add.
-
Repeat the steps to add additional users.
-
-
Click Object to get a list of options taken from the API.
-
Select one of the following object types:
-
User
-
Role
-
Organization
-
Application
-
Entitlement
For example, if you want to create a
Parent Organizationselect field, select Organization. -
-
Click Save.
-
Provide Default Value
Click Provide Default Value to assign a default value for this text field. In this example, skip this step.
Columns
Enter the number of columns for this text field. Values are from 1 to 12. In this example, use the default (12).
Offset
Enter the number of columns to offset from the left for this text field. Values are from 0 to 11. In this example, use the default (0).
Use validation
Click if you want to validate the text field using a regular expression. In this example, skip this step.
-
-
On the Forms editor canvas, drag-and-drop the Checkbox node to the canvas, and fill in the properties in the right pane for the
Include yourself as administratorfield:Include yourself as administratorCheckbox field propertiesField Description Key
Enter the key for the text string. You can retrieve this key from the example in Task 1 under the
schemasentry. For example, entercustom.includeSelfAdminas the key.Label
Enter a general label for this text field. For example, enter
Include yourself as administrator.Description
Enter help text for the text field. The description appears below your text field.
Read Only
Click to make the field non-editable. In this example, skip this step.
Provide Default Value
Click Provide Default Value to assign a default value for this text field. In this example, skip this step.
Columns
Enter the number of columns for this text field. Values are from 1 to 12. In this example, use the default (12).
Offset
Enter the number of columns to offset from the left for this text field. Values are from 0 to 11. In this example, use the default (0).
Use validation
Click if you want to validate the text field using a regular expression. In this example, skip this step.
-
-
Click Preview to review your form.
-
Click Save.
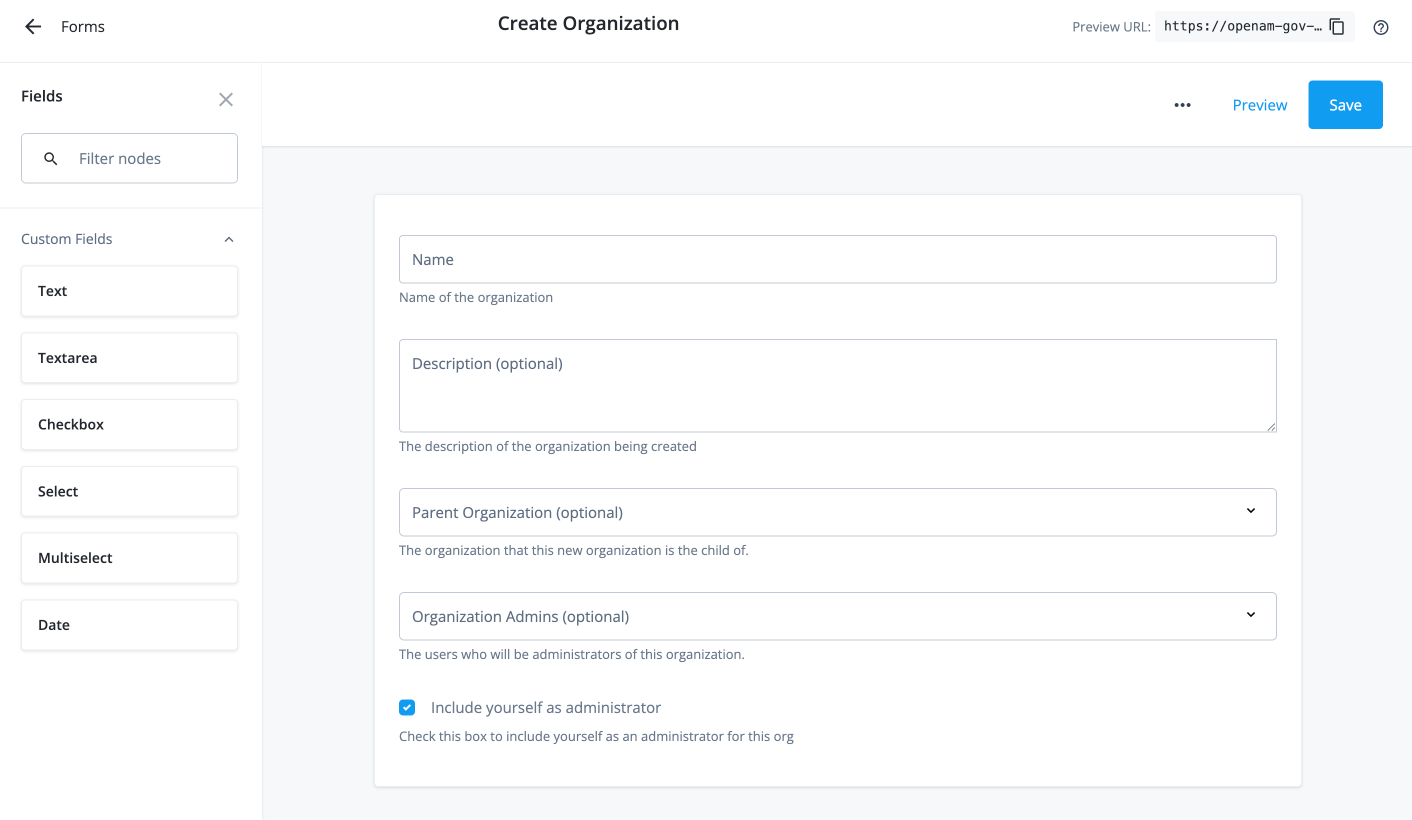
Task 3: Create a workflow to use the organization request type and form
|
Download the JSON file for this workflow here. Learn more about how to import or export workflows in workflow editor canvas. |
Task 4: Submit the organization request
You can enter a curl command to submit a Create Organization request.
curl --location 'https://<hostname>/iga/governance/requests/createOrganization?_action=publish' \
--header 'Authorization: Bearer <access-token>' \
--header 'Content-Type: application/json' \
--data '{
    "custom": {
        "name": "IGA Organization",
        "description": "Organization for all IGA members.",
        "parent": "a27172ad-8adf-425e-a93f-ebd7c7aaa776",
        "admins": [
            "c51d9ee1-43b3-49d1-8742-cbb33842a5cc",
            "e140e883-8ec7-4201-889d-f77ea118fcf3",
            "adeb08c0-f3b7-44eb-a31a-a31fba305a40"
        ],
        "includeSelfAdmin": false
    },
    "common": {

    }
}'
|
Currently, you must include the |
Workflow for entitlement grant with custom approvers
In this example, an administrator wants to create a basic entitlement grant workflow that uses a custom list of approvers in the Approval node.
Administrators need to carry out the following tasks:
Example
Task 1: Create a custom glossary property
The initial task is to create a custom entitlement glossary property, Approvers, that lets an administrator easily set a custom list of approvers.
-
In the Advanced Identity Cloud admin console, click Governance > Glossary.
-
Click Entitlement and then Entitlement Glossary Item.
-
In the Add Entitlement Glossary Item modal, enter the following, and click Save.
Field Description Name
Enter a label for the entitlement glossary item. For example,
approvers.Display Name
Enter a display name for the entitlement glossary item. For example,
Approvers.Description (optional)
Enter a general description for the glossary item.
Type
Select User.
Multi-Valued
Click Multi-Valued.
Enumerated Values
Leave disabled.
Task 2: Create a workflow with custom approvers
Create a new workflow called Basic Entitlement Grant Custom Approvers.
|
Download the JSON file for this workflow here. Learn more about importing or exporting workflows in workflow editor canvas. |
Manage forms
PingOne Identity Governance lets you create request and approval forms to make it easier for end users to request access to applications. You can create new forms or access existing forms from the Advanced Identity Cloud admin console Request Forms page.
Types of forms
The forms page lets you create two types of forms:
- Application Request form
-
Administrators create a request form linked to an application and its associated account object type. They can then connect this form to an Approval node within the workflow editor. When an end user requests access to the application, the form is displayed. End users can view their form submissions by clicking My Requests. After the form is submitted, administrators can review it by navigating to Governance > Requests.
- Custom Request form
-
To create a form for a new custom request type, an administrator first creates the request type and links it to a workflow using either the UI or the API. The form can then be associated with the Approval node in the workflow editor. End users can access the forms by navigating to {enduserUrl}/?realm=/alpha#/requestForm/${formId}, where they can approve or provide the necessary information. Once the end user submits the form, administrators can view it by going to Governance > Requests.
Form nodes
The forms editor provides standard nodes to create your forms.
Custom nodes
Create new forms using custom nodes. Each node has a Key field allowing you to map
the property to a specific schema element for the request type. You can find an example
in Create a custom request type.
Text
The Text field accepts a single string. There is no character limit for this field.
Details
| Field | Description |
|---|---|
Key |
Enter or select a property to write the field value to. |
Label |
Enter a label for the Text field. The label appears within the field. |
Description |
Enter help text that describes the Text field. The text appears below the field. |
Required |
Click to make the field required. |
Read Only |
Click to make the field non-editable. |
Provide Default Value |
Click to enable and enter a default value. |
Columns |
Enter a numeric value for the number of columns to make the field. Possible values are 1-12. |
Offset |
Enter a numeric value to offset from the left. Possible values are 0-11. |
Use validation |
Click to require validation on the Text field. If you click the box, enter the following:
|
Textarea
The Textarea field accepts multiline strings. There is no limit for the number of lines for this field.
Details
| Field | Description |
|---|---|
Key |
Enter or select a property to write the field value to. |
Label |
Enter a label for the Textarea field. The label appears within the field. |
Description |
Enter help text that describes the Textarea field. The text appears below the field. |
Required |
Click to make the field required. |
Read Only |
Click to make the field non-editable. |
Provide Default Value |
Click to enable and enter a default value. |
Columns |
Enter a numeric value for the number of columns to make the field. Possible values are 1-12. |
Offset |
Enter a numeric value to offset from the previous column. Possible values are 0-11. |
Use validation |
Click to require validation on the Textarea field. If you click the box, enter the following:
|
Checkbox
The Checkbox field accepts a boolean value.
Details
| Field | Description |
|---|---|
Key |
Enter or select a property to write the field value to. |
Label |
Enter a label for the Checkbox field. The label appears next to the checkbox. |
Description |
Enter help text that describes the Checkbox field. The text appears below the checkbox. |
Read Only |
Click to make the field non-editable. |
Provide Default Value |
Click to enable and enter a default value. |
Columns |
Enter a numeric value for the number of columns to make the checkbox. Possible values are 1-12. |
Offset |
Enter a numeric value to offset from the previous column. Possible values are 0-11. |
Use validation |
Click to require validation on the checkbox. If you click the box, enter the following:
|
Select
The Select field accepts a single line from a list of enumerated values.
|
If you use a Select or Multiselect form node with an identity object (for example, Learn more in Assign access request privileges to identities. |
Details
| Field | Description |
|---|---|
Key |
Enter or select a property to write the field value to. |
Label |
Enter a label for the Select field. The label appears within the field. |
Description |
Enter help text that describes the Select field. The text appears below the field. |
Required |
Click to make the field required. |
Read Only |
Click to make the field non-editable. |
Options |
Click one of the following to populate the Select field entries: Enumerated or Object.
|
Columns |
Enter a numeric value for the number of columns to make the field. Possible values are 1-12. |
Offset |
Enter a numeric value to offset from the previous column. Possible values are 0-11. |
Use validation |
Click to require validation on the Select field. If you click the box, enter the following:
|
Multiselect
The Multiselect field accepts multiple strings from a list of enumerated values or freeform text input.
|
If you use a Select or Multiselect form node with an identity object (for example, Learn more in Assign access request privileges to identities. |
Details
| Field | Description |
|---|---|
Key |
Enter or select a property to write the field value to. |
Label |
Enter a label for the Multiselect field. The label appears within the field. |
Description |
Enter help text that describes the Multiselect field. The text appears below the field. |
Required |
Click to make the field required. |
Read Only |
Click to make the field non-editable. |
Options |
Click one of the following to populate the Select field entries: Enumerated or Object.
|
Columns |
Enter a numeric value for the number of columns to make the field. Possible values are 1-12. |
Offset |
Enter a numeric value to offset from the previous column. Possible values are 0-11. |
Use validation |
Click to require validation on the Multiselect field. If you click the box, enter the following:
|
Date
The Date field accepts a single ISO-formatted string.
Details
| Field | Description |
|---|---|
Key |
Enter or select a property to write the field value to. |
Label |
Enter a label for the Date field. The label appears within the field. |
Description |
Enter help text that describes the Date field. The text appears below the field. |
Required |
Click to make the field required. |
Read Only |
Click to make the field non-editable. |
Columns |
Enter a numeric value for the number of columns to make the field. Possible values are 1-12. |
Offset |
Enter a numeric value to offset from the previous column. Possible values are 0-11. |
Use validation |
Click to require validation on the Text field. If you click the box, enter the following:
|
Utility
Enhance your forms using the utility node, such as Form Text. You can use the node to add instructions to your form or other information.
Form Text
The Form Text field accepts multiple text strings. You can use this form field for any custom or generalized text, such as instructions.
Details
| Field | Description |
|---|---|
Text to display |
Enter custom form text. There is no character limit for this field. |
Columns |
Enter a numeric value for the number of columns to make the field. Possible values are 1 - 12. |
Offset |
Enter a numeric value to offset from the previous column. Possible values are 0 - 11. |
Create an application request form
The Identity Governance Forms provides an easy-to-use interface to create an application request form.
Key points
The Form creator must consider the following key points:
-
You can only link an application to a single form. While a form can be used with multiple applications, each application can only be associated with one form at a time.
-
The typical use case is to create a form that aligns with the application’s account object type schema.
-
In a workflow, you can assign a form in the Approval node. For typical cases, you can select Dynamic form selection, which uses the form associated with the application.
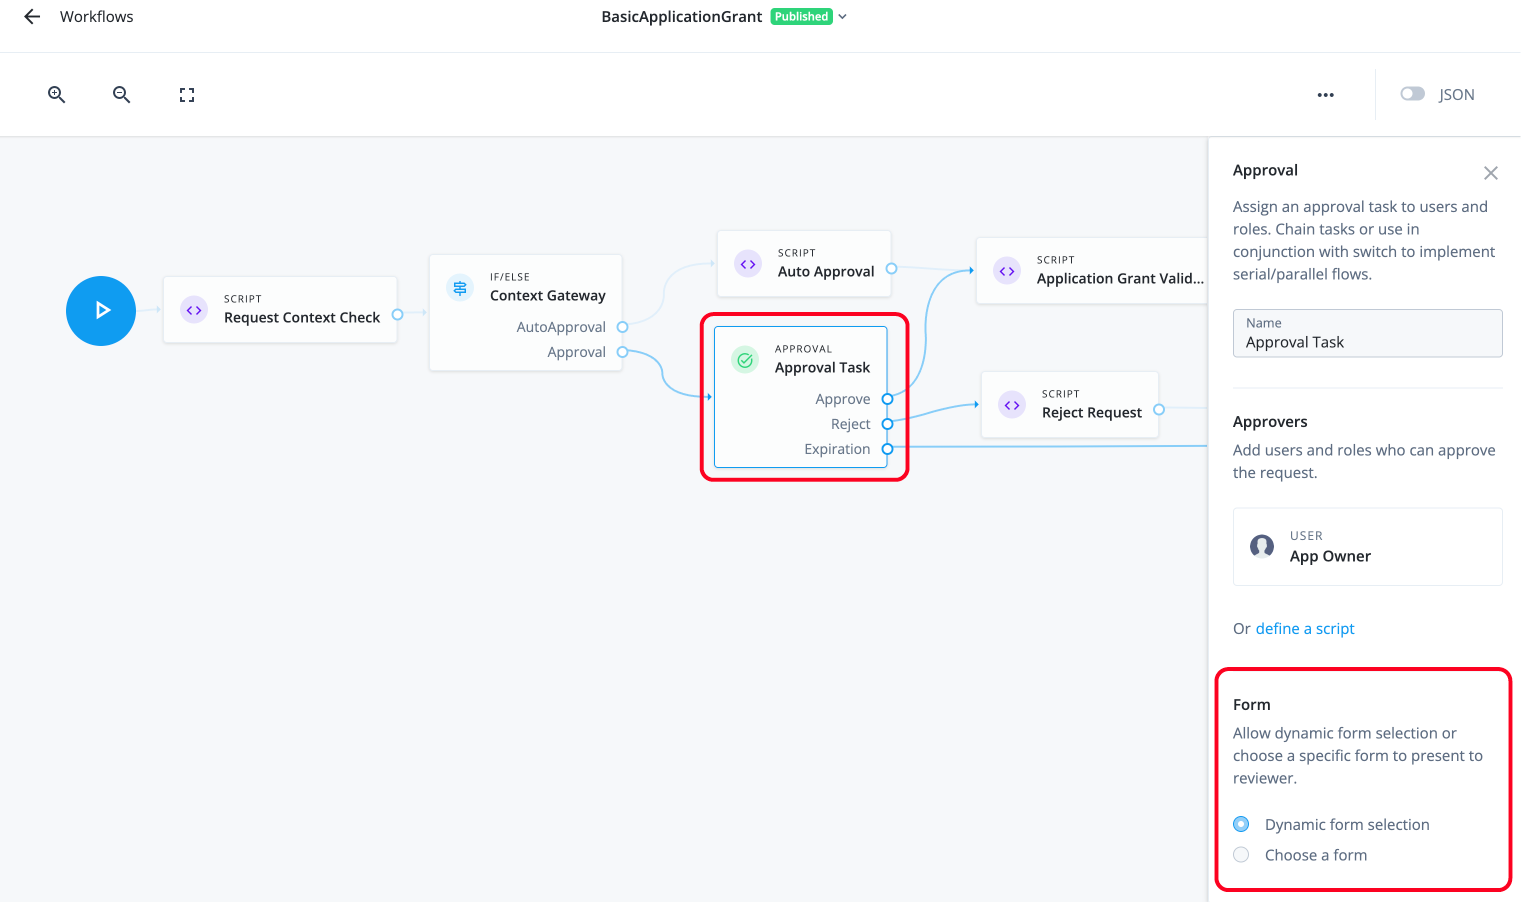
-
For more customization, you can define the keys exactly as you want. Once a request is generated, the form’s contents are copied into the request, making those properties available for use within the workflow to provision access as needed. For example, you can define a key with a value of
NAME. When a user submits a request, the key appears inrequest.common.object.blob.NAMEwith the value, Testing:{ "id": "409f28fc-65f6-41b8-a9f5-bb3a64f55925", "requester": { "givenName": "Frank", "id": "managed/user/c51d9ee1-43b3-49d1-8742-cbb33842a5cc", "mail": "frank.york@example.com", "sn": "York", "userName": "fyork", "isAdmin": false }, "requestType": "applicationGrant", "request": { "common": { "priority": "low", "justification": "Testing", "applicationId": "d248cc89-79b2-4f6a-98bc-46d0a938318f", "userId": "f3617664-4dd2-48eb-bdae-512f45b157df", "blob": { "form": { "NAME": "Testing" } }, "isDraft": false, "context": { "type": "request" } }, "_rev": 1 } ..... }
Steps
Governance or tenant administrators can carry out the following steps to create a new application request form:
-
In the Advanced Identity Cloud end-user UI, click Forms > New Form.
-
In the New Form modal, click Application request form, and then click Next.
-
In the modal, enter the following and click Save when completed:
Field Description Form Name
Enter a descriptive name for your form. Follow any convention established by your company.
Description (optional)
Enter a general description for the form.
Application
Select application to associate the form to.
You can only link one form to an application or object type.
Object type
Select an option:
-
User
-
Group
-
Directory Role
-
Service Plan
-
-
In the Forms editor, drag-and-drop forms nodes onto the canvas and fill in the fields in the right pane.
-
In a workflow, you can assign a form in the Approval node properties pane. For typical cases, you can select Dynamic form selection, which uses the form you associated with the application.
-
Click Preview to see the form you created.
-
Click Save when complete. Your form appears on the Forms page.
End user steps
Administrators can test the new custom request form by logging in to an end-user account.
-
In the Advanced Identity Cloud end-user UI, the end user logs in and clicks My Requests.
-
In the My Requests page, click New Request.
-
In the New Request modal, click Next.
-
In the Access Catalog page, click Request for an application.
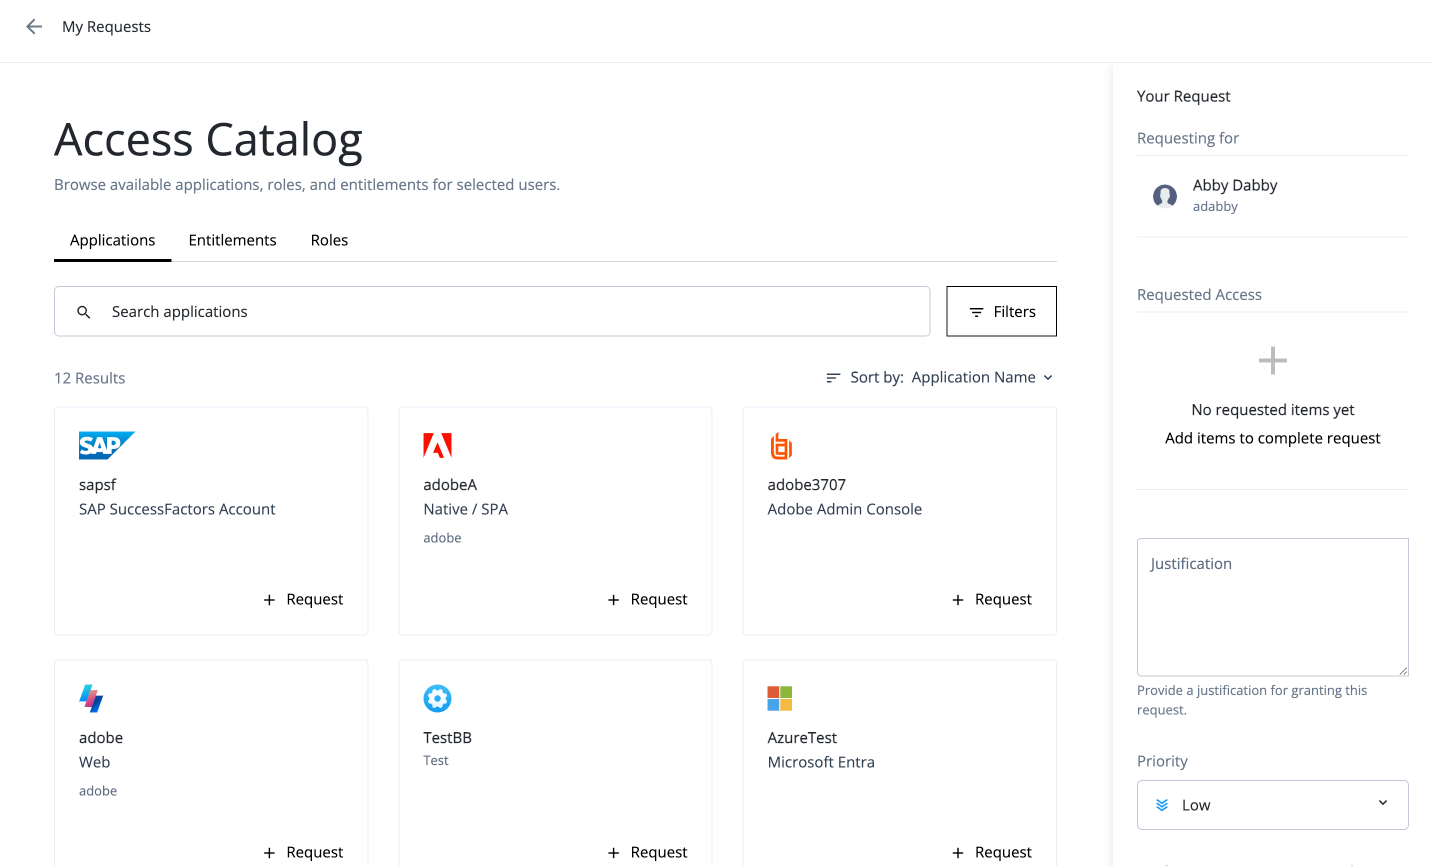
-
In the Request Application Access modal, review the application details and click Add to Request.
-
In the Request Application Access modal, fill out the form associated with the application, and then click Add to Request.
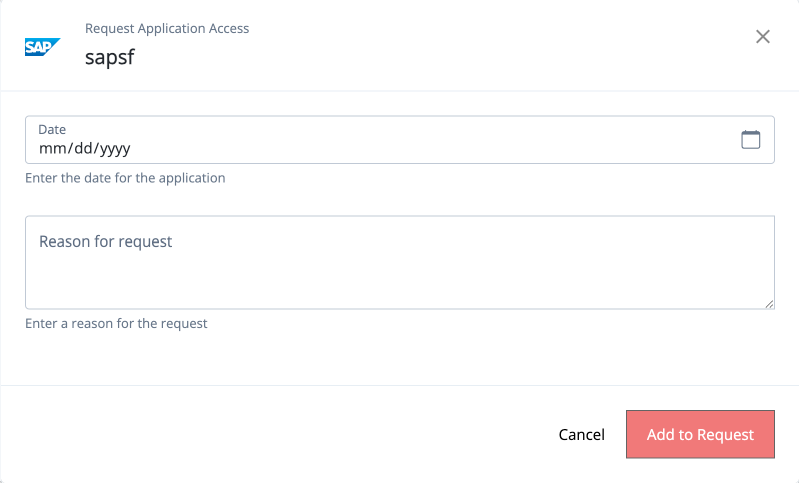
Create a form for custom request types
Creating a form for custom request types requires several steps the administrator must carry out:
-
Create a custom request type.
-
Create a simple form for the new custom request type.
-
Create a workflow to handle the custom request type and the form.
-
Submit a request.
Key points
The Form creator must consider the following key points:
-
You can only link a custom request type to a single form. While a form can be used with multiple custom requests, each custom request can only be associated with one form at a time.
-
The typical use case is to create a form that aligns with the custom request’s object type schema. For an example, refer to Create a custom request type.
-
In a workflow, you can assign a form in the Approval node properties pane. For typical cases, you can select Choose a form and select your custom request form.
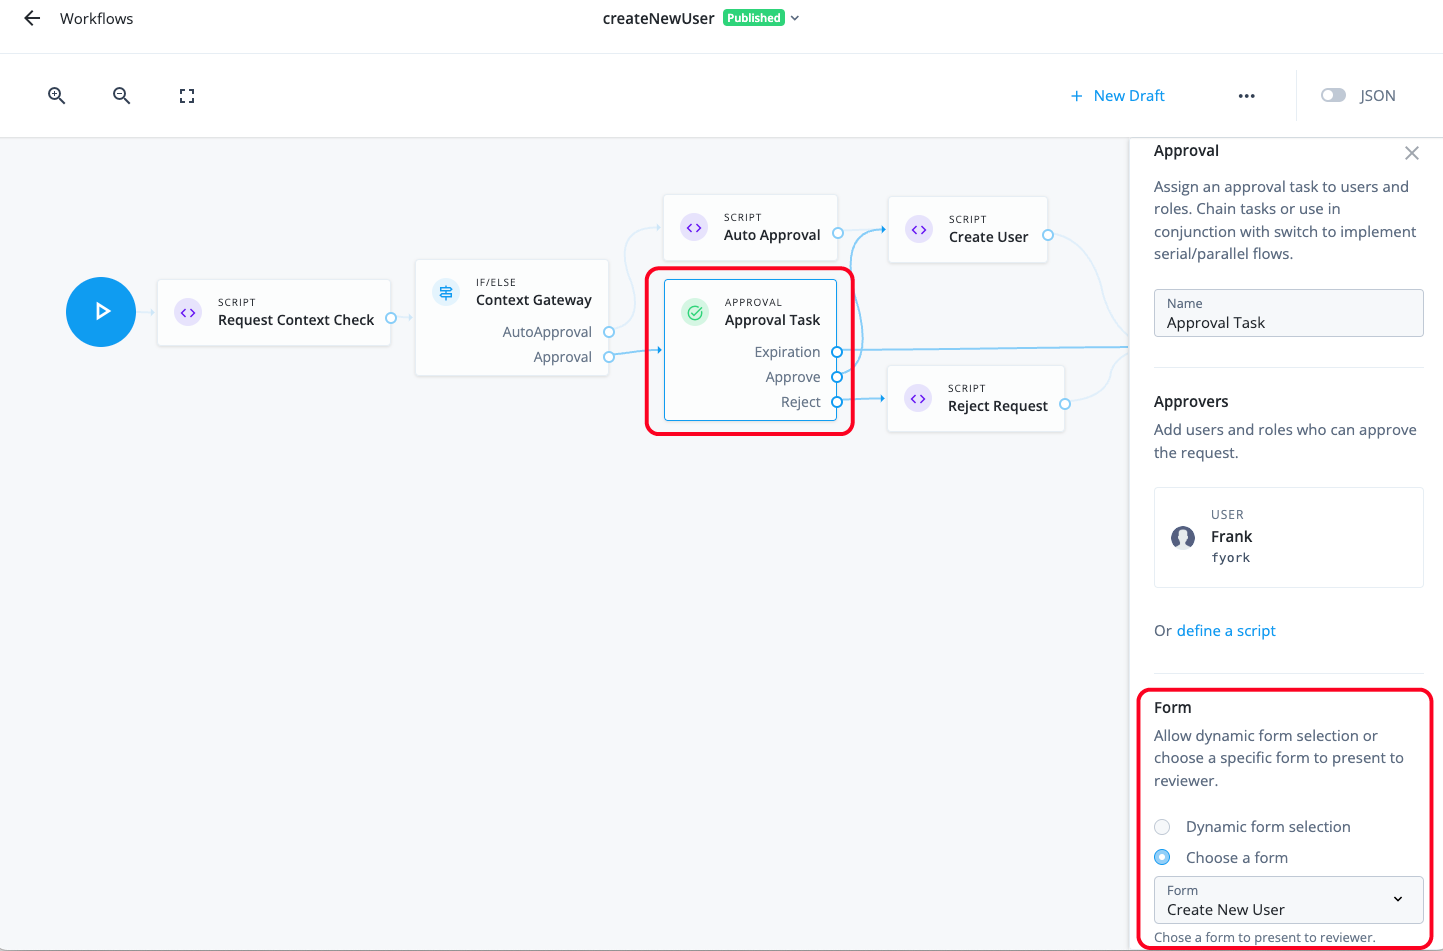
-
For more customization, you can define the keys exactly as you want. Once a request is generated, the form’s contents are copied into the request, making those properties available for use within the workflow to provision access as needed. For example, you can define a key with a value of
NAME. When a user submits a request, the key appears inrequest.common.object.blob.NAMEwith the value, Testing:{ "id": "409f28fc-65f6-41b8-a9f5-bb3a64f55925", "requester": { "givenName": "Frank", "id": "managed/user/c51d9ee1-43b3-49d1-8742-cbb33842a5cc", "mail": "frank.york@example.com", "sn": "York", "userName": "fyork", "isAdmin": false }, "requestType": "applicationGrant", "request": { "common": { "priority": "low", "justification": "Testing", "applicationId": "d248cc89-79b2-4f6a-98bc-46d0a938318f", "userId": "f3617664-4dd2-48eb-bdae-512f45b157df", "blob": { "form": { "NAME": "Testing" } }, "isDraft": false, "context": { "type": "request" } }, "_rev": 1 } ..... }
Steps
Governance or tenant administrators can carry out the following steps to create a new custom request form:
-
Create a custom request type. You can find an example in Workflow using a custom request type and form.
-
In the Advanced Identity Cloud end-user UI, click Forms > New Form.
-
In the New Form modal, click Custom request form, and then click Next.
-
In the modal, enter the following and click Save when completed:
Field Description Form Name
Enter a descriptive name for your form. Follow any convention established by your company.
Description (optional)
Enter a general description for the form.
Request Type (optional)
Select a request type this form is intended for.
You can only assign one form to each request type. If you click the checkbox, make this form available to the end user for new requests on the Advanced Identity Cloud end-user UI.
If you leave the checkbox unchecked, the request type only offers
Keyfield suggestions during the form design process.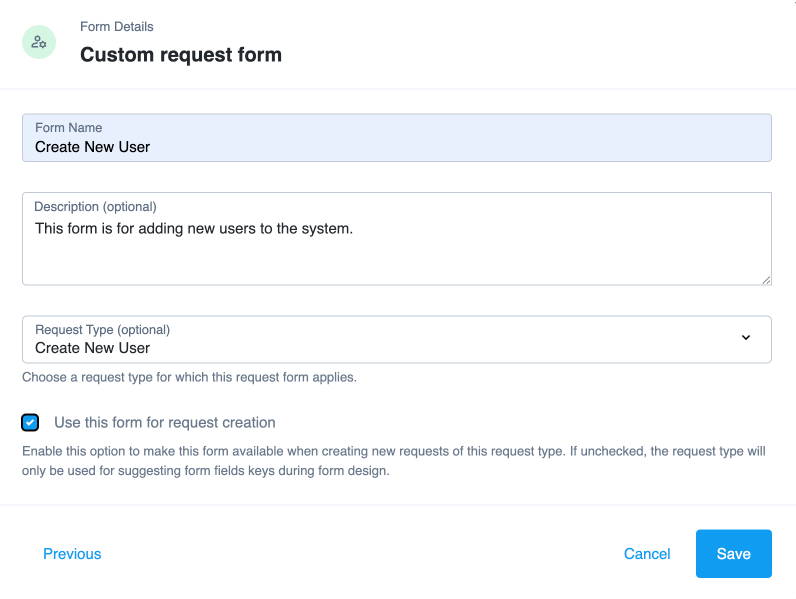
-
In the Forms editor, create your form by dragging and dropping any of the form nodes onto the canvas and fill in the fields in the right pane.
-
Click Preview to see the form you created. Click Exit Preview to go back. Copy and save the Preview URL in the top right corner. This is the URL on the Advanced Identity Cloud end-user UI.
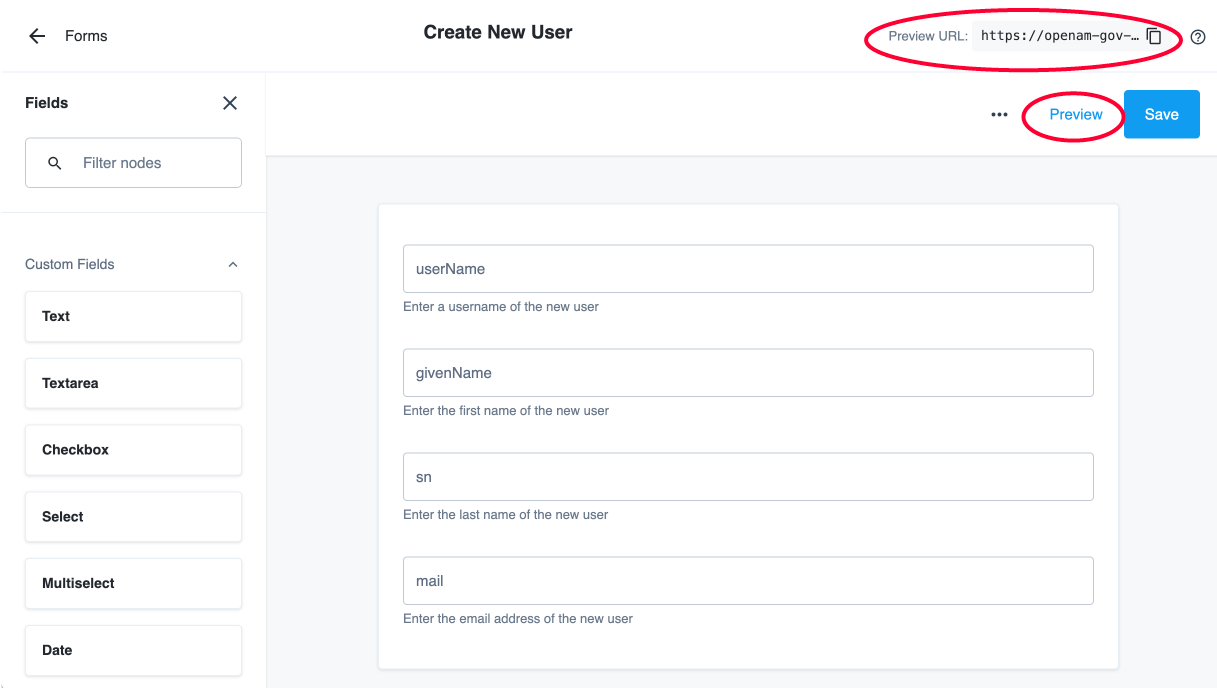
-
Click Save. Your form appears on the Forms page.
End user steps
Administrators can test the new custom request form by logging in to an end-user account.
-
In the Advanced Identity Cloud end-user UI, log in as an end user.
-
If you clicked Use this form for request creation, you can make the new custom request form available to the end user by using the Preview URL. For example, the end user pastes in the preview URL in the Advanced Identity Cloud end-user UI browser to access the custom request form.
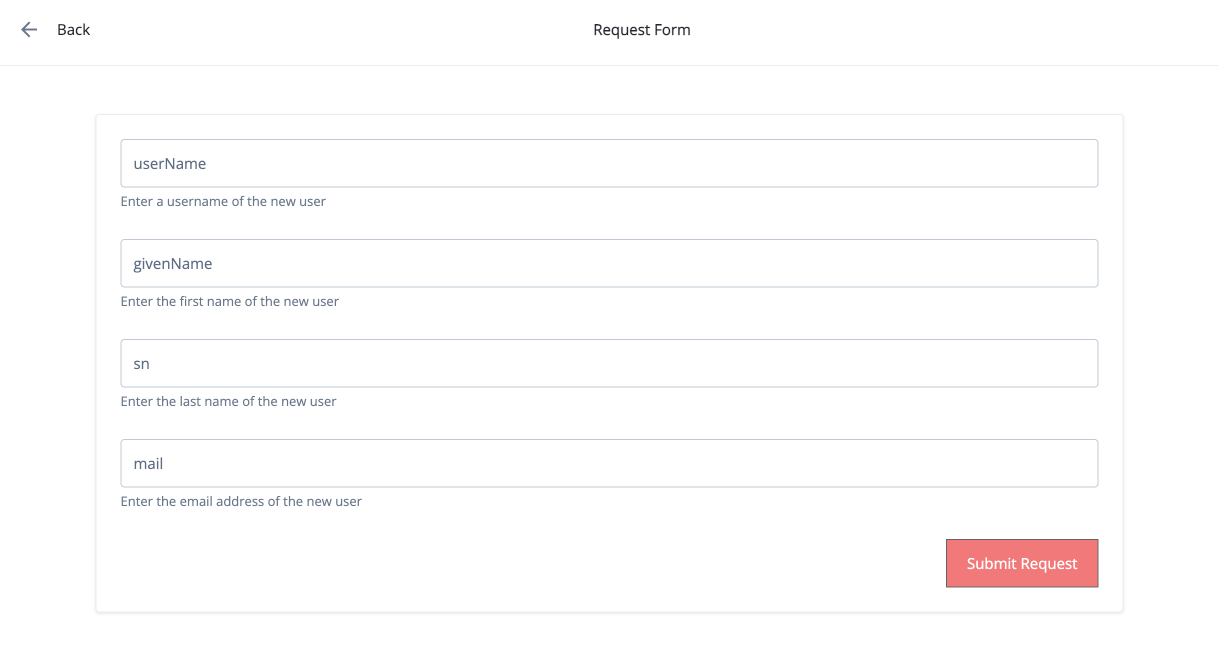
Manage entitlements
Entitlements are specific permissions given to an account in an target application. Each entitlement correlates to a permission.
Identity Governance aggregates entitlements from onboarded target applications into a centralized repository called the entitlements catalog, providing a unified view of the entitlements.
The entitlement catalog gives you the ability to view the granular access (entitlements) users in Advanced Identity Cloud have for accounts in onboarded target applications.
When you view entitlements, you can do the following:
-
View and populate the entitlement glossary attributes you create for each entitlement.
-
Manage the entitlement owner.
-
View the entitlement properties in the target application and accounts associated with the entitlement.
Load entitlements into Advanced Identity Cloud
Entitlements are pulled into Advanced Identity Cloud when you onboard a target application. Entitlements rely on an object to be configured when you onboard a target application. This object, known as a non-account object (NAO), is the object that represents entitlements (permissions) in the target application.
In many cases, there is no action on your part to set up a NAO as many application connectors have predefined NAOs.
There are scripted applications that require you to manually set the NAO which include:
-
Scripted REST
-
Scripted Groovy
-
Scripted Table
-
PowerShell
|
You must populate the Display Name Attribute on the target application NAO in the Details tab. This allows each entitlement pulled into Advanced Identity Cloud to display with a human-readable name:
The following video shows an example: |
For more information on NAOs when provisioning an target application, refer to synchronize an identity.
View entitlements
When you load entitlements into Advanced Identity Cloud, they appear in the left navigation pane under the Entitlements tab. All onboarded target applications that have entitlements appear on this screen.
There are three tabs that appear on the entitlements screen:
-
Details — Shows the entitlement owner of the entitlement as well as the entitlement glossary attributes.
-
Object Properties — Displays the entitlement data as it is in the target application.
-
Users — Shows the Advanced Identity Cloud user and the corresponding user entity in the target application.
Modify entitlement owner
Entitlement owners are individuals responsible for the entitlements in Advanced Identity Cloud.
You can select the entitlement owners to be the certifiers (reviewers) of the certification when you define Who will Certify in an entitlement assignment certification.
To modify an entitlement owner:
-
Select Entitlements from the left navigation pane.
-
Select the desired entitlement.
-
On the Details tab, click the Entitlement Owner field.
-
Select the user to be the entitlement owner.
-
Click Save.
Grant entitlements to a user
Identity Governance provides capabilities to grant entitlements to a user.
Add an entitlement to a user
Advanced Identity Cloud allows you to add entitlements to a user directly, via a request, or via synchronization with the target application.
To add an entitlement to a user directly:
-
In the Advanced Identity Cloud admin console, go to Identities > Manage.
-
On the Manage Identities page, click realm-name - Users, and select an existing user.
-
On the selected user’s page, click Entitlements > Add Entitlements.
-
On the Grant Entitlements modal, select which application you would like to grant permissions for this user to access.
-
On the Choose Entitlements modal, select one or more entitlements to grant to the user, and then click Grant Entitlements. You will see an "Entitlements request successfully submitted" message. The new entitlement appears on the user’s entitlements page.
View a user’s entitlements
-
In the Advanced Identity Cloud admin console, go to Identities > Manage.
-
On the Manage Identities page, click realm-name - Users, and select an existing user.
-
On the selected user’s page, click Entitlements. Each row shows the entitlement name in bold text with the associated application listed below it.
-
Enter an entitlement in the Search box, or click an entitlement from the selected list.
View user entitlement details
-
In the Advanced Identity Cloud admin console, go to Identities > Manage.
-
On the Manage Identities page, click realm-name - Users, and select an existing user.
-
On the selected user’s page, click Entitlements. Each row shows the entitlement name in bold text with the associated application listed below it.
-
Enter an entitlement in the Search box, or click an entitlement from the selected list.
-
Next, click the ellipsis () for an entitlement, and then click View Details. The modal opens to the Entitlement Details.
Field Description Application
Displays the application name and logo.
Owner
Displays the owner of the application.
<glossary attributes>
Displays various glossary attributes and their values. For example:
-
Requestable. Displays the values of the
requestableflag:trueorfalse. -
Description. Displays the description of the attribute.
-
New Entitlement Glossary Attribute. Displays the value of the entitlement glossary attribute.
<Technical details>
Displays technical details, such as object type properties and their values. The details differ with each application.
-
Revoke a user’s entitlement
Advanced Identity Cloud admin console allows users to revoke non-role-based entitlements from the user’s entitlements list page. If the entitlement is role-based, users cannot revoke the entitlement.
-
In the Advanced Identity Cloud admin console, go to Identities > Manage.
-
On the Manage Identities page, click realm-name - Users, and select an existing user.
-
On the selected user’s page, click Entitlements. Each row shows the entitlement name in bold text with the associated application listed below it.
-
Enter an entitlement in the Search box, or click an entitlement from the selected list.
-
Next, click the ellipsis () for an entitlement, and then click Revoke. The Revoke Request modal appears.
-
On the Revoke Request modal, enter the following information:
-
Justification. Enter a justification for the entitlement revoke request.
-
Priority. Select a priority for the revocation.
-
Expiry Date. Enter an expiry date for the revoke request.
-
-
Click Submit Request. The
Request successfully submittedmessage appears.
Manage entitlements in a role
Identity Governance provides capabilities to manage entitlements in a role.
View entitlements in a role
-
In the Advanced Identity Cloud admin console, go to Identities > Manage.
-
On the Manage Identities page, click realm-name - Roles.
-
Enter a role in the Search box, or click a role from the selected list.
-
On the selected role page, click Entitlements. Each row shows the entitlement name in bold text with the associated application listed below it.
View entitlement details in a role
-
In the Advanced Identity Cloud admin console, go to Identities > Manage.
-
On the Manage Identities page, click realm-name - Roles.
-
Enter a role in the Search box, or click a role from the selected list.
-
On the selected role page, click Entitlements. Each row shows the entitlement name in bold text with the associated application listed below it.
-
Next, click the ellipsis () for an entitlement, and then click View Details. The modal opens to the Entitlement Details.
Field Description Application
Displays the application name and logo.
Owner
Displays the owner of the application.
<glossary attributes>
Displays various glossary attributes and their values. For example:
-
Requestable. Displays the values of the
requestableflag:trueorfalse. -
Description. Displays the description of the entitlement attribute.
-
New Entitlement Glossary Attribute. Displays the value of the entitlement glossary attribute.
<Technical details>
Displays technical details, such as object type properties and their values. The details differ with each application.
-
Revoke an entitlement in a role
-
In the Advanced Identity Cloud admin console, go to Identities > Manage.
-
On the Manage Identities page, click realm-name - Roles.
-
Enter a role in the Search box, or click a role from the selected list.
-
On the selected role page, click Entitlements. Each row shows the entitlement name in bold text with the associated application listed below it.
-
Next, click the ellipsis () for an entitlement, and then click Revoke. The Revoke Entitlement? modal appears.
-
Click Revoke. The
Entitlement was revokedmessage appears.
Enhance entitlements with glossary attributes
When you create entitlement glossary attributes, they appear as metadata you can populate for each entitlement.
To enhance entitlements:
-
From the Advanced Identity Cloud admin console, go to Governance > Entitlements.
-
Select the desired entitlement.
-
On the Details tab, populate the glossary attributes you created.
-
Click Save.
Example of when to use the governance glossary
There are many scenarios in which using identity glossary attributes can provide useful business logic to make decisions.
Oftentimes, organizations have specific attributes to track users' entitlements from applications.
An example could be that you want to attach a risk score to each entitlement pulled into Advanced Identity Cloud. This could be to determine the sensitivity of the entitlement (privilege) in the target application.
Steps:
-
From the Advanced Identity Cloud admin console, click Glossary.
-
Click Entitlement > + Entitlement Glossary Item.
-
Enter the following values:
-
Name -
riskScore -
Display Name -
Risk score -
Type -
NumberFor more information, refer to create entitlement attribute.
-
-
Once you create the entitlement glossary attribute, it displays as metadata for each entitlement. To view this metadata in an entitlement, go to Entitlements > Select entitlement to view the attribute under the Details tab.
-
Assign a risk score of
80using the newly createdRisk scoreattribute. The higher the risk score for an entitlement, the more sensitive operations that entitlement allows.
Now that you have created an entitlement glossary attribute and enriched existing entitlements with
the Risk score attribute, you can leverage this new business-relevant data.
For example, you can create an entitlement assignment certification template that filters
the template to show entitlements to review that have a Risk score of 75 or higher. This allows you to
certify highly-sensitive entitlements.
This is just one scenario in which the identity glossary can be used. Create identity glossary attributes for applications, entitlements, or roles to suit your business cases.
Manage governance glossary
In Identity Governance, you can use the governance glossary to attach custom attributes (metadata) to applications, entitlements, or roles to enhance certifications or access requests.
When using the governance glossary, you can create the following custom attributes:
Typical steps to make use of a governance glossary attribute
-
Create governance glossary attribute (application, entitlement, or role).
-
Populate the governance glossary attribute you create. For example, if you create an application glossary attribute, the attribute will appear on every target application in the Details tab.
-
Use the attribute you create to:
-
Filter on what you would like to certify when you create a template.
-
Allow the end user to filter on the attribute in applications, entitlements, or roles when they request access.
-
Example of when to use the governance glossary
| If you are already familiar with the use case(s) of governance glossary, start with Create a governance glossary attribute. |
There are many scenarios in which using identity glossary attributes can provide useful business logic to make decisions.
Oftentimes, organizations have specific attributes to track users' entitlements from applications.
An example could be that you want to attach a risk score to each entitlement pulled into Advanced Identity Cloud. This could be to determine the sensitivity of the entitlement (privilege) in the target application.
Steps:
-
From the Advanced Identity Cloud admin console, click Glossary.
-
Click Entitlement > + Entitlement Glossary Item.
-
Enter the following values:
-
Name -
riskScore -
Display Name -
Risk score -
Type -
NumberFor more information, refer to create entitlement attribute.
-
-
Once you create the entitlement glossary attribute, it displays as metadata for each entitlement. To view this metadata in an entitlement, go to Entitlements > Select entitlement to view the attribute under the Details tab.
-
Assign a risk score of
80using the newly createdRisk scoreattribute. The higher the risk score for an entitlement, the more sensitive operations that entitlement allows.
Now that you have created an entitlement glossary attribute and enriched existing entitlements with
the Risk score attribute, you can leverage this new business-relevant data.
For example, you can create an entitlement assignment certification template that filters
the template to show entitlements to review that have a Risk score of 75 or higher. This allows you to
certify highly-sensitive entitlements.
This is just one scenario in which the identity glossary can be used. Create identity glossary attributes for applications, entitlements, or roles to suit your business cases.
Create a governance glossary attribute
To access the governance glossary, navigate to Glossary from the left navigation pane in the Advanced Identity Cloud admin console.
Create governance glossary attributes for:
Create an application glossary attribute
To create an application glossary attribute:
-
Select Application from the left pane in the table.
-
Select + Application Glossary Item.
-
Enter details for the item:
Field Description Name
The backend name of the attribute.
Display Name
The name that displays on the Details tab of the target application.
Description
The rationale for the attribute.
Type
The data type of the attribute. The data type you select changes the way it displays in the application’s Details tab and the actions you can take.
Select one of the following:
-
String
-
Number
-
Boolean — A checkbox. Checking the box corresponds to
true. -
Date — A date field (
mm/dd/yyyy). -
User — Select from existing users.
-
Role — Select from existing roles.
-
Organization — Select from existing organizations.
-
-
Depending on the data type chosen, optional settings appear:
-
Multi-Valued — Lets you have more than one value when you populate the attribute, an array. For example, if you select the
Usertype in step 3, you can select multiple users instead of one. -
Enumerated Values — When you are populating the attribute on the application, create fixed values to choose from:
-
Select the + icon.
-
Fill out the text and value for the item.
The text displays as the human-readable option to select. The value is the actual value saved to the backend.
-
If desired, add more values.
-
-
-
Click Show advanced settings and optionally select Searchable. This allows an end user to search using this attribute when requesting access to the application.
-
Click Save.
The application glossary attribute displays in the Details tab of every target application.
The following video shows an example:
Create an entitlement glossary attribute
To create an entitlement glossary attribute:
-
Select Entitlement from the left pane in the table.
-
Select + Entitlement Glossary Item.
-
Enter details for the item:
Field Description Name
The backend name of the attribute.
Display Name
The name that displays on the Details tab of each entitlement.
Description
The rationale for the attribute.
Type
The data type of the attribute. The data type you select changes the way it displays each entitlement and the actions you can take.
Select one of the following:
-
String
-
Number
-
Boolean — A checkbox. Checking the box corresponds to
true. -
Date — A date field (
mm/dd/yyyy). -
User — Select from existing users.
-
Role — Select from existing roles.
-
Organization — Select from existing organizations.
-
-
Depending on the data type chosen, optional settings appear:
-
Multi-Valued — Lets you have more than one value when you populate the attribute, an array. For example, if you select the
Usertype in step 3, you can select multiple users instead of one. -
Enumerated Values — When you are populating the attribute on the entitlement, create fixed values to choose from:
-
Select the + icon.
-
Fill out the text and value for the item.
The text displays as the human-readable option to select. The value is the actual value saved to the backend.
-
If desired, add more values.
-
-
-
Click Show advanced settings and optionally select Searchable. This allows an end user to search using this attribute when requesting access to the entitlement.
-
Click Save.
The entitlement glossary attribute displays in every onboarded entitlement. From the Advanced Identity Cloud admin console, go to Entitlements > Select entitlement > Details tab to view the newly created entitlement attribute.
The following video shows an example:
Create role glossary attribute
To create a role glossary attribute:
-
Select Role from the left pane in the table.
-
Select + Role Glossary Item.
-
Enter details for the item:
Field Description Name
The backend name of the attribute.
Display Name
The name that displays on the Details tab of each role.
Description
The rationale for the attribute.
Type
The data type of the attribute. The data type you select changes the way it displays each role and the actions you can take.
Select one of the following:
-
String
-
Number
-
Boolean — A checkbox. Checking the box corresponds to
true. -
Date — A date field (
mm/dd/yyyy). -
User — Select from existing users.
-
Role — Select from existing roles.
-
Organization — Select from existing organizations.
-
-
Depending on the data type chosen, optional settings appear:
-
Multi-Valued — Lets you have more than one value when you populate the attribute, an array. For example, if you select the
Usertype in step 3, you can select multiple users instead of one. -
Enumerated Values — When you are populating the attribute on the role, create fixed values to choose from:
-
Select the + icon.
-
Fill out the text and value for the item.
The text displays as the human-readable option to select. The value is the actual value saved to the backend.
-
If desired, add more values.
-
-
-
Click Show advanced settings and select any of the following:
-
Click Show advanced settings and optionally select Searchable. This allows an end user to search using this attribute when requesting access to the entitlement.
-
Click Save.
The role glossary attribute displays in every role. From the Advanced Identity Cloud admin console, go to Manage > Identities > Select role > Details tab to view the newly created role attribute.
The following video shows an example:
Delete a governance glossary attribute
To delete a governance glossary attribute:
-
From the Advanced Identity Cloud admin console, click Glossary.
-
Select one of the following tabs:
-
Application
-
Entitlement
-
Role
-
-
Click ellipsis () next to the governance glossary attribute you want to delete.
-
Click Delete.
-
Click Delete again to confirm the deletion.
This action cannot be undone.
Identity Governance REST API reference
This section describes the endpoints and specific characteristics of Identity Governance REST APIs. You can find an overview of the Ping Identity REST API framework in Advanced Identity Cloud REST.
| Access Identity Governance REST APIs using access tokens. You can find information on obtaining a token in Authenticate to Advanced Identity Cloud REST API with access token. |
-
Identity Governance-related APIs: Identity Governance has many features, including access requests, the governance glossary (catalog), and entitlements. This page explores the Identity Governance REST API endpoints.
Identity Governance-related APIs
Identity Governance has many features, including access requests, the governance glossary (catalog), and entitlements.
The following sections comprehensively explore the Identity Governance REST API endpoints.
YAML file
The REST APIs contain many parameters and, in some instances, large request bodies. For your convenience, you can view the entire API using a YAML file based on the OpenAPI specification.
To download the YAML file, click here.
Learn more in the API reference documentation.
| Adjust the configurations of the file to match your specific details, such as your Advanced Identity Cloud tenant FQDN. |
Endpoints
Access request
In Identity Governance, end users can request access to resources. Resources are target applications, entitlements, or roles. You define which resources are requestable.
Learn more in access requests.
| URI | HTTP method | Description |
|---|---|---|
|
POST |
Create or validate a new access request for a list of users. When submitting a new request for access, the system validates the request’s contents. If no issues are found, IGA creates a request for each pairing of user and catalog items included in the request. You can choose to only validate the request by using the |
|
POST |
Create request for the given request type. |
|
GET |
Retrieve the details of a single access request using an unique identifier, |
|
PUT |
Replace the content of a request. The only properties that can be changed are
properties that are defined in the request schema and not in the |
|
PATCH |
Update the contents of a request. The only properties that can be updated are properties
that are defined in the request schema and not in the |
|
POST |
Perform various actions on a specific request, such as |
|
GET |
Get requests for which the authenticated user has permissions to view. For additional search capabilities,
use the |
|
POST |
Get requests for which the authenticated user has permissions to view. The |
|
POST |
Get requests for which the authenticated user is assigned, either directly, through a role, or
through a delegate. The |
Account
Accounts are user profiles in applications. For example, when you provision an end user to an application, an account is created for them.
| URI | HTTP method | Description |
|---|---|---|
|
GET |
Retrieve all account objects across all applications that have been onboarded as part of any application. |
|
POST |
Retrieve all account objects across all applications that have been onboarded as part of any application. Additional filter criteria can be provided to allow searching by application, user, or glossary data. |
|
GET |
Retrieve by details of a single account object using its unique identifier. |
|
GET |
Retrieve the glossary specific details of a single account object using its unique identifier. |
|
POST |
Create glossary entry for a single account object using its unique identifier. |
|
PUT |
Create or update a glossary entry for a single account object using its unique identifier. |
Audit
Endpoints associated with IDM’s audit functionality.
|
To use the
This is a temporary requirement and will be removed in a future release. |
| URI | HTTP method | Description |
|---|---|---|
|
GET |
Get audit reports. |
|
GET |
Get the audit reports for a given user. |
Catalog
In Identity Governance, you can use the governance glossary to attach custom attributes (metadata) to applications, entitlements, or roles to enhance certifications or access requests.
You can find more information in the Manage governance glossary.
| URI | HTTP method | Description |
|---|---|---|
|
GET |
Get a list of items from the Identity Governance access catalog. Each entry represents a single
type of requestable access that can be added to a request. The current supported types
of access that are requestable are |
|
POST |
Get a list of items from the Identity Governance access catalog using additional filter criteria.
Each entry represents a single type of requestable access that can be added to a request.
The current supported types of access that are requestable are |
|
GET |
Retrieve all currently configured properties eligible to be used for search or sort when searching against the catalog API. Each property includes some additional metadata about the property, such as whether it is multivalued or not and its datatype. |
|
GET |
Retrieve all currently configured properties eligible to be used for search or sort for a single object when searching against the catalog API. For example, you can use the endpoint to search for all specific entitlement properties. Each property includes some additional metadata about the property, such as whether it is multivalued or not and its datatype. |
Certification
| URI | HTTP method | Description |
|---|---|---|
|
GET |
Query existing certification templates. |
|
POST |
Create a new certification template. |
|
POST |
Duplicate an existing certification template. |
|
PUT |
Update a single certification template. |
|
DELETE |
Delete a single certification template. |
|
POST |
Get the available schema on which to filter certification templates. |
|
GET |
Query existing certification campaign instances. |
|
GET |
Read a single certification campaign. |
|
GET |
Get the actors (certifiers) tasks view for a certification. |
|
POST |
Update a certification’s deadline. |
|
POST |
Cancel a certification campaign. |
|
GET |
Query the review items (tasks) that are assigned to you. |
|
GET |
Query line items of the certification campaign instance. |
|
POST |
Query line items of the certification campaign instance. |
|
POST |
Take action on line items. |
|
POST |
Take action on a single line item. |
Config
Identity Governance has overarching configurations, such as requiring a justification when rejecting an access request.
| URI | HTTP method | Description | ||
|---|---|---|---|---|
|
GET |
Reads and returns all Identity Governance configuration properties across all categories. Only access request-related properties are available. These properties are used to determine the behavior behind functionality. For example, access request features contain configuration on whether justification is required to reject a request or whether a user can approve their own access. |
||
|
PUT |
Update all Identity Governance configuration properties across all categories. Only access request-related properties are available.
|
||
|
GET |
Get Identity Governance configuration settings for a given category (for example, |
||
|
PUT |
Update Identity Governance configuration settings for a given category (for example, |
Event
Events are rules defined to detect a change in the IGA system. Each rule has two core parts: a condition for the event and the action taken when that event occurs.
| URI | HTTP method | Description |
|---|---|---|
|
GET |
Get and search for a list of event rules defined in IGA. Each entry represents a single event rule defined to detect a change in the system. IGA rules consist of two core pieces: condition for the event, and action taken when the event occurs. For example, a rule might define that whenever someone creates a user in IGA, they should also generate a certification for that user. |
|
POST |
Create a single IGA event rule. A single event rule is defined to detect a change in the system. IGA rules consist of two core pieces: condition for the event, and action taken when that event occurs. For example, a rule might define that whenever someone creates a user in IGA, they should also generate a certification for that user. |
|
GET |
Get a single IGA event by ID. The response is a single event rule defined to detect a change in the system. |
|
PUT |
Update a single IGA event by ID. This call requires that the entire object be provided and that it replaces the entire existing event definition. |
|
PATCH |
Update a single IGA event by ID. This call allows the caller to update specific properties of the event only without providing the entire object. |
|
DELETE |
Delete a single IGA event by ID. |
|
GET |
Get the list of available event entities from which you can define a condition. |
|
GET |
Get the available schema for defining a condition on a given object.
For example, |
Job
Endpoint to trigger an Identity Governance’s job process.
| URI | HTTP method | Description |
|---|---|---|
|
POST |
Manualy triggers one of IGA’s job processes. |
Request form
Identity Governance enables administrators to create custom forms presented to users during request workflows.
| URI | HTTP method | Description |
|---|---|---|
|
GET |
Search request forms. |
|
POST |
Create a request form. |
|
GET |
Get a request form by ID. |
|
PUT |
Replace an existing request form by ID. |
|
PATCH |
Update an existing request form by ID. |
|
GET |
Search the request form assignments. |
|
POST |
Assign and unassign a request form. |
Request type
| You can define workflows for access requests, such as what email gets sent to whom for an access request type. These endpoints are used, in tandem, with the access request endpoints. |
| URI | HTTP method | Description |
|---|---|---|
|
GET |
Get a list of supported request types. |
|
POST |
Create a new custom request type. |
|
GET |
Get the request type by ID. |
|
PUT |
Replace an existing request type. |
|
PATCH |
Update a request type. |
|
DELETE |
Delete a request type. |
Provisioning
In the Advanced Identity Cloud admin console, you can add or remove, or provision, resources from end users, however; you can do the same through REST APIs.
| URI | HTTP method | Description |
|---|---|---|
|
POST |
Provision or de-provision applications for an end user. |
|
POST |
Provision or de-provision roles for an end user. |
|
POST |
Provision or de-provision entitlements for an end user. |
Scope
Scope determines which specific users are able to view or interact with particular target objects. Scoping rules comprise of two core parts: a condition for the source object (who or what the scope applies to) and a condition for the target object that can be viewed or acted upon.
| URI | HTTP method | Description |
|---|---|---|
|
GET |
Get and search for a list of scoping rules defined in IGA. Each entry represents a single scoping rule defined to assign a set of conditions that allows a subset of users visibility on a subset of target objects. IGA scoping rules consist of two core parts: a condition for the source object (who/what the scope applies to) and a condition for the target object that can be viewed or acted upon. |
|
POST |
Create a single scoping rule in IGA. Each scoping rule is defined to assign a set of conditions that allows a subset of users visibility on a subset of target objects. IGA scoping rules consist of two core parts: a condition for the source object (who/what the scope applies to) and a condition for the target object that can be viewed or acted upon. |
|
GET |
Get a single scoping rule in IGA by ID. Each scoping rule is defined to assign a set of conditions that allows a subset of users visibility on a subset of target objects. IGA scoping rules consist of two core parts: a condition for the source object (who/what the scope applies to) and a condition for the target object that can be viewed or acted upon. |
|
PUT |
Update a single IGA scope by ID. This call expects the entire object to be provided and replaces the entire existing scope definition. |
|
PATCH |
Update a single IGA scope by ID. This call allows the caller to update specific properties of the scope only without providing the entire object. |
|
DELETE |
Delete a single IGA scope by ID. |
|
GET |
Get a list of available entities on which a condition can be defined. |
|
GET |
Get the available schema for defining a condition on a given object. For example, 'user' returns the attributes available for defining a scope for users in IGA. |
Segregation of Duty
Segregation of Duties (SoD) is an internal control process ensuring no single individual is granted privileges that could lead to a conflict of interest or fraud. Administrators can configure SoD using policies and policy rules that let them identify violations and run actions, such as create an exception, allow or remediate the violation, and others.
You can view the entire API using a YAML file based on the OpenAPI specification.
| Adjust the configurations of the file to match your specific details, such as your Advanced Identity Cloud tenant FQDN. |
| URI | HTTP method | Description |
|---|---|---|
|
GET |
Search policies. The endpoint returns policies stored within the Identity Governance store, based on a set of query parameters. |
|
POST |
Create a new policy object within Identity Governance. |
|
POST |
Query policy objects using a targeted search filter. |
|
GET |
Get policy by ID. The endpoint returns the policy with the provided ID. |
|
PUT |
Update an existing policy object within Identity Governance. |
|
DELETE |
Delete an existing policy object within Identity Governance. |
|
POST |
Run a scan on all given rules of a policy and create violations if desired. |
|
GET |
Get policy rules associated with a policy ID. |
|
GET |
Query policy rules based on a set of query parameters. |
|
POST |
Create a new policy rule object within Identity Governance. |
|
POST |
Query the policy rule objects using a targeted search filter. |
|
GET |
Get policy rule by ID. |
|
POST |
Duplicate a given policy rule. The rule will be set as |
|
PUT |
Update an existing policy rule object. |
|
DELETE |
Delete an existing policy rule. |
|
POST |
Run a scan the given policy for violations and create violations if desired. |
|
POST |
Run a scan on a given user rule and return potential violations. |
|
GET |
Query policy scans with the Identity Governance store based on a set of query parameters. |
|
POST |
Query policy scan objects using a targeted search filter. |
|
GET |
Get policy scan by ID. |
|
DELETE |
Delete an existing policy scan object within Identity Governance. |
|
GET |
Query the signed-in user’s violation objects. |
|
GET |
Query the violation objects. |
|
POST |
Creates a violation with the given body. |
|
POST |
Once a phase (or phases) have chosen to allow a violation, close and complete the
violations with the outcome of |
|
POST |
As a user who can take action on violations, cancel existing exceptions, reverting the violations back to in-progress. |
|
POST |
As a user who can take action on violations, add a comment to the violation objects. |
|
POST |
As a user who can take action on violations, grant an exception to the violating access. |
|
POST |
As a user who can take action on violations, edit the list of active actors on the violation tasks. |
|
POST |
Query the violation objects using a targeted search filter. |
|
POST |
Query the signed-in user’s violation object using a targeted search filter. |
|
GET |
Query the contents of a single violation object. |
|
PUT |
Updates a given violation with the given body. |
|
DELETE |
Deletes a violation with a given ID. |
|
POST |
Once a phase (or phases) have chosen to allow a violation, close and complete the
violation with an outcome of |
|
POST |
As an actor on a violation, add a comment to a violation object. |
|
POST |
Once a phase (or phases) have chosen to remediate a violation, complete the violation
with an outcome of |
|
POST |
For violations with an outcome of |
|
POST |
Add a phase to a violation. A phase is a task that must be completed to move the violation forward,
which depends on the task configuration, such as expiration, assignee, notifications, and others.
For type= |
|
POST |
As an actor on a violation, allow the user to continue to violate the defined rule in perpetuity. |
|
POST |
As an actor on a violation, cancel an existing exception, reverting the violation back to |
|
POST |
Add a comment to a violation object. |
|
POST |
As an actor on a violation, grant an exception to the violating access. |
|
POST |
As an actor on a violation, edit the actors and permissions on a violation task. |
|
POST |
As an actor on a violation, choose to remediate the access, kicking off the remediation workflow assigned to the violation. |
|
POST |
As an actor on a manual provisioning task to handle the violation remediation, mark the action as completed. |
|
POST |
As an actor on a manual provisioning task to handle the violation remediation, mark the action as canceled (not completed). |
Task
Endpoints for fulfillment tasks.
| URI | HTTP method | Description |
|---|---|---|
|
GET |
Get the tasks for which the authenticated user has permissions to view. |
|
POST |
Get the tasks for which the authenticated user has permissions to view. The
|
User
Endpoint for a user’s grants and recommendations.
| URI | HTTP method | Description |
|---|---|---|
|
GET |
Get the grants a user currently has. |
|
GET |
Get the access recommendations for a given user. |
Workflow
|
To use the
This is a temporary requirement and will be removed in a future release. |
| URI | HTTP method | Description |
|---|---|---|
|
GET |
Get the workflow definitions. |
|
Post |
Create and/or publish workflow definitions. |
|
GET |
Get the workflow definition. |
|
DELETE |
Delete the workflow definition. If the status is published, it will try to delete the workfow model and process the definition in IDM. |
|
PUT |
Update or publish the workflow definition. |
Evolving APIs
| The APIs referenced in this section are evolving, which means they can change or become deprecated at any time. |
The current evolving APIs focus on entitlements. For more information, refer to Manage entitlements.
| URI | HTTP method | Description |
|---|---|---|
|
GET |
Get an entitlement by an ID. |
|
POST |
Search for a list of all entitlements that match the target filter. |
|
GET |
Gets the users assigned to a specific entitlement. |
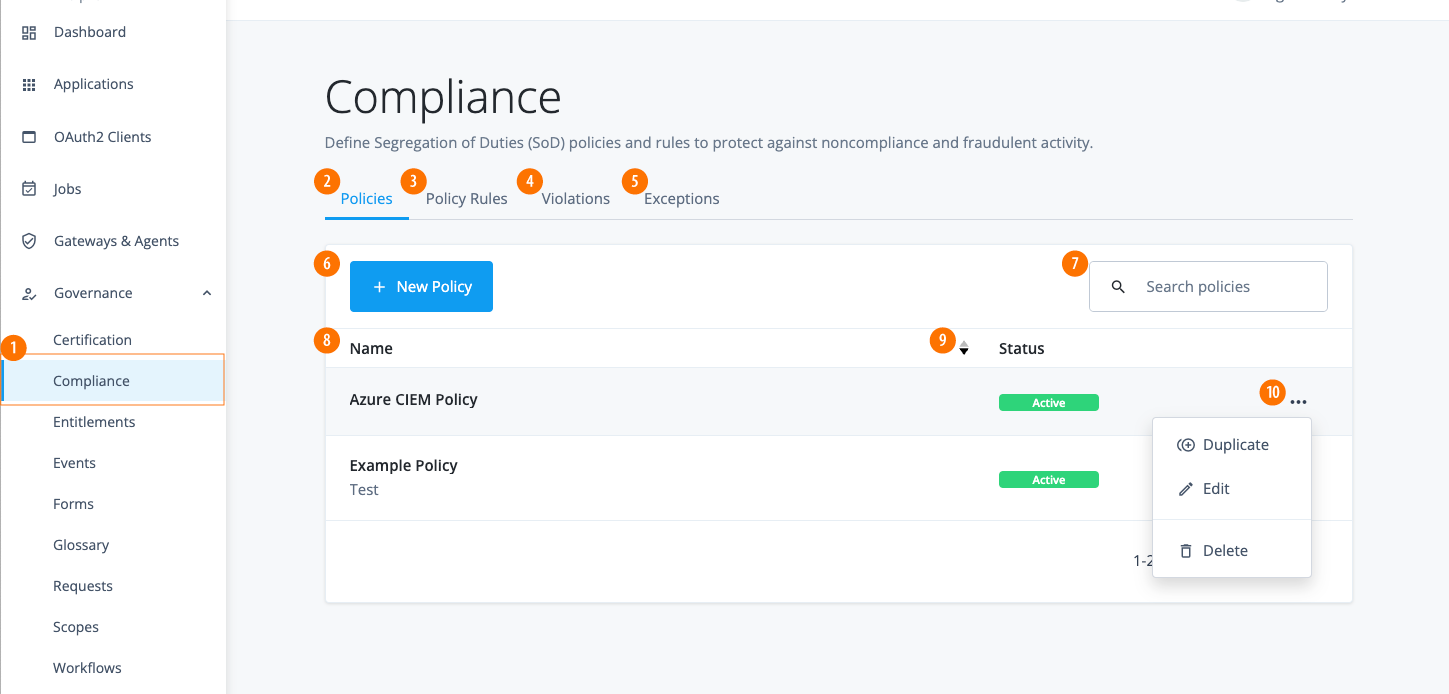
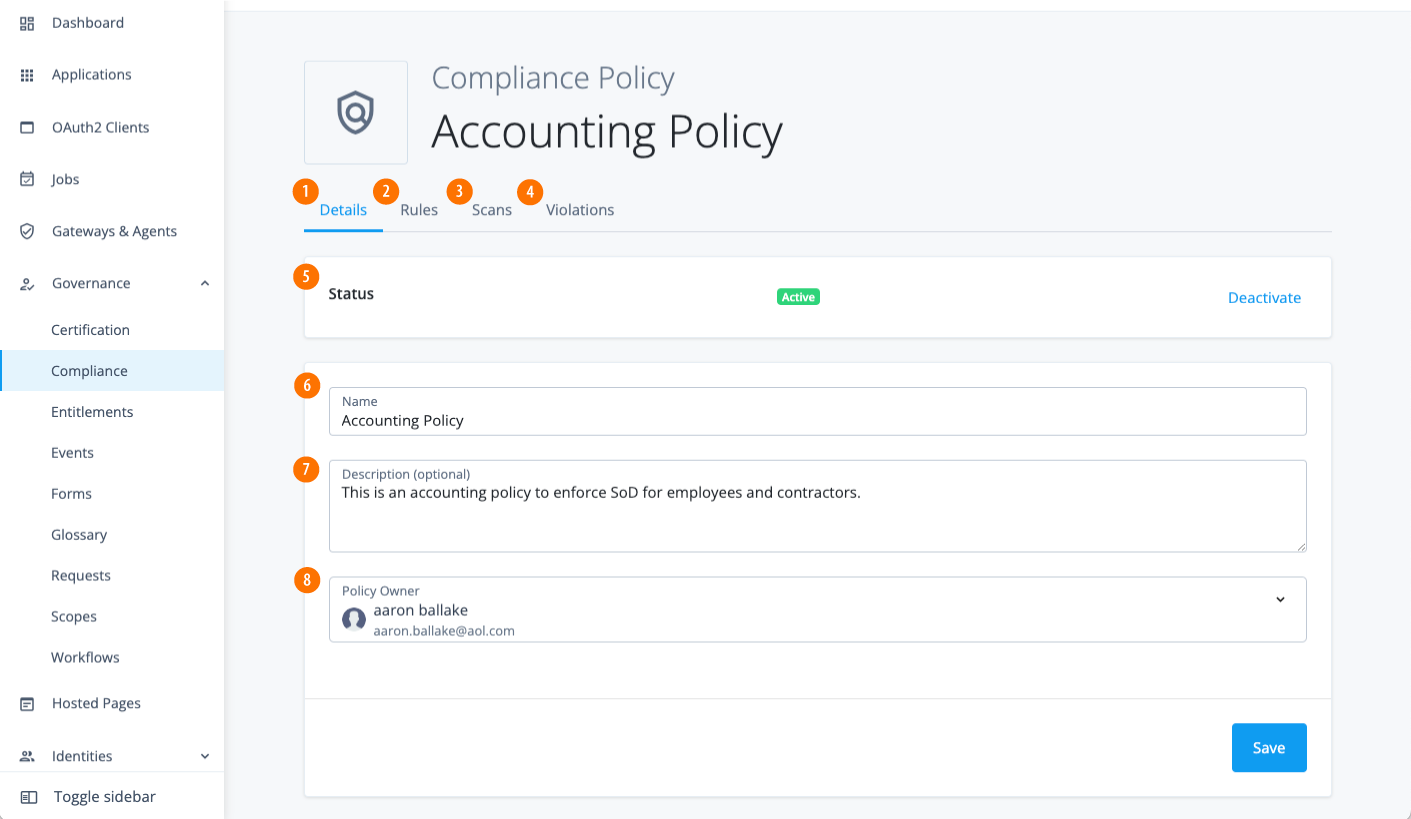
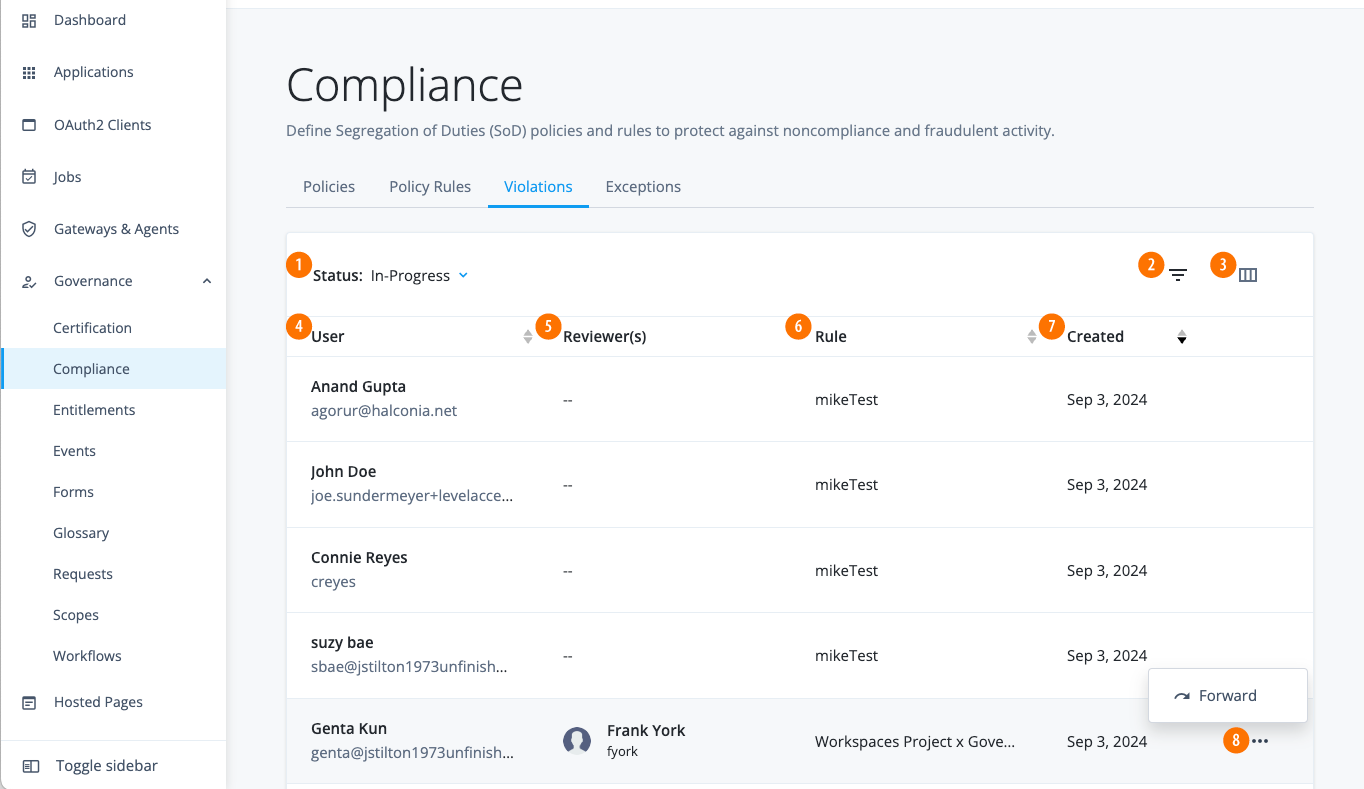
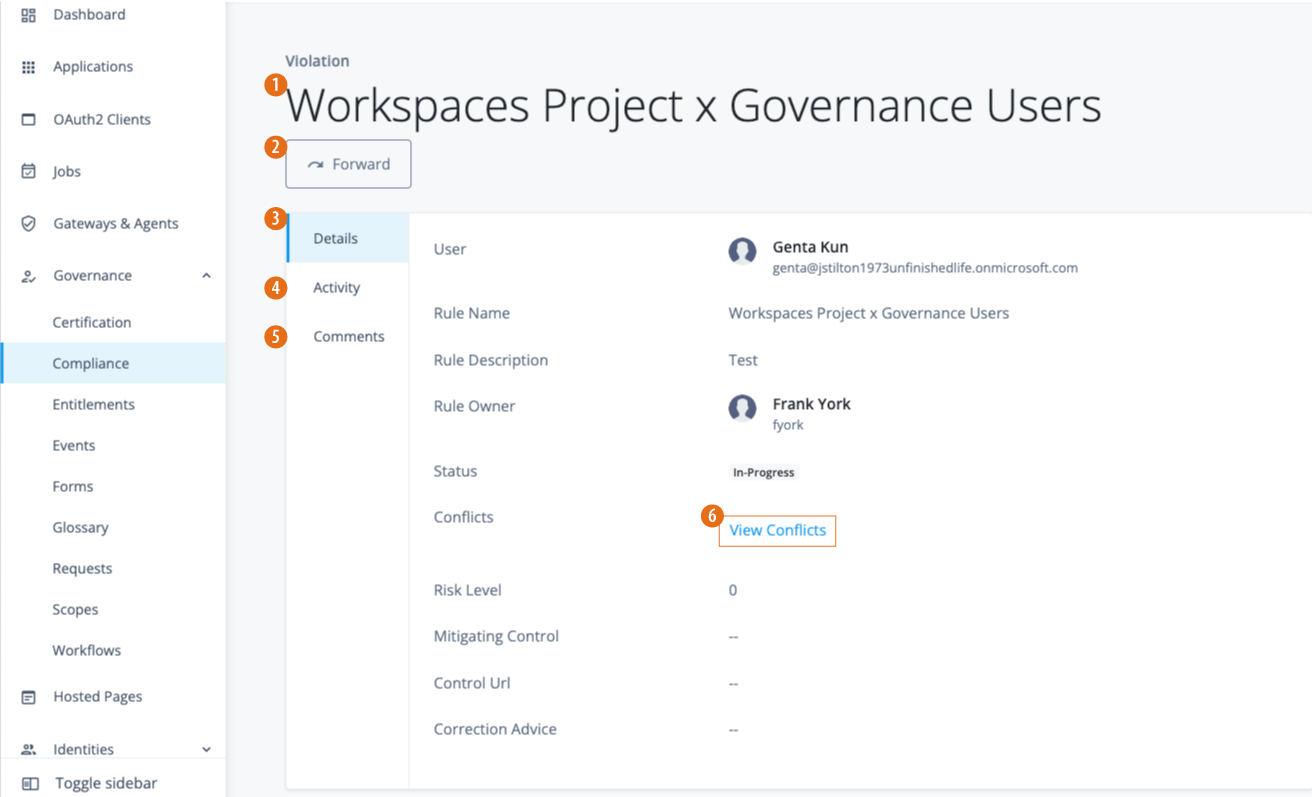
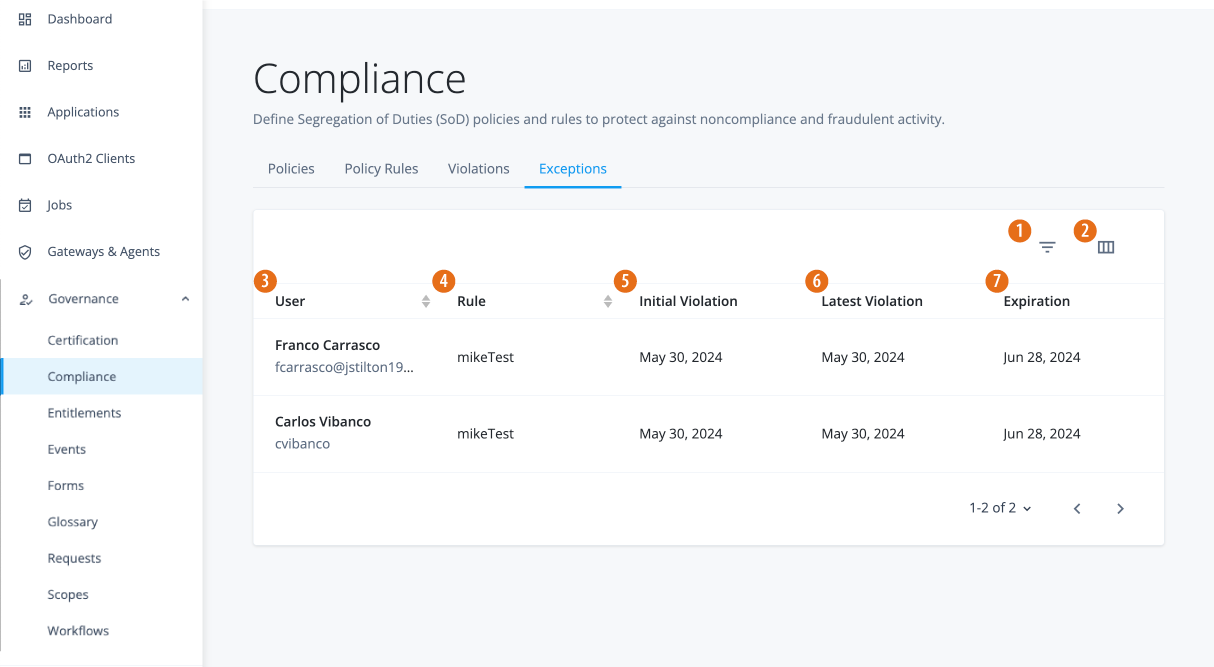
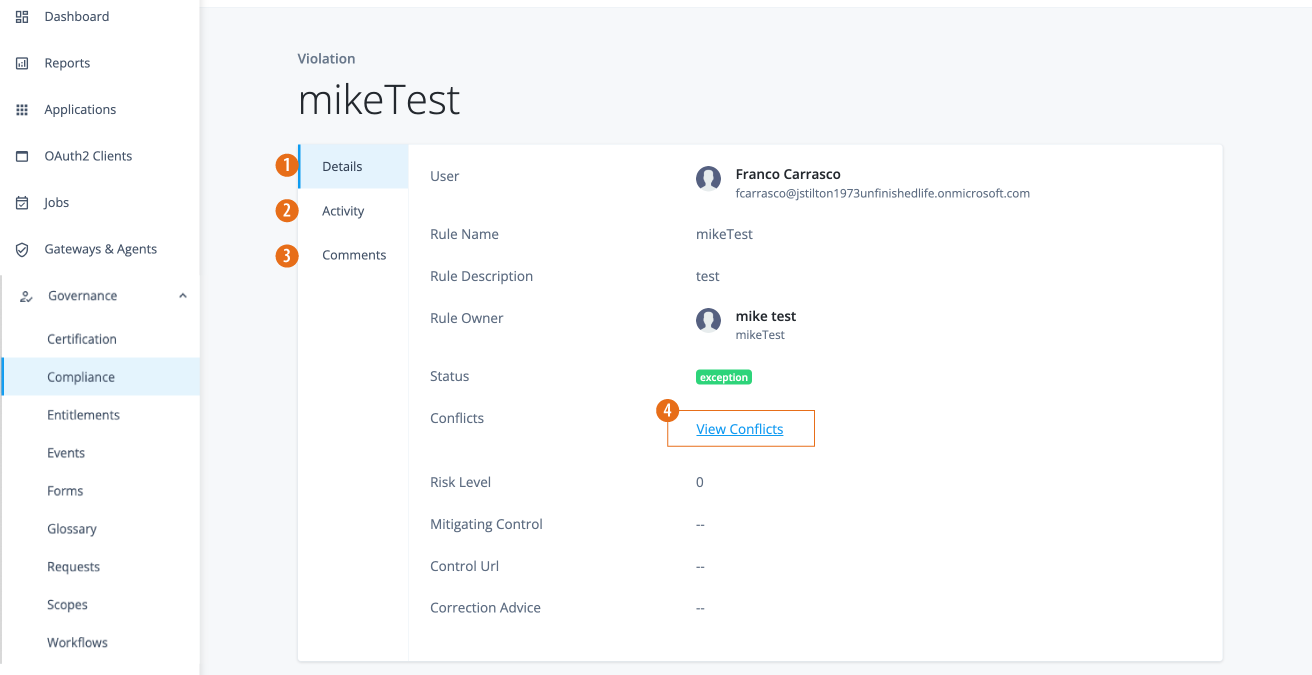
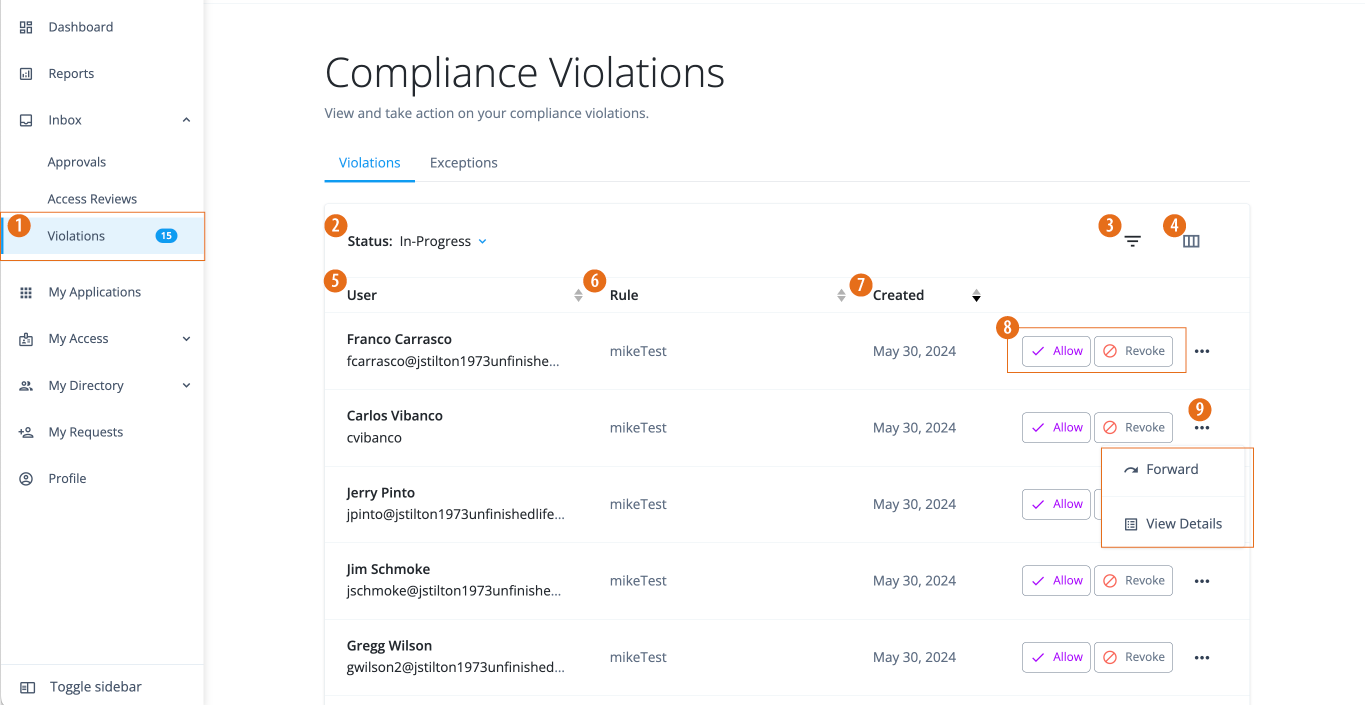
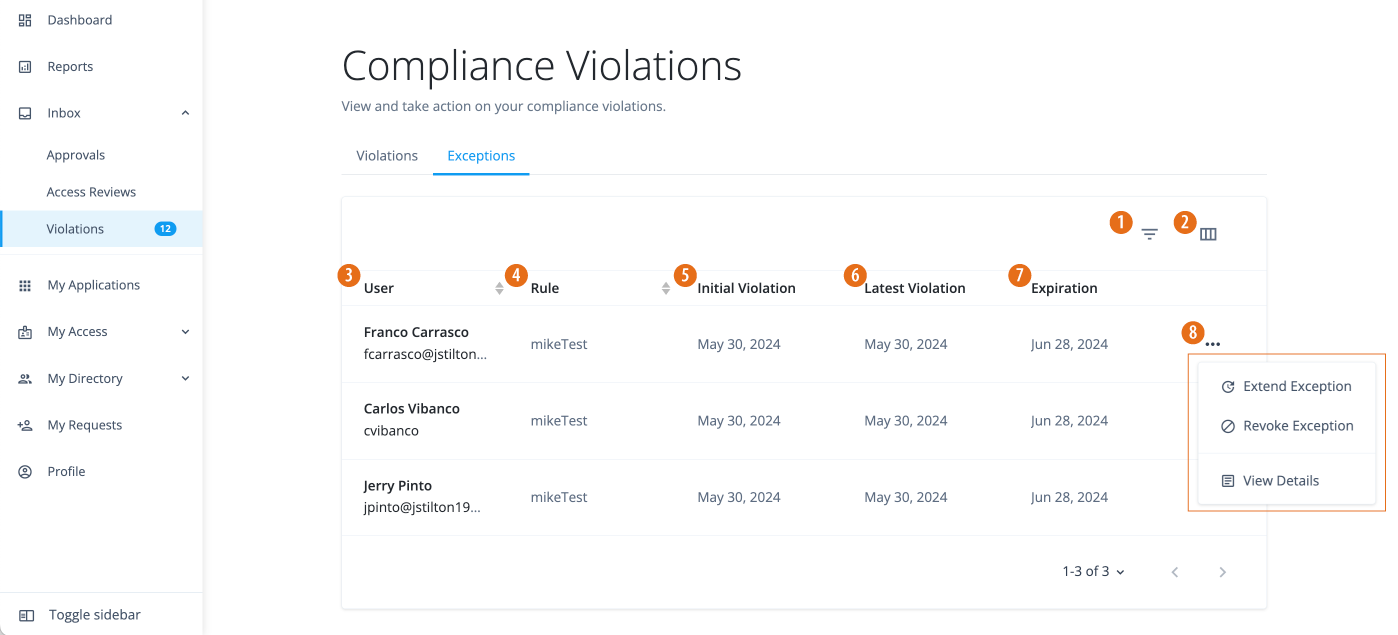
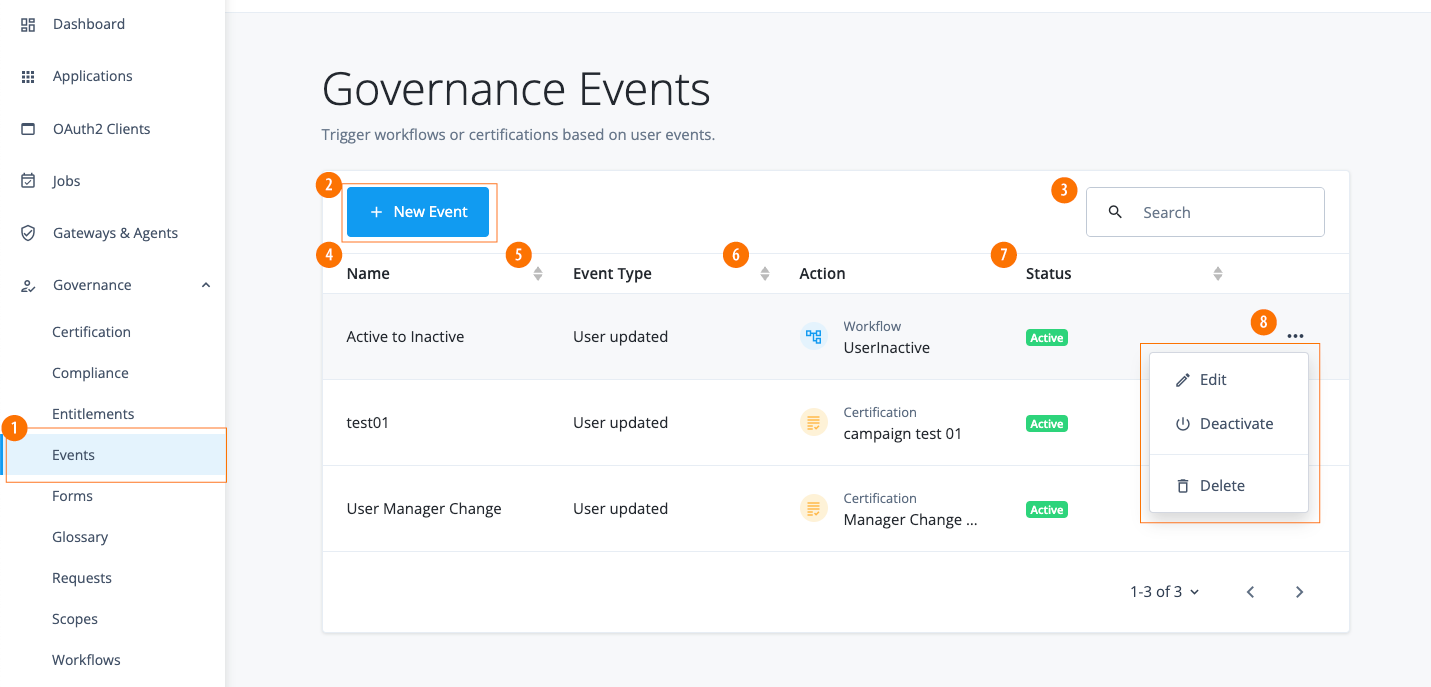
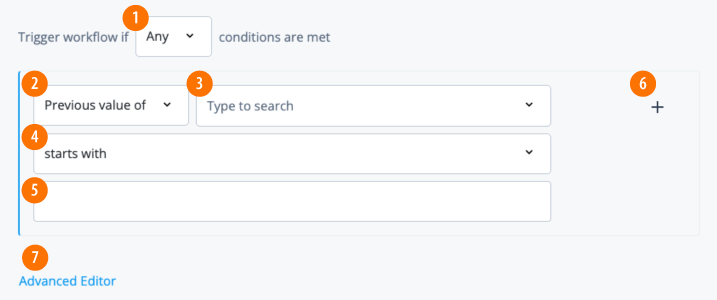
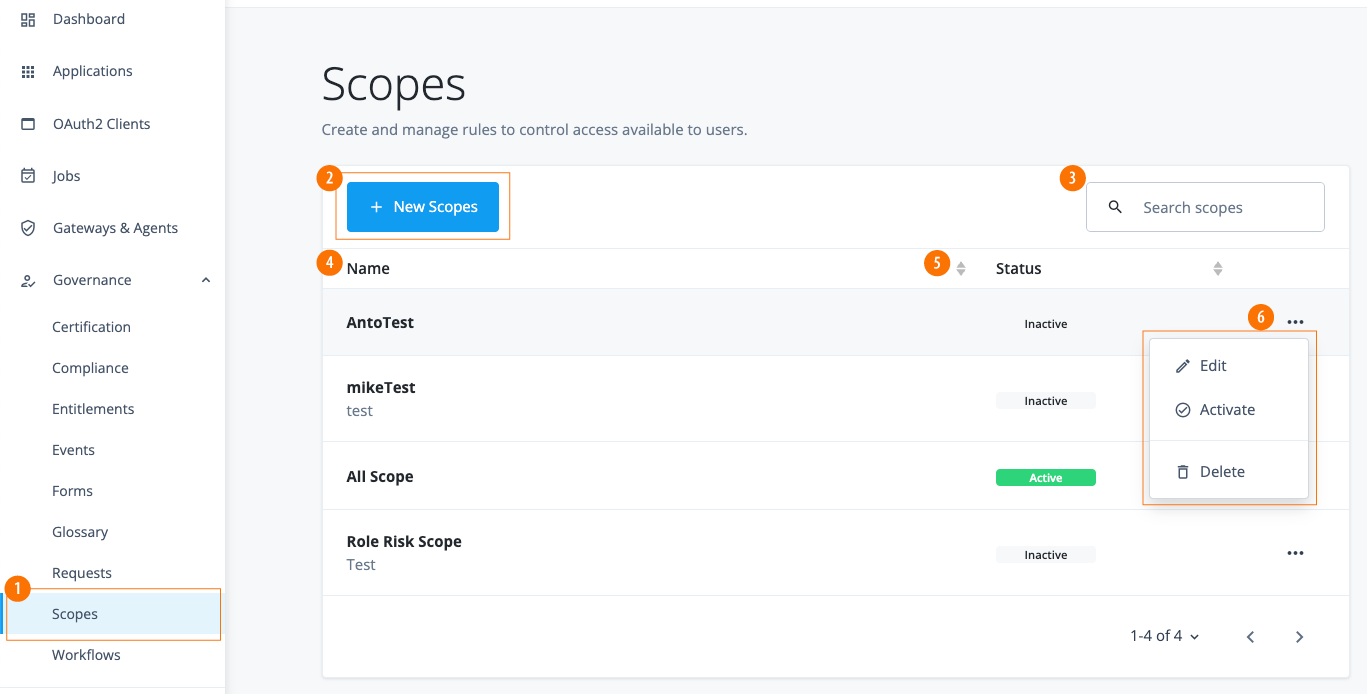
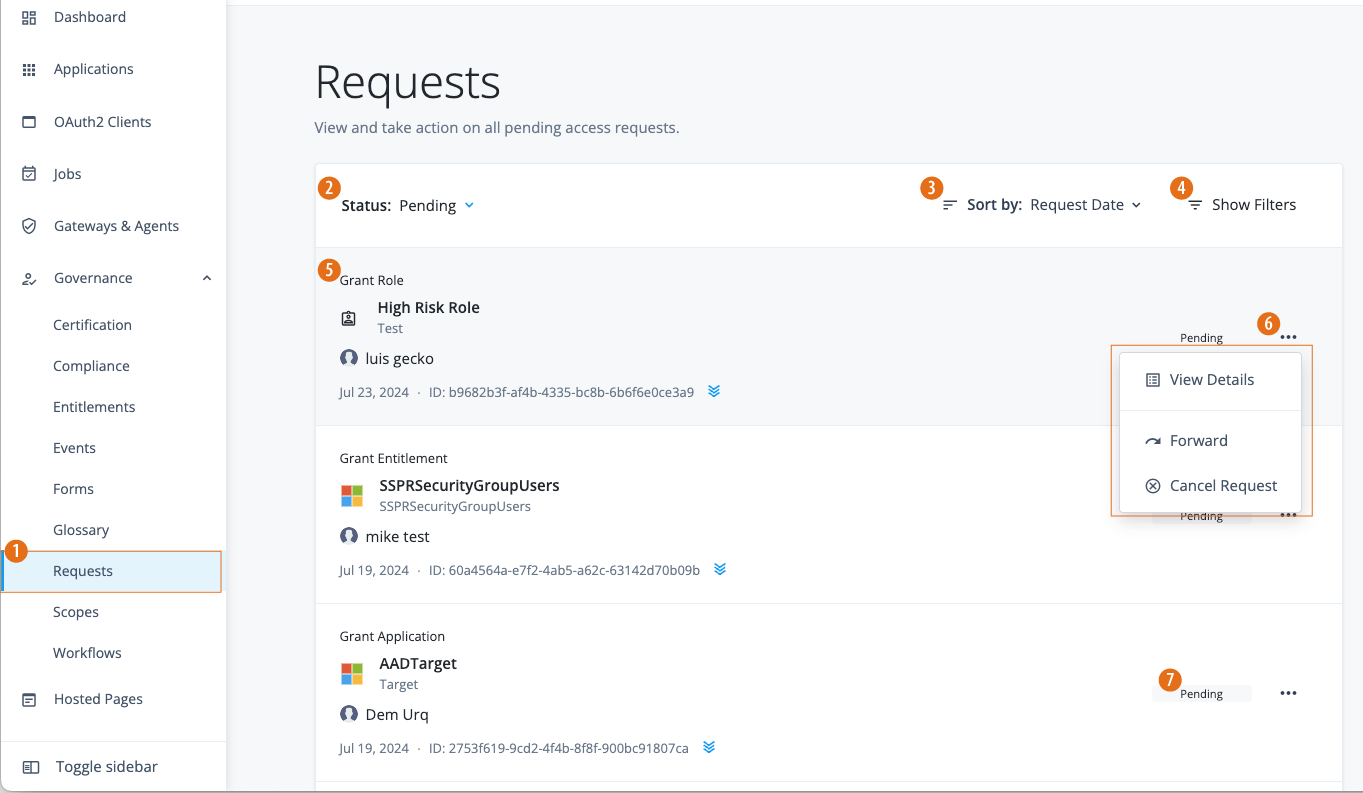
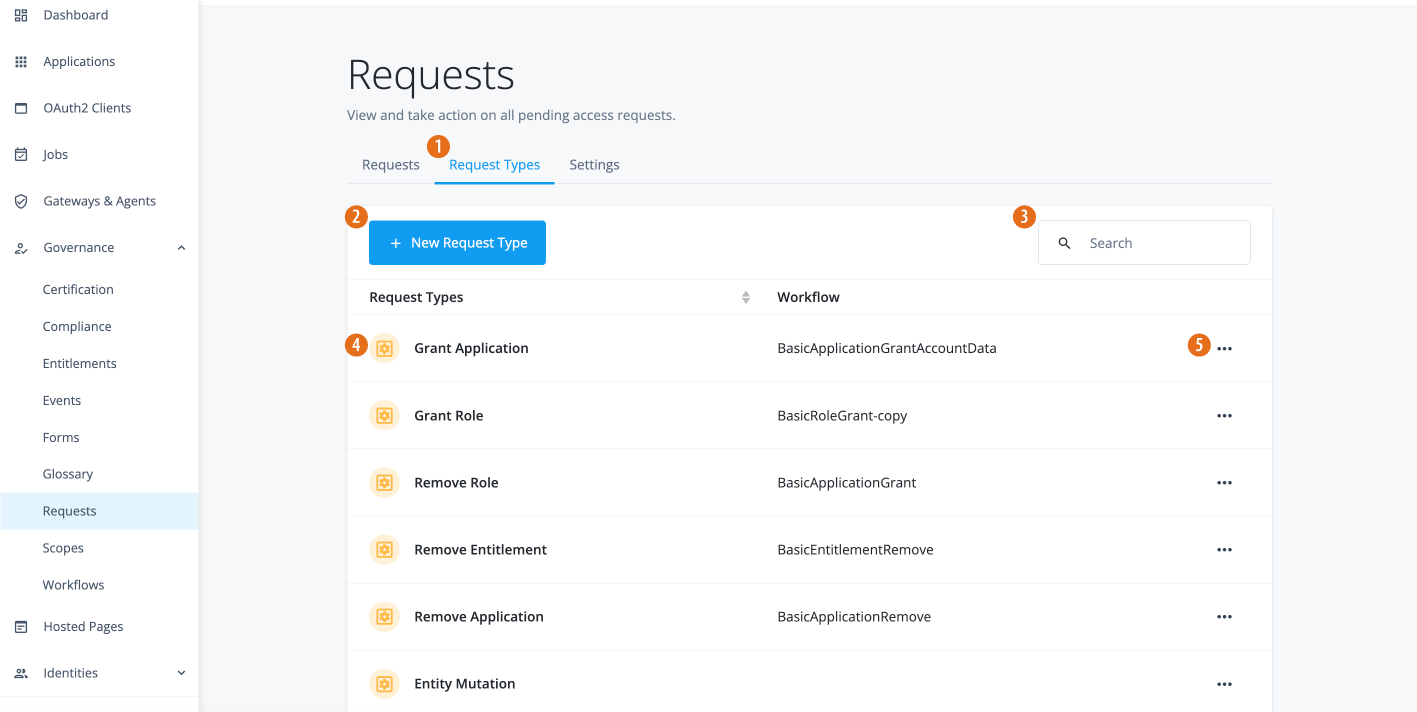
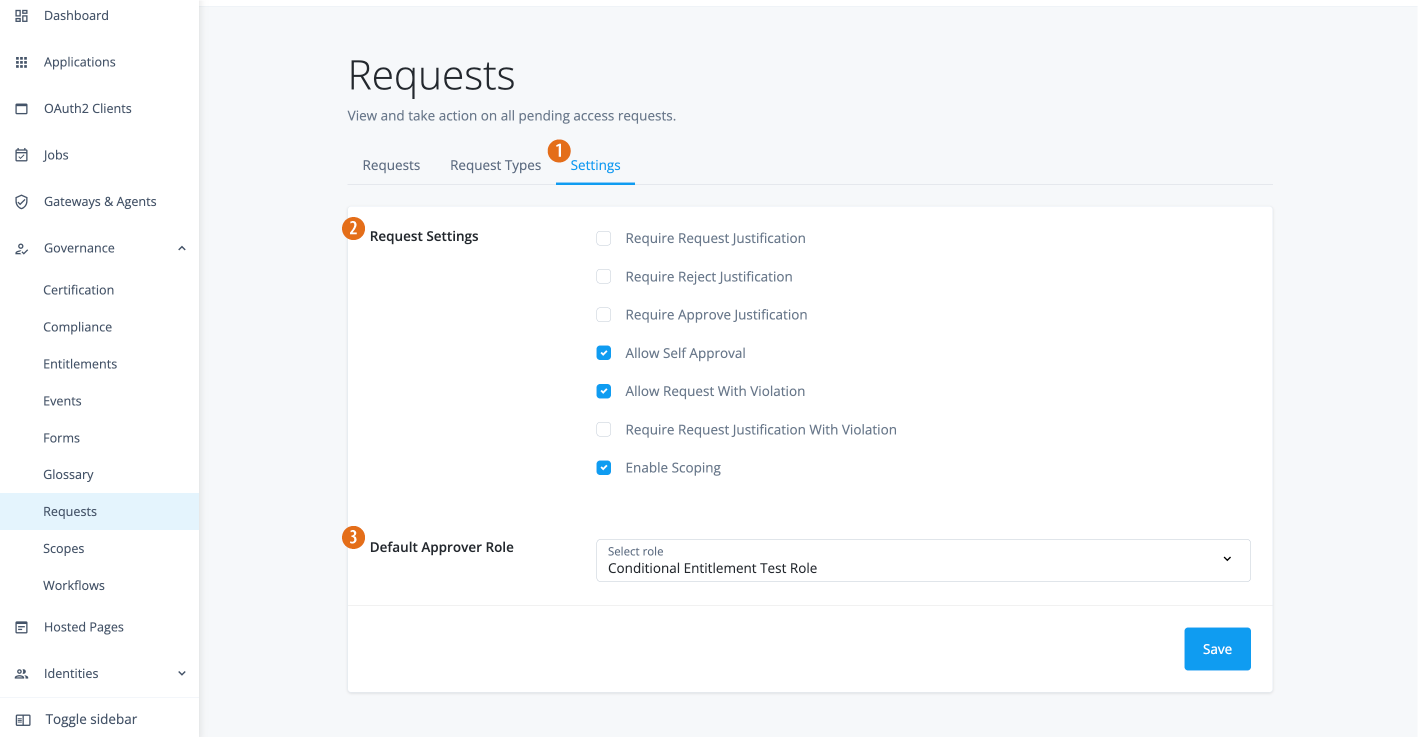

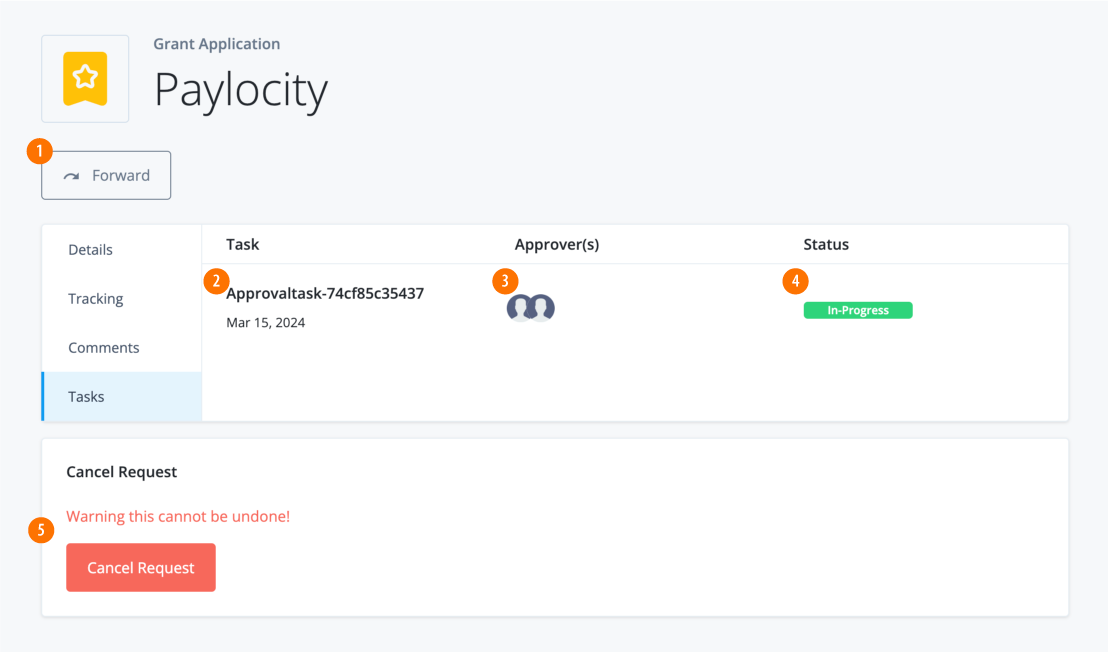
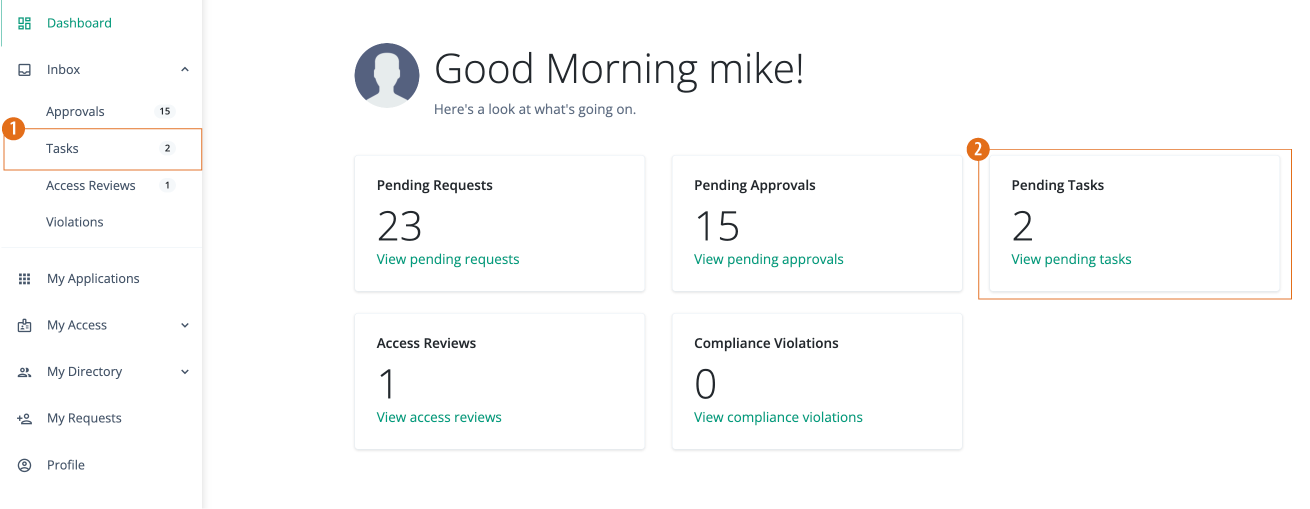
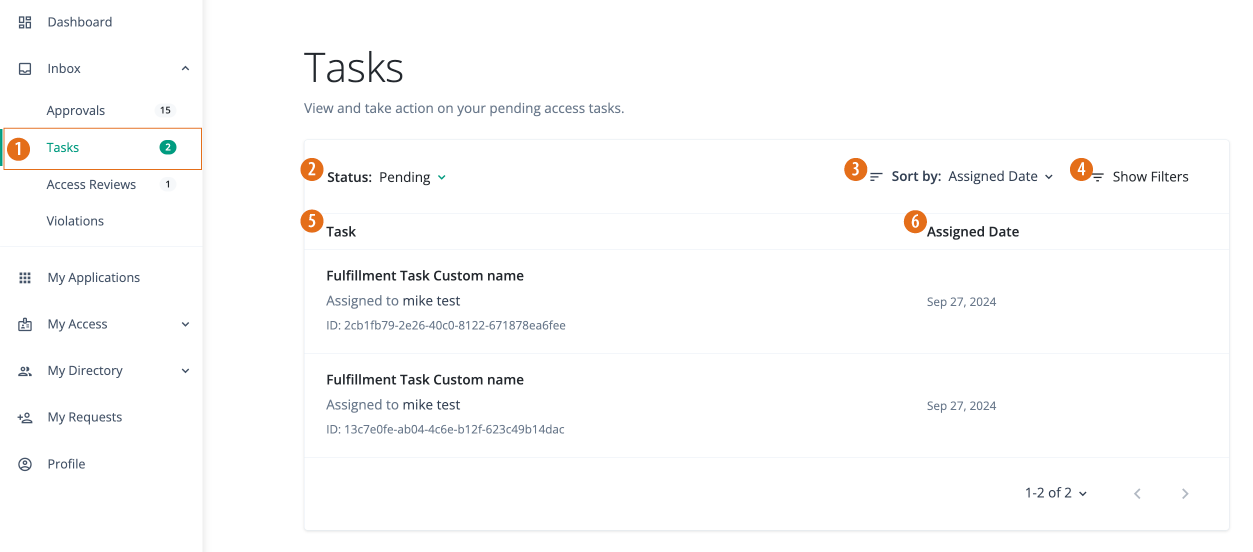
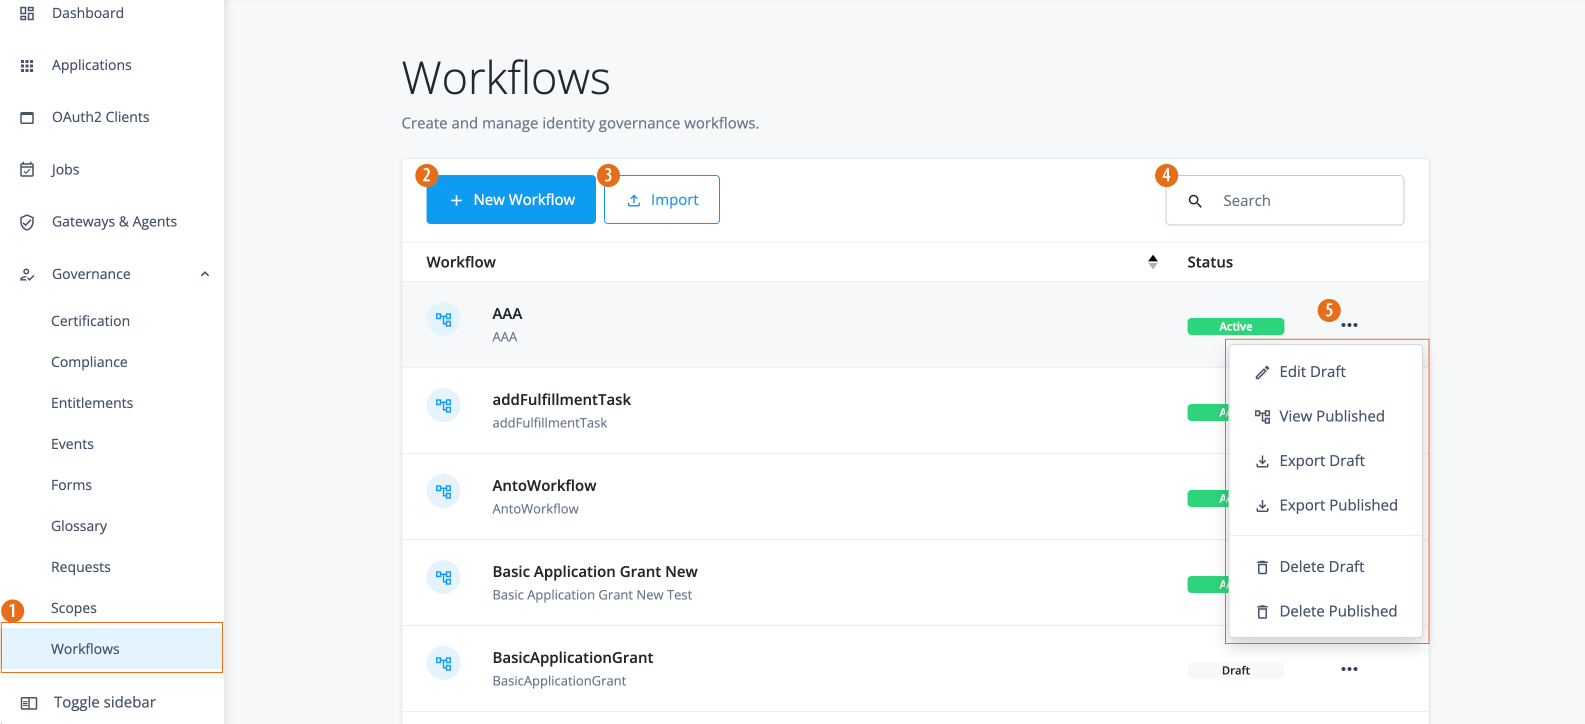
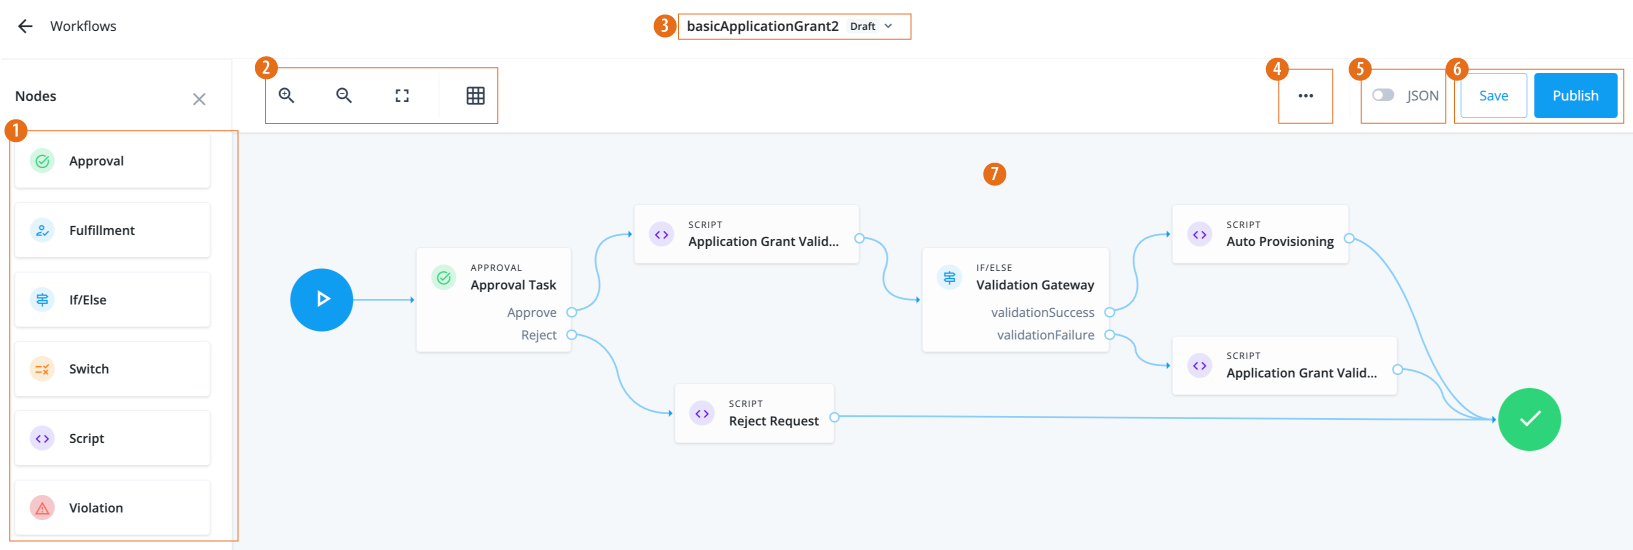
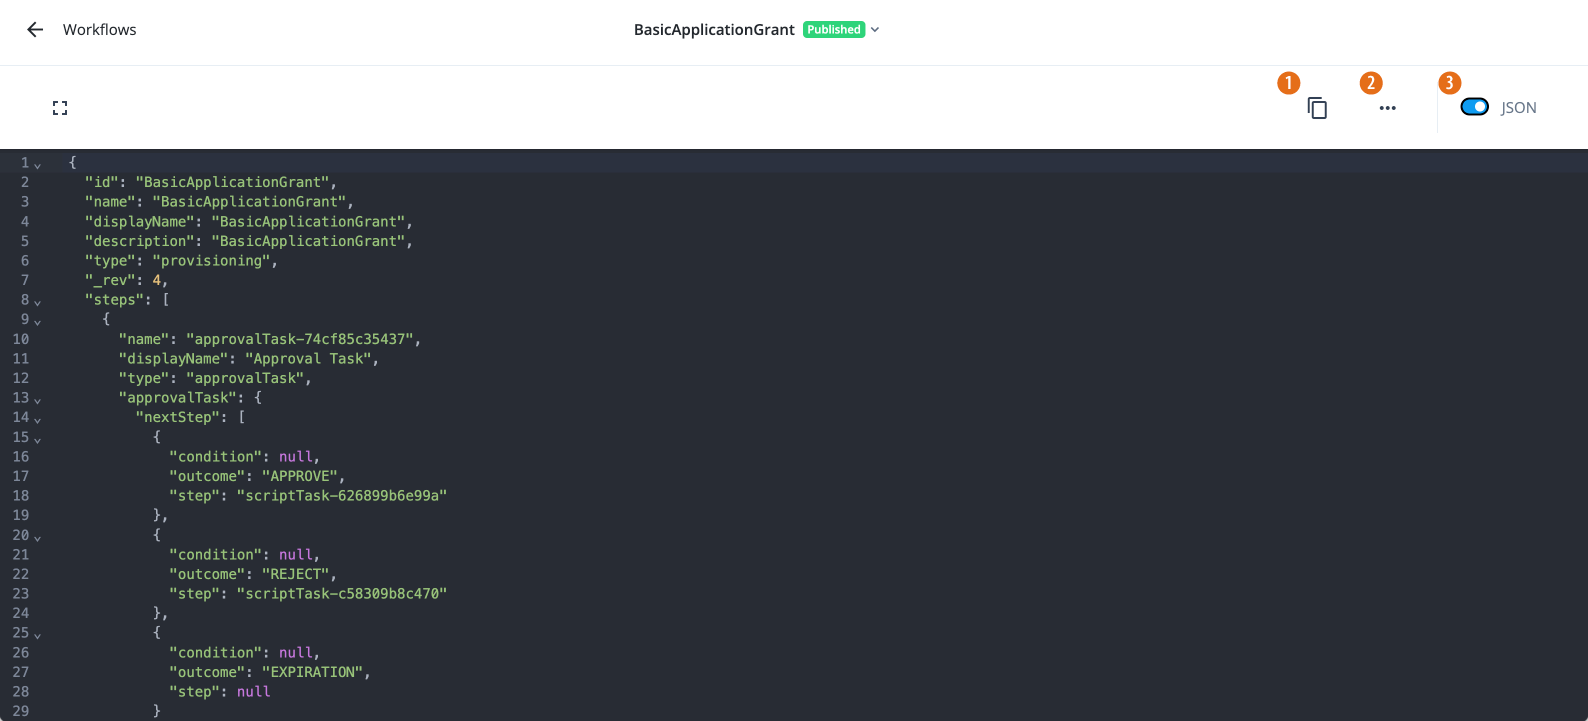


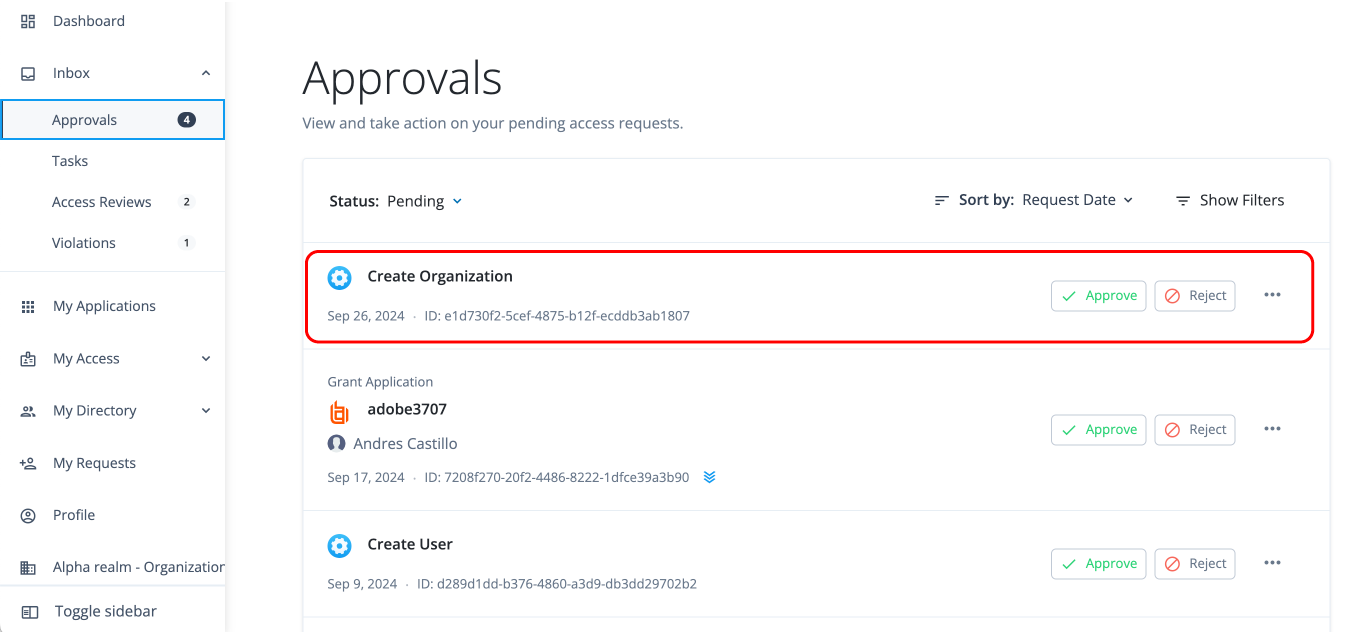

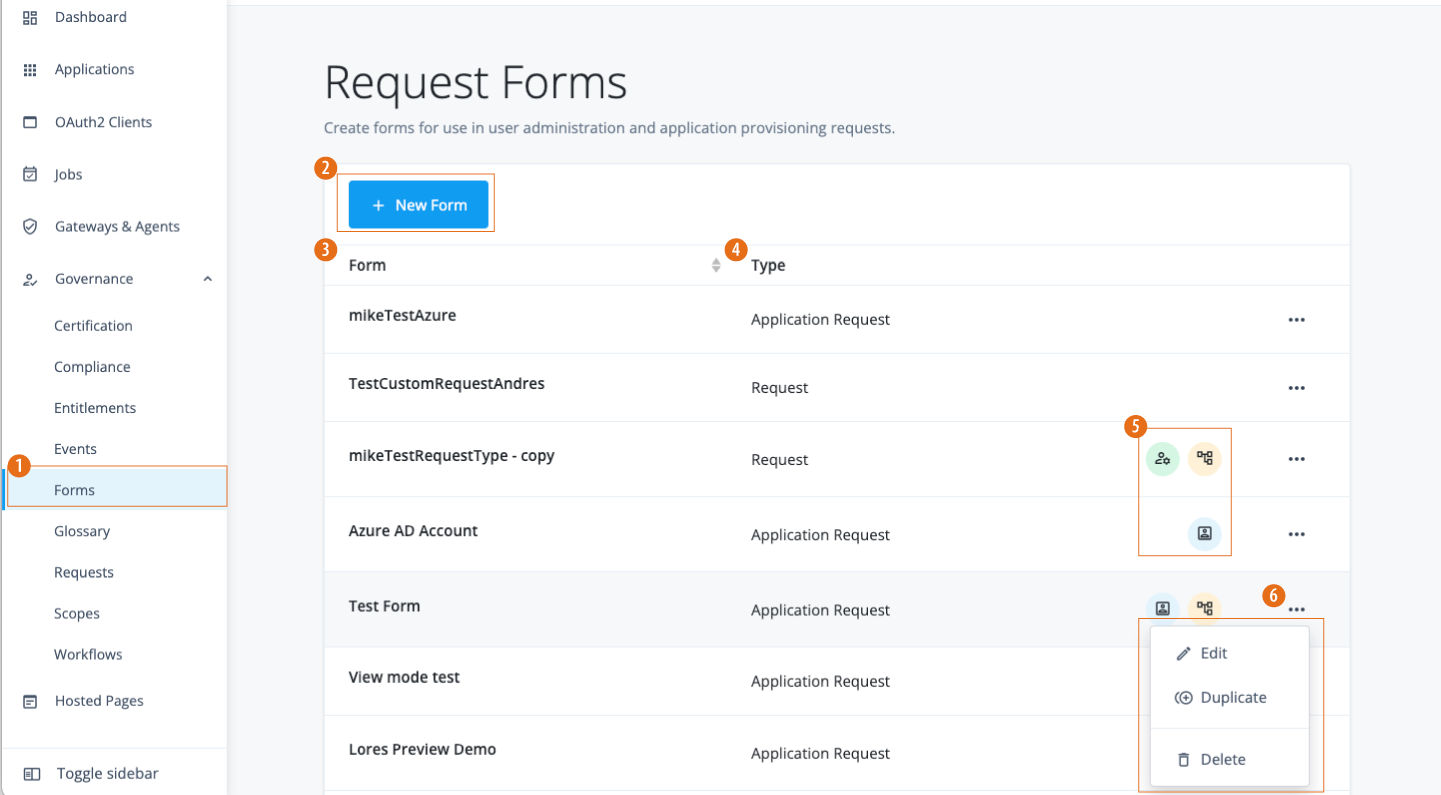
![{iga_name] Forms Editor canvas](_images/governance-forms-editor.png)