About the use case catalog
The use case catalog contains administrator-focused use cases that explain how to configure PingOne Advanced Identity Cloud and select third-party products to meet your organizational needs.
Administration
In PingOne Advanced Identity Cloud, tenant administrators can invite other tenant administrators, promote static configuration changes between environments, monitor their environments, read audit logs, or allow cross-domain service requests (CORS).
The use cases in this section focus on tenant-related administration activities.
| Use case | Description |
|---|---|
Operate as a super administrator and run tasks to view the tenant settings and invite other administrators on Advanced Identity Cloud. |
|
Examine audit logs to investigate user behavior, and you use debug logs to investigate system behavior. |
Set up administrators
Description
Estimated time to complete: 15 minutes
In this use case, you operate as a super administrator and run tasks to view the tenant settings and invite other administrators on Advanced Identity Cloud.
Goals
After completing this use case, you will know how to do the following:
-
View the tenant settings.
-
Invite other users to be administrators.
Prerequisites
Before you start work on this use case, make sure you have these prerequisites:
-
A basic understanding of:
-
The Advanced Identity Cloud admin console
-
The tenant environments
-
The support case creation process and the different priority levels.
-
-
You have received an email from Ping Identity support to set up your administrator account for your tenant environments.
-
You have registered your Advanced Identity Cloud account and set up two-step verification in all environments (development, staging, and production).
-
Access to your development environment as an administrator.
-
To test creating a test administrator, an additional email you have access to.
Tasks
Task 1: View tenant settings
-
In the Advanced Identity Cloud admin console, open the TENANT menu (upper right), and click Tenant settings. The Tenant Settings page displays.

-
Click Details to display your tenant’s information:
Field Description Tenant name
Specifies the identifier assigned to the tenant during onboarding and registration. This identifier is not configurable.
Region
Specifies the region where your data resides.
Environment tag
Describes the type of tenant environment. The possible tags are:
-
Dev: Environment used to build and add new features.
The number of identity objects in a development environment is limited to 10,000.
The 10,000 limit applies to the total sum of all identity object types combined, including applications, assignments, custom identity objects, groups, OAuth 2.0 clients, organizations, relationships, roles, SAML entities, policies, and users.
-
UAT: User acceptance testing (UAT) is a dedicated environment used for testing applications or capabilities with real users before deploying them into production. The UAT and staging environments are used often in parallel to run different usability, stress, and load tests. The UAT environment is an Advanced Identity Cloud add-on capability.
-
Staging: Environment used to test development changes, including stress and scalability tests with realistic deployment settings.
-
Prod: Environment used to deploy applications into operational end-user activity.
-
Other: Environment other than Dev, Staging, or Prod. For example, a demo tenant.
-
-
Click Global Settings to view the specific settings:
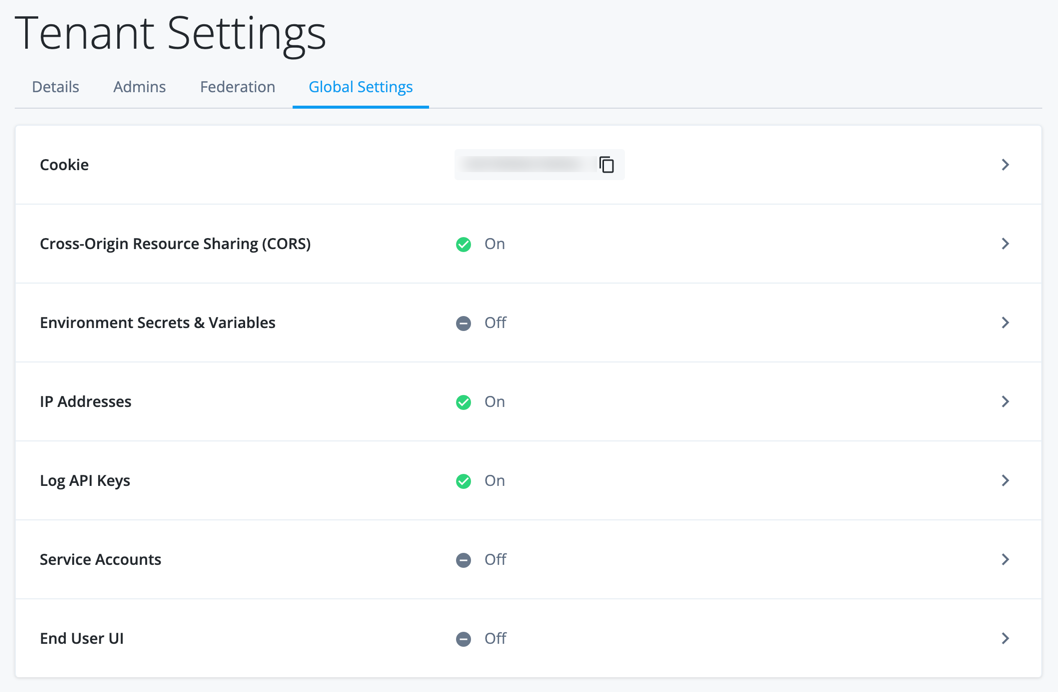
Field Description Cookie
Copy the field value to the clipboard by clicking the icon. The Advanced Identity Cloud tenant cookie is a unique, pseudo-random session cookie for the tenant, generated when your tenant is created. You use the tenant cookie in HTTP headers for Advanced Identity Cloud API requests.
Cross-Origin Resource Sharing (CORS)
View the details, add, edit, deactivate, and delete a CORS configuration. CORS provides the ability to integrate web applications in one domain and interact with protected resources in another domain. Learn more in Configure CORS.
Environment Secrets & Variables
View the secrets and variables details. Environment Secrets & Variables (ESVs) are configuration variables letting you set values different from your development, staging, and production environments in the Advanced Identity Cloud. Learn more in Introduction to ESVs.
IP Addresses
Ping Identity allocates outbound static IP addresses to each of your development, staging, and production tenant environments (and to any sandbox[1] and UAT[2] tenant environments). This lets you identify network traffic originating from Advanced Identity Cloud and from individual environments within Advanced Identity Cloud.
Log API Keys
Use the log API key and secret to authenticate and access the Advanced Identity Cloud REST API endpoints. Learn more in Authenticate to Advanced Identity Cloud REST API with API key and secret.
Service Accounts
View, create, edit, activate or deactivate, delete, and regenerate your service account keys. Service accounts let you request access tokens for REST API endpoints. Learn more in Service accounts.
End User UI
View and manage your hosted UI pages. Hosted UI pages support customizable themes for your Advanced Identity Cloud end-user UI. Learn more in Advanced Identity Cloud hosted pages.
Task 2: Invite administrators
-
In the Advanced Identity Cloud admin console, open the TENANT menu (upper right), and click Invite admins to send invitations to other users to become administrators. You are authorizing them to manage settings in your tenant.
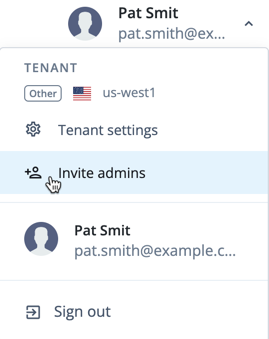
From the tenant menu, you can add other administrators by clicking Tenant settings > Admins > Invite Admins. -
In the Invite Admins dialog box, enter the test user’s email.
-
Click Tenant Admin to grant privileges to the test user. There are two types of administrator groups on Advanced Identity Cloud:
-
Super Admin: An administrator who has full access to all administrative features and can manage every aspect of this tenant, including adding other administrators. -
Tenant Admin: An administrator who has full access to all administrative features, except the ability to add other administrators.
-
-
Click Send Invitations.
Advanced Identity Cloud sends an email to the test user’s address containing instructions to register an administrator account.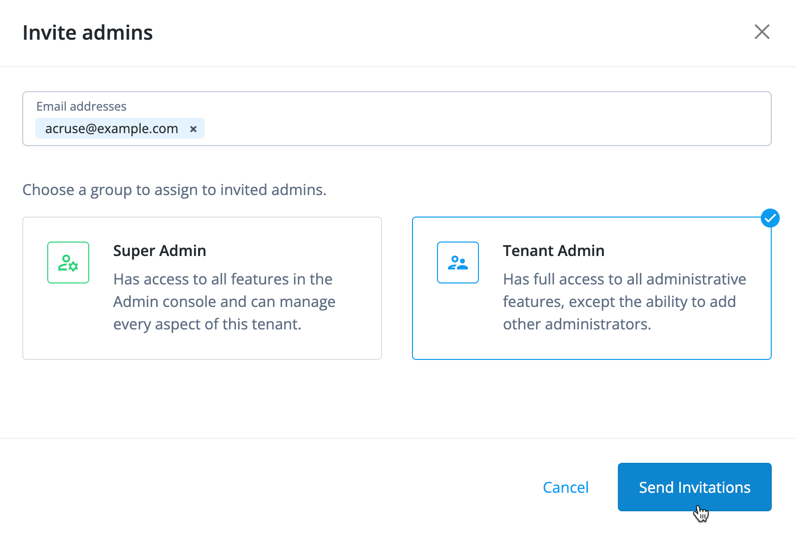
Validation
You have viewed your tenant settings and invited other users to become administrators. Now, validate adding another administrator by registering and signing on as the additional administrator.
Register test administrator
-
Access the email of the test administrator.
-
Click on the email from Advanced Identity Cloud.
-
Click Complete Registration.
-
Fill out the fields to register the test administrator.
-
Click Next.
-
Select your region of residence, agree to the privacy policy, and click Next.
-
Click Set up and register for 2-step verification. The Advanced Identity Cloud admin console displays.
-
Sign off as the test administrator and sign back on with your original administrator (super admin) account.
Manage other administrators
-
As the super admin, test deactivating, reactivating, and deleting the test administrator:
-
Click Tenant Settings.
-
Click the Admins tab to view the list of administrators.
When an invited administrator successfully registers, the status column changes from InvitedtoActive. -
Find the test admin. Click the ellipsis icon (), and then click Deactivate.
-
For the same test admin, click the ellipsis icon (), and then click Activate.
-
For the same test admin, click the ellipsis icon (), and then click Delete. Then, click Delete on the confirmation dialog. The test admin no longer displays on the list of administrators.
Read audit logs using REST
Description
Estimated time to complete: 30 minutes
In this use case, you examine audit logs to investigate user behavior, and you use debug logs to investigate system behavior.
Prerequisites
Before you start work on this use case, ensure that you have these prerequisites:
-
A basic understanding of Advanced Identity Cloud logging sources
-
Access to your Advanced Identity Cloud development environment as a tenant administrator
-
General understanding of how to run commands from the terminal window
-
The
curlcommand installed on your system
Tasks
Task 1: Create an API key and secret, and retrieve log sources
In this task, you create an API key and an API secret in the
Advanced Identity Cloud admin console; you’ll need these values to call the /logs endpoint.
Then, you call the /logs/sources endpoint to retrieve log sources.
-
Get an API key and an API secret:
-
Log in to the Advanced Identity Cloud admin console as an administrator.
-
In the Advanced Identity Cloud admin console, access the Tenant menu (upper right).
-
Select Tenant Settings.
-
Click Global Settings.
-
On the Global Settings tab, click Log API Keys.
-
Click + New Log API Key
-
Provide a name for the key.
-
Click Create key.
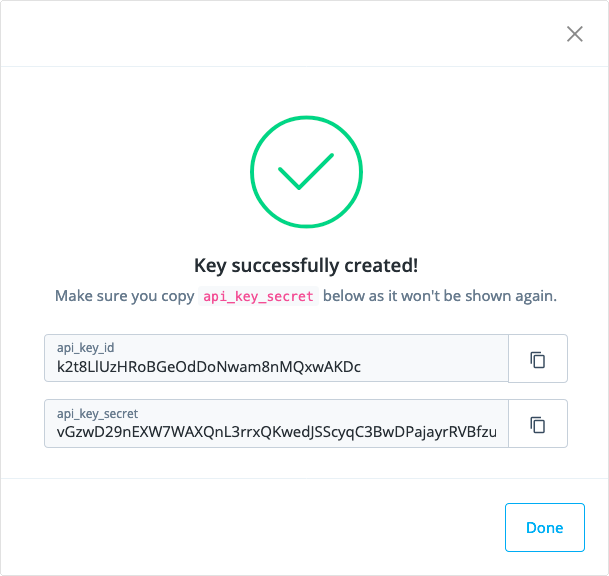
The UI displays a dialog box containing the new keys:
-
Copy the api_key_id and api_key_secret values from the dialog box and save them using a text editor. You’ll need to access these two values whenever you make an API call in this use case.
Store the values in a safe place, and do not share them with anyone else. The API key and API secret values provide access to administrative endpoints in Advanced Identity Cloud. -
After you’ve saved the api_key_id and api_key_secret values, click Done.
You won’t be able to view the api_key_secret value again after you click Done. If you didn’t save this value, you’ll need to repeat the preceding steps to create another API key and secret.
-
-
Get your tenant FQDN.
In the Advanced Identity Cloud admin console, go to Tenant Settings > Details.
Your tenant FQDN is labeled Tenant Name.
-
Advanced Identity Cloud makes browsing the logs easier by storing them in various sources. Learn more about logging sources in Sources.
List the logging sources available in Advanced Identity Cloud:
-
Open a terminal window.
-
Run a
curlcommand[3] to list the log sources.Specify variables in the
curlcommand as follows:-
<api-key> — The api_key_id value from step 1
-
<api-secret> — The api_key_secret value from step 1
-
<tenant-env-fqdn> — Your Advanced Identity Cloud tenant FQDN from step 2
$ curl --get \ --header 'x-api-key: <api-key>' \ --header 'x-api-secret: <api-secret>' \ 'https://<tenant-env-fqdn>/monitoring/logs/sources'The terminal displays output similar to this:
{"result":["am-access","am-activity","am-authentication","am-config","am-core","am-everything","idm-access","idm-activity","idm-authentication","idm-config","idm-core","idm-everything","idm-recon","idm-sync"],"resultCount":14,"pagedResultsCookie":null,"totalPagedResultsPolicy":"NONE","totalPagedResults":1,"remainingPagedResults":0} -
-
-
Rerun the
curlcommand to list the log sources, but this time, filter the command’s JSON output through thejson_ppcommand[4] to make the output easier to read:$ curl --get \ --header 'x-api-key: <api-key>' \ --header 'x-api-secret: <api-secret>' \ 'https://<tenant-env-fqdn>/monitoring/logs/sources' | json_pp { "pagedResultsCookie" : null, "remainingPagedResults" : 0, "result" : [ "am-access", "am-activity", "am-authentication", "am-config", "am-core", "am-everything", "idm-access", "idm-activity", "idm-authentication", "idm-config", "idm-core", "idm-everything", "idm-recon", "idm-sync" ], "resultCount" : 14, "totalPagedResults" : 1, "totalPagedResultsPolicy" : "NONE" }
Task 2: Get logs
In this task, you retrieve all available log entries from a log source by
calling the logs endpoint. Then you retrieve the tail end of a log source
by calling the logs/tail endpoint.
-
Run a
curlcommand to retrieve theam-authenticationlog source.Specify variables in the
curlcommand as follows:-
<api-key> — The api_key_id value you got in Task 1
-
<api-secret> — The api_key_secret value you got in Task 1
-
<tenant-env-fqdn> — Your Advanced Identity Cloud tenant FQDN
$ curl --get \ --header 'x-api-key: <api-key>' \ --header 'x-api-secret: <api-secret>' \ --data 'source=am-authentication' \ 'https://<tenant-env-fqdn>/monitoring/logs'The
curlcommand displays all available log entries in theam-authenticationlog source. A query like this one, which usually displays a large amount of log data, is not particularly useful as it is difficult to work with the output without a log analysis tool. -
-
Retrieve the
am-authenticationlog source using thelogs/tailendpoint.Run a similar
curlcall, but instead of calling thelogsendpoint, call thelogs/tailendpoint and filter the output through thejson_ppcommand:$ curl --get \ --header 'x-api-key: <api-key>' \ --header 'x-api-secret: <api-secret>' \ --data 'source=am-authentication' \ 'https://<tenant-env-fqdn>/monitoring/logs/tail' | json_ppA smaller amount of output displays. Your call may not return any log entries at all if there hasn’t been any recent authentication activity.
When you call the
/logs/tailendpoint without specifying any parameters other than the log source, the call returns log entries from the last 15 seconds of Advanced Identity Cloud activity.If the call to the
/logs/tailendpoint didn’t return any log entries, log in to the Advanced Identity Cloud admin console, wait a few seconds for Advanced Identity Cloud to write log entries, and call the/logs/tailendpoint again; several log entries should display. -
Call the
logs/tailendpoint repeatedly to see changes to a log source since the last time you called the endpoint.When you specify the
_pagedResultsCookieparameter when calling thelogs/tailendpoint, it returns only the changes that have been made to the log source since the last time you called the endpoint.In this step, you’ll use the
am-everythinglog source; more entries are written to this log source than to theam-authenticationlog source:-
Retrieve the
am-everythinglog source using thelogs/tailendpoint:$ curl --get \ --header 'x-api-key: <api-key>' \ --header 'x-api-secret: <api-secret>' \ --data 'source=am-everything' \ 'https://<tenant-env-fqdn>/monitoring/logs/tail' | json_pp -
Review the start of the output from the call to the
logs/tailendpoint. You’ll see a value for thepagedResultsCookiekey:"pagedResultsCookie" : "eyJfc29ydEtleXM...", "remainingPagedResults" : -1, "result" : [], "resultCount" : 0, "totalPagedResults" : -1, "totalPagedResultsPolicy" : "NONE" } -
Save the
pagedResultsCookiekey’s value using a text editor. You’ll need this value for subsequent calls to the/logs/tailendpoint. -
Retrieve the
am-everythinglog source again using thelogs/tailendpoint. This time, specify the_pagedResultsCookieparameter in yourcurlcall so that only the log entries written to the log source since your previous call to the/logs/tailendpoint are displayed:$ curl --get \ --header 'x-api-key: <api-key>' \ --header 'x-api-secret: <api-secret>' \ --data 'source=am-everything' \ --data '_pagedResultsCookie=<paged-results-cookie>' \ 'https://<tenant-env-fqdn>/monitoring/logs/tail' | json_pp -
Run the same
curlcommand several times to see the log entries written to theam-everythinglog source since the call from which you saved thepagedResultsCookievalue.Additional log entries should be displayed for each call, but the output depends on the level of activity in your Advanced Identity Cloud tenant.
-
Task 3: Filter log results
In this task, you’ll filter log data using the _queryFilter parameter so that
you get a limited amount of log entries from queries. You’ll run a variety of
queries to gain experience with filtering.
-
To formulate query filters, you first need to understand the structure of a log query result so that you can construct a query filter expression:
-
Run the same query to retrieve the
am-authenticationlog source you ran in Task 2:$ curl --get \ --header 'x-api-key: <api-key>' \ --header 'x-api-secret: <api-secret>' \ --data 'source=am-authentication' \ 'https://<tenant-env-fqdn>/monitoring/logs' | json_ppIf you don’t get any results from your query, log in to the Advanced Identity Cloud admin console, wait a few seconds for Advanced Identity Cloud to write log entries, and then rerun your
curlcall. You should get results after doing this. -
Examine the value of one of the
payloadkeys thecurlcommand returned. The JSON output should be similar to if not exactly the same as the following; different types of log entries have different JSON objects:{ "payload" : { "_id" : "d6741f27-47b2-4047-8c61-09fe846b7d93-70338", "component" : "Authentication", "entries" : [ { "info" : { "authLevel" : "0", "displayName" : "MFA Required?", "nodeId" : "6ed9e2ac-bc5a-49b0-ac81-3e33c4ccfa1d", "nodeOutcome" : "Optional", "nodeType" : "ScriptedDecisionNode", "treeName" : "FRSecondFactor" } } ], "eventName" : "AM-NODE-LOGIN-COMPLETED", "level" : "INFO", "principal" : [ "pat@example.com" ], "realm" : "/", "source" : "audit", "timestamp" : "2023-09-11T18:16:33.923Z", "topic" : "authentication", "trackingIds" : [ "d6741f27-47b2-4047-8c61-09fe846b7d93-70286" ], "transactionId" : "4cbed6e6-6b10-4a06-b978-b95d25b7c254-request-2/0" }, "source" : "am-authentication", "timestamp" : "2023-09-11T18:16:33.92361169Z", "type" : "application/json" }You specify JSON keys in log query filter expressions, using a syntax where objects in the JSON hierarchy are separated by forward slashes. In the example JSON output above:
-
The
payloadobject has a nested object namedeventName; a query filter to retrieve log entries for a specific log event would compare/payload/eventNameto the log event name. -
The
payloadobject has a nested object namedprincipal; a query filter to retrieve log entries for a specific user (also known as a principal) would compare/payload/principalto the user’s name.
Learn more about query filter syntax in Filter expressions.
For examples of query filters, refer to the table in Filter log results.
-
-
-
Run a
curlcommand to retrieve log entries for your authentication activity.Specify variables in the
curlcommand as follows:-
<api-key> — The api_key_id value you got in Task 1
-
<api-secret> — The api_key_secret value you got in Task 1
-
<your-user-id> — The user ID you use to log into Advanced Identity Cloud
-
<tenant-env-fqdn> — Your Advanced Identity Cloud tenant FQDN
$ curl --get \ --header 'x-api-key: <api-key>' \ --header 'x-api-secret: <api-secret>' \ --data 'source=am-authentication' \ --data-urlencode '_queryFilter=/payload/principal eq "<your-user-id>"' \ 'https://<tenant-env-fqdn>/monitoring/logs'If you don’t get any results from your query, log in to the Advanced Identity Cloud admin console, wait a few seconds for Advanced Identity Cloud to write log entries, and then rerun your
curlcall. You should get results after doing this. -
-
Run a
curlcommand to retrieve log entries that indicate you have completed an authentication journey.Specify variables in the
curlcommand as follows:-
<api-key> — The api_key_id value you got in Task 1
-
<api-secret> — The api_key_secret value you got in Task 1
-
<your-user-id> — The user ID you use to log into Advanced Identity Cloud
-
<tenant-env-fqdn> — Your Advanced Identity Cloud tenant FQDN
$ curl --get \ --header 'x-api-key: <api-key>' \ --header 'x-api-secret: <api-secret>' \ --data 'source=am-authentication' \ --data-urlencode '_queryFilter=/payload/principal eq "<your-user-id>" and /payload/eventName eq "AM-TREE-LOGIN-COMPLETED"' \ 'https://<tenant-env-fqdn>/monitoring/logs'If you don’t get any results from your query, log in to the Advanced Identity Cloud admin console, wait a few seconds for Advanced Identity Cloud to write log entries, and then rerun your
curlcall. You should get results after doing this. -
Validation
Now that you’ve had some practice writing API calls to retrieve log entries, you’re ready to validate your skills by retrieving all the log entries for a request to Advanced Identity Cloud.
All log events for an external request to Advanced Identity Cloud, such as authentication, are assigned the same unique transaction ID. Reviewing multiple log entries that a single request generates can be valuable when troubleshooting system behavior.
Steps
In this validation, demonstrate the ability to get a set of log entries for an external request to Advanced Identity Cloud. First, authenticate to the Advanced Identity Cloud admin console. Then, call the log API to obtain the transaction ID. Finally, run filtered queries to retrieve all the log entries for your authentication.
-
Log in to the Advanced Identity Cloud admin console.
-
Run a
curlcommand to retrieve log entries from theam-authenticationlog source. -
Find one of the log entries for your authentication attempt in the
curlcommand output. -
Find the transaction ID in this log record. The key-value pair to locate is similar to this example:
"transactionId" : "4cbed6e6-6b10-4a06-b978-b95d25b7c254-request-2/0" -
Run another
curlcommand to retrieve all the log entries for your transaction from theam-authenticationlog source.You should retrieve multiple log entries.
Tips:
-
If you use the
logs/tailendpoint, you may not get any log entries back. Remember, thelogs/tailendpoint retrieves log entries from the only last 15 seconds of Advanced Identity Cloud activity. -
When constructing your
curlcommand, use/payload/transactionIdas the JSON key for your query filter.
-
-
Run another
curlcommand to retrieve all the log entries for your transaction from all the log sources.Tips:
-
Use the
am-everythinglog source in yourcurlcommand. -
Expect a large number of log entries to be returned in the command output.
-
Explore further
Reference material
| Reference | Learning Asset | Description |
|---|---|---|
Getting started with the ForgeRock Identity Cloud REST API: Part 8 - Auditing and monitoring |
Community |
Examples of running Advanced Identity Cloud auditing and monitoring requests using both
Postman and |
Knowledge base |
Steps for installing, configuring, and using the community-supported PingOne Advanced Identity Cloud app for Splunk, which is available on Splunkbase. |
Authentication
Authentication is the act of confirming a user’s identity, for example, by providing a set of credentials.
In PingOne Advanced Identity Cloud, you primarily use journeys to create your authentication flows; However, you can also set up an external application to act as an identity provider.
Since there are many ways to implement authentication based on your needs, use cases vary and can include:
| Item | Description |
|---|---|
Single sign-on (SSO) |
SSO lets authenticated users access multiple independent services from a single login session by storing user sessions as HTTP cookies. You can configure Advanced Identity Cloud to let users use SSO with other applications, or let users of other applications use SSO with Advanced Identity Cloud. This includes creating applications to use popular federation protocols such as SAML and OAuth 2.0/OIDC. |
Multi-factor authentication (MFA) |
MFA is an authentication technique that requires users to provide multiple forms of identification when authenticating. MFA provides a more secure method for users to access their accounts with the help of a device. |
Pass-through authentication (PTA) |
PTA lets you validate passwords with a remote service. This allows you to retain a remote service for authentication or to migrate passwords to Advanced Identity Cloud as part of authentication (just-in-time synchronization). |
The use cases in this section focus on authentication:
| Use case | Description |
|---|---|
Authenticate a user with MFA by setting up the ForgeRock Authenticator application for push notification on a smartphone. |
|
Configure SSO using SAML federated identities with Advanced Identity Cloud as the Identity provider (IDP) and Salesforce as the Service provider (SP). Specifically, you configure Advanced Identity Cloud as the IDP for Salesforce using SAML. |
|
Configure Advanced Identity Cloud to be a relying party (RP), or client, with Microsoft Entra ID (formerly known as Azure AD) as the OpenID provider (IDP). You also create a journey that lets end users log in to Advanced Identity Cloud optionally using Microsoft Entra ID. |
|
Configure Okta to be the RP with Advanced Identity Cloud as the IDP. |
|
Enable pass-through authentication (PTA) to Microsoft Entra ID and let Advanced Identity Cloud capture the Microsoft Entra ID password for future logins. |
Login with MFA using push notifications
Description
Estimated time to complete: 30 minutes
In this use case, you authenticate a user with MFA by setting up the ForgeRock Authenticator application for push notification on a smartphone.
Goals
After completing this use case, you will know how to do the following:
-
Set configurations in the AM admin console, such as configuring a service in Advanced Identity Cloud for push notifications.
-
Capture and validate a username and password.
-
Configure and register an end user’s device with their user profile in Advanced Identity Cloud.
-
Create a journey to enforce MFA at log in.
-
Provide recovery codes to end users if they lose their device.
Prerequisites
Before you start work on this use case, ensure you have these prerequisites:
-
A basic understanding of these Advanced Identity Cloud concepts:
-
Realms
-
The AM admin console
-
Journeys
-
Nodes
-
The Advanced Identity Cloud end-user UI
-
-
Access to your development environment as an administrator
-
An identity in Advanced Identity Cloud to test the journey (you may need to create this)
-
An Android or iOS smartphone with access to the internet
-
A Backstage account
Tasks
Task 1: Log in and configure the ForgeRock Authenticator Push service
-
Log in to the Advanced Identity Cloud admin console as an administrator.
-
In the left menu pane, select Native Consoles > Access Management.
The realm overview for the Alpha realm displays.
-
Select Services.
-
Click + Add a Service.
-
Create the push service configuration:
-
Select ForgeRock Authenticator (Push) Service in the service type drop-down list.
-
Click Create.
-
Click Save Changes to accept the default settings.
The default settings don’t encrypt the device metadata stored in user profiles. This use case accepts the default settings for simplicity. Learn more in Configure the ForgeRock Authenticator (Push) service.
-
Task 2: Create Push service credentials in Backstage
Advanced Identity Cloud uses an external AWS service to send push notifications. Its configuration requires access keys and other metadata. As a Ping Identity customer, you have streamlined access to the required metadata:
-
In a new tab, log in to Backstage.
-
In the top right corner, click your profile icon > Profile.
-
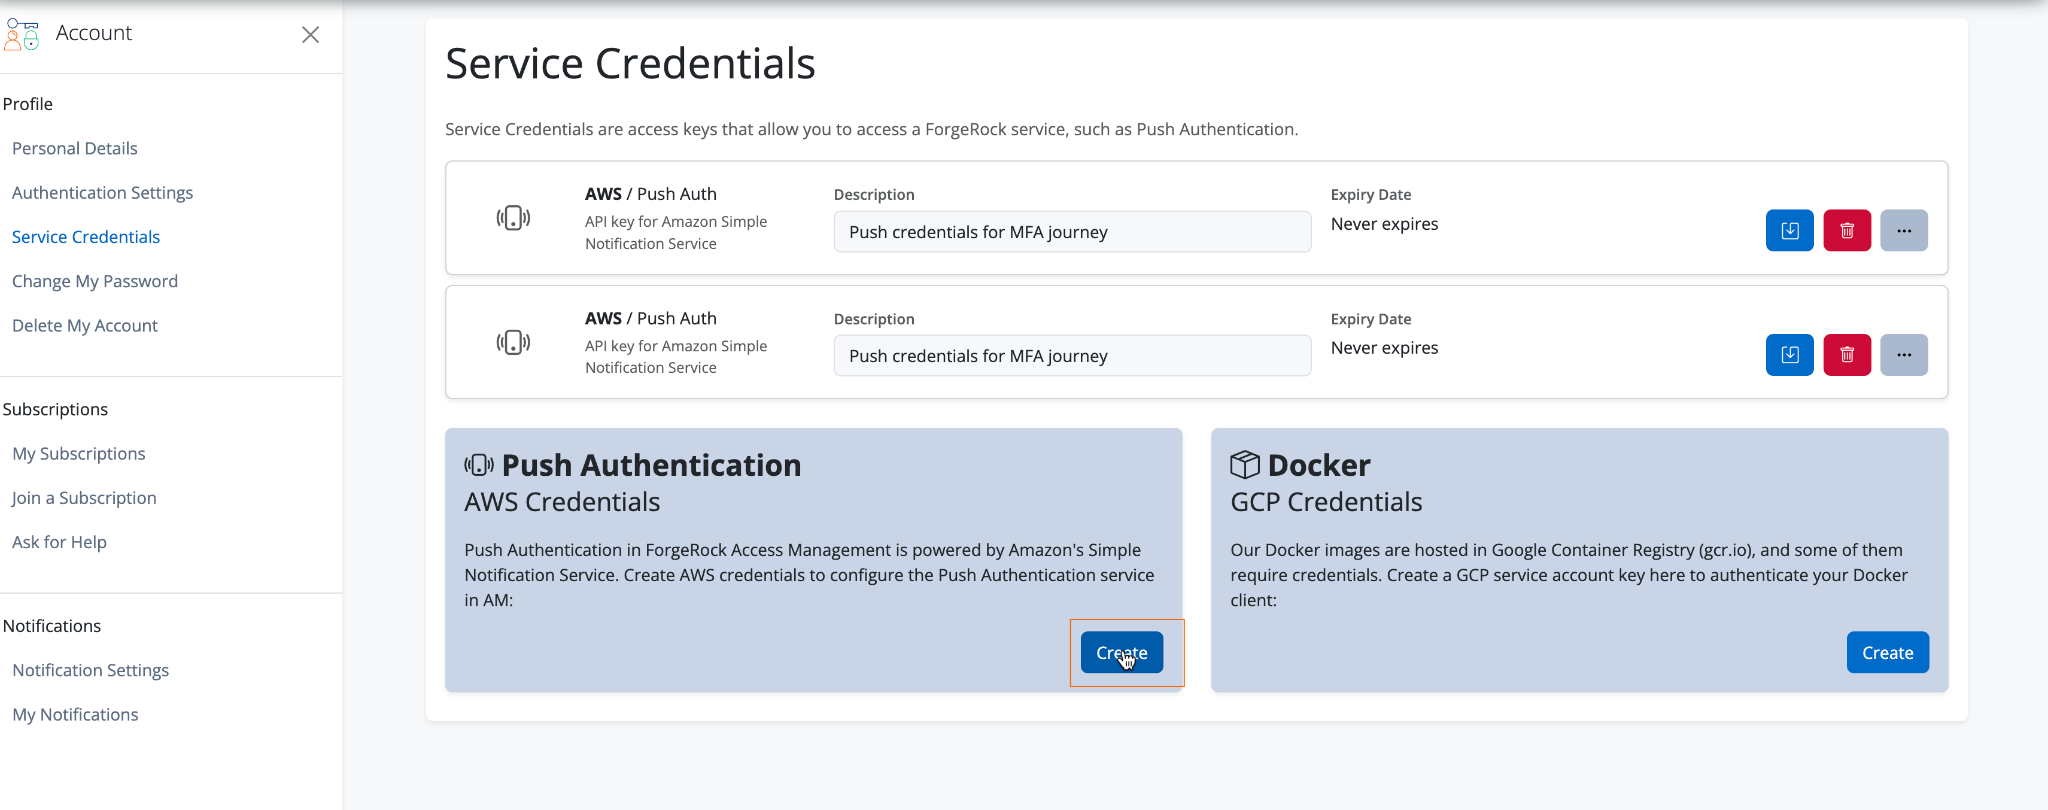
From the left mxenu pane, select Service Credentials.
-
Under Push Notifications AWS Credentials, click Create.
-
In the Description field, enter
Push credentials for MFA journey. -
Click Create.
-
Click Download as JSON.
-
Click Close.
-
Close the Backstage tab.
Task 3: Configure the Push Notification service in the AM admin console
-
Click back to the tab that displays the AM admin console.
-
Select Services.
-
Click + Add a Service.
-
To configure the Push Notification service, select Push Notification Service in the service type drop-down list.
-
Open the JSON file you downloaded in step 7.
-
Enter the fields from the JSON file into the fields that display:
Don’t enter the quotes that surround the JSON value. Field in AM admin console Field in JSON file Description SNS Access Key ID
accessKeyId
The generated Key ID; the
"accessKeyId"in the JSON.SNS Access Key Secret
accessKeySecret
The generated Secret; the
"accessKeySecret"in the JSON.SNS Endpoint for APNS
APNS
The generated APNS; the
"APNS"in the JSON. Used to send push notifications to the Apple Push Notification Service (APNS).SNS Endpoint for GCM
GCM
The generated GCM; the
"GCM"in the JSON. Used to send push notifications to Android devices using Google Cloud Messaging (GCM). -
Click Create.
-
Click Save Changes.
-
Close the AM admin console tab.
-
Click back to the Advanced Identity Cloud admin console tab.
Task 4: Create the MFA using push notifications journey
Configure journey options
-
In the Advanced Identity Cloud admin console, click Journeys. All existing Advanced Identity Cloud journeys display.
-
Click + New Journey.
-
Configure options for the new journey:
Field Value Description Name
Enter
Login with Push MFAA name to display in the journeys list.
Identity Object
Select
Alpha Realm - UsersThe type of object that this journey authenticates.
Description
Enter
A login journey with MFA using push notifications. This is for the
implementation guide.
Description of the journey.
Override theme
Do not enable
Lets you provide a unique UI for this journey.
Default journey for end users
Do not enable
Lets you designate this journey as the default journey for your Advanced Identity Cloud environment.
Tags
Enter
Implementation GuideKeywords for organizing the journeys list.
-
Click Save. The journey editor displays.
To save your progress, periodically click Save in the top right of the journey editor. Failure to do this results in losing your work if the page reloads or if you lose your network connection. 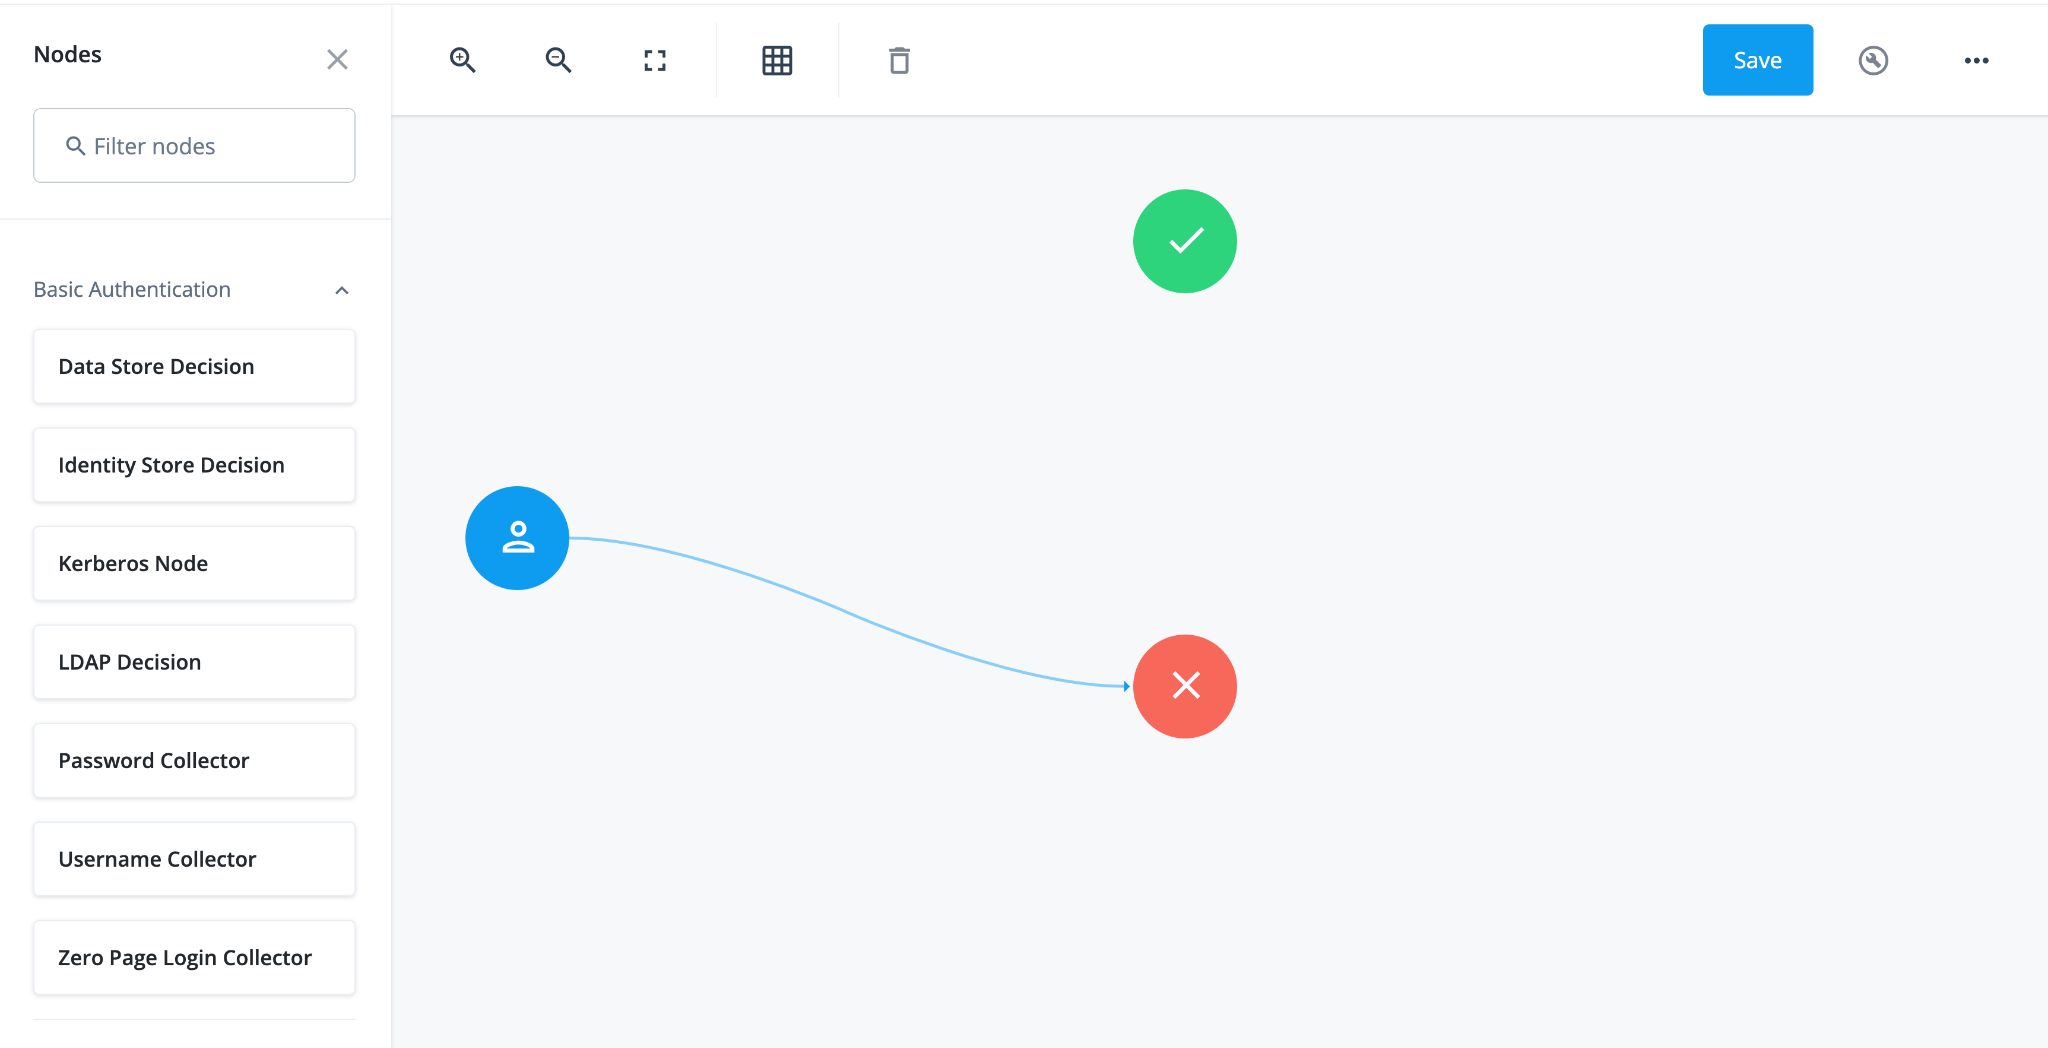
Collect username, password, and validate login on one page
-
In the top left search bar, enter
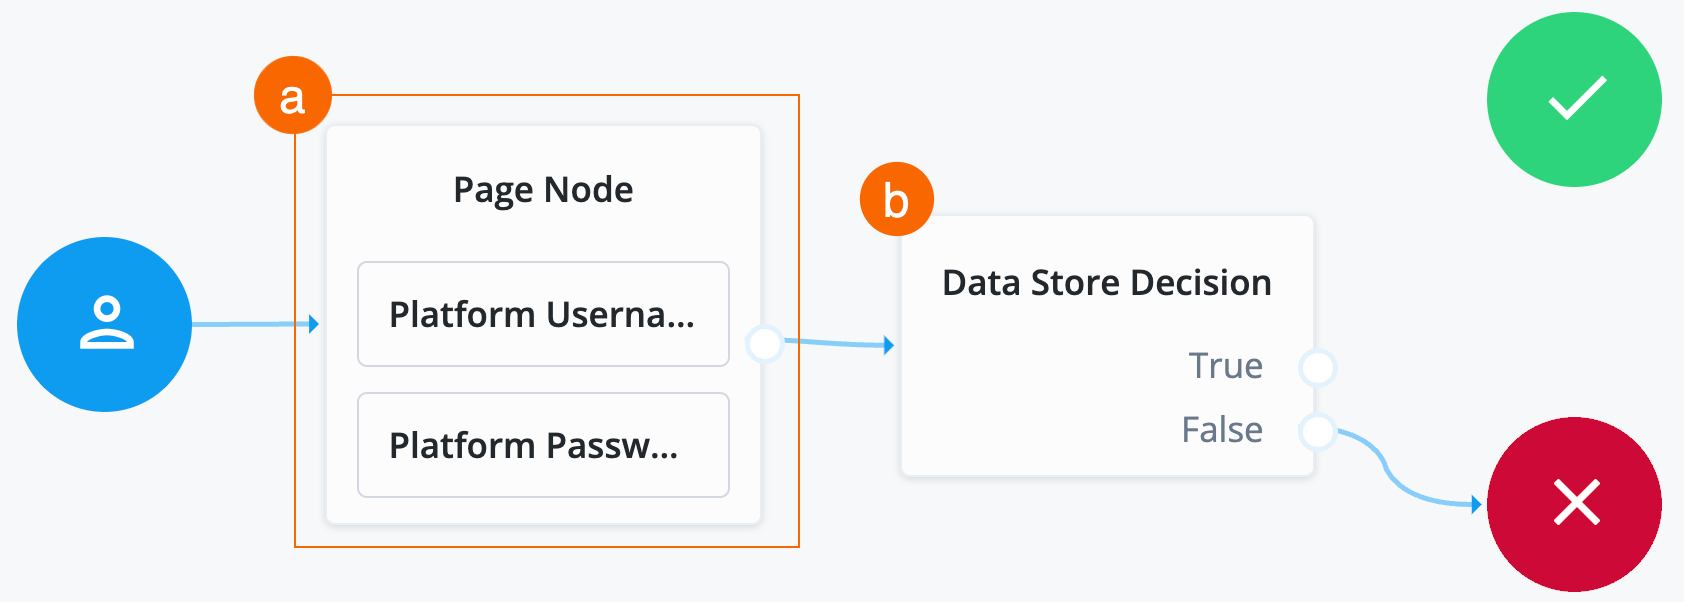
Page Node.A Page node combines multiple nodes that request input into a single page for display to the user. In this case, it allows the username and password boxes to display to the end user on the same page.
-
Drag the Page Node box from the left side of the journey editor to the right side (the canvas).
-
Connect the start (person) icon to the Page Node by selecting the icon and dragging it into the left side (input) of the Page Node. An arrow shows the flow of the journey from the person icon into the Page Node.
When you connect nodes together, the arrows show the flow of the journey from node to node.
-
Search for the
Platform Usernamenode and drag it into the Page Node.The Platform Username node prompts the end user to enter their username and stores it in a configurable state attribute.
-
Search for the
Platform Passwordnode and drag it into the Page Node.The Platform Password node prompts the end user to enter their password and stores it in a configurable state attribute.
-
Search for the
Data Store Decisionnode and drag it to the right of the Page Node.The Data Store Decision node verifies that the username and password values match those in the data store configured for the realm.
-
Connect the right side of the Page Node (the outcome) into the left side of the Data Store Decision node (input).
-
Connect the
Falseoutcome of the Data Store Decision node into the Failure node (red X circle). -
In the top right of the journey editor, click Save.
|
When connecting the outcome of a node to another node, make sure there is a hand icon present on the node you’re connecting to. Click to display an example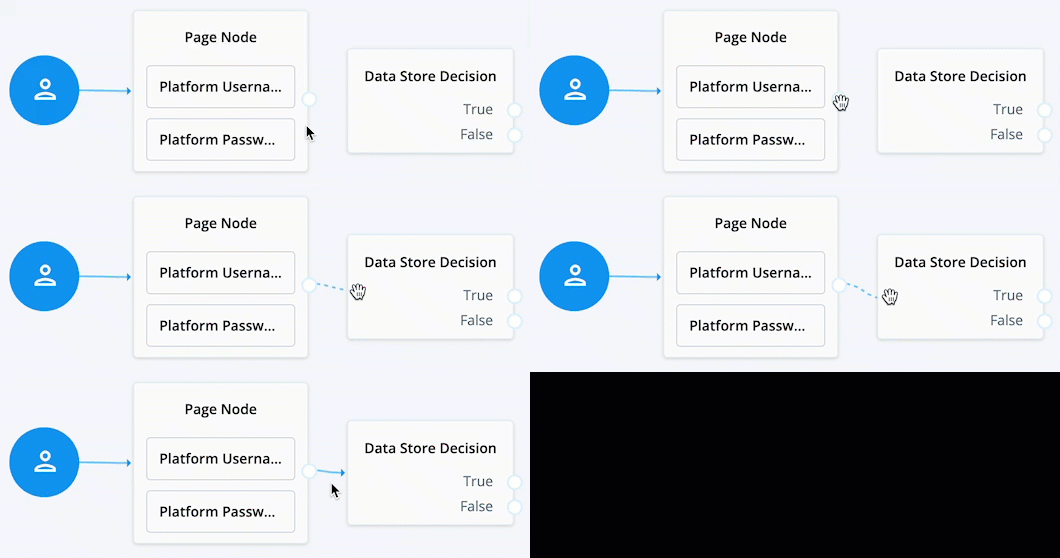
|
The following video demonstrates the steps up to this point in the procedure:
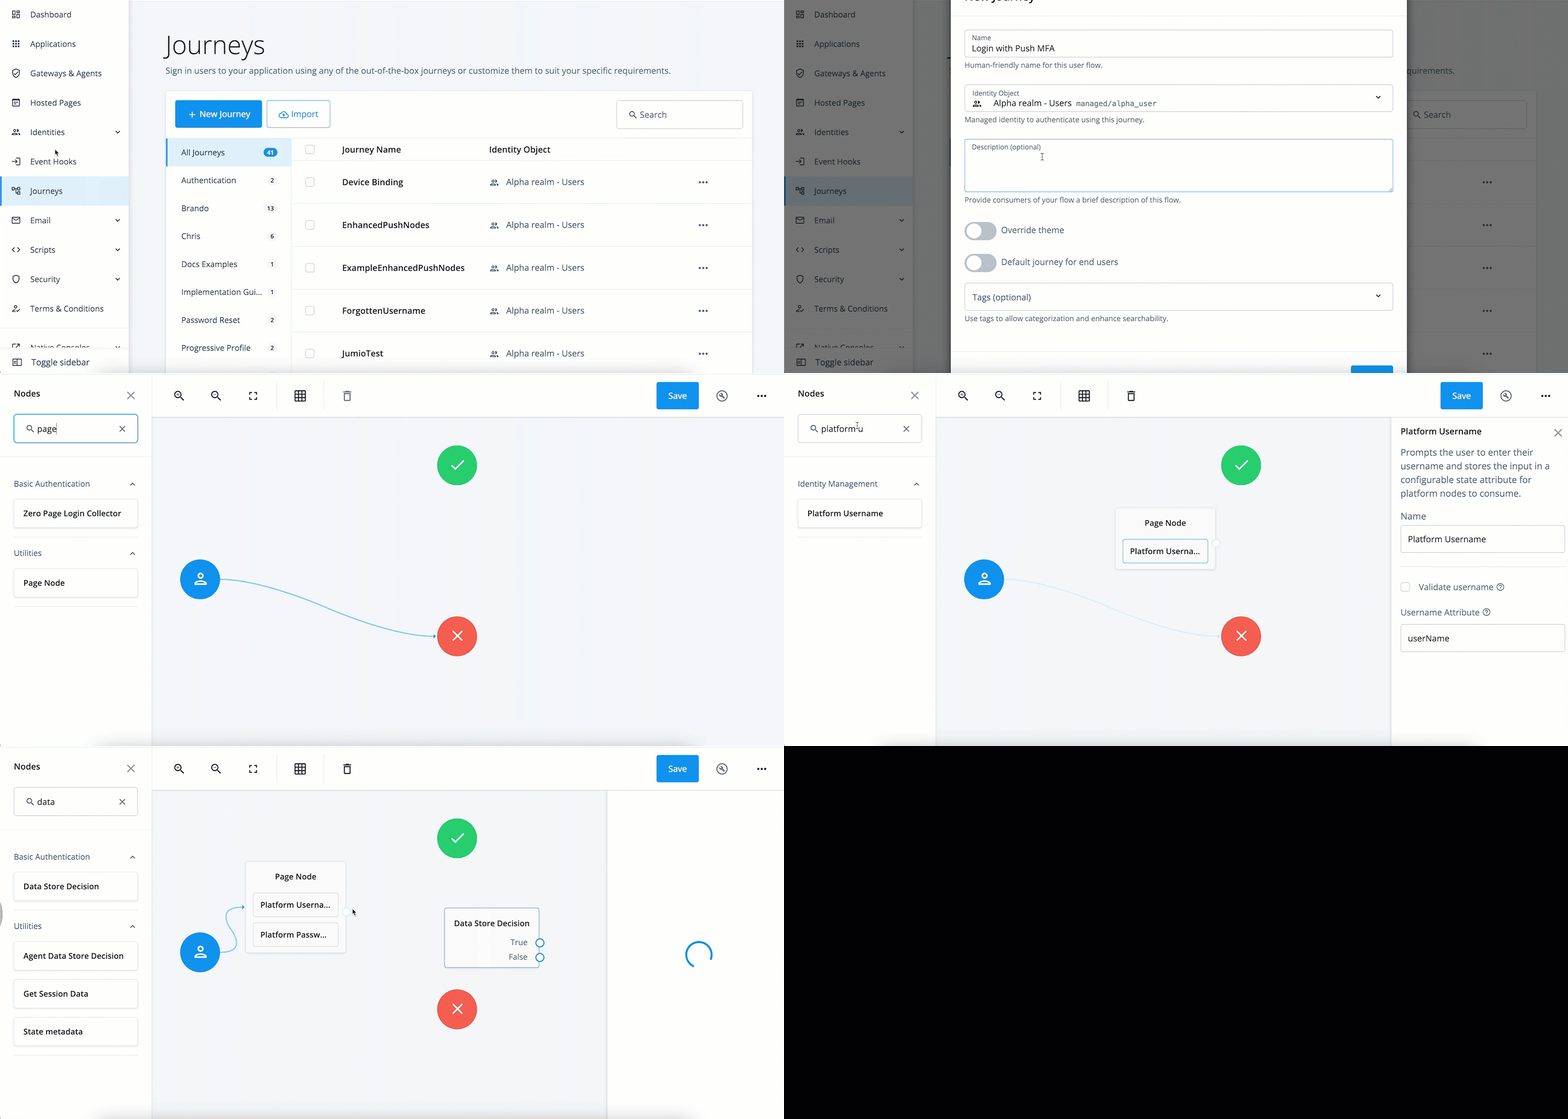
Send and verify push notifications
The journey goes down this path when the end user has a device registered with their Advanced Identity Cloud profile.
-
Search for the
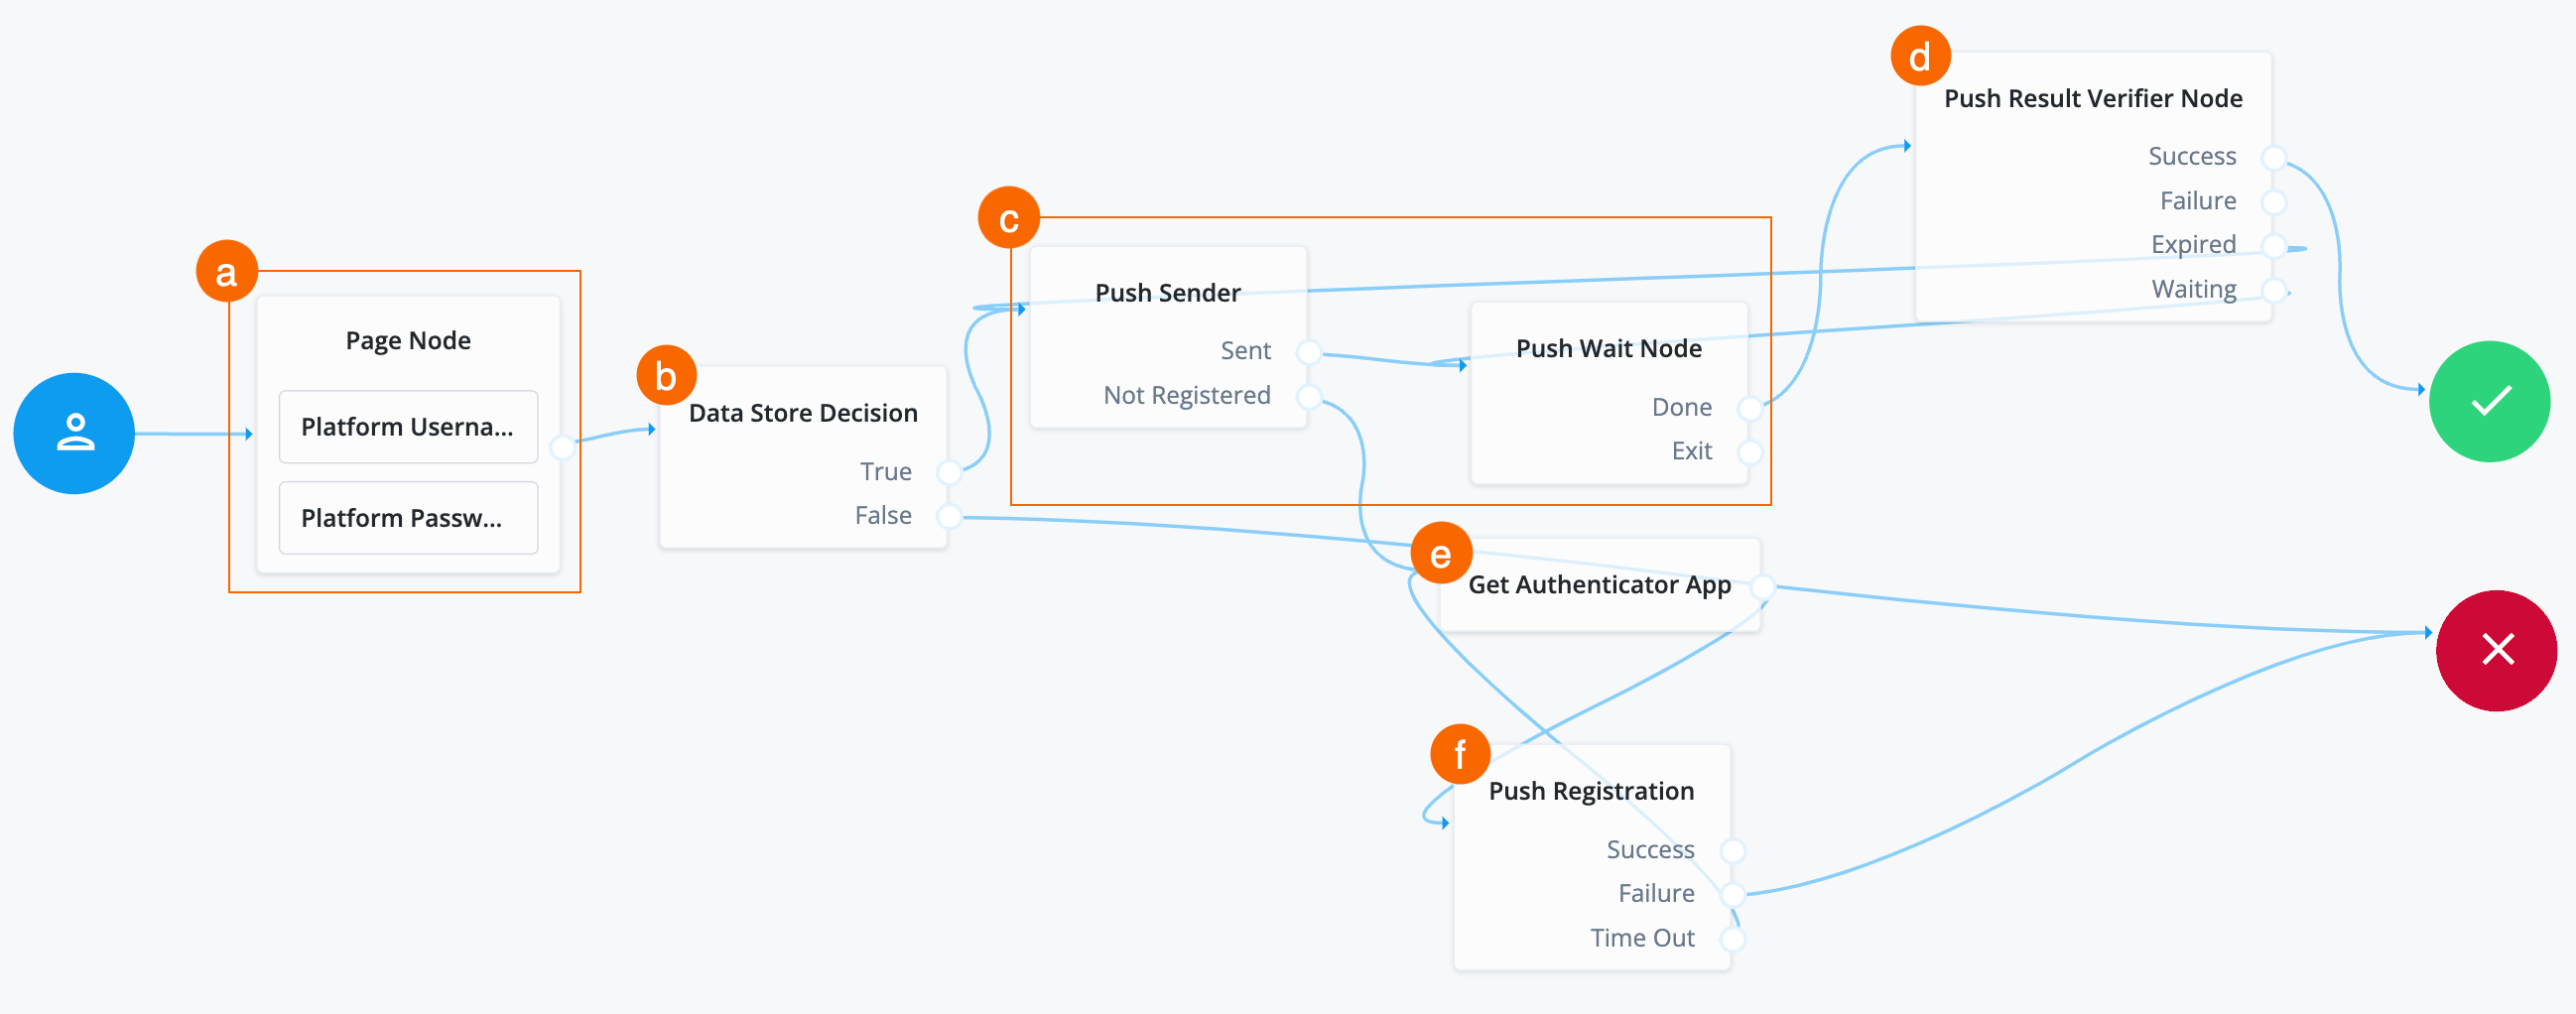
Push Sendernode and drag it to the right of the Data Store Decision node on the canvas. -
Connect the
Trueoutcome of the Data Store Decision node to the input of the Push Sender node. -
Click the Push Sender node and configure its options:
Field Value Description Message Timeout
Do not modify.
Specifies the number of milliseconds the push notification message remains valid.
User Message
Do not modify.
Specifies an optional message to send to the end user on their device.
Remove ‘skip’ option
Enable this property.
Enable this option in the node to make the push authentication mandatory.
When disabled, the user can skip the push authentication requested by the node and evaluation continues along the
Skippedoutcome path.Share Context Info
Enable this property.
Enable this option to include context data, such as remoteIp, userAgent, and location, in the notification payload.
Custom Payload Attributes
Do not modify.
Include shared state objects in the message payload sent to the client. The size of the payload must not exceed 3 Kb or a NodeProcessException is thrown.
Push Type
Select Display Challenge Code.
The type of push authentication the user must perform on their device to continue the journey. Select one of the following types:
-
Tap to accept— Requires the user to tap to accept. -
Display Challenge Code— Requires the user to select one of three numbers displayed on their device. This selected number must match the code displayed in the browser for the request to be verified. -
Use Biometrics to Accept— Requires the user’s biometric authentication to process the notification.
Research shows users might accept a push authentication without fully checking if it’s legitimate. To reduce the chances of a user accepting a malicious push authentication attempt, select Display Challenge CodeorUse Biometrics to Accept.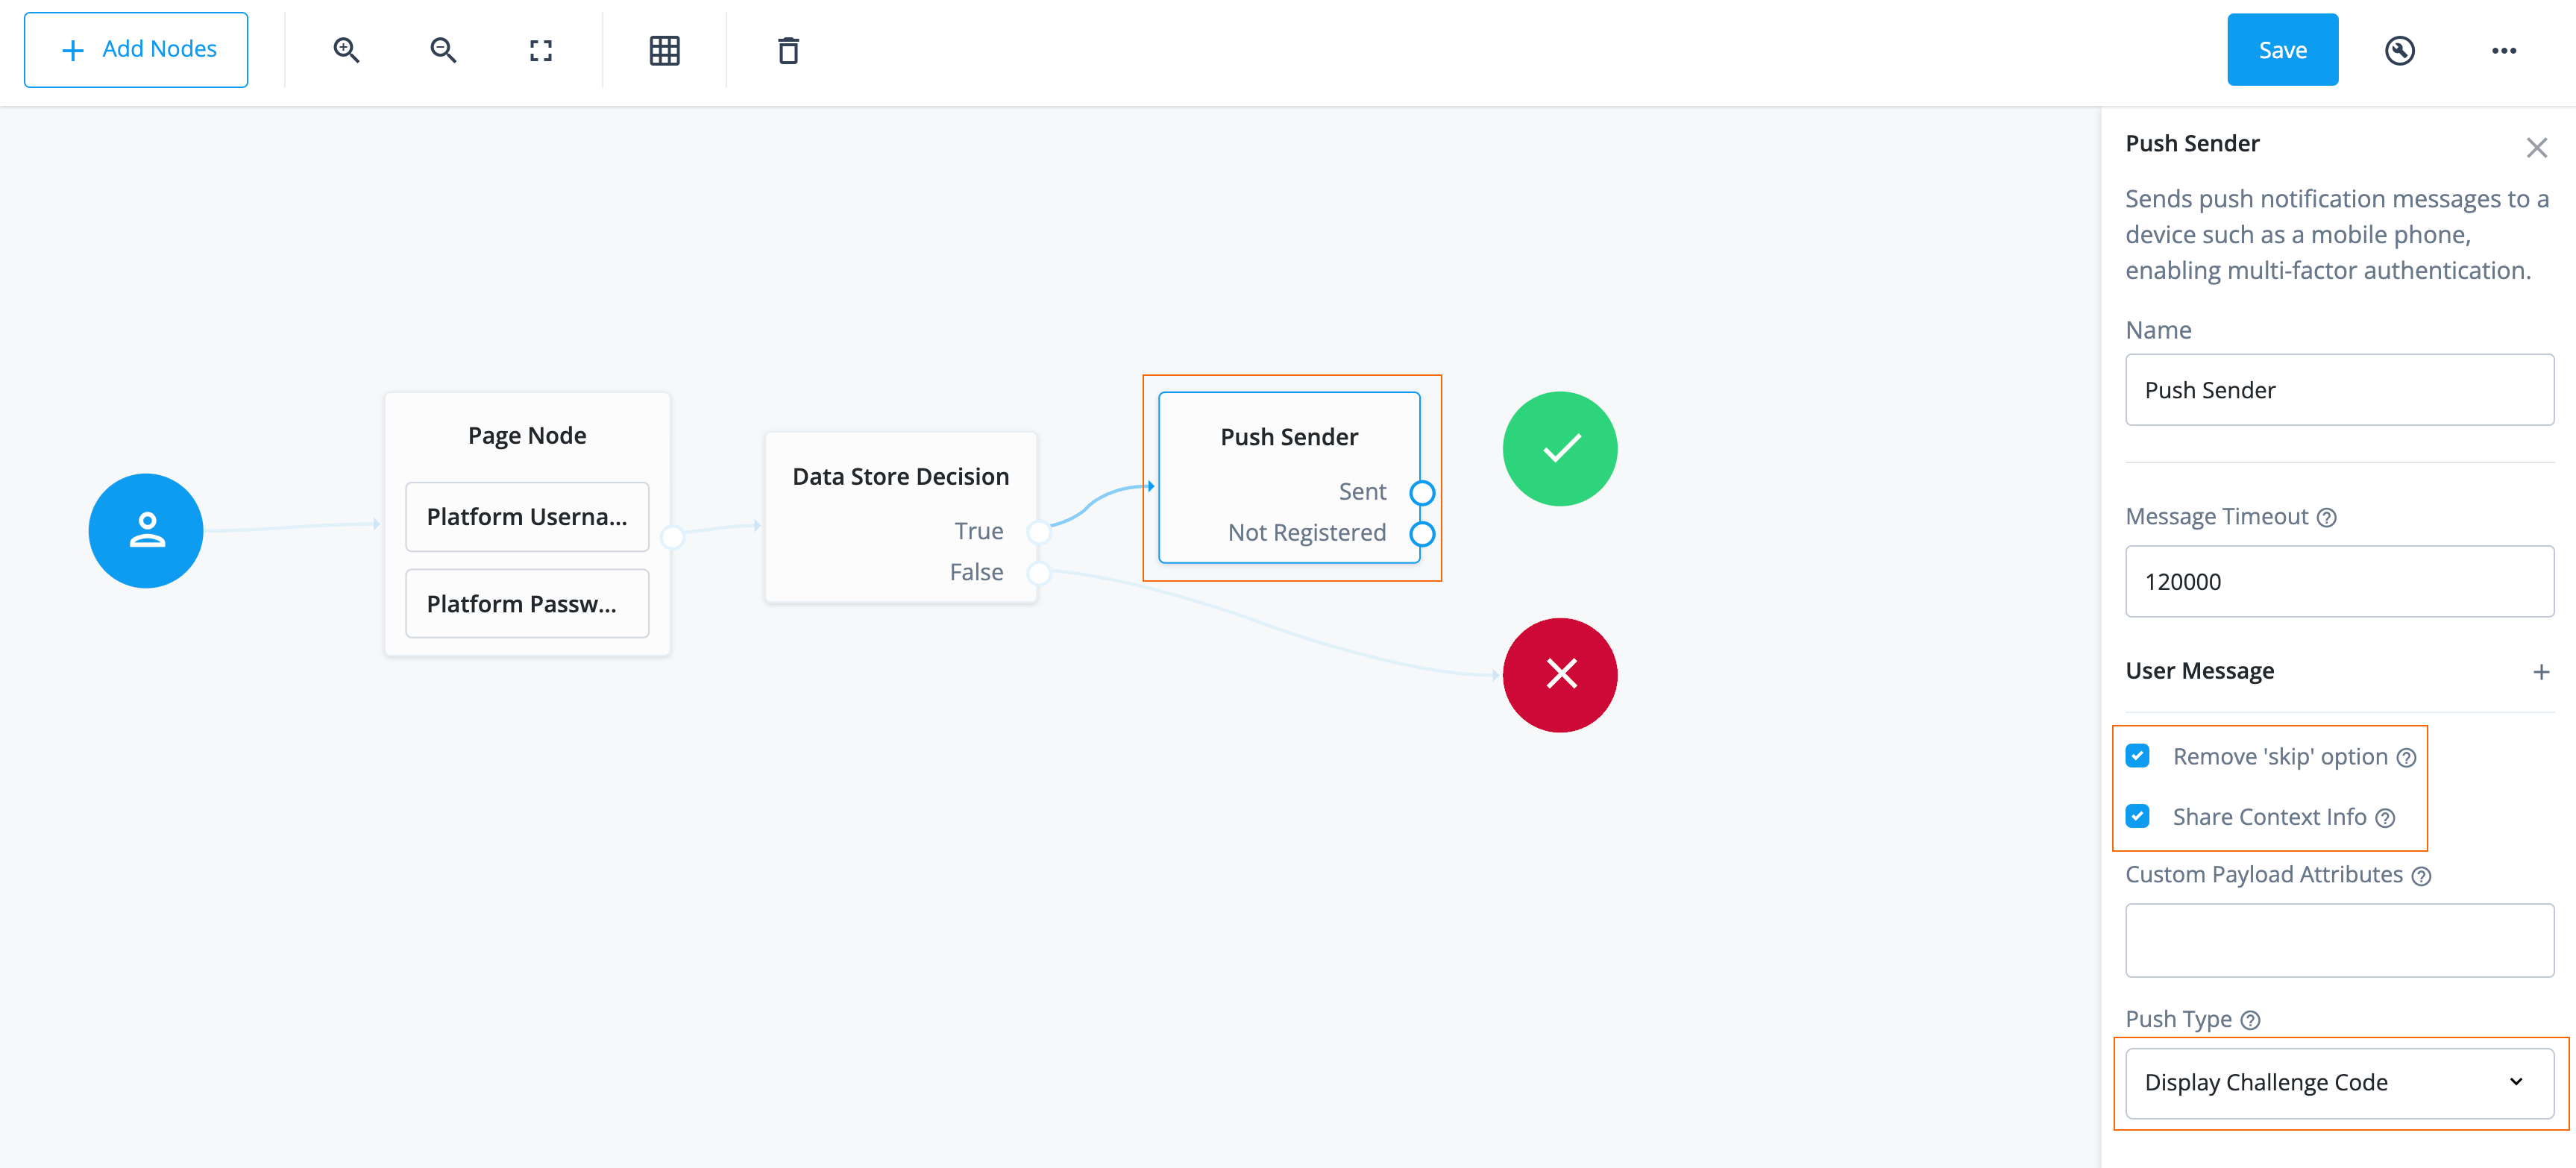
-
-
Search for the Push Wait Node and drag it to the right of the Push Sender node in the canvas.
To let the end user respond to the push notification, the Push Wait node pauses authentication for the specified number of seconds while processing a push authentication request.
-
Connect the Sent outcome of the Push Sender node to the input of the Push Wait Node.
-
Search for the Push Result Verifier Node and drag it to the right of the Push Wait Node.
The Push Result Verifier node works with the Push Sender node to validate the user’s response to a previously sent push notification message.
-
Connect the Done outcome of the Push Wait Node to the input of the Push Result Verifier Node.
-
Connect the outcomes of the Push Result Verifier Node to various nodes:
Outcome path Target node SuccessSuccess node (green check mark)
FailureFailure node (red X)
ExpiredPush sender node
WaitingPush Wait Node
-
Click Save.
Register device (smartphone) with Advanced Identity Cloud profile
The journey goes down this path when the Push Sender node goes to the Not Registered outcome, signaling that the end user doesn’t have a device registered with their Advanced Identity Cloud profile.
-
Search for the
Get Authenticator Appnode and drag it under the Push Sender node.The Get Authenticator App node displays information to obtain the ForgeRock Authenticator application from the Apple App Store or the Google Play Store.
-
Connect the
Not Registeredoutcome of the Push Sender node to the input of the Get Authenticator App node. -
Search for the
Push Registrationnode and drag it to the right of the Get Authenticator App node. -
Connect the outcome of the Get Authenticator App node to the input of the Push Registration node.
-
Connect the
Failureoutcome of the Push Registration node to the Failure node. -
Connect the
Time Outoutcome of the Push Registration node to the Get Authenticator App node. -
Click Save.
Add recovery codes and send push notification to the new device
-
Search for the
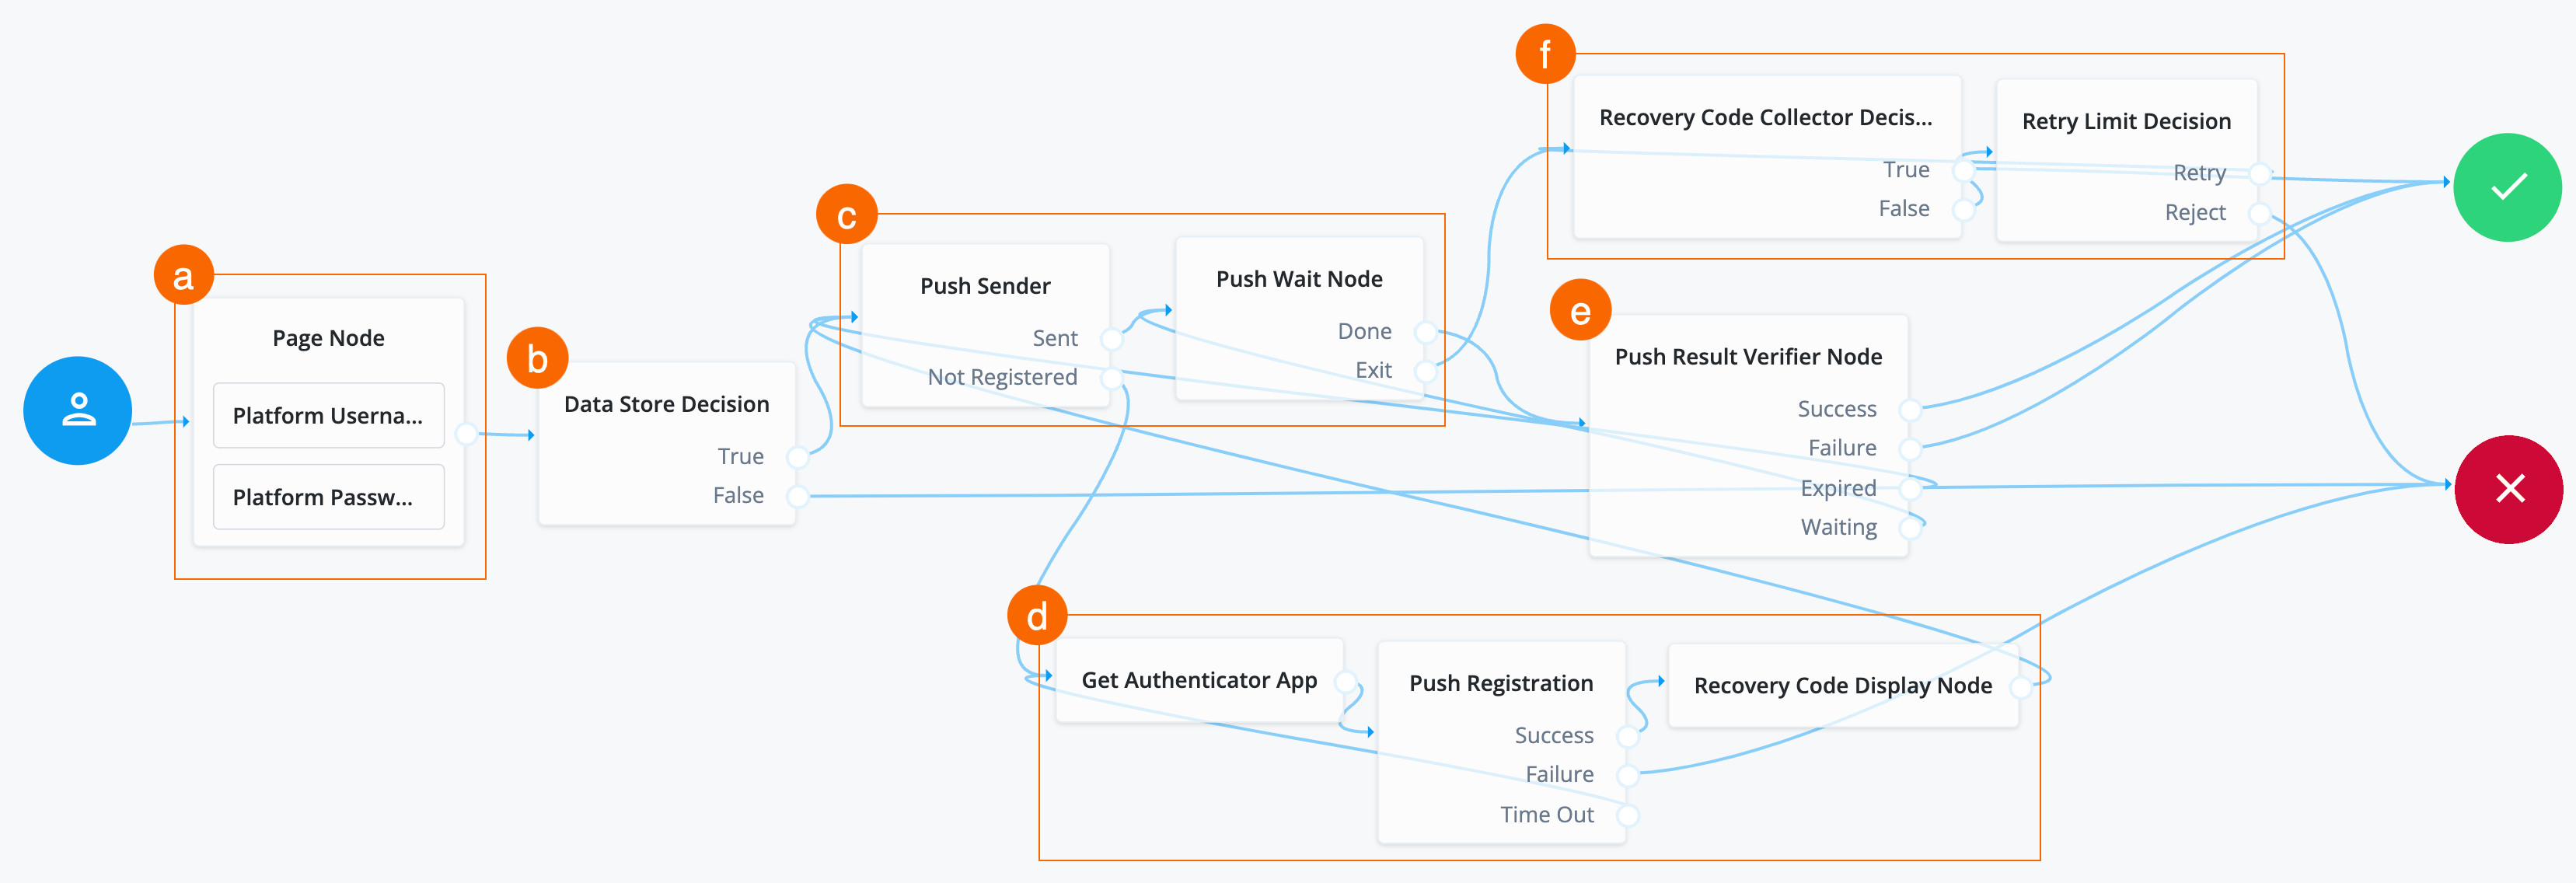
Recovery Code Display Nodeand drag it to the right of the Push Registration node.If the user’s device is lost, the Recovery Code Display node retrieves generated recovery codes from the transient state and presents them to the user for safekeeping. The codes can be used to authenticate if a registered device is lost or stolen.
-
Connect the
Successoutcome of the Push Registration node as input to the Recovery Code Display Node. -
Connect the outcome of the Recovery Code Display Node as input to the Push Sender node.
-
Search for the
Recovery Code Collector Decisionnode and drag it to the right of the Push Wait Node.In the event the end user doesn’t have access to or has lost their device, the Recovery Code Collector Decision node lets the end user authenticate with the recovery code provided in the Recovery Code Display node.
-
Connect the
Exitoutcome of the Push Wait Node as input to the Recovery Code Collector Decision node. -
Connect the
Trueoutcome of the Recovery Code Collector Decision node to the Success node. -
Search for the
Retry Limit Decisionnode and drag it to the right of the Recovery Code Collector Decision node.The Retry Limit Decision node permits the specified number of passes through to the Retry outcome path before continuing evaluation along the Reject outcome path. In this case, it lets the end user reenter their recovery codes up to three times before the journey goes to the Failure node.
-
Connect the
Falseoutcome of the Recovery Code Collector Decision node as input to the Retry Limit Decision node. -
Connect the
Retryoutcome of the Retry Limit Decision node as input to the Recovery Code Collector Decision node. -
Connect the
Rejectoutcome of the Retry Limit Decision node to the Failure node. -
Click Save. You have now configured the journey successfully.
Task 5: Check journey path connections
The MFA using push notifications journey uses many nodes. Use the following
table to compare the outcomes of each node and to validate that you wired the
journey correctly.
Many nodes can have more than one outcome. "→" denotes that a node only has one outcome path.
| Source node | Outcome path | Target node |
|---|---|---|
Start (person icon) |
→ |
Page Node |
Page Node containing:
|
→ |
Data Store Decision |
Data Store Decision |
True |
Push Sender |
False |
Failure |
|
Push Sender |
Sent |
Push Wait Node |
Not Registered |
Get Authenticator App |
|
Push Wait Node |
Done |
Push Result Verifier Node |
Exit |
Recovery Code Collector Decision |
|
Push Result Verifier Node |
Success |
Success |
Failure |
Failure |
|
Expired |
Push Sender |
|
Waiting |
Push Wait Node |
|
Recovery Code Collector Decision |
True |
Success |
False |
Retry Limit Decision |
|
Retry Limit Decision |
Retry |
Recovery Code Collector Decision |
Reject |
Failure |
|
Get Authenticator App |
→ |
Push Registration |
Push Registration |
Success |
Recovery Code Display Node |
Failure |
Failure |
|
Timeout |
Get Authenticator App |
|
Recovery Code Display Node |
→ |
Push Sender |
Validation
Now that you have configured the ForgeRock Authenticator push service, the push notifications for Advanced Identity Cloud, and created your journey, you are ready to validate your journey.
Before validating, make sure you have created a test user and have access to an Android or iOS smartphone.
Steps
In the journey you created, there are various paths the end user may go down, depending on their actions and the information in their user profile. For example, if the end user has a device (smartphone) registered with their profile, the journey does not display the page to download the ForgeRock Authenticator application or to register a device. On the other hand, if the end user does not approve the push notification in the specified time (defined in the Push Wait node in the journey), the journey prompts the user to enter a recovery code.
To demonstrate the device registration process and push notification approval, this validation explores the path of an end user who does not have the ForgeRock Authenticator application on their smartphone and does not have a smartphone registered with their user profile in Advanced Identity Cloud.
-
Get a URL you can use to test the journey:
-
Log in to the Advanced Identity Cloud admin console as an administrator.
-
Select Journeys.
-
Select the journey you created, Login with Push MFA. A preview screen of the journey displays.
-
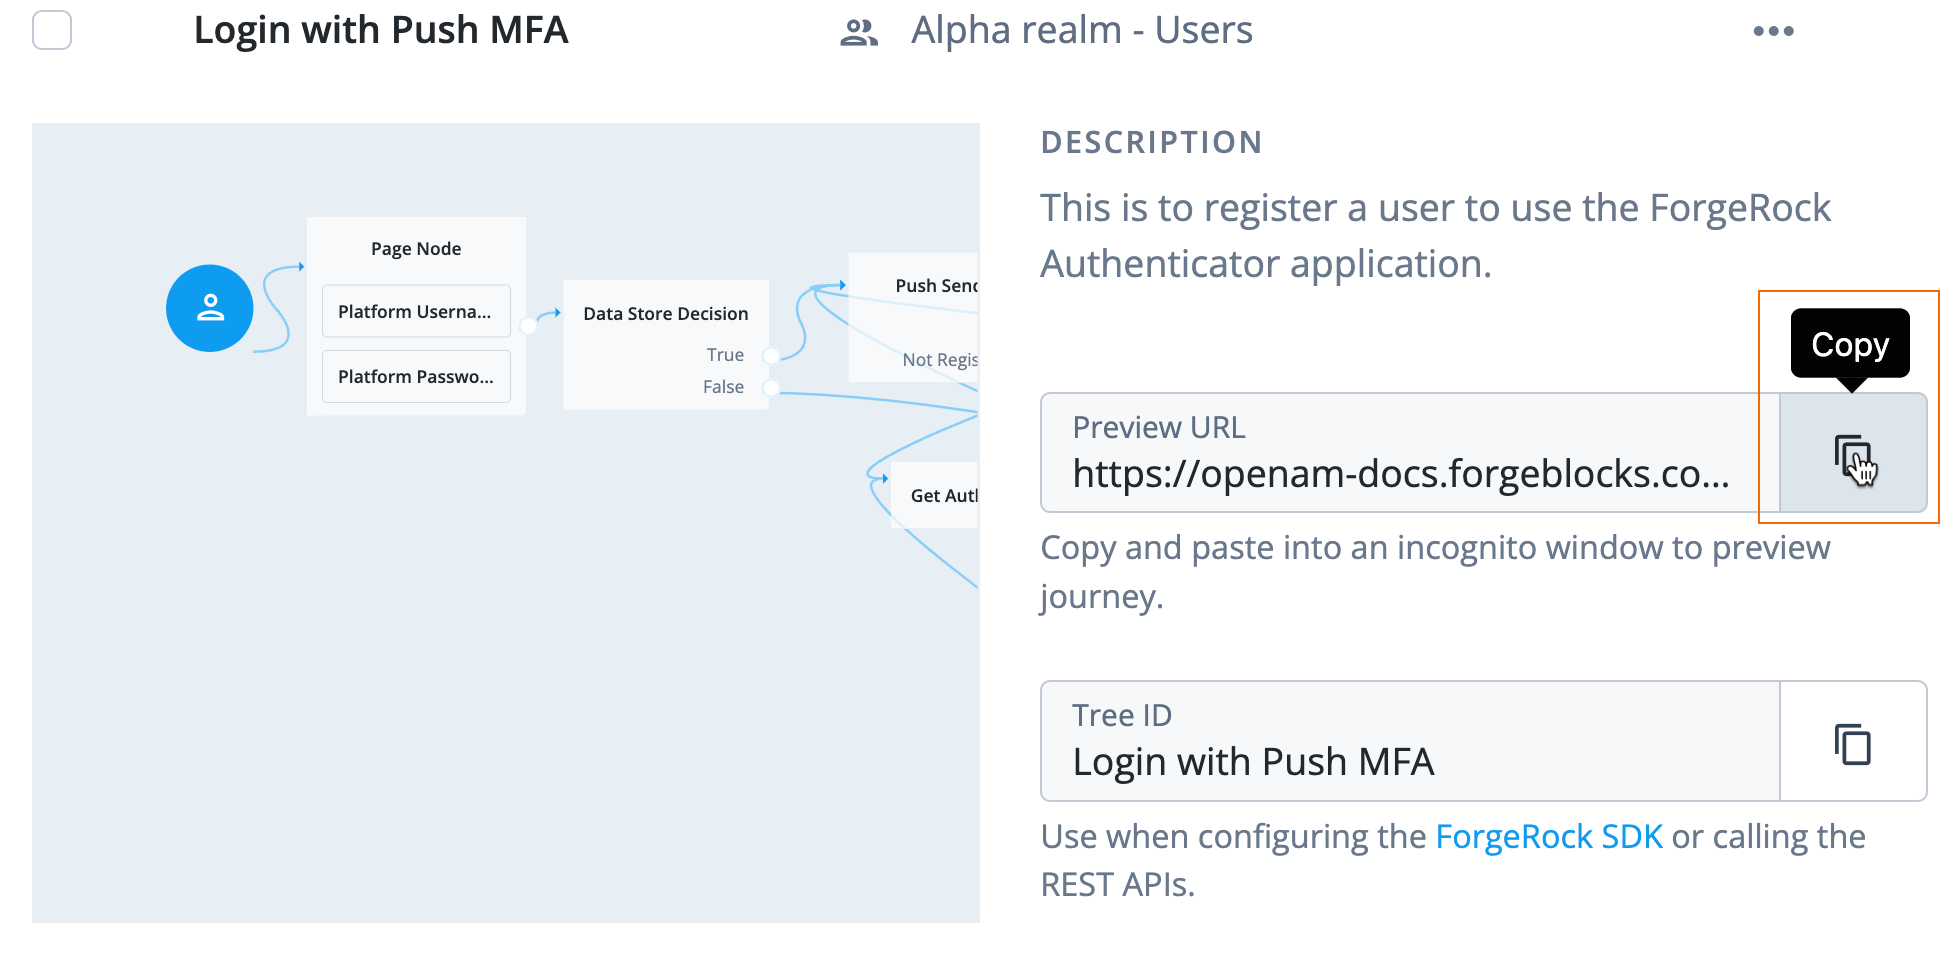
Click the copy icon next to Preview URL, a URL you can use to test a journey as an end user:
-
-
Log in to Advanced Identity Cloud:
-
Paste the URL into an incognito window.
Use incognito mode for testing to avoid caching issues, and so that any current sessions you have don’t interfere with your test.
The login end-user UI displays.
-
Enter the test user’s username and password.
-
Click Next.
A screen displays prompting you to download the ForgeRock Authenticator application.
-
-
Download the ForgeRock Authenticator application:
-
Click the Apple App Store or Google Play Store link, depending on which smartphone you have.
-
Download the ForgeRock Authenticator application.
-
After you have downloaded the ForgeRock Authenticator application, click Continue. A screen displays prompting you to scan a QR code.
-
-
Register your user profile with your smartphone and copy recovery codes:
-
Open the ForgeRock Authenticator application on your smartphone.
-
Tap the blue + icon in the bottom right corner.
-
Tap Scan QR Code.
-
Scan the QR code that displays in your browser window with your smartphone’s. camera.
A profile displays in the ForgeRock Authenticator application. Verify the test user’s username displays in the account created in the ForgeRock Authenticator application and that recovery codes display in the browser window.
-
Copy the recovery codes.
An end user can use recovery codes when they lose their device and need to log in.
-
Click Done. A push notification is sent to your smartphone.
-
-
Approve push notification and finish logging in:
-
Tap Accept on your smartphone.
-
Verify the acceptance by using your fingerprint or facial recognition.
You should now be logged into the Advanced Identity Cloud end-user UI.
-
-
Log out of Advanced Identity Cloud end-user UI:
-
Click the test user’s name in the top right corner of the Advanced Identity Cloud end-user UI.
-
Select Sign Out.
You are redirected to a sign-in page. This page differs from the journey you created, Login with MFA Push. The page you are directed to when you sign out is the default journey in the realm. Learn how to set the default journey in "Default end-user journey" in Journeys.
-
Explore further
Reference material
| Reference | Description |
|---|---|
Realms are administrative units that group configurations and identities together. Realms let you manage different sets of identities and applications within the same Advanced Identity Cloud tenant. Each realm is fully self-contained and operates independently of other realms within a tenant. |
|
Get to know the admin interfaces; Advanced Identity Cloud admin console, AM admin console, and IDM admin console. |
|
Conceptual information on journeys and their purpose in Advanced Identity Cloud. |
|
A guided video of journeys in Advanced Identity Cloud and how to use them. |
|
Learn about the configurable nodes Advanced Identity Cloud offers for use in journeys. |
|
Integrate third-party services into your applications or journeys with marketplace nodes. |
|
Manage, group, and assign privileges to identities. |
|
Customize the look and feel of login and end-user UI pages. This is used when you are using the ForgeRock hosted pages as your UI option. |
|
A more in-depth reference on the configuration properties and the steps to create a journey with push notifications. |
Salesforce as SP (SAML)
Description
Estimated time to complete: 30 minutes.
In this use case, you configure SSO using SAML federated identities with Advanced Identity Cloud as the Identity provider (IDP) and Salesforce as the Service provider (SP).
Specifically, you configure Advanced Identity Cloud as the IDP for Salesforce using SAML. This allows a user from the Advanced Identity Cloud end-user UI, to click the Salesforce application and be logged in to Salesforce with IDP-iniatied SSO.
Prerequisites
Before you start work on this use case, ensure you have these prerequisites:
-
A basic understanding of:
-
The Advanced Identity Cloud admin console
-
SSO (Federation)
-
SAML
-
The Advanced Identity Cloud end-user UI
-
Salesforce
-
-
Access to your development environment as an administrator.
-
A test Salesforce environment
-
The use case, Provision users to a target application (Salesforce), completed with a test user provisioned from Advanced Identity Cloud to Salesforce. Specifically, make sure the user’s
mailattribute in Ping Identity matches theUser. Usernameattribute in Salesforce. -
A test user in Advanced Identity Cloud to serve as the application owner for the custom SAML (Salesforce) application.
Tasks
| This use case requires the use of third-party services. Use your environment specific details where necessary. |
Task 1: Create custom SAML application
-
In the Advanced Identity Cloud end-user UI, go to Applications > Custom Application.
-
Select SAML and click Next.
-
On the Application Details page, enter the following:
Field Value Name
Enter
Salesforce SAML SSO.Description
Enter
Ping Identity serving as the IDP for SAML. End users
can log into Salesforce from the Advanced Identity Cloud end-user UI, when they are assigned
to this application and have an account in Salesforce.
Owners
Select a user to be the application owner.
App Logo URI
-
From the custom SAML application Salesforce SAML SSO, click the Sign On tab > Set up SSO.
-
On the Set up Single Sign-On modal window, click Download Metadata. The metadata to import into Salesforce displays in a new browser tab.
-
Save this file as identity-cloud-idp-saml-metadata.xml. You will import this file into Salesforce later.
-
Click Next.
-
In a new browser tab, go to your Salesforce environment.
Task 2: Configure Salesforce to serve as SP
The next task is to prepare Salesforce to serve as an SP.
-
Salesforce documents these steps; therefore, in Salesforce’s documentation, Create a SAML Single Sign-On Setting in Salesforce.
In step 3 of the Salesforce documentation, import the XML file you saved in task 1 by selecting New from Metadata File in Salesforce. The XML file you upload in Salesforce sets the necessary configurations; therefore, you don’t need to complete the steps past step 3.
-
After configuring SSO in Salesforce, download Salesforce’s SP metadata to import into Advanced Identity Cloud by clicking Download Metadata in Salesforce.
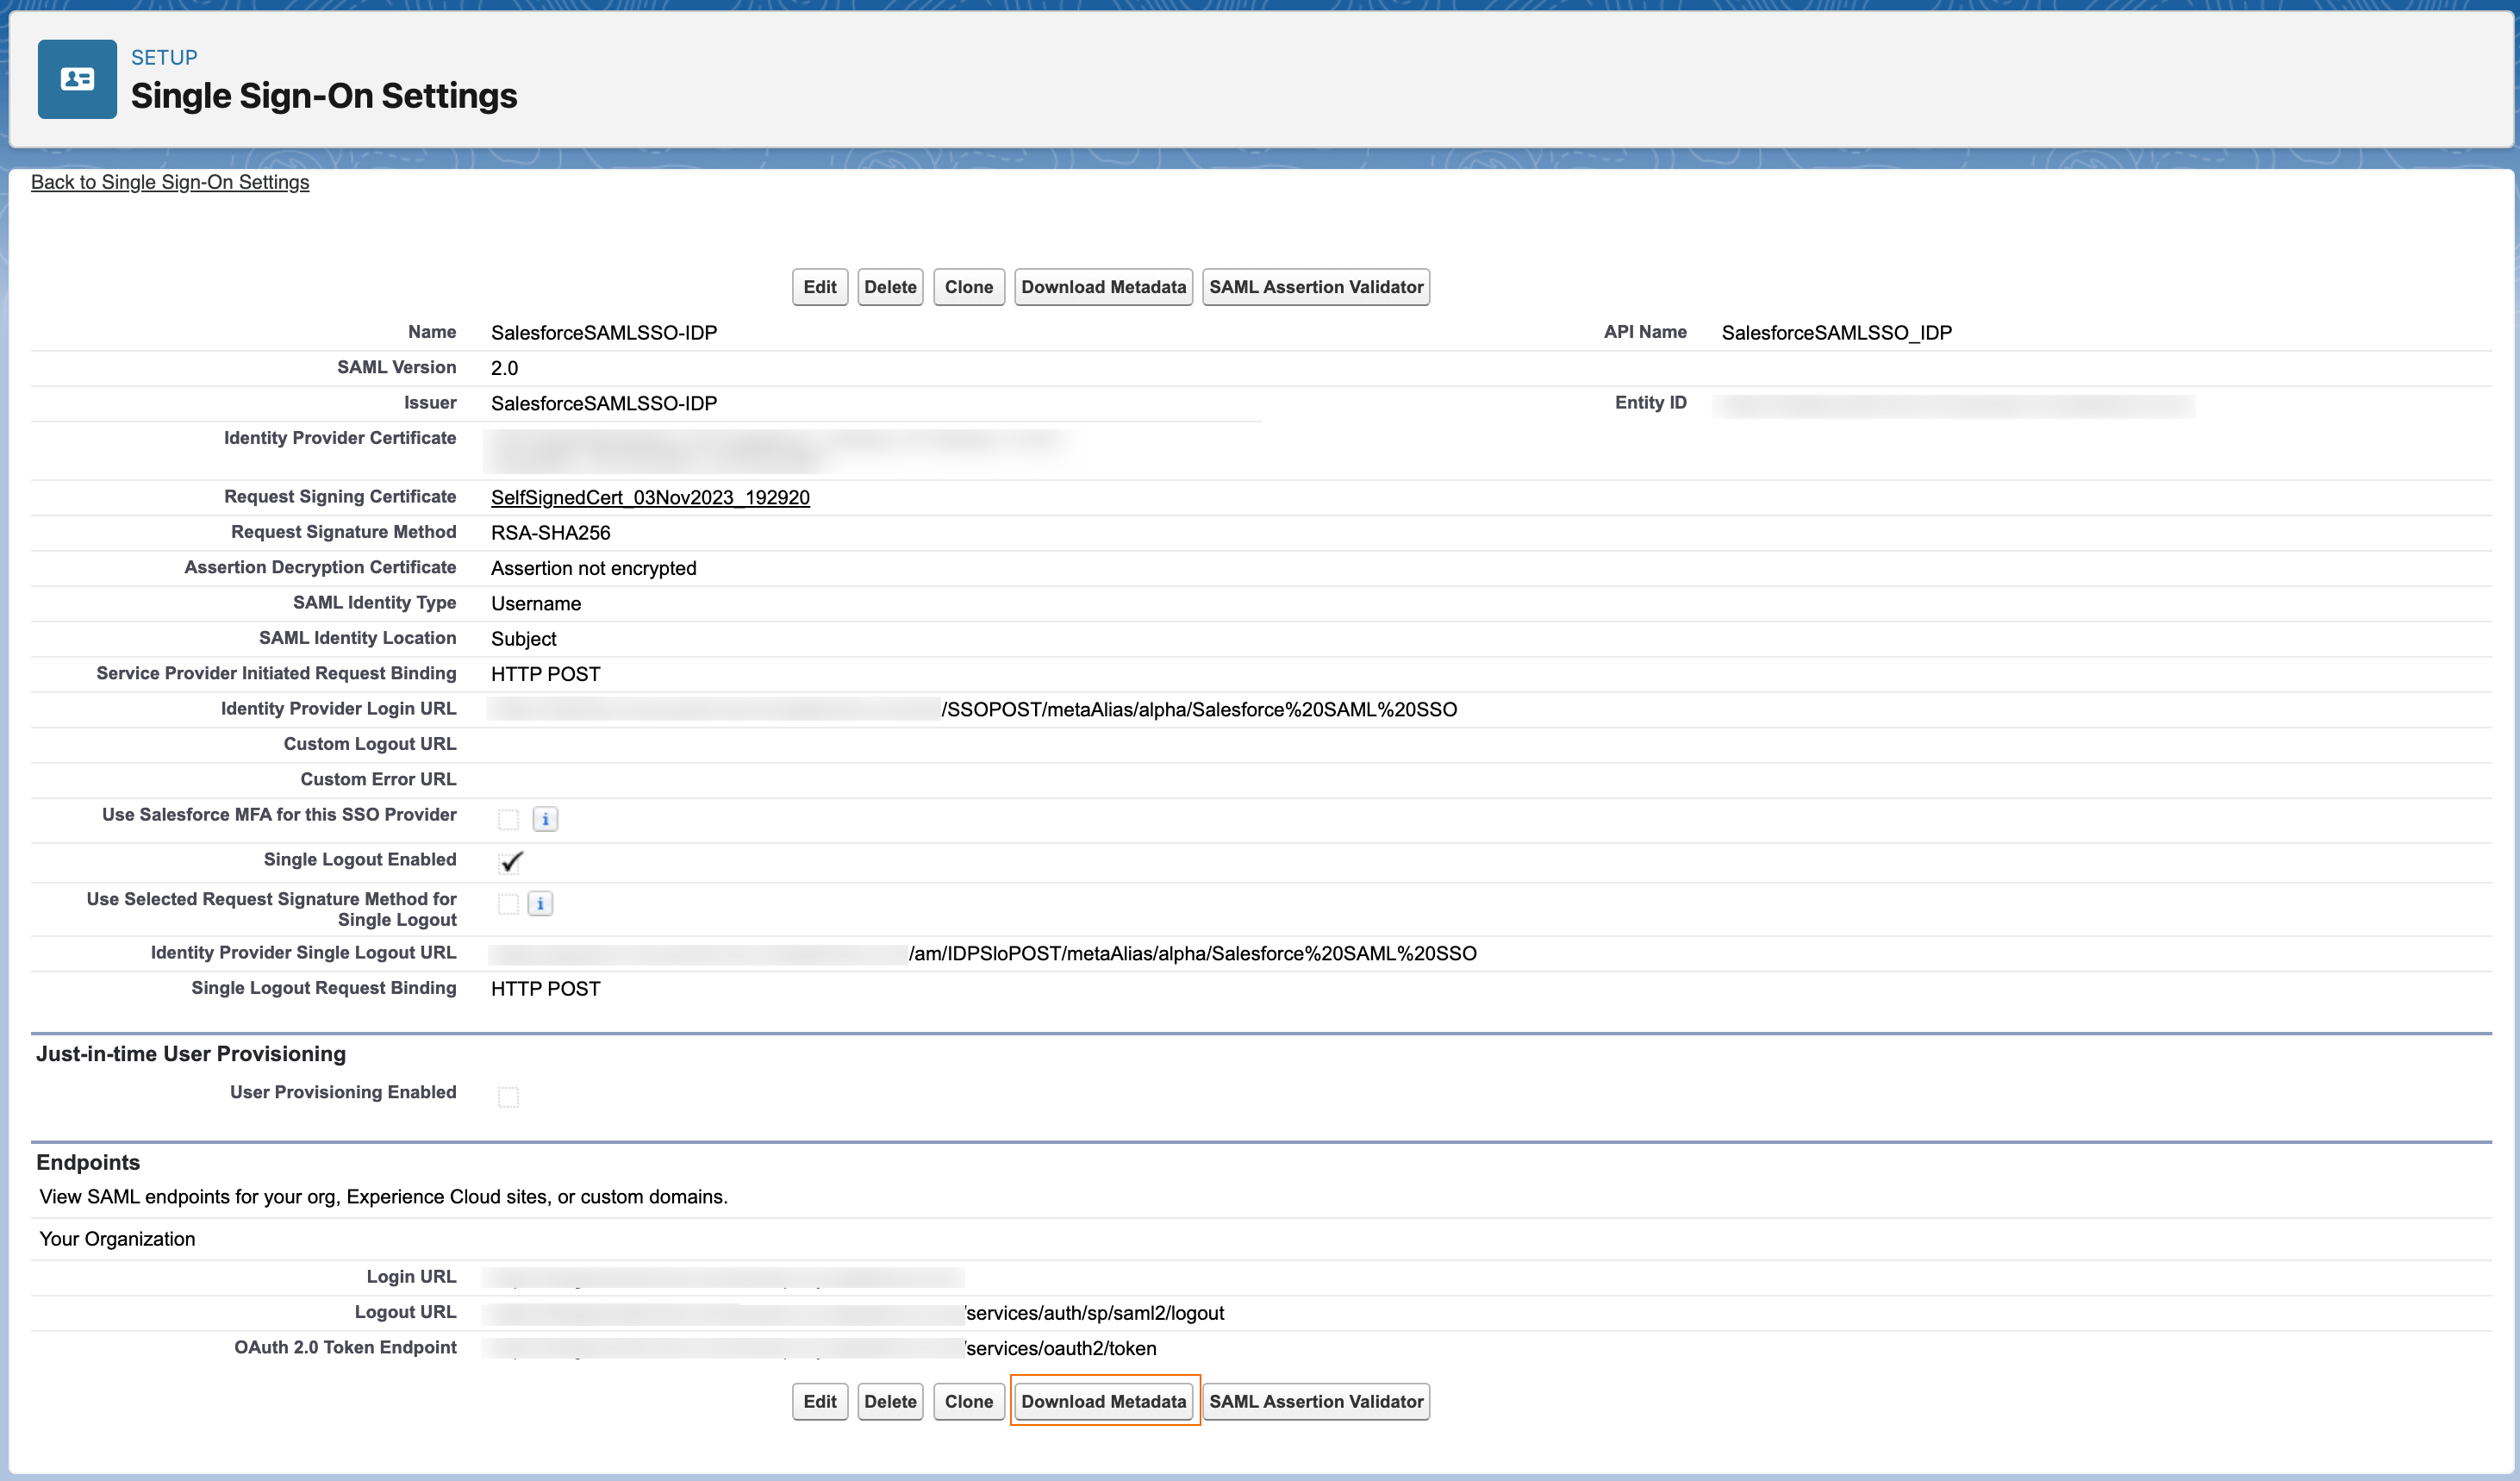
The metadata file name looks similar to
SAMLSP-00DDp000001yWwS.xml.
Task 3: Configure custom SAML application
Now that you have configured Salesforce, you must configure the custom SAML Salesforce application in Advanced Identity Cloud to include the information Salesforce requires in the SAML assertion.
-
Go back to the Advanced Identity Cloud admin console. You should be on the Set Up Single Sign-On modal window.
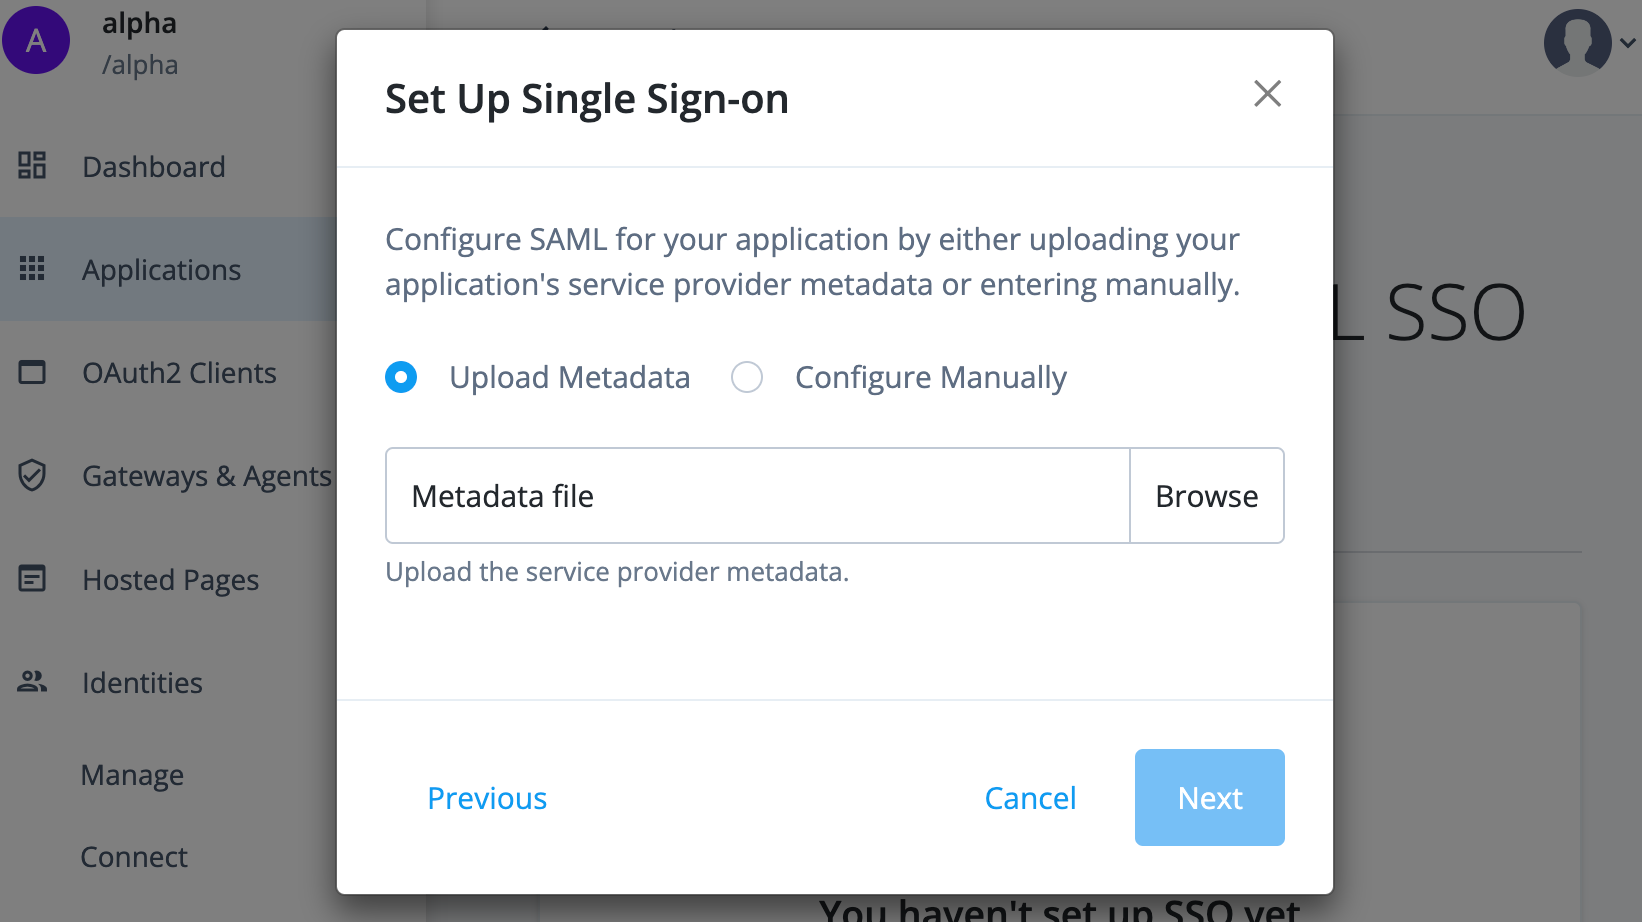
-
Click Browse and upload the SP metadata file you downloaded from Salesforce.
-
Click Next. The application displays. By default, Advanced Identity Cloud maps the following assertion attributes:
Name (SAML attribute) Value (attribute in Advanced Identity Cloud) Description SSOIDmailAdvanced Identity Cloud sends the property of
mail(email) as the SAML attributeSSOID.User.EmailmailAdvanced Identity Cloud sends the property of
mail(email) as the SAML attributeUser.Email.User.ProfileID"Standard.User"Advanced Identity Cloud sends the static value of
Standard.Useras the SAML attributeUser.ProfileID.User.LastNamesnAdvanced Identity Cloud sends the property
sn(last name) as the SAML attributeUser.LastName.User.UsernamemailAdvanced Identity Cloud sends the property of
mail(email) as the SAML attributeUser.Username.By default, the federation identifier is mailto the Salesforce attributeUser.Username. Users can change theirmailaddress in Advanced Identity Cloud and doing so breaks their SAML connection to Salesforce. Either makemailimmutable in Advanced Identity Cloud, or set a different, immutable attribute as the federation identifier.Salesforce supports many SAML assertion formats. For example, you can configure SAML to have a user’s unique identifier in the
NameIDof theSubjectblock or in theAttributeStatementblock. Refer to Salesforce’s documentation on Example SAML Assertions.
Validation
Now that you created and configured a custom SAML application and configured Salesforce as the SP, validate the configurations by:
-
Adding a user to the application
-
Logging in as the end user to the Advanced Identity Cloud admin console
-
Federating into Salesforce by clicking the Salesforce application
Steps
-
From the Advanced Identity Cloud admin console, go to Applications > Salesforce SAML SSO > Users & Roles tab.
-
On the Users tab, click Add Member.
-
Add the test user that exists in both Advanced Identity Cloud and Salesforce. The application now displays to the test user in the Advanced Identity Cloud end-user UI.
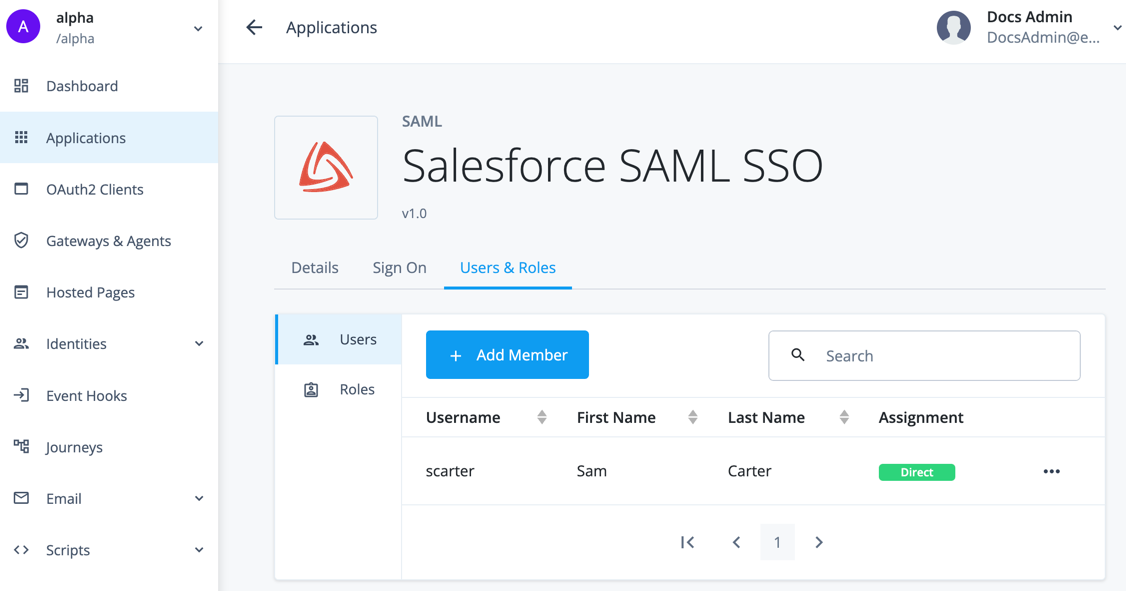
-
In an incognito window, log into the Advanced Identity Cloud end-user UI as the test user.
The default login URL for end users is the
Loginjourney. In the Advanced Identity Cloud admin console:-
Go to Journeys and click the
Loginjourney. -
In the Preview URL field, click (copy).
-
-
From the Advanced Identity Cloud end-user UI, click My Applications. The Salesforce SAML application displays.
-
Click the application. Advanced Identity Cloud redirects you to Salesforce logged in.
If you receive an error in Salesforce, refer to the Salesforce article Troubleshoot SAML Assertion Errors.
This article discusses using Salesforce’s SAML validator by providing the SAML assertion Advanced Identity Cloud sends. One way to obtain the SAML assertion is to use the browser plugin SAML tracer.
Explore further
Reference material
| Reference | Description |
|---|---|
Instructions on setting up a custom SAML application for SSO. |
|
Detailed information on SAML SSO and single logout (SLO). |
|
Learn about how end users can access applications for SSO in the Advanced Identity Cloud end-user UI. |
|
Learn how to configure Salesforce as a SAML service provider. |
Microsoft Entra ID (Azure AD) as OpenID provider
Description
Estimated time to complete: 45 minutes
In this use case, you configure Advanced Identity Cloud to be a relying party (RP), or client, with Microsoft Entra ID (formerly known as Azure AD) as the OpenID provider (IdP).
You also create a journey that lets end users log in to Advanced Identity Cloud optionally using Microsoft Entra ID.
Goals
After completing this use case, you will know how to do the following:
-
Configure Microsoft Entra ID to be an identity provider (IdP).
-
Configure Advanced Identity Cloud to be a relying party (RP) by delegating authentication to a third party.
-
Create a journey that lets end users log in to Advanced Identity Cloud using either their Microsoft Entra ID credentials or their Advanced Identity Cloud credentials. If no identity exists in Advanced Identity Cloud after a user authenticates with Microsoft Entra ID, complete just in time (JIT) registration based on information returned to Advanced Identity Cloud from Microsoft Entra ID.
Prerequisites
Before you start work on this use case, ensure you have these prerequisites:
-
A basic understanding of:
-
Realms
-
The UI under Native Consoles > Access Management
-
Journeys
-
Nodes
-
The Advanced Identity Cloud end-user UI
-
The
managed/alpha_userobject schema
-
-
Access to your Advanced Identity Cloud development environment as a tenant administrator.
-
Proficiency in Microsoft Entra ID
-
A Microsoft Entra ID environment with administrator privileges
-
A test identity in Microsoft Entra ID
Tasks
| This use case requires the use of third-party services. Use your environment specific details where necessary. |
Task 1: Create application in Microsoft Entra ID
| Some steps require you to copy information. Paste the information into a text editor to keep track. |
-
Log in to your Microsoft Entra ID environment.
-
Under Azure services, select App registrations.
If the resource isn’t present, use the search bar to search for it.
-
Click + New Registration.
-
Specify the following values on the Register an application page:
-
Name —
Advanced Identity Cloud (OIDC) -
Supported account types — Select
Accounts in any organizational directory (Any Azure AD directory - Multitenant). -
Redirect URI — Where to redirect an end user after they authenticate with Microsoft Entra ID.
Select
Weband enter the fully qualified domain name (FQDN) of your Advanced Identity Cloud tenant:https://<tenant-env-fqdn>/am
-
-
Click Register.
Copy the value of Application (client) ID and paste it into a text editor. You’ll need it in a later step.
-
From the left navigation menu, click Certificates & secrets.
-
Click + New client secret and enter the following values:
-
Description —
Client Secret for Advanced Identity Cloud (OIDC). -
Expires — Select
180 days (6 months). For the purposes of this use case, six months is sufficient. Ensure you have a change management process in place to update the secrets in Microsoft Entra ID and in Advanced Identity Cloud.
-
-
Click Add.
Copy the secret value from the Value column and paste it into a text editor. You’ll need it in a later step.
Learn more about registering an application in Microsoft’s documentation.
Task 2: Configure Advanced Identity Cloud’s social identity provider service
Because this use case explores the use of Microsoft Entra ID as an additional login option for end users, you must configure the Microsoft social identity provider as follows:
-
In a new tab, log in to the Advanced Identity Cloud admin console as an administrator.
-
In the left navigation pane, select Native Consoles > Access Management.
The realm overview for the Alpha realm displays.
-
In the left navigation pane, click Services.
In the enabled services, check if Social Identity Provider Service is present. If it is, skip to step 7.
-
Click + Add a Service.
-
In the Service Types… drop-down list, select Social Identity Provider Service.
-
Click Create.
-
Ensure the Enabled box is checked.
-
Click Save Changes to accept the default settings.
-
Click the Secondary Configurations tab > + Add a Secondary Configuration > Client configuration for Microsoft.
-
Complete the following fields:
Fields
Field Value Description Name
Enter
Microsoft Social Login.The name of the service.
Client ID
Enter the client ID you copied in Task 1.
For example,
9b6b20d4-36e0-4d13-af17-412f51a6567f.Specifies the
client_idparameter as described in section 2.2 of The OAuth 2.0 Authorization Framework specification.Token Introspection Endpoint URL
Leave blank.
The URL to the endpoint handling access token validation, as described in the OAuth 2.0 Token Introspection specification.
For example,
https://oauth2.googleapis.com/tokeninfo.Redirect URL
The redirect URL you entered when creating the application in Microsoft Entra ID. The Redirect URL in Advanced Identity Cloud and the Redirect URI in Microsoft Entra ID must match.
For example,
https://<tenant-env-fqdn>/am.The URL to which the identity provider will redirect the user after authenticating, as described in Section 3.1.2 of The OAuth 2.0 Authorization Framework specification.
Redirect after form post URL
Leave blank.
The URL of a custom login page or application. Advanced Identity Cloud sends the processed form post data related to social login authentication to that URL as the value of the
form_post_entryquery parameter.Scope Delimiter
Enter a blank space in this field by placing your cursor in the field and pressing the Spacebar.
Specifies the delimiter used to separate scope values. For example, a blank space or a comma character.
Most providers use a blank space.
JWKS URI Endpoint
Leave blank.
The URI that contains the public keys of the identity provider. Advanced Identity Cloud uses these keys to verify signatures or to encrypt objects.
JWT Encryption Algorithm
If not already selected, select
NONE.The encryption algorithm supported by the provider that Advanced Identity Cloud should use to encrypt client authentication JWTs when Client Authentication Method is set to
PRIVATE_KEY_JWT, and (OpenID Connect providers only) request JWTs when Request Parameter JWT Option is set toVALUEorREFERENCE.If set to
NONE, Advanced Identity Cloud doesn’t encrypt the JWTs. Obtain a list of the supported algorithms from the provider’s.well-knownendpoint.JWT Encryption Method
If not already selected, select
NONE.The encryption algorithm supported by the provider that Advanced Identity Cloud should use to encrypt the following:
-
Client authentication JWTs when Client Authentication Method is set to
PRIVATE_KEY_JWT. -
(OpenID Connect providers only) Request JWTs when Request Parameter JWT Option is set to
VALUEorREFERENCE.Used in conjunction with
JWT Encryption Algorithm. Obtain a list of supported methods from the provider’s.well-knownendpoint.
Certificate Revocation Checking Options
Leave blank.
Specify one or more options to be used by the TLS certificate revocation checking mechanism.
If you select no options, the default behavior is to enable revocation checking with
SOFT_FAIL. -
-
Click Create.
-
In the Client Secret field, enter the client secret you copied in Task 1.
-
At the bottom of the page, click Save Changes.
The properties under the UI Config Properties section set the Microsoft logo and branding that displays to the end user when they select to authenticate with Microsoft.
The default settings use the Microsoft logo and branding. Change them if necessary.
|
The Transform Script field with the value of This use case doesn’t require you to update this script; however, if needed, you can update the script:
|
Task 3: Create a social authentication journey
In this task you create a journey that allows the end user to log in locally (using their Advanced Identity Cloud credentials) or log in socially using SSO (through Microsoft Entra ID).
After you set up the journey, it includes the following capabilities:
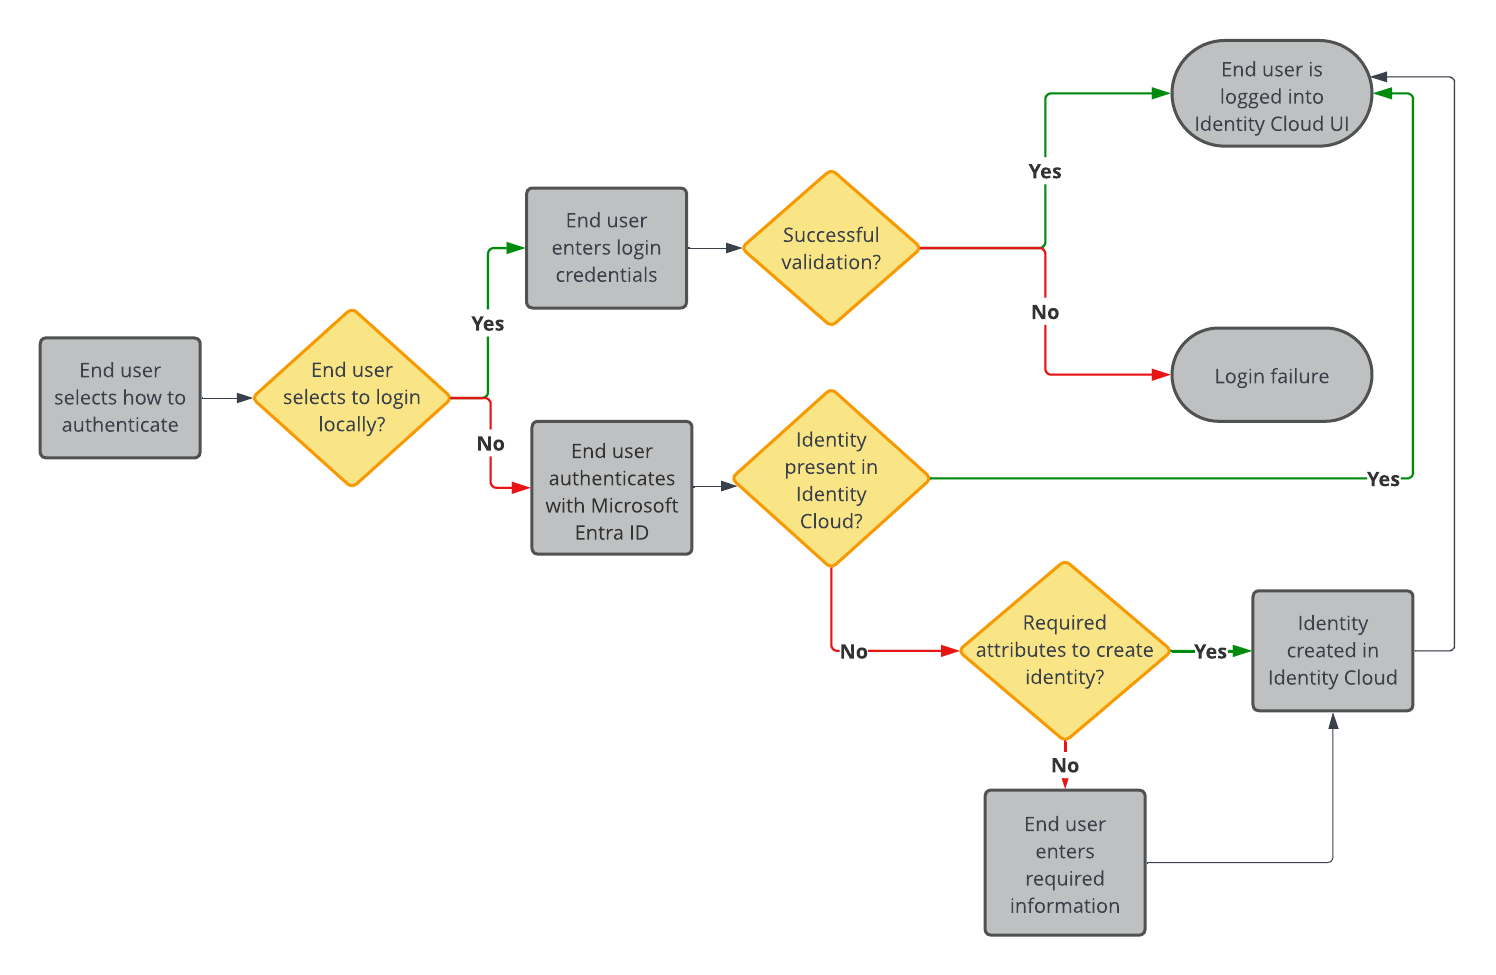
Configure journey options
-
In the Advanced Identity Cloud admin console, click Journeys.
All existing Advanced Identity Cloud journeys display.
-
Click + New Journey.
-
Configure options for the new journey:
Field Value Description Name
Enter
Social authentication with Microsoft.A name to display in the journeys list.
Identity Object
Select
Alpha Realm - Users.The type of object that this journey authenticates.
Description
Enter
A login journey that allows end users to log into the end user UI locally or with Microsoft. This is for the implementation guide..Description of the journey.
Override theme
Don’t enable.
Lets you provide a unique UI for this journey.
Default journey for end users
Don’t enable.
Lets you designate this journey as the default journey for your Advanced Identity Cloud environment.
Tags
Enter
Implementation Guide.Keywords for organizing the journeys list.
-
Click Save. The journey editor displays.
To save your progress, periodically click Save in the top right of the journey editor. Failure to do this results in losing your work if the page reloads or if you lose your network connection. 
Collect and validate user credentials locally
-
In the top left search bar, enter
Page Node.A Page node combines multiple nodes that request input into a single page for display to the user. In this case, Advanced Identity Cloud displays the username and password boxes on the same page.
-
Drag the Page Node box from the left side of the journey editor to the right side (the canvas).
-
Connect the Start (person) icon to the Page Node by selecting the icon and dragging it into the left side (input) of the Page Node. An arrow shows the flow of the journey from the person icon into the Page Node.
-
Search for the
Platform Usernamenode and drag it into the Page Node.The Platform Username node prompts the end user to enter their username and stores it in a configurable state attribute.
-
Search for the
Platform Passwordnode and drag it into the Page Node.The Platform Password node prompts the end user to enter their password and stores it in a configurable state attribute.
-
Search for the
Data Store Decisionnode and drag it to the right of the Page Node.The Data Store Decision node verifies that the username and password values match those in the data store configured for the realm.
-
Connect the right side of the Page Node (the outcome) into the left side of the Data Store Decision node (input).
-
Connect the
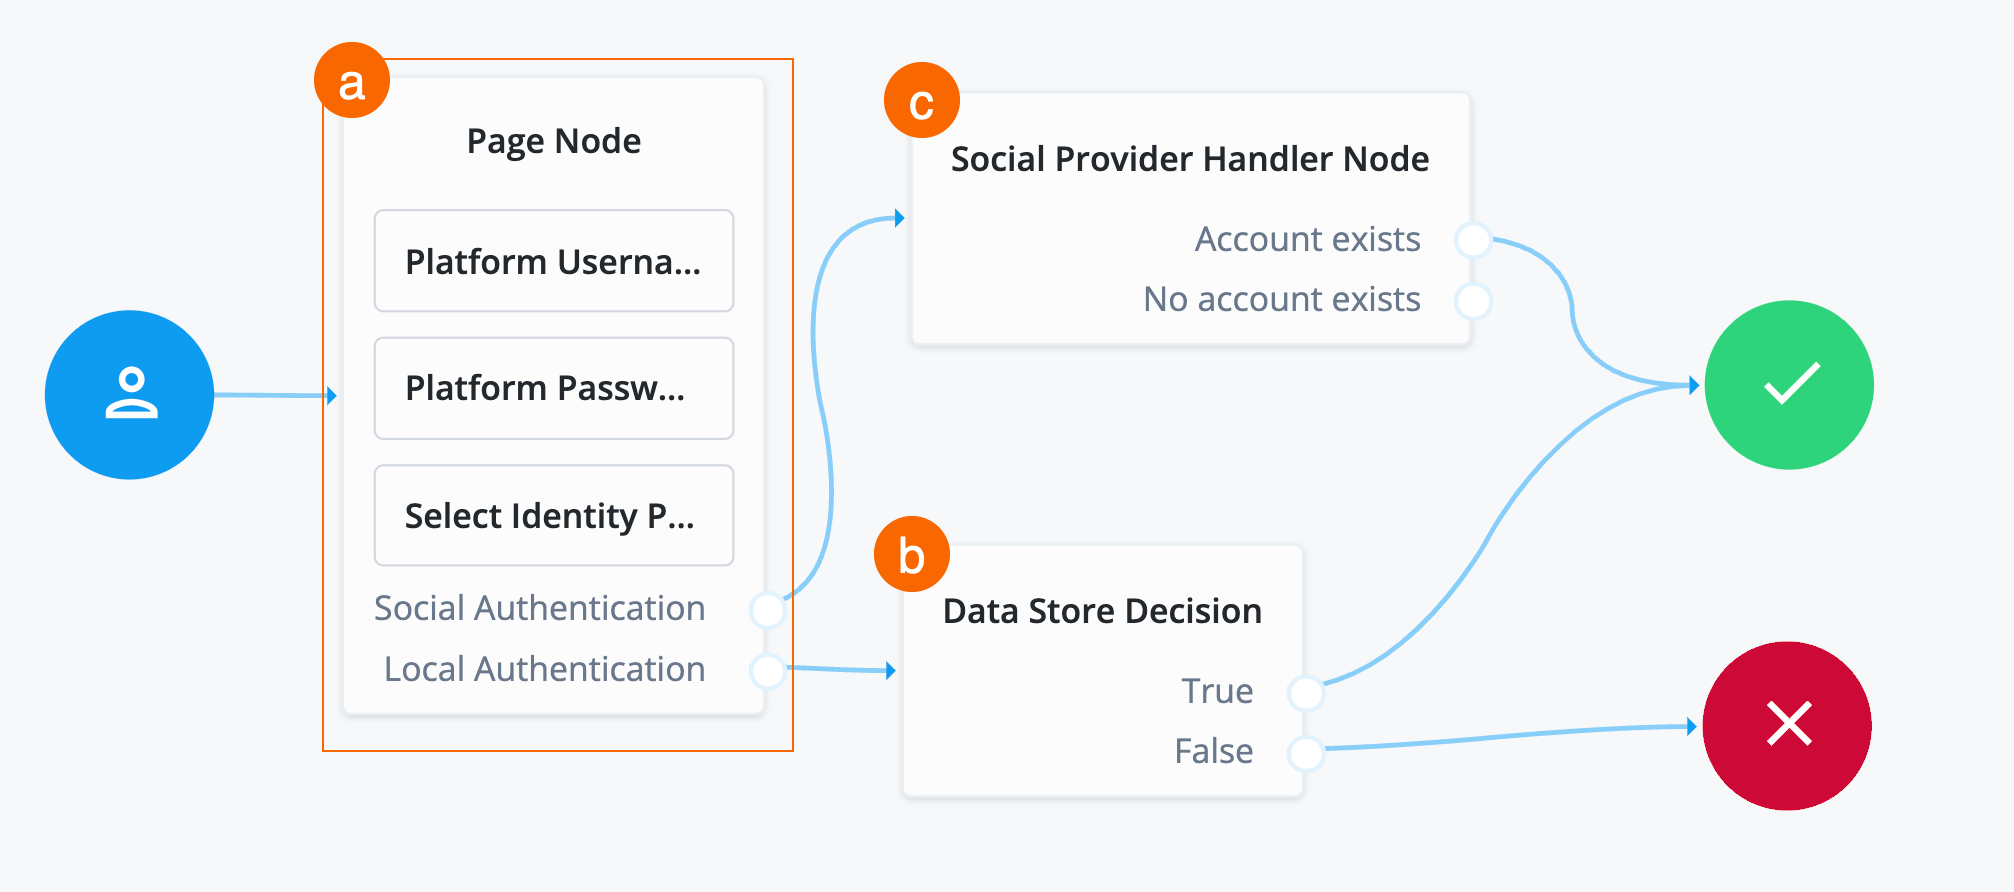
Trueoutcome of the Data Store Decision node into the Success node (green circle). -
Connect the
Falseoutcome of the Data Store Decision node into the Failure node (red X circle). -
In the top right of the journey editor, click Save.
|
When connecting the outcome of a node to another node, make sure there is a hand icon present on the node you’re connecting to. Click to display an example
|
Add Microsoft as identity provider
The next step in the journey is to:
-
Update the page node description to provide more information to the end user on login.
-
Add Microsoft as an option for the end user to choose when authenticating.
-
Upon successful redirect back to Advanced Identity Cloud, verify if the account (identity) exists in Advanced Identity Cloud.
To add Microsoft as an authentication provider:
-
Click the Page Node.
-
In the Page Node configurations under Page Description, click +.
-
Click + Add and enter the following:
Field Value Description Key
Enter
en.The locale of the text to display. You can add multiple locales. The locale set in the end user’s browser determines the locale presented in the journey.
Description
Enter
Enter your login credentials or log in with Microsoft..Custom text that displays to the end user when the journey goes through the Page node.
-
Click Done and then Save.
-
Search for the
Select Identity Providernode and drag it into the Page Node.The Select Identity Providers node presents the user with a list of configured, enabled, social identity providers to use for authentication.
-
Click the Select Identity Provider node, and in the Filter Enabled Providers field on the right side of the screen, enter
Microsoft Social Login.By default, the node displays all identity providers marked as
Enabledin the Social Identity Provider Service as a selectable option. Specify the name of one of more providers to filter the list.View the names of your configured social identity providers in Native Consoles > Access Management > Realms > Realm name > Services > Social Identity Provider Service > Secondary Configurations. Don’t change the default properties.
-
Connect the
Local Authenticationoutcome of the Page Node as input to the Data Store Decision node. -
Search for the
Social Provider Handler Nodeand drag it to the right of the Page Node.The Social Provider Handler node takes the identity provider the end user selects, in this case Microsoft, from the Select Identity Provider node and attempts to authenticate the user. This node collects relevant profile information from the provider and returns the user to the flow, transforming the profile information into the appropriate attributes.
-
Configure the properties for the Social Provider Handler node:
Properties
Field Value Description Name
Don’t modify.
Name of the node. The name entered displays in the journey canvas.
Transformation Script
Select Normalized Profile to Managed User.
This script transforms the IdP’s user identity into a normalized user identity that Advanced Identity Cloud can use.
You can view the script in normalized-profile-to-managed-user.js.
Username Attribute
Don’t modify the default value (userName).
The user identity attribute in Advanced Identity Cloud that contains a user name.
Client Type
Don’t modify the default value (BROWSER).
The client type authenticating to the provider.
-
Connect the
Social Authenticationoutcome of the Page Node as input to the Social Provider Handler Node. -
Connect the
Account Existsoutcome of the Social Provider Handler Node to the Success node. -
Click Save.
Create identity if not present in Advanced Identity Cloud
If the identity returned from Microsoft Entra ID isn’t present in Advanced Identity Cloud, then Advanced Identity Cloud must create the identity with JIT registration.
This requires that the journey:
-
Check if the attributes in the returned access token from Microsoft Entra ID are enough to create the identity in Advanced Identity Cloud.
The required attributes to create an identity in Advanced Identity Cloud are set by enabling the requiredfield on properties in a managed object. Learn more about therequiredproperty description in Create and modify object types.If the required attributes are present, create the identity in Advanced Identity Cloud, create a session for the end user, and log them into the Advanced Identity Cloud admin console.
-
If the access token from Microsoft Entra ID doesn’t contain enough required information to create the identity, prompt the end user to enter the necessary information. After doing this, create the identity in Advanced Identity Cloud, create a session for the end user, and log them into the Advanced Identity Cloud admin console.
To create an identity if not present:
-
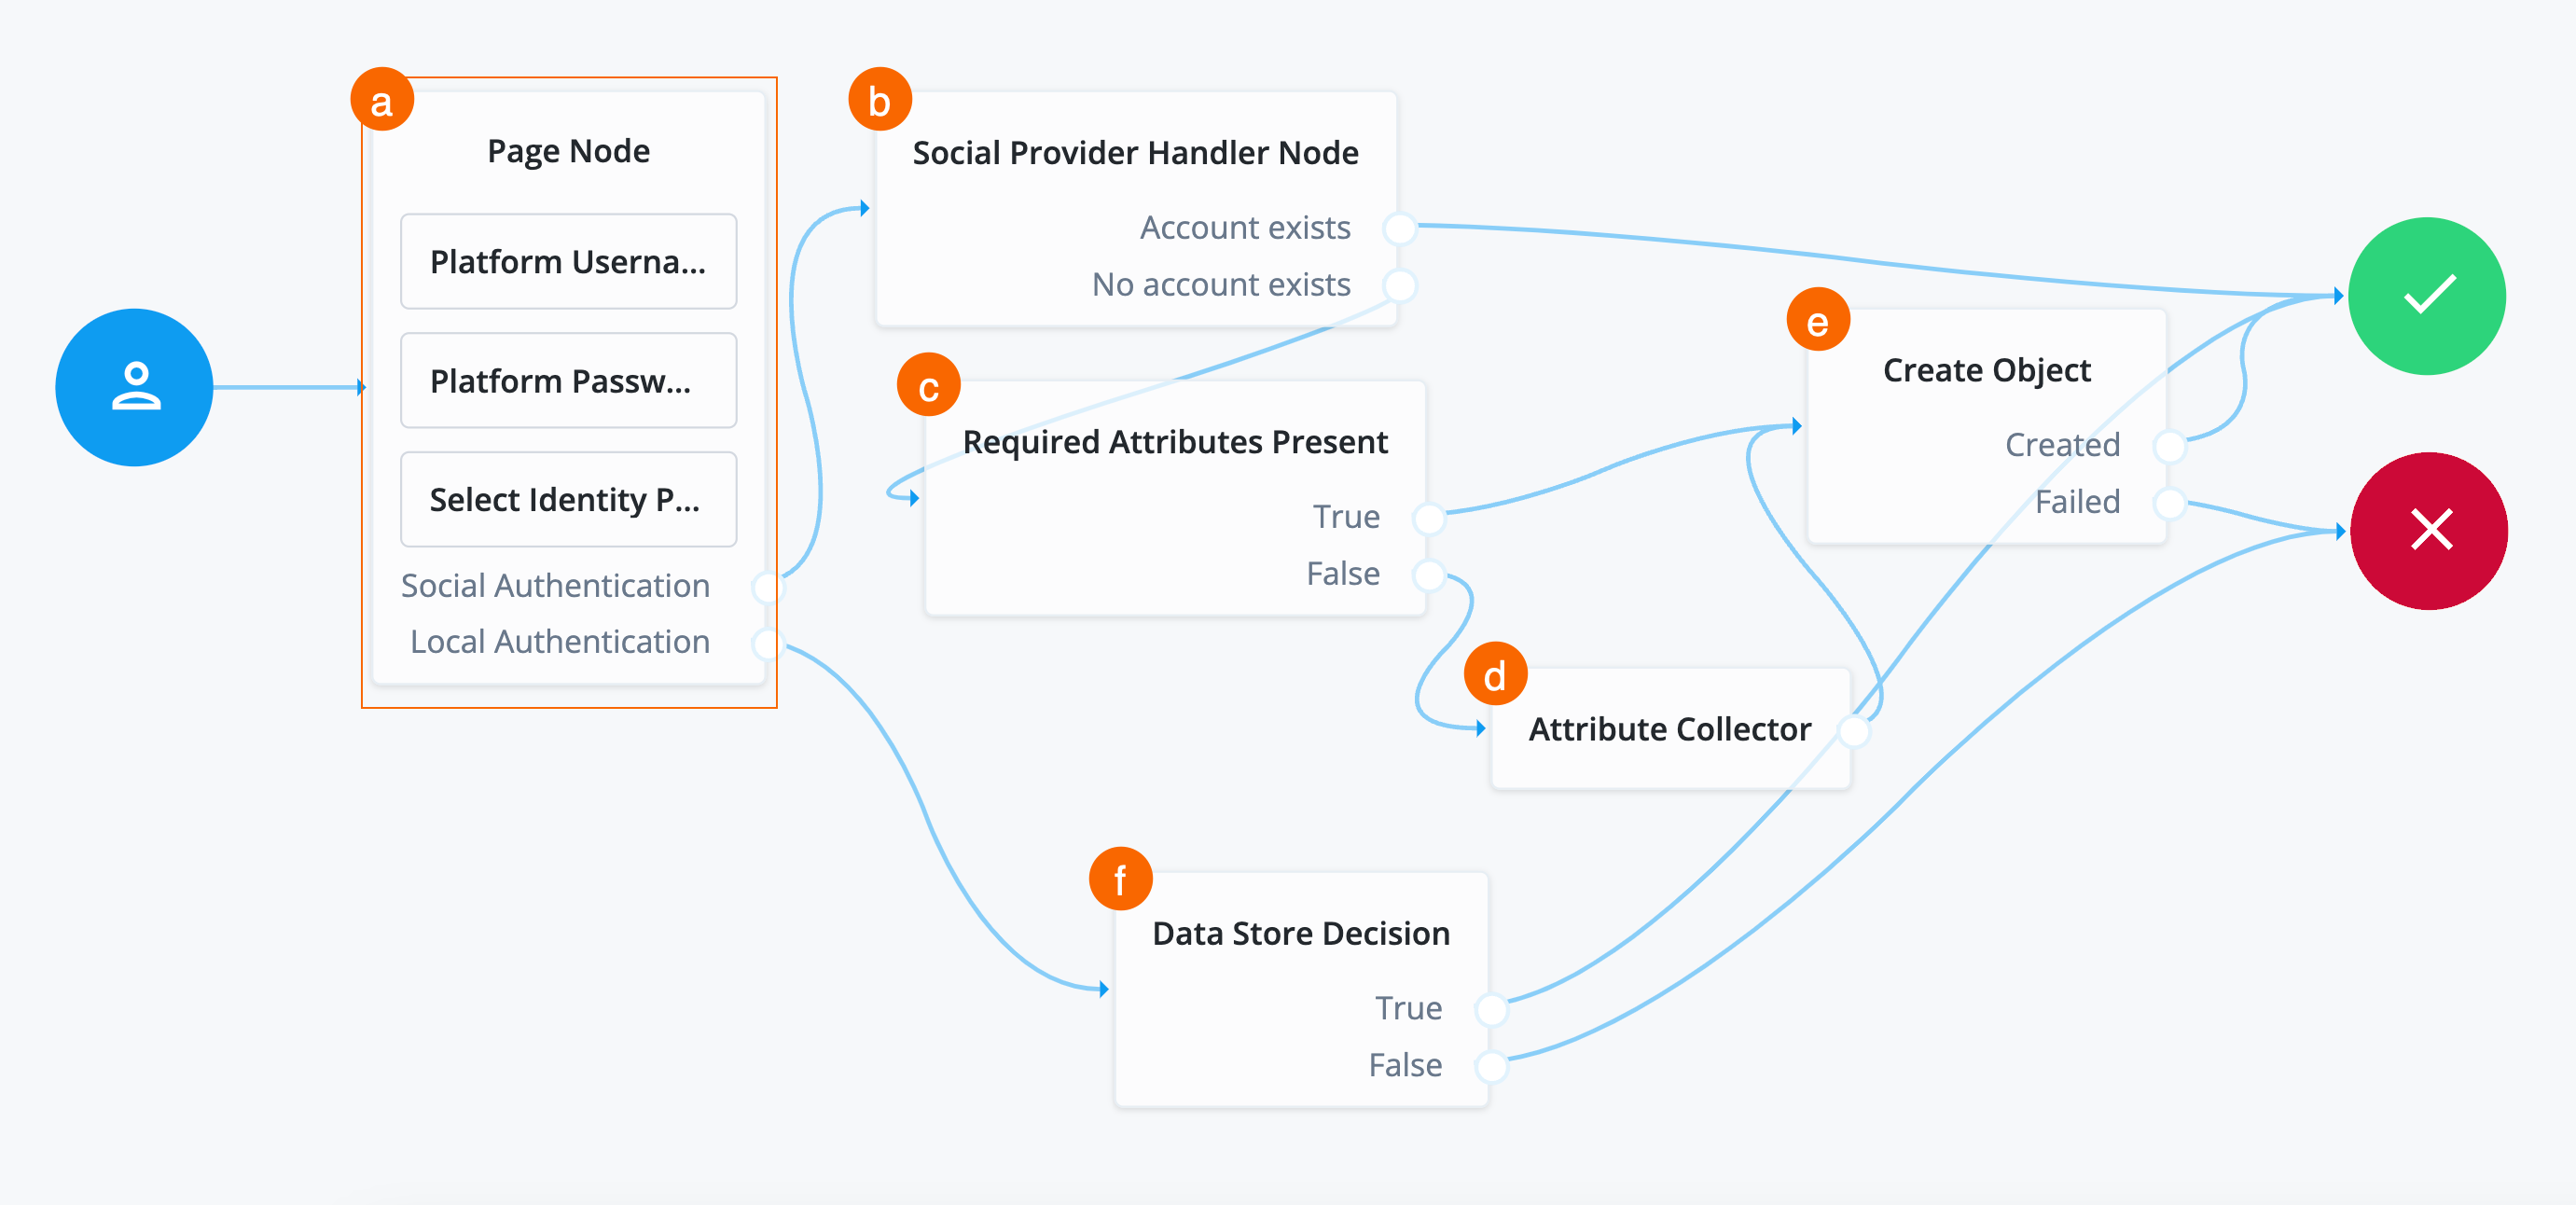
Search for the
Required Attributes Presentnode and drag it under thr Social Provider Handler Node.The Required Attributes Present node checks the specified identity resource in Advanced Identity Cloud, and determines if all attributes required to create the specified object exist within the shared node state. In this case, these are the attributes that Microsoft sent back to Advanced Identity Cloud.
-
Connect the
No Account Existsoutcome of the Social Provider Handler Node as input to the Required Attributes Present node. -
In the properties of the Required Attributes Present node, set the value of Identity Resource to
managed/alpha_user. -
Search for the
Create Objectnode and drag it to the right of the Required Attributes Present node.The Create Object node creates a new object in Advanced Identity Cloud based on information collected during authentication, such as user registration.
Any managed object attributes that are marked as required must be collected during authentication to create the new object. The is why the Required Attributes Present node precedes the Create Object node.
-
Connect the
Trueoutcome of the Required Attributes Present node to the input of the Create Object node. -
In the properties of the Create Object node, set the value of Identity Resource to
managed/alpha_user. -
Connect the
Createdoutcome of the Create Object node to the Success node and theFailedoutcome to the Failure node. -
Search for the
Attribute Collectornode and drag it under the Required Attributes Present node.The Attribute Collector node collects the values of attributes for use later in the flow; for example, to populate a new account during registration. To reference the attributes, they must exist in the managed object schema.
-
Connect the
Falseoutcome of the Required Attribiutes Present node to the input of the Attribute Collector node. -
Configure the properties for the Attribute Collector node:
Properties
Field Value Description Name
Don’t modify.
Name of the node. The name entered displays in the journey canvas.
Attributes to Collect
Enter the following attributes:
-
userName -
mail -
givenName -
sn
You must press Enter after each entry. A list of the attributes to collect, based on those in the Advanced Identity Cloud schema for the current identity object.
For example, to view the properties of
alpha_user, from the IDM admin console, go to Configure > Managed Objects > alpha_user and enter values into this field as they display in the Property Name column.All Attributes Required
Enable.
When enabled, all attributes collected in this node are required to continue. In this case, all attributes are required because they correspond to the attributes needed by the managed object schema.
Validate Input
Don’t enable.
When enabled, validate the content against any policies specified in the managed object schema for each collected attribute. For example, if you set a policy that the
`userNamemust be in an email format, then the node validates that this policy is met before preceding.Identity Attribute
If not already entered, enter
userName.The attribute used to identify the object in Advanced Identity Cloud. In this case, the attribute used to reference the identity in the backend.
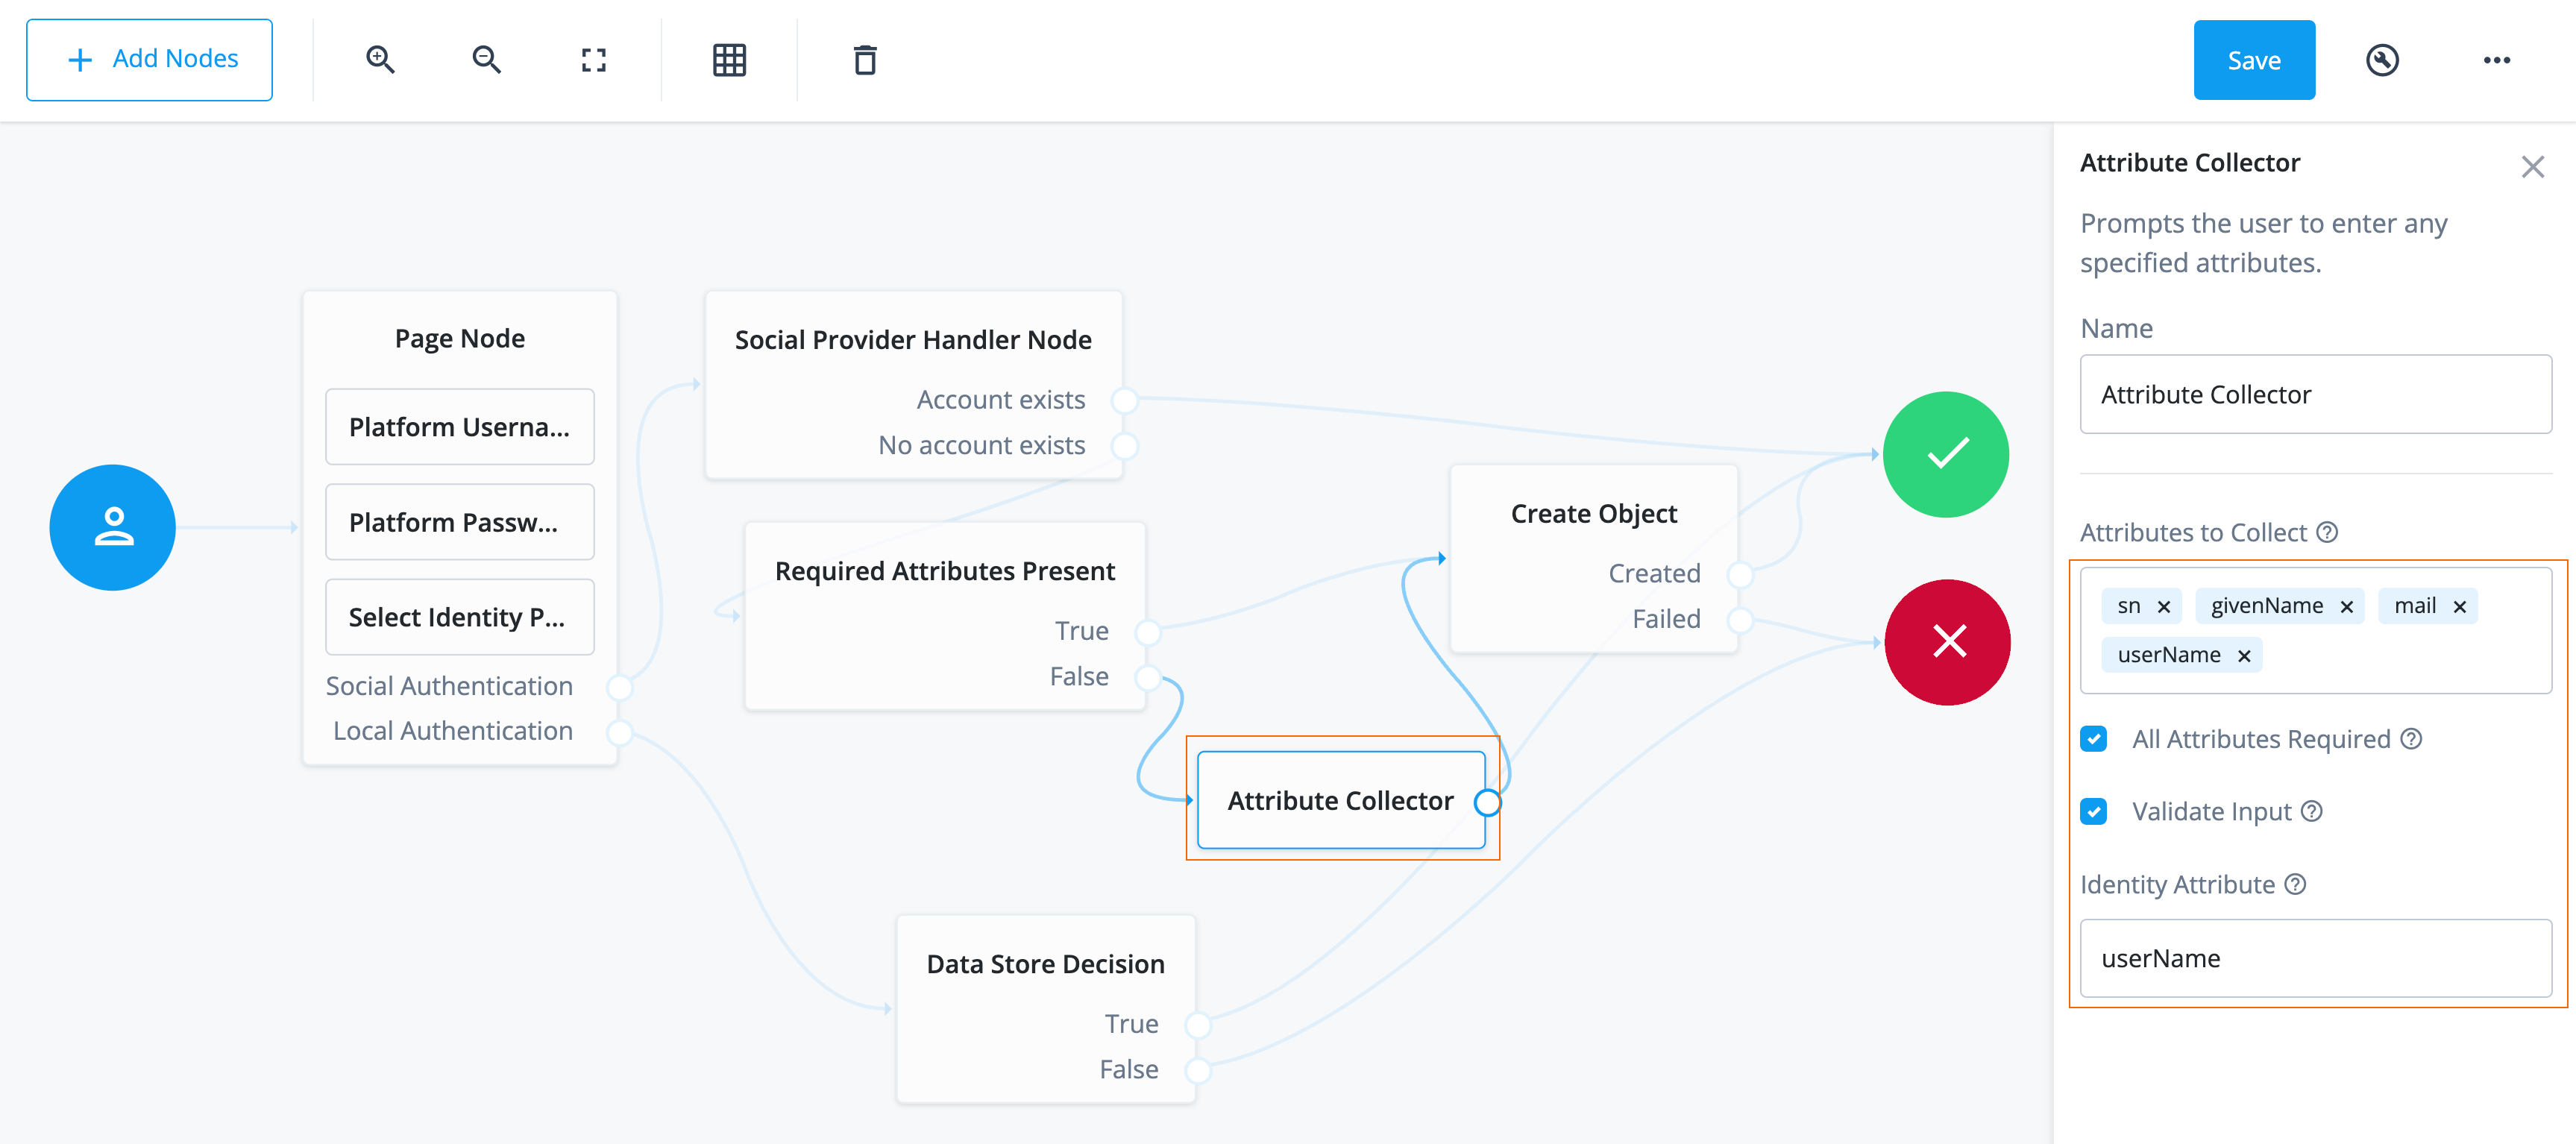
-
-
Connect the outcome of the Attribute Collector node to the input of the Create Object node.
-
Click Save. You have now configured the journey successfully.
Task 4: Check journey path connections
The Social authentication with Microsoft journey uses many nodes.
Use the following table to compare each node’s outcomes and validate
that you wired the journey correctly.
Many nodes can have more than one outcome. "→" denotes that a node only has one outcome path.
| Source node | Outcome path | Target node |
|---|---|---|
Start (person icon) |
→ |
Page Node |
Page node containing:
|
Social Authentication |
Social Provider Handler Node |
Local Authentication |
Data Store Decision |
|
Social Provider Handler Node |
Account exists |
Success |
No account exists |
Required Attributes Present |
|
Required Attributes Present |
True |
Create Object |
False |
Attribute Collector |
|
Attribute Collector |
→ |
Create Object |
Create Object |
Created |
Success |
Failed |
Failure |
|
Data Store Decision |
True |
Success |
False |
Failure |
Validation
Now that you have created an application in Microsoft Entra ID, configured Advanced Identity Cloud, and created your journey, you are ready to validate the use case.
Before validating, make sure you have a test user in Microsoft Entra ID that has all the necessary attributes Advanced Identity Cloud requires in its identity:
When you create an identity in Advanced Identity Cloud, you set the required attributes by enabling the
required field on properties in a managed object.
Learn more about the required property description in
Create and modify object types.
|
-
User Principal Name(UPN)Advanced Identity Cloud uses the UPN to create the
mail(email) anduserNameattributes of the identity in Advanced Identity Cloud. -
Display Name -
Given Name -
Surname
The steps in this validation follow a typical flow where Microsoft Entra ID provides the necessary attributes that Advanced Identity Cloud requires to create an identity.
Steps
-
Get a URL you can use to test the journey:
-
Log in to the Advanced Identity Cloud admin console as an administrator.
-
Select Journeys.
-
Select the journey you created, Social authentication with Microsoft.
A preview screen of the journey displays.
-
Click the copy icon next to Preview URL, a URL you can use to test a journey as an end user.
-
-
Authenticate using Microsoft:
-
Paste the URL into an incognito window.
Use incognito mode for testing to avoid caching issues so that any current sessions you have don’t interfere with your test.
The login end-user UI displays.
-
Click Sign in with Microsoft. The journey redirects you to a Microsoft sign-in page.
-
Enter the email/UPN of the test user in Microsoft Entra ID.
-
Click Next.
-
Enter the password of the test user.
Microsoft may prompt you to configure MFA or other settings. This depends on the configurations you have set in Microsoft Entra ID. -
On the Permissions Requested screen, click Accept. Microsoft is requesting your permission to share the user’s information with Advanced Identity Cloud using the application you created.
Microsoft redirects you back to Advanced Identity Cloud logged into the Advanced Identity Cloud end-user UI.
If you receive an error similar to
AADSTS500113: no reply address is registered for the application, make sure the Reply URL you configured in Advanced Identity Cloud and in Microsoft Entra ID are the same.If you receive the error
Session has timed outon redirect to Advanced Identity Cloud, restart the flow. To configure the timeout, go to Native Consoles > Access Management > Authentication > Settings > Trees and set the Max duration (minutes) field.
-
-
View created user and logout:
-
From the left navigation menu, click Profile. View the username of the user in Advanced Identity Cloud. This username correlates to the email/UPN in Microsoft Entra ID.
Under Social Sign In, view that Microsoft is now a connected application.
-
Click the test user’s name in the top right corner of the Advanced Identity Cloud end-user UI.
-
Select Sign Out.
You are redirected to a sign-in page. This page differs from the journey you created, Social authentication with Microsoft. The page you are directed to when you sign out is the default journey in the realm. Learn how to set the default journey in "Default end-user journey" in Journeys.
-
Close the incognito window.
-
|
For further validation, test the journey with
a test user from Microsoft Entra ID
that has the |
Explore further
Reference material
| Reference | Description |
|---|---|
Realms are administrative units that group configurations and identities together. Realms let you manage different sets of identities and applications within the same Advanced Identity Cloud tenant. Each realm is fully self-contained and operates independently of other realms within a tenant. |
|
Get to know the admin interfaces; Advanced Identity Cloud admin console, AM admin console, and IDM admin console. |
|
Conceptual information on journeys and their purpose in Advanced Identity Cloud. |
|
Description of fields that relate to authentication settings that apply to the entire realm. |
|
A guided video of journeys in Advanced Identity Cloud and how to use them. |
|
Learn about the configurable nodes Advanced Identity Cloud offers for use in journeys. |
|
Customize the look and feel of login and end-user UI pages. This is used when you are using the ForgeRock hosted pages as your UI option. |
|
Reference of the social identity provider service configurations. |
|
Learn more about localization (support for languages) with Advanced Identity Cloud hosted (login and end-user UI) pages. |
|
Configure policies on properties in a managed object. For example, create a policy on the
|
Okta as RP (OIDC)
Description
Estimated time to complete: 20 minutes
In this use case, configure SSO using OIDC with Advanced Identity Cloud as the identity provider (IDP) and Okta as the service provider (SP).
Goals
After completing this use case, you will know how to do the following:
-
Configure Advanced Identity Cloud as an OIDC identity provider
-
Configure Okta as a remote SP
-
Use the Advanced Identity Cloud end-user UI application dashboard to federate to Okta
Prerequisites
Before you start, make sure you have the following:
-
A basic understanding of:
-
The Advanced Identity Cloud admin console and Advanced Identity Cloud end-user UI
-
SSO (Federation)
-
OIDC
-
-
Completed the use case Create test users and roles
-
Access to your test Advanced Identity Cloud environment as an administrator
-
Access to an Okta development environment as an administrator
Tasks
| This use case requires the use of third-party services. Use your environment-specific details where necessary. |
Task 1: Create a custom OIDC application in Advanced Identity Cloud
-
Log in to the Advanced Identity Cloud admin console.
-
In the Advanced Identity Cloud admin console, go to Applications > Custom Application > OIDC - OpenId Connect > Web.
-
On the Application Details page, add a web application with the following configuration, and then click Next:
Field Value Name
okta_clientDescription
Okta clientOwners
App OwnerApp Logo URI
https://www.okta.com/sites/default/files/Okta_Logo_BrightBlue_Medium-thumbnail.png -
On the Web Settings page, add the following configuration, and then click Create Application:
Field Value Client ID
okta_clientClient Secret
Enter a password for the client. Remember the password because you need it to configure Okta.
The Okta client page is displayed.
-
On the Okta client page, go to the Sign On tab, add the following configuration, and then click Save:
Field Value Sign-in URLs
https://<okta-tenant-env-fqdn>/oauth2/v1/authorize/callbackGrant Types
Authorization CodeScopes
openid,profile,email -
At the end of the General Settings panel, click Show advanced settings, and then Authentication.
-
Set Token Endpoint Authentication Method to
client_secret_postand click Save.The configuration should resemble the following examples:
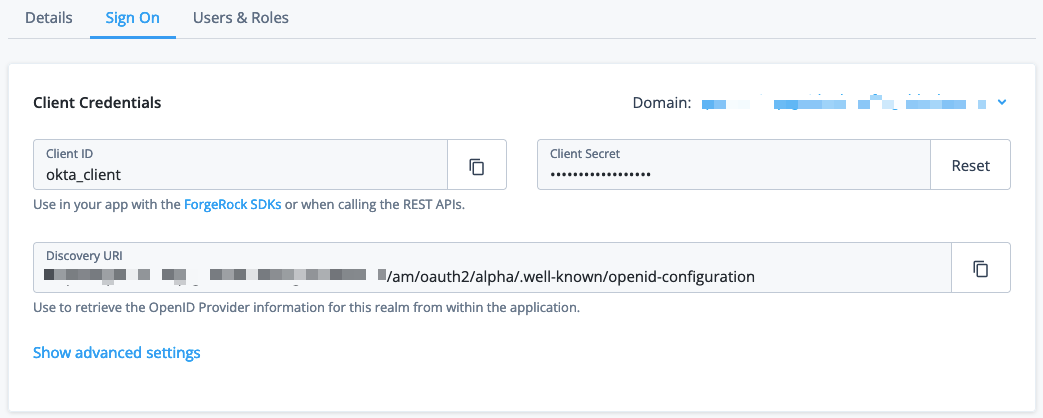
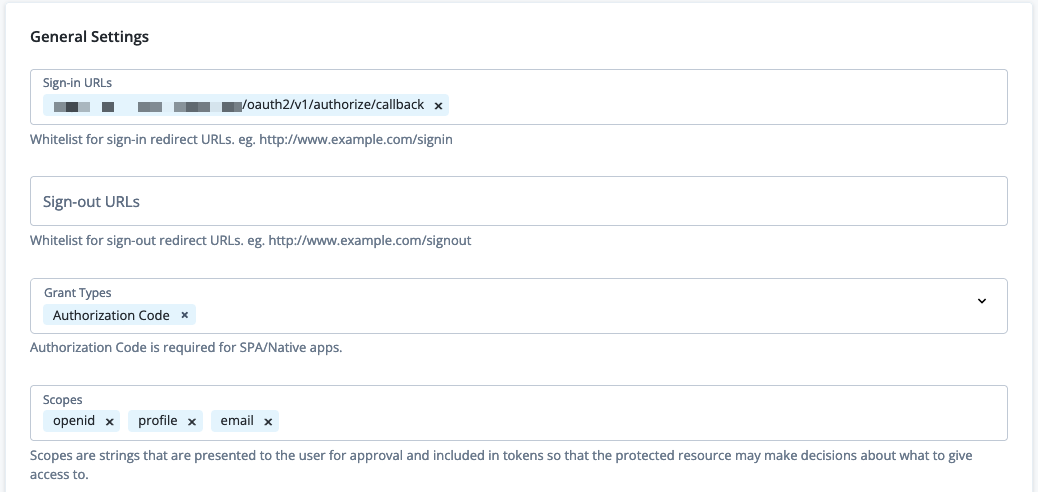
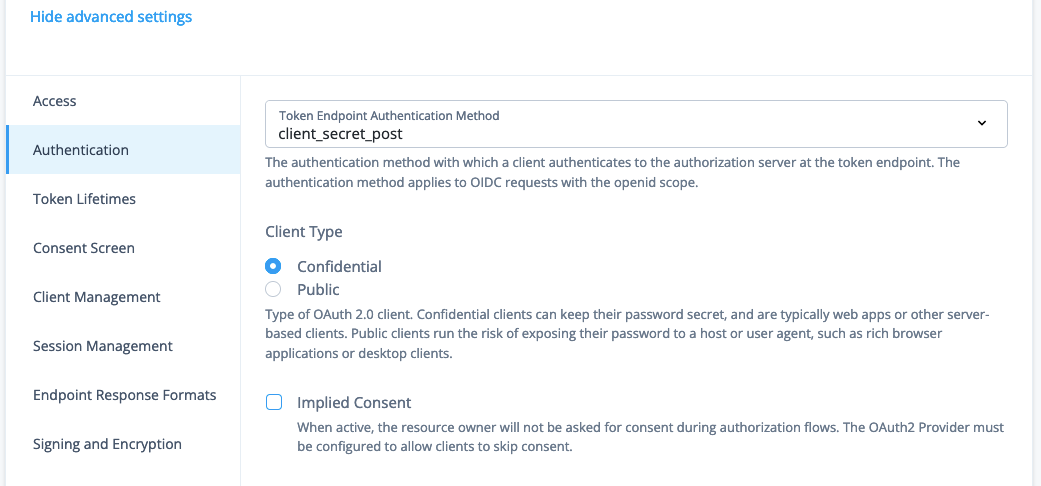
| To require Advanced Identity Cloud to ask for consent to share information during authorization flows, deselect Implied Consent. |
Task 2: Add Advanced Identity Cloud as an IDP in Okta
Refer to Okta’s documentation on how to Create an app at the Identity Provider.
-
Log in to the administrator interface for your Okta tenant and go to the Dashboard.
-
On the Okta Admin Console, click Directory > People > Add person and create a user with the same configuration as a user in Advanced Identity Cloud. This example uses the following user:
Field Value Username
acruseFirst Name
alexLast Name
cruseEmail Address
alex.cruse@example.comI will set password
Enable
Password
Secret12!User must change password on first login
Disable
-
Select Security > Identity Providers > Add identity providers and add an OpenID Connect IdP provider.
-
On the Configure OpenID Connect IdP page, add the following configuration, and then click Finish. Leave other fields with the default values:
Field Value Name
ForgeRockIdP Usage
SSO onlyScopes
email,openid,profileClient ID
okta_clientAuthentication type
Client secretClient Secret
The password created for
okta_clientin Task 1: Create a custom OIDC application in Advanced Identity CloudIssuer
https://<tenant-env-fqdn>:443/am/oauth2/alphaThe port number is required for this property. Authorization endpoint
https://<tenant-env-fqdn>/am/oauth2/alpha/authorizeToken endpoint
https://<tenant-env-fqdn>/am/oauth2/alpha/access_tokenJWKS endpoint
https://<tenant-env-fqdn>/am/oauth2/alpha/connect/jwk_uriUserinfo endpoint
https://<tenant-env-fqdn>/am/oauth2/alpha/userinfoIf no match is found
Create new user (JIT)Profile Source
Update attributes for existing usersThe ForgeRock identity provider page is displayed.
-
(Optional) Select Edit profile and mappings to change the mapping of attributes from Advanced Identity Cloud to Okta.
-
Enable the ForgeRock identity provider:
-
On the Okta Admin Console, go to Security > Identity Providers.
-
On the Routing Rules tab, click Add Routing Rule to redirect requests that meet defined criteria for authentication with Advanced Identity Cloud. The following rule redirects all requests from the
example.comdomain:Field Value Rule Name
PingOne Advanced Identity CloudIF User’s IP is
AnywhereAND User’s device platform is
Any deviceAND User is accessing
Any applicationAND User matches
Domain list on loginexample.comTHEN Use this identity provider
ForgeRockFor other options, learn more in Okta’s documentation.
-
At the Activate Rule prompt, activate the rule immediately.
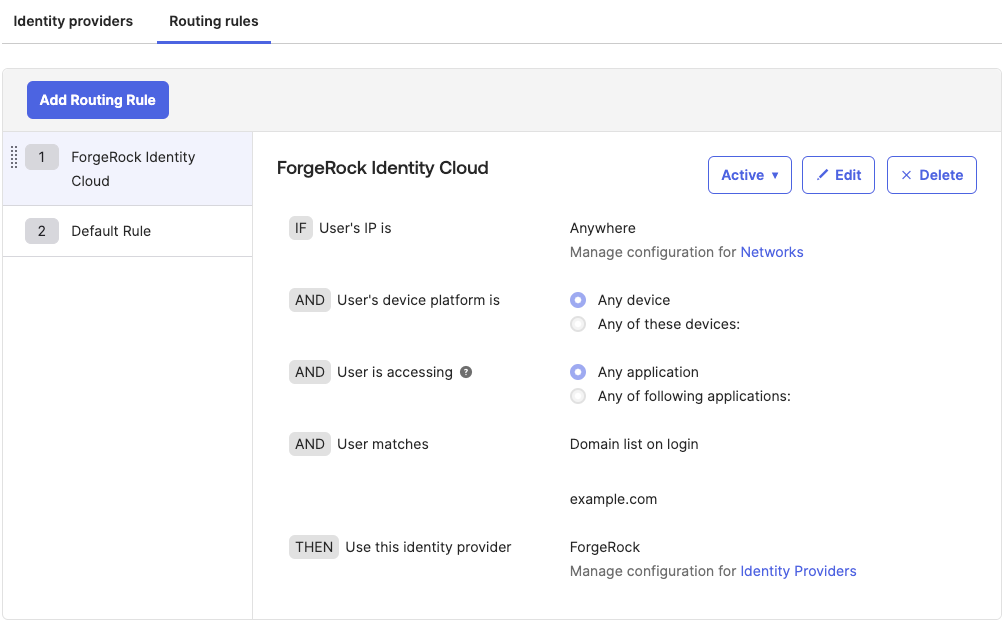
-
Validation
Now that you have created and configured a custom OIDC application and configured Okta as the SP, validate the configurations by:
-
Logging in to Okta as an end user
-
Authenticating to Advanced Identity Cloud after redirection
Validate your work with an identity that exists in Advanced Identity Cloud and Okta
-
In your browser’s privacy or incognito mode, go to your Okta tenant.
-
Log in as the user you created in Okta. For example, log in as username
alex.cruse@example.com.Because the username matches the routing rule created in Task 2: Add Advanced Identity Cloud as an IDP in Okta, Okta redirects the request to Advanced Identity Cloud for authentication.
If something is wrong, the authorization response contains error information to help you resolve the issue.
-
Log in to Advanced Identity Cloud as the identity you created in Create test users and roles. This example logs in as username
acrusepasswordSecret12!.If you deselected Implied Consent in Create a custom OIDC application in Advanced Identity Cloud, you are prompted for consent:
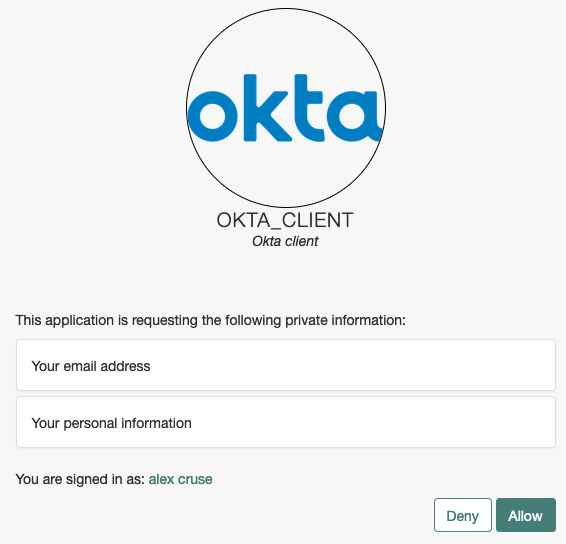
-
Click Allow to give Advanced Identity Cloud consent to access Okta resources.
After consenting, you are logged in to Okta.

Validate your work with an identity that exists in Advanced Identity Cloud but not in Okta
-
In a separate incognito browser, return to your Okta tenant.
-
In the Okta sign in window, enter the email of a user that exists in Advanced Identity Cloud but not in Okta. For example, enter username
bina.raman@example.comcreated in Create test users and roles.Okta redirects the request to Advanced Identity Cloud for authentication.
-
Log in to Advanced Identity Cloud as a user. For example, log in as username
bramanpasswordSecret12!.After successful authentication, the Okta JIT provisions the user
bramanbased on information in the response and logs them in to Okta. -
On the Okta Admin Console, click Directory > People and see that
braman@example.comhas been provisioned automatically.
Explore further
Reference material
| Reference | Description |
|---|---|
In Okta, manually add users, assign them to apps and groups, and manage their profile. |
|
In Okta, create a client application to use for authenticating and authorizing users. link: |
|
In Okta, configure routing rules for each of your Identity Providers or for different combinations of user criteria. |
|
Set up and manage applications that work with Advanced Identity Cloud. |
Pass-through auth (PTA) with Microsoft Entra ID (Azure AD)
Description
Estimated time to complete: 30 minutes
In this use case, you enable pass-through authentication (PTA) to Microsoft Entra ID (formerly Azure AD) and let Advanced Identity Cloud capture the Microsoft Entra ID password for future logins.
Goals
In completing this use case, you will learn how to do the following:
-
Use the Advanced Identity Cloud admin console
-
Create an authentication journey enabling pass-through authentication for Microsoft Entra ID users provisioned to Advanced Identity Cloud
-
Capture passwords on successful pass-through authentication
Prerequisites
Before you start work on this use case, make sure you have:
-
A basic understanding of:
-
The Advanced Identity Cloud admin console
-
Journeys
-
Nodes
-
Pass-through authentication
-
-
Completed the use case to Provision users from Microsoft Entra
-
A test user in Microsoft Entra ID and provisioned in Advanced Identity Cloud with the password to sign in as the test user
-
Access to your Advanced Identity Cloud development environment as an administrator
-
Access to your Microsoft Entra ID tenant environment as an administrator
Tasks
Task 1: Sign on to Microsoft Entra ID as the test user
This confirms you have the test user credentials and the test user is active in Microsoft Entra ID:
-
Browse to the sign-on page for Microsoft Azure.
-
Sign on as the test user.
-
If this is the first time the test user signed on, update the password and record the new password for pass-through authentication.
|
Do not enable multi-factor authentication for the test user. For this use case, the test user must be able to authenticate with only a username and password. |
Task 2: Confirm the test user account in Advanced Identity Cloud
-
Log in to the Advanced Identity Cloud admin console as an administrator.
-
Select Application > Identities > Manage.
-
Find the Advanced Identity Cloud test user in the list.
If the test user doesn’t have a Advanced Identity Cloud account yet, provision the account from Microsoft Entra ID.
Task 3: Create a pass-through authentication journey
-
Log in to the Advanced Identity Cloud admin console as an administrator.
-
Select Journeys > + New Journey and set at least the following before clicking Save:
Field Value NAME
PTA with password captureIdentity Object
managed/alpha_user -
Drag the following nodes onto the journey editor canvas:
-
Page node containing:
-
Platform Username node
-
Platform Password node
-
-
Data Store Decision node
-
Passthrough Authentication node
-
Identify Existing User node
-
Required Attributes Present node
-
Patch Object node
-
Increment Login Count node
-
Inner Tree Evaluator node
-
-
Connect the nodes, clicking Save from time to time to keep your work:
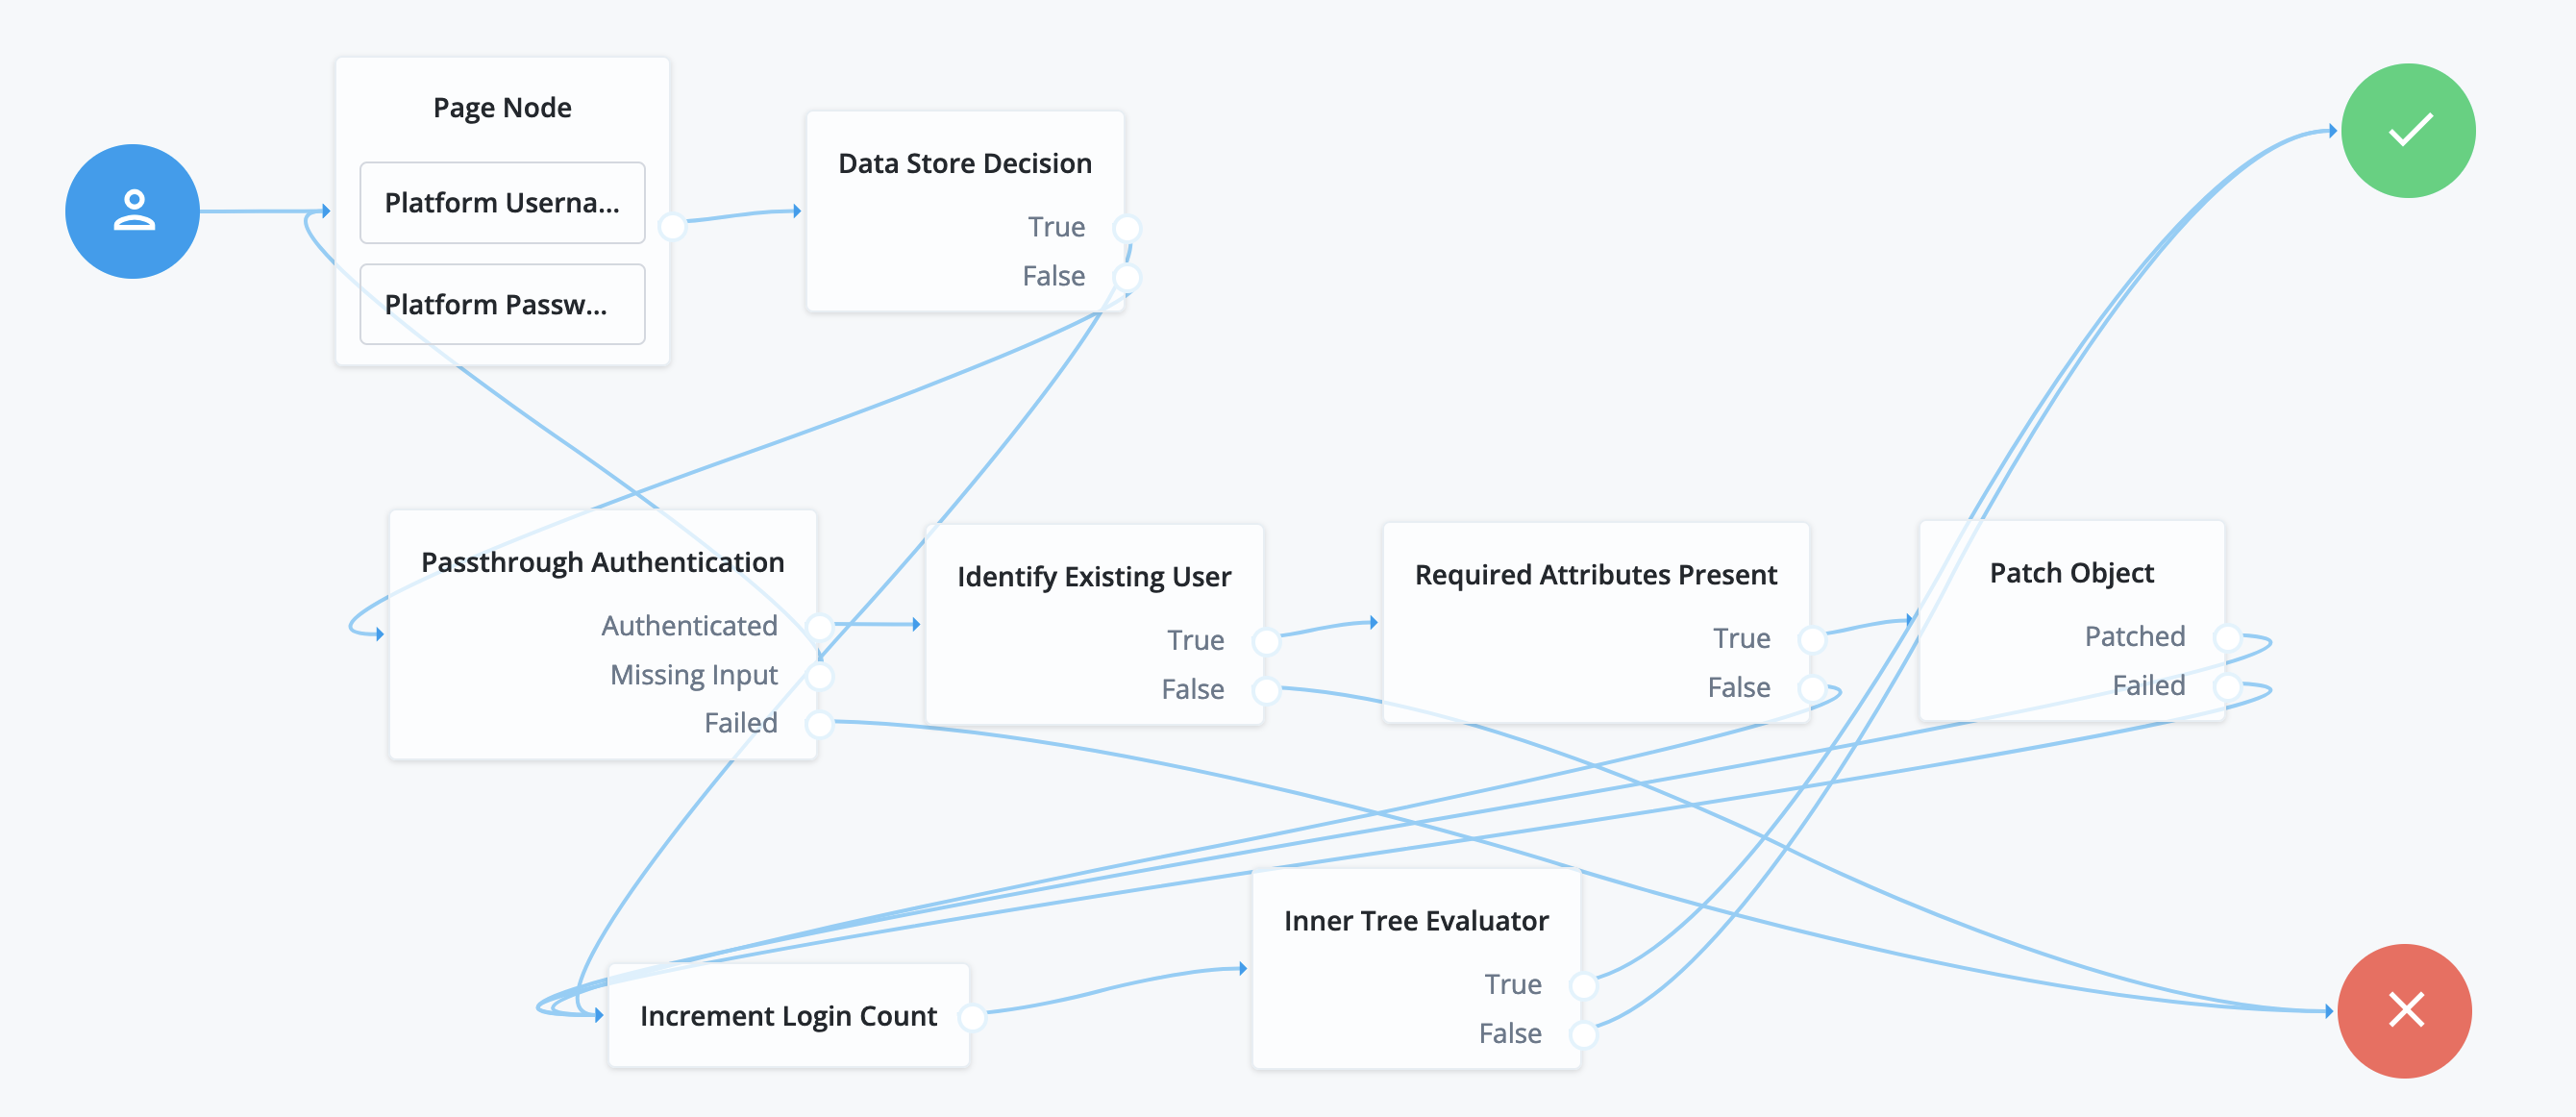
Source node Outcome path Target node Start (person icon)
→
Page node
Page node containing:
-
Platform Username node
-
Platform Password node
→
Data Store Decision node
Data Store Decision node
TrueIncrement Login Count node
FalsePassthrough Authentication node
Passthrough Authentication node
AuthenticatedIdentify Existing User node
Missing InputPage node
FailedFailure node
Identify Existing User node
TrueRequired Attributes Present node
FalseFailure node
Required Attributes Present node
TruePatch Object node
FalseIncrement Login Count node
Patch Object node
PatchedIncrement Login Count node
FailedIncrement Login Count node
Increment Login Count node
→
Inner Tree Evaluator node
Inner Tree Evaluator node
TrueSuccess node
FalseSuccess node
-
Task 4: Adjust node settings for the journey
Adjust the settings for the specified nodes as follows:
-
Configure these Page node settings and click Save:
Field Value Page Header
Key:
en, Value:Sign onPage Description
Key:
en, Value:This page uses pass-through authentication.All other fields
Accept the default settings, leaving the fields blank.
-
Configure these Passthrough Authentication node settings and click Save:
Field Value System Endpoint
The name of the connector for the provisioning application.
To find the name of the connector:
-
Log in to the Advanced Identity Cloud admin console as an administrator.
-
Select Native Consoles > Identity Management.
-
On the Identity Management page, select Configure > Connectors.
-
Find the MSGraphAPI Connector.
It is named like the application, but the connector name does not include spaces; for example, an application named Microsoft Entra ID has a connector named
MicrosoftEntraID.
Object Type
Enter
User.To find the name of the object type:
-
On the Identity Management page, select Configure > Connector Name > Object Types.
-
Find the available types in the list.
Identity Attribute
Keep
userName.Password Attribute
Keep
password. -
-
Configure these Identify Existing User node settings and click Save:
Field Value Identifier
Keep
userName.Identity Attribute
Enter
userName. -
Configure these Required Attributes Present node settings and click Save:
Field Value Identity Resource
managed/alpha_user -
Configure these Patch Object node settings and click Save:
Field Value Patch As Object
Enable.
Identity Resource
managed/alpha_userIdentity Attribute
Keep
userName. -
Configure these Inner Tree Evaluator node settings and click Save:
Field Value Tree Name
Select
ProgressiveProfile.
Task 5: Adjust password policy settings
When Advanced Identity Cloud updates a password, it checks the password policy to prevent weak passwords. Pass-through authentication has no way of ensuring a remote password is valid according to the Advanced Identity Cloud policy.
Default Microsoft Entra ID password policies don’t necessarily match the default Advanced Identity Cloud password policy. Adjust the Advanced Identity Cloud password policy appropriately to avoid rejecting valid Microsoft Entra ID passwords:
-
Log in to the Advanced Identity Cloud admin console as an administrator.
-
Select Security > Password Policy.
-
Adjust the settings to avoid rejecting valid Microsoft Entra ID passwords.
-
Click Save.
| This changes the password policy for all identities in the realm. |
Task 6: Allow public client flows in Microsoft Entra ID
Update the Microsoft Entra ID application Advanced Identity Cloud uses for provisioning. This change allows the Advanced Identity Cloud connector to authenticate to Microsoft Entra ID with the username and password:
-
Sign in to the Microsoft Entra ID tenant as administrator.
-
Select Home > App registrations > Microsoft Entra ID application.
-
In the App registrations page, change Authentication > Advanced settings > Allow public client flows to Yes.
-
Click Save.
Validation
You are ready to validate the pass-through authentication journey.
Steps
Validate authentication in each of the following ways.
Default login before
Check the user cannot log in to Advanced Identity Cloud. Advanced Identity Cloud doesn’t have the user’s password:
-
Log in to the Advanced Identity Cloud admin console as an administrator.
-
Select Journeys > Login and copy the Preview URL.
-
Paste the URL into an incognito window.
Use incognito mode for testing to avoid caching issues. No current sessions interfere with your test.
The login page for the tenant displays.
-
Log in as the test user.
Log in fails.
Pass-through authentication
Log in with the user’s Microsoft Entra ID credentials, providing the username and password. After Advanced Identity Cloud verifies the credentials in Microsoft Entra ID, it stores the captured password in the user’s profile:
-
Log in to the Advanced Identity Cloud admin console as an administrator.
-
Select Journeys > Pass-through authentication with password capture and copy the Preview URL.
-
Paste the URL into an incognito window.
The login page for the pass-through authentication journey displays.
-
Log in as the test user.
Behind the scenes, the journey proceeds as follows:
-
The Data Store Decision node fails to authenticate the user.
-
The Passthrough Authentication node tests the username and password through the connector to Microsoft Entra ID.
You provided the correct credentials, so the test succeeds. The node has confirmed the password is valid.
-
The Identify Existing User node finds the provisioned test user in Advanced Identity Cloud.
-
The Required Attributes Present node checks the shared node state has the
managed/alpha_userattributes needed for a minimally complete user profile. -
The Patch Object node updates the test user profile with the required attributes, capturing the valid password.
-
The Increment Login Count node updates the login count.
-
The Inner Tree Evaluator node invokes the
ProgressiveProfilejourney. -
The journey succeeds and the test user profile displays.
-
Default login after
Advanced Identity Cloud captured the user password during the pass-through authentication journey. The user can now log in to Advanced Identity Cloud directly:
-
Log in to the Advanced Identity Cloud admin console as an administrator.
-
Select Journeys > Login and copy the Preview URL.
-
Paste the URL into an incognito window.
The login page for the tenant displays.
-
Log in as the test user.
Log in succeeds.
Explore further
Reference material
| Reference | Description |
|---|---|
Get to know the Advanced Identity Cloud admin console. |
|
Learn about connecting Advanced Identity Cloud to Microsoft Entra ID. |
|
Read about alternative pass-through authentication methods. |
|
Refer to this Microsoft Entra ID documentation for details. |
Ping Identity as external authentication method for Microsoft Entra ID (Azure AD)
Description
Estimated time to complete: 30 minutes.
In this use case, you configure Advanced Identity Cloud as an external authentication method for Microsoft Entra ID (formerly Azure AD) using OIDC. This lets a user from Microsoft Entra ID use Advanced Identity Cloud as a second factor authentication solution.
Prerequisites
Before you start work on this use case, ensure you have these prerequisites:
-
A basic understanding of:
-
The Advanced Identity Cloud admin console
-
SSO (Federation)
-
OIDC
-
The Advanced Identity Cloud end-user UI
-
Microsoft Entra ID
-
-
Access to your development environment as an administrator.
-
A test Microsoft Entra ID environment with at least a P1 license.
-
An admin with the Privileged Role Administrator or Global Administrator role in Microsoft Entra ID.
-
A test user in Advanced Identity Cloud to serve as the application owner for the custom OIDC (Microsoft Entra ID) application.
-
The use case matches a user from Microsoft Entra ID to a test user in Advanced Identity Cloud. Specifically, make sure the test user’s
frIndexedString1attribute in Advanced Identity Cloud matches theObject IDattribute for the user in Microsoft Entra ID.
Tasks
| This use case requires the use of third-party services. Use your environment specific details where necessary. |
Task 1: Create a new OIDC web app in Advanced Identity Cloud
-
Create a new OIDC Web App (Applications > Custom Applications > OIDC - OpenId Connect > Web) with the following config:
Field Value Sign-in URLs
https://login.microsoftonline.com/common/federation/externalauthprovider
Grant Type
Implicit
Scopes
openid
Response Types
id_token
Claims
profile
Advanced > Authentication > Token Endpoint Authentication Method
none
Task 2: Set up Microsoft Entra ID as the service provider
The next task is to prepare Microsoft Entra ID to serve as a service provider (SP) and use Advanced Identity Cloud as an external authentication method.
Register a new app (required)
-
Navigate to https://entra.microsoft.com/#home.

-
In the left panel, click Applications > App registrations.
-
Click New registration.

-
Complete the following fields, and click Register:
Field Value Name
<AIC-EAM-DOC>
Supported account types
Accounts in this organizational directory only (... - Single tenant)
Redirect URI
<Your AIC authorization_endpoint> https:// <your instance>.forgeblocks.com/am/oauth2/alpha/authorize
Select a platform
Web

-
In the new app’s Overview page, note the UUID under Application (client) ID. You will need it to create an external authentication method.

-
On the left, under Manage, click API permissions.

-
Click Add a permission.
-
Click APIs my organization uses.

-
In the search box, search for Microsoft Graph.

-
In the result list, select Microsoft Graph.
-
Select Delegated permissions.

-
Under the Openid permissions section, select the openid and profile checkboxes, and click Add permissions.

-
Click Grant admin consent for <your company>.

-
Complete the necessary steps for this task, including granting admin consent, and refresh the screen to display the updated permission status. Learn more in Grant tenant-wide admin consent to an application in the Microsoft Entra ID documentation.

Create a new group (if needed)
We highly recommend that you initially don’t include all users in case you encounter issues. Instead, we recommend that you use a group.
-
In the left panel, click Identity > Groups > All groups.

-
Click New group, and complete the following fields:

Field Value Group type
Security
Group Name
Anything you want
Membership type
Assigned
-
Add a few test users, as needed.
Add a new authentication method (required)
-
Navigate to https://entra.microsoft.com/#home.
-
In the left panel, click Protection > Authentication methods.

-
Click Add external method (Preview), complete the following fields, and click Save:
Field Value Name
<Anything you want>
Client ID
Use the generated Application (client) ID you recorded when setting up the application in Advanced Identity Cloud
Discovery Endpoint
https://<tenant-env-fqdn>/am/oauth2/alpha/.well-known/openid-configuration
App ID
Use the generated Application (client) ID you recorded when setting up the application in Advanced Identity Cloud

-
Set Include or Exclude of users/groups, as needed.
-
Ensure that you granted admin consent from Task 2 - Register a new app, step 20. You need the Privileged Role Administrator or Global Administrator role to grant admin consent for the provider’s application.
Create new conditional access (required)
-
Navigate to https://entra.microsoft.com/#home.
-
In the left-hand panel, click Protection > Conditional Access.

-
Click Create new policy, and complete the following fields:
Field Value Name
<anything you want>
Users
You can add anyone you want, but we highly recommend that you don’t include all users at first in case you encounter issues. Instead, we recommend that you use a group. For example, the optional one created above.
Target resources
Apps you want to protect (My Apps for testing purposes)
Network
Set as needed
Condition
Set as needed
Grant
Grant access selected: Check Require multifactor authentication
Grant
For multiple controls: Set according to your security model
Task 3: Complete set up of Microsoft Entra ID in Advanced Identity Cloud
|
Learn more in Override the audience and issuer claims. |
-
Make a copy of the
Alpha OIDC Claims Script, and add the following lines in thegetComputedClaimsfunction, right before the return://MS Entra EAM var recievedSub = session.getProperty("eamsub"); computedClaims.put("sub", recievedSub); var amrMFAUsed = session.getProperty("eam-mfa-type"); var amrClaim = [amrMFAUsed]; computedClaims.put("amr", amrClaim);javascript -
Update your OIDC Client. From the Platform UI, navigate to Native Consoles > Access Management > Applications > OAuth 2.0 - Clients > clients > <The Client you create in the AIC Initial Setup above>.
-
On the Core tab, complete the following fields:
Field Value Redirection URIs
https:// login.microsoftonline.com/common/federation/externalauthproviderDefault Scope(s)
openid profile
-
On the Advance tab, complete the following fields:
Field Value JavaScript Origins
https://login.microsoftonline.com
https://login.microsoftonline.com:443Response Types
id_token
Grant Types
Implicit
Token Endpoint Authentication Method
None
-
On the OAuth2 Provider Overrides tab, complete the following fields:
Field Value Enable OAuth2 Provider Overrides
Enabled
Access Token Modification Plugin Type
Scripted
Access Token Modification Script
Alpha OAuth2 Access Token Modification Script
OIDC Claims Plugin Type
SCRIPTED
OIDC Claims Script
Name of the script you created in step 1
OIDC Claims Plugin Implementation Class
org.forgerock.openam.oauth2.OpenAMScopeValidator
Use Client-Side Access & Refresh Tokens
Enabled
Allow Clients to Skip Consent
Enabled
Scope Evaluation Plugin Implementation Class
org.forgerock.openam.oauth2.OpenAMScopeValidator
Scope Validation Plugin Type
JAVA
Scope Validation Plugin Implementation Class
org.forgerock.openam.oauth2.OpenAMScopeValidator
Authorize Endpoint Data Provider Plugin Type
SCRIPTED
Authorize Endpoint Data Provider Script
OAuth2 Authorize Endpoint Data Provider Script
Authorize Endpoint Data Provider Plugin Implementation Class
org.forgerock.openam.oauth2.OpenAMScopeValidator
Overrideable Id_Token Claims
sub acr amr
-
-
In the left panel, click Services.
-
Click Add a Service.
-
In the drop-down list, select Session Property Whitelist Service, and click Create.
-
In the Allowlisted Session Property Names and Session Properties to return for session queries fields, enter
eamsubandeam-mfa-type, and click Save Changes.
-
Import this journey, and update the config variable in the EAMGetLoginHint script with your EAM-specific data.
The EAMGetLoginHint script takes the redirect from Entra with a signed JWT containing the username to auth-n in the journey.
Learn more in Importing journeys.
|
This journey is only provided as an example. It isn’t configured to perform MFA. |

-
Update the
EAMGetLoginHintscript within the journey with the following details:Field Value issuer
The issuer URL in the format - https://login.microsoftonline.com/
<tid>/v2.0For
<tid>, on the left panel, navigate to Identity > Overview to find your tenant ID (TID).jwksJson
The full JWKS that can be found at https://login.microsoftonline.com/
<tid>/discovery/v2.0/keysaudience
The MS EAM App ID
tid
The MS EAM Tenant ID
nodeName
The name used for logging purposes
-
Make sure your test user has the User principal name from MS set on the
frIndexedString1field for your test user in Advanced Identity Cloud. -
Navigate to the Access Management native console (Native Consoles > Access Management) and in the Advanced OpenID Connect tab, update your OAuth2 Provider by completing the following fields:
Field Value Enable "claims_parameter_supported"
True (on)
OpenID Connect acr_values to Auth Chain Mapping
possessionorinherence: EAM SAMPLE (my journey name)
Validation
Now that you have created and configured the EAM setup, validate the configurations:
Steps
-
Navigate to https://myapps.microsoft.com.
-
Enter the test user’s username and password.
-
Select the external authentication method you set up.
-
Select your MFA Choice (Assumption - Your Journey Administrator set up the MFA challenge).
|
At this point, the user should be logged into Entra. |
Customization
PingOne Advanced Identity Cloud is highly customizable. For example, you can tailor the end-user experience or script a custom action within an authentication journey. Therefore, the use cases in this section focus on customization, from branding to code:
| Use case | Description |
|---|---|
Customize the look and feel of the Advanced Identity Cloud end-user UI hosted pages to match your organization’s branding. |
|
Customize an email template to match your organization’s branding. |
|
Duplicate an existing journey and modify it to record the time the user logs in to the Advanced Identity Cloud end-user UI. You use a script in a journey to record the login time. |
|
Create a script to get a service account access token within your journeys. Then, create a simple journey with this script to prove you can successfully request an access token. |
|
Create a sign-on journey that stores a custom session property. Then, create a custom OIDC claims script to and add the session property to the ID token as a custom claim. |
Customize a theme for hosted pages
Description
Estimated time to complete: 20 minutes.
In this use case, you customize the look and feel of the Advanced Identity Cloud end-user UI hosted pages to match your organization’s branding.
Goals
After completing this use case, you will know how to do the following:
-
Create a new theme in Advanced Identity Cloud.
-
Define the branding for end-user journey pages and account pages.
-
Enable account controls so that end users can download and delete their data from their profile page.
-
Set the new theme as the default theme for the Advanced Identity Cloud end-user UI hosted pages.
Prerequisites
Before you start work on this use case, ensure you have these prerequisites:
-
Access to your Advanced Identity Cloud development environment as an administrator.
-
A URL that specifies the location of a logo image. The URL must be publicly accessible.
-
A proficient understanding of HTML. Ping Identity allows you to customize pages with your own custom HTML.
-
You have completed the use case create test users and roles. Specifically, you have created the test user
acruse.
Tasks
Task 1: Create a new theme and define the branding
In this task, you create a new theme for end-user hosted pages and define the branding.
-
Log in to the Advanced Identity Cloud admin console as an administrator.
-
Go to Hosted Pages and New Theme.
-
Enter
My Organization Theme, and then click Save.The Hosted Pages editor displays.
-
In Global Settings make the following branding changes:
Tab Option Customize Styles
Brand Colors
Click the Brand Color field and enter the hex value
#009C80.Click the Brand Hover Color field and enter the hex value
#007661. -
Click Journey Pages and make the following branding changes:
Tab Option Customize Styles
Page Background
Click the Page Background Color field and enter the hex value
#007661.Logo
Logo
Click the pencil icon (), enter your logo URL in the Logo URL field, and then click Update.
Layout
Footer
Enable the Footer switch.
Click the pencil icon (), edit the HTML, and then click Update. For example, enter the following:
<div class="d-flex justify-content-center py-4 w-100"> <span class="pr-1">© 2023</span> <a href="https://www.my-example-org.com" class="text-body">My Organization</a> <a href="https://www.my-example-org.com/privacy-policy" style="color:#0000ee" class="pl-3 text-body">Privacy Policy</a> <a href="https://www.my-example-org.com/terms-conditions" style="color:#0000ee" class="pl-3 text-body">Terms & Conditions</a> </div>html -
Click Account Pages and make the following branding changes:
Tab Option Customize Logo
Expanded Version
Click the pencil icon (), enter your logo URL in the Logo URL field, and then click Update.
Collapsed Version
Click the pencil icon (), enter your logo URL in the Logo URL field, and then click Update.
Layout
Profile Page
Enable Account Controls.
Account controls allow end users to download the data Identity Cloud has about them in a JSON format and allow end users to delete their account information.
End users can only view the information and take actions for the items you enable in the Profile Page. Learn more in Configure visible information and end-user actions. -
Click Global to review your changes.
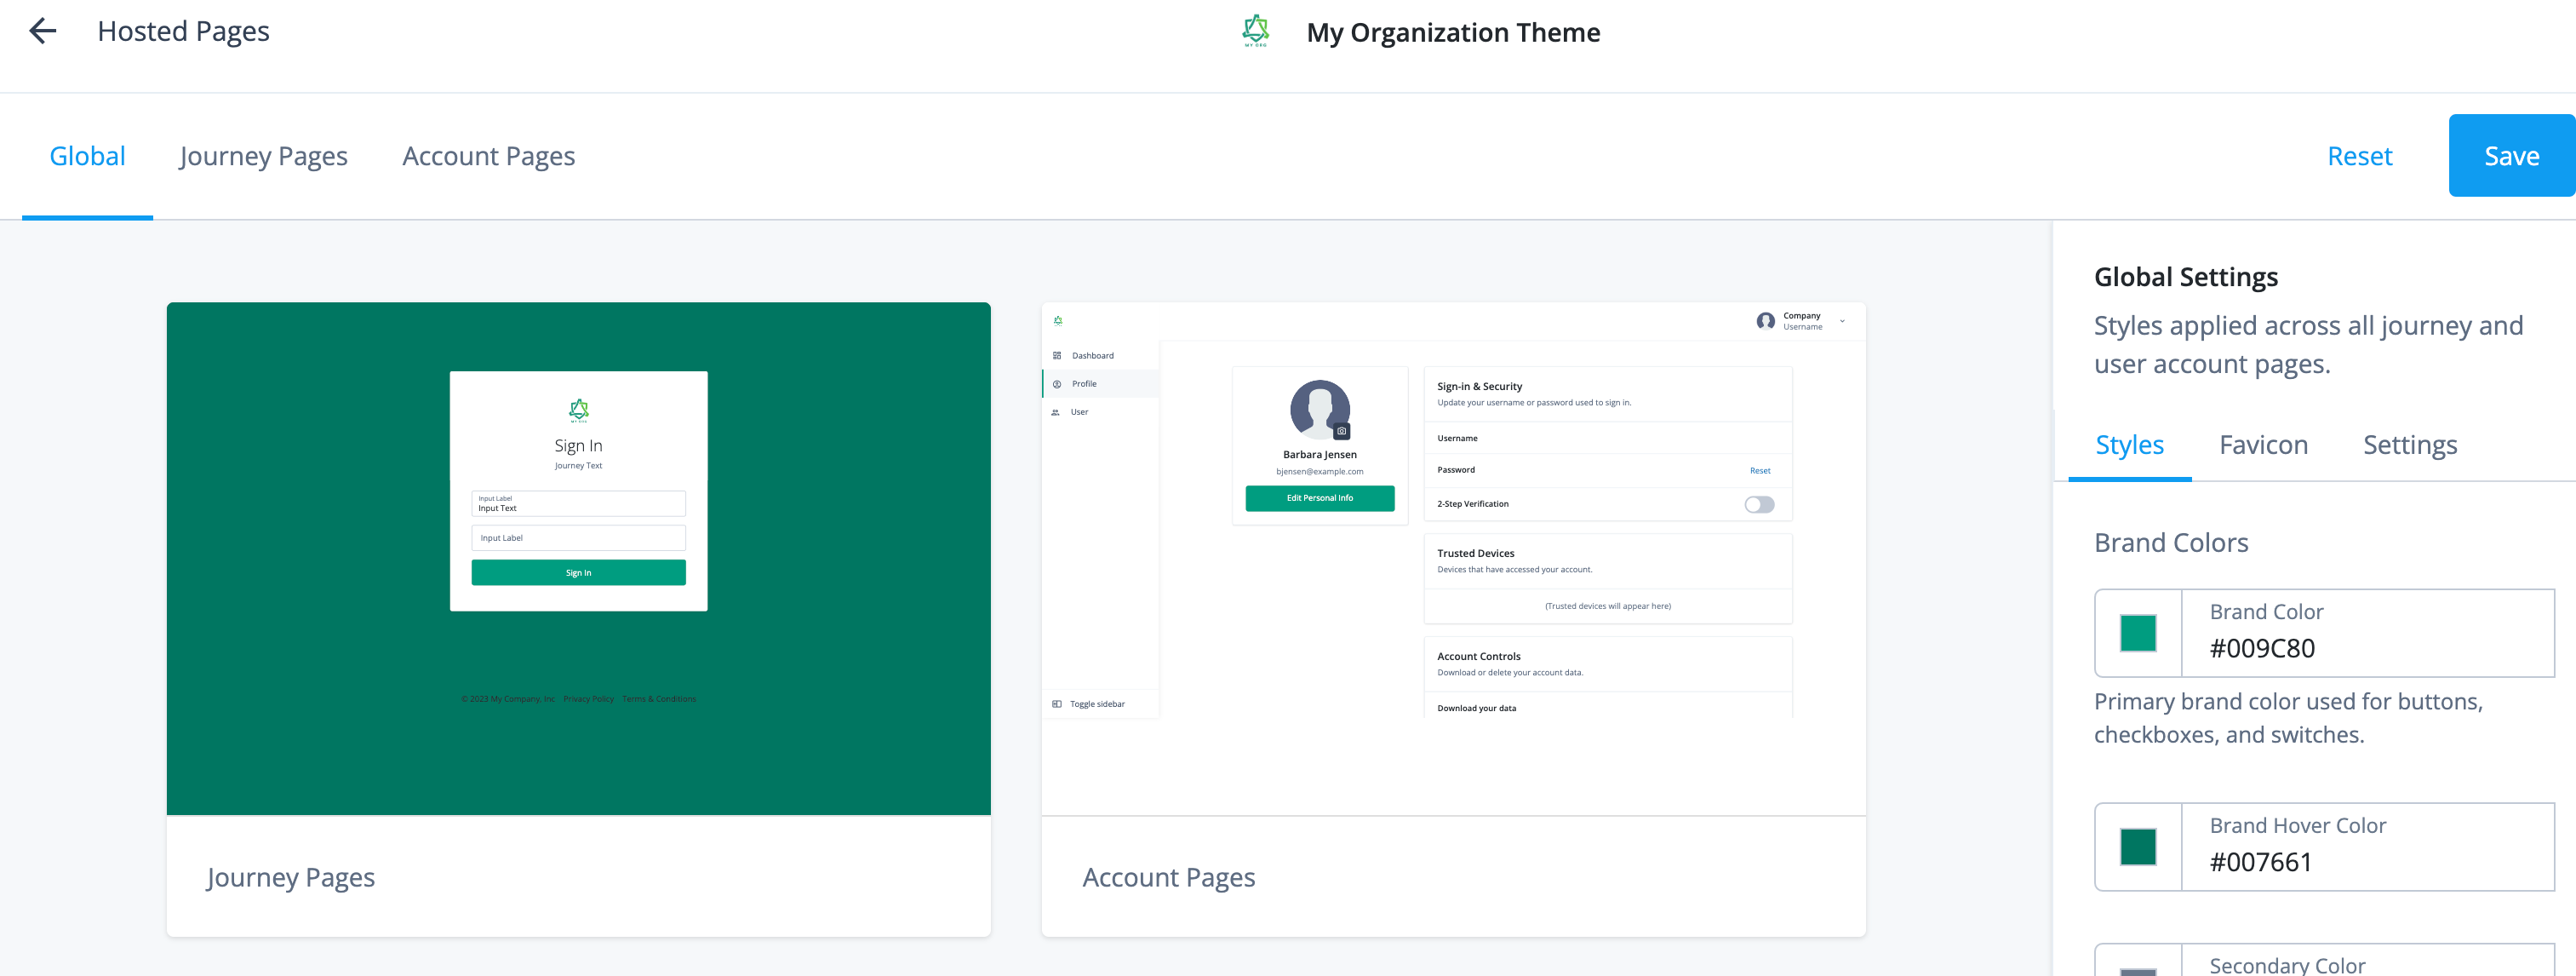
-
Click Save.
Task 2: Set the new theme as the default theme
-
In the Advanced Identity Cloud admin console, go to Hosted Pages.
-
Click the ellipsis icon () for the
My Organization Themeand select Set as Realm Default.My Organization Themeis now the realm default theme.
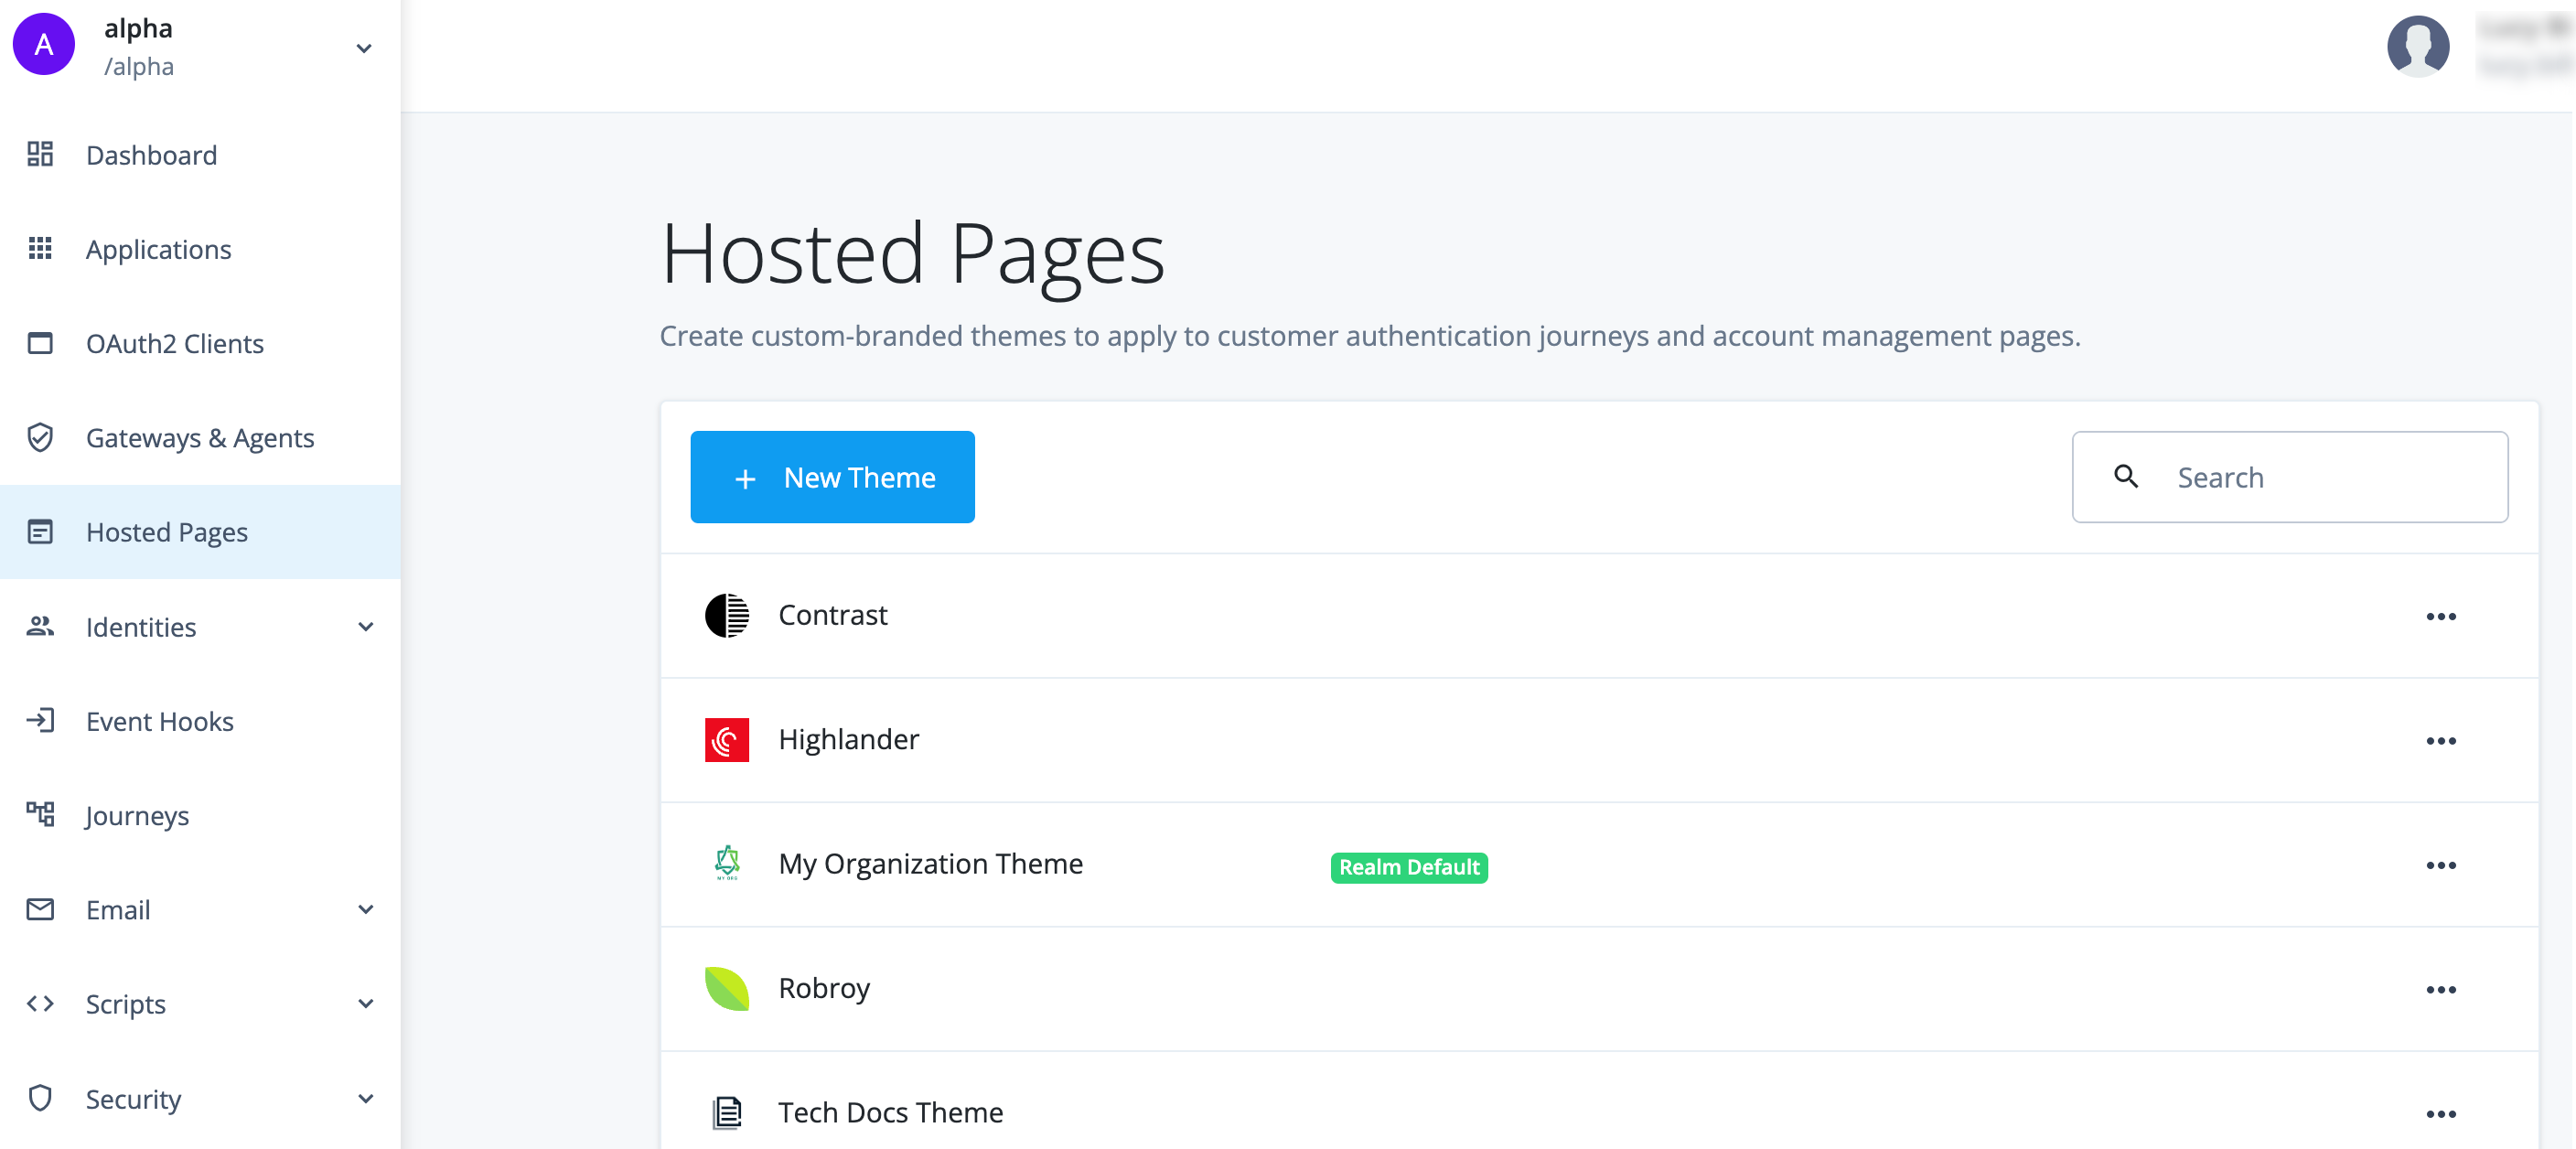
| The default theme applies to the end-user login pages and the Advanced Identity Cloud end-user UI. You can add custom themes so that your end users are presented with screens specific to their authentication journey. Learn more in Add a custom theme. |
Validation
Now that you have created your new theme and set it as the default, you are ready to validate the configuration.
The steps in this validation check that the login pages and Advanced Identity Cloud end-user UI display the new theme, including letting end users download and delete their account data.
In this validation task you log in as acruse, who is one of the users created in Create users and roles.
|
Steps
-
In the Advanced Identity Cloud admin console, go to Journeys and click on the
Loginjourney provided as default in Advanced Identity Cloud. -
Copy and paste the
Preview URLinto an Incognito window.The Sign In page for the tenant displays with the
My Organization Themebranding.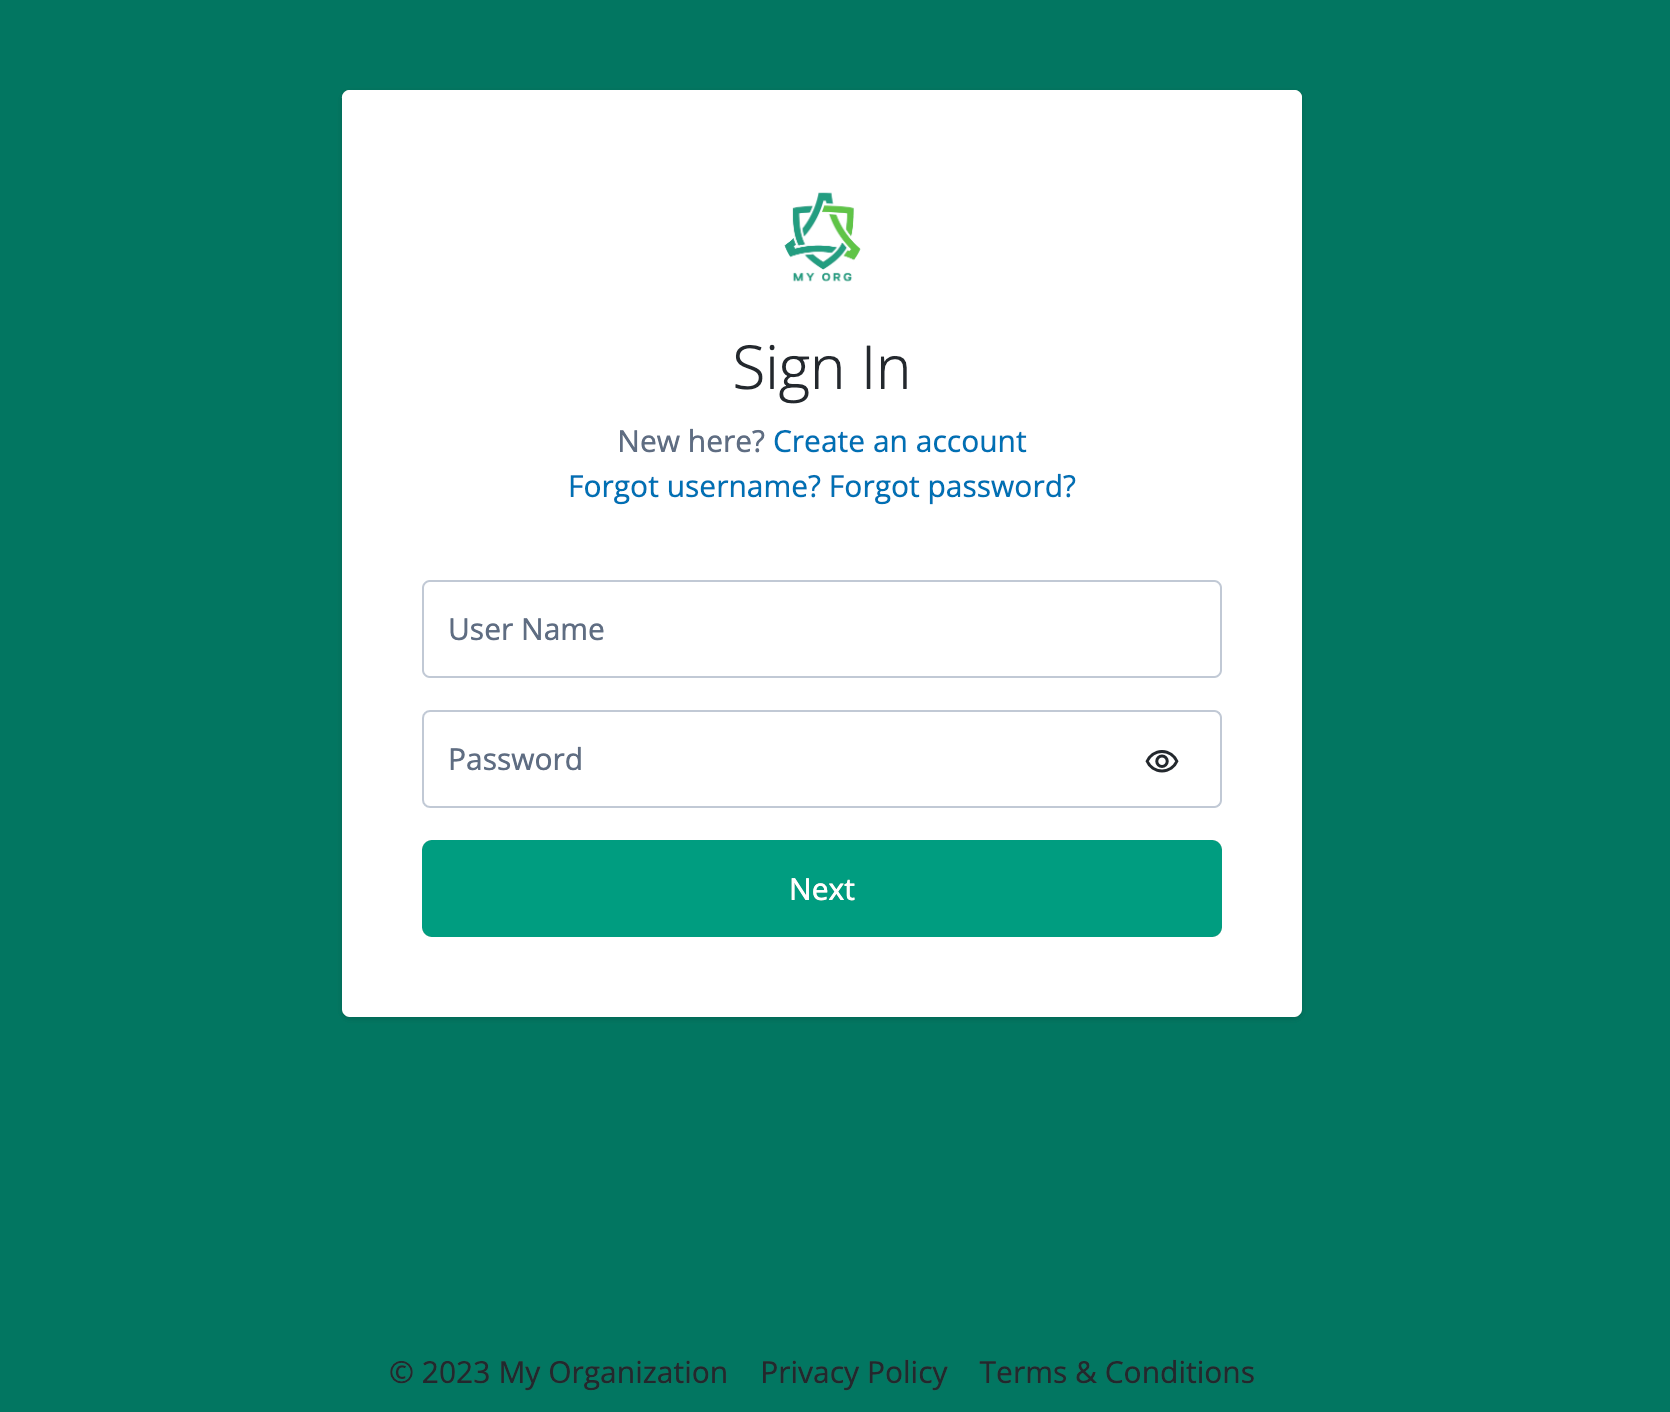
-
Enter the username and password for
acruse, and then click Next.You are logged in to the Advanced Identity Cloud end-user UI.
-
Click Edit Your Profile.
The Profile page displays, including Account Controls.
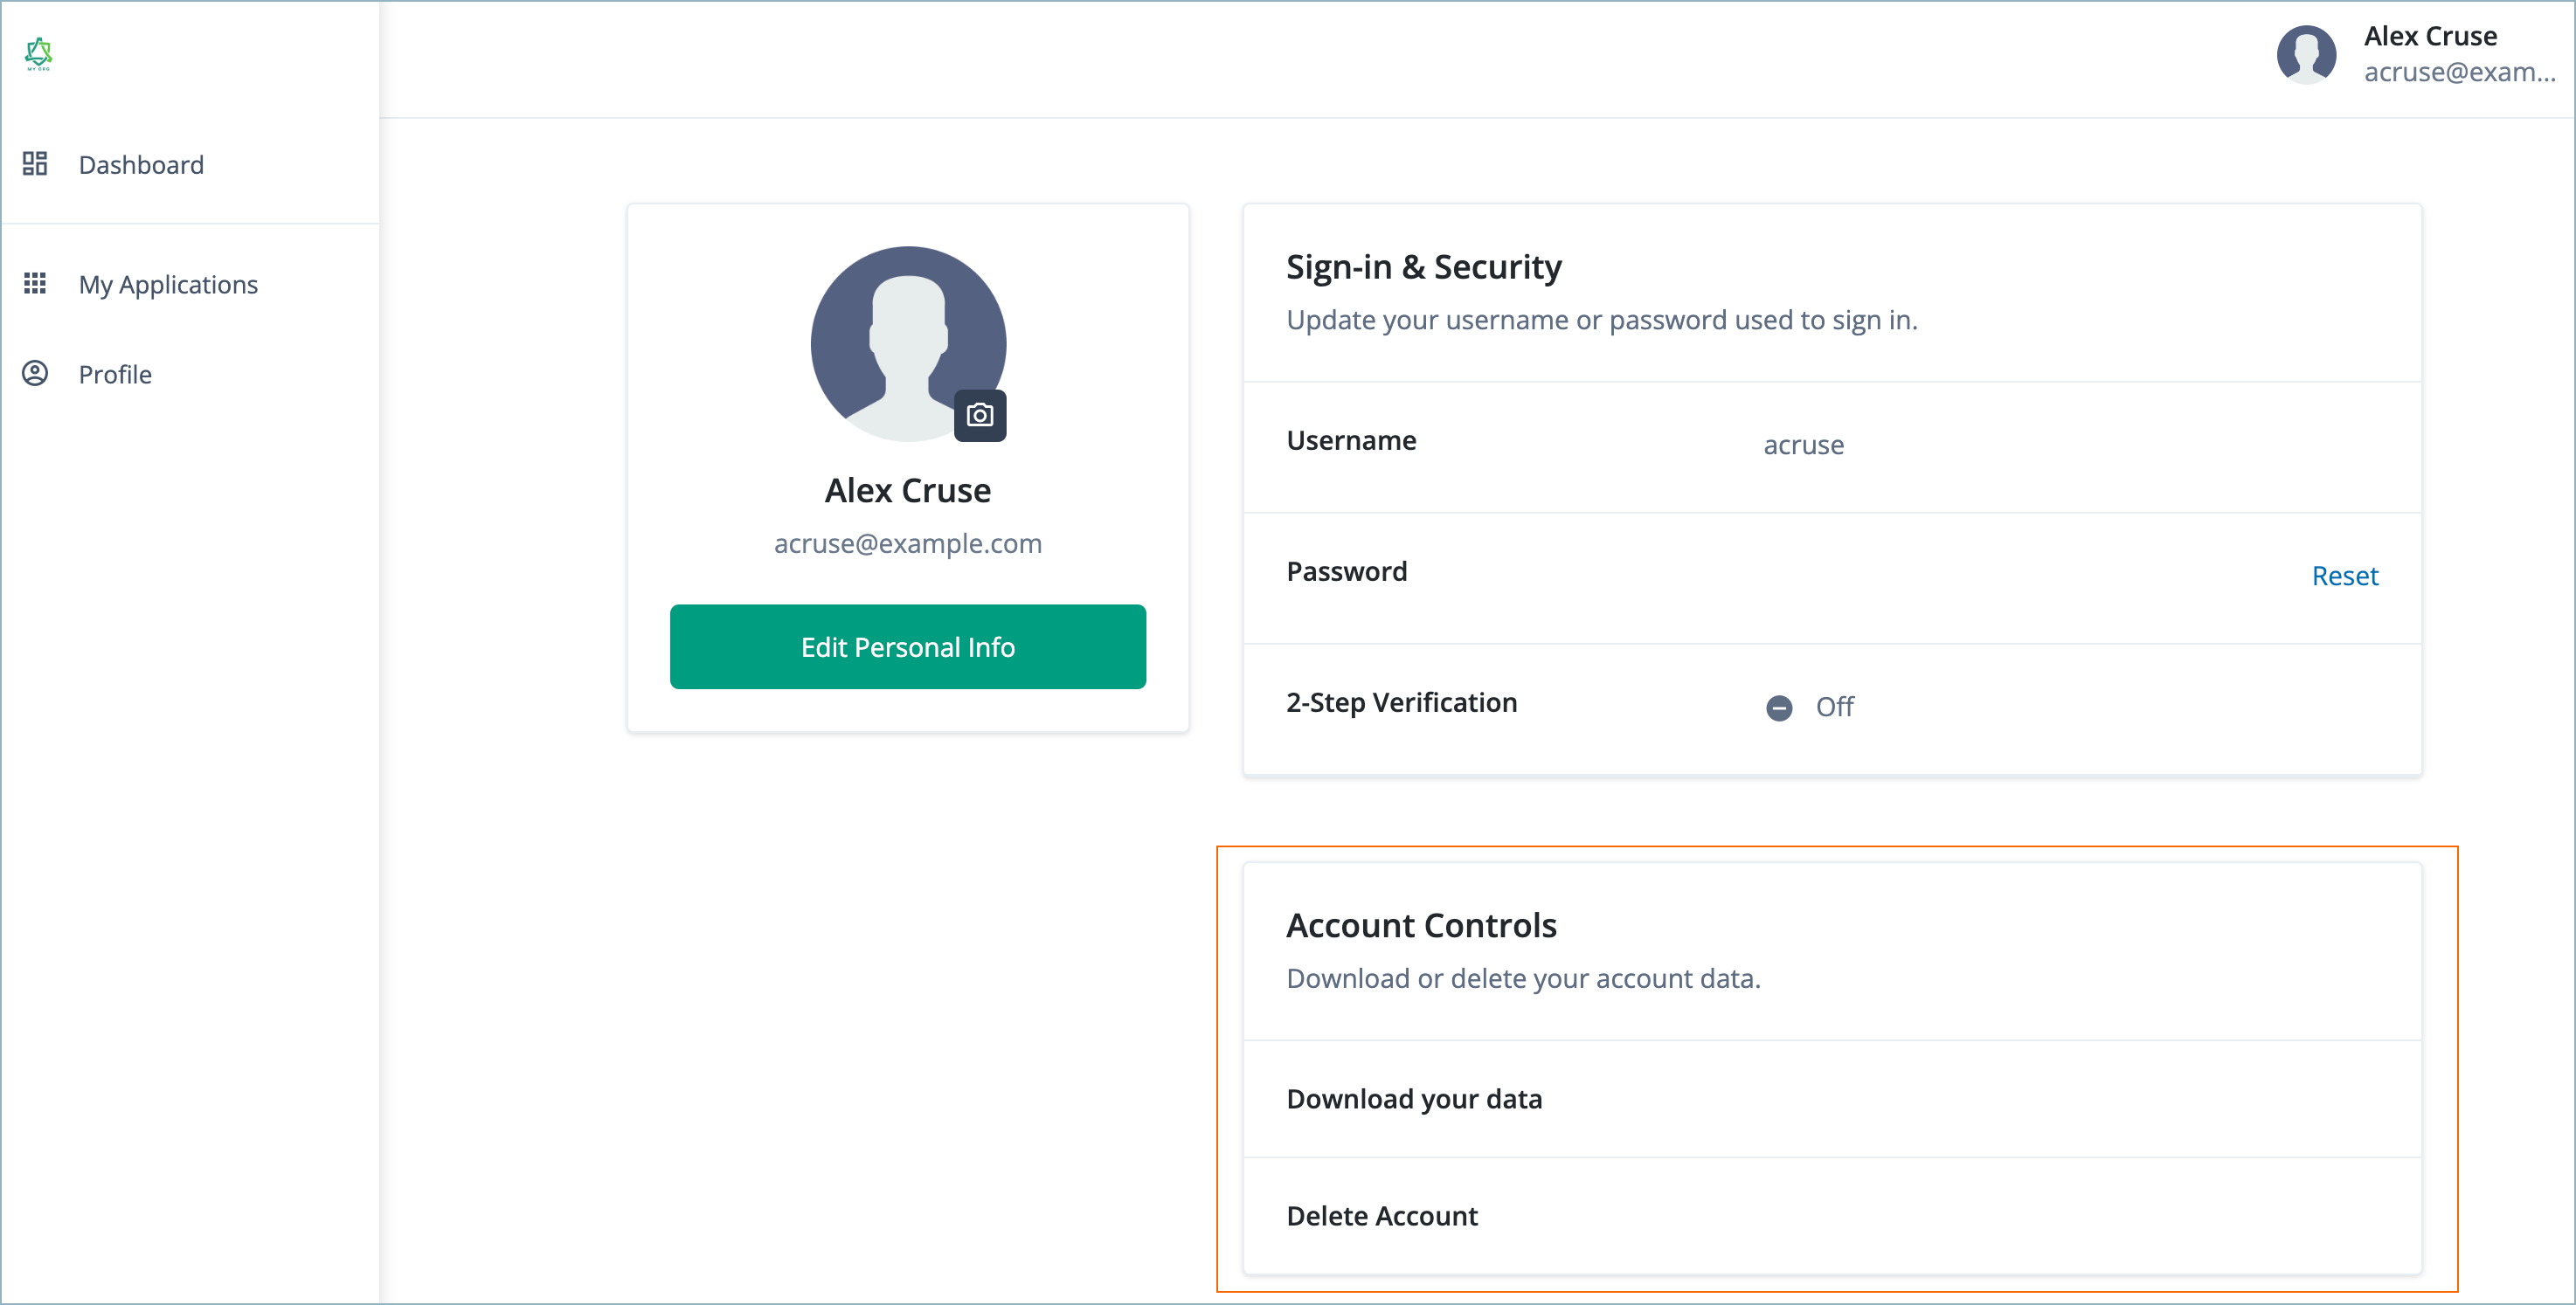
-
In the Advanced Identity Cloud admin console, go to Hosted Pages.
-
Click the ellipsis icon () for a different theme and select Set as Realm Default.
-
Go back to the Advanced Identity Cloud end-user UI (in the Incognito window) and refresh the browser.
The look and feel of the Advanced Identity Cloud end-user UI changes to the theme you selected as the default.
Explore further
Reference material
| Reference | Description |
|---|---|
Learn about hosted pages you can use in journeys and the Advanced Identity Cloud end-user UI. |
|
Demo: Configure themes for the Alpha and Bravo realms - ForgeRock University |
A guided walkthrough video demonstrating how to configure themes for the Advanced Identity Cloud end-user UI account pages. |
Use case: Create dynamically branded journeys in Advanced Identity Cloud |
A guided walkthrough demonstrating how to apply themes dynamically during a journey, based on the end user’s organization. |
Customize emails
Description
Estimated time to complete: 20 minutes
In this use case, you:
-
Duplicate the default registration email
-
Customize the duplicated email to match your organization’s branding
-
Add the new email template to the
User Registrationjourney (you must complete the User registration use case) -
Register as a new end user to test the newly branded email
Prerequisites
Before you start work on this use case, ensure you have these prerequisites:
-
You have completed the User registration use case
-
Access to your Advanced Identity Cloud development environment as an administrator
-
A basic understanding of journeys and nodes
-
A basic understanding of CSS
Tasks
Task 1: Create a new user registration email template
| In your staging and production tenant environments, you must update the email provider configuration with values to connect to something other than the built-in SMTP server. |
Duplicate the default user registration email
-
In the Advanced Identity Cloud admin console, go to Email > Templates.
-
On the Email Templates page, click the ellipsis icon () for the
Registrationtemplate and select Duplicate. -
In the Duplicate Template window, enter the following details:
Field Value Template Name
Branded RegistrationFrom Address
Enter an email address for the group or individual sending the email.
From Name
Enter a name for the group or individual sending the email.
Description
Branded version of the default Registration email. -
Click Save.
The email templates editor displays.
Customize the new email template
| You can add images to your email template if they are hosted online. Learn more in Add an image to an email template. |
-
In the email templates editor, make the following changes to the
Branded Registrationemail template:Change Detail Update the heading text
Replace the heading text in line 1 with
Thank you for registering.Leave the
#characters. This indicates a heading, in this case, an H3 heading.Update the email verification link text
Update the email verification link text in line 3 to:
To confirm your email address, click [verify email](<{{object.resumeURI}}>). -
Click Save.
-
Click Styles to change the look and feel of the email template. Make the following changes:
Change Detail Update the font
Add
font-family:arial;under .content to change the font used in the email.Change the link color
Change the color value under a to
#0C85CF.Format the heading text
Add the following CSS to format the heading text:
h3{
   color:#324054
}
css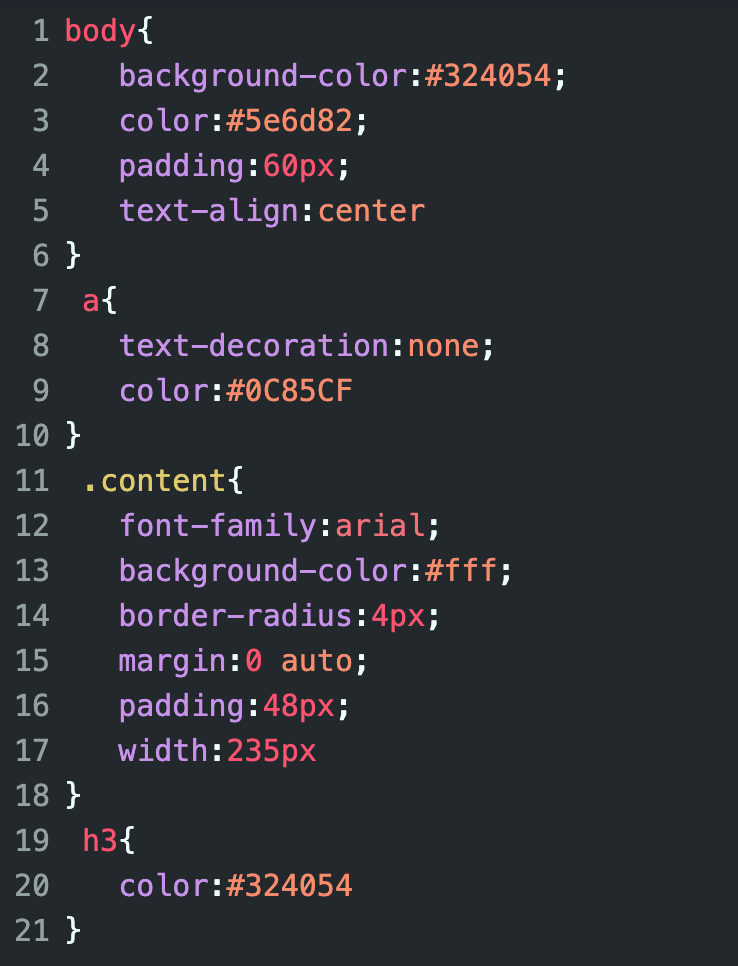
-
Click Save.
The email preview shows the updated email template:
-
In the URL, copy the email template name shown after /edit (
brandedRegistration). You will need this in the next task.
| You can send yourself a test email to check everything looks correct before proceeding. Click Send Test Email, enter your email address, and click Send. |
Task 2: Update the user registration journey
In this task, you update the User Registration journey to use your new email template.
-
In the Advanced Identity Cloud admin console, go to Journeys.
-
Click the ellipsis icon () for the
Registrationjourney and select Edit. -
Click the Email Suspend Node and enter
brandedRegistrationin the Email Template Name field.The name you enter must exactly match the name shown in the URL when you customized the email template.
-
Click Save.
Validation
Now that you have created a new email template for user registration and added it to the User Registration journey, you are ready to validate the email.
The steps in this validation register a new end user in Advanced Identity Cloud so you can check they receive the branded email during the registration process.
| When you register the new end user, ensure you use an email address that you can access. |
Steps
-
In the Advanced Identity Cloud admin console, go to Journeys and click on the
User Registrationjourney you just updated. -
In the Preview URL field, click and paste the URL into an Incognito window.
The Sign Up page for the tenant displays.
-
In the Sign Up page, enter the following details:
Field Value Username
cbarnesFirst Name
CharlieLast Name
BarnesEmail Address
Enter an email address for this new user. You must have access to this email account.
-
Click Next. A message displays informing you an email has been sent.
-
Check the inbox for the email address you entered and view the registration email. Confirm it has been branded as expected.
-
Click the link in the email to confirm your email address and continue registration.
-
Enter
Ch4ng3it!in the Password field. -
Click Next.
You are logged into the Advanced Identity Cloud end-user UI as Charlie Barnes.
Explore further
Reference material
| Reference | Description |
|---|---|
Learn about creating, editing and managing email templates. |
|
Steps for enhancing email templates in Advanced Identity Cloud with images and HTML formatting |
|
Steps for including Environment secrets and variables (ESVs) in email templates. |
|
Steps to send localized emails from a journey. |
|
Conceptual information on journeys and their purpose in Advanced Identity Cloud. |
Create a script in a journey to record last login time
Description
Estimated time to complete: 20 minutes
In this use case, you duplicate an existing journey and modify it to record the time the user logs in to the Advanced Identity Cloud end-user UI. You use a script in your journey to record the login time.
Prerequisites
Before you start work on this use case, make sure you have:
-
A basic understanding of:
-
JavaScript.
-
Journeys and nodes.
-
Realms.
-
The Advanced Identity Cloud admin console.
-
The Advanced Identity Cloud end-user UI.
-
The
managed/alpha_userobject schema.
-
-
Access to your Advanced Identity Cloud development environment as an administrator.
-
A test identity in Advanced Identity Cloud.
Tasks
Task 1: Create a journey decision script
A journey decision script runs in Advanced Identity Cloud during an authentication journey. It’s called a decision script because it’s programmed to decide how the journey continues.
When the script runs, it can also read and change the shared state of the journey. In this example, the script adds a timestamp to record when it runs in the shared state.
Later, nodes can use the shared state data to take action. You can configure nodes to use shared state data and script the actions Advanced Identity Cloud takes. In this example, a later node writes the timestamp in the authenticating user’s profile.
-
Log in to the Advanced Identity Cloud admin console as an administrator.
Select the
alpharealm if it is not selected by default. -
In the left menu pane, select Scripts > Auth scripts and click + New script.
-
Select Journey Decision Node and click Next to open the script editor.
-
Set the fields as follows and click Save and Close:
Field Value Name
last-login-timeDescription
Set last login time. Use this after successful authentication.JavaScript
function tag(message) { return '*** last-login-time: '.concat(message) } var lastLoginAttribute = 'frUnindexedDate1' var lastLoginTime = new Date().toISOString() sharedState.get('objectAttributes').put(lastLoginAttribute, lastLoginTime) logger.message(tag('Setting ' + lastLoginAttribute + ' to ' + lastLoginTime)) outcome = 'Success'JavaScriptThe script sets the shared state
objectAttributes.frUnindexedDate1to the current time as an ISO date string. Managed users have many optional fields. ThefrUnindexedDate1field is one of them. The script sets this field inobjectAttributes, the attributes of the managed user object, so a later node can write the updatedfrUnindexedDate1value from shared state to the user’s profile.The
frUnindexedDate1field is an unindexed field, meaning Advanced Identity Cloud does not maintain a search index for the field. If applications look up profiles based on the last login time, use one of thefrIndexedDate*fields instead.Notice the following objects from Advanced Identity Cloud bound to the journey decision script execution context; the script uses them directly without having to define them first:
-
sharedState: Use this to access the shared journey state. -
logger: Use this to log debug messages. -
outcome: Set the outcome to a string as the last processing step.
There is no authentication decision to make, so the script’s only outcome is
Success. You include each outcome in the Scripted Decision node Outcomes setting when using the script in a journey. -
Task 2: Update the target managed user field
By default, the label in the Advanced Identity Cloud end-user UI for the frUnindexedDate1 field is Generic Unindexed Date 1.
The journey uses this field for last login times; therefore, you change the label to Last Login Time for readability.
-
In the left menu pane of Advanced Identity Cloud admin console, select Native Consoles > Identity Management.
The IDM admin console dashboard displays.
-
In the top menu of the IDM admin console, select Configure > Managed Objects and click the card for Alpha_user to edit the managed object properties.
-
Scroll to the
frUnindexedDate1row and click it to edit the property. -
Set the fields as follows and click Save:
Field Value Readable Title
Last Login TimeThis changes the label in the Advanced Identity Cloud end-user UI.
Show advanced options > Searchable
Enable this.
Show advanced options > User Editable
Disable this.
Task 3: Create a last login journey
You base the last login journey on the default Login journey. To reference the script, you add a Scripted Decision node. To write the last login time to the user’s profile, you add a Patch Object node.
Duplicate the default login journey
-
In the left menu pane of Advanced Identity Cloud admin console, select Journeys
-
Select the More () menu for the default Login journey and select Duplicate to display the Duplicate Journey modal.
-
Set the fields as follows and click Save:
Field Value Name
Log in and set last login timeIdentity Object
Alpha realm - Users
managed/alpha_userDescription
Duplicate of default Login journey that also sets last login timeThe Advanced Identity Cloud admin console displays the journey editor.
Configure your last login time journey
-
In the journey editor, find these nodes to drag and drop them onto the journey canvas:
-
Scripted Decision node
-
Patch Object node
-
-
Select the Scripted Decision node and set the fields as follows:
Field Value Name
Last login timeScript
last-login-timeOutcomes
SuccessLeave the default settings for other fields.
When the journey reaches this node, your journey decision script runs.
-
Select the Patch Object node and set the fields as follows:
Field Value Identity Resource
managed/alpha_userLeave the default settings for other fields.
When the journey reaches this node, it updates the
managed/alpha_userobject properties with the shared stateobjectAttributesfields including thefrUnindexedDate1field set by your script. This update stores the last login time in the end user’s profile. -
Reconnect the Scripted Decision node
Trueoutcome to theLast login timenode input. -
Connect the
Last login timenode outcome to the Patch Object node input. -
Connect the Patch Object node
Patchedoutcome to the Increment Login Count node input. -
Connect the Patch Object node
Failedoutcome to the Failure node.
At this point, the authentication journey is complete. The following shows a rectangle around the nodes you added after duplicating the default journey:

-
a Collects the username and password.
-
b Validates the username and password.
-
c Records the time in the shared state object attributes on
frUnindexedDate1. -
d Writes the time to the user’s profile.
-
e Increments the number of authentications.
-
f Triggers an inner journey; in this case, a journey for progressive profiling.
Task 4: Check journey path connections
Use the following table to check the connections for each node in the Log in and set last login time journey.
Some nodes have more than one outcome. The → symbol means the node only has one outcome path.
| Source node | Outcome path | Target node |
|---|---|---|
Start (person icon) |
→ |
Page node |
Page node containing:
|
→ |
Data Store Decision node |
Data Store Decision node |
|
Scripted Decision node ( |
|
Failure node |
|
Scripted Decision node ( |
→ |
Patch Object node |
Patch Object node |
|
Increment Login Count node |
|
Failure node |
|
Increment Login Count node |
→ |
Inner Tree Evaluator node |
Inner Tree Evaluator node |
|
Success node |
|
Failure node |
Validation
Now that you have created your script, updated a label in the Advanced Identity Cloud end-user UI, duplicated the default Login journey, and updated the copy to record the last login time in the user’s profile, you are ready to validate the journey.
Before validating, make sure you have a test user in the alpha realm.
Steps
-
Get a URL you can use to test the journey:
-
Log in to the Advanced Identity Cloud admin console as an administrator.
-
Select Journeys.
-
Select the journey you created, Log in and set last login time.
A preview screen of the journey displays.
-
Click the copy icon next to Preview URL, a URL you can use to test the journey as an end user:
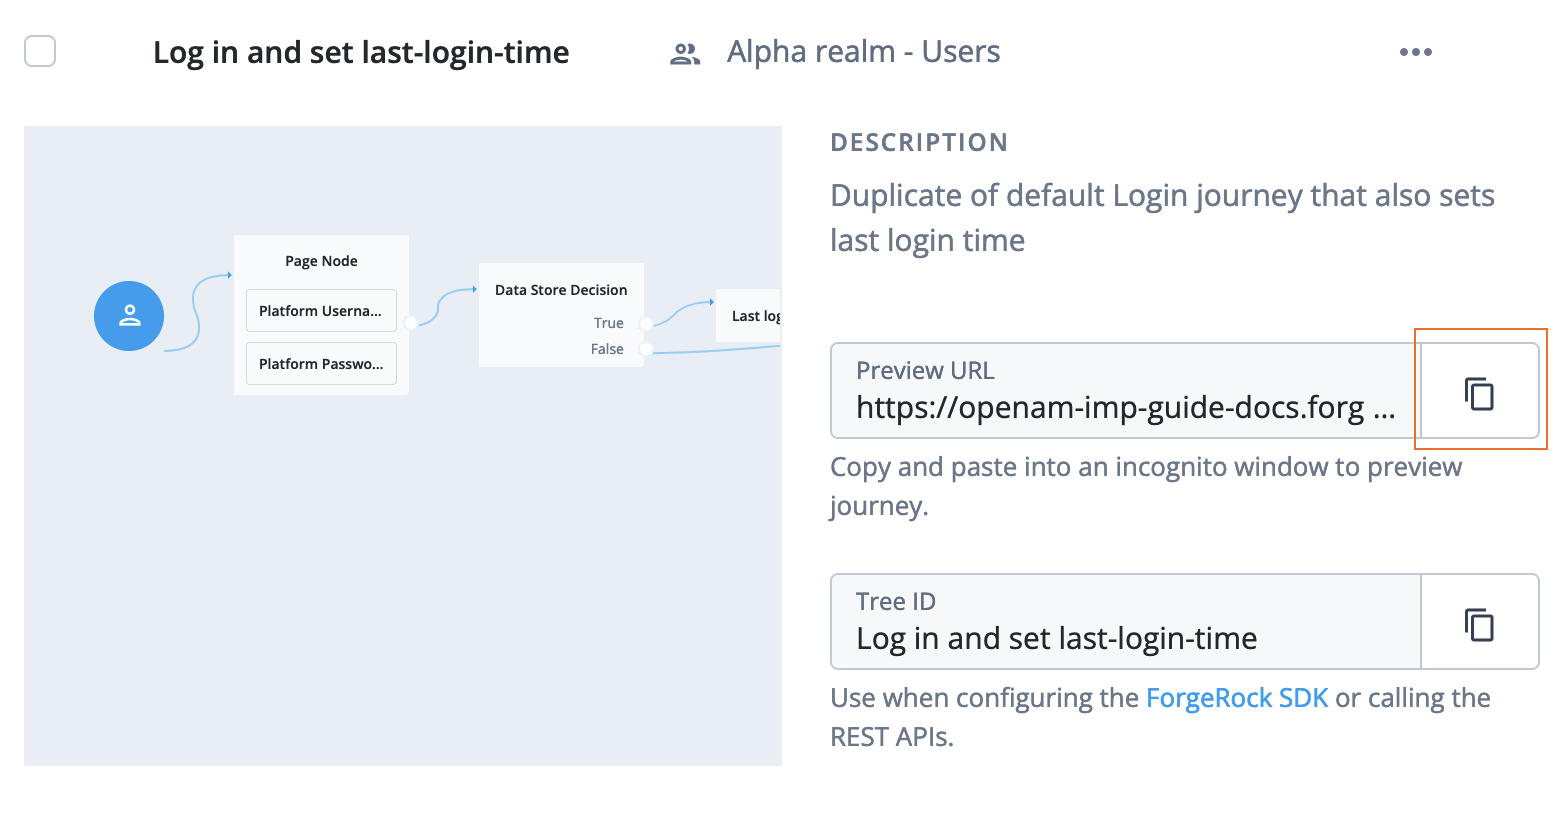
-
-
Log in to the Advanced Identity Cloud end-user UI:
-
Paste the URL into an incognito window.
Use incognito mode for testing to avoid caching issues and interference with any current sessions.
The Advanced Identity Cloud end-user UI displays the login screen.
-
Enter the test user’s username and password.
-
Click Next.
The Advanced Identity Cloud end-user UI displays the test user’s profile.
-
-
Click Edit Your Profile to display the profile screen then Edit Personal Info to display the profile fields.
-
Scroll to the Last Login Time field.
The field contains the timestamp written when the test user logged in:

The Advanced Identity Cloud end-user UI appends
(optional)to the field name for managed object properties without Required enabled.
Explore further
Reference material
| Reference | Description |
|---|---|
Get to know the admin interfaces; Advanced Identity Cloud admin console, AM admin console, and IDM admin console. |
|
Conceptual information on journeys and their purpose in Advanced Identity Cloud. |
|
A guided video of journeys in Advanced Identity Cloud and how to use them. |
|
Learn about the configurable nodes Advanced Identity Cloud offers for use in journeys. |
|
Reference information for end user profile properties. |
|
Reference information for journey decision node scripts. |
Get an access token in a journey
|
This use case creates a service account access token for each authentication request, which can cause performance issues. Instead, Ping Identity recommends you use the service account openidm script binding to get the access token. |
Description
Estimated time to complete: 25 minutes
In this use case, create a script to get an access token using a service account. A service account lets you request access tokens for most Advanced Identity Cloud REST API endpoints. Then, create a simple journey with this script to prove you can successfully request an access token.
|
The script in this use case uses the Service accounts can only be used with Advanced Identity Cloud API endpoints; if you want to communicate with a third-party API, you’ll need to use the standard OAuth 2.0 client credential flow. |
Goals
After completing this use case, you will know how to do the following:
-
Get an access token to use in API calls in a Scripted Decision node in Advanced Identity Cloud.
Prerequisites
Before you start work on this use case, ensure you have these prerequisites:
-
A basic understanding of:
-
Journeys and nodes
-
JavaScript
-
Service accounts
-
ESVs
-
-
Access to your Advanced Identity Cloud development environment as a tenant administrator.
-
A service account that can grant the
fr:idm:*scope to an access token.You’ll need the service account ID and private key later when you create ESVs.
Tasks
Task 1: Create ESVs
-
In the Advanced Identity Cloud admin console, go to Tenant Settings > Global Settings > Environment Secrets & Variables.
-
Create the following ESVs:
ESV name ESV type Description esv-tenant-env-fqdnVariable (string)
Tenant FQDN (in the appropriate FQDN format); for example:
openam-mycompany-ew2.id.forgerock.ioesv-service-account-idSecret
Service account ID; for example:
449d7e27-7889-47af-a736-83b6bbf97ec5esv-service-account-privatekeySecret
Service account private key; for example:
{ d: "RhpIZ32rNfkoVkQh3pt1me...rDkFL9nBWDOZvXQ2LsFEBc", dp: "RfrvtBH_NmzxS......IpJ1vYZS_J0cw", dq: "OVO8_yXFRHT...2VREB2b8f8xvIhv5jrQWQ", e: "AQAB", kty: "RSA", n: "5LoH3Fc8IdRg1...K4eUvMEJsjVvfRgzpWCDM0", p: "_wjzIYyYcQiNOZdV1Cp7...kjDw", q: "5ZeYq0C......6WOaiYw", qi: "Z9ECeon...q56tpl2Mu65yqlw", } -
Apply the updates.
Learn more about creating ESVs and applying updates in Manage ESVs using the admin console .
Task 2: Create a script to get an access token
-
Download the sample script: getAccessToken.js.
View script
/*
 * Copyright © 2024 - 2025 Ping Identity Corporation
 *
 * This code is to be used exclusively in connection with Ping Identity Corporation
 * software or services.
 * Ping Identity Corporation only offers such software or services to legal entities
 * who have entered into a binding license agreement with Ping Identity Corporation.
*/

var nodeConfig = {
  nodeName: "Get Access Token Demo",
  tenantFqdnEsv: "esv.tenant.env.fqdn",
  accountIdEsv: "esv.service.account.id",
  privateKeyEsv: "esv.service.account.privatekey",
  accessTokenStateField: "idmAccessToken",
  maxAttempts: 3,
  scope: "fr:idm:*",
  serviceAccountClientId: "service-account",
  jwtValiditySeconds: 10,
};

var nodeLogger = {
  debug: function (message) {
    logger.message("***" + nodeConfig.nodeName + " " + message);
  },
  warning: function (message) {
    logger.warning("***" + nodeConfig.nodeName + " " + message);
  },
  error: function (message) {
    logger.error("***" + nodeConfig.nodeName + " " + message);
  },
};

var nodeOutcomes = {
  SUCCESS: "Success",
  ERROR: "Error",
};

var javaImports = JavaImporter(
  org.forgerock.openam.auth.node.api.Action,
  org.forgerock.json.jose.builders.JwtBuilderFactory,
  org.forgerock.json.jose.jwt.JwtClaimsSet,
  org.forgerock.json.jose.jws.JwsAlgorithm,
  org.forgerock.json.jose.jws.SignedJwt,
  org.forgerock.json.jose.jws.handlers.SecretRSASigningHandler,
  org.forgerock.json.jose.jwk.RsaJWK,
  javax.crypto.spec.SecretKeySpec,
  org.forgerock.secrets.SecretBuilder,
  org.forgerock.secrets.keys.SigningKey,
  java.time.temporal.ChronoUnit,
  java.time.Clock,
  java.util.UUID
);

function getKeyFromJwk(issuer, jwk) {
  var privateKey = javaImports.RsaJWK.parse(jwk).toRSAPrivateKey();

  var secretBuilder = new javaImports.SecretBuilder();

  secretBuilder
    .secretKey(privateKey)
    .stableId(issuer)
    .expiresIn(
      5,
      javaImports.ChronoUnit.MINUTES,
      javaImports.Clock.systemUTC()
    );
  return new javaImports.SigningKey(secretBuilder);
}

function getAssertionJwt(accountId, privateKey, audience, validity) {
  var signingHandler = new javaImports.SecretRSASigningHandler(
    getKeyFromJwk(accountId, privateKey)
  );

  var iat = new Date().getTime();
  var exp = new Date(iat + validity * 1000);

  var jwtClaims = new javaImports.JwtClaimsSet();

  jwtClaims.setIssuer(accountId);
  jwtClaims.setSubject(accountId);
  jwtClaims.addAudience(audience);
  jwtClaims.setExpirationTime(exp);
  jwtClaims.setJwtId(javaImports.UUID.randomUUID());

  var jwt = new javaImports.JwtBuilderFactory()
    .jws(signingHandler)
    .headers()
    .alg(javaImports.JwsAlgorithm.RS256)
    .done()
    .claims(jwtClaims)
    .build();

  return jwt;
}

function getAccessToken(accountId, privateKey, tenantFqdn, maxAttempts) {
  var response = null;
  var accessToken = null;
  var tokenEndpoint = "https://"
    .concat(tenantFqdn)
    .concat("/am/oauth2/access_token");

  nodeLogger.debug("Getting Access Token from endpoint " + tokenEndpoint);

  var assertionJwt = getAssertionJwt(
    accountId,
    privateKey,
    tokenEndpoint,
    nodeConfig.jwtValiditySeconds
  );

  if (!assertionJwt) {
    nodeLogger.error("Error getting assertion JWT");
    return null;
  }

  nodeLogger.debug("Got assertion JWT " + assertionJwt);

  for (var attempt = 0; attempt < maxAttempts; attempt++) {
    nodeLogger.debug("Attempt " + (attempt + 1) + " of " + maxAttempts);
    try {
      var request = new org.forgerock.http.protocol.Request();
      request.setUri(tokenEndpoint);
      request.setMethod("POST");
      request
        .getHeaders()
        .add("Content-Type", "application/x-www-form-urlencoded");

      var params = "grant_type="
        .concat(
          encodeURIComponent("urn:ietf:params:oauth:grant-type:jwt-bearer")
        )
        .concat("&client_id=")
        .concat(encodeURIComponent(nodeConfig.serviceAccountClientId))
        .concat("&assertion=")
        .concat(encodeURIComponent(assertionJwt))
        .concat("&scope=")
        .concat(encodeURIComponent(nodeConfig.scope));

      request.setEntity(params);
      response = httpClient.send(request).get();
      if (response) {
        break;
      }
    } catch (e) {
      nodeLogger.error(
        "Failure calling access token endpoint: " +
          tokenEndpoint +
          " exception:" +
          e
      );
    }
  }

  if (!response) {
    nodeLogger.error("Bad response");
    return null;
  }

  if (response.getStatus().getCode() !== 200) {
    nodeLogger.error(
      "Unable to acquire Access Token. HTTP Result: " + response.getStatus()
    );
    return null;
  }

  try {
    var responseJson = response.getEntity().getString();
    nodeLogger.debug("Response content " + responseJson);
    var oauth2response = JSON.parse(responseJson);
    accessToken = oauth2response.access_token;
    nodeLogger.debug("Access Token acquired: " + accessToken);
    return accessToken;
  } catch (e) {
    nodeLogger.error("Error getting access token from response: " + e);
  }

  return null;
}

(function () {
  try {
    nodeLogger.debug("Node starting");

    var accessToken = nodeState.get(nodeConfig.accessTokenStateField);

    if (accessToken) {
      nodeLogger.debug("Access token already present: continuing");
      action = javaImports.Action.goTo(nodeOutcomes.SUCCESS).build();
      return;
    }

    var tenantFqdn = systemEnv.getProperty(nodeConfig.tenantFqdnEsv);
    if (!tenantFqdn) {
      nodeLogger.error("Couldn't get FQDN from esv " + config.tenantFqdnEsv);
      action = javaImports.Action.goTo(nodeOutcomes.ERROR).build();
      return;
    }

    var accountId = systemEnv.getProperty(nodeConfig.accountIdEsv);
    if (!accountId) {
      nodeLogger.error(
        "Couldn't get service account id from esv " + nodeConfig.accountIdEsv
      );
      action = javaImports.Action.goTo(nodeOutcomes.ERROR).build();
      return;
    }

    var privateKey = systemEnv.getProperty(nodeConfig.privateKeyEsv);
    if (!privateKey) {
      nodeLogger.error(
        "Couldn't get private key from esv " + nodeConfig.privateKeyEsv
      );
      action = javaImports.Action.goTo(nodeOutcomes.ERROR).build();
      return;
    }

    accessToken = getAccessToken(
      accountId,
      privateKey,
      tenantFqdn,
      nodeConfig.maxAttempts
    );

    if (!accessToken) {
      nodeLogger.error("Failed to get access token");
      action = javaImports.Action.goTo(nodeOutcomes.ERROR).build();
      return;
    }

    nodeLogger.debug("Success - adding token to transient state");
    nodeState.putTransient(nodeConfig.accessTokenStateField, accessToken);
    action = javaImports.Action.goTo(nodeOutcomes.SUCCESS).build();
  } catch (e) {
    nodeLogger.error("Exception encountered " + e);
    action = javaImports.Action.goTo(nodeOutcomes.ERROR).build();
    return;
  }
})();
javascript -
In the Advanced Identity Cloud admin console, go to Scripts > Auth Scripts and click + New Script.
-
Select Journey Decision Node and click Next.
-
Select Legacy and click Next.
-
In the New Journey Decision Node Script window, enter the following details:
Field Value Name
Get access tokenDescription
Get an access token using a service accountJavaScript
Replace the sample JavaScript with the contents of the downloaded
getAccessToken.jsscript. -
Check the variables defined in the script and update as needed:
var nodeConfig = { nodeName: "Get Access Token Demo", (1) tenantFqdnEsv: "esv.tenant.env.fqdn", (2) accountIdEsv: "esv.service.account.id", (3) privateKeyEsv: "esv.service.account.privatekey", (4) accessTokenStateField: "idmAccessToken", maxAttempts: 3, scope: "fr:idm:*", (5) serviceAccountClientId: "service-account", (6) jwtValiditySeconds: 10, };javascript1 The nodeNameindicates the name of your journey for debugging purposes.2 The tenantFqdnEsvcontains the script reference to theesv-tenant-env-fqdnESV.3 The accountIdEsvcontains the script reference to theesv-service-account-idESV.4 The privateKeyEsvcontains the script reference to theesv-service-account-privatekeyESV.5 The scopeyou chose when you set up your service account; this determines which API endpoints you can get an access token for.6 The serviceAccountClientIdmust be set toservice-accountto use the built-in OAuth 2.0 public client for service accounts; otherwise, the JWT profile for OAuth 2.0 authorization grant flow will fail. -
Click Save and Close.
Task 3: Create a journey to get an access token
-
In the Advanced Identity Cloud admin console, go to Journeys and click + New Journey.
-
In the New Journey window, enter the following details:
Field Value Name
Get Access Token DemoIdentity Object
Alpha realm - Users
managed/alpha_userDescription
Journey to get an access token using a service account -
Click Save. The journey editor displays.
-
In the journey editor, search for the
Scripted Decisionnode and drag it onto the canvas. -
Configure this node as follows:
Field Value Name
Get Access TokenScript
Get access tokenOutcomes
Create two outcomes:
SuccessandError -
In the journey editor, search for the
Message Nodeand drag two copies of it onto the canvas. -
Select the first
Message Nodeand configure it as follows:Field Value Name
Success MessageMessage
Key
enValue
Access token successfully acquired -
Select the second
Message Nodeand configure it as follows:Field Value Name
Error MessageMessage
Key
enValue
Failed to get access token -
Connect the nodes:
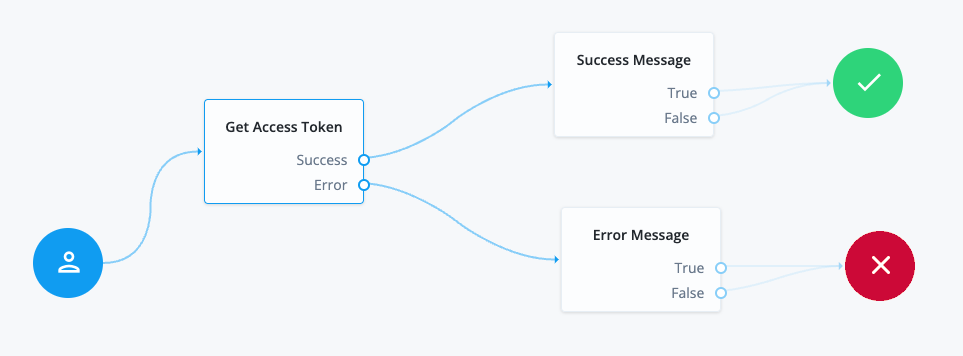
Source node Outcome path Target node Start (person icon)
→
Scripted Decision node
(
Get Access Token)Scripted Decision node
(
Get Access Token)Success
Message node
(
Success Message)Error
Message node
(
Error Message)Message node
(
Success Message)True
Success node
False
Success node
Message node
(
Error Message)True
Failure node
False
Failure node
-
Click Save.
Validation
Now that you have created a journey to get an access token, you are ready to validate it.
The journey runs the script to acquire an access token using the service account and ESVs you set up. If an access token is successfully acquired, the Success Message is shown.
| If you want to view the access token created during testing, you can enable debug mode in your development environment. |
Steps
-
In the Advanced Identity Cloud admin console, go to Journeys and click on the
Get Access Token Demojourney you just created. -
In the Preview URL field, click and paste the URL into an Incognito window.
The script runs to get an access token, and if successful, the Success Message displays:
The Yes and No buttons shown are the default outcomes for a Message node; they are not relevant to this example and don’t do anything further.
If an access token is not acquired, the Error Message is shown instead (
Failed to get access token).
Explore further
Reference material
| Reference | Description |
|---|---|
Information about service accounts in Advanced Identity Cloud. |
|
Authenticate to Advanced Identity Cloud REST API with access token |
Learn how to authenticate to Advanced Identity Cloud REST API endpoints using an access token. |
Information about environment secrets and variables (ESVs). |
|
Conceptual information on journeys and their purpose in Advanced Identity Cloud. |
|
Learn about the configurable nodes Advanced Identity Cloud offers for use in journeys. |
|
Reference information for journey decision node scripts. |
Expose journey session properties in the OIDC ID token
Description
Estimated time to complete: 20 minutes
In this use case, you create a PingOne Advanced Identity Cloud sign-on journey that collects end-user details and stores them as session properties on successful authentication. You then create an OIDC claims script that defines a custom claim. This script lets you retrieve a stored session property and include it in the ID token as a custom claim.
For testing purposes, the example uses a custom session property called mySessionProperty and an additional scope called myCustomScope, which adds the session property to the ID token.
|
Learn more about adding a session property claim to the profile scope in Add a session property claim to the profile scope. |
Prerequisites
Before you start work on this use case, ensure you have these prerequisites:
-
A basic understanding of:
-
Journeys and nodes
-
OIDC
-
-
Access to your Advanced Identity Cloud development environment as a tenant administrator.
-
A test end user in the Alpha realm. Learn more about creating test users in Create test users and roles.
Tasks
Task 1: Create a sign-on journey
In this task, you create a journey that adds a custom property to the end user’s session on successful authentication.
-
Sign on to the Advanced Identity Cloud admin console as a tenant administrator.
-
Select Journeys > + New Journey and set the following before clicking Save:
Field Value Name
SetSessionPropertiesIdentity Object
managed/alpha_user -
Drag the following nodes onto the journey editor canvas:
-
Connect the nodes, clicking Save from time to time to keep your work:

-
Click the Set Session Properties node and add a session property:
-
Click +, then Add + in the Properties modal.
-
Enter
mySessionPropertyin the Key field andcustomValuein the Value field. -
Click Done.
-
Click Save.
-
-
Click Save to save the journey.
Task 2: Allowlist the session property
In this task, you provide access to the mySessionProperty property to allow it to be output in the ID token.
-
Under Native Consoles > Access Management, select Realms > alpha > Services > Session Property Whitelist Service.
-
Add
mySessionPropertyto the Allowlisted Session Property Names field. -
Save your changes.
Task 3: Create a custom claims script
In this task, you create a new OIDC claims script to map a session property claim.
-
In the Advanced Identity Cloud admin console, go to Scripts > Auth Scripts > + New Script, and create a new OIDC Claims script.
-
Name the script
Demo OIDC claims. -
Edit the default JavaScript as follows:
-
In the
utils.setScopeClaimsMapfunction call, add themySessionPropertyclaim to a new scope namedmyCustomScope:utils.setScopeClaimsMap({ profile: [ 'name', 'family_name', 'given_name', 'zoneinfo', 'locale' ], email: ['email'], address: ['address'], phone: ['phone_number'], myCustomScope: ['mySessionProperty']javascript -
In the
utils.setClaimResolversfunction call, insertmySessionPropertyafter thephone_numberclaim:utils.setClaimResolvers({ ... phone_number: utils.getUserProfileClaimResolver('telephonenumber'), mySessionProperty: function () { return session.getProperty('mySessionProperty'); } });javascript
-
-
Save your changes.
The new claims script is now ready to retrieve a session property claim for myCustomScope.
Task 4: Configure the OAuth 2.0 provider to return claims in the ID token
In this task, you configure the OAuth 2.0 provider to always return scope-derived claims in the ID token.
| This option is disabled by default because of the security concerns of returning claims that may contain sensitive user information. Learn more in Request claims in ID tokens. |
-
Under Native Consoles > Access Management, select Realms > alpha > Services > OAuth2 Provider > Advanced OpenID Connect.
-
Enable Always Return Claims in ID Tokens.
-
Save your changes.
Task 5: Create an OIDC relying party profile
In this task, you create an OIDC relying party (client) profile that overrides the OAuth 2.0 provider settings. The override lets you test the script you created in Task 3 without affecting ID and access tokens issued to other applications.
Learn more in Register a client application.
Create a confidential OAuth 2.0 client
-
In the Advanced Identity Cloud admin console, go to Applications and click + Custom Application.
-
Select the sign-in method as OIDC - OpenId Connect and application type as Web.
-
Create the application, providing the following details:
- Name
-
myClient - Owners
-
<resource-owner> - Client ID
-
myClient - Client Secret
-
mySecret
-
Switch to the Sign On tab and under General Settings, make the following changes:
- Sign-in URLs
-
https://www.example.com:443/callback - Grant Types
-
Implicit - Scopes
-
openidmyCustomScope
-
Click Show advanced settings, select the Access tab and make the following changes:
- Response Types
-
token id_token
-
Select the Authentication tab and make the following changes:
- Token Endpoint Authentication Method
-
None
-
Save your changes.
Override OAuth 2.0 provider settings for this client
-
Under Native Consoles > Access Management, select Realms > alpha > Applications > OAuth 2.0 > Clients > myClient, switch to the OAuth2 Provider Overrides tab and update the following settings:
- Enable OAuth2 Provider Overrides
-
Enabled
- OIDC Claims Plugin Type
-
SCRIPTED - OIDC Claims Script
-
Demo OIDC claims
-
Save your changes.
Validation
You are now ready to validate the use case by authenticating to the Set session properties journey as a test end user, and then calling the /oauth2/idtokeninfo endpoint to inspect the session property claim values.
Steps
-
In an Incognito window, enter the following URL:
https://<tenant-env-fqdn>/am/oauth2/realms/root/realms/alpha/authorize?client_id=myClient&response_type=id_token&scope=openid%20myCustomScope&redirect_uri=https://www.example.com:443/callback&service=SetSessionProperties&nonce=abc123&state=123abc (1)(2)(3)(4)1 Replace <tenant-env-fqdn> with the FQDN of your tenant environment. 2 myClientis the name of the client you created in Task 5.3 openidandmyCustomScopeare the scopes configured in your client.4 SetSessionPropertiesis the name of the journey you created in Task 1. -
On the Sign in page, enter the username and password for your test end user and click Next.
-
Allow access to your account when prompted for consent.
-
After successful authentication, copy the value of the
id_tokenin the URL. You’ll need this value in the next step. -
Call the /oauth2/idtokeninfo endpoint to inspect the session property claim values, including the ID token obtained from the previous request:
$ curl \ --request POST \ --user myClient:mySecret \ --data 'id_token=<id-token>' \(1) "https://<tenant-env-fqdn>/am/oauth2/realms/root/realms/alpha/idtokeninfo" (2)bash1 Replace <id_token> with the id_token copied in step 4. 2 Replace <tenant-env-fqdn> with the FQDN of your tenant environment. Example output:
{ "sub": "6bc9650a-05fa-400c-8529-98d4a701381d", "auditTrackingId": "7734d5b8-5ac5-4c21-a211-0a4dfc299dfd-624957", "subname": "6bc9650a-05fa-400c-8529-98d4a701381d", "iss": "https://<tenant-env-fqdn>:443/am/oauth2/realms/root/realms/alpha", "tokenName": "id_token", "nonce": "abc123", "sid": "5WoPI3klaBoa3K1MvjYpcKbe9/4Tm58dKX+gE501ZRw=", "aud": "myClient", "acr": "username-password", "org.forgerock.openidconnect.ops": "H-oyuSQJJCY46ObWRGM5ULmwF8I", "s_hash": "3RMKhJ17KeVUGwXS9_hqSg", "azp": "myClient", "auth_time": 1734864493, "mySessionProperty": "customValue", (1) "realm": "/alpha", "exp": 1734868156, "tokenType": "JWTToken", "iat": 1734864556 }json1 mySessionPropertyis the custom session property you defined in the journey.If you use PingGateway to consume the resulting ID token, the session property might be null. This can happen when the ID token is issued successfully with the custom claim containing your session property. Subsequently, PingGateway makes a call to
/userinfo, which causes the OIDC claims script to be invoked again, but this time there is no session, which leads to a null session property.If you experience this issue, modify the OIDC claims script to ensure it only adds claims when a session exists.
Explore further
Reference material
| Reference | Description |
|---|---|
Conceptual information on journeys and their purpose in Advanced Identity Cloud. |
|
Learn about the configurable nodes Advanced Identity Cloud offers for use in journeys. |
|
Learn about OIDC claims and ID tokens in Advanced Identity Cloud. |
|
Learn about modifying and overriding claims in an ID token in Advanced Identity Cloud. |
Data (identity) management
In PingOne Advanced Identity Cloud, data management covers a wide-range of activities including:
| Item | Description |
|---|---|
Identity object schema |
The model for your data including users, roles, and applications. Create new objects or modify existing ones so that each object represents the properties your organizations requires. |
Organizations |
Create organizations in PingOne Advanced Identity Cloud when you want to group identities to suit your business needs. For example, you can build an organization structure modeled after your brand hierarchy. This lets you control access to business applications with tailored login experiences. You can also use organizations to delegate user administration. |
Roles |
Roles define privileges for user and device identities. Roles let you automatically assign and update privileges in numerous identity profiles. For further information about roles and assignments, refer to Roles and assignments. The role object is a managed object type that uses the relationships mechanism to link the role to the managed object to which it applies. |
Applications |
While you can use applications for authentication, applications are also used for provisioning and synchronization. |
The use cases in this section focus on data management in a holistic way:
| Use case | Description |
|---|---|
Create test users and roles, assign users to roles, and log in to the Advanced Identity Cloud end-user UI as one of the users. |
|
Dynamically assign a user to a role based off a criteria being met. |
|
Provision data between Advanced Identity Cloud and PingDirectory |
Provision accounts to and from Advanced Identity Cloud and PingDirectory. |
Configure Advanced Identity Cloud to group users into organizations. Use organizations to delegate user administration to different groups of users. |
|
Configure Advanced Identity Cloud to enable managers to update their direct reports' information and assign provisioning roles to them through Advanced Identity Cloud end-user UI. |
|
Provision accounts from Microsoft Entra ID (formerly Azure AD) into Advanced Identity Cloud. |
|
Provision accounts from an on-premise Active Directory (AD) server into Advanced Identity Cloud. |
Create test users and roles
Description
Estimated time to complete: 10 minutes
In this use case, you create test users and roles, assign users to roles, and log in to the Advanced Identity Cloud end-user UI as one of the users.
Goals
After completing this use case, you will know how to do the following:
-
Create new users
-
Create a role
-
Assign the role to the users
Prerequisites
Before you start, make sure you have a basic understanding of these Advanced Identity Cloud concepts:
-
Advanced Identity Cloud admin console
-
Advanced Identity Cloud end-user UI
Tasks
Task 1: Create new users
In this task, you create two new users.
-
In the Advanced Identity Cloud admin console, go to Identities > Manage.

-
On the Manage Identities page, click Alpha realm - Users and New Alpha realm - User.
-
On the New Alpha realm - User page, enter the following information for the user, and then click Save:
Field Value Username
acruseFirst Name
alexLast Name
cruseEmail Address
alex.cruse@example.comPassword
Secret12! -
Go back to the New Alpha realm - User page and repeat the last step to add another user with the following values:
Field Value Username
bramanFirst name
binaLast name
ramanEmail Address
bina.raman@example.comPassword
Secret12!
Task 2: Create a role
In this task, you create a role called employee.
Roles define privileges for user and device identities.
Although the role isn’t required for this use case,
you can bulk assign users to an application when they are assigned a role.
-
In the Advanced Identity Cloud admin console, go to Identities > Manage.
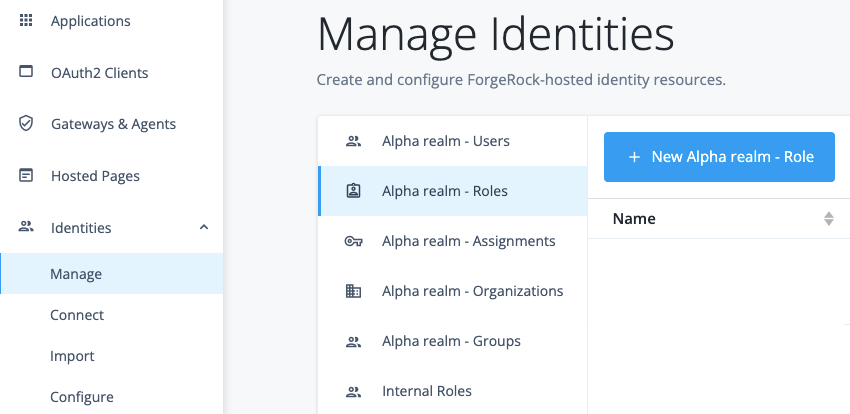
-
On the Manage Identities page, click Alpha Realm - Roles > New Alpha realm - Role.
-
On the role page, enter the following information for the role and then click Next:
Field Value Name
employeeDescription
Role granted to workers on the company payroll -
Skip the option to assign the role conditionally, and click Next.
-
Skip the option to assign the role temporarily, and click Save.
The
employeerole page is displayed. -
Click Role Members > Add Role Members.
-
Select your users from the drop-down list and then click Save.
The role is assigned to the users.
Validation
To validate your work:
-
In the Advanced Identity Cloud admin console, go to Journeys and click on the
Loginjourney provided as default in Advanced Identity Cloud. -
Copy and paste the
Preview URLinto an incognito window.The login page for the tenant is displayed.
-
Log in to the tenant as one of the new users and view the profile page for the user.
Assign roles to users dynamically
Description
Estimated time to complete: 10 minutes
In the use case Create test users and roles, you created two users and a role and then assigned the role users to the users. In this use case, you are going to:
-
Assign an inactive status to one of the users
-
Add a condition to the role so that it applies only to active users
Goals
After completing this use case, you will know how to:
-
Change the properties of a user
-
Add a condition to a role
Prerequisites
Before you start, make sure you have:
-
A basic understanding of these Ping Identity concepts:
-
Advanced Identity Cloud admin console
-
Advanced Identity Cloud end-user UI
-
-
Completed the use case in Create test users and roles
Tasks
Task 1: Assign an inactive status to a user
In this task, you select one of the users you created in Create test users and roles and change their status to inactive.
-
In the Advanced Identity Cloud admin console, go to Identities > Manage > Alpha realm - Users.
-
Click on the user
acruse. -
On the user details page, change the Status from the default value
activetoinactiveand save the change.
Task 2: Add a condition to a role
In this task, you create a condition so that the role applies only to active users.
-
In the Advanced Identity Cloud admin console, go to Identities > Manage > Alpha Realm - Roles.
-
Click on the
employeerole and then click on Settings.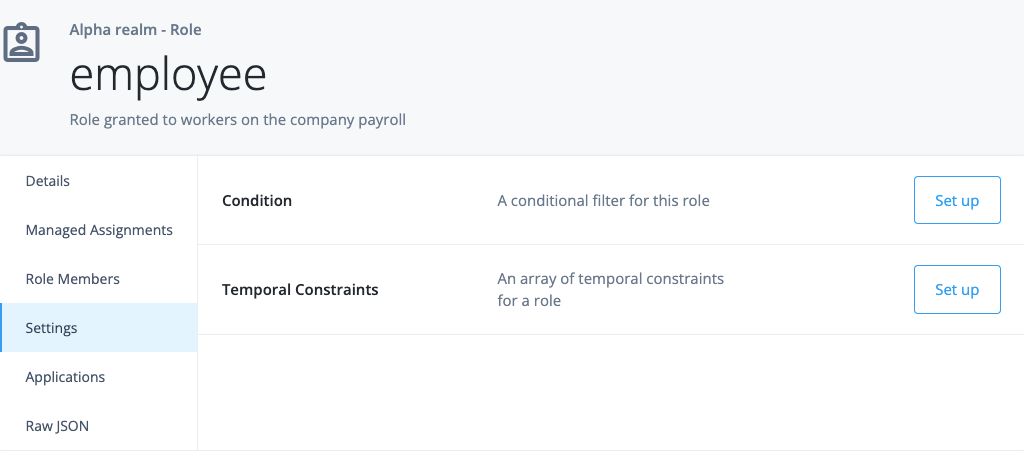
-
In the Condition panel, click on Set up to create the following condition for the role and save the condition:
Field Value A conditional filter for this role
Enable
Assign to alpha_user if Any conditions are met
AnyAlpha_user properties
Statuscontains
isBlank
active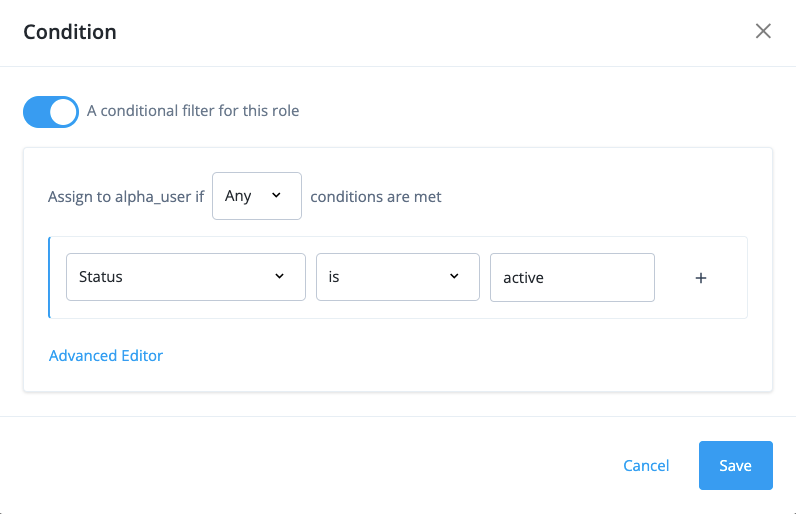
-
(Optional) Click on Add Rule to add another condition and take a moment to browse the other conditions that can apply to roles.
Validation
In Create test users and roles, you created the employee role
and manually assigned it to braman and acruse. To validate this use
case, make sure the role is no longer assigned to acruse.
-
In the Advanced Identity Cloud admin console, go to Identities > Manage > Role Members.
-
Make sure
bramanis in the list butacruseis not. -
Change the status of
bramantoinactiveandacrusetoactive, then make sureacruseis in the list butbramanis not.
Create organizations to delegate administration
Description
Estimated time to complete: 20 minutes
In this use case, you configure Advanced Identity Cloud to group users into organizations. Use organizations to delegate user administration to different groups of users.
Goals
After completing this use case, you will know how to do the following:
-
Create users.
-
Create organizations.
-
Assign administrators to organizations for delegated administration.
-
Add users (members) to organizations.
-
Use the Advanced Identity Cloud end-user UI to manage users in an organization as an organization administrator.
Prerequisites
Before you start work on this use case, ensure you have these prerequisites:
-
Access to your Advanced Identity Cloud development environment as an administrator.
-
A basic understanding of realms.
Tasks
Task 1: Create organization administrators and users
In this task, you create six test users. Two users will be administrators for OrgA and OrgB, respectively. The other four are members of OrgA and OrgB.
-
Log in to the Advanced Identity Cloud admin console as an administrator.
-
Go to Identities > Manage.
-
Click Alpha realm - Users and New Alpha realm - User.
-
On the New Alpha realm - User page, enter the following information for the user, and then click Save:
Field Value Username
orga_adminFirst Name
OrgALast Name
AdminEmail Address
orgaadmin@example.comPassword
Secret12! -
Go back to the New Alpha realm - User page and repeat steps 3 and 4 to add another administrator user with the following values:
Field Value Username
orgb_adminFirst Name
OrgBLast Name
AdminEmail Address
orgbadmin@example.comPassword
Secret12! -
Go back to the New Alpha realm - User page and repeat steps 3 and 4 to add four more users with the following values:
-
User1 in OrgA:
Field Value Username
orga_emorrisFirst Name
ElysiaLast Name
MorrisEmail Address
emorris@example.comPassword
Secret12! -
User2 in OrgA:
Field Value Username
orga_flandryFirst Name
FatmaLast Name
LandryEmail Address
flandry@example.comPassword
Secret12! -
User1 in OrgB
Field Value Username
orgb_ajarvisFirst Name
AminLast Name
JarvisEmail Address
ajarvis@example.comPassword
Secret12! -
User2 in OrgB
Field Value Username
orgb_mpattisonFist Name
MorganLast Name
PattisonEmail Address
mpattison@example.comPassword
Secret12!
-
Six new users now display in the alpha realm.
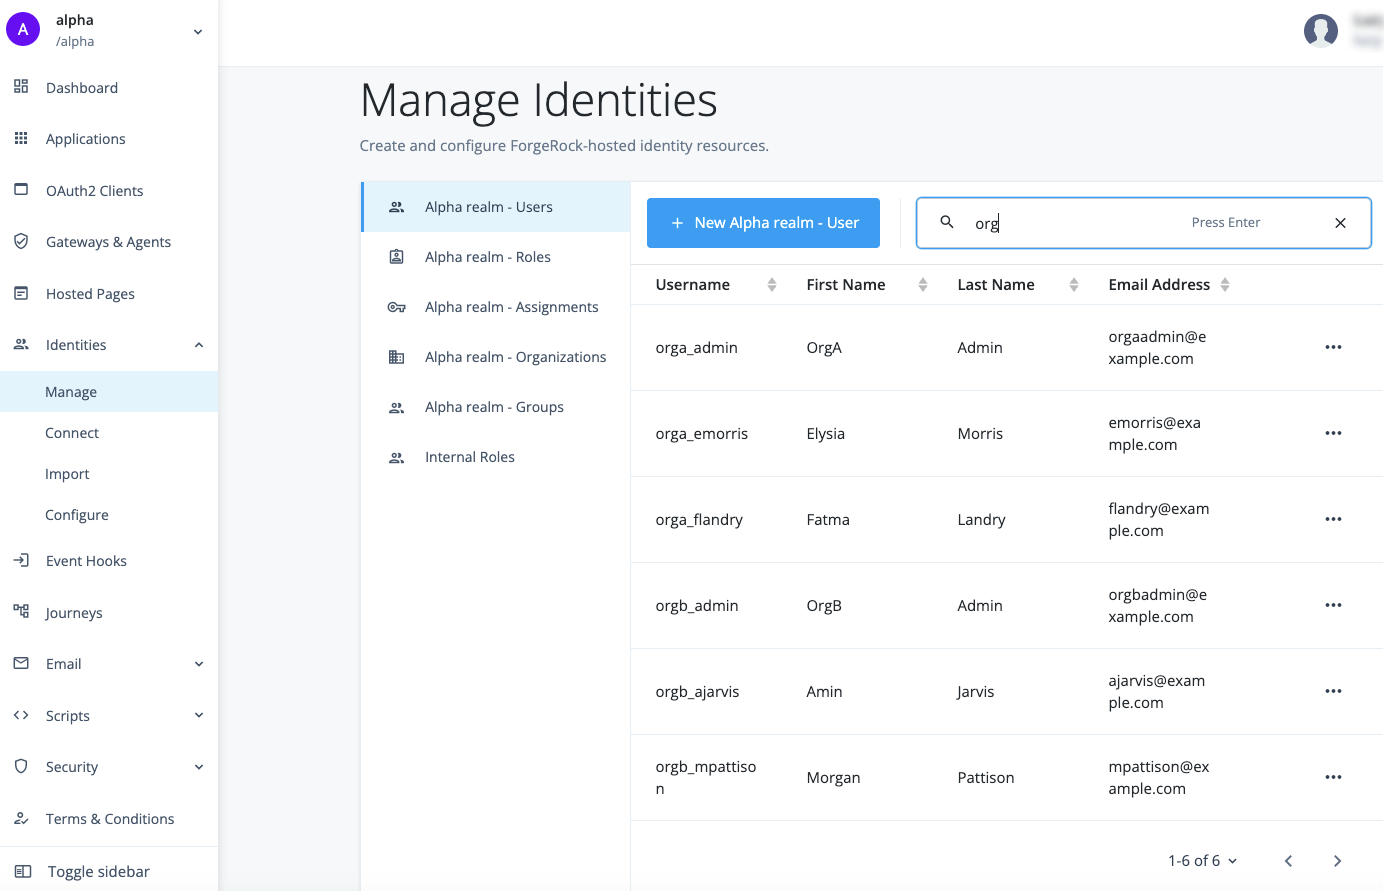
Task 2: Create two organizations and assign administrators
In this task, you create two parent organizations, OrgA and OrgB, and assign administrators to them.
| Parent organizations can only be created by super or tenant administrators. Sub-organizations are allowed within an organization, and organization administrators can create them within their respective organizations. |
-
In the Advanced Identity Cloud admin console, go to Identities > Manage.
-
On the Manage Identities page, click Alpha realm - Organizations.
-
Create
OrgAand assign an administrator:-
Click New Alpha realm - Organization.
-
In the Name field, enter
OrgA, and then click Save. -
In the Description field, enter
Organization A - employees, and then click Save.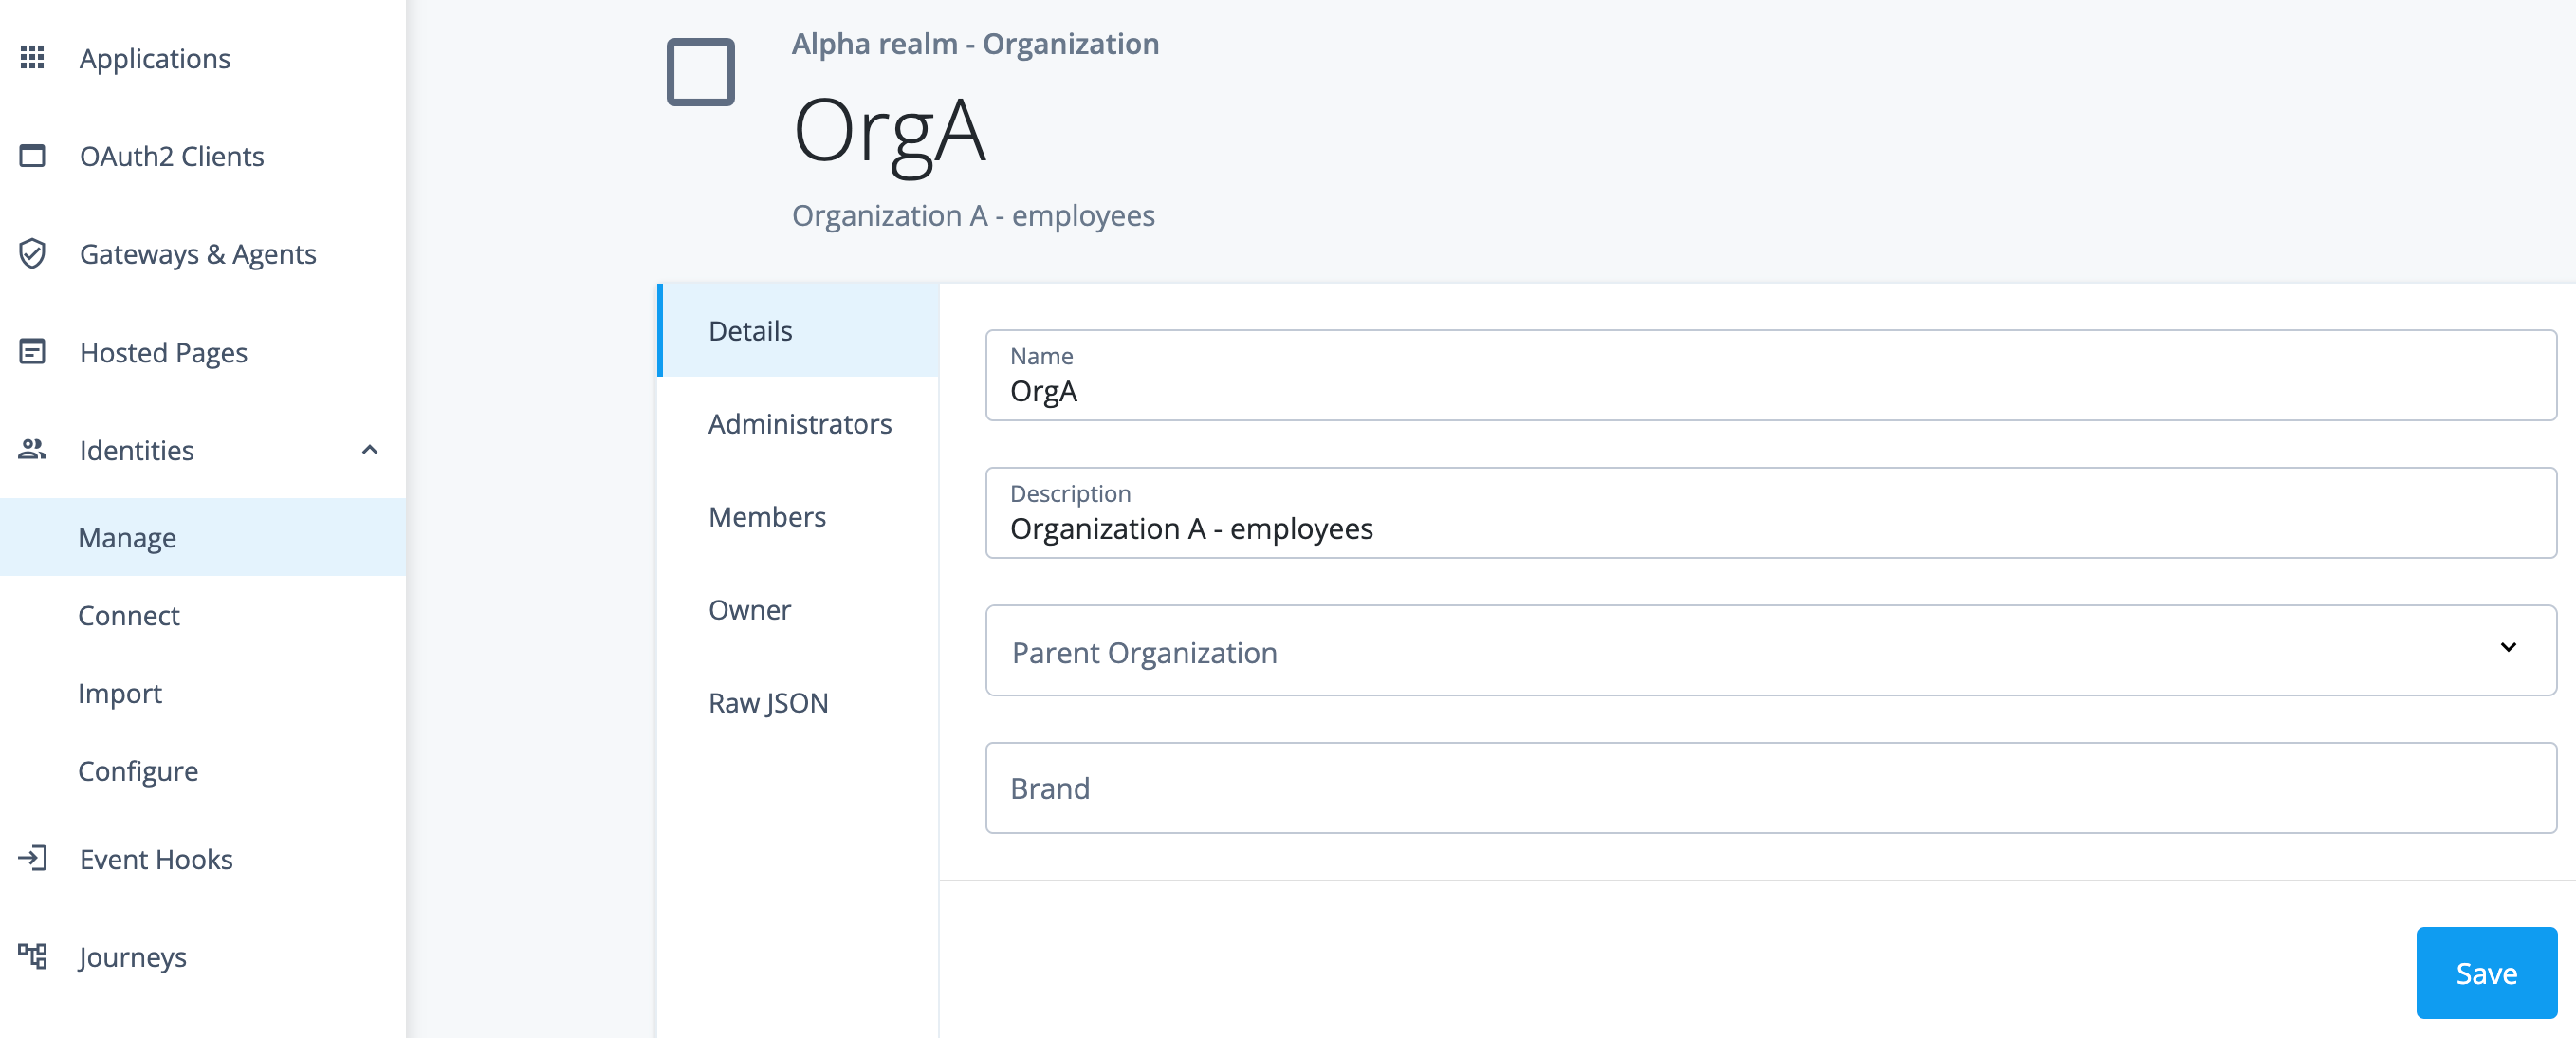
-
Click Administrators and Add Administrators.
-
Search for and select the user
orga_admin, and then click Save.
-
-
Go back to the Alpha realm - Organization page.
-
Create
OrgBand assign an administrator:-
Click New Alpha realm - Organization.
-
In the Name field, enter
OrgB, and then click Save. -
In the Description field, enter
Organization B - contractors, and then click Save. -
Click Administrators and Add Administrators.
-
Search for and select the user
orgb_admin, and then click Save.
-
-
Go back to the Alpha realm - Organization page.
You now have two alpha realm organizations, OrgA and OrgB, each with an assigned administrator.
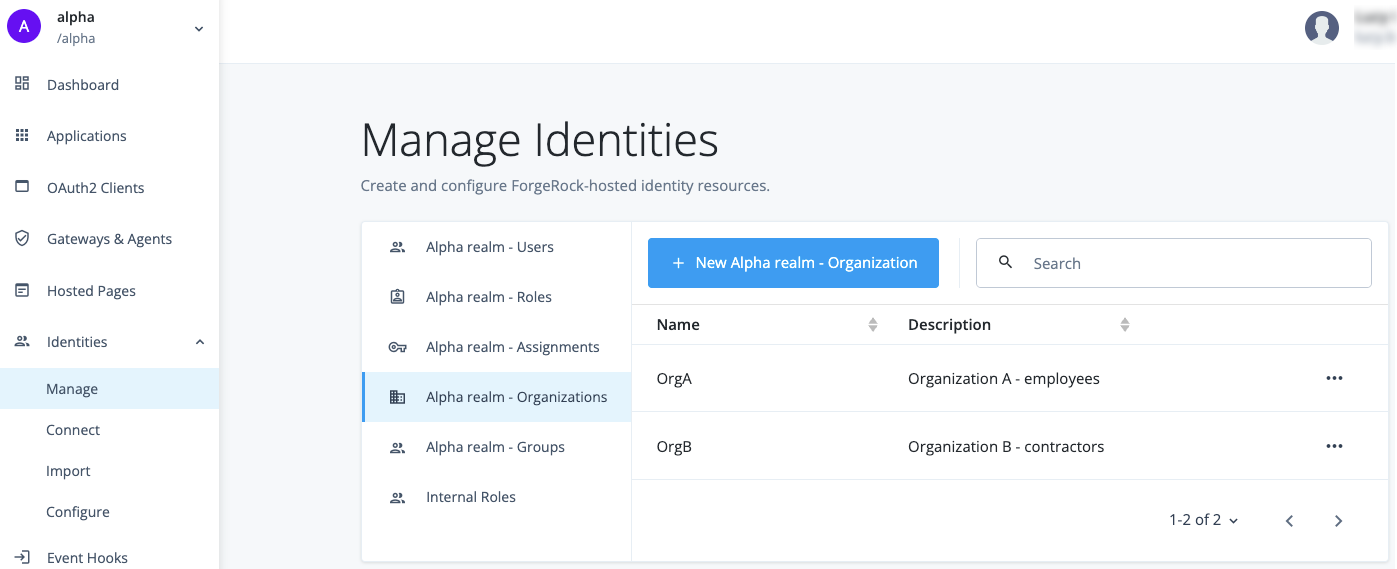
Task 3: Add members to the organizations
-
In the Advanced Identity Cloud admin console, go to Identities > Manage.
-
On the Manage Identities page, click Alpha realm - Organizations.
-
Add members to
OrgA:-
Click
OrgA. -
Click Members and Add Members.
-
Search for and select
orga_emorrisandorga_flandry, and then click Save.The selected users are added to OrgA.
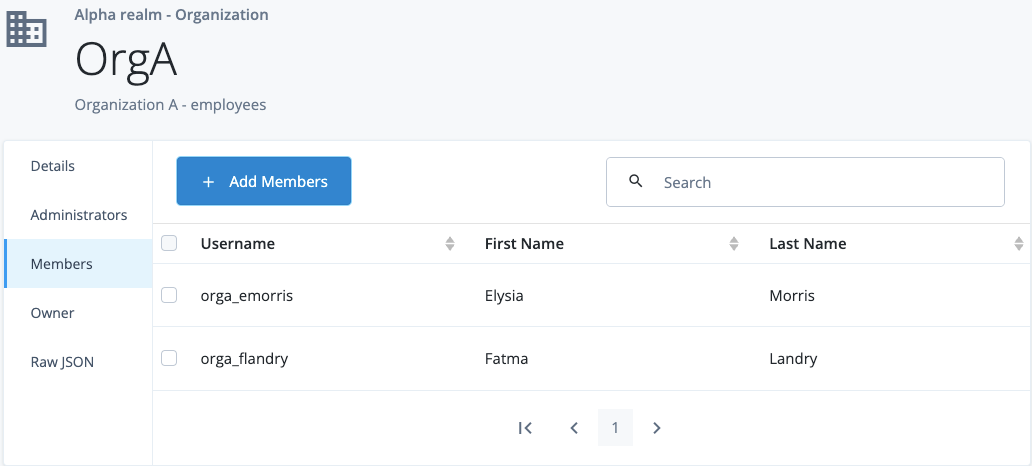
-
-
Go back to the Alpha realm - Organization page.
-
Add members to
OrgB:-
Click
OrgB. -
Click Members and Add Members.
-
Search for and select
orgb_ajarvisandorgb_mpattison, and then click Save.The selected users are added to
OrgB.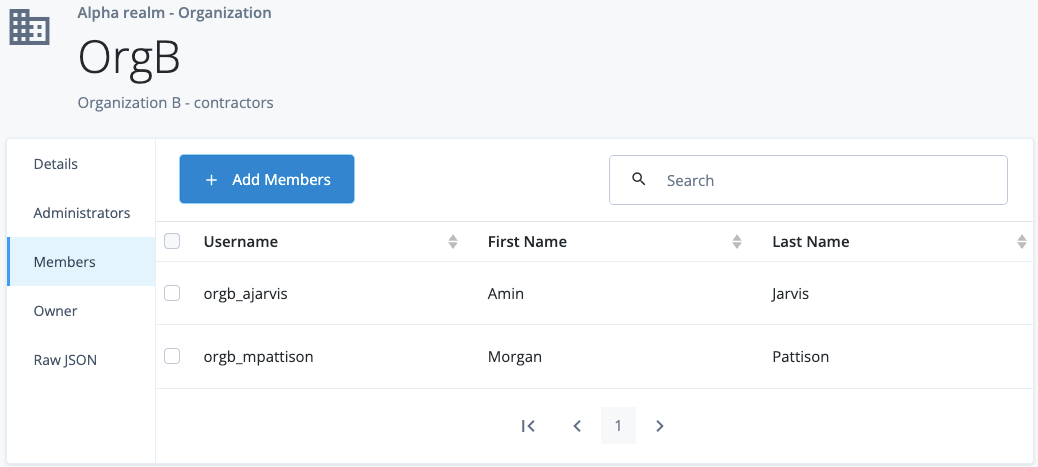
-
-
Go back to the Alpha realm - Organization page.
Validation
Now that you have set up your organizations and assigned administrators to them, you are ready to validate the configuration.
The steps in this validation check that organization administrators only have access to users who are members of their organizations. An additional step checks that the organization administrator can update the details of an individual user within their organization.
| To restrict the access organization (delegated) administrators have in Advanced Identity Cloud, organization administrators access user management functions through the Advanced Identity Cloud end-user UI and not the Advanced Identity Cloud admin console. |
Steps
-
In the Advanced Identity Cloud admin console, go to Journeys and click on the
Loginjourney provided as default in Advanced Identity Cloud. -
Copy and paste the
Preview URLinto an Incognito window.The login page for the tenant displays.
-
In the Sign In page, enter the username and password for
orga_admin, and then click Next.You are logged in to the Advanced Identity Cloud end-user UI as the
OrgAadmin. The left panel includes two administration menu items: Alpha realm - organization and Alpha realm - user. These menu items display to an end user when they are a delegated administrator.
-
Click Alpha realm - user.
Only the users you added as
OrgAmembers are listed (orga_emorrisandorga_flandry).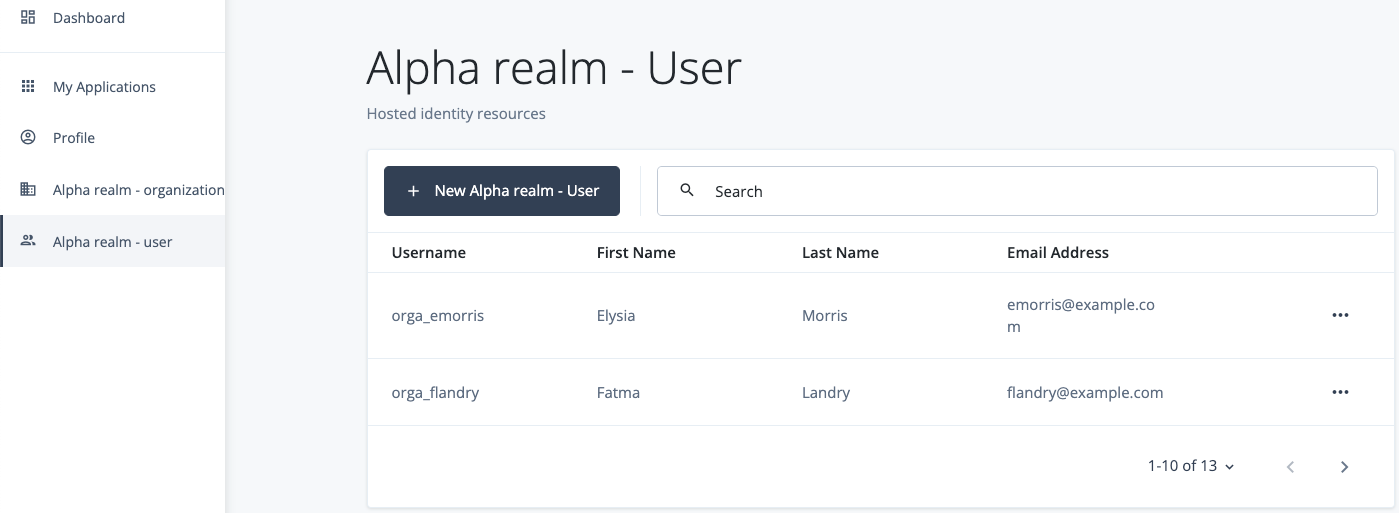
-
Log out of the Advanced Identity Cloud end-user UI .
-
In the Sign In screen, enter the username and password for
orgb_admin, and then click Next. -
Click Alpha realm - user.
Only the users you added as
OrgBmembers are listed (orgb_ajarvisandorgb_mpattison).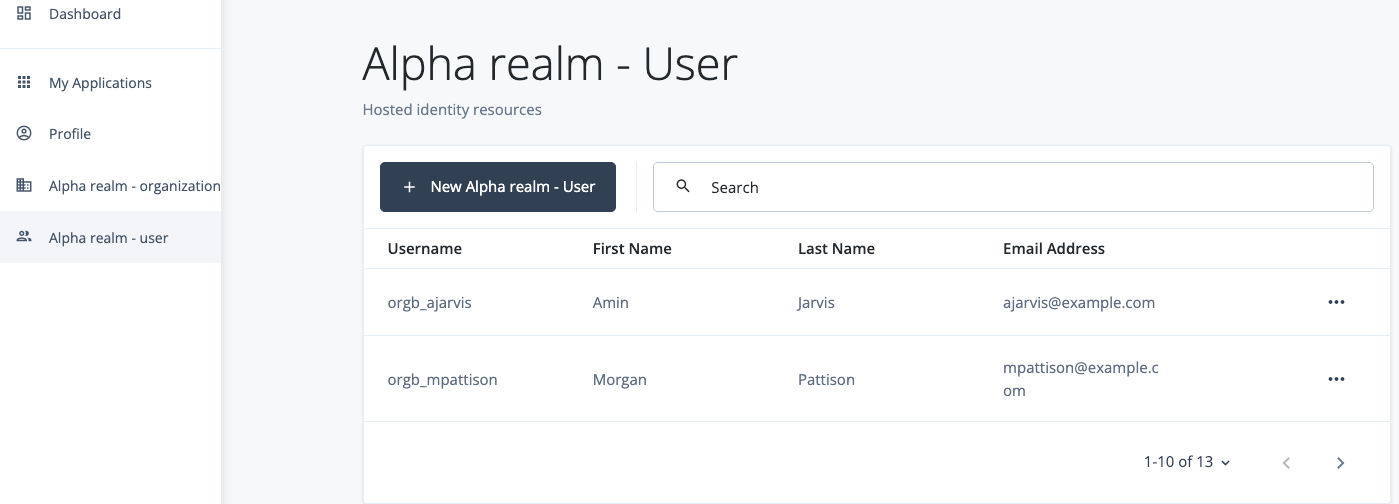
-
Click on
orgb_mpattison. -
Enter a phone number in the Telephone Number field, and then click Save.
-
Verify the updated user details:
-
In the Advanced Identity Cloud admin console, go to Identities > Manage
-
Search for
orgb_mpattison.The phone number you added as the
OrgAadministrator is shown in the Telephone Number field.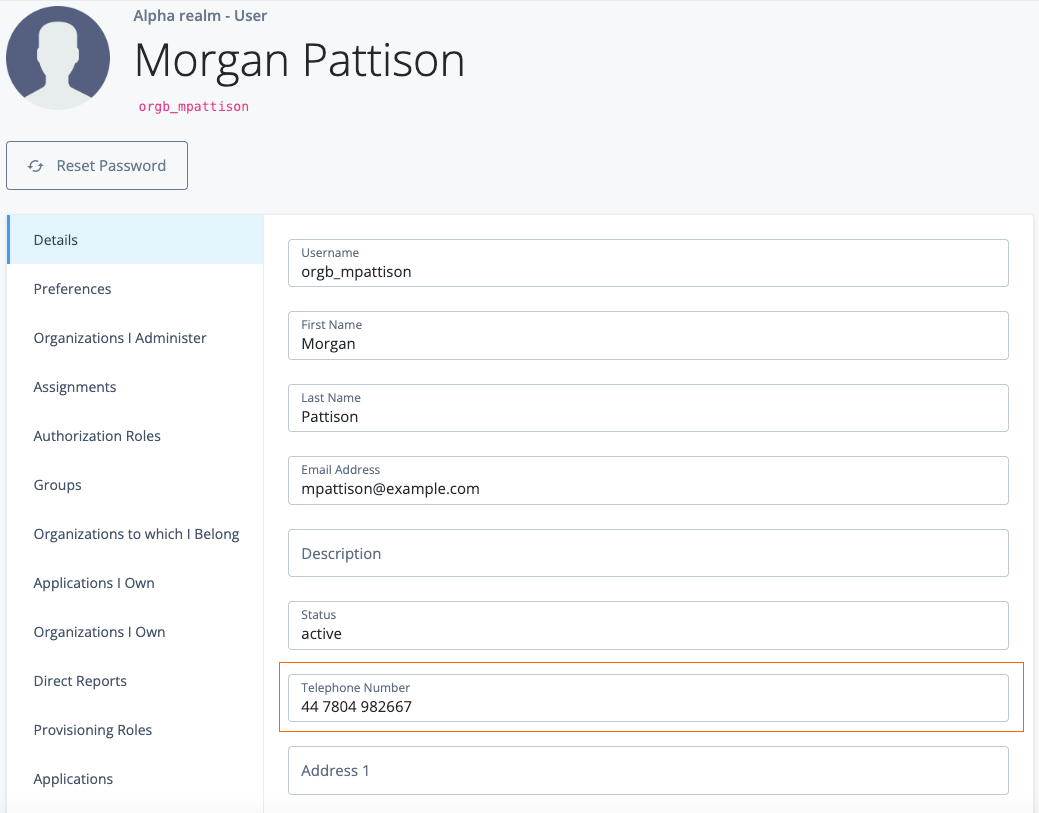
-
|
To explore the role of organization administrators further, check out the other options in the Advanced Identity Cloud end-user UI. Organization administrators can do the following within their organization:
Learn more in Administration. |
Explore further
Reference material
| Reference | Description |
|---|---|
An overview of organizations in Advanced Identity Cloud. Includes an example to help explain organization concepts. |
|
A deeper dive into organizations. |
|
Realms are administrative units that group configurations and identities together. Realms let you manage different sets of identities and applications within the same Advanced Identity Cloud tenant. Each realm is fully self-contained and operates independently of other realms within a tenant. |
|
Get to know the admin interfaces; Advanced Identity Cloud admin console, AM admin console, and IDM admin console. |
|
Use case: Configure organizations in PingOne Advanced Identity Cloud |
A guided walkthrough on configuring organizations, including setting up owners, administrators, and members. Also explores how to delegate a subset of administration tasks to certain users based on an internal role. |
A guided walkthrough video describing the Organization managed object. |
|
A guided walkthrough video demonstrating how to build an example organization. |
Enable managers to manage their direct reports
Description
Estimated time to complete: 20 minutes
In this use case, you configure delegated administration to let managers update their direct reports' information and assign provisioning roles to them through the Advanced Identity Cloud end-user UI.
You’ll need to use Relationship-derived virtual properties (RDVPs) to filter users based on their manager relationships in the Advanced Identity Cloud end-user UI. This approach stores references to the target objects of a relationship as a property of the source object, enabling their use in privilege filters.
Goals
After completing this use case, you will know how to do the following:
-
Define a virtual property to use as a privilege filter.
-
Set up relationship notifications.
-
Configure delegated administration by creating an internal role with privileges.
-
Test delegated administration in the Advanced Identity Cloud end-user UI.
Prerequisites
Before you start work on this use case, ensure you have these prerequisites:
-
Access to your Advanced Identity Cloud development environment as an administrator.
-
A basic understanding of:
-
Two users in the alpha realm:
-
A manager user, with username
testmanager1 -
A report user, with username
testuser1
-
Learn more about creating test users in Create test users and roles.
Tasks
Task 1: Define a virtual property to use as a privilege filter
In this task, you define a virtual property to store the manager ID. To achieve this, you can modify an indexed general purpose extension attribute. The example uses frindexedstring1.
-
Log in to the Advanced Identity Cloud admin console as an administrator.
-
In the left menu pane, select Native Consoles > Identity Management.
-
Click Configure > Managed Objects and select
Alpha_user. -
Click the pencil icon () next to
frIndexedString1. -
On the Details tab, enter the following information:
Field Value Readable title
custom_managerIDDescription
Manager’s ID-
Click Show advanced options.
-
Select Virtual and Return By Default.
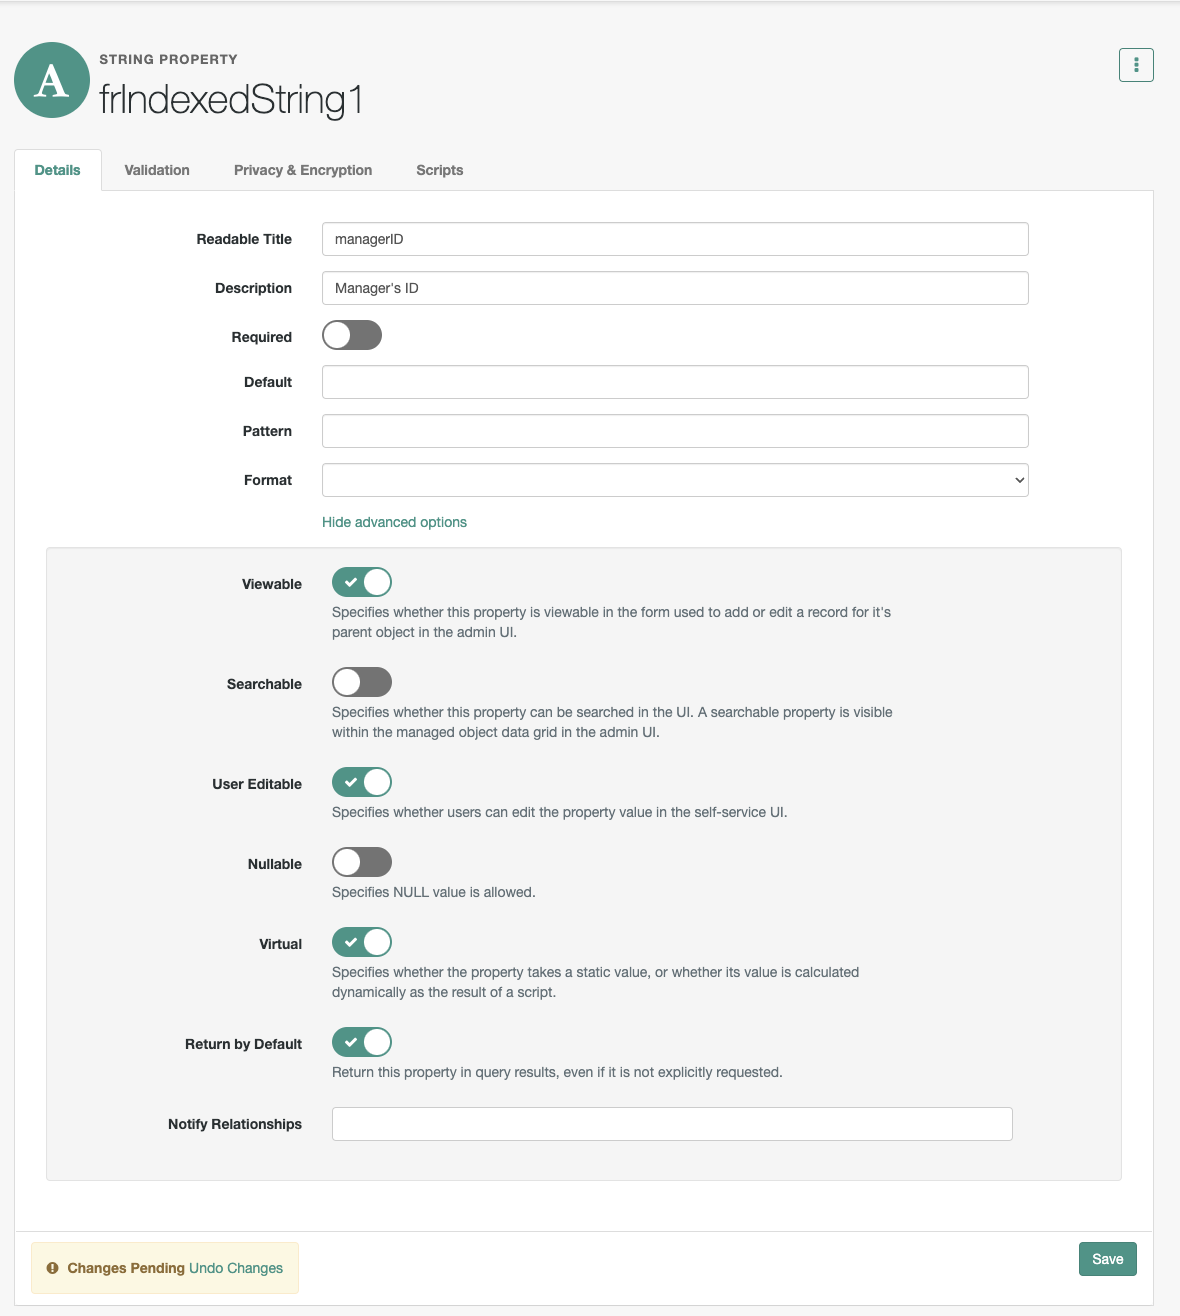
-
Click Save.
-
-
Click the Query Configuration tab and enter the following information:
Field Value Referenced Relationship Fields
["manager"]Referenced Object Fields
_idFlatten Properties
Select the checkbox.
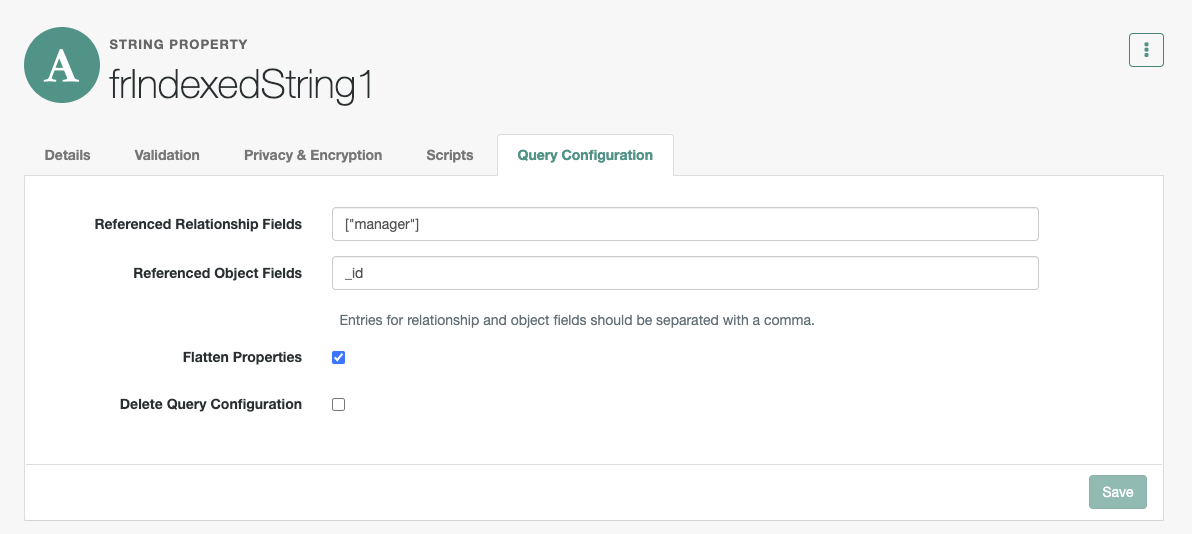
-
Click Save.
With this configuration, whenever an alpha_user object is updated, Advanced Identity Cloud will resolve its manager relationship and store the relationship data in the frindexedstring1 property along with the updated object.
Task 2: Set up relationship notifications
In this task, you configure relationship notifications so that a user object is notified whenever its manager relationship changes. Relationship notifications are triggered by any activities related to an object update, including the onUpdate and postUpdate, script hooks, and implicit synchronization.
Relationship notifications are necessary because an object can be impacted by a relationship change even if it is not the direct target of the change. Without these notifications, the user object won’t receive updates. Since manager/reports is a reverse relationship, you must ensure the user object is notified when a report is added to a manager.
Enable “Notify Self” on the manager relationship property
-
In the Identity Management native console, click Configure > Managed Objects, and then select
Alpha_user. -
Click the
managerrelationship property. -
On the Details tab, click Show advanced options.
-
Select Notify Self.
-
Click Save.
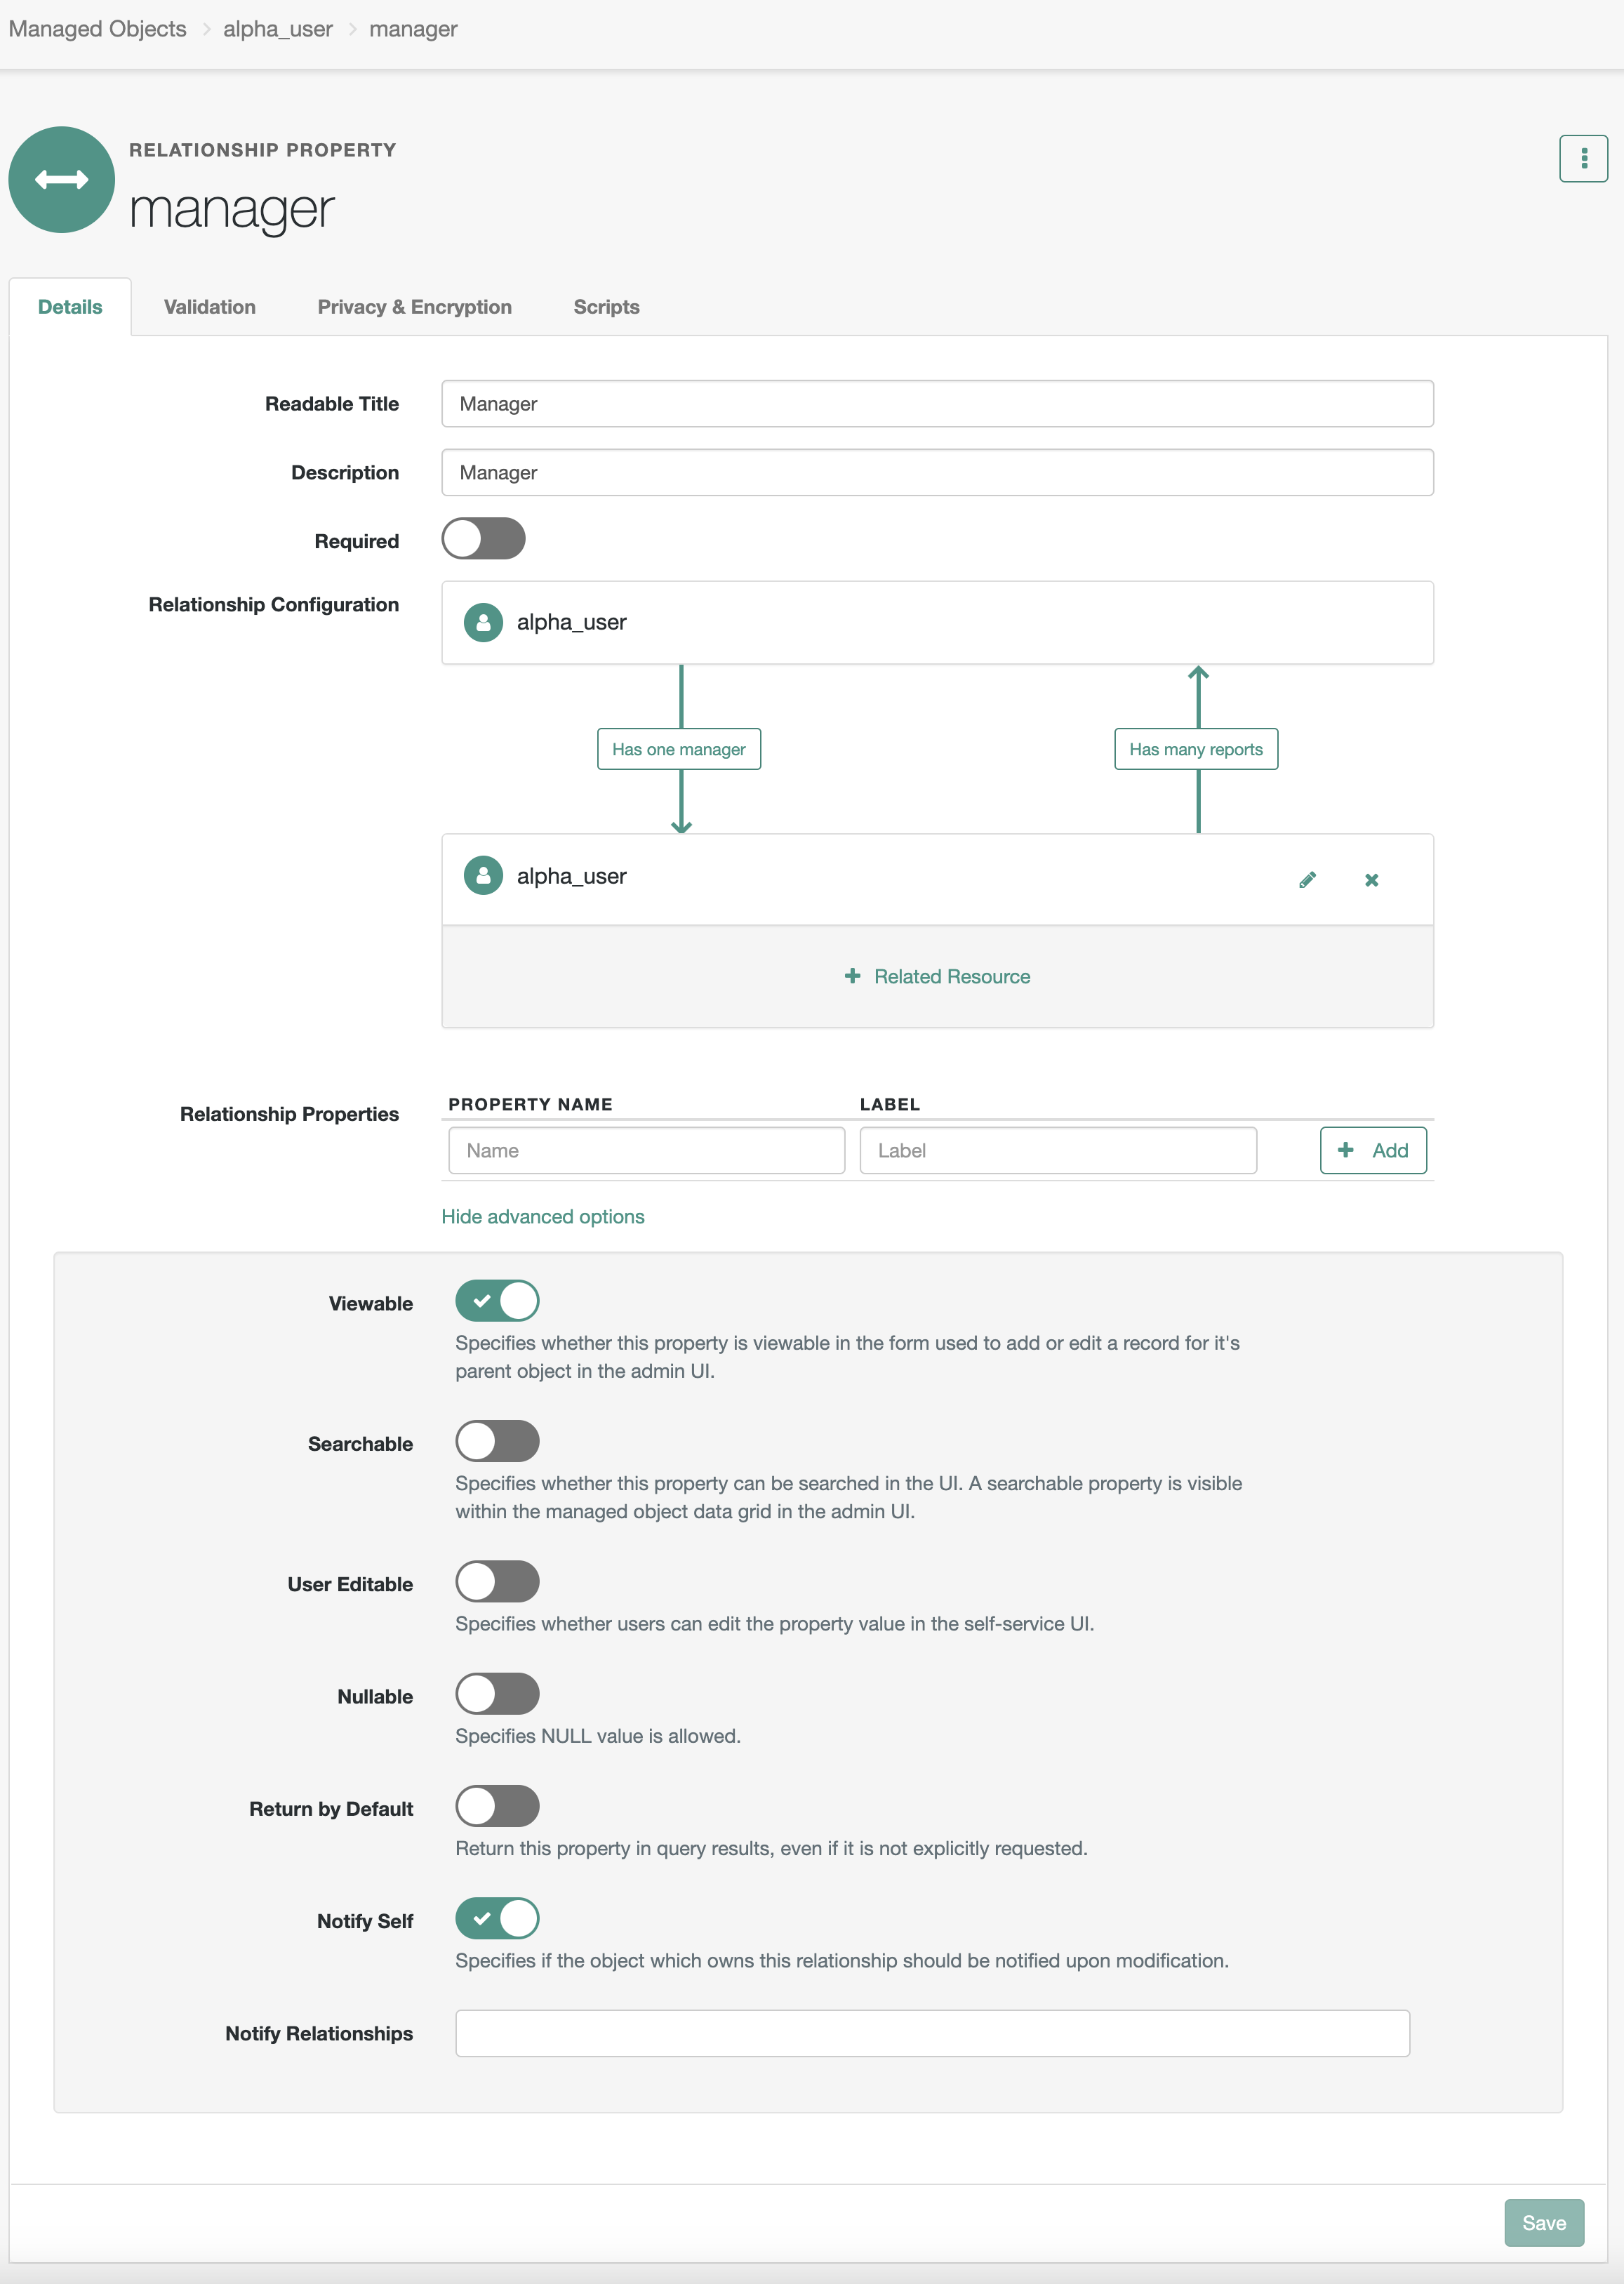
Enable notifications on the reports relationship property
-
In the Identity Management native console, return to Configure > Managed Objects >
Alpha_user. -
Click the
reportsrelationship property. -
On the Details tab > Relationship Configuration, click the pencil icon () next to
alpha_user. -
Select Notify, and then click Save.
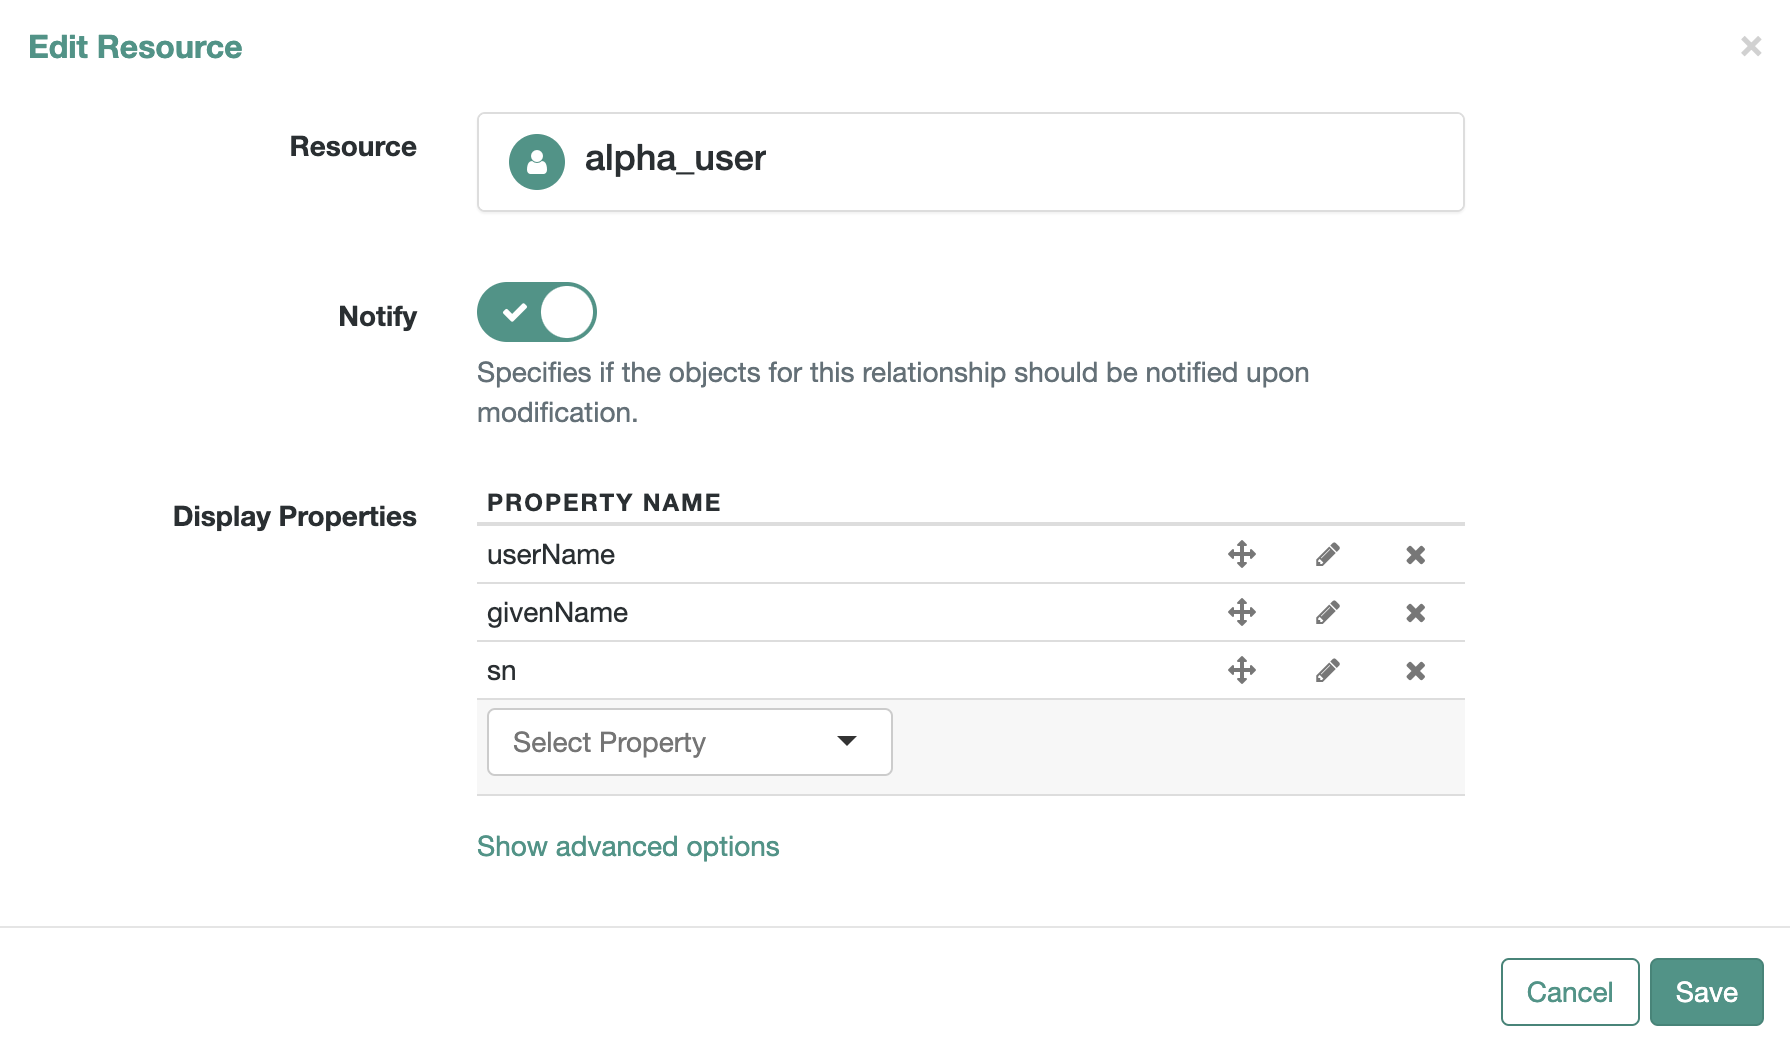
Task 3: Assign a manager user (testmanager1) to a report user (testuser1)
In this task, you assign a manager to the report user.
-
In the Advanced Identity Cloud admin console, go to Identities > Manage.
-
On the Manage Identities page, click Alpha realm - Users.
-
Search for and select
testuser1. -
Scroll down to the Manager field and enter the manager. In our example, this is
testmanager1.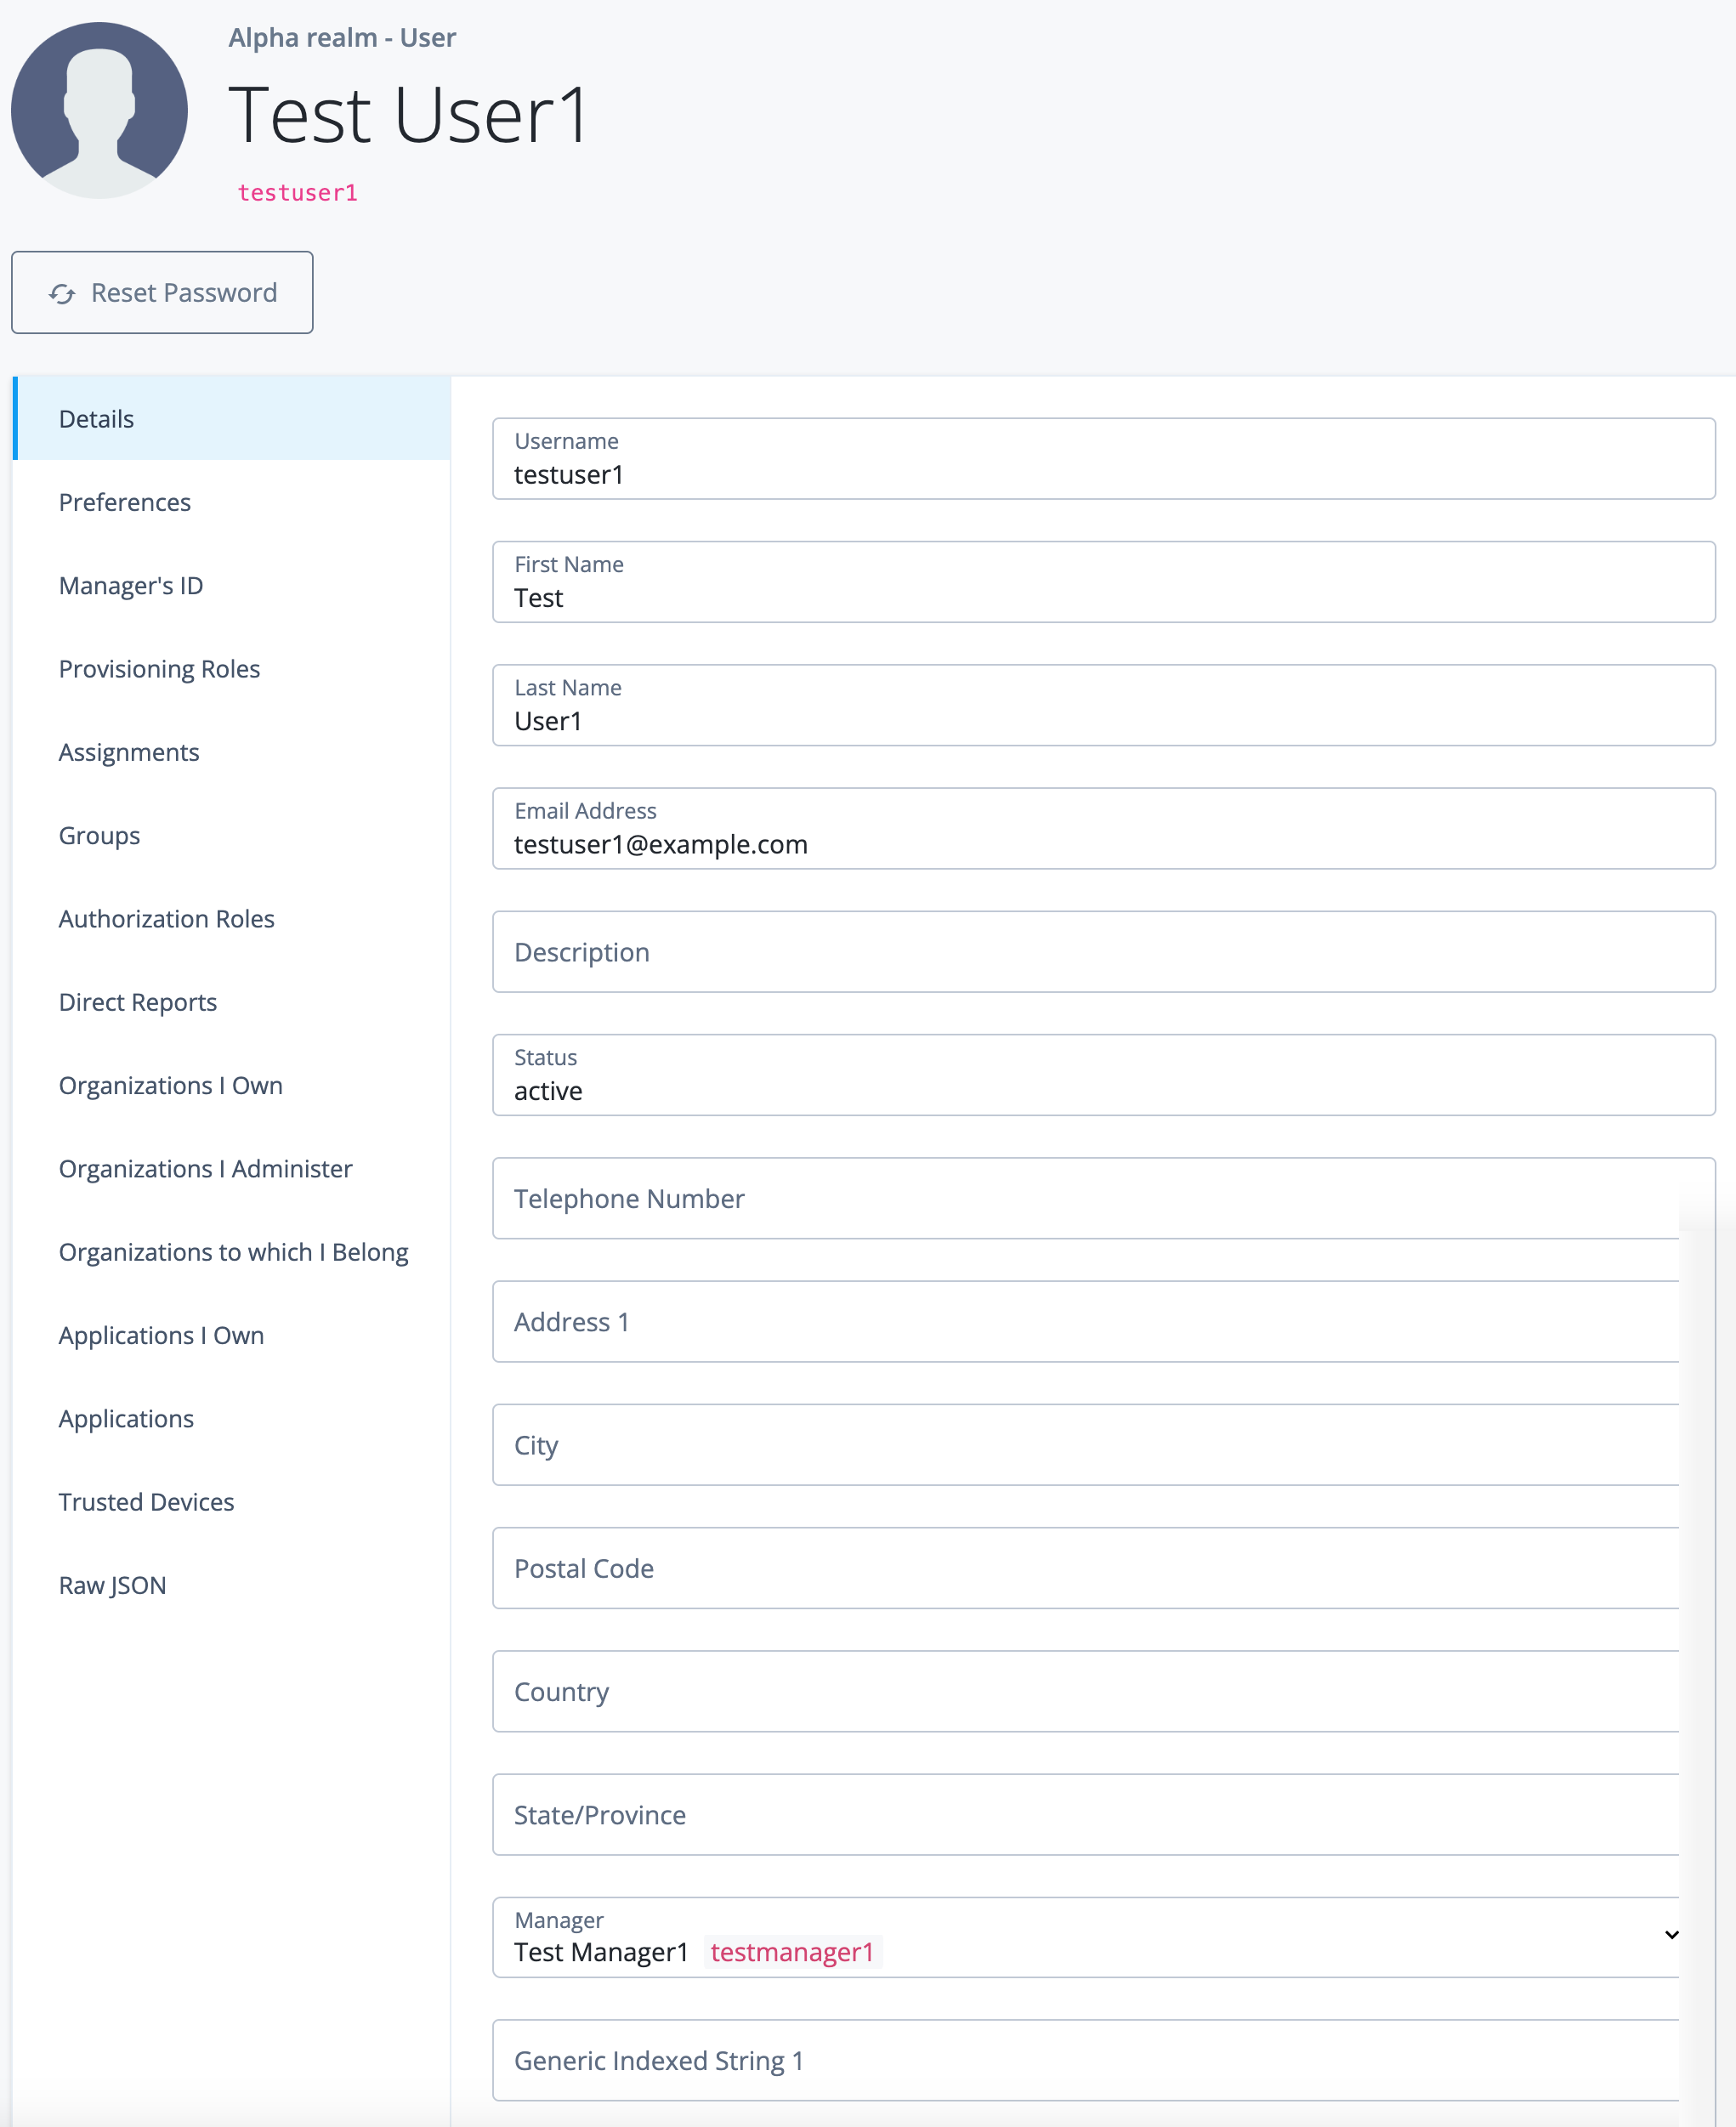
-
Click Save.
-
Click [.label]Raw JSON# and notice that the
frIndexedString1field is populated, similar to this:"frIndexedString1": "4d130ce4-1cc9-40c8-899d-468ec1ef0161"json
Task 4: Configure delegated administration privileges
In this task, you create an internal role with privileges and assign it to managers, enabling them to view and manage their direct reports through the Advanced Identity Cloud end-user UI.
Create an internal managers role with privileges
-
In the Advanced Identity Cloud admin console, go to Identities > Manage.
-
On the Manage Identities page, click Internal Roles.
-
Click + New Internal Role.
-
Enter the following information, and then click Next:
Field Value Name
managersDescription
Role for managers -
Select
Alpha Realm Users - managed/alpha_userfrom the drop-down list, and then click Add. -
Select the View and Update checkboxes, and then click Show advanced.
-
Under Attribute Permissions, click set all attributes, and select
None. -
Scroll through the list of attributes and enable the ones to be exposed to the manager:
-
Set
userName,givenName,cnandsnto Read. -
Set
descriptionandrolesto Read/Write.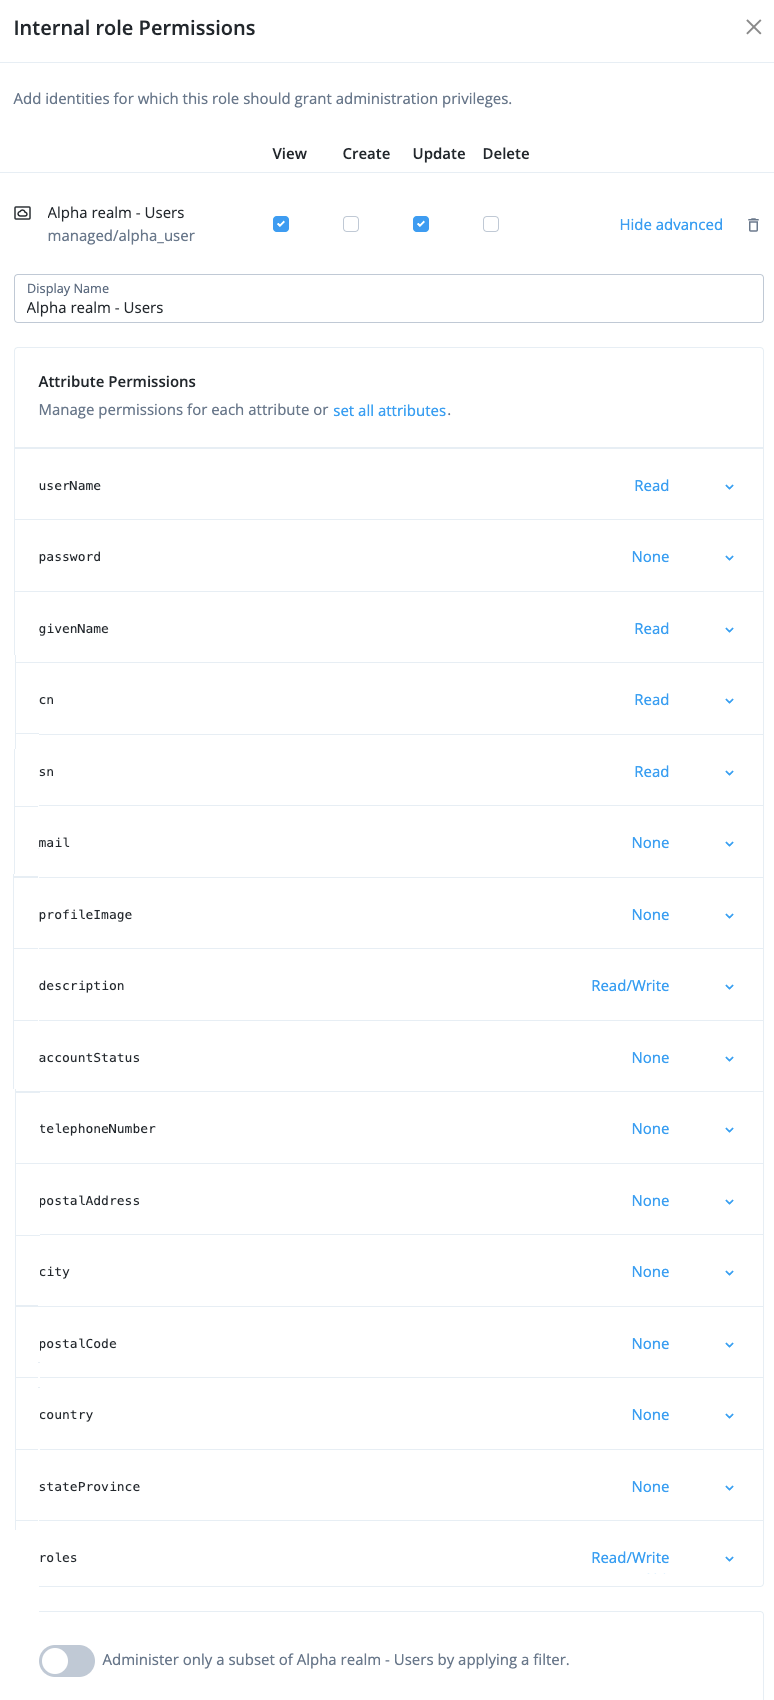
-
-
Select Administer only a subset of Alpha realm - Users by applying a filter.
-
Click Advanced Editor and enter the following query expression:
frIndexedString1 eq "{{_id}}""jsThis filter condition means that only objects that have a property named
frIndexedString1whose value matches the value of the authenticated user’s_idare returned.
-
Click Next.
-
Click Next (without setting a dynamic internal role assignment).
-
Click Save (without setting a time constraint).
Validation
You are now ready to validate the configuration.
Steps
-
In an Incognito browser window, go to the Advanced Identity Cloud end-user UI login URL.
-
In the Sign In page, enter the username and password for
testmanager1, and then click Next.Alpha realm - User appears as a menu option on the left menu pane, enabling managers to view and manage their direct reports.
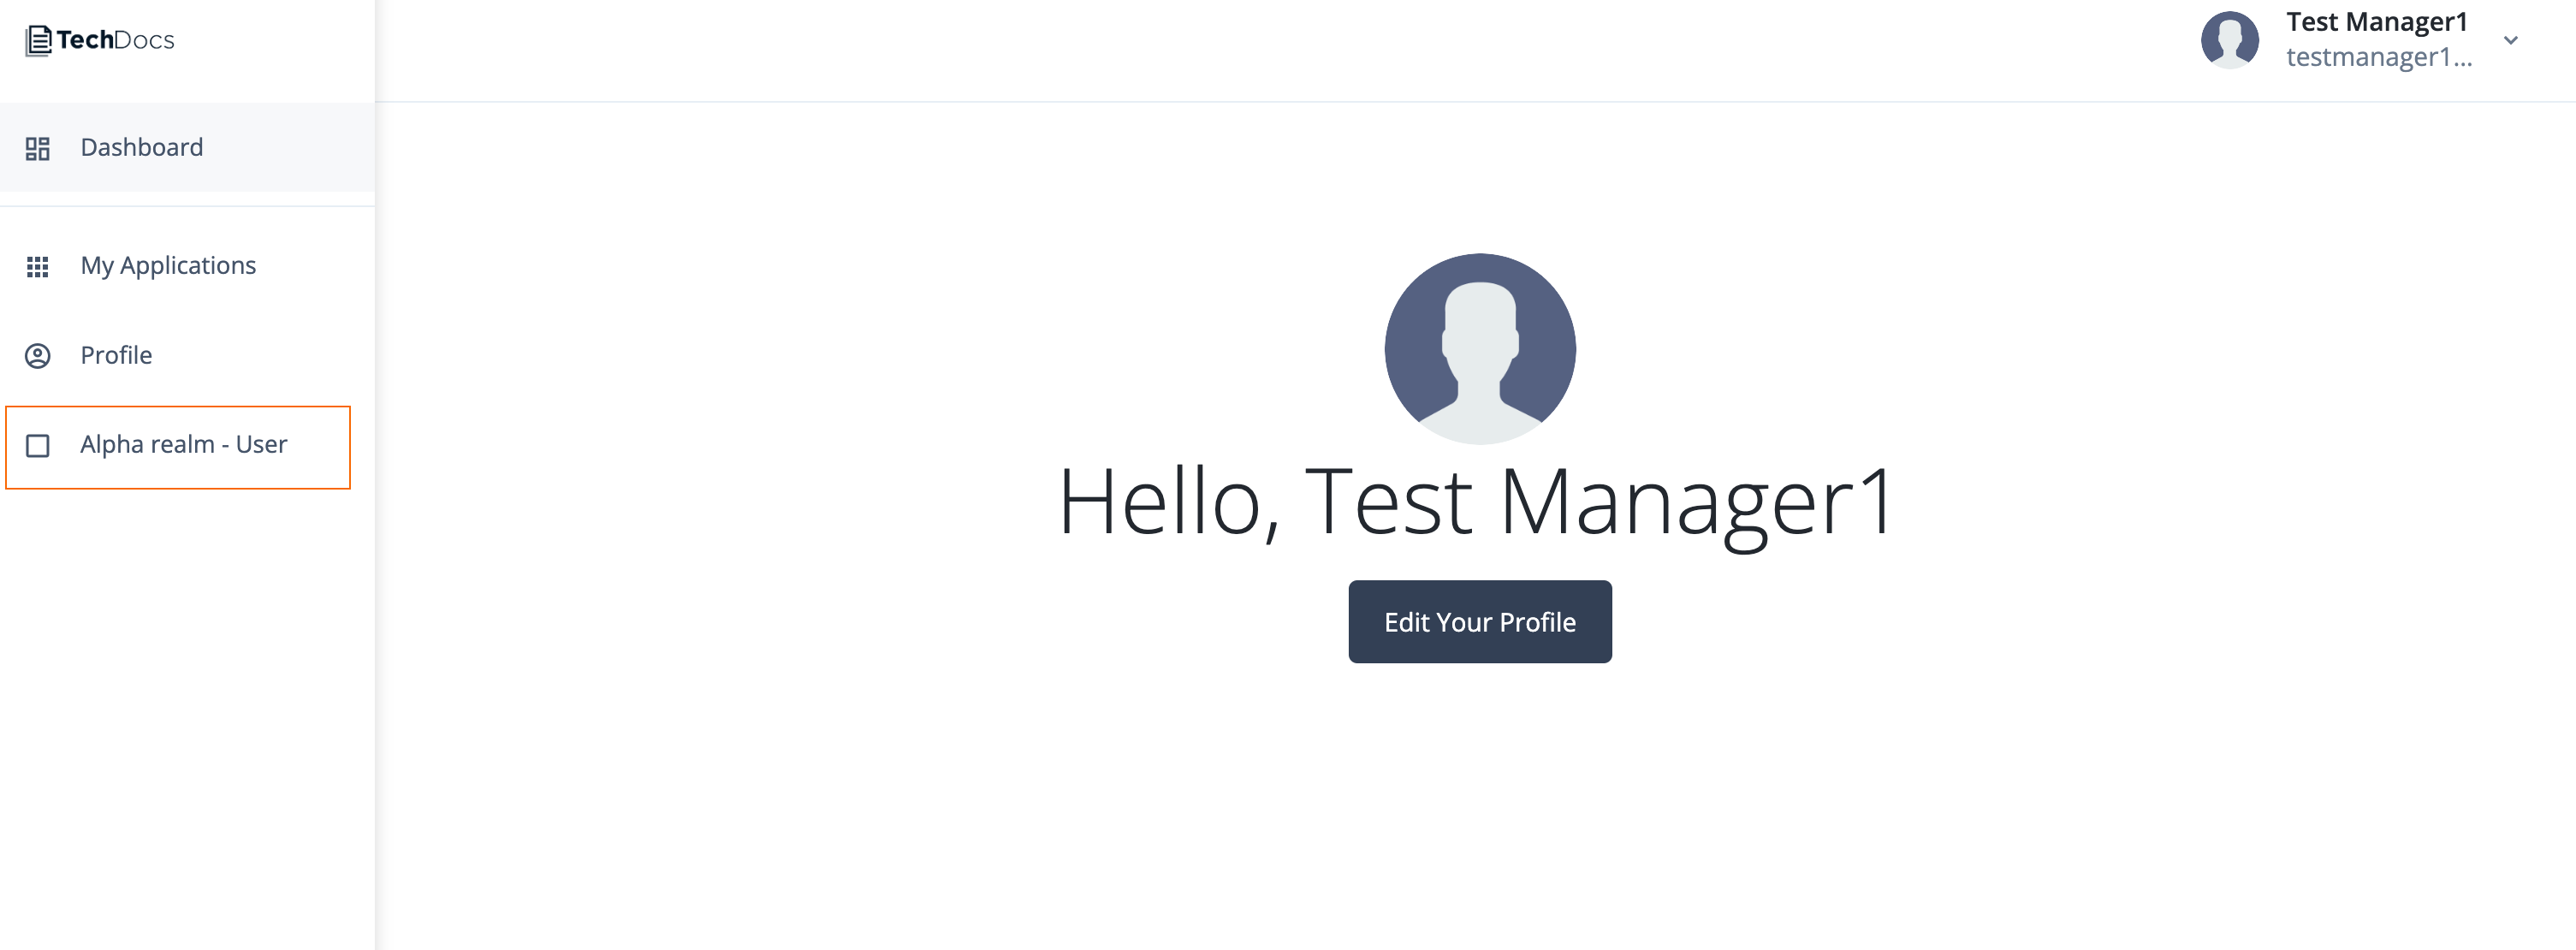
-
Click Alpha realm - User.
The manager’s direct reports are listed (just
testuser1in this example).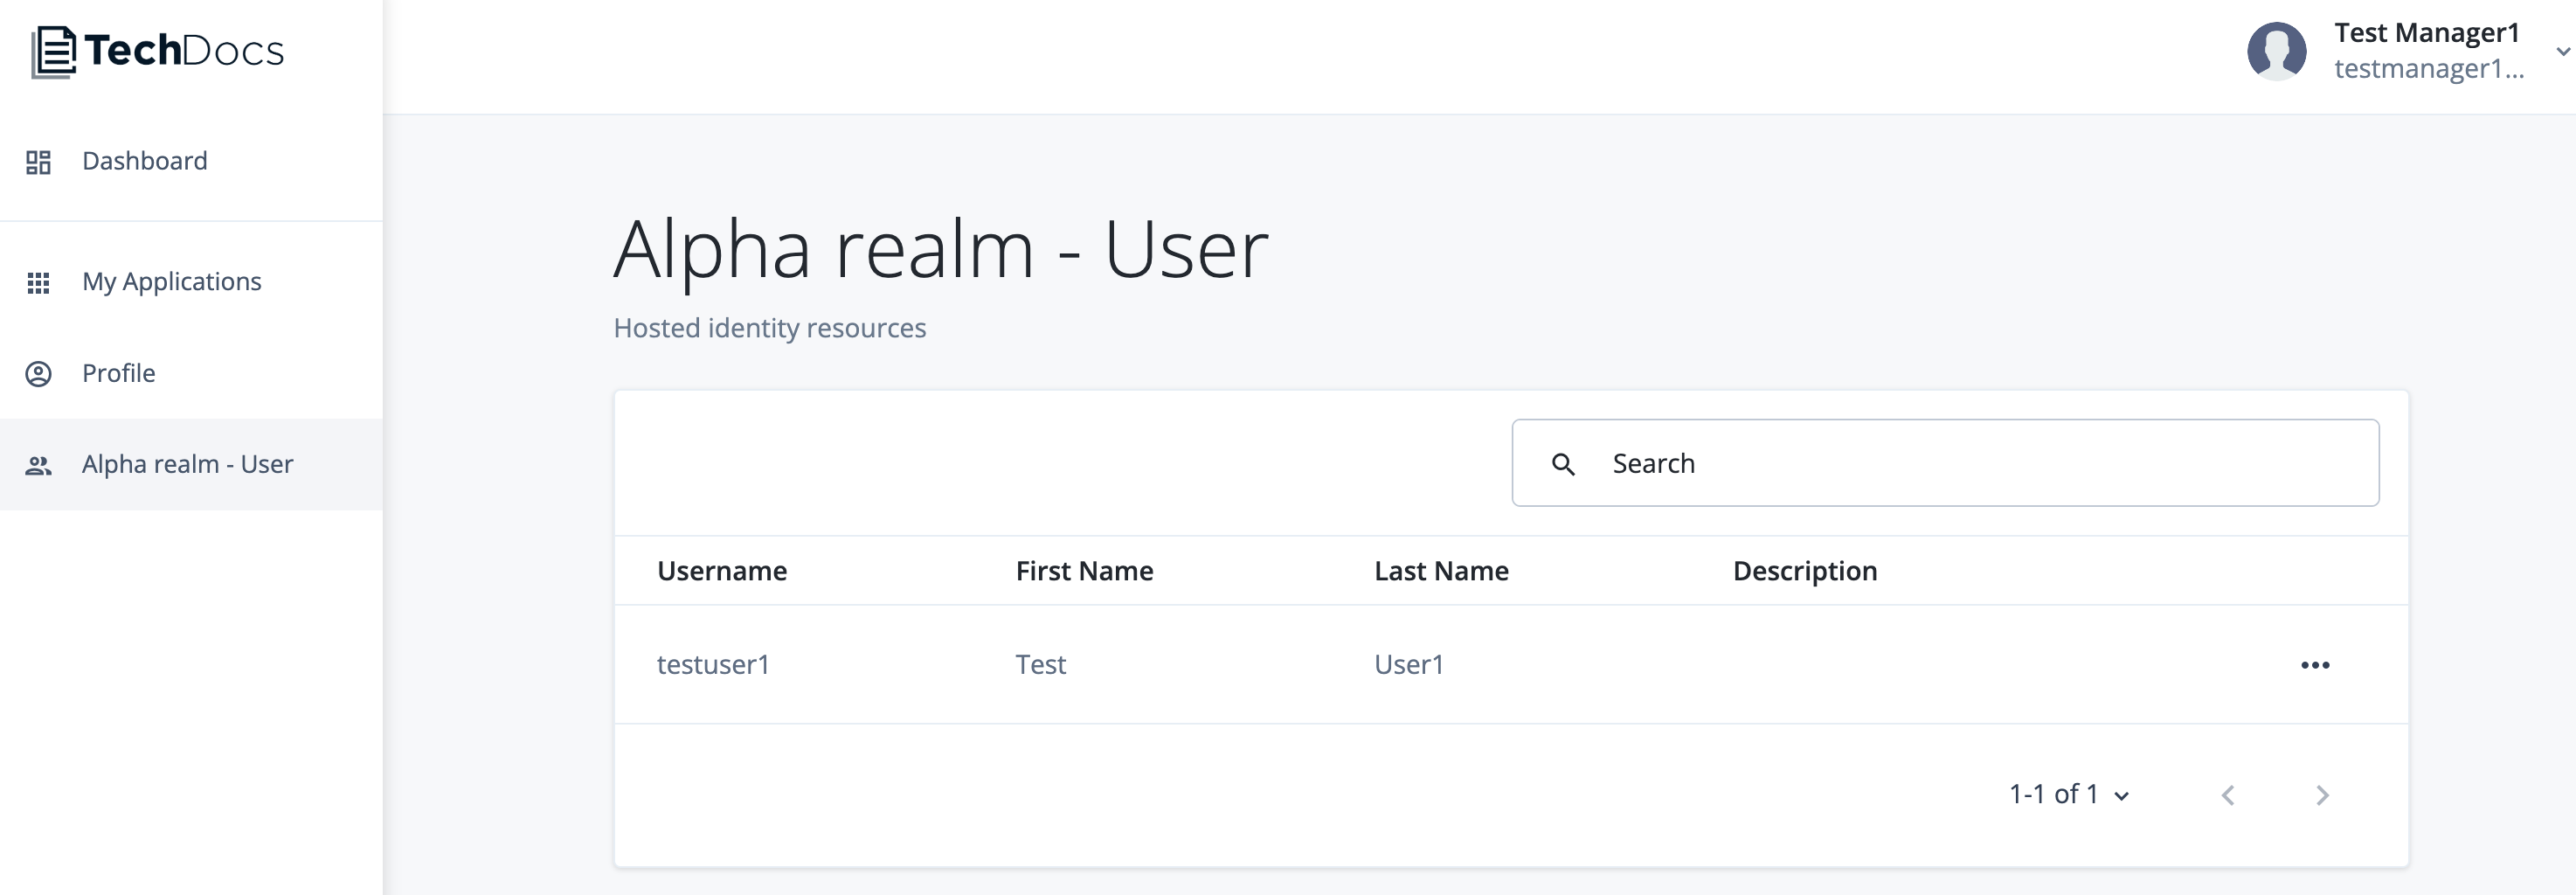
-
Click
testuser1.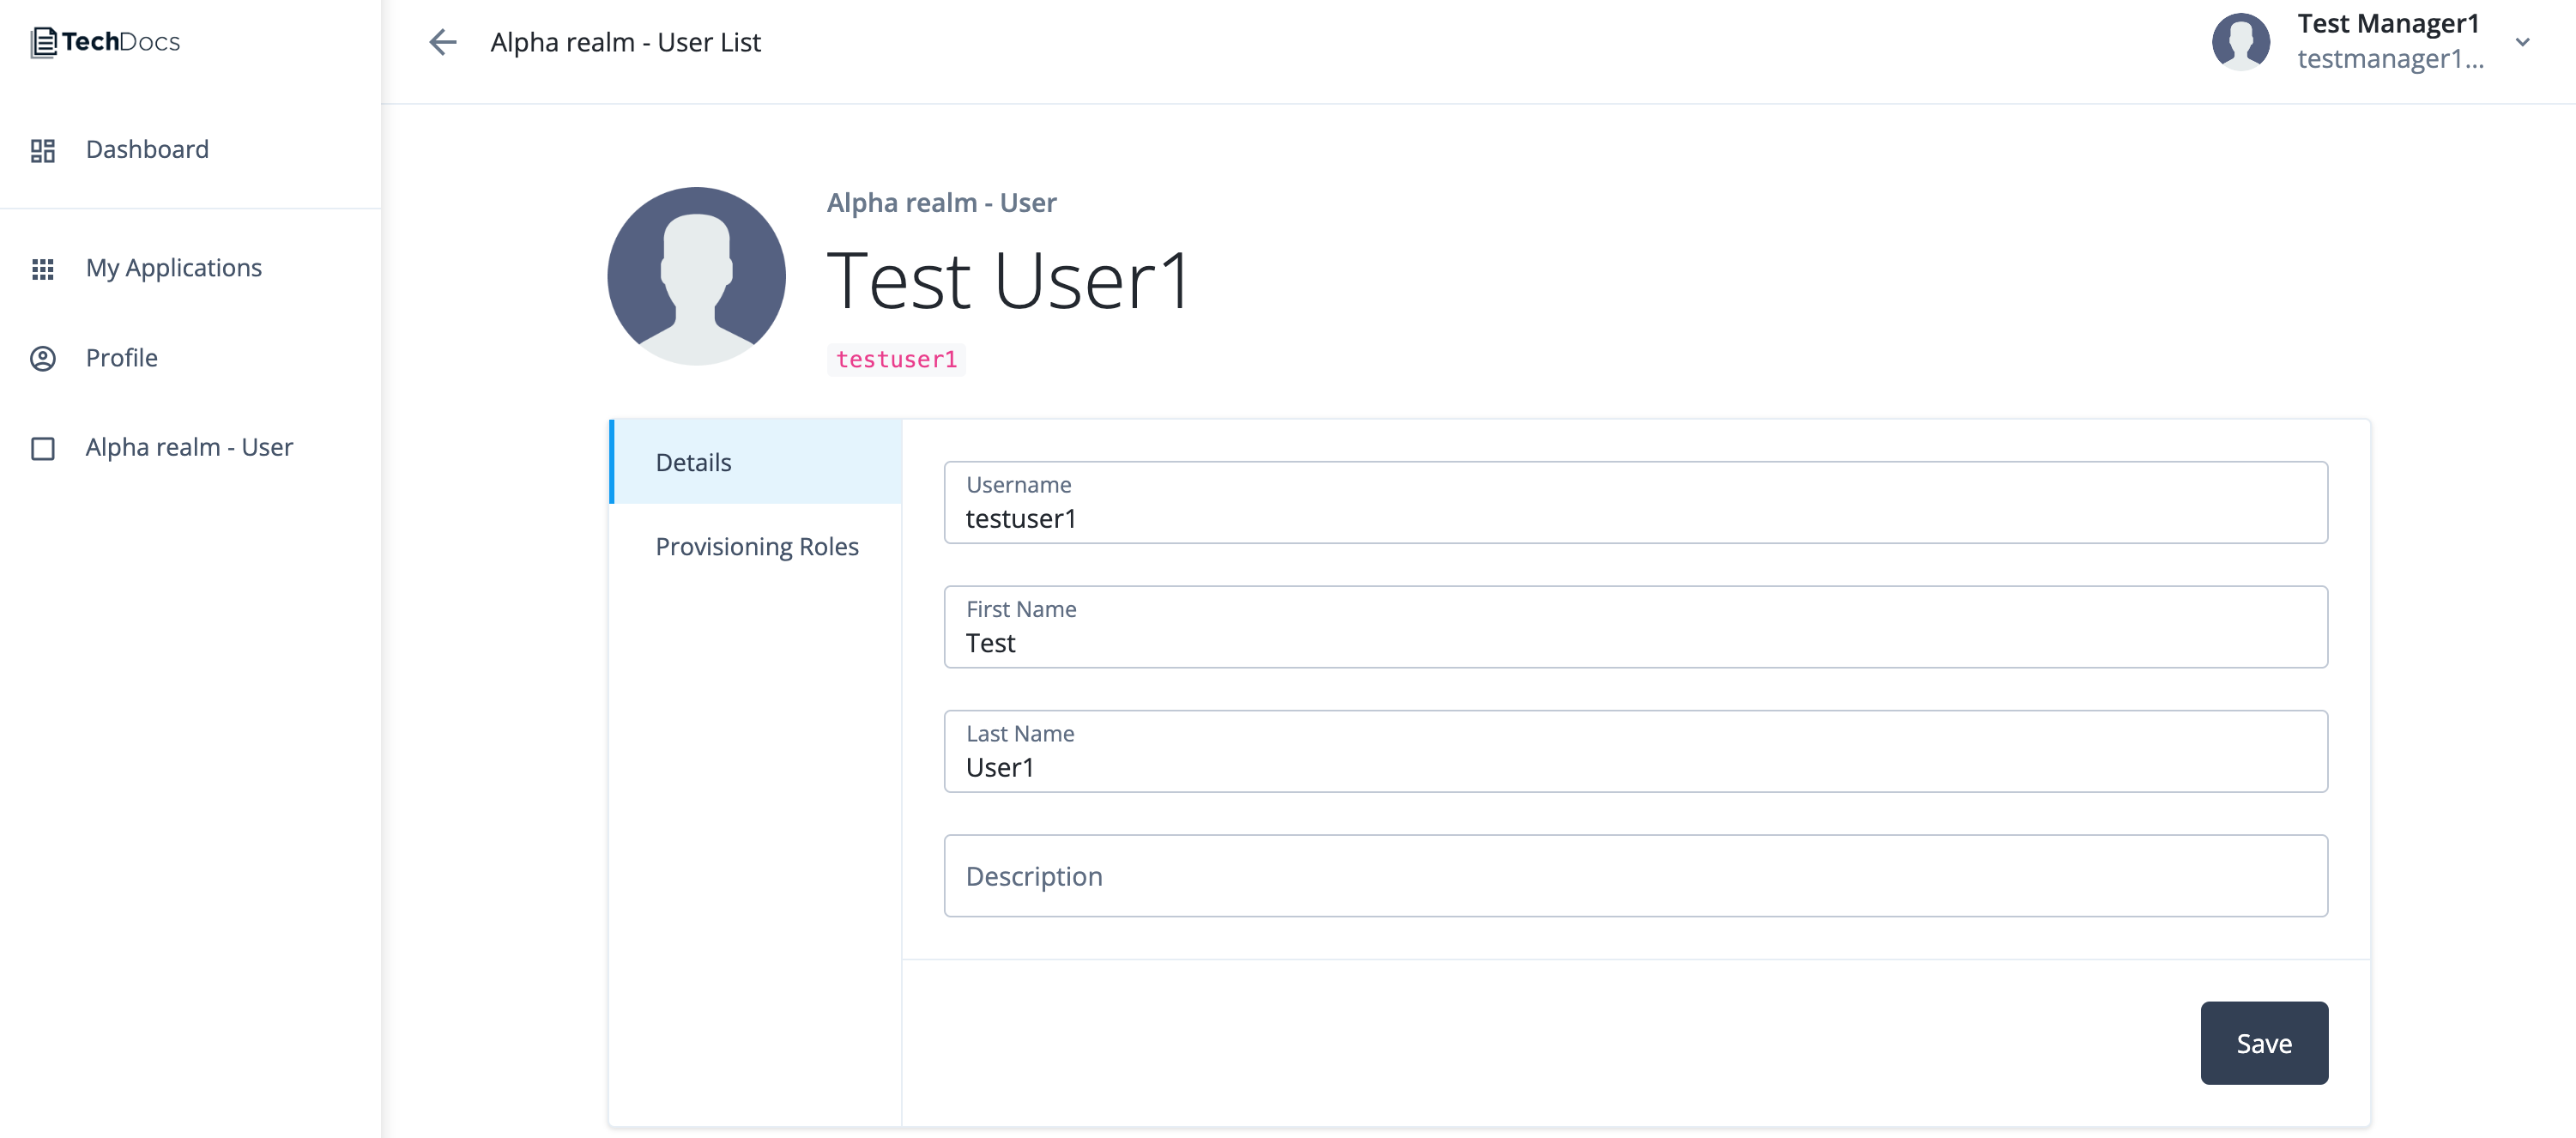
The manager can make updates to their report users' details based on the attribute permissions defined in the internal role.
Explore further
Reference material
| Reference | Description |
|---|---|
An overview of the identity schema used to organize users, roles, assignments, groups, organizations, and applications. |
|
An overview of relationships in the identity model. |
|
An overview of virtual properties that can be calculated based on relationships and relationship notifications. |
|
An overview of building an entitlement structure in Advanced Identity Cloud. |
|
On-demand training videos and demos on identity modeling in Advanced Identity Cloud. |
Provision data between Advanced Identity Cloud and PingDirectory
Description
Estimated time to complete: 1 hour.
In this use case, you configure two apps in PingOne Advanced Identity Cloud to provision data to and from PingDirectory using the LDAP app template via a remote connector server (RCS).
Goals
After completing this use case, you will know how to do the following:
-
Create an authoritative app to provision data to Advanced Identity Cloud.
-
Create a target app to provision data from Advanced Identity Cloud.
-
Let Advanced Identity Cloud communicate with an on-premise external data store, a PingDirectory server, by installing a remote connector server (RCS), also referred to as a remote server, and using an LDAP connector.
-
Map attributes between Advanced Identity Cloud and an external data source.
-
Determine the actions Advanced Identity Cloud takes with synchronization situations.
Prerequisites
Before you start work on this use case, ensure you have these prerequisites:
-
A basic understanding of:
-
Provisioning-related concepts in app management:
-
Mappings
-
Reconciliation
-
Synchronization
-
Synchronization situations and actions
-
-
Access to your development environment as an administrator with test data.
-
A test user to provision to the PingDirectory server.
-
A test user in Advanced Identity Cloud to serve as the app owner for the created apps.
-
PingDirectory installed on a server with test data. PingDirectory connects to Advanced Identity Cloud using a remote connector server. The server must be able to communicate with the PingDirectory server.
Tasks
|
The following tasks assume you have access to a server with PingDirectory installed. Substitute your own environment and PingDirectory details as necessary. |
Task 1: Download remote server
Advanced Identity Cloud uses a remote server to connect to on-premise external data stores. The remote server contains bundled connectors.
Register a remote server
-
Log in to the Advanced Identity Cloud admin console as an administrator.
-
In the left menu pane, go to Identities > Connect and click + New Connector Server.
-
In the New Connector Server dialog box, provide the following:
Name — This name displays in the Connector Servers list.
Use only lowercase letters and numerals. Underscores and hyphens are the only special characters allowed. In this case, enterping-directory. -
Click Save. This creates an OAuth2 client.
|
When the remote server is successfully registered, links display the next steps. Be sure to open each link in a different window or tab, so you always have access to the Next Steps dialog box. These steps are listed in the following sections. 
|
Reset the client secret and download remote server
-
Under the Client Credentials box, next to the Client Secret field, click Reset.
-
In the Reset Client Secret dialog box, enter any string to serve as a password.
-
Read the warning, and then click Save.
-
Go to Identities > Connect, and click ping-directory.
-
Under the Quick Start box, click the Download a connector server link. You’re redirected to the IDM Cloud Connectors download page.
-
Log in to Backstage.
-
Download the remote server to the host that runs the connector server.
We recommend you use the Java version of RCS. Only download the .NET version if you need to use a PowerShell connector. For more information about the differences between the RCS types, learn more in Install a Remote Connector Server (RCS).
You can run the connector server on the same host as the external data source or you can run it on a different host. For example, you could download the remote server to a different server that has connectivity to the external data source
-
Task 2: Configure the remote server
-
On the server you downloaded RCS, unpack the remote server you downloaded in task 1.
-
On the remote server, open
ConnectorServer.properties. This file includes the configurations to connect to your Advanced Identity Cloud tenant.The path to this file may differ depending on the version and type of remote server you download.
-
The remote server (OAuth2 client) uses the Client Credentials grant type. To add the OAuth2 client credentials, operational, and security settings, specify the following values in
ConnectorServer.properties:The default values in ConnectorServer.properties serve as starting configurations for your remote server. Adjust the properties to the needs of your organization. ConnectorServer.properties
Field Value Description connectorserver.urlUncomment and update to
connectorserver.url=wss://<tenant-env-fqdn>/openicf/0.This is the Advanced Identity Cloud OpenICF endpoint.
-
In sandbox or development environments, use only one URL. Example:
connectorserver.url=wss://<tenant-env-fqdn>/openicf/0 -
In staging and production environments, use three URLs in a space-delimited list. For example:
connectorserver.url=wss://<tenant-env-fqdn>/openicf/0 wss://<tenant-env-fqdn>/openicf/1 wss://<tenant-env-fqdn>/openicf/2
connectorserver.connectorServerNameThe name of the remote server in Advanced Identity Cloud to connect to. Uncomment and enter the name of the remote server (OAuth2 client) you created in task 1.
For example,
connectorserver.connectorServerName=ping-directory.The name of the remote server (OAuth2 client) in Advanced Identity Cloud to connect to.
connectorserver.pingPongIntervalUncomment and don’t modify.
The WebSocket Ping/Pong interval, in seconds. The default is
60seconds.connectorserver.housekeepingIntervalUncomment and don’t modify.
The WebSocket connections housekeeping interval, in seconds. The default is
20seconds.connectorserver.groupCheckIntervalUncomment and don’t modify
The WebSocket groups check interval, in seconds. The default is
60seconds.connectorserver.webSocketConnectionsUncomment and don’t modify.
Specifies the number of sockets the connector server establishes and maintains to each Advanced Identity Cloud (IDM) backend instance. The default is
3.connectorserver.connectionTtlUncomment and don’t modify.
The WebSocket connection’s time to live (ttl), in seconds. The default is
300seconds.connectorserver.newConnectionsIntervalUncomment and don’t modify.
The time between new connections, in seconds. The default is
10seconds.connectorserver.tokenEndpointUncomment and update to
connectorserver.tokenEndpoint=https://<tenant-env-fqdn>/am/oauth2/realms/root/realms/alpha/access_token.The token endpoint to retrieve the access token.
connectorserver.clientIdUpdate to
connectorserver.clientId=RCSClient.When you create a remote server in Advanced Identity Cloud, Advanced Identity Cloud sets the
clientIdtoRCSClient.connectorserver.clientSecretUpdate to
connectorserver.clientSecret=client-secret.Enter the client secret you reset.
The client secret for the OAuth2 client.
connectorserver.scopeUncomment and update to
connectorserver.scope=fr:idm:*.The OAuth2 token scope. The scope
fr:idm:*gives access to/openidm/*(identity-related) API endpoints.connectorserver.loggerClassDon’t modify. Ensure the key/value pair is
connectorserver.loggerClass=org.forgerock.openicf.common.logging.slf4j.SLF4JLog.The logging class the remote server uses.
You don’t need to set the
connectorserver.usesslproperty; the remote server determines connection security from the value of theconnectorserver.urlproperty. -
-
Save the file.
-
Start the remote server from the openicf-zip-<version>\openicf directory by running one of the following commands:
-
Windows
-
Linux
bin\ConnectorServer.bat /rundosIf the server starts successfully, the following (or similar) displays:
RCS <version> started.bin/ConnectorServer.sh /runbashIf the server starts successfully, the following (or similar) displays:
RCS 1.5.20.15 started.This starts the remote server for the terminal session only. Consider creating a job to start or stop your remote server(s). -
-
To verify that the connection between Advanced Identity Cloud and the remote server is successful, in the Advanced Identity Cloud admin console, navigate to Identites > Connect.
The Status column of the remote server, in this case,
ping-directory, displays Connected.If the status is Waiting to connect…, make sure the server where the remote server resides is connected to Advanced Identity Cloud. Verify the properties you set inConnectorServer.propertiesare correct.To view the bundled connectors with RCS, select the connected remote serve in Advanced Identity Cloud and click the Connectors tab. Learn more about each connector in the Connector reference.
Task 3: Create authoritative LDAP app to provision users from PingDirectory server
In Advanced Identity Cloud, you create one app to provision data from an external data source and another app to provision data from Advanced Identity Cloud. In both situations, you use RCS to facilitate the connection between the two.
This task configures an authoritative app to provision data from PingDirectory to Advanced Identity Cloud.
-
From the Advanced Identity Cloud admin console, go to Applications and click Browse App Catalog.
-
In the Filter apps search box, enter and select
LDAP.Select the latest application version.
-
Click Next.
-
Click Next again.
-
Enter the following details:
Field Value Description Name
Enter
PingDirectory - Authoritative.N/A
Description
Enter
This app is to provision data from the PingDirectory server to Advanced Identity Cloud.Optional. The purpose of the app.
Owners
Select the test user you created in Advanced Identity Cloud to be the app owner.
Every app has an owner. The owner is responsible for the app, including the details and the users and roles who have access to the app.
App Logo URI
Don’t modify.
The location of the app logo.
Authoritative
Enable.
If you want the app to be authoritative, enable this field. When enabled, synchronization can only happen from the app to Advanced Identity Cloud, and Advanced Identity Cloud can’t push changes to the app. If you don’t enable this field, Advanced Identity Cloud can provision data to the app.
-
Click Create App. Advanced Identity Cloud redirects you to the newly created app.
-
Enter the connection details for the app by going to the Provisioning tab and clicking Set up Provisioning.
-
Enter the following details:
Field Value Description Host Name or IP
Enter the host name or IP of the server where you installed the remote server. If entering the IP address leads to a connection failure, try the host name.
N/A
Port
Enter the port to connect to the PingDirectory server. For example,
389. In a production scenario, use a common secure port, such as1636.The server must be actively waiting for inbound requests on this port, and firewall policies must be in place to allow Advanced Identity Cloud to connect to the server via this port.
Learn more about the port the server is listening on in Configuring connection handlers.
Use SSL
Disable
Enabled by default. In a production scenario, enable.
Login Account DN
Enter the name of the administrator service account to connect to the server. For example,
cn=Directory Manager.N/A
Password
Enter the password of the administrator service account to connect to the server.
N/A
Base DNs
Enter base DNs that include your users and groups.
For example,
DC=example,DC=com.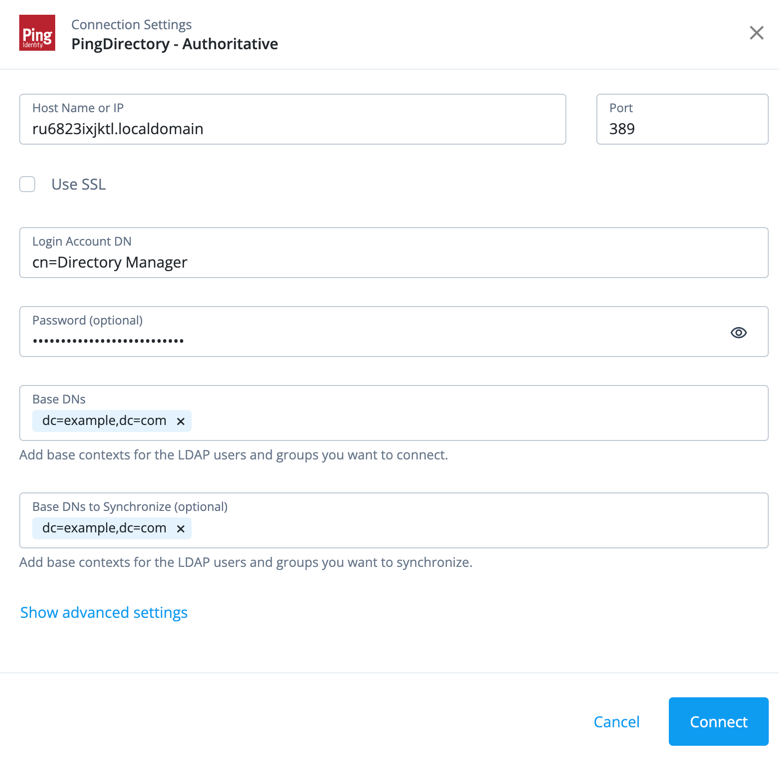
-
Click Connect. Advanced Identity Cloud uses the remote server that has connectivity to the PingDirectory server. On the Provisioning tab, the status Connected displays.
If you receive an error connecting to the PingDirectory server, ensure your connection details are correct. If the error persists, check the PingDirectory server error log. -
On the Provisioning tab, click Data to confirm that you’re reading data from PingDirectory.
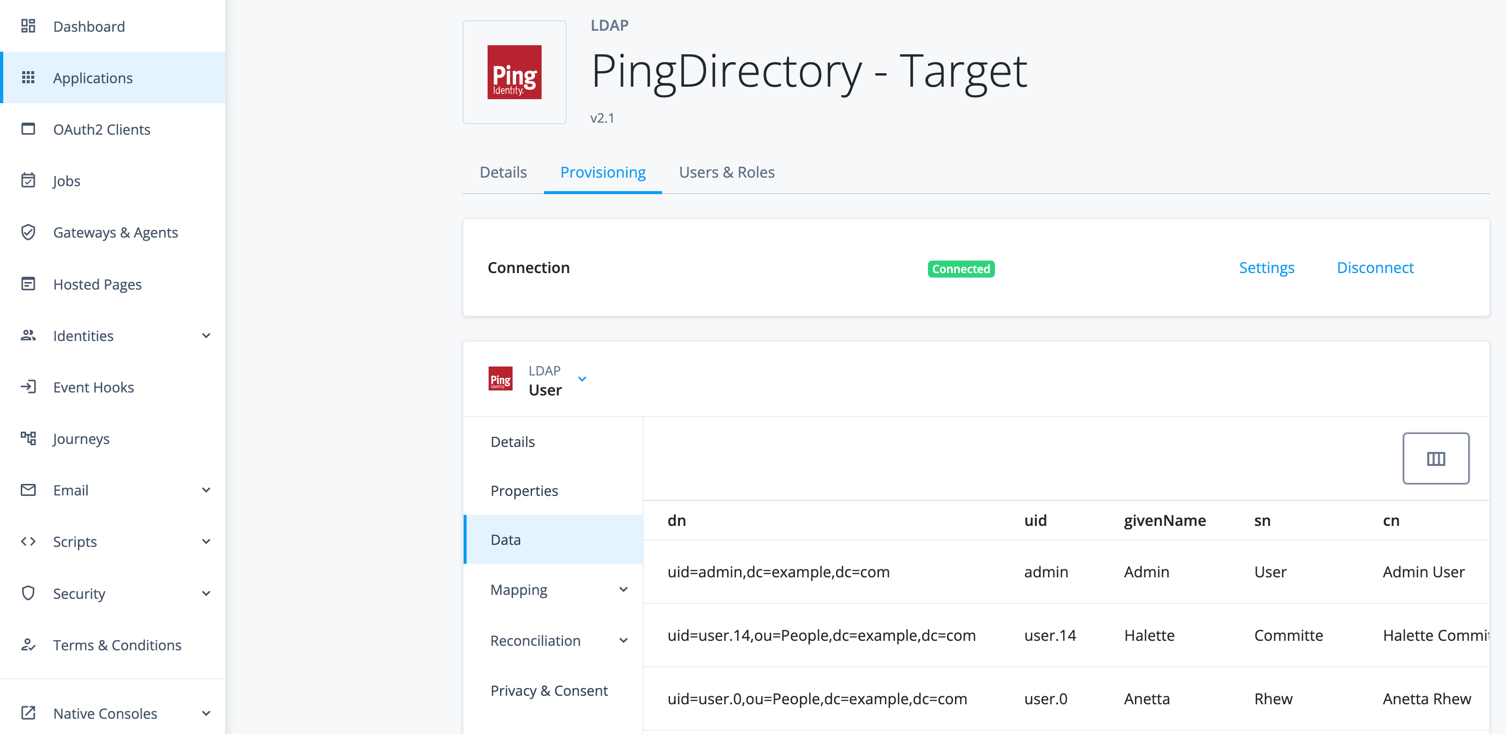
Task 4: Map attributes from the PingDirectory server to Advanced Identity Cloud
Now that you’ve connected the PingDirectory server to Advanced Identity Cloud, you must map and correlate the attributes between the two:
|
Because of hashing compatibility and because organizations typically have a phased approach to migrating passwords, this use case doesn’t map or migrate passwords. |
-
In the PingDirectory - Authoritative app, click Mappings > Add a property.
-
In the Ping Identity Property field, select
userName. -
Click Next.
-
In the PingDirectory - Authoritative Property field, select
source.uid. -
Click Save.
-
Repeat steps 2 - 5 for the following fields:
Ping Identity property PingDirectory property mailsource.mailgivenNamesource.givenNamesnsource.snWhen you create a mapping, you must specify the attributes required by the Advanced Identity Cloud managed object, which is the
alpha_usermanaged object in this use case. Otherwise, you’ll experience an error during object creation.In a default Advanced Identity Cloud tenant, the required properties are
userName,givenName,sn, andmail.Learn more in property definition fields.
Correlate user attributes
Now that you’ve mapped attributes between PingDirectory to Advanced Identity Cloud, ensure that you also correlate user attributes between the PingDirectory Authoritative app and Advanced Identity Cloud. Correlation ensures user account updates match between Advanced Identity Cloud and the application. In this use case, correlation would apply to the userName attribute.
The Account Correlation section of the Reconciliation > Settings tab lets you choose the attributes to use to match users in the PingDirectory Authoritative app to users in the Advanced Identity Cloud admin console:
-
On the Reconciliation > Settings tab, navigate to the Account Correlation section.
-
Click Match using.
-
In the Attribute(s) to Match dropdown list, choose the attributes to use to match users in the PingDirectory Authoritative app to users in Advanced Identity Cloud admin console.
-
To use a query to set or edit match attributes, click Use advanced query.
-
For an authoritative application:
-
Choose to correlate a user if any or all attributes are matched.
-
Use the User property field to set the user property to match.
-
-
For a target application:
-
Edit the correlation query script.
-
-
-
Click Save.
Learn more about correlating user attributes in Configure basic and advanced correlation between accounts.
Task 5: Create target LDAP app to provision users to PingDirectory server from Advanced Identity Cloud
In the previous task, you created an authoritative app and connected the PingDirectory server to Advanced Identity Cloud to prepare to provision data into Advanced Identity Cloud.
In this task, you create an app to provision data from Advanced Identity Cloud to the PingDirectory server.
-
From the Advanced Identity Cloud admin console, go to Applications and click Browse App Catalog.
-
In the Filter apps search box, enter and select
LDAP.Select the latest application version.
-
Click Next.
-
Click Next again.
-
Enter the following details:
Field Value Description Name
Enter
PingDirectory - Target.N/A
Description
Enter
This app is to provision data from Advanced Identity Cloud TO the PingDirectory server.Optional. The purpose of the app.
Owners
Select the test user you created in Advanced Identity Cloud to be the app owner.
Every app has an owner. The owner is responsible for the app, including the details and the users and roles who have access to the app.
App Logo URI
Don’t modify.
The location of the app logo.
Authoritative
Don’t enable.
When enabled, synchronization can only happen from the app to Advanced Identity Cloud and Advanced Identity Cloud can’t push changes to the app. If you don’t enable this field, Advanced Identity Cloud can provision data to the app.
-
Click Create App. Advanced Identity Cloud redirects you to the newly created app.
-
Enter the connection details for the app by going to the Provisioning tab and clicking Set up Provisioning.
-
Enter the following details:
Field Value Description Host Name or IP
Enter the host name or IP of the server where you installed the remote server. If entering the IP address leads to a connection failure, try the host name.
N/A
Port
Enter the port to connect to the PingDirectory server.
For example,
389. In a production scenario, use a common secure port, such as1636.The server must be actively waiting for inbound requests on this port and firewall policies must be in place to allow Advanced Identity Cloud to connect to the server via this port.
Learn more in Configuring connection handlers.
Use SSL
Disable
Enabled by default. In a production scenario, enable.
Login Account DN
Enter the name of the administrator service account to connect to the server. For example,
cn=Directory Manager.N/A
Password
Enter the password of the administrator service account to connect to the server.
N/A
Base DNs
Enter base DNs that include your users and groups.
For example,
DC=example,DC=com.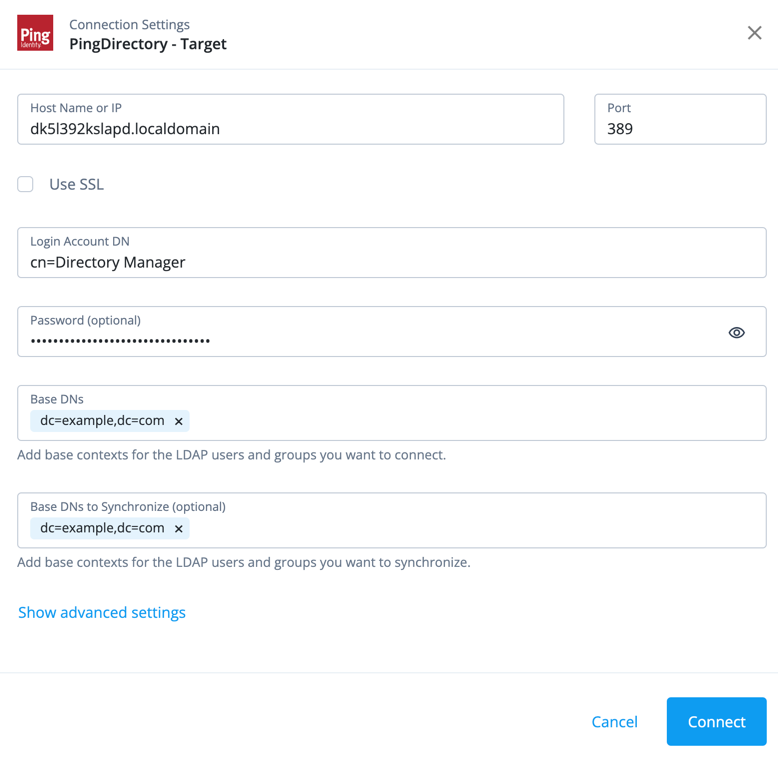
-
Click Connect. Advanced Identity Cloud uses the remote server that has connectivity to the PingDirectory server. On the Provisioning tab, the status Connected displays.
If you receive an error connecting to the PingDirectory server, ensure your connections details are correct. If the error persists, check the PingDirectory server error log. -
On the Provisioning tab, click Data to confirm that you’re reading data from PingDirectory.

Task 6: Map attributes from Advanced Identity Cloud to the PingDirectory server
By default, Advanced Identity Cloud maps attributes in the target app. However, you must add attributes to suit your specific needs. In this instance, you must add additional PingDirectory attributes.
-
From the
PingDirectory - Targetapp, click Provisioning > Mapping > Add a property. -
In the PingDirectory - Target Property field, select
uid. -
Click Next.
-
In the Ping Identity Property field, select
source.userName. -
Click Save.
-
Again, click Add a property.
-
In the PingDirectory - Target Property field, select
dn. -
In the Ping Identity Property field, select
source.userName. -
Enable Apply transformation script.
-
Transform the
dnattribute to match your directory structure. For example, enter the following in the Transformation Script box:"uid=" + source + ",ou=People,dc=example,dc=com"js -
Click Save.
Task 7: Configure situations and actions for both apps
-
Select the PingDirectory - Authoritative app.
-
From the Provisioning tab, click Reconciliation > Settings.
-
Under the Situation Rules section, set the following actions for each situation:
Situation Action Ambiguous
Select
Exception.Source Missing
Authoritative apps only.
Select
Exception.Missing
Select
Create.Found Already Linked
Select
Exception.Unqualified
Select
Delete.Unassigned
Select
Exception.Link Only
Select
Unlink.Confirmed
Select
Update.Found
Select
Update.Absent
Select
Create.For descriptions of the situations and actions, learn more in Manage reconciliation rules.
-
Repeat steps 2 and 3 for the PingDirectory - Target app.
Validation
Validate provisioning data to and from Advanced Identity Cloud and the PingDirectory server by:
-
Provisioning one user from PingDirectory into Advanced Identity Cloud.
-
Adding a user to the PingDirectory - Target app.
Provision user from the PingDirectory server
-
From the Advanced Identity Cloud admin console, click Applications > PingDirectory - Authoritative.
-
Click the Provisioning tab. To show provisioning a user into Advanced Identity Cloud, restrict the reconciliation to one user matching a defined criteria.
-
Under Reconciliation > Settings, click Show advanced settings.
-
Enable the Filter Source checkbox (PingDirectory is the source) and fill out the following details:
Field Value Assign to PingDirectoryAuthoritative if Any conditions are met
Select
Any.PingDirectoryAuthoritative properties
Select
uid.contains
Select
is.Blank
Enter the uid of the user you want to pull in from the PingDirectory server.
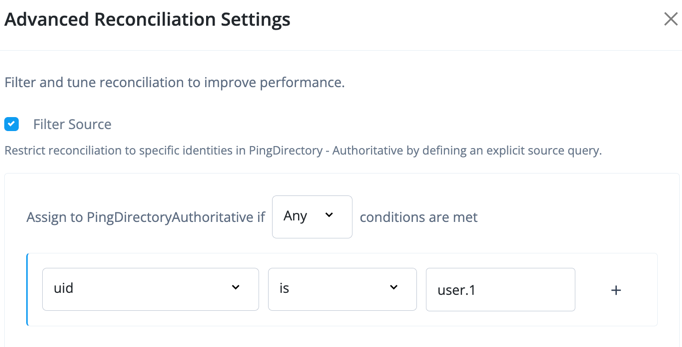
-
Scroll down and click Save.
-
In the left tabs, click Reconciliation > Reconcile.
-
Click Reconcile Now. Monitor the progress of the reconciliation in the metrics that display. Since you are filtering to reconcile only one user, failures on the reconciled data are expected.
-
In the left menu pane, Identities > Manage > Alpha realm - Users and search for the user. The user successfully displays in Advanced Identity Cloud.
If the user doesn’t display, check the following:
-
The fields Advanced Identity Cloud required to create an identity are present in the mapping.
-
The source filtering to reconcile only one record is correct.
-
Provision a user to the PingDirectory server
-
From the Advanced Identity Cloud admin console, click Applications > PingDirectory - Target.
-
Click the Users & Roles tab.
-
Click Add Member.
-
Select a test user.
-
Click Next.
-
Review the account information.
-
Click Assign. The user successfully creates in the PingDirectory server.
-
From the Provisioning tab, click Data.
-
The user successfully displays from the read-only view of the PingDirectory server data.
Explore further
Reference material
| Reference | Description |
|---|---|
Register and connect a remote server with Advanced Identity Cloud. |
|
Learn about PingDirectory including system requirements, installation requirements, and loading sample data. |
|
Gain an in-depth understanding of registering an application using app templates. |
|
Learn how to connect an LDAP server to Advanced Identity Cloud. |
|
Learn how to add or edit mappings with application templates. |
|
Learn the various actions you can take on reconciliation situations. For example,
if the situation is |
|
Understand identity object fields you can modify, such as setting a property as required or whether an end user can update the property in the Advanced Identity Cloud end-user UI. |
|
Understand the various synchronization types Advanced Identity Cloud uses to keep data consistent: reconciliation, liveSync, and implicit synchronization. |
|
Learn more about connectors. This includes connectors bundled with RCS and connectors you can download and add to the remote server. |
Provision users from Microsoft Entra
Description
Estimated time to complete: 30 minutes
In this use case, you provision accounts from Microsoft Entra ID (formerly Azure AD) into Advanced Identity Cloud.
Goals
In completing this use case, you will learn how to do the following:
-
Use the Advanced Identity Cloud admin console
-
Set up a Microsoft Entra application as an authoritative identity data source
-
Provision identity data from the application to Advanced Identity Cloud
-
Enable incremental reconciliation
Prerequisites
Before you start work on this use case, make sure you have:
-
A basic understanding of:
-
The Advanced Identity Cloud admin console
-
The
managed/alpha_userobject schema -
Application templates
-
Reconciliation
-
-
Access to your Microsoft Entra ID tenant environment as an administrator
-
Access to your Advanced Identity Cloud development environment as an administrator
-
A test user in Advanced Identity Cloud to serve as the application owner for the Microsoft Entra application
Tasks
Task 1: Create a Microsoft Entra application
| Some steps require you to copy information. Paste the information into a text editor to keep track. |
Advanced Identity Cloud uses a Microsoft Entra application account to connect to Microsoft Entra ID through the Microsoft Graph API. To register the application in Advanced Identity Cloud, make sure you record:
-
The tenant ID
-
The client ID
-
The client secret—the value of the secret, not the secret ID
You register the application and set the Graph API permissions Advanced Identity Cloud requires.
-
Sign in to the Microsoft Entra ID tenant as administrator.
-
Select Home > + Add > App registration.
-
Set a Name and click Register.
-
On the profile page for the application you registered, record the values for:
-
Application (client) ID
-
Directory (tenant) ID
-
-
On the profile page for the application you registered, select Client credentials > Client secrets > + New client secret and add a client secret.
Record the client secret for use when configuring the connection from Advanced Identity Cloud. You cannot retrieve the secret after leaving the page where you created it.
-
On the profile page for the application you registered, select API permissions > + Add a permission and add the following Microsoft Graph API permissions:
-
User.Export.All -
User.ManageIdentities.All -
User.Read.All -
User.ReadWrite.All -
Group.Create -
Group.Read.All -
Group.ReadWrite.All -
Directory.Read.All -
Directory.ReadWrite.All
-
-
On the API permissions page, select Grant admin consent for tenant.
Each permission must have Granted for tenant status before you connect Advanced Identity Cloud to the Microsoft Entra ID tenant:
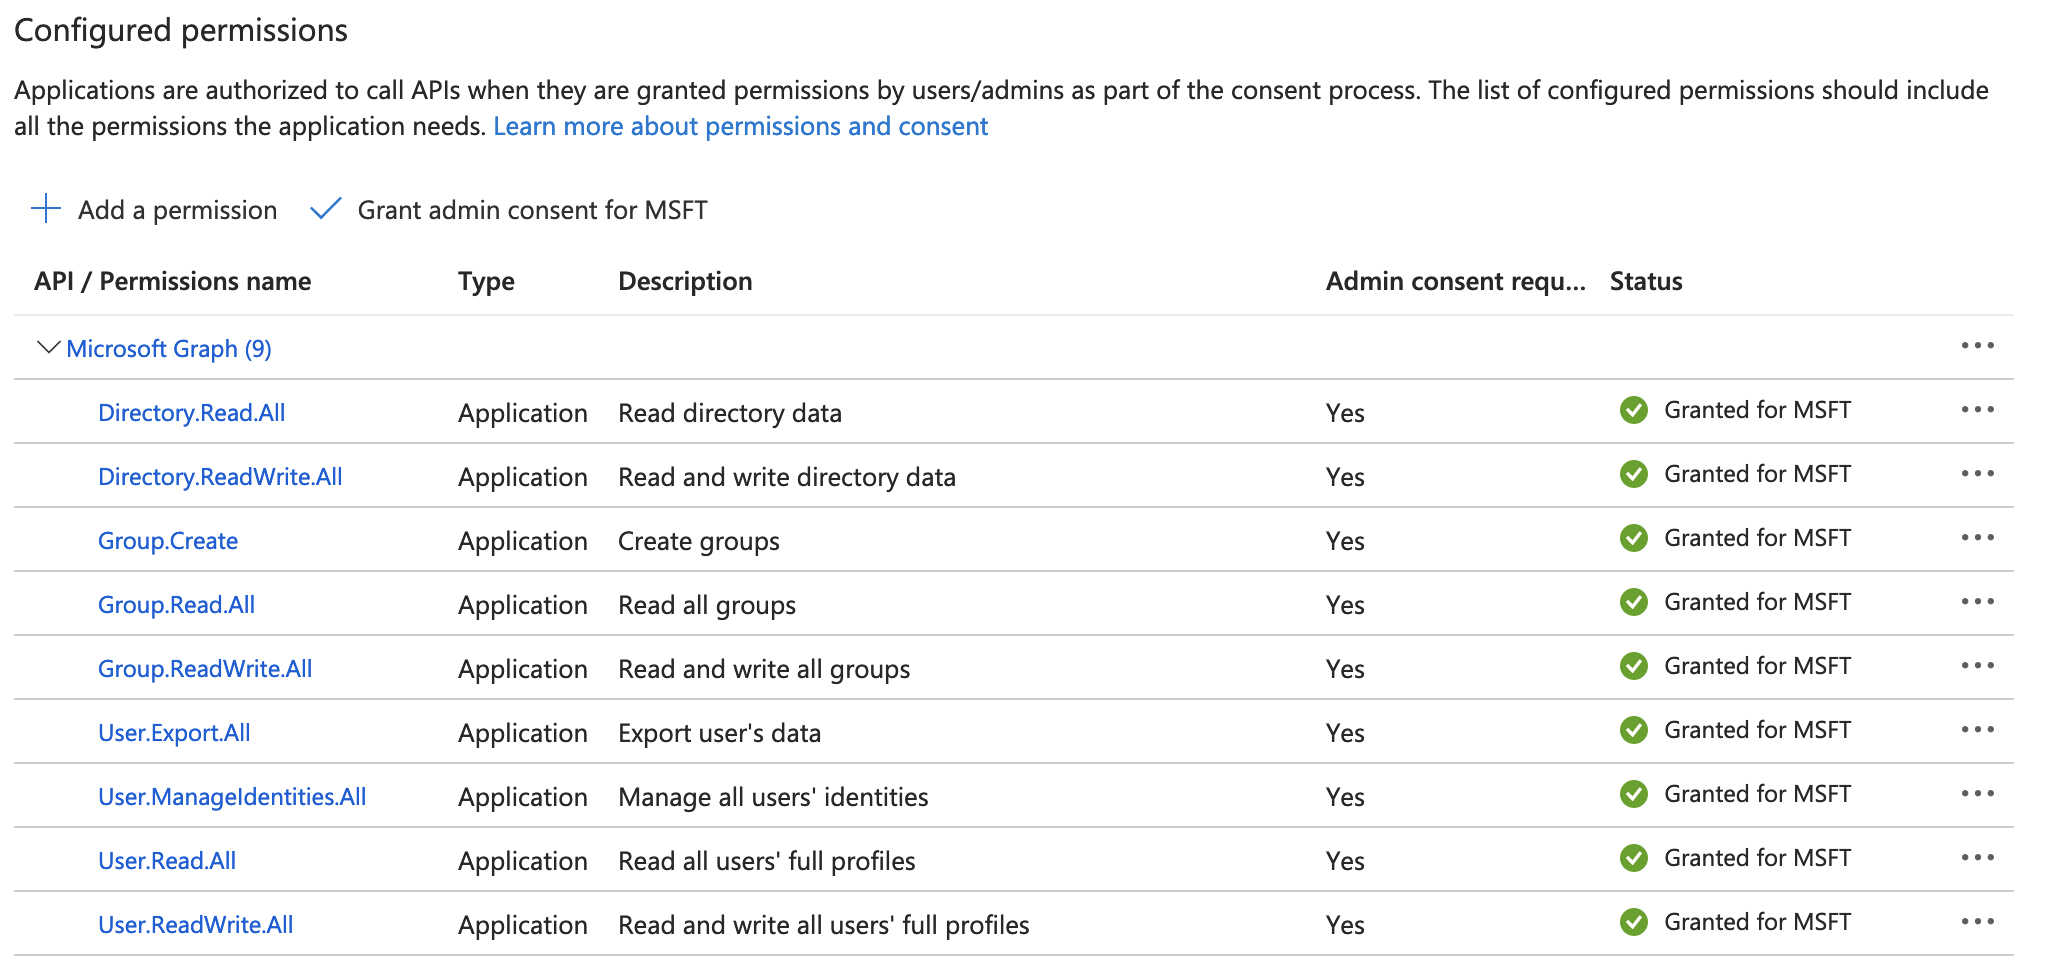
If you cannot grant the permissions yourself, ask the primary tenant administrator to grant the permissions.
Task 2: Create a Microsoft Entra ID test user account
To validate reconciliation, Advanced Identity Cloud requires at least one user with the required Advanced Identity Cloud properties:
-
An email address
-
A display name
-
A first name
-
A last name
Create the test account in Microsoft Entra ID:
-
Sign in to the Microsoft Entra ID tenant as administrator.
-
Select Home > + Add > User > Create new user.
-
Prepare to create the user with the following settings:
Field Value User principal name
scarter@domain, where domain is the Microsoft Entra ID tenant domainMail nickname
Select Derive from user principal name.
Display name
Sam CarterPassword
Select Auto-generate password.
This use case doesn’t use the password, but record the password so you can sign on to Microsoft Entra ID later.
Account enabled
Leave this selected.
First name
SamLast name
CarterEmail
scarter@example.com -
Review and create the test user account.
Task 3: Configure Microsoft Entra as an authoritative identity data source
-
Log in to the Advanced Identity Cloud admin console as an administrator.
-
Select Application Browse App Catalog > Microsoft Entra Provisioning and click Next.
Select the latest application version.
-
Click Next again and create an application with the following settings:
Field Value Name
Microsoft Entra IDOwners
The Advanced Identity Cloud test user to act as the owner of this application.
Authoritative
Enable
-
In the application profile screen, select Provisioning > Set up Provisioning, enter the information you collected when registering the Microsoft Entra ID application, and click Connect:
Field Value Tenant
The Directory (tenant) ID from Microsoft Entra ID; for example,
f7ff6108-c26f-48dd-ae9e-9743eefbd11f.Client ID
The Application (client) ID from Microsoft Entra ID; for example,
b5ee41de-4a06-40ec-b170-1edbeb7c7764.Client Secret (optional)
The value of the client secret from Microsoft Entra ID.
The client secret is not optional for this use case.
-
Make sure the Advanced Identity Cloud admin console displays the application as Connected:

-
Select Data to display a table of details from accounts in Microsoft Entra ID.
This confirms Advanced Identity Cloud can access the account properties.
Task 4: Configure reconciliation
Advanced Identity Cloud uses reconciliation to keep its accounts in sync with accounts in other systems. You configure:
-
How account properties in the other systems map to Advanced Identity Cloud account properties.
-
What Advanced Identity Cloud does in each reconciliation situation.
Mapping
For this use case, configure at least a minimal mapping from Microsoft Entra:
-
Log in to the Advanced Identity Cloud admin console as an administrator.
-
Select Application > Microsoft Entra > Provisioning > Mapping.
-
Review how a Microsoft Entra ID user account maps to the corresponding Advanced Identity Cloud
alpha_useraccount. -
Adjust the mapping to the following settings:
Microsoft Entra ID user property Advanced Identity Cloud alpha_userpropertysource.givenNamegivenNamesource.mailmailsource.surnamesnsource.userPrincipalNameuserNameReconciliation only synchronizes mapped properties. If required, add additional mappings.
Reconciliation situations
-
Log in to the Advanced Identity Cloud admin console as an administrator.
-
Select Application > Microsoft Entra > Reconciliation > Settings.
-
Edit the default Situation Rules to set Link Only to
UNLINK: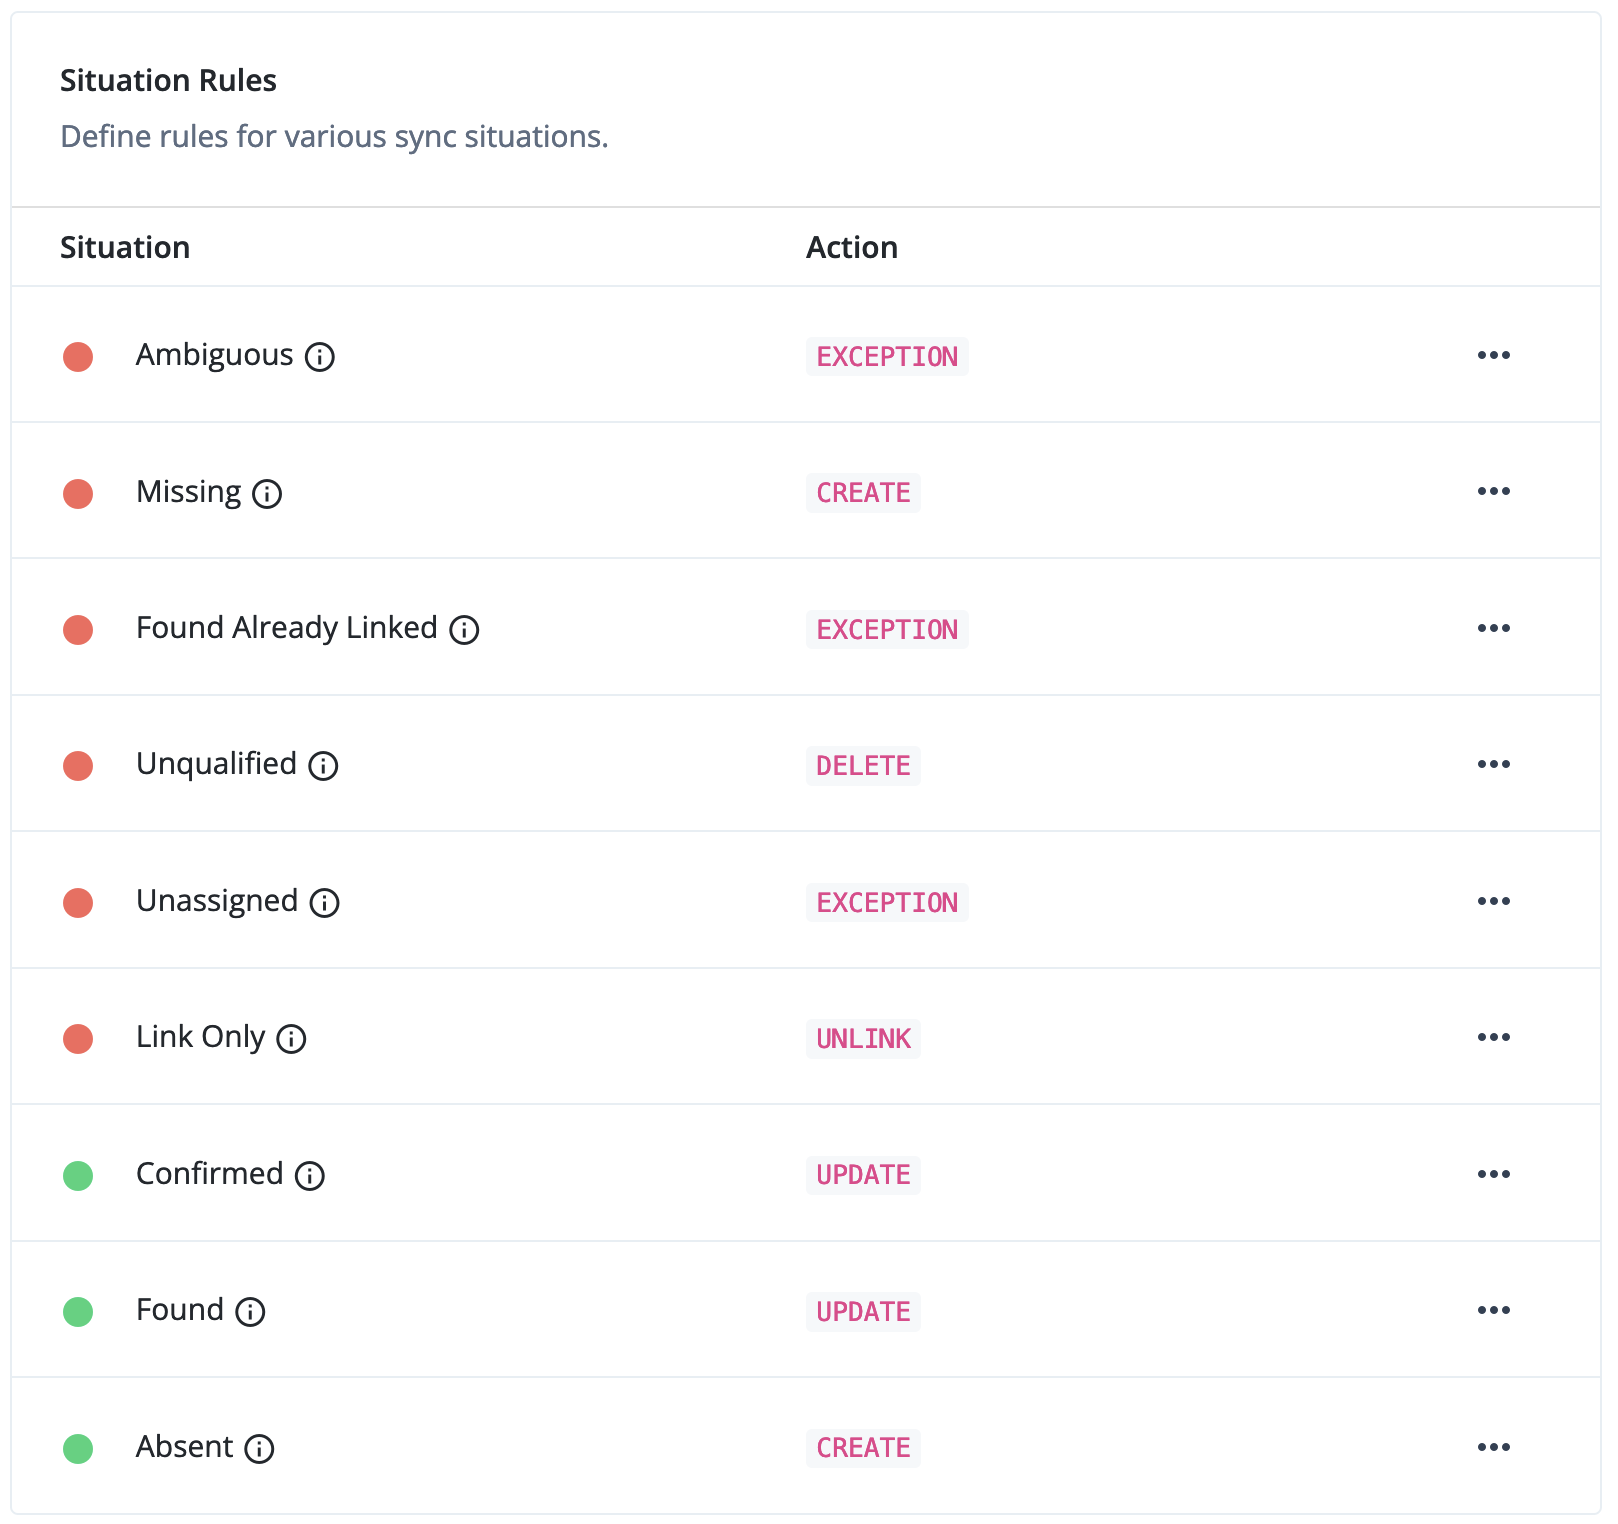
Advanced Identity Cloud is now ready to provision user accounts from the Microsoft Entra ID tenant.
Task 5: Prepare reconciliation for validation
Although you can run reconciliation manually for initial synchronization and testing, you can also enable incremental reconciliation as a recurring task. Incremental reconciliation runs periodically, synchronizing new changes automatically.
For testing, you can restrict which accounts reconciliation synchronizes with a filter. After validating your work, you can disable the filter and reconcile all accounts.
-
Log in to the Advanced Identity Cloud admin console as an administrator.
-
Select Application > Microsoft Entra > Reconciliation > Settings.
-
Select Schedules > Incremental Reconciliation > Set Up and configure the task.
For example, to run reconciliation every 15 minutes, select Use cron and set the Frequency to
*/15 * * * * ?: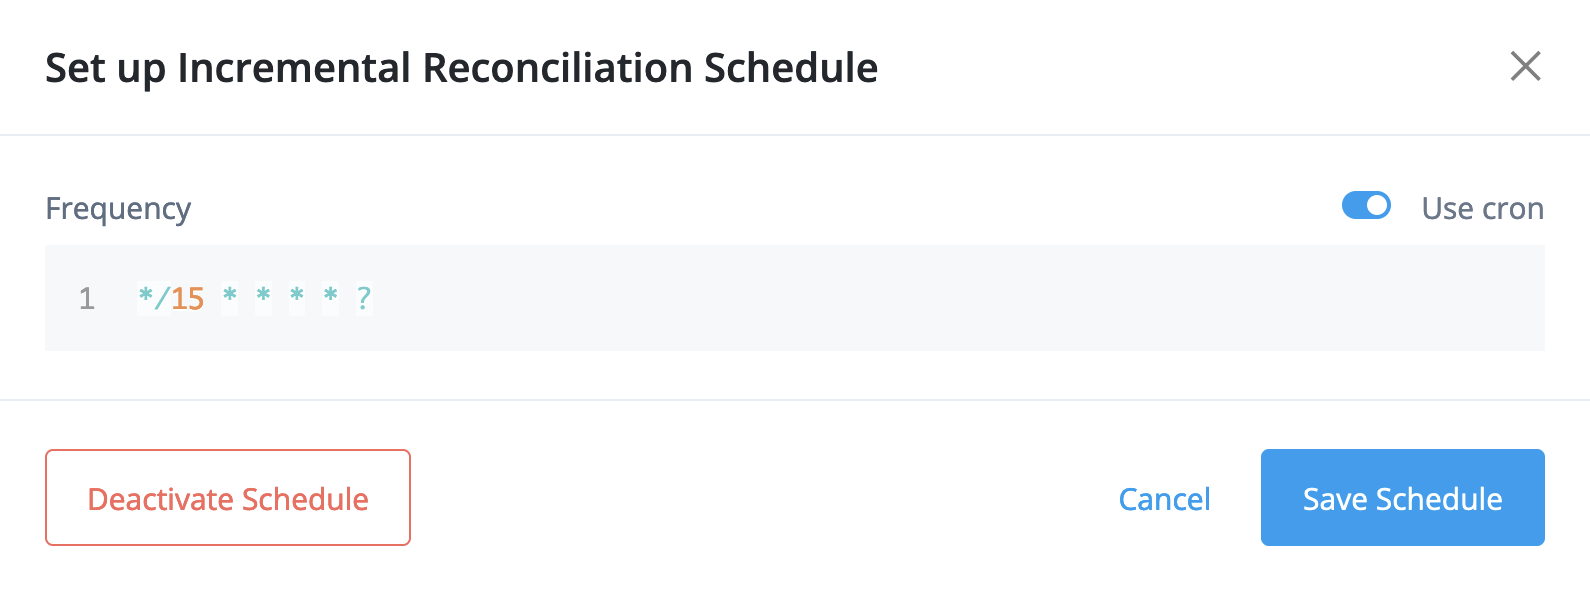
-
Select Show advanced settings and filter reconciliation to target only the Microsoft Entra test account.
For example, select Filter Source and set the filter to match when the user
mailis the test account email address: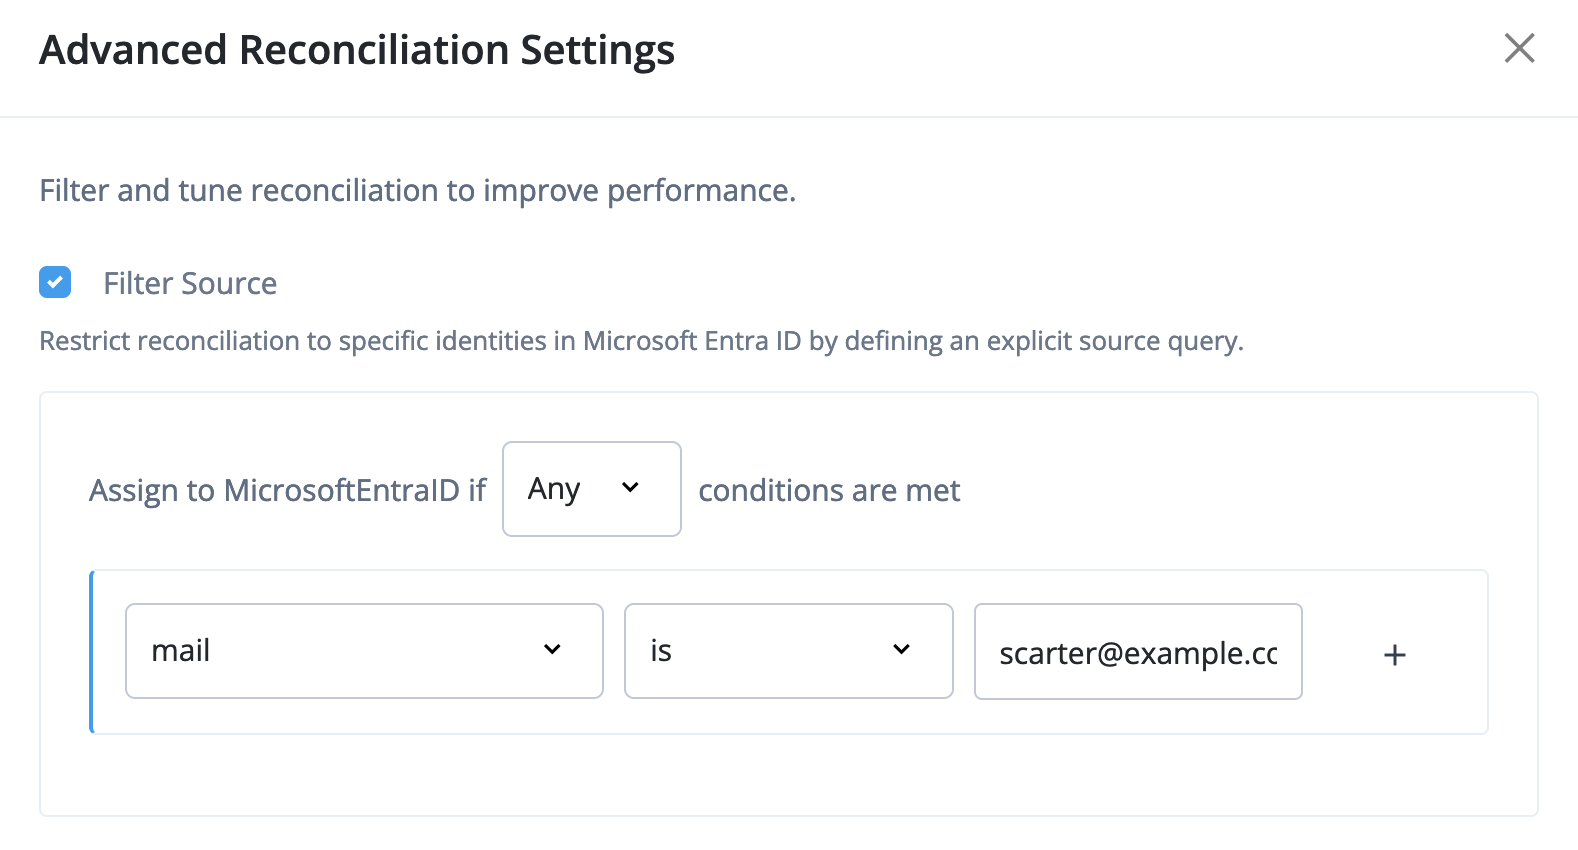
-
Click Save.
Validation
With Advanced Identity Cloud connected to Microsoft Entra ID as an authoritative identity data source, validate the configuration by provisioning an account from Microsoft Entra ID to Advanced Identity Cloud and receiving updates to the newly created Advanced Identity Cloud user.
Steps
Initial reconciliation
-
Log in to the Advanced Identity Cloud admin console as an administrator.
-
Select Application > Microsoft Entra > Provisioning > Reconciliation > Reconcile > Reconcile Now.
Reconciliation creates the test user account from Microsoft Entra ID in Advanced Identity Cloud.
On the reconciliation status page, Unresolved Microsoft Entra users are greater than zero. Advanced Identity Cloud found a Microsoft Entra ID user account and created an identity in Advanced Identity Cloud.
-
Select Identities > Manage and search for the test user account.
The Advanced Identity Cloud admin console displays the new account reconciliation created based on the Microsoft Entra ID test user account.
Incremental reconciliation
-
Sign in to the Microsoft Entra ID tenant as administrator.
-
Select Home > Users > Select test user > Edit properties, change one of the mapped properties, such as First name and Save your change.
-
Log in to the Advanced Identity Cloud admin console as an administrator.
-
Wait for reconciliation to run as scheduled or select Reconcile Now again in Advanced Identity Cloud admin console.
Reconciliation applies the changes you made in Microsoft Entra ID to the account in Advanced Identity Cloud.
On the reconciliation status page, 1-to-1 match is greater than 0. Advanced Identity Cloud found a Microsoft Entra ID account with a matching Advanced Identity Cloud account and reconciled the two.
-
Select Identities > Manage, search for the account and select it to display the details.
The Advanced Identity Cloud admin console displays the change from the Microsoft Entra ID test user account.
Explore further
Reference material
| Reference | Description |
|---|---|
Get to know the Advanced Identity Cloud admin console. |
|
Learn about connecting Advanced Identity Cloud to Microsoft Entra ID. |
|
Learn about reconciliation of user accounts. |
|
Find out more about application templates. |
|
Learn how Advanced Identity Cloud keeps data consistent across multiple systems. |
|
Refer to this Microsoft Entra ID documentation for details. |
Provision data from Active Directory (AD) using RCS
Description
Estimated time to complete: 1 hour
In this use case, you provision accounts from an on-premise AD server into Advanced Identity Cloud.
Goals
After completing this use case, you will know how to do the following:
-
Let Advanced Identity Cloud communicate with an on-premise external data store, Active Directory (AD), by installing a remote connector server (RCS), also referred to as a remote server, and using an AD LDAP connector.
-
Map attributes from AD to Advanced Identity Cloud.
-
Determine the actions Advanced Identity Cloud takes with synchronization situations.
-
Provision users from an on-prem external data source into Advanced Identity Cloud.
Prerequisites
Before you start work on this use case, ensure you have these prerequisites:
-
A basic understanding of:
-
The
managed/alpha_userobject schema -
Application templates
-
Advanced Identity Cloud remote connector servers (RCS)
-
PingOne Open Connector Framework (ICF)
-
Mappings
-
Reconciliation
-
Synchronization
-
Synchronization situations and actions
-
-
Access to your development environment as an administrator.
-
Access to an on-premise AD server (it can be a test server) that contains user test data with the following minimum properties on the user(s):
-
userPrincipalName(UPN) — Unique identifier for the user in AD. Typically, it’s in an email format. -
mail— Email address -
givenName— First name -
sn— Last name
-
-
A test user in Advanced Identity Cloud that serves as the application owner for the Active Directory application.
-
A server to install the remote server on. The server must be able to connect to the on-premise AD server.
-
A Backstage account.
Tasks
|
The following tasks assume you have access to an AD server. Substitute your own environment and AD details as necessary. |
Task 1: Download remote server
Advanced Identity Cloud uses a remote server to connect to on-premise external data stores. The remote server contains bundled connectors.
Register a remote server
-
Log in to the Advanced Identity Cloud admin console as an administrator.
-
In the left menu pane, go to Identities > Connect and click + New Connector Server.
-
In the New Connector Server dialog box, provide the following:
Name — This name displays in the Connector Servers list.
Use only lowercase letters and numerals. Underscores and hyphens are the only special characters allowed. In this case, enterad-imp-guide. -
Click Save. This creates an OAuth2 client.
|
When the remote server is successfully registered, links display the next steps. Be sure to open each link in a different window or tab, so you always have access to the Next Steps dialog box. These steps are listed in the following sections. 
|
Reset the client secret and download remote server
-
Under the Client Credentials box, next to the Client Secret field, click Reset.
-
In the Reset Client Secret dialog box, enter any string to serve as a password.
-
Read the warning, and then click Save.
-
Go to Identities > Connect, and click ad-imp-guide.
-
Under the Quick Start box, click the Download a connector server link. You’re redirected to the IDM Cloud Connectors download page.
-
Log in to Backstage.
-
Download the remote server to the host that runs the connector server.
We recommend you use the Java version of RCS. Only download the .NET version if you need to use a PowerShell connector. For more information about the differences between the RCS types, learn more in Install a Remote Connector Server (RCS).
You can run the connector server on the same host as the external data source or you can run it on a different host. For example, you could download the remote server to a different server that has connectivity to the external data source
-
Task 2: Configure the remote server
-
On the server you downloaded RCS, unpack the remote server you downloaded in task 1.
-
On the remote server, open
ConnectorServer.properties. This file includes the configurations to connect to your Advanced Identity Cloud tenant.The path to this file may differ depending on the version and type of remote server you download.
-
The remote server (OAuth2 client) uses the Client Credentials grant type. To add the OAuth2 client credentials, operational, and security settings, specify the following values in
ConnectorServer.properties:The default values in ConnectorServer.properties serve as starting configurations for your remote server. Adjust the properties to the needs of your organization. ConnectorServer.properties
Field Value Description connectorserver.urlUncomment and update to
connectorserver.url=wss://<tenant-env-fqdn>/openicf/0.This is the Advanced Identity Cloud OpenICF endpoint.
-
In sandbox or development environments, use only one URL. Example:
connectorserver.url=wss://<tenant-env-fqdn>/openicf/0 -
In staging and production environments, use three URLs in a space-delimited list. For example:
connectorserver.url=wss://<tenant-env-fqdn>/openicf/0 wss://<tenant-env-fqdn>/openicf/1 wss://<tenant-env-fqdn>/openicf/2
connectorserver.connectorServerNameThe name of the remote server in Advanced Identity Cloud to connect to. Uncomment and enter the name of the remote server (OAuth2 client) you created in task 1.
For example,
connectorserver.connectorServerName=ad-imp-guide.The name of the remote server (OAuth2 client) in Advanced Identity Cloud to connect to.
connectorserver.pingPongIntervalUncomment and don’t modify.
The WebSocket Ping/Pong interval, in seconds. The default is
60seconds.connectorserver.housekeepingIntervalUncomment and don’t modify.
The WebSocket connections housekeeping interval, in seconds. The default is
20seconds.connectorserver.groupCheckIntervalUncomment and don’t modify
The WebSocket groups check interval, in seconds. The default is
60seconds.connectorserver.webSocketConnectionsUncomment and don’t modify.
Specifies the number of sockets the connector server establishes and maintains to each Advanced Identity Cloud (IDM) backend instance. The default is
3.connectorserver.connectionTtlUncomment and don’t modify.
The WebSocket connection’s time to live (ttl), in seconds. The default is
300seconds.connectorserver.newConnectionsIntervalUncomment and don’t modify.
The time between new connections, in seconds. The default is
10seconds.connectorserver.tokenEndpointUncomment and update to
connectorserver.tokenEndpoint=https://<tenant-env-fqdn>/am/oauth2/realms/root/realms/alpha/access_token.The token endpoint to retrieve the access token.
connectorserver.clientIdUpdate to
connectorserver.clientId=RCSClient.When you create a remote server in Advanced Identity Cloud, Advanced Identity Cloud sets the
clientIdtoRCSClient.connectorserver.clientSecretUpdate to
connectorserver.clientSecret=client-secret.Enter the client secret you reset.
The client secret for the OAuth2 client.
connectorserver.scopeUncomment and update to
connectorserver.scope=fr:idm:*.The OAuth2 token scope. The scope
fr:idm:*gives access to/openidm/*(identity-related) API endpoints.connectorserver.loggerClassDon’t modify. Ensure the key/value pair is
connectorserver.loggerClass=org.forgerock.openicf.common.logging.slf4j.SLF4JLog.The logging class the remote server uses.
You don’t need to set the
connectorserver.usesslproperty; the remote server determines connection security from the value of theconnectorserver.urlproperty. -
-
Save the file.
-
Start the remote server from the openicf-zip-<version>\openicf directory by running one of the following commands:
-
Windows
-
Linux
bin\ConnectorServer.bat /rundosIf the server starts successfully, the following (or similar) displays:
RCS <version> started.bin/ConnectorServer.sh /runbashIf the server starts successfully, the following (or similar) displays:
RCS 1.5.20.15 started.This starts the remote server for the terminal session only. Consider creating a job to start or stop your remote server(s). -
-
To verify that the connection between Advanced Identity Cloud and the remote server is successful, in the Advanced Identity Cloud admin console, navigate to Identites > Connect.
The Status column of the remote server, in this case,
ad-imp-guide, displays Connected.If the status is Waiting to connect…, make sure the server where the remote server resides is connected to Advanced Identity Cloud. Verify the properties you set inConnectorServer.propertiesare correct.To view the bundled connectors with RCS, select the connected remote serve in Advanced Identity Cloud and click the Connectors tab. Learn more about each connector in the Connector reference. 
Task 3: Connect AD to Advanced Identity Cloud using AD LDAP connector app template
Now that Advanced Identity Cloud is connected to the intranet where AD resides via an installed remote server, Advanced Identity Cloud can now connect to AD.
-
From the Advanced Identity Cloud admin console, go to Applications and click Browse App Catalog.
-
In the Filter apps search box, enter and select
Active Directory.Select the latest application version.
-
Click Next.
-
Click Next again.
-
Enter the following details:
Field Value Description Name
Enter
AD Implementation Guide.N/A
Description
Enter
Application used to connect to an on-premise AD server using a remote server.Optional. The purpose of the application.
Owners
Select the test user you created in Advanced Identity Cloud to be the test owner.
Every application has an owner. The owner is responsible for the application, including the details and the users and roles who have access to the application.
App Logo URI
Don’t modify.
The location of the application logo.
Authoritative
Enable.
If you want the application to be authoritative, enable this field. When enabled, synchronization can only happen from the application to Advanced Identity Cloud and Advanced Identity Cloud can’t push changes to the application. If you don’t enable this field, Advanced Identity Cloud can provision data to the application.
-
Click Create Application. Advanced Identity Cloud redirects you to the newly created application.
-
Enter the connection details for the application by going to the Provisioning tab and clicking Set up Provisioning.
-
Enter the following details:
Field Value Description Host Name or IP
Enter the host name or IP of the server where you installed the remote server. If entering the IP address leads to a connection failure, try the host name.
N/A
Port
Enter the port to connect to your AD server. For example,
389. In a production scenario, use a common secure port, such as1636.The AD server must be actively waiting for inbound requests on this port and firewall policies must be in place to allow Advanced Identity Cloud to connect to the AD server via this port.
Use SSL
Disable
Enabled by default. In a production scenario, enable.
Login Account DN
Enter the name of the administrator service account to connect to the AD server.
N/A
Password
Enter the password of the administrator service account to connect to the AD server.
N/A
Base DNs
Enter base DNs that include your users and groups.
For example,
DC=example,DC=com. -
Click Connect. Advanced Identity Cloud uses the remote server that has connectivity to AD to connect to AD. On the Provisioning tab, the status Connected displays.
Task 4: Map attributes from AD to Advanced Identity Cloud
Now that you have registered the application and connected Advanced Identity Cloud to the AD server, you are ready to map the attributes from AD to Advanced Identity Cloud.
Review mapping attributes
The attributes mapped from the external data store (AD) to Advanced Identity Cloud are for provisioning operations.
All application templates are configured to auto-map attributes.
|
When you create a mapping, you must specify the attributes required by the Advanced Identity Cloud managed object, which is the In a default Advanced Identity Cloud tenant, the required properties are Learn more in property definition fields. |
-
From the left menu pane, go to Applications and select an application. In this case, click AD Implementation Guide.
-
Click the Provisioning tab and select User.
-
Click Mapping and view the default mapping.
Configure sync situations and actions
Advanced Identity Cloud evaluates each record during the reconciliation process. When reconciling, Advanced Identity Cloud determines the state of the record, referred to as the situation. Based on the situation, Advanced Identity Cloud takes an action that you configure.
You define what action Advanced Identity Cloud takes in each situation.
For example, if reconciliation detects a record exists in the source, but not in the target situation, you can define an action to create the record in Advanced Identity Cloud.
-
From the Provisioning tab, click Reconciliation > Settings.
-
From the Situation Rules section, set the following actions for each situation:
Situation Action Ambiguous
Select
Exception.Source Missing
Select
Exception.Missing
Select
Create.Found Already Linked
Select
Exception.Unqualified
Select
Delete.Unassigned
Select
Exception.Link Only
Select
Unlink.Confirmed
Select
Update.Found
Select
Update.Absent
Select
Create.You can find descriptions of the situations and actions in Manage reconciliation rules.
Advanced Identity Cloud is now ready for provisioning. In most cases, you would complete more tasks to reconcile users and set up schedules. For the purposes of this use case, those tasks are left for the following Validation section.
Validation
To test provisioning between AD and Advanced Identity Cloud, reconcile one user account and update the same user account in AD to observe the change in Advanced Identity Cloud.
|
These validations use the test user, |
Reconcile data from AD to Advanced Identity Cloud
In most cases, you would want to reconcile an entire set of users from an external data source into Advanced Identity Cloud. For the purposes of this use case, only one account is reconciled. To reconcile one account, you must add a filter so that Advanced Identity Cloud only reconciles based on the filter.
-
From the Provisioning tab, click Reconciliation > Settings.
-
Scroll down and click Show advanced settings.
-
Enable the Filter Source checkbox (AD is the source) and fill out the following details:
Field Value Assign to ADImplementationGuide if Any conditions are met
Select
Any.ADimplementationguide properties
Select
mail.contains
Select
is.Blank
Enter the email of the user you want to pull in from AD. The
mailattribute must be populated in AD, and the email you enter must be an exact match. For example, entersamcarter@example.com.
-
Scroll down and click Save.
-
In the left tabs, click Reconciliation > Reconcile.
-
Click Reconcile Now. Monitor the progress of the reconciliation in the metrics that display. Since you are filtering to reconcile only one user, failures on the reconciled data is expected.
-
In the left menu pane, Identities > Manage > Alpha realm - Users and search for the user. The user successfully displays in Advanced Identity Cloud.
If the user doesn’t display, check the following:
-
The fields Advanced Identity Cloud requires to create an identity are present in the mapping.
-
The source filtering to reconcile only one record is correct.
-
-
Go into your AD server, and update the
sn(last name) of your test user. In this example, update the sn toChanged. -
From the left menu pane, go to Applications and select
AD Implementation Guide. In the Reconcile tab, click Reconcile Now again. -
Similar to step 7, locate the test user in Advanced Identity Cloud. The last name is updated.
|
You can set a schedule to perform a full or incremental reconciliation by going to Reconciliation > Settings. Learn more in reconciliation schedules. |
Explore further
Reference material
|
In this use case, you configured only one remote server. In a production scenario, register a server cluster and install remote servers on multiple servers for high-availability. |
| Reference | Description |
|---|---|
Register and connect a remote server with Advanced Identity Cloud. |
|
Gain an in-depth understanding of registering an application using app templates. |
|
Learn how to connect AD to Advanced Identity Cloud. |
|
Learn how to add or edit mappings with application templates. |
|
Learn the various actions you can take on reconciliation situations. For example,
if the situation is |
|
Understand managed object fields you can modify, such as setting a property as required or whether an end user can update the property in the Advanced Identity Cloud end-user UI. |
|
Understand the various synchronization types Advanced Identity Cloud uses to keep data consistent: reconciliation, liveSync, and implicit synchronization. |
|
Learn more about connectors. This includes connectors bundled with RCS and connectors you can download and add to the remote server. |
Reports
In PingOne Advanced Identity Cloud, tenant administrators can create custom reports specific to your company’s requirements and make them available to your end users.
|
Advanced Identity Cloud add-on capability
Contact your Ping Identity representative if you want to add Advanced Reporting to your PingOne Advanced Identity Cloud subscription. Learn more in Add-on capabilities. |
| Use case | Description |
|---|---|
In this use case, you create a custom report called |
Creating a custom report using Advanced Reporting
|
Advanced Identity Cloud add-on capability
Contact your Ping Identity representative if you want to add Advanced Reporting to your Advanced Identity Cloud subscription. |
Description
Estimated time to complete: 15 minutes
In this use case, you create a custom report called Userlist by Expertise by Organization
that generates a list of experts within an organization. The use case also
shows how to create a duplicate of the report called Count of Userlist By Expertise By Organization
that generates a count of experts within an organization.
Goals
After completing this use case, you’ll know how to do the following:
-
Create a new custom report draft.
-
Add a data source and user-provided parameters.
-
Add filters for the report’s data.
-
Run and view the report.
-
Publish the report.
-
Duplicate the report.
-
Edit the report and add an aggregate count to the report.
-
Export and download the report.
-
Show how the end user can access the report.
Before you begin
For this use case, you’ll need to have:
-
A basic understanding of Advanced Identity Cloud concepts:
-
Advanced Reporting
-
Journeys
-
-
An Advanced Identity Cloud tenant with the Advanced Reporting feature.
-
Access to the tenant as an administrator.
-
A set of test data to help correctly configure the report.
-
An end user test account.
Tasks
Creating a new custom report draft
-
In the Advanced Identity Cloud admin console, go to Reports > New Report.
-
In the New Report modal, enter the following:
-
Name: Enter a descriptive name for the report. For this example, enter
Userlist by Expertise by Organization. -
Description (optional): Enter a description for the report.
-
Who Can Run: Enter users who can run the report. For example, enter a test user in your database, such as
john.doe.
-
-
Click Next.
Adding a data source and user-provided parameters
-
Click Data Source.
-
In the Add a Data Source modal, select Users. This data source provides access to the user database.
-
Click Next.
-
-
In the right pane, under Settings, click Data and select the following columns:
-
Username
-
Generic Indexed String 1
-
-
In the right pane, click Organizations to which I Belong.
-
Click and then click Add as Data Source.
-
Under users/orgs, select the Org Name checkbox.
-
-
Next, add report parameters for
orgNameandexpertise:-
Scroll down to Parameters and click for the
orgNameparameter. -
In the Add a Parameter modal, enter the following:
-
Name: Enter
orgNamefor the parameter’s descriptive name. -
Input Label: Enter
Org Namefor the parameter’s input label. -
Input Type: Select String for the parameter’s input type.
-
-
Click Save.
-
-
Click to add the next parameter.
-
Name: Select
expertisefor the parameter’s descriptive name. -
Input Label: Select
Expertisefor the parameter’s input label. -
Input Type: Select String for the parameter’s input type.
-
Multivalued: Select the Multivalued checkbox to accept one or more values.
-
-
Click Save.
Adding filters for the report’s data
You need to configure filters for retrieving the correct data from your database.
Create two filter rules for the orgName and expertise variables.
-
In the right pane, click next to Filters.
-
In the Add Filters modal, enter or select the following:
-
Any|All: Select All to require that all conditions must be met to be included in the filter.
-
Value: Select the users.orgs.name value for the filter rule.
-
Condition: Select the equals to condition for the filter rule.
-
Literal or Variable: Select Variable# for the filter, and then select the value, orgName.
-
-
Click , and then click Add Rule.
-
Value: Select the
users.frIndexedString1for the filter rule. -
Condition: Select the contains condition for the filter rule.
-
Select Variable for the filter, and then select the value, expertise.
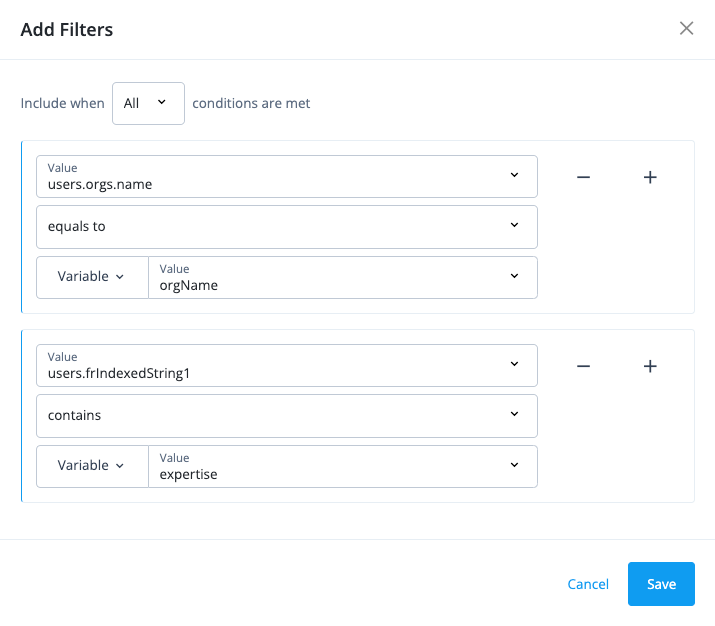
-
-
Click Save.
Running and viewing the report
-
In the Advanced Identity Cloud admin console, return to the Reports page.
-
Locate your newly created report, Userlist by Expertise by Organization. In the report file, click Run.
-
On the Reports page, enter the following input parameters for the report:
-
Org Name: Enter
Data Sciencefor the organization name. -
Expertise: Enter
Programming,Machine Learning, andData Modeling.
-
-
Click Run Report.
-
On the Run History tab, click View Report.
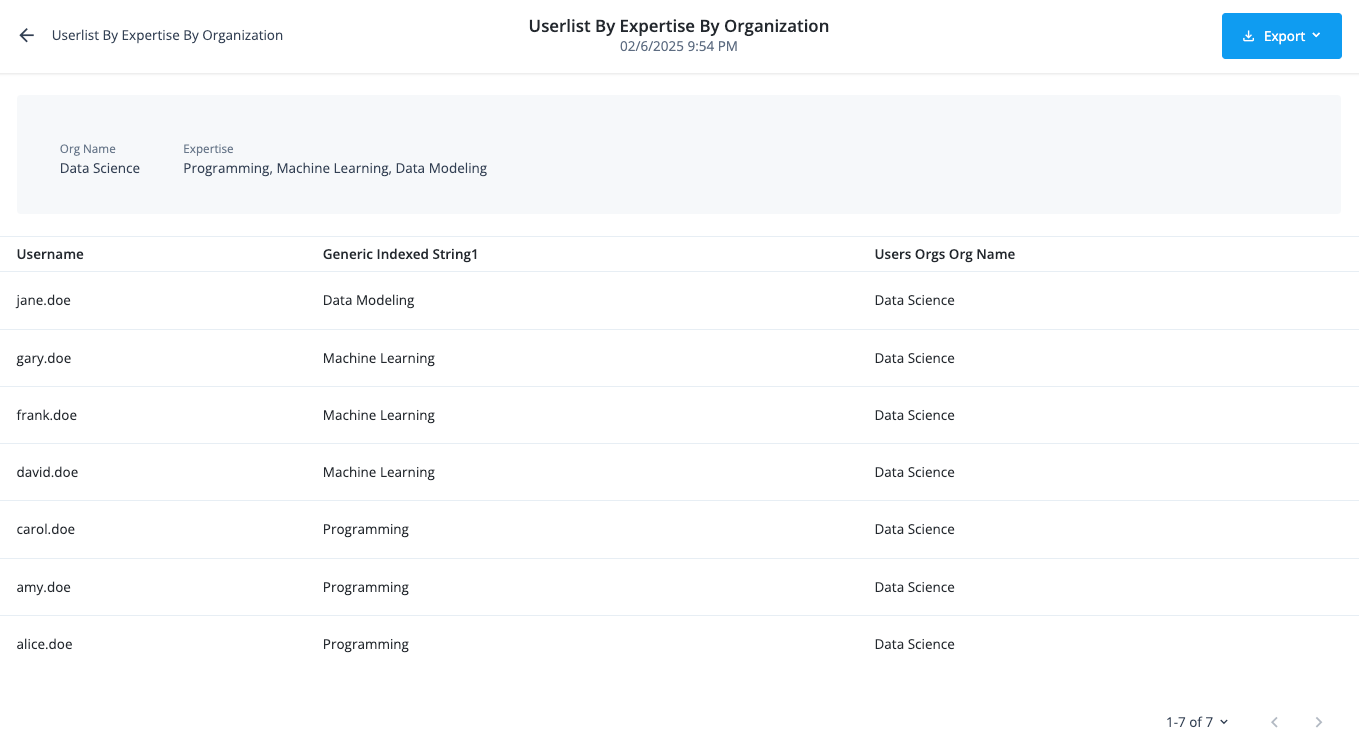
Publishing the report
-
After reviewing the draft of your report, return to the Reports page and look for your report.
-
On the report tile, click , and then click Publish. The Published icon appears in the top right of the report tile.
Duplicating the report
You can create a similar report with different parameters or columns by duplicating the original report and editing the new report copy. In this example, you’ll create a new report listing the count of users by expertise in an organization.
-
On the Reports page, search for a report you want to copy. In this example, you’ll search for
Userlist by Expertise by Organization. -
Click , and then click Duplicate.
-
In the Duplicate Report modal, enter the following:
-
Name: Enter
Count of Userlist By Expertise By Organizationfor the report name. -
Description (optional): Enter a general description for the new duplicate report.
-
Users: Select a test user in your database, such as
john-doe.
-
-
Click Duplicate.
Editing the copy and adding an aggregate count to the report
-
On the Reports page, locate your report. In this example, search for
Count of Userlist By Expertise By Organization. -
Click , and then click Edit.
-
In the right pane, scroll down the users data source properties, and clear the Username checkbox.
-
In the right pane, scroll down to Aggregate, and click .
-
In the Add an Aggregate modal, enter the following:
-
Name: Enter
Count of Usersfor a descriptive name. -
Type: Select
Count of specific rowsfor the type of parameter. -
Value: Select
users.frIndexedString1for the parameter value.
-
-
Click Save.
-
-
Click Save at the upper right of the page to apply your edits to the report.
-
On the Reports page, locate your report, and click Run.
-
On the Reports page, enter the following input parameters for the report:
-
Org Name: Enter
Data Sciencefor the organization name. -
Expertise: Enter
Programming,Machine Learning, andData Modeling.
-
-
Click Run Report, and then click View Report.
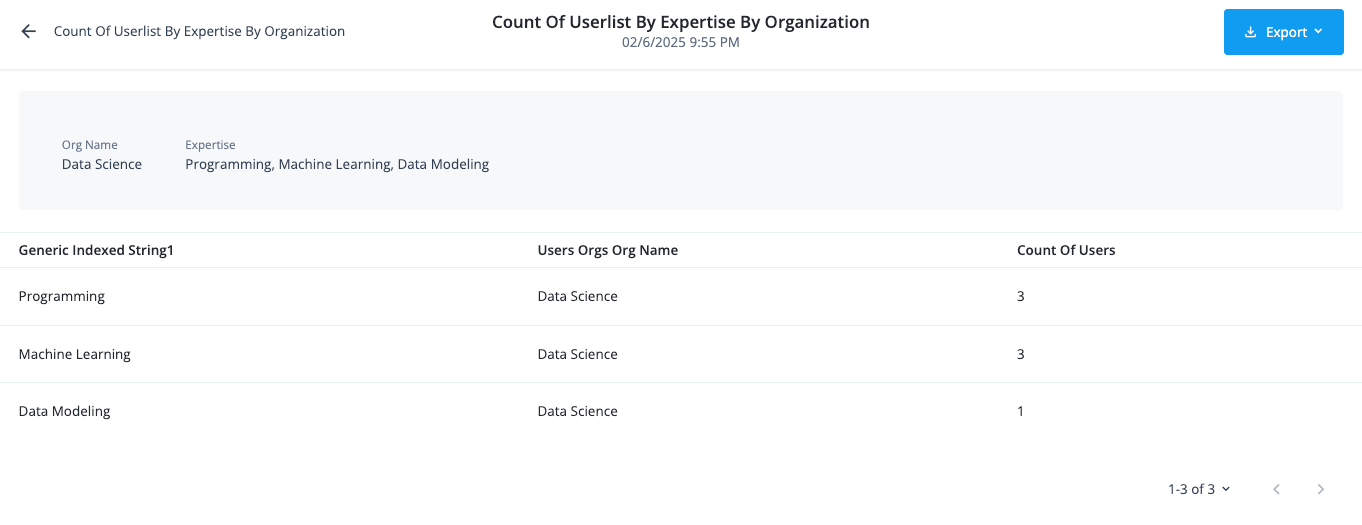
-
Exporting and downloading the report
-
On the Reports page, locate your report.
-
Click , and then click Run History. If the report isn’t available, run the report again.
-
Click the Download icon (), and select Export CSV.
-
After the download generates, click Download Report (CSV).
-
Open the CSV file to review the results.
Showing how the end user can access the report
-
In the Advanced Identity Cloud admin console, click Journeys.
-
Click the Login journey.
-
In the Preview URL field, click and paste the URL into an incognito window.
-
In the end-user sign-on page, enter the end user’s
User NameandPassword. The end user should be the one who can run the report, such asjohn.doe. -
In the Advanced Identity Cloud end-user UI, click Reports. The Reports page displays the reports.
Validation
To validate your work:
-
In the Advanced Identity Cloud admin console, go to Reports.
-
On the Reports page, enter
userlistin the search box. -
Click Userlist By Expertise By Organization.
-
Click and then Run History.
-
On the Run History tab, check the report status. If the report displays
Expired, you need to run the report again. -
Click the Run Report tab, enter the following parameters:
-
Org Name: Enter
Data Science. -
Expertise: Enter
Programming,Machine Learning, andData Modeling.
-
-
Click Run Report.
-
View the report to check that the report displays the data configured for it.
Troubleshooting
Error when running a report
If you run a report and encounter an error, it’s likely because of an incorrect mapping of parameters and variables that’s preventing the system from retrieving the user’s data from the database.
-
Check the report’s filters
-
In the Advanced Identity Cloud admin console, click Reports and locate your report.
-
Go to > Edit.
-
In the right pane, scroll down to Filters and go to > Edit Filter.
-
Review which variables are mapped to the reports parameters.
-
-
Check user details:
-
In the Advanced Identity Cloud admin console, go to Identities > Manage.
-
Search for a test user.
-
On the Details tab, check the variables used for your report. For example, in this use case, check the following:
-
Generic Indexed String1
-
-
On the user’s page, click Organizations to which I Belong. Check the user’s organizations.
-
-
Edit your filters:
-
In the Advanced Identity Cloud admin console, click Reports and locate your report.
-
Go to > Edit.
-
In the right pane, scroll down to Filters and go to > Edit Filter.
-
Make changes to the filters.
-
Click Save.
-
Run the report and check that it contains the correct data.
-
Self-service
In PingOne Advanced Identity Cloud, many self-service activities take place during authentication in journeys and also relate to creating or updating identities. However, the use cases in this section specifically focus on end-user self-service:
| Use case | Description |
|---|---|
Test the default registration journey to observe how it works. Then, duplicate it and make changes to meet your organization’s needs. Finally, register as a new end user using the updated registration journey. |
Learn about additional self-service use cases in End user self-service.
User registration
Description
Estimated time to complete: 20 minutes
In this use case, you test the default registration journey to observe how it works. Then, you duplicate it and make changes to meet your organization’s needs. Finally, you register as a new end user using the updated registration journey.
| To quickly test this user registration journey without building it from scratch, you can download it from the Ping Identity Integration Directory. Learn more in User Registration Journey. |
Prerequisites
Before you start work on this use case, ensure you have these prerequisites:
-
Access to your Advanced Identity Cloud development environment as an administrator.
-
A basic understanding of journeys and nodes.
Tasks
Task 1: Test the default registration journey
-
In the Advanced Identity Cloud admin console, go to Journeys and click on the Registration journey.
-
In the Preview URL field, click and paste the URL into an Incognito window.
The Sign Up page for the tenant displays.
-
In the Sign Up page, enter the following details:
Field Value Username
asmithFirst Name
AmyLast Name
SmithEmail Address
asmith@example.comPassword
Ch4ng3it!Select a security question
Select
What’s your favorite color?Answer
Red -
Click Next.
You are logged into the Advanced Identity Cloud end-user UI as Amy Smith.
-
Close the Incognito window and go back to the Advanced Identity Cloud admin console.
-
Go to Identities > Manage.
-
Enter
asmithin the Search field and press Enter.The user
asmithdisplays with the details you entered above:
Task 2: Modify the default registration journey
-
In the Advanced Identity Cloud admin console, go to Journeys.
-
On the Journeys page, click the ellipsis icon () for the
Registrationjourney and select Duplicate. -
In the Duplicate Journey window, enter the following details:
Field Value Name
User RegistrationIdentity Object
Alpha realm - Users
managed/alpha_userDescription
Updated user registration journey. -
Click Save.
The journey editor displays.
-
In the journey editor, select the KBA Definition node in the Page Node and click to delete this node.
This removes the security questions from the registration process.
-
Search for the
Email Suspend Nodeand drag it on to the journey canvas.The Email Suspend Node sends an email to the end user and only resumes the journey once they click a link in the email. In this case, they confirm their email address.
-
Select the Platform Password node in the Page Node and drag it out of the node on to the journey canvas.
-
Connect the Page Node outcome to the Email Suspend Node input.
-
Connect the Email Suspend Node outcome to the Platform Password node input.
-
Click the Email Suspend Node and review the default settings. You do not need to modify them.
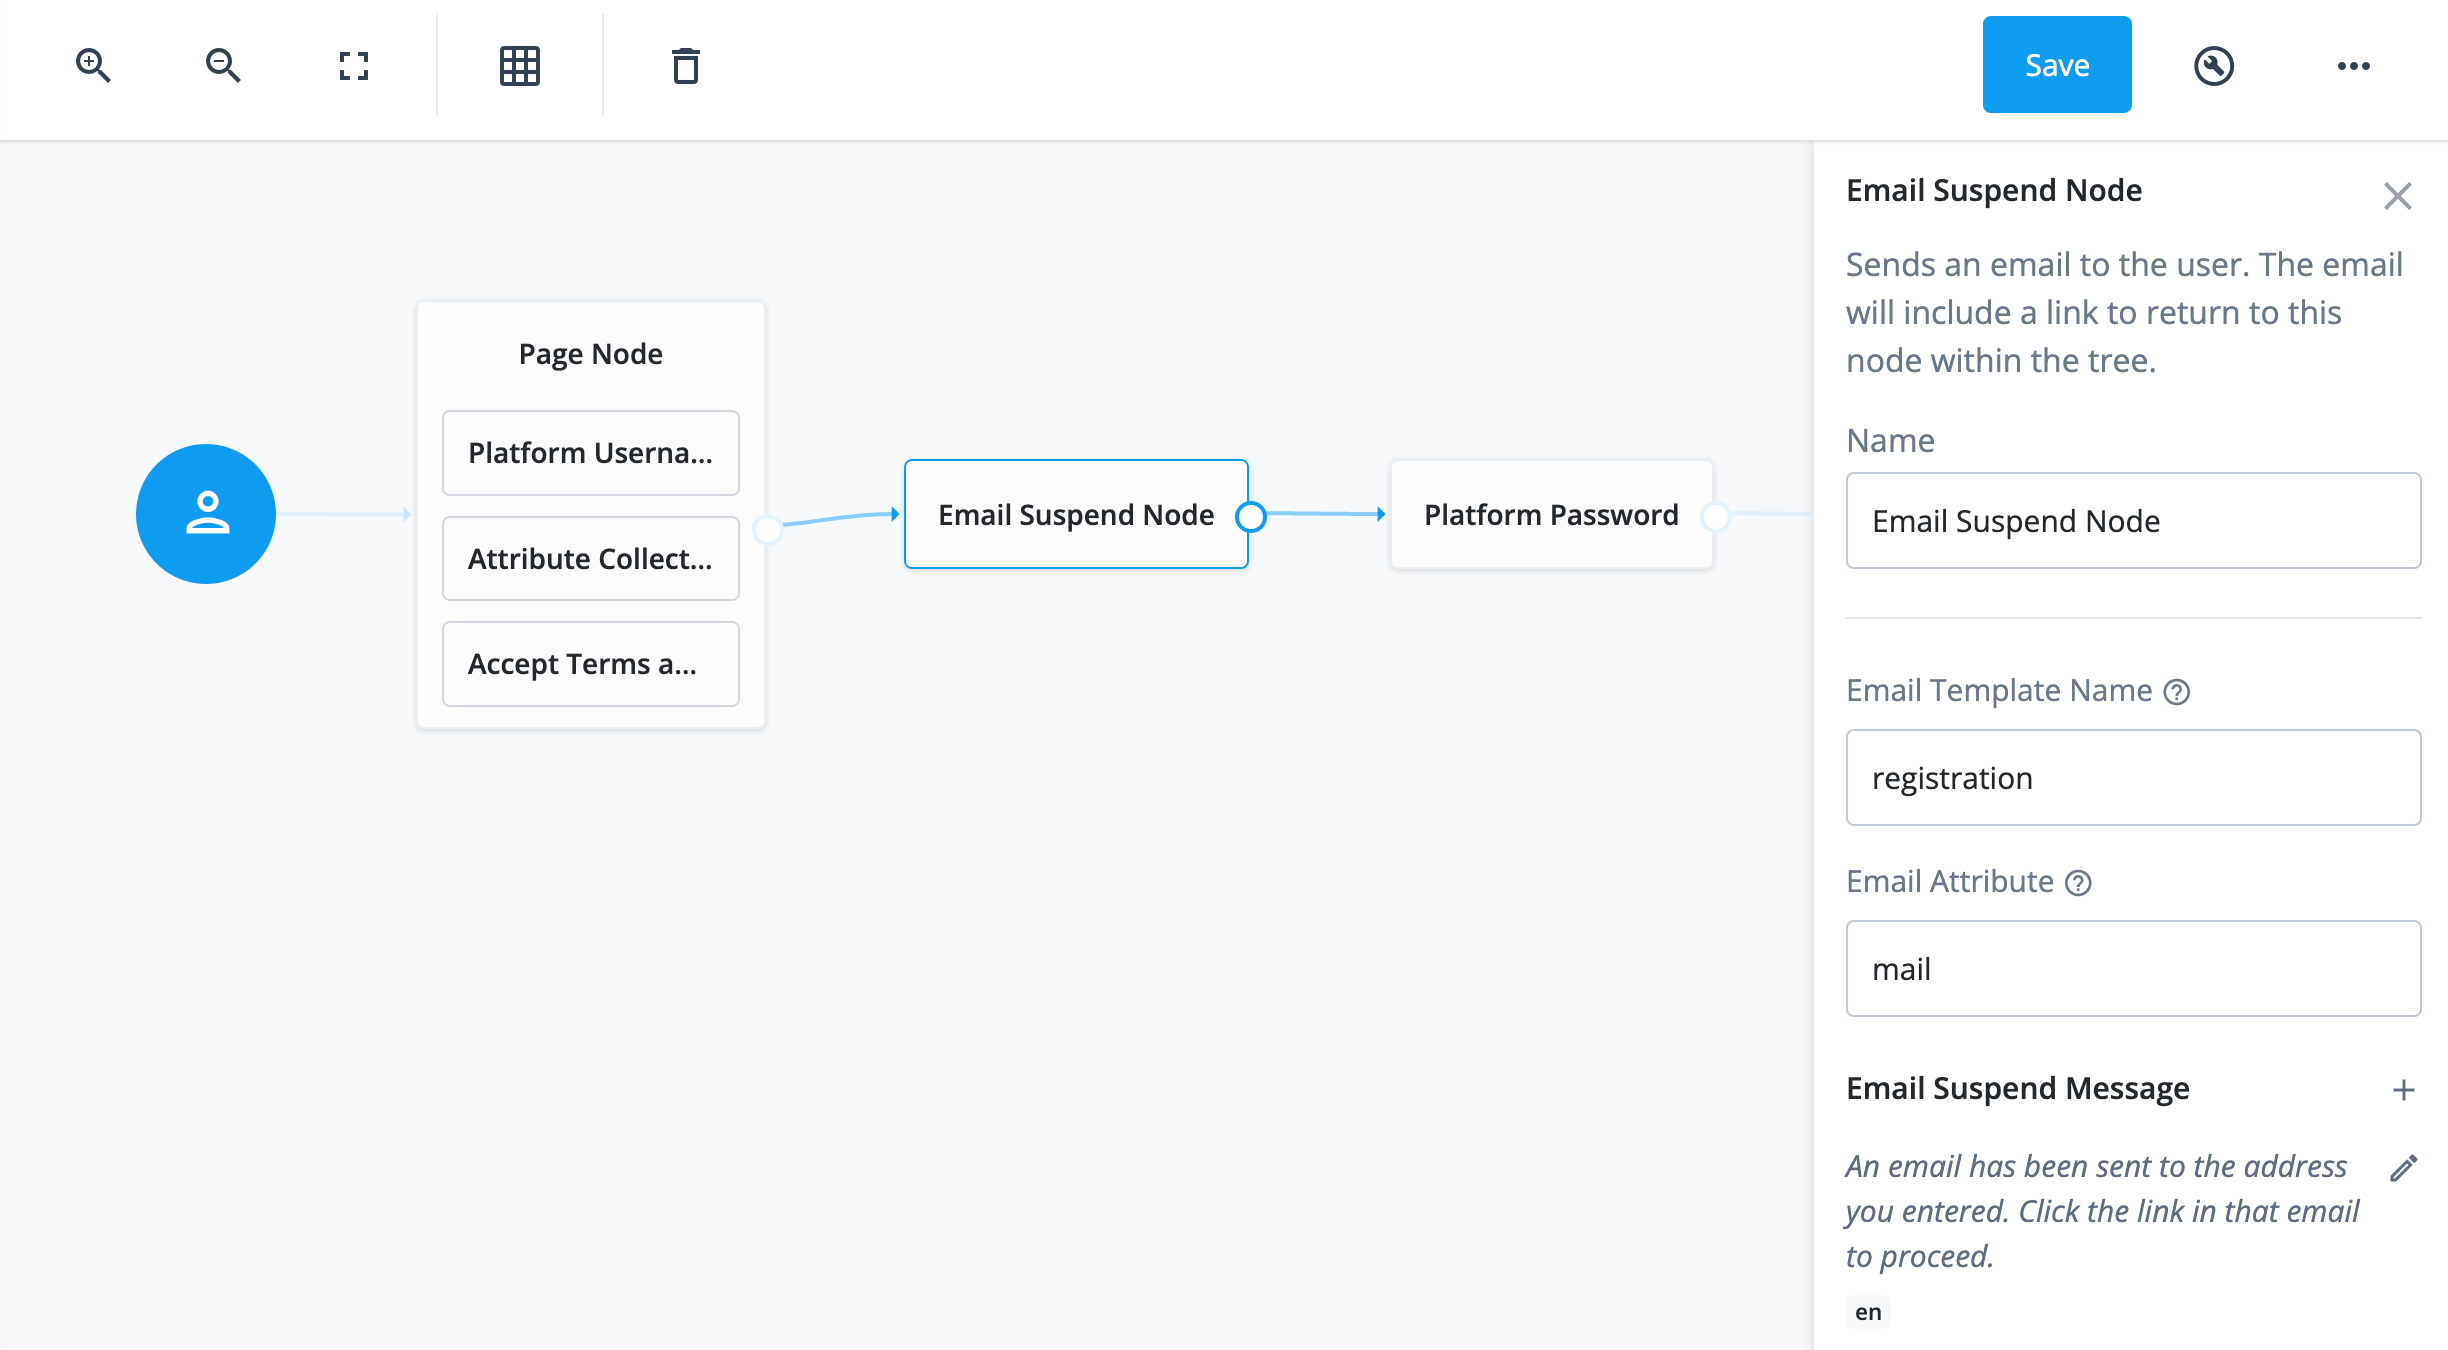
The Email Template Name field shows which email template is used in the journey.
-
Connect the Platform Password node outcome to the Create Object node input.
-
Click Save.
Task 3: Check journey path connections
Use the following table to check the outcomes for each node in the User Registration journey.
Many nodes can have more than one outcome. "→" denotes that a node only has one outcome path.
| Source node | Outcome path | Target node |
|---|---|---|
Start (person icon) |
→ |
Page Node |
Page Node containing:
|
→ |
Email Suspend Node |
Email Suspend Node |
→ |
Platform Password |
Platform Password |
→ |
Create Object |
Create Object |
Created |
Increment Login Count |
Failed |
Failure |
|
Increment Login Count |
→ |
Success |
Validation
Now that you have created a new user registration journey, you are ready to validate your journey.
The steps in this validation register a new end user in Advanced Identity Cloud so you can verify the new User Registration journey.
| When you register the new end user, ensure you use an email address that you can access. |
Steps
-
In the Advanced Identity Cloud admin console, go to Journeys and click on the
User Registrationjourney you just updated. -
In the Preview URL field, click and paste the URL into an Incognito window.
The Sign Up page for the tenant displays.
-
In the Sign Up page, enter the following details:
Field Value Username
agarciaFirst Name
AlexLast Name
GarciaEmail Address
Enter an email address for this new end user. You must have access to this email account.
-
Click Next. A message displays informing you an email has been sent.
-
Click the link in the Registration email to confirm your email address and continue registration.
-
Enter
Ch4ng3it!in the Password field. -
Click Next.
You are logged into the Advanced Identity Cloud end-user UI as Alex Garcia.
-
Close the Incognito window and go back to the Advanced Identity Cloud admin console.
-
Go to Identities > Manage.
-
Enter
agarciain the Search field and press Enter.The user
agarciadisplays with the details you entered above.
Explore further
Reference material
| Reference | Description |
|---|---|
Information about the default registration journey. |
|
Conceptual information on journeys and their purpose in Advanced Identity Cloud. |
|
Learn about the configurable nodes Advanced Identity Cloud offers for use in journeys. |
|
Manage, group, and assign privileges to identities. |
Third-party integrations
PingOne Advanced Identity Cloud third-party integrations are included throughout the relevant use case sections. The following table provides links to the third-party use cases:
| Use case | Description |
|---|---|
Provision data between Advanced Identity Cloud and PingDirectory |
Provision data to and from Advanced Identity Cloud and PingDirectory. Validate by provisioning a user from a PingDirectory server to Advanced Identity Cloud and provisioning a user from Advanced Identity Cloud to a PingDirectory server. |
Advanced Identity Cloud serves as the IdP for Okta using OIDC. Validate by navigating to Okta, being redirected to Advanced Identity Cloud and signing on, and then being redirected back to Okta signed in. |
|
Advanced Identity Cloud serves as the IdP for Salesforce using SAML. Validate by signing on to the Advanced Identity Cloud end-user UI to SSO into Salesforce. |
|
Configure social authentication by letting Microsoft Entra ID (formerly Azure AD) serve as the IdP to Advanced Identity Cloud using OIDC. Validate by authenticating with Microsoft Entra ID and automatically be signed on to the Advanced Identity Cloud end-user UI. |
|
Ping Identity as external authentication method for Microsoft Entra ID (Azure AD) |
Configure Advanced Identity Cloud as an external authentication method for Microsoft Entra ID (formerly Azure AD). Validate by using Advanced Identity Cloud as a second authentication factor for Microsoft Entra ID. |
Connect to Microsoft Entra ID (formerly Azure AD) in a journey to capture an end user’s password, after successful authentication, to store in Advanced Identity Cloud. Validate by authenticating with Microsoft Entra ID in a PTA journey for Advanced Identity Cloud to capture the password. Then, sign on to the Advanced Identity Cloud end-user UI with the default login journey to show that Advanced Identity Cloud successfully stored the password. |
|
Provision users from an on-premises data source, AD, using a remote connector server (RCS). Validate from AD by using Advanced Identity Cloud. |
