Configure federated access for tenant administrators
Federated access lets tenant administrators use your company’s single sign-on (SSO) to sign on to your PingOne Advanced Identity Cloud tenant environments.
By using federation to authenticate your tenant administrators to Advanced Identity Cloud, you can quickly and easily provision and deprovision users from your centralized identity provider (IdP) instead of managing them separately in each Advanced Identity Cloud tenant environment.
The groups feature allows you to add and remove tenant administrators depending on their group membership in your IdP. You can also specify the level of administrator access (super administrator[1] or tenant administrator) for groups of users.
Advanced Identity Cloud lets you configure federated access in two main ways:
-
You can use PingOne to configure PingOne itself as an IdP for Advanced Identity Cloud. Learn more in Configure federated access using PingOne.
-
You can use the Advanced Identity Cloud admin console to configure Microsoft Entra ID (Entra ID)[2] or Microsoft Active Directory Federation Services (AD FS) as IdPs, or any other IdP that’s OpenID Connect (OIDC) compliant. Learn more in Configure federated access using PingOne Advanced Identity Cloud.
Configure federated access using PingOne
You can configure PingOne as a federation IdP for PingOne Advanced Identity Cloud. To do this, configure it in PingOne itself. Learn more in Set up SSO to PingOne Advanced Identity Cloud.
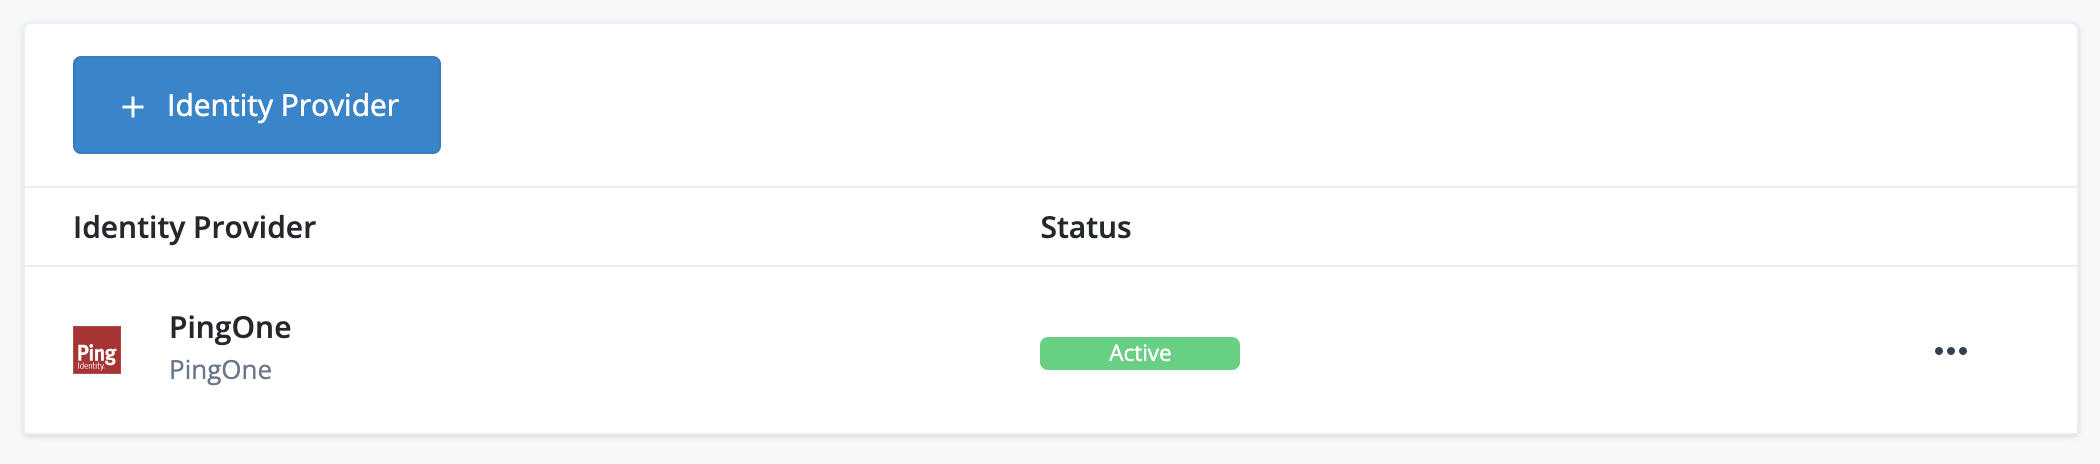
After you configure PingOne as a federation IdP, each configured tenant environment in Advanced Identity Cloud automatically displays PingOne in its list of federation IdPs:
-
Sign on to the Advanced Identity Cloud admin console for any of the environments you configured for federated access using PingOne.
-
Go to Tenant settings.
-
Click Federation.
-
If configured correctly in PingOne, the list contains a PingOne federation IdP:
-
Click the PingOne list item to view its configuration settings page. For PingOne, this is a basic page containing the Status and the Well-Known Endpoint of the PingOne federation IdP:

If you configure a federation IdP in PingOne, the corresponding Advanced Identity Cloud tenant environments are configured automatically. You do not need to promote configuration changes.
Configure federated access using PingOne Advanced Identity Cloud
You can configure the following federation IdPs using the Advanced Identity Cloud admin console:
If you configure a federation IdP using the Advanced Identity Cloud admin console, you must do so in your development environment and promote the configuration changes. You must also store the federation IdP secrets for each of your environments in ESV secrets and set corresponding placeholders in your configuration. Learn more in Configure federated access across your tenant environments.
Configure federated access across your tenant environments
The high-level process to set up federated access across your tenant environments is as follows:
-
Set up a federation IdP for each of your tenant environments and note the client secrets.
-
In your development environment:
-
Follow the instructions in Configure a mutable environment to use a federation IdP, entering the federation IdP values for your development environment. These values will be replaced by ESVs in the following steps.
-
Create the following ESVs to substitute into configuration:
-
Federation IdP fields:
Field ESV type Client ID
Variable
Well-known endpoint
Variable
Authorization endpoint
Variable
Client secret
Secret
Issuer
Variable
Redirect URI
Variable
Token endpoint
Variable
-
(Optional) Federation IdP groups fields:
Field ESV type Super administrators[1] group ID
Variable
Tenant administrators group ID
Variable
-
The instructions referenced in step 2d contain example values for these fields.
-
Create a variable or create a secret using the API.
-
Create a variable or create a secret using the Advanced Identity Cloud admin console.
-
-
-
Use the following instructions to update the federation IdP configuration:
-
-
(Optional) If you have a UAT[3] environment, adapt the next step to suit the revised promotion order. Learn more in Additional UAT environments.
-
In your staging environment:
-
Repeat step 2b for your staging environment. Ensure the ESV names are the same as you set up in the development environment.
-
Run a promotion to move the configuration change from your development environment to your staging environment. Learn more in:
-
-
In your production environment:
-
Repeat step 2b for your production environment. Ensure the ESV names are the same as you set up in the development environment.
-
Run a further promotion to move the configuration change from your staging environment to your production environment.
-
-
(Optional) If you have a sandbox[4] environment:
-
Repeat step 2a for your sandbox environment.
-
(Optional) Repeat step 2b – d for your sandbox environment.
-
-
Configure federation sign-on requirements in each environment.
| Ensure that the federation IdP for each environment is configured with a redirect URL. If you are using the same federation IdP for your sandbox[4], development, UAT[3], staging, and production environments, ensure that it is configured with redirect URLs for each environment. |
Set up a federation IdP
You can find instructions for setting up a federation IdP in the following guides:
Configure a mutable environment to use a federation IdP
After you’ve set up a federation IdP, you can configure it in a mutable environment (development or sandbox[4]) to provide federated access to tenant administrators.
| To understand how the instructions in this section fit into the process of configuring federated access across your tenant environments, refer to step 2a in the high-level process. |
-
Sign on to the Advanced Identity Cloud admin console of your mutable environment (development or sandbox[4]) as a super administrator[1].
-
Go to Tenant settings.
-
Click Federation.
-
Click + Identity Provider.
-
Select the federation provider to use:
-
Microsoft Azure
-
ADFS
-
OIDC
-
-
Click Next.
-
Follow the steps on the Configure Application page and click Next.
-
On the Identity Provider Details page:
-
Complete the following fields:
-
Name: The name of the provider.
-
Application ID: The ID for the application.
-
Application Secret: The client secret for the application.
-
Well-known Endpoint:
-
For Entra ID, this is the URL from the OpenID Connect metadata document field. In the URL, make sure to replace
organizationwith the actual tenant ID for your tenant. -
For AD FS, this is the endpoint from the OpenID Connect section.
-
For OIDC, refer to your IdP vendor’s documentation on locating a client’s well-known endpoint.
When you populate the Well-known Endpoint field with a valid URL, the following fields are automatically populated:
-
Authorization Endpoint: The endpoint for authentication and authorization. The endpoint returns an authorization code to the client.
-
Token Endpoint: The endpoint that receives an authorization code. The endpoint returns an access token.
-
User Info Endpoint: The endpoint that receives an access token. The endpoint returns user attributes.
-
-
(For OIDC only): OAuth Scopes: The scopes the application uses for user authentication. The default scopes are
openid,profile, andemail. -
(For OIDC only): Client Authentication Method: Options are
client_secret_postandclient_secret_basic. The default option isclient_secret_post. -
Button Text: The text for the application button.
-
-
Click Save. By default all users are given the tenant administrator level of access when they access the tenant using your IdP. To give some or all users the super administrator[1] level of access, configure groups in the next step.
-
-
(Optional) Configure group membership to determine administrator access level (super administrator[1] or tenant administrator).
-
Set up groups in your IdP:
-
For Entra ID: Follow the instructions in Use group membership to enable federation in Entra ID.
-
For AD FS: Follow the instructions in Use group membership to enable federation in AD FS.
-
For OIDC: Follow the instructions in Use group membership to enable federation in an OIDC-compliant IdP.
-
-
On the Identity Provider Details page:
-
Select one of the following options:
-
For Entra ID: Enable Use group membership to allow federated login to Ping Identity.
-
For AD FS: Enable Use ADFS group membership to allow federated login to Ping Identity.
-
For OIDC: Enable Use OIDC group membership to allow federated login to Ping Identity.
-
-
Enter the name of the group claim in the Group Claim Name field. For example,
groups.By default, Entra ID sends the IDof the group. You might need to configure it to send thenameof the group. -
To apply an access level to specific IdP groups:
-
To apply the super administrator[1] access level:
-
Locate the Group Identifiers field to the left of
Super Admins. -
Enter one or more group identifiers. For example,
8c578f67-cac4-49eb-8f28-8e4f2c22945e.
-
-
(Optional) To apply the tenant administrator access level:
-
Locate the Group Identifiers field to the left of
Tenant Admins. -
Enter one or more group identifiers. For example,
3623050d-3604-45a2-942e-f6be9ec9f9ed.
-
-
-
Click Save.
-
-
Configure federation sign-on requirements
After you have enabled federated access to your tenant environments, you can choose how strictly to enforce it. It can be enforced for just tenant administrators or for both tenant administrators and super administrators[1]. These settings are stored in dynamic configuration, so need to be configured per environment.
| To understand how the instructions in this section fit into the process of configuring federated access across your tenant environments, refer to step 5 in the high-level process. |
-
Sign on to the Advanced Identity Cloud admin console as a super administrator[1].
-
Go to Tenant settings, then click the Federation tab.
-
In the Enforcement section, click Edit.
-
On the Edit Tenant Federation Enforcement page, select one of the following items:
-
Optional for All Admins: Allow all administrators to use either their Advanced Identity Cloud credentials or federated access to sign on.
-
Required for All Admins Except Super Admins: Require all administrators that are not super administrators to use federated access to sign on. Super administrators can use their Advanced Identity Cloud credentials or federated access to sign on.
-
Required for All Admins: Require all administrators to use federated access to sign on. If you choose this option, then subsequently need to switch to a lower enforcement level, you must create a support case in the Ping Identity Support Portal.
-
-
Click Update. It can take about 10 minutes for the changes to take effect.
-
On the Change Federation Enforcement? modal:
-
To confirm your changes, click Confirm.
-
To cancel your changes, click Cancel.
-
Deactivate a federation IdP
You can deactivate a federation IdP and reactivate it later. For example, you might want to deactivate a federation IdP if the provider is experiencing technical issues. If you deactivate all federation IdPs for a tenant, tenant administrators can no longer use federation to sign on to the tenant.
You can only deactivate a federation IdP if one of the following is true:
-
Optional for All Adminsis selected as the federation enforcement level (learn more in Configure federation sign-on requirements). -
More than one federation IdP is enabled in the Advanced Identity Cloud tenant.
To deactivate a federation IdP:
-
Sign on to the Advanced Identity Cloud admin console of your development environment as a super administrator[1].
-
Go to Tenant settings, then click Federation.
-
Perform one of the following actions:
-
To deactivate a federation IdP, click the ellipsis icon () to the right of an active federation IdP, then click Deactivate.
-
To activate a federation IdP, click the ellipsis icon () to the right of a deactivated federation IdP, then click Activate.
-
-
Run a series of promotions to move the updated configuration to your UAT[3], staging, and production environments.
Rotate a federation IdP client secret
Most IdPs force you to rotate the client secrets they generate by setting an expiry on the secret. To ensure that federated access continues uninterrupted,you must create and configure a new client secret before the old one expires. If the client secret is stored in an ESV, you can rotate it by creating a new secret version.
For your development, UAT[3], staging, or production environment:
-
In the IdP’s UI:
-
Locate the client configured for the Advanced Identity Cloud environment.
-
Create a new secret and make a note of it:
-
For Azure AD, add a new client secret to the application.
-
For AD FS, reset the client secret for the application group.
-
For OIDC, refer to your IdP vendor’s documentation on creating a new client secret.
-
-
-
In Advanced Identity Cloud admin console:
-
Add a new secret version to the ESV secret using the value of the new federation IdP secret from the previous step. Learn more in Update an ESV referenced by a configuration placeholder.
-
Set up Microsoft Entra ID as a federation IdP
To use Microsoft Entra ID (Entra ID) as a federation IdP for a PingOne Advanced Identity Cloud tenant environment, you need to create a new app registration.
| Microsoft Entra ID used to be known by the name Microsoft Azure AD. Learn more in New name for Azure Active Directory. |
Step 1: Configure Entra ID as a federation IdP
-
In a browser, navigate to the Microsoft Entra admin center.
-
Create a new application:
-
Click Applications, then click App registrations.
-
In the top toolbar, click New registration.
-
On the Register an application page:
-
Enter the application Name. For example, "Advanced Identity Cloud administrators".
-
Select Accounts in this organizational directory only (Me only - Single tenant) from the Supported account types list.
-
In the Redirect URI (optional) section:
-
In the left-hand field, select Web.
-
In the right-hand field, enter the redirect URI for an Advanced Identity Cloud environment using the following URL format:
https://<tenant-env-fqdn>/login/admin
For example, if your tenant environment FQDN is
openam-mycompany-ew2.id.forgerock.io, usehttps://openam-mycompany-ew2.id.forgerock.io/login/admin.
-
-
Click Register to create the application.
-
-
-
Find the application ID:
-
In the application menu, click Overview.
-
Note the Application (client) ID of the application. For example,
6b05a314-c721-4aa6-baad-7f533cbd25b0.In Advanced Identity Cloud, enter this value in an application’s Application ID field (or set in an ESV mapped to that field).
-
-
Find the application’s well-known endpoint:
-
In the top toolbar, click Endpoints.
-
Note the OpenID Connect metadata document endpoint of the application. For example,
https://login.microsoftonline.com/0e076864-135f-4914-9b72-80efaa4c3dcf/v2.0/.well-known/openid-configuration.In Advanced Identity Cloud, enter this value in an application’s Well-known Endpoint field (or set in an ESV mapped to that field).
-
-
Add the
emailclaim to the application’s token configuration:-
In the application menu, click Token configuration.
-
Click Add optional claim.
-
In the Add optional claim modal:
-
Select the ID token type.
-
Select the email claim checkbox.
-
Click Add.
-
The first time you add the
emailclaim, the UI displays an Add optional claim dialog box to let you grant the appropriate API permissions: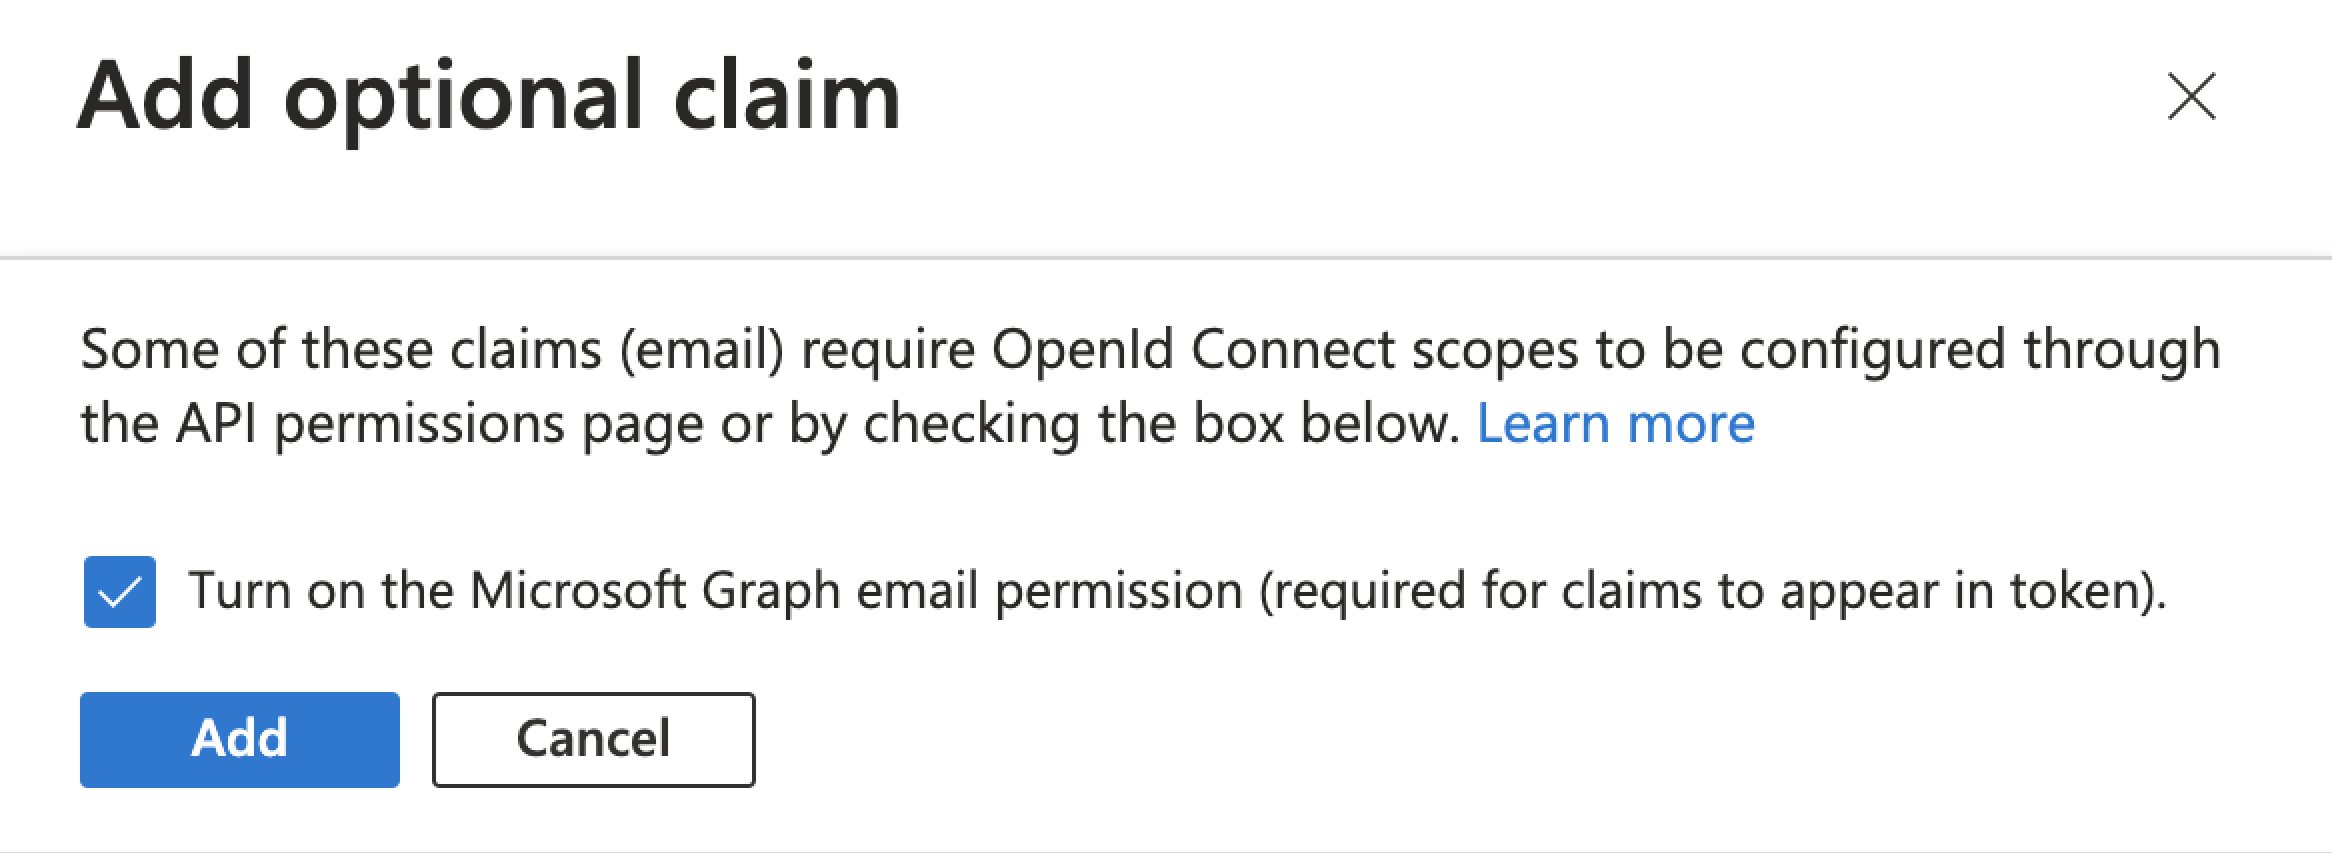
-
Select the Turn on the Microsoft Graph profile permission checkbox.
-
Click Add.
-
-
-
-
Add an application secret:
-
In the application menu, click Certificates & secrets.
-
Click New client secret.
-
In the Add a client secret modal:
-
(Optional) Enter a Description.
-
Select an option from the Expires list (or accept the default selection of 180 days).
-
Click Add to create the secret.
-
-
Note the Value of the new secret. Do this immediately, as it can only be viewed for a short time after creation.
In Advanced Identity Cloud, enter this value in an application’s Application Secret field (or set in an ESV mapped to that field).
-
Step 2: Use group membership to enable federation in Entra ID
Groups let you add and remove sets of administrators based on their group membership in your IdP. You can also specify the level of administrator access (super administrator[1] or tenant administrator) for groups of users.
| If you modify group membership in Entra ID, it can take a few minutes for those changes to take effect in Advanced Identity Cloud. |
-
In a browser, navigate to the Microsoft Entra admin center.
-
Create one or more groups:
-
Create a group for super administrators[1]:
-
Click Groups, then click All groups.
-
In the top toolbar, click New group.
-
In the New Group page:
-
Select Microsoft 365 from the Group type list.
-
Enter the super administrator Group name. For example,
Super administrators. -
Click Create.
-
-
In the All groups page, in the top toolbar, click Refresh.
-
Click the new group you just created.
-
Note the Object ID of the group. For example,
8c578f67-cac4-49eb-8f28-8e4f2c22945e.In Advanced Identity Cloud, enter this value in an application’s Group Identifiers field (or set in an ESV mapped to that field).
-
-
(Optional) Repeat step 2a to create a group for tenant administrators.
-
-
Set up the application to acquire claims from the identity token instead of the user info endpoint:
-
Click Applications, then click App registrations.
-
Click All applications, then click your application.
-
In the application menu, click Token configuration.
-
Click Add optional claim.
-
In the Add optional claim modal:
-
Select the ID token type.
-
Select the email, family_name, and given_name claim checkboxes.
-
Click Add.
-
The first time you add these new claims, the UI displays an Add optional claim dialog box to let you grant the appropriate API permissions:
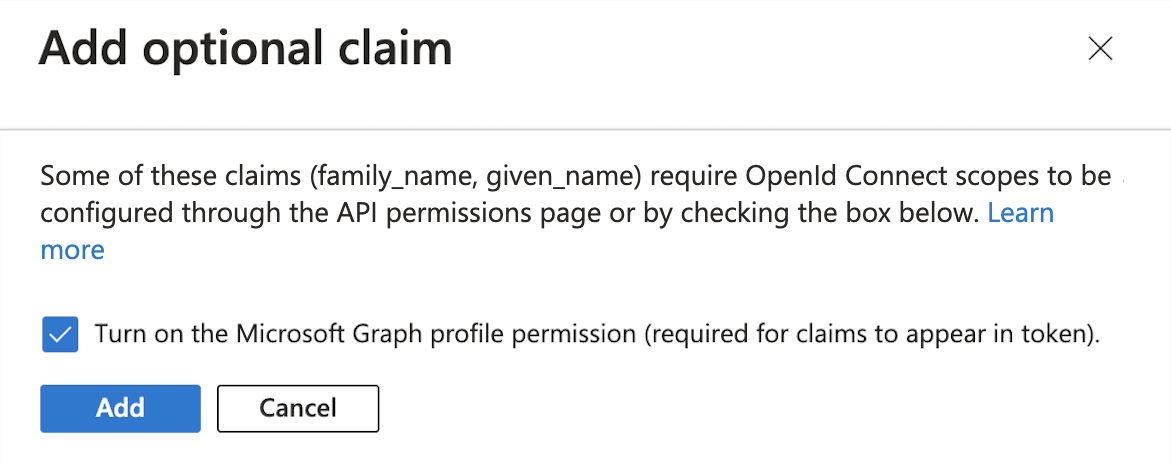
-
Select the Turn on the Microsoft Graph profile permission checkbox.
-
Click Add.
-
-
-
Click Add groups claim.
-
In the Edit groups claim modal:
-
Select Groups assigned to the application.
-
Click Add.
-
-
Confirm the name of the groups claim you added is
groups.In Advanced Identity Cloud, enter this value in an application’s Group Claim Name field (or set in an ESV mapped to that field).
-
Set up Microsoft Active Directory Federation Services as a federation IdP
To use Microsoft Active Directory Federation Services (AD FS) as a federation IdP for a PingOne Advanced Identity Cloud tenant environment, you must create a relying party trust. The trust is a set of identifiers, names, and rules that identify the partner or web-application to the federation service.
Afterward, you must create an application group that uses single sign-on (SSO) to access applications that are outside the corporate firewall.
| The instructions in this document assume that you have a self-hosted instance of AD FS version 4.0, running on Windows Server 2016 or higher. |
Step 1: Create a relying party trust
In this step, you create a relying party trust. The trust is a set of identifiers, names, and rules that identify the partner or web-application to the federation service.
-
Open the Server Manager console by clicking Server Manager on the Start screen or clicking Server Manager in the taskbar on the desktop.
-
In AD FS Management, select Tools > AD FS.
-
On the AD FS dialog, in the left panel, click Relying Party Trusts.
-
In the Actions pane, select Add Relying Party Trust.
-
On the Welcome page of the Add Relying Party Trust wizard, select Claims aware.
-
On the Select Data Source page, select Enter data about the relying party manually.
-
On the Specify Display Name page, enter a display name.
-
Complete the steps in the wizard until you reach the Configure Identifiers page.
-
On the Configure Identifiers page, add a relying party trust identifier for each of your tenant environments using the following URL format:
https://<tenant-env-fqdn>/am
For example, if your tenant environment FQDN is
openam-mycompany-ew2.id.forgerock.io, usehttps://openam-mycompany-ew2.id.forgerock.io/am. -
On the Choose Access Control Policy page, select the appropriate settings according to your corporate policy.
-
Complete the steps in the wizard until you reach the Finish page.
Step 2: Create an application group
In this step, you create an application group that uses single sign-on (SSO) to access applications.
-
In the AD FS editor, select Application Groups.
-
In the Actions pane, select Add Application Group.
-
Complete the Add Application Groups wizard as follows:
-
On the Welcome page of the Add Application Groups wizard, provide a name and a description and select the Server application accessing a web API template.
-
On the Server application page:
-
Accept the proposed
Name. -
Note the
Client Identifier.In Advanced Identity Cloud, enter this value in an application’s Application ID field (or set in an ESV mapped to that field). -
Add tenant Redirect URIs for each of your tenant environments using the following URL format:
https://<tenant-env-fqdn>/login/admin
For example, if your tenant environment FQDN is
openam-mycompany-ew2.id.forgerock.io, usehttps://openam-mycompany-ew2.id.forgerock.io/login/admin.
-
-
Click Register to create the application.
-
On the Configure Application Credentials page:
-
Select Generate a shared secret. The secret acts as a password for the application.
-
Use the Copy to clipboard button to copy the secret.
In Advanced Identity Cloud, enter this value in an application’s Application Secret field (or set in an ESV mapped to that field).
-
-
Click Next.
-
On the Configure Web API page, add the
client identifieryou noted earlier. -
Click Next.
-
On the Choose Access Control Policy page, select the appropriate settings according to your corporate policy.
-
Click Next.
-
On the Configure Application Permissions page, check the following permitted scopes:
-
allatclaims: Lets the application request the claims in the access token that is added to the ID token.
-
email: Lets the application request an email claim for the signed-in user.
-
openid: Lets the application request use of the OpenID Connect authentication protocol.
-
profile: Lets the application request profile-related claims for the signed-in user.
-
-
Click Next.
-
On the Summary page, review your selections.
-
Click Next.
-
On the Complete page, click Close.
-
Step 3: Include additional identity claims in tokens
In this step, you configure AD FS to include additional claims in the identity tokens it issues.
This is necessary because AD FS does not support the /userinfo endpoint.
-
In the AD FS editor, select Application Groups.
-
In the Actions pane, select Add Application Group.
-
Double-click your application group.
-
In the Applications section, in the Web API area, select your application, and click Edit.
-
Click the Issuance Transform Rules tab, and click Add Rule.
-
To include active directory attributes of the users that are accessing Advanced Identity Cloud, in the Claim rule template drop-down field, select Send LDAP Attributes as Claims.
-
In the Claim rule name field, enter a name for the claim rule. For example, Profile Attributes.
-
In the Attribute store drop-down field, select Active Directory.
-
To map LDAP attributes to name spaces in Advanced Identity Cloud, complete the Mapping of LDAP attributes to outgoing claim types table:
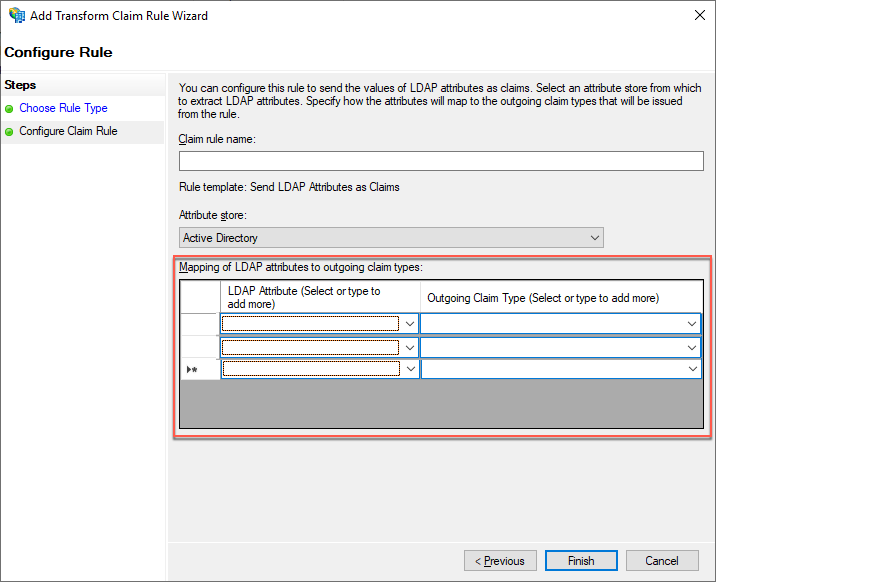
LDAP Attribute (Select or type to add more) Outgoing Claim Type (Select or type to add more) E-Mail Addresses
mail
Given-Name
givenName
Surname
sn
-
Click Finish.
-
On the Issuance Transform Rules tab, click Apply.
-
Click OK twice.
Step 4: Obtain the well-known endpoint for the AD FS OpenID Connect service
In this step, you identify the well-known URI that the AD FS OpenID Connect service uses.
-
In the AD FS editor, select Service > Endpoints.
-
In the middle pane, scroll down to the OpenID Connect section.
-
In the OpenID Connect section, note the URL path. The well-known end point URL is the concatenation of the host name of the machine running AD FS and the URL path you just noted.
In Advanced Identity Cloud, enter this value in an application’s Well-known Endpoint field (or set in an ESV mapped to that field).
Step 5: Use group membership to enable federation in AD FS
Groups let you add and remove sets of administrators based on their group membership in your IdP. You can also specify the level of administrator access (super administrator[1] or tenant administrator) for groups of users.
Create groups containing Advanced Identity Cloud tenant administrators
You must create two groups of administrators in AD FS for each of your Advanced Identity Cloud environments:
For each tenant:
-
The first group should consist of the users that will be super administrators in your Advanced Identity Cloud tenant.
-
The second group should consist of the users that will be tenant administrators in your Advanced Identity Cloud tenant.
When naming each group, use a prefix that identifies the group as relevant for Advanced Identity Cloud; this allows the AD FS claim scripts to only include relevant groups. Make sure to include the tenant name as part of the group name to help you identify the tenant the group is for.
Example: group name template
<prefix>-<tenant identifier>-<admin type>.
Example: group name
aic-dev-superadmin
In this example:
-
aicrepresents the prefix. -
devrepresents the tenant identifier. -
superadminrepresents the admin type.
Example: All group names for a standard promotion group of tenants and a sandbox tenant.
-
aic-dev-superadmin -
aic-dev-tenantadmin -
aic-staging-superadmin -
aic-staging-tenantadmin -
aic-prod-superadmin -
aic-prod-tenantadmin -
aic-sandbox-superadmin -
aic-sandbox-tenantadmin
Include additional claims in the tokens for Advanced Identity Cloud
To use group membership to enable federation, you must add issuance transform rules to enable AD FS to add additional group claims.
You must add the following two rules in AD FS:
-
Store Groups rule: A rule that collects all the user groups and stores them in a claim with the indicated name. The script produces a potentially large claim.
-
Issue Groups rule: A rule that takes the long list of groups that the Store Groups script creates and only selects the groups with the Group Name Prefix that is relevant for the claim.
-
In the AD FS editor, select Application Groups.
-
In the Actions pane, select the group you previously created.
-
Right-click the group and select Properties.
-
In the Applications section, in the Web API area, select your application, and click Edit.
-
Click the Issuance Transform Rules tab.
-
Click Add Rule.
-
To include active directory attributes of the users that are accessing Advanced Identity Cloud, in the Claim rule template drop-down field, select Send Claims Using a Custom Rule.
-
In the Custom rule field, enter the rule definition for the Store Groups rule.
-
Store Groups rule template:
c:[Type == "http://schemas.microsoft.com/ws/2008/06/identity/claims/windowsaccountname", Issuer == "AD AUTHORITY"] ⇒ add(store = "Active Directory", types = ("<Groups Claim Name>"), query = ";tokenGroups;{0}", param = c.Value); -
Store Groups rule example:
c:[Type == "http://schemas.microsoft.com/ws/2008/06/identity/claims/windowsaccountname", Issuer == "AD AUTHORITY"] ⇒ add(store = "Active Directory", types = ("groups"), query = ";tokenGroups;{0}", param = c.Value);-
"groups" is the name of the resulting claim that you enter into the Groups Claim Name field on the Identity Provider Details page in the Advanced Identity Cloud.
-
-
-
Click Finish.
-
Click Add Rule.
-
To include active directory attributes of the users that are accessing Advanced Identity Cloud, in the Claim rule template drop-down field, select Send Claims Using a Custom Rule.
-
In the Custom rule field, enter the rule definition for the Issue Groups rule.
-
Issue Groups rule template:
c:[Type == "<Groups Claim Name>", Value =~ "^<Group Name Prefix>-.+"] ⇒ issue(claim = c); -
Issue Groups rule example:
c:[Type == "groups", Value =~ "^aic-.+"] ⇒ issue(claim = c);-
"groups" is the name of the resulting claim that you enter into the Groups Claim Name field on the Identity Provider Details page in the Advanced Identity Cloud.
-
"aic" is the prefix you chose for the group names.
-
-
-
Click Finish.
-
Set up an OIDC-compliant IdP as a federation IdP
To use an OIDC-compliant IdP as a federation IdP for a PingOne Advanced Identity Cloud tenant environment, you need to create a new OIDC client.
Step 1: Configure OIDC-compliant IdP as a federation IdP
-
Read your IdP vendor’s documentation on configuring an OIDC client.
-
Configure an OIDC client profile:
-
Choose a client ID or note the automatically generated client ID. Some OIDC IdPs let you choose the client ID while others autogenerate it for you.
In Advanced Identity Cloud, use this in an application’s Application ID field. -
Choose a client secret or note the automatically generated client secret. Some OIDC IdPs let you choose the client secret while others autogenerate it for you.
In Advanced Identity Cloud, enter this value in an application’s Application Secret field (or set in an ESV mapped to that field). -
Configure the allowed scopes. Recommended scopes:
openid,profile, andemail. -
Configure the client authentication method. Supported authentication methods:
client_secret_post,client_secret_basic, ornone.
-
-
Obtain the well-known URL from the OIDC-compliant IdP. You will enter this URL when you enable the IdP in Advanced Identity Cloud.
In Advanced Identity Cloud, enter this value in an application’s Well-known Endpoint field (or set in an ESV mapped to that field).
Step 2: Use group membership to enable federation in an OIDC-compliant IdP
Groups let you add and remove sets of administrators based on their group membership in your IdP. You can also specify the level of administrator access (super administrator[1] or tenant administrator) for groups of users.
-
Read your IdP vendor’s documentation on configuring groups in your OIDC client.
-
Obtain the name of the
groupsclaim from the OIDC-compliant IdP.In Advanced Identity Cloud, enter this value in an application’s Group Claim Name field (or set in an ESV mapped to that field). -
Set up super administrators[1] groups:
-
Set up one or more groups for users that need to be super administrators[1] when they access the tenant using your IdP.
-
Note the group ID (or group IDs).
In Advanced Identity Cloud, enter the group ID (or group IDs) in an application’s Group Identifiers field to the left of Super Admins(or set in an ESV mapped to that field).
-
-
(Optional) Set up tenant administrators groups:
-
Set up one or more groups for users that need to be tenant administrators when they access the tenant using your IdP.
-
Note the group ID (or group IDs).
In Advanced Identity Cloud, enter the group ID (or group IDs) in an application’s Group Identifiers field to the left of Tenant Admins(or set in an ESV mapped to that field).
-