Token Vault
Token Vault
Token Vault provides an additional layer of security for storing and using OAuth 2.0 and OpenID Connect 1.0 tokens in your JavaScript single-page applications (SPAs).
|
Intended audience
Token Vault is complex to set up. It is designed for situations that demand the highest level of client-side security for OAuth 2.0 token management. Token Vault might be suitable in these scenarios:
Due to the complexity of deployment, we recommend considering alternative solutions if your use case does not absolutely require the high level of client-side security that the Token Vault offers. Alternative solutions include:
|
Implemented as a plugin for the Ping SDK for JavaScript, Token Vault provides a feature called origin isolation.
Web applications can only access data that gets stored within the matching origin - the unique combination of protocol (usually HTTPS), hostname, and port number.
By storing OAuth 2.0 and OpenID Connect 1.0 tokens under a different origin than your main application, you are isolating these tokens from malicious code.
Your main app uses the Ping SDK for JavaScript as usual to request tokens and access protected resources, however the Token Vault intercepts these requests and manages related tokens in the isolated origin.
As your main app does not get access to the contents of the isolated tokens, they are protected from being exposed or reused in attacks such as cross-site scripting.
Token Vault components
Token Vault consists of two main components:
- Token Vault Proxy
-
The Token Vault Proxy is responsible for:
-
Receiving and storing tokens in responses from your authorization server
-
Redacting responses from your authorization server that contain token values, before passing the redacted response to your application
-
Attaching stored tokens to requests that match the configured list of endpoints that require authorization
The Token Vault Proxy is embedded into your main application by using an inline frame, or iframe. An embedded iframe has a parent-child relationship with the main app, and the two can communicate with one another as long as they share the same parent domain, such as
example.com.To enable isolation, however, the origins must be different. For example, if your main app is served from
https://sdkapp.example.com, the Token Vault Proxy could be served fromhttps://proxy.example.com. -
- Token Vault Interceptor
-
The Token Vault Interceptor is implemented as a service worker on your main app and intercepts requests to URLs that match a configured list.
These URLs are your protected resources and therefore require authorization to access. The Token Vault Interceptor captures these requests and passes them to the Token Vault Proxy iframe to add the relevant tokens.
The Token Vault Interceptor is also responsible for capturing OAuth 2.0 calls from the SDK to the authorization server and routing them through the Token Vault Proxy. The Token Vault Proxy forwards these requests to the authorization server and stores the returned tokens inside its own origin away from your main app.
Token Vault flow
The following diagram gives a simplified high-level overview of how the Token Vault isolates tokens away from your main application:

-
When your app uses the Ping SDK to request tokens from your authorization server it uses the Authorization Code Flow with PKCE. The last step in this flow is a call to the
/access_tokenendpoint. -
The Token Vault Interceptor captures this call to the
/access_tokenendpoint. -
The Token Vault Interceptor forwards the call to the Token Vault Proxy to handle instead of going directly to your authorization server.
The Token Vault Proxy completes the authorization code flow and captures the tokens from the response. It stores the tokens securely in its origin, which is different from your main app but shares the parent domain. The Token Vault Proxy can attach these stored tokens to any future calls routed through it that require authorization.
-
The Token Vault Proxy then returns a redacted version of the response body. This ensures the main app never receives or stores the tokens.
Example of a redacted response body{ "accessToken": "REDACTED", "idToken": "eyJ0eXAiOiJKV1QiLCJra...7r8soMCk8A7QdQpg", "refreshToken": "REDACTED", "tokenExpiry": 1690712227226, }json -
The SDK makes the redacted response available to your application.
-
Your app can now make requests for protected resources that require authorization.
-
If the protected resource matches a value on the configured list then the Token Vault Interceptor routes the request through the Token Vault Proxy.
-
The Token Vault Proxy attaches the tokens it has stored in its own origin to the request and sends the request to the resource server.
-
If the request has valid authorization bearer tokens attached, the resource server returns the protected content.
-
The protected resource is returned to the main app.
If the tokens were invalid or expired in the previous step, the main app receives a 400 error instead. In this case your app must restart the authorization code flow.
Getting started
Get started with the Token Vault:
Configure the authorization server
Learn how to set up your PingOne Advanced Identity Cloud or PingAM instance with an OAuth 2.0 client and suitable CORS configuration.
Prepare for Token Vault
Discover how to integrate the Token Vault into your app and make some necessary changes to your environment.
Implement Token Vault code
Find out about the three main components to configure when implementing the Token Vault.
Access a protected resource via Token Vault
Implement origin isolation by accessing a resource through the Token Vault.
Configure your Authorization Server
You need to set up your PingOne Advanced Identity Cloud or PingAM instance with an OAuth 2.0 client and suitable CORS configuration.
Configure an OAuth 2.0 client
Follow the instructions below to create the public OAuth 2.0 client the Token Vault requires:
In addition to the instructions above, perform the following steps:
-
Add the fully-qualified URL where you will host the Token Vault Proxy.
For example,
https://proxy.example.com.Add this value to either the Redirection URIs (self-managed PingAM) or the Sign-in URLs (PingOne Advanced Identity Cloud) property.
-
Enable refresh tokens in your authorization server:
-
Add
refresh_tokento either the Advanced > Response Types (self-managed PingAM) or the Access > Response Types (PingOne Advanced Identity Cloud) property. -
Ensure Refresh Token is added to either the Advanced > Grant Types (self-managed PingAM) or the Sign On > Grant Types (PingOne Advanced Identity Cloud) property.
Generally, we do not recommend the use of OAuth 2.0 refresh tokens with typical web-based applications, but using the Token Vault mitigates a number of the security concerns with using refresh tokens, so they can be enabled to allow refreshing the access tokens without user intervention.
-
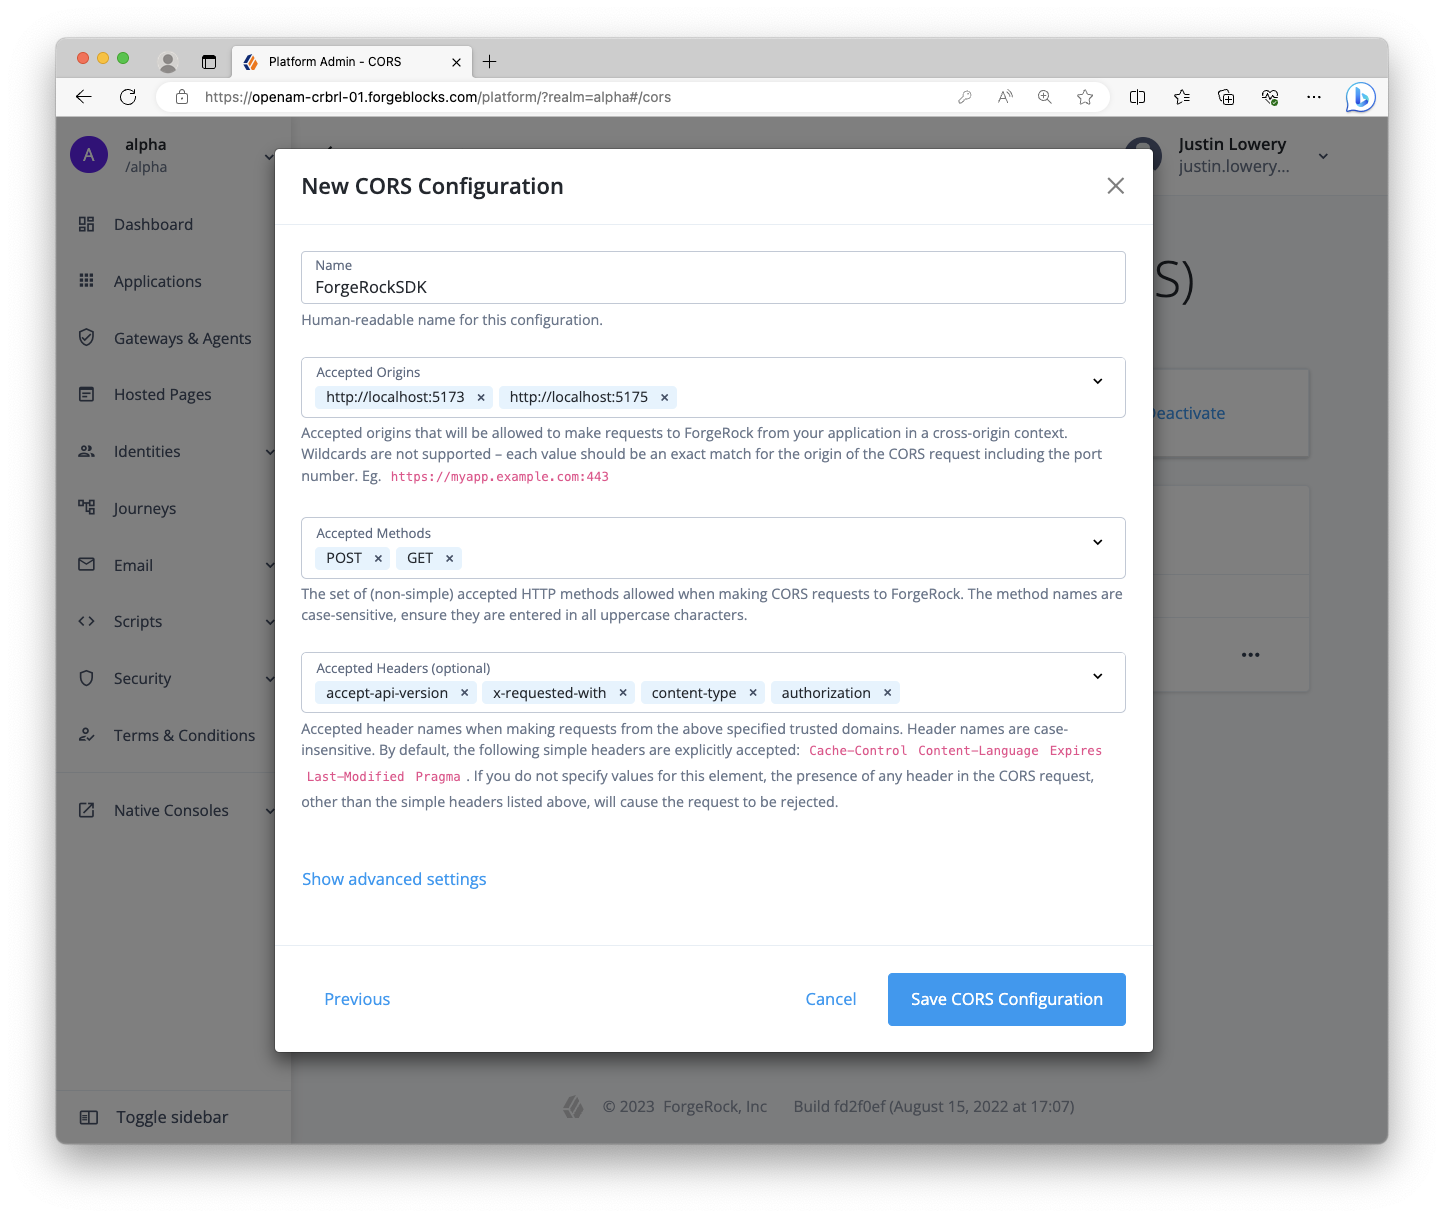
Configure CORS
Follow the instructions below to configure CORS to allow the Token Vault to connect to your server:
In addition to the instructions above, perform the following steps:
-
Add the origins where you will host your main application and the Token Vault Proxy.
For example,
https://sdkapp.example.comandhttps://proxy.example.com, or when testing locallyhttp://localhost:5173andhttp://localhost:5174.Add these values to the Accepted origins property.
Prepare for Token Vault
To integrate the Token Vault into your app you need to make some changes to your environment.
Configure your module bundler
You need to implement the Token Vault Interceptor component as a service worker in your main application.
To maximize cross-browser compatibility, we recommend that the Token Vault Interceptor is unified and down-levelled into a single output file.
To achieve this, you should create a separate bundler configuration dedicated to the Token Vault Interceptor. This configuration should produce a single file without using ES Module syntax. For example, Webpack version 5 and earlier can do this by default.
In addition, the Token Vault Proxy needs to have its own module bundler configuration as it must be separate from your main application.
Configure your web servers
You must serve the Token Vault Proxy from a different origin than your main application, but using the same parent domain.
To achieve this, we recommend that the Token Vault Proxy uses a dedicated web server. Your main application can then embed the Token Vault Proxy within an iframe to implement origin isolation for your tokens.
|
If you are testing locally, you can use different port numbers to ensure the origins differ. |
In addition, you must configure the web server for the main application to avoid rewriting incoming URLs. The redirections back to your app from the authorization server contain query parameters that must be preserved and read by the SDK.
URL rewriting can cause timeout issues related to /authorize requests. For example, even though it succeeds and redirects back to your app with the code and state query parameters, the request to /access_token is not made. This can be caused by your web server rewriting the URL after receipt to only / and stripping the query parameters. This can cause the OAuth 2.0 flow to fail to resolve correctly leading to failures.
Structure your codebase
To help you integrate the Token Vault into your apps successfully, we recommend a codebase structure such as the following, which uses the Vite development environment:
root
├── .env (1)
├── package.json (2)
├── app/ (3)
| ├── public/
| | └── <static files>
| ├── src/
| | ├── main.js
| | └── <app files>
| ├── interceptor/ (4)
| | └── interceptor.js
| ├── index.html
| ├── package.json
| ├── vite.config.js (5)
| └── vite.interceptor.config.js (6)
└── proxy/ (7)
├── src/
| └── proxy.js
├── index.html
├── package.json
└── vite.config.js (8)| 1 | You could store shared configuration properties in an .env file |
| 2 | You could use npm workspaces |
| 3 | Main app folder |
| 4 | Separate Token Vault Interceptor code from your main app code |
| 5 | Vite configuration file to build your main app |
| 6 | Dedicated Vite configuration file to build the Token Vault Interceptor |
| 7 | Separate folder for the Token Vault Proxy |
| 8 | Separate Vite configuration to build the Token Vault Proxy |
The structure of some of these files might resemble the following:
-
index.html
-
main.js
-
interceptor.js
-
proxy.js
<!DOCTYPE html>
<html lang="en">
<head></head>
<body>
<!-- Root div for mounting app -->
<div id="root"></div>
<!-- Root div for mounting Token Vault Proxy (iframe) -->
<div id="token-vault"></div>
<!-- Import main app -->
<script type="module" src="/src/main.js"></script>
</body>
</html>import { Config, TokenManager } from '@forgerock/javascript-sdk';
import { client } from '@forgerock/token-vault';
const register = client({ /* global config */ });
register.interceptor();
register.proxy(document.getElementById('token-vault'));
const tokenVaultStore = register.store();
Config.set({ /* {sdk_name} config */});import { interceptor } from '@forgerock/token-vault';
interceptor({ /* config */ });import { proxy } from '@forgerock/token-vault';
proxy({ /* config */ });Next steps
When you have set up your project, you can proceed to Implement Token Vault code.
Implement Token Vault code
There are three main components to configure when implementing the Token Vault. It is important the configuration is consistent between these components. To achieve this, you could add your shared configuration to a .env file in the root of your project.
In the following examples, the configuration uses literal values to help understand the values required.
Implement main app code
This configuration should be within your app’s index or main file.
Initialize the Token Vault client:
app/src/main.jsimport { Config, TokenManager } from '@forgerock/javascript-sdk';
import { client } from '@forgerock/token-vault';
/**
* This factory function takes in a config object and returns
* the necessary methods to setup the iframe ("proxy"), the
* service worker ("interceptor"), and the token store replacement
* API ("store").
*/
const register = client({
app: {
origin: 'https://app.example.com',
},
interceptor: {
file: '/interceptor.js',
},
proxy: {
origin: 'https://proxy.example.com',
},
});
/**
* Sets up the service worker for intercepting fetch requests
*/
register.interceptor({
/* optional interceptor worker config */
});
/**
* Injects the iframe into the DOM to setup the proxy
* Make sure to pass in the required, real DOM element as the zeroeth argument
*/
register.proxy(document.getElementById('token-vault'), {
/* optional proxy config */
});
/**
* Creates the store replacement for the SDK
*/
const tokenVaultStore = register.store({
/* optional store config */
});In the same file, configure the SDK:
app/src/main.jsConfig.set({
clientId: 'ForgeRockSDKClient',
redirectUri: location.href,
scope: 'openid profile email address',
serverConfig: {
baseUrl: 'https://openam-forgerock-sdks.forgeblocks.com/am',
timeout: 5000,
},
realmPath: 'alpha',
// Replace the default token store with Token Vault's store
tokenStore: tokenVaultStore,
});Implement Token Vault Interceptor code
This configuration should be within the Service Worker’s entry file, which is separate from your main application code.
This is also the file to which your client() method config object property of interceptor.file method references.
Reference this file in your main application when calling the client() method, as the interceptor.file property.
Example configuration is as follows:
app/interceptor/interceptor.jsimport { interceptor } from '@forgerock/token-vault';
interceptor({
interceptor: {
// Use either fully qualified URLs
// Or end with a single asterisk as a wildcard
urls: [/* Your protected endpoint URLs */],
},
forgerock: {
// MUST match what you configured in your main app
serverConfig: {
baseUrl: 'https://openam-forgerock-sdks.forgeblocks.com/am',
timeout: 5000,
},
realmPath: 'alpha',
},
});|
The For example, This is not a full glob-pattern feature - just a single trailing wildcard. |
Implement Token Vault Proxy code
This configuration should be within the Token Vault Proxy entry file.
Example configuration is as follows:
proxy/src/proxy.jsimport { proxy } from '@forgerock/token-vault';
proxy({
app: {
// This MUST match the origin where your main app runs
origin: 'https://app.example.com',
},
forgerock: {
// MUST match the config in your main app and interceptor
clientId: 'ForgeRockSDKClient',
redirectUri: location.href,
scope: 'openid profile email address',
serverConfig: {
baseUrl: 'https://openam-forgerock-sdks.forgeblocks.com/am',
timeout: 5000,
},
realmPath: 'alpha',
},
});Build the code
The Token Vault requires more complex building and bundling configuration than a regular JavaScript app that uses the SDK because it requires three different bundles:
-
The main application
-
The Token Vault Interceptor (Service Worker)
-
The Token Vault Proxy (iframe)
You can often use a default configuration for the main application and the Token Vault Proxy when using any of the popular bundlers, such as Webpack or Vite
The Token Vault Interceptor requires a specific build configuration to ensure maximum compatibility with various browsers.
Bundling the Interceptor
To provide the best cross-browser support, the Token Vault Interceptor requires a dedicated bundle configuration so that it results in a single-file output, down-leveled to at least ES2020 without any ES Module syntax.
We recommend using a separate vite.interceptor.config.js or webpack.interceptor.config.js for the Token Vault Interceptor, as well as a build separate command that consumes this separate configuration file.
| If you are using Vite, you might achieve the best results with bundling into an Immediately Invoked Function Expression (IIFE). |
If you are using Webpack, its defaults are good for bundling the Token Vault Interceptor.
Access resources using Token Vault
After you complete the set up of the Token Vault successfully, you can use the Ping SDK for JavaScript or any HTTP or fetch library to request protected resources.
With the exception of refreshing tokens, and configuration of the token storage mechanism, using the Ping SDK for JavaScript with the Token Vault is almost entirely transparent.
The Token Vault manages token lifecycle automatically. If you enable refresh tokens in your OAuth 2.0 client, the Token Vault automatically refreshes access tokens.
Request tokens
Use the TokenManager class from the SDK as usual to request tokens and have them safely stored within the Token Vault Proxy:
import { TokenManager } from '@forgerock/javascript-sdk';
const tokens = TokenManager.getTokens();
console.log(tokens); // Refresh & Access Token values will be redactedYou can verify the tokens are stored under the origin of the Token Vault Proxy, not the origin of your main app, by using the developer tools in your browser.
The response your app and the SDK receive contains redacted values. This is expected behavior and increases security.
For example:
{
  "accessToken": "REDACTED",
  "idToken": "eyJ0eXAiOiJKV1QiLCJra...7r8soMCk8A7QdQpg",
  "refreshToken": "REDACTED",
  "tokenExpiry": 1690712227226,
}Make requests
Use the native fetch API or any HTTP request library that emits a fetch event.
For example, you could use the HttpClient module provided in the Ping SDK for JavaScript.
The Token Vault Interceptor routes any of these requests that matches its configuration through the Token Vault Proxy so that the relevant tokens get attached before reaching your resource server.
Revoke tokens
To remove tokens and log the user out, use the FRUser class as usual:
import { FRUser } from '@forgerock/javascript-sdk';

FRUser.logout();This destroys the user’s session, revokes tokens on the server, and removes tokens from the Token Vault Proxy.
Use convenience methods
The tokenVaultStore object provides some convenience functions for use in your apps.
These methods are useful as your main app does not have any direct access to the tokens in the Token Vault.
The has method
Use the has method to determine whether the Token Vault has relevant tokens stored.
The method returns an object with a hasTokens property and a boolean value. It does not return the tokens.
const tokenVaultStore = register.store();

const { hasTokens } = tokenVaultStore.has();

console.log(hasTokens); // logs `true` or `false`|
This method reflects the presence of tokens but does not validate those tokens. They may have expired or were revoked by the server. To validate the tokens use the |
The refresh method
Use the refresh method to manually request that the Token Vault refreshes its tokens.
The Token Vault attempts to refresh tokens automatically when required, but you can use this refresh method to force a refresh of the tokens, if needed.
The method returns an object with a refreshTokens property with a boolean value.
const tokenVaultStore = register.store();

const { refreshTokens } = tokenVaultStore.refresh();

console.log(refreshTokens); // logs `true` or `false`Build advanced token security in a JavaScript single-page app
This tutorial covers the advanced development required for implementing the Token Vault with the Ping SDK for JavaScript.
First, why advanced token security?
In JavaScript Single Page Applications (or SPA), OAuth/OIDC Tokens (referred to from here on as tokens) are typically stored by using the browser’s Web Storage API: localStorage or sessionStorage.
The security mechanism the browser uses to ensure data doesn’t leak out to unintended actors is through the Same-Origin Policy. In short, only JavaScript running on the exact same origin, that is scheme, domain, and port, can access the stored data.
For example, if an SPA running on https://auth.example.com/login stores data, JavaScript running on the following will be able to access it:
-
https://auth.example.com/users: origins match, regardless of path -
https://auth.example.com?status=abc: origins match, regardless of query parameters
The following will NOT be able to access the data:
-
http://auth.example.com: uses a different scheme,httpvs.https -
https://auth.examples.com: uses a different domain; notice the plurality -
https://example.com: does not include the sub-domain -
https://auth.example.com:8000: uses a different port
For the majority of web applications, this security model can be sufficient.
In most JavaScript applications, the code running on the app’s origin can usually be trusted; hence, the browser’s Web Storage API is sufficient as long as good security practices are in place.
However, in applications that are high-value targets, such as apps required to run untrusted, third-party code, or apps that have elevated scrutiny due to regulatory or compliance needs, the Same-Origin Policy may not be enough to protect the stored tokens.
Examples of situations where the Same-Origin Policy may not be sufficient include government agencies, financial organizations, or those that store sensitive data, such as medical records. The web applications of these entities may have enough inherent risk to offset the complexity of a more advanced token security implementation.
There are two solutions that can increase token security:
The Backend for Frontend (BFF) pattern
One solution that is quite common is to avoid storing high-value secrets within the browser in the first place. This can be done with a dedicated Backend for Frontend, or BFF. Yeah, it’s a silly initialism.
This is increasingly becoming a common pattern for apps made with common meta-frameworks, such as Next, Nuxt, SvelteKit, and so on. The server component of these frameworks can store the tokens on the front end’s behalf using in-memory stores or just writing the token into an HTTPOnly cookie, and requests that require authorization can be proxied through the accompanying server where the tokens are accessible. Therefore, no token needs to be stored on the front end, eliminating the risk.
You can read more about the arguments in favor of, and against, this design in the Hacker News discussion on the blog post titled "SPAs are Dead".
If, on the other hand, you are not in the position to develop, deploy and maintain a full backend, you have an alternative choice for securing your tokens: Origin Isolation.
Origin Isolation
Origin Isolation is a concept that introduces an alternative to BFF, and provides a more advanced mechanism for token security.
The concept is to store tokens in a different and dedicated origin related to the main application. To do this, two web servers are needed to respond to two different origins: one is your main app, and the second is an iframed app dedicated to managing tokens.
For more information, refer to the patent: Transparently using origin isolation to protect access tokens.
This particular design means that if your main application gets compromised, the malicious code running in your main app’s origin still has no access to the tokens stored in the alternative origin.
You’ll still need a web server of some kind to serve the files necessary to handle requests to this alternative origin, but being that only static files are served, the options are much simpler and lightweight.
This solution, which is implemented by using the Token Vault is the focus of this tutorial.
What is Token Vault?
Token Vault is a codified implementation of Origin Isolation. For more information, refer to Token Vault in the documentation.
It is a plugin available to customers that use the Ping SDK for JavaScript to enable OAuth 2.0 or OIDC token request and management in their apps. These apps can remain largely unmodified to take advantage of Token Vault.
|
Even though your main app doesn’t need much modification, additional build and server requirements are necessary, which introduces complexity and added maintenance to your system. We recommend that you only integrate Token Vault into an app if heightened security measures are a requirement of your system. |
What you will learn
We will use an existing React JS, to-do sample application similar to what we built in another guide as a starting point for implementing Token Vault. This represents a realistic web application that has an existing implementation of the Ping SDK for JavaScript. Unlike the previous tutorial, we’ll start with a fully working app and focus on adding Token Vault.
This tutorial focuses on OAuth 2.0 and OIDC authorization and token management. Authentication-related concerns, such as login and registration journeys are handled outside the app. We call this approach OIDC login.
|
This is not a guide on how to build a React app
How you architect or construct React apps is outside the scope of this guide. It’s also worth noting that there are many React-based frameworks and generators for building web applications, such as Next.js, Remix, and Gatsby. What is best is highly contextual to the product and user requirements for any given project. |
To demonstrate Token Vault integration, we will be using a simplified, non-production-ready, to-do app. This to-do app represents a Single Page Application (SPA) with nothing more than React Router added to the stack for routing and redirection.
Using this tutorial
This is a hands-on tutorial. We are providing the web app and resource server for you. You can find the repo on GitHub to follow along.
All you’ll need is your own PingOne Advanced Identity Cloud or PingAM. If you don’t have access to either, reach out to a representative today, and we’ll be happy to get you started.
There are two ways to use this guide:
-
Follow along by building portions of the app yourself: continue by ensuring you can meet the requirements below.
-
Just curious about the code implementation details: skip to Implementing the Token Vault.
Requirements
Knowledge requirements
-
JavaScript and the npm ecosystem of modules
-
The command line interface, such as Shell or Bash
-
Core Git commands, including
cloneandcheckout -
React and basic React conventions
-
Context API: the concept for managing global state
-
Build systems/bundlers and development servers: We use basic Vite configuration and commands
Authorization server setup
|
If you’ve already completed the previous tutorial for React JS or Angular, then you may already have most of this setup within your server. We’ll call out the newly introduced data points to ensure you don’t miss the configuration. |
Step 1. Configure CORS (Cross-Origin Resource Sharing)
Due to the fact that pieces of our system will be running on different origins (scheme, domain, and port), we need to configure CORS in the server to allow our web app to make requests. Use the following values:
-
Allowed Origins:
http://localhost:5173http://localhost:5175 -
Allowed Methods:
GETPOST -
Allowed headers:
accept-api-versionauthorizationcontent-typex-requested-with -
Allow credentials: enable
Rather than domain aliases and self-signed certificates, we will use localhost as that is a trusted domain by default. The main application will be on the 5173 port, and the proxy will be on the 5175 port. Because the proxy also make calls to the PingAM server, its origin must also be allowed.
|
Service Workers are not compatible with self-signed certificates, regardless of tool or creation method. Certificates from a system-trusted, valid Certificate Authority (CA) are required or direct use of text |
For more information about CORS configuration, refer to the following:
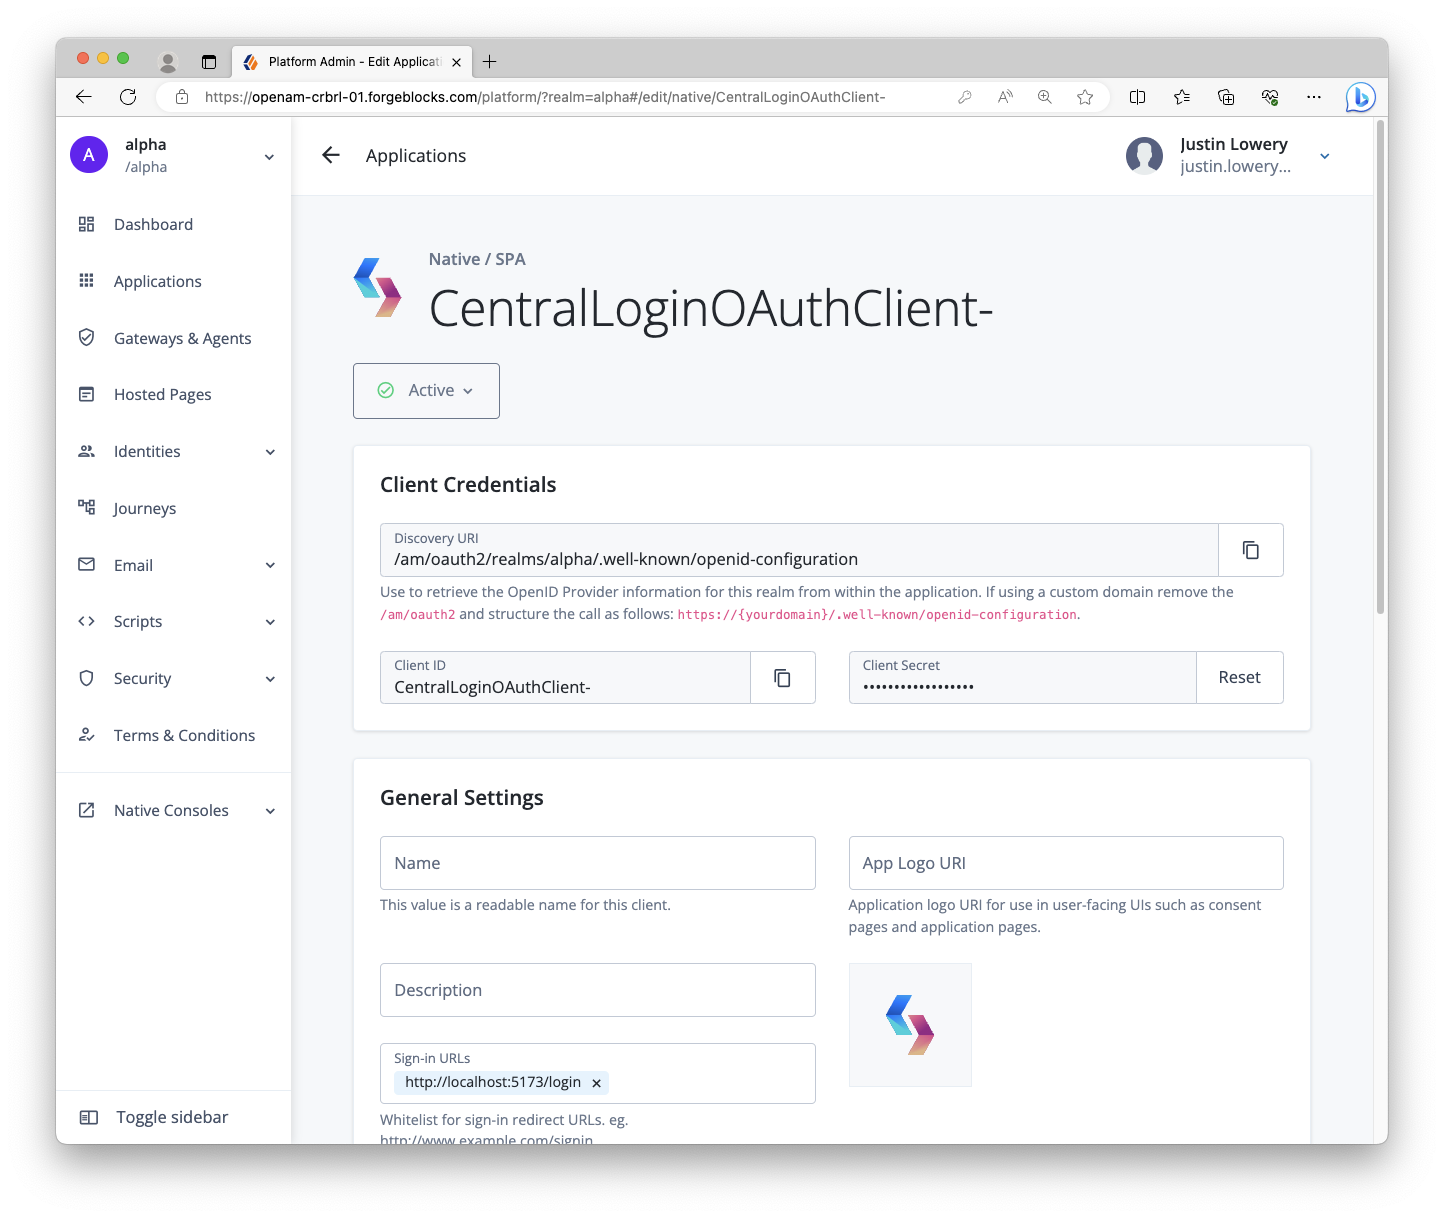
Step 2. Create two OAuth 2.0 clients
Within the server, create two OAuth 2.0 clients: one for the React web app and one for the Node.js resource server.
Why two? It’s conventional to have one OAuth 2.0 client per app in the system. For this case, a public OAuth 2.0 client for the React app provides our app with OAuth 2.0 or OIDC tokens. The Node.js server validates the user’s Access Token shared via the React app using its own confidential OAuth 2.0 client.
Public OAuth 2.0 client settings
-
Client name/ID:
CentralLoginOAuthClient -
Client type:
Public -
Secret:
<leave empty> -
Scopes:
openidprofileemail -
Grant types:
Authorization CodeRefresh Token -
Implicit consent: enabled
-
Redirection URLs/Sign-in URLs:
http://localhost:5173/login -
Response types:
codeid_tokenrefresh_token -
Token authentication endpoint method:
none
|
The client name and redirection/sign-in URL values have changed from the previous tutorial, as well as the Refresh Token grant and response type values. |
Confidential OAuth 2.0 client settings
-
Client name/ID:
RestOAuthClient -
Client type:
Confidential -
Secret:
<alphanumeric string>(treat it like a password) -
Default scope:
am-introspect-all-tokens -
Grant types:
Authorization Code -
Token authentication endpoint method:
client_secret_basic
Select the environment you are using for more information on configuring OAuth 2.0 clients:
Local project setup
Step 1. Installing the project
First, clone the forgerock-sample-web-react-ts repo to your local computer, cd (change directory) into the project folder, check out the branch for this guide, and install the needed dependencies:
git clone https://github.com/cerebrl/forgerock-sample-web-react-ts
cd forgerock-sample-web-react-ts
git checkout blog/token-vault-tutorial/start
npm install
There’s also a branch that represents the completion of this guide. If you get stuck, you can check out the blog/token-vault-tutorial/complete branch from GitHub.
|
Step 2. Create an .env file
First, open the .env.example file in the root directory. Copy this file and rename it .env. Add your relevant values to this new file as it provides all the important configuration settings to your applications.
Here’s a hypothetical example .env file:
.env file# .env
# System settings
VITE_AM_URL=https://openam-forgerock-sdks.forgeblocks.com/am/ # Needs to be your {fr_server}
VITE_APP_URL=http://localhost:5173
VITE_API_URL=http://localhost:5174
VITE_PROXY_URL=http://localhost:5175 # This will be our Token Vault Proxy URL
# {am_name} settings
VITE_AM_JOURNEY_LOGIN=Login # Not used with Centralized Login
VITE_AM_JOURNEY_REGISTER=Registration # Not used with Centralized Login
VITE_AM_TIMEOUT=50000
VITE_AM_REALM_PATH=alpha
VITE_AM_WEB_OAUTH_CLIENT=CentralLoginOAuthClient
VITE_AM_WEB_OAUTH_SCOPE=openid email profile
# {am_name} settings for your API (todos) server
# (does not need VITE prefix)
AM_REST_OAUTH_CLIENT=RestOAuthClient
AM_REST_OAUTH_SECRET=6MWE8hs46k68g9s7fHOJd2LEfv # Don't use; this is just an exampleWe are using Vite for our client apps' build system and development server, so by using the VITE_ prefix, Vite automatically includes these environment variables in our source code. Here are descriptions for some of the values:
-
VITE_AM_URL: This should be your server and the URL almost always ends with/am/ -
VITE_APP_URL,VITE_API_URL, andVITE_PROXY_URL: These will be the URLs you use for your locally running apps -
VITE_AM_REALM_PATH: The realm of your server. Likely,alphaif using PingOne Advanced Identity Cloud orrootif using a self-managed PingAM server -
VITE_REST_OAUTH_CLIENTandVITE_REST_OAUTH_SECRET: This is the OAuth 2.0 client you configure in your server to support the REST API server
Build and run the project
Now that everything is set up, build and run the to-do app project. Open two terminal windows and use the following commands in the root directory of the SDK repo:
# Start the React app
npm run dev:reactThis dev:react command uses Vite restarts on any change to a dependent file. This also applies to the dev:proxy we will build shortly.
# Start the Rest API
npm run dev:apiThis dev:api command runs a basic Node server with no "watchers." This should not be relevant as you won’t have to modify any of its code. If a change is made within the todo-api-server workspace or an environment variable it relies on, a restart would be required.
| We use npm workspaces to manage our multiple sample apps but understanding how it works is not relevant to this tutorial. |
Open the app in browser
In a different browser than the one you are using to administer the server, visit the following URL: http://localhost:5173. For example, you could use Edge for the app development and Chrome for the server administration.
A home page should be rendered explaining the purpose of the project. It should look like the example below, but it might be a dark variant if you have the dark theme/mode set in your OS:
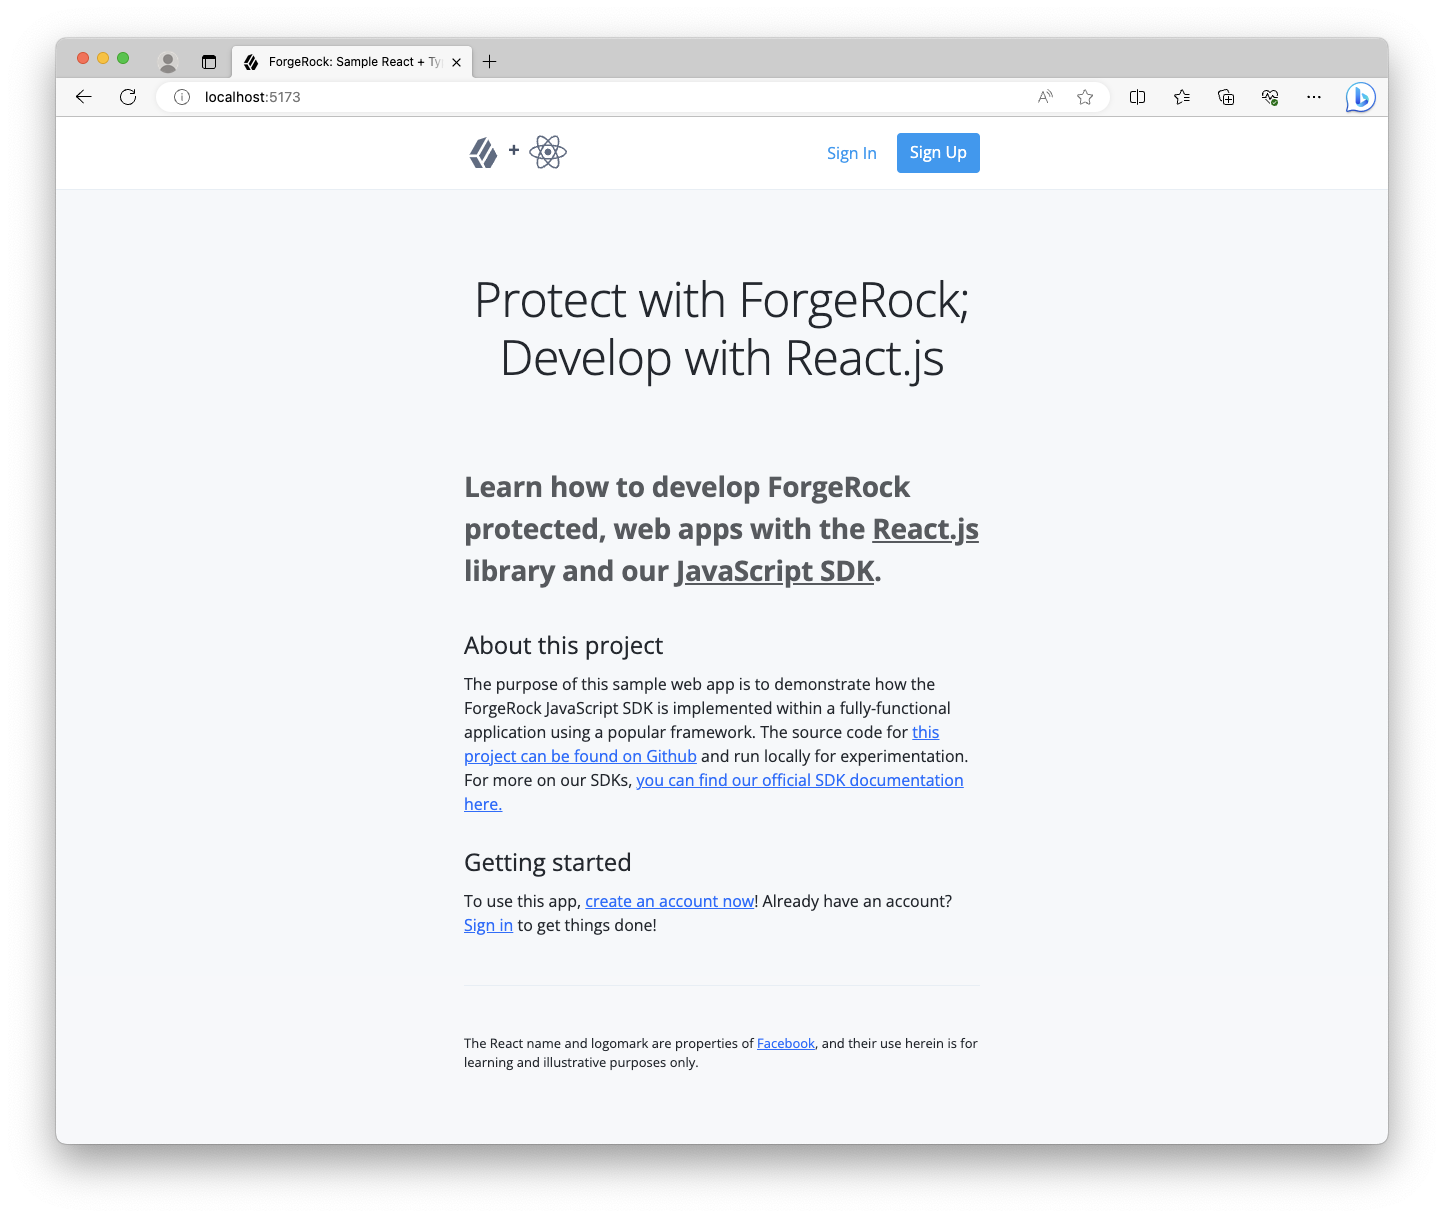
If you encounter errors, here are a few tips:
-
Visit
http://localhost:5174/healthcheckin the same browser you use for the React app; ensure it responds with "OK" -
Check the terminal that has the
dev:reactcommand running for error output -
Ensure you are not logged into the server within the same browser as the sample app; log out if you are and use a different browser
Click the Sign in link in the header or in the Getting started section to sign in to the app with your test user. After successfully authenticating, you should see the app respond to the existence of the valid tokens.
Open your browser’s developer tools to inspect its localStorage. You should see a single origin with an object containing tokens:
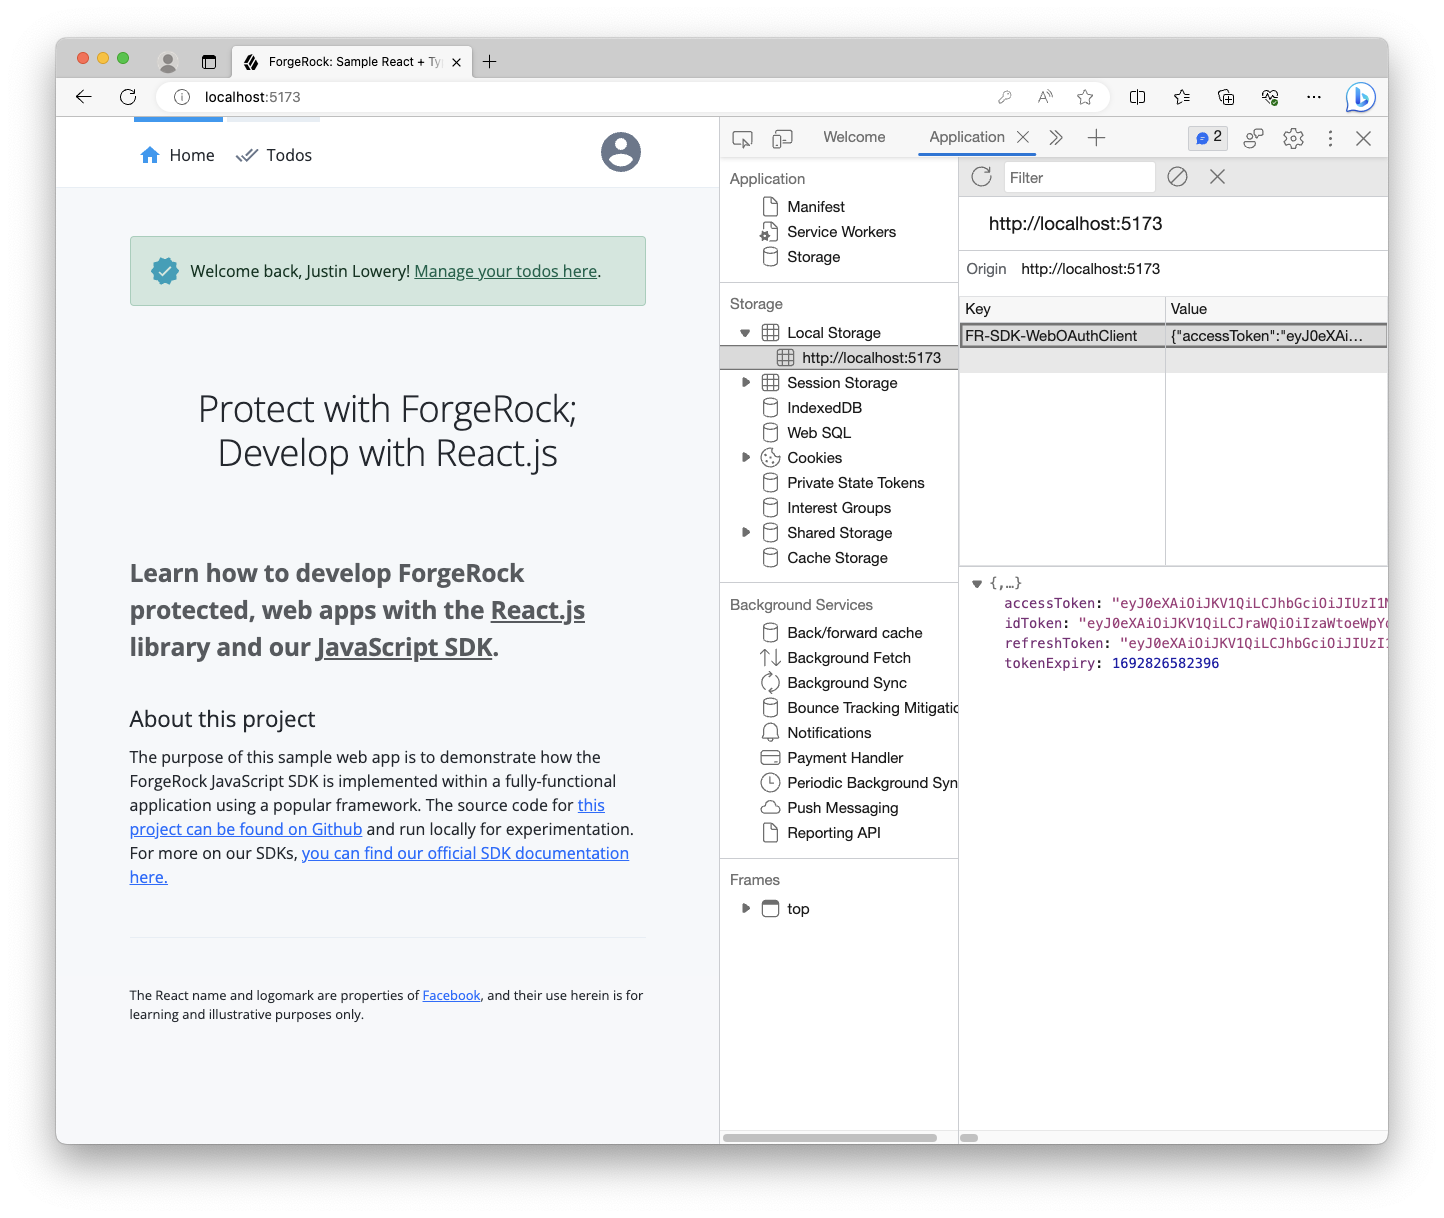
Install Token Vault module
Install the Token Vault npm module within the root of the app:
npm install @forgerock/token-vaultThis npm module is used throughout multiple applications in our project, so installing it at the root rather than at the app or workspace level is a benefit.
Implement the Token Vault Proxy
Step 1. Scaffold the Proxy
Next, we’ll need to create a third application, the Token Vault Proxy.
Follow this structure when creating the new directory and its files:
  root
  ├── todo-api-server/
  ├── todo-react-app/
+ └─┬ token-vault-proxy/
+   ├─┬ src/
+   │ └── index.ts
+   ├── index.html
+   ├── package.json
+ └── vite.config.tsStep 2. Add the npm workspace
To ease some of the dependency management and script running, add this new "workspace" to our root package.json, and then add a new script to our scripts:
package.json file@@ package.json @@
@@ collapsed @@
"scripts": {
"clean": "git clean -fdX -e \"!.env\"",
"build:api": "npm run build --workspace todo-api-server",
"build:react": "npm run build --workspace todo-react-app",
+ "build:proxy": "npm run build --workspace token-vault-proxy",
"dev:api": "npm run dev --workspace todo-api-server",
"dev:react": "npm run dev --workspace todo-react-app",
+ "dev:proxy": "npm run dev --workspace token-vault-proxy",
"dev:server": "npm run dev --workspace todo-api-server",
"lint": "eslint --ext ts,tsx --report-unused-disable-directives --max-warnings 0",
"serve:api": "npm run serve --workspace todo-api-server",
- "serve:react": "npm run serve --workspace todo-react-app"
+ "serve:react": "npm run serve --workspace todo-react-app",
+ "serve:proxy": "npm run serve --workspace token-vault-proxy"
},
@@ collapsed @@
"workspaces": [
"todo-api-server"
- "todo-react-app"
+ "todo-react-app",
+ "token-vault-proxy",
]Step 3. Setup the supporting files
Create a new directory at the root named token-vault-proxy, then create a package.json file:
package.json file@@ token-vault-proxy/package.json @@
+ {
+ "name": "token-vault-proxy",
+ "private": true,
+ "version": "1.0.0",
+ "description": "The proxy for Token Vault",
+ "main": "index.js",
+ "scripts": {
+ "dev": "vite",
+ "build": "vite build",
+ "serve": "vite preview --port 5175"
+ },
+ "dependencies": {},
+ "devDependencies": {},
+ "license": "MIT"
+ }Now, create the Vite config file:
@@ token-vault-proxy/vite.config.ts @@

+ import { defineConfig, loadEnv } from 'vite'; (1)
+
+ // https://vitejs.dev/config/
+ export default defineConfig(({ mode }) => { (2)
+   const env = loadEnv(mode, `${process.cwd()}/../`); (3)
+   const port = Number(new URL(env.VITE_APP_URL).port); (4)
+
+   return { (5)
+     envDir: '../', // Points to the `.env` created in the root dir
+     root: process.cwd(),
+     server: {
+       port,
+       strictPort: true,
+     },
+   };
+ });What does the above do? Good question! Let’s review it:
| 1 | We import helper functions from vite |
| 2 | Using defineConfig, we pass in a function, as opposed to an object, because we want to calculate values at runtime |
| 3 | The parameter mode helps inform Vite how the config is being executed, useful when you need to calculate env variables |
| 4 | Then, extract the port out of our app’s configured origin, which should be 5175 |
| 5 | Finally, use this data to construct the config object and return it |
Now, create the index.html file. This file can be overly simple as all you need is the inclusion of the JavaScript file that will be our proxy:
index.html file@@ token-vault-proxy/index.html @@
+ <!DOCTYPE html>
+ <html>
+ <p>Proxy is OK</p>
+ <script type="module" src="src/index.ts"></script>
+ </html>If you’re not familiar with how Vite works, seeing the .ts extension may look a bit odd in an HTML file but don’t worry. Vite uses this to find entry files, and it rewrites the actual .js reference for us.
Step 4. Create and configure the Proxy
Let’s create and configure the Token Vault Proxy according to our needs. First, create the src directory and the index.ts file within it.
index.ts file@@ src/index.ts @@
+ import { proxy } from '@forgerock/token-vault';
+
+ // Initialize the token vault proxy
+ proxy({
+ app: {
+ origin: new URL(import.meta.env.VITE_APP_URL).origin, (1)
+ },
+ forgerock: { (2)
+ clientId: import.meta.env.VITE_AM_WEB_OAUTH_CLIENT,
+ scope: import.meta.env.VITE_AM_WEB_OAUTH_SCOPE,
+ serverConfig: {
+ baseUrl: import.meta.env.VITE_AM_URL,
+ },
+ realmPath: import.meta.env.VITE_AM_REALM_PATH,
+ },
+ proxy: { (3)
+ urls: [`${import.meta.env.VITE_API_URL}/*`],
+ }
+ });The configuration above represents the minimum needed to create the Token Vault Proxy:
| 1 | We need to declare the app’s origin, as that’s the only source to which the Proxy will respond. |
| 2 | We have the configuration in order for the Proxy to call out to the server effectively for token lifecycle management. |
| 3 | Finally, there’s the Proxy’s urls array that acts as an allow-list to ensure only valid URLs are proxied with the appropriate tokens. |
Step 5. Build and verify the Proxy
With everything set up, build the proxy app and verify it’s being served correctly.
npm run dev:proxyOnce the script finishes its initial build and runs the server, you can now check the app and ensure it’s running. Go to http://localhost:5175 in your browser. You should see "Proxy is OK" printed on the screen, and there should be no errors in the Console or Network tab of your browser’s dev tools.
Implement the Token Vault Interceptor
Step 1. Create the Token Vault Interceptor build config
Since the Token Vault Interceptor is a Service Worker, it needs to be bundled separately from your main application code. To do this, write a new Vite config file within the todo-react-app directory/workspace named vite.interceptor.config.ts.
We do not recommend trying to use the same configuration file for both your app and Interceptor.
  root
  ├── ...
  ├─┬ todo-react-app/
  │ ├── ...
  │ ├── vite.config.ts
+ │ └── vite.interceptor.config.tsNow that you have the new Vite config for the Interceptor, import the defineConfig method and pass it the appropriate configuration.
vite.interceptor.config.ts file@@ todo-react-app/vite.interceptor.config.ts @@
+ import { defineConfig } from 'vite';
+
+ // https://vitejs.dev/config/
+ export default defineConfig({
+ build: {
+ emptyOutDir: false,
+ rollupOptions: {
+ input: 'src/interceptor/index.ts',
+ output: {
+ dir: 'public', // Treating this like a static asset is important
+ entryFileNames: 'interceptor.js',
+ format: 'iife', // Very important for better browser support
+ },
+ },
+ },
+ envDir: '../', // Points to the `.env` created in the root dir
+ });|
Rather than passing a function into This is because we don’t need any variables at runtime, like env values. |
In the above, we provide the Token Vault Interceptor source file as the input, and then explicitly tell Vite to bundle it as an IIFE (Immediately Invoked Function Expression) and save the output to this app’s public directory. This means the Token Vault Interceptor will be available as a static asset at the root of our web server.
It is important to know that bundling it as an IIFE and configuring the output to the public directory is intentional and important. Bundling as an IIFE removes any module system from the file, which is vital to supporting all major browsers within the Service Worker context. Outputting it to the public directory like a static asset is also important. It allows the scope of the Service Worker to also be available at the root.
For more information, refer to Service Worker scopes on MDN.
Step 2. Create the new Token Vault Interceptor file
Let’s create the new Token Vault Interceptor source file that is expected as the entry file to our new Vite config.
  root
  ├─┬ todo-react-app
  │ ├─┬ src/
+ │ │ ├─┬ interceptor/
+ │ │ │ └── index.ts
  │ │ └── ...
  │ ├── ...
│ └── vite.interceptor.config.tsStep 3. Import and initialize the interceptor module
Configure your Token Vault Interceptor with the following variables from your .env file.
index.ts source file@@ todo-react-app/src/interceptor/index.ts @@
+ import { interceptor } from "@forgerock/token-vault";
+
+ interceptor({
+ interceptor: {
+ urls: [`${import.meta.env.VITE_API_URL}/*`], (1)
+ },
+ forgerock: { (2)
+ serverConfig: {
+ baseUrl: import.meta.env.VITE_AM_URL,
+ timeout: import.meta.env.VITE_AM_TIMEOUT,
+ },
+ realmPath: import.meta.env.VITE_AM_REALM_PATH,
+ },
+ });The above only covers the minimal configuration needed, but it’s enough to get a basic Interceptor started.
| 1 | The urls array represents all the URLs you’d like intercepted and proxied through the Token Vault Proxy in order for the Access Token to be added to the outbound request. This should only be for requesting your "protected resources."
The wildcard ( |
| 2 | The configuration here must match the configuration in the main app. This is easily enforced by using the .env file |
Step 4. Build the Interceptor
Now that we have the dedicated Vite config and the Token Vault Interceptor entry file created, add a dedicated build command to the package.json within the todo-react-app workspace.
package.json file@@ todo-react-app/package.json @@
@@ collapsed @@
"scripts": {
- "dev": "vite",
+ "dev": "npm run build:interceptor && vite",
- "build": "vite build",
+ "build": "npm run build:interceptor && vite build",
+ "build:interceptor": "vite build -c ./vite.interceptor.config.ts",
"serve": "vite preview --port 5173"
},
@@ collapsed @@It’s worth noting that the Token Vault Interceptor will only be rebuilt at the start of the command and not rebuilt after any change thereafter as there’s no watch command used here for the Token Vault Interceptor itself. Once this portion of code is correctly set up, it should rarely change, so this should be fine.
Your main app will still be rebuilt and "hot-reloading" will take place.
Enter npm run build:interceptor -w todo-react-app to run the new command you just wrote above in the todo-react-app workspace. You can see the resulting interceptor.js built and placed into your public directory.
  root
  ├─┬ todo-react-app
  │ ├─┬ public/
  │ │ ├── ...
+ │ │ ├── interceptor.jsStep 5. Ensure interceptor.js is accessible
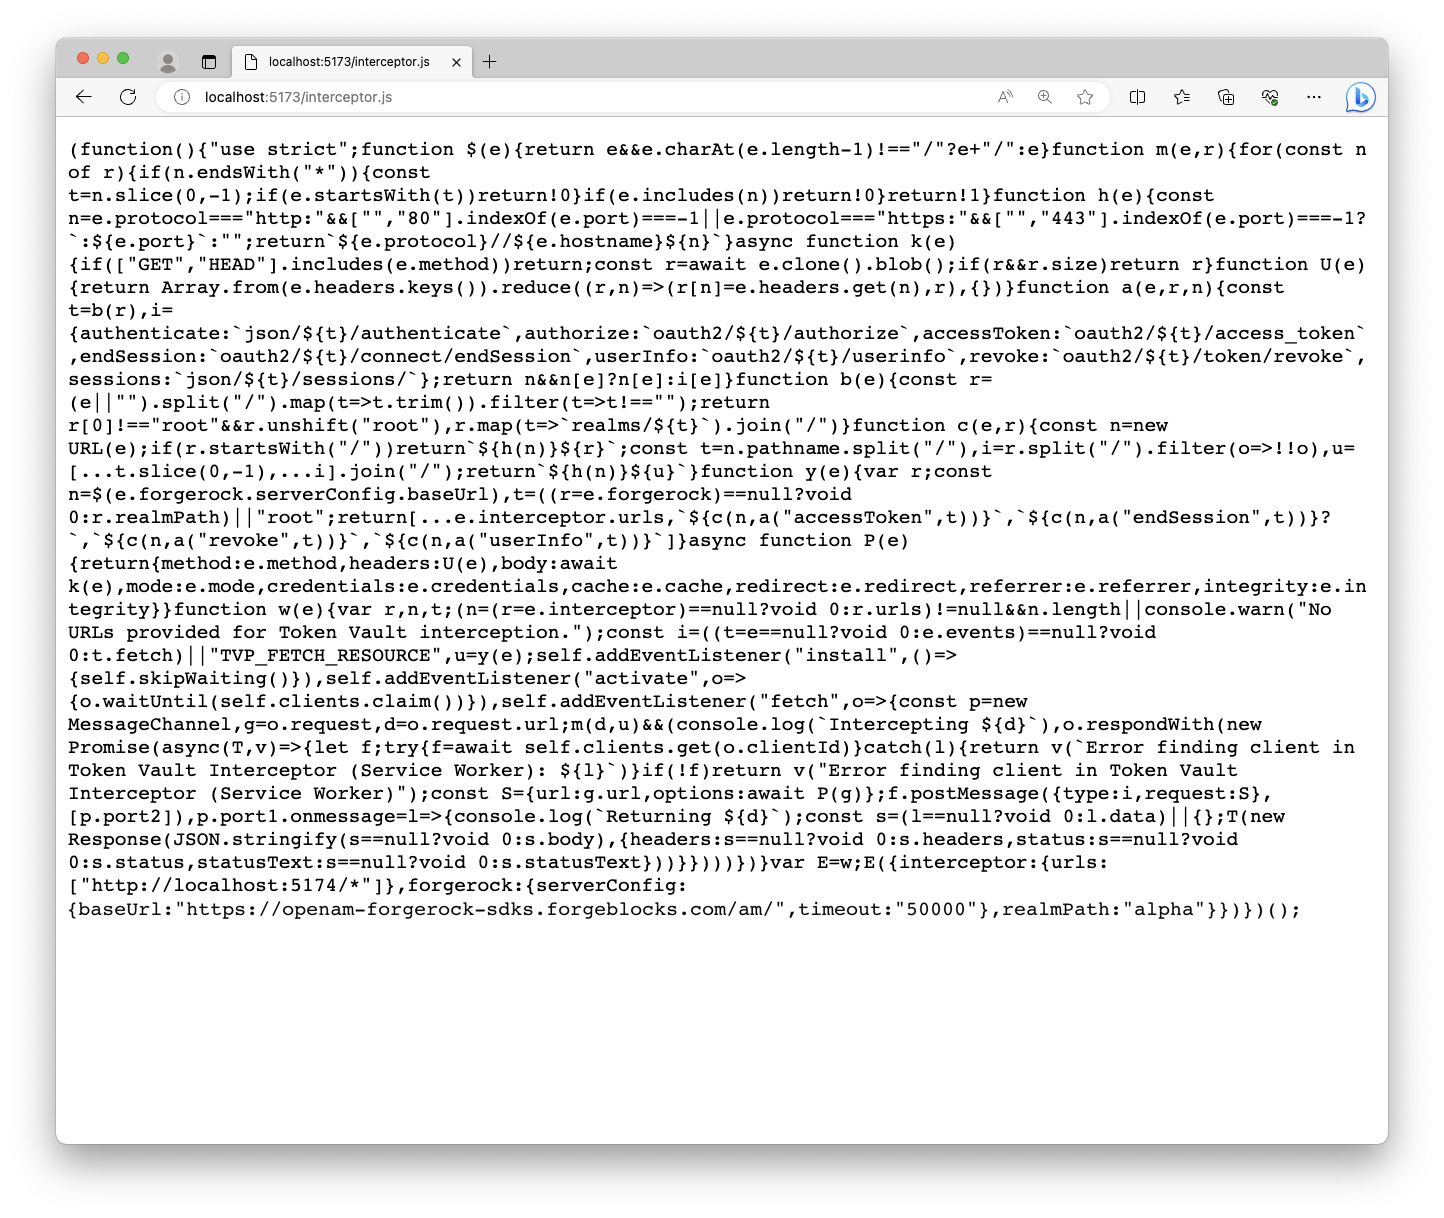
Since we haven’t implemented the Token Vault Interceptor yet in the main app, we can’t really test it; however, we can at least make sure the file is accessible in the browser as we expect. To do this, run the following command:
npm run dev:reactAfter the command starts the server, using your browser, visit http://localhost:5173/interceptor.js.
You should plainly see the fully built JavaScript file. Ensure it does not have any import statements and looks complete. It should contain more code than just the original source file you wrote above.
Implement the Token Vault Client
Now that we have all the separate pieces set up, wire it all together with the Token Vault Client plugin.
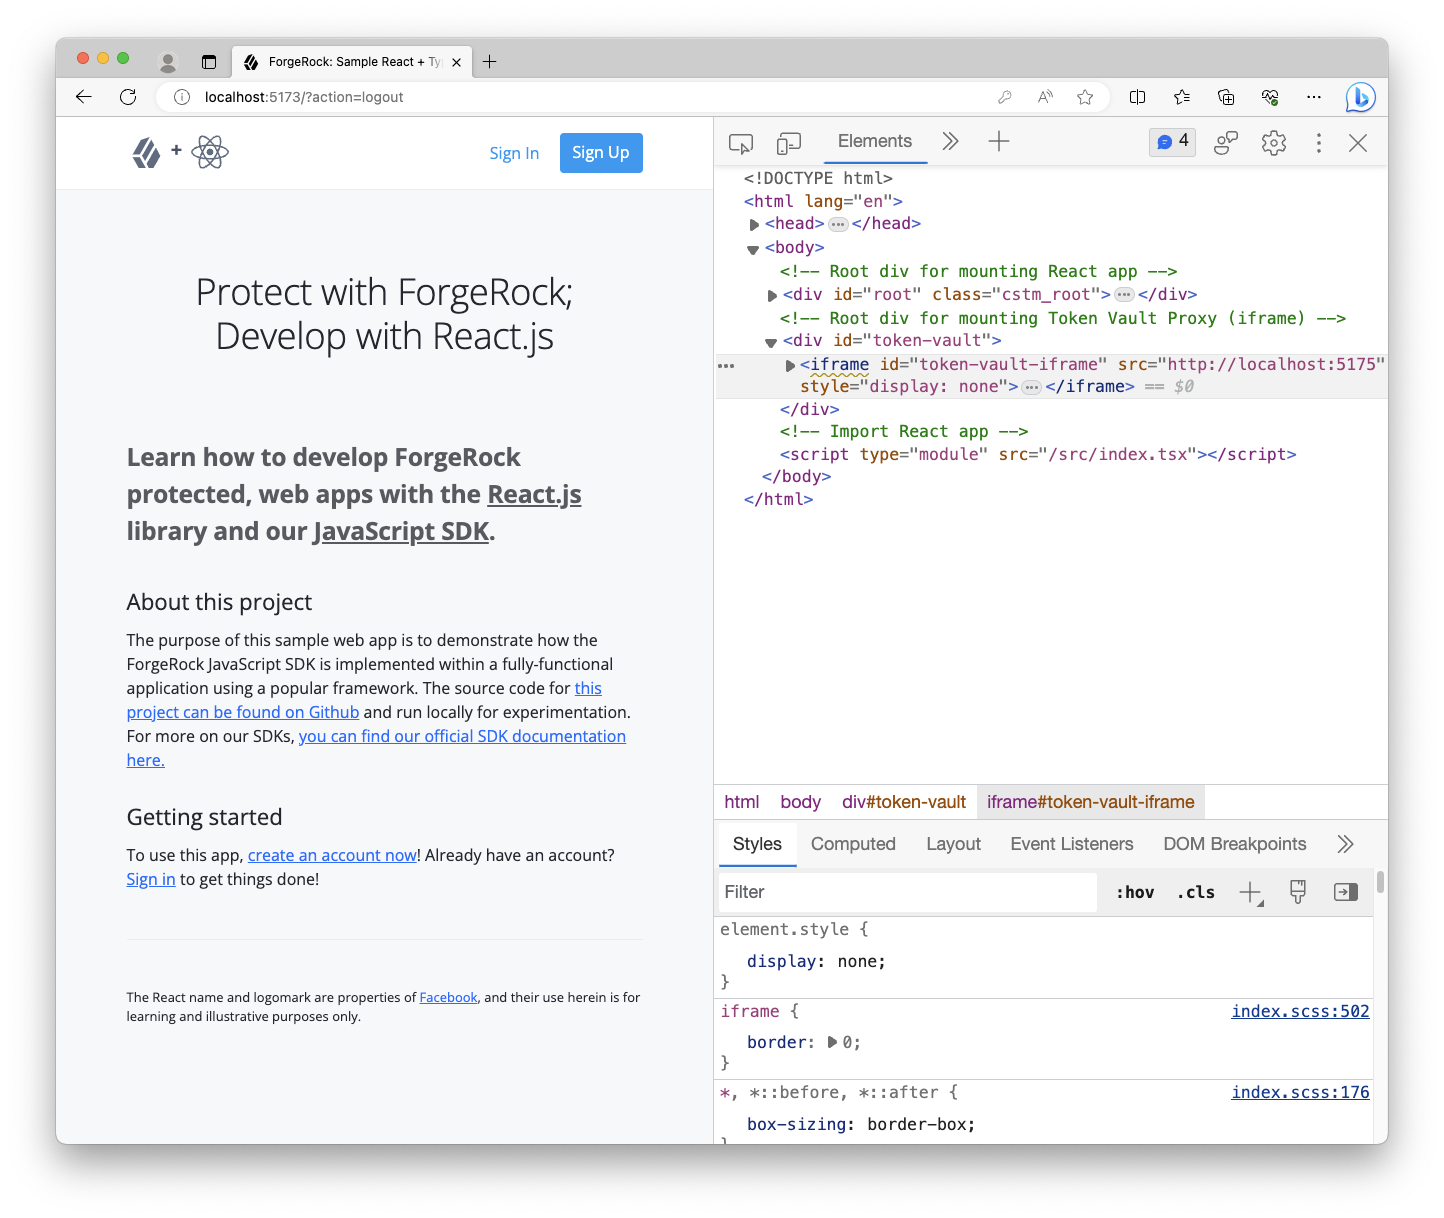
Step 1. Add HTML element to index.html
When we initiate the Token Vault Proxy, it needs a real DOM element to mount to. The easiest way to ensure we have a proper element is to add it to the index.html directly.
index.html file@@ todo-react-app/index.html @@
@@ collapsed @@
<body>
<!-- Root div for mounting React app -->
<div id="root" class="cstm_root"></div>
+
+ <!-- Root div for mounting Token Vault Proxy (iframe) -->
+ <div id="token-vault"></div>
<!-- Import React app -->
<script type="module" src="/src/index.tsx"></script>
</body>
</html>Step 2. Import and initialize the client module
First, import the client module and remove the TokenStorage module from the SDK import.
Second, call the client function with the below minimal configuration. This is how we "glue" the three entities together within your main app. This function returns an object that we use to register and instantiate each entity.
index.tsx source file@@ todo-react-app/src/index.tsx @@
- import { Config, TokenStorage } from '@forgerock/javascript-sdk';
+ import { Config } from '@forgerock/javascript-sdk';
+ import { client } from '@forgerock/token-vault';
import ReactDOM from 'react-dom/client';
@@ collapsed @@
+ const register = client({
+ app: {
+ origin: c.TOKEN_VAULT_APP_ORIGIN,
+ },
+ interceptor: {
+ file: '/interceptor.js', // references public/interceptor.js
+ },
+ proxy: {
+ origin: c.TOKEN_VAULT_PROXY_ORIGIN,
+ },
+ });
/**
* Initialize the React application
*/
(async function initAndHydrate() {
@@ collapsed @@Remember, the file reference within the interceptor object needs to point to the built Token Vault Interceptor file, which will be located in the public directory as a static file but served from the root, not the source file itself.
This function ensures the app, Token Vault Interceptor and Token Vault Proxy are appropriately configured.
Step 2. Register the interceptor, proxy, and token store
Now that we’ve initialized and configured the client, we now register the Token Vault Interceptor, the Token Vault Proxy, and the token vault store just under the newly added code from above:
index.tsx source file@@ todo-react-app/src/index.tsx @@
@@ collapsed @@
proxy: {
origin: c.TOKEN_VAULT_PROXY_ORIGIN,
},
});
+
+ // Register the Token Vault Interceptor
+ await register.interceptor();
+
+ // Register the Token Vault Proxy
+ await register.proxy(
+ // This must be a live DOM element; it cannot be a Virtual DOM element
+ // `token-vault` is the element added in Step 1 above to `todo-react-app/index.html`
+ document.getElementById('token-vault') as HTMLElement
+ );
+
+ // Register the Token Vault Store
+ const tokenStore = register.store();
/**
* Initialize the React application
*/
(async function initAndHydrate() {
@@ collapsed @@Registering the Token Vault Interceptor is what requests and registers the Service Worker. Calling register.interceptor returns the ServiceWorkerRegistration object that can be used to unregister the Service Worker, as well as other functions, if that’s needed. We won’t be implementing that in this tutorial.
Registering the Token Vault Proxy constructs the iframe component and mounts it do the DOM element passed into the method. It’s important to note that this must be a real, available DOM element, not a Virtual DOM element. This results in the Token Vault Proxy being "registered" as a child frame and, therefore, accessible to your main app.
Calling register.proxy also returns an optional reference to the DOM element of the iframe that can be used to manually destroy the element and the Token Vault Proxy, if needed.
Finally, registering the store provides us with the object that replaces the default token store within the SDK. There are some additional convenience methods on this store object that we’ll take advantage of later in the tutorial.
You will see a few errors in the console, but don’t worry about those at the moment. The next steps will resolve them.
Step 3. Replace the SDK’s default token store
Within the existing SDK configuration, pass the tokenStore object we created in the previous step to the set method to override the SDK’s internal token store.
index.tsx source file@@ todo-react-app/src/index.tsx @@
@@ collapsed @@
// Configure the SDK
Config.set({
clientId: import.meta.env.WEB_OAUTH_CLIENT,
redirectUri: import.meta.env.REDIRECT_URI,
scope: import.meta.env.OAUTH_SCOPE,
serverConfig: {
baseUrl: import.meta.env.AM_URL,
timeout: import.meta.env.TIMEOUT,
},
realmPath: import.meta.env.REALM_PATH,
+ tokenStore, // this references the Token Vault Store we created above
});
@@ collapsed @@This configures the SDK to use the Token Vault Store, which is within the Token Vault Proxy, and that it needs to manage the tokens internally.
Step 4. Check for existing tokens
Currently in our application, we check for the existence of stored tokens to provide a hint if our user is authorized. Now that the main app doesn’t have access to the tokens, we have to ask the Token Vault Proxy if it has tokens.
To do this, replace the SDK method of TokenStorage.get with the Token Vault Proxy has method:
index.tsx source file@@ todo-react-app/src/index.tsx @@
@@ collapsed @@
let isAuthenticated = false;
try {
- isAuthenticated = !((await TokenStorage.get()) == null);
+ isAuthenticated = !!(await tokenStore?.has())?.hasTokens;
} catch (err) {
console.error(`Error: token retrieval for hydration; ${err}`);
}
@@ collapsed @@Note that this doesn’t return the tokens as that would violate the security of keeping them in another origin, but the Token Vault Proxy will inform you of their existence. This is enough to hint to our UI that the user is likely authorized.
Build and run the apps
At this point, all the necessary entities are set up. We can now run all the needed servers and test out our new application with Token Vault enabled.
Open three different terminal windows, all from within the root of this project. Enter each command in its own window:
npm run dev:reactnpm run dev:apinpm run dev:proxyAllow all the commands to complete the build and start the development servers.
Then, visit http://localhost:5173 in your browser of choice. The to-do application should look and behave no different from before.
Open the dev tools of your browser, and proceed to sign in to the app. You will be redirected to the login page, and then redirected back after successfully authenticating. You may notice some additional redirection within the React app itself, this is normal.
Once you land on the home page, you should see the "logged in experience" with your username in the success alert.
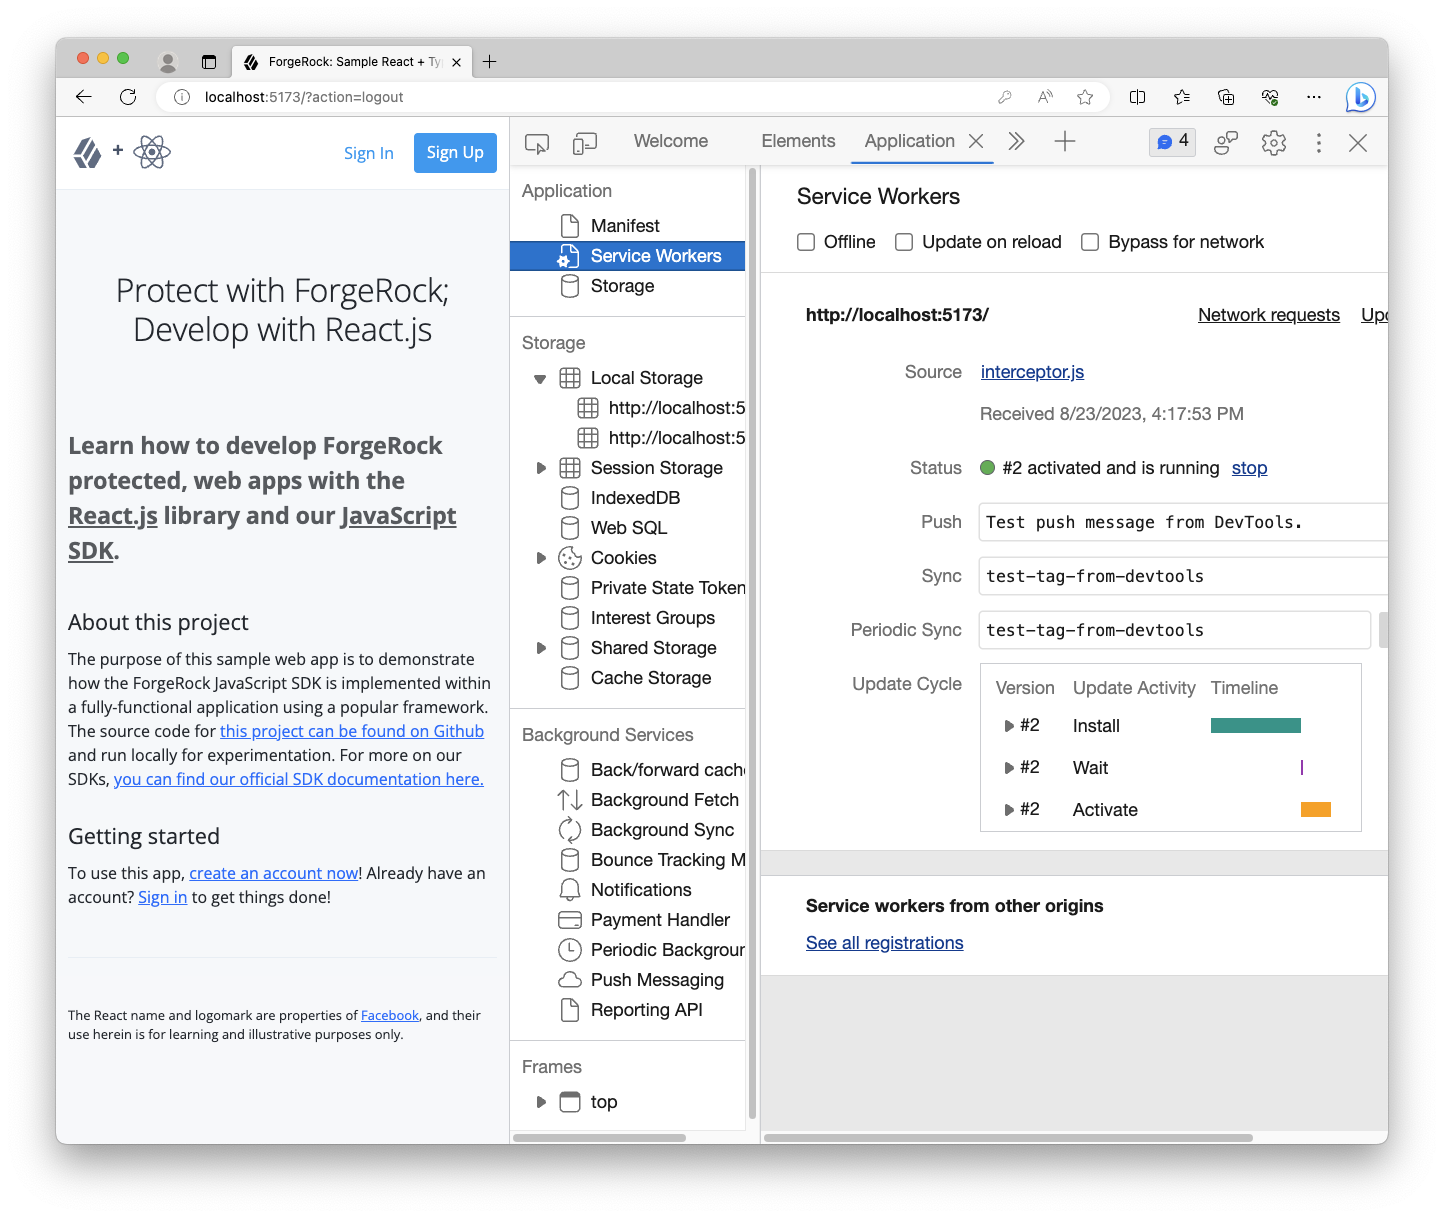
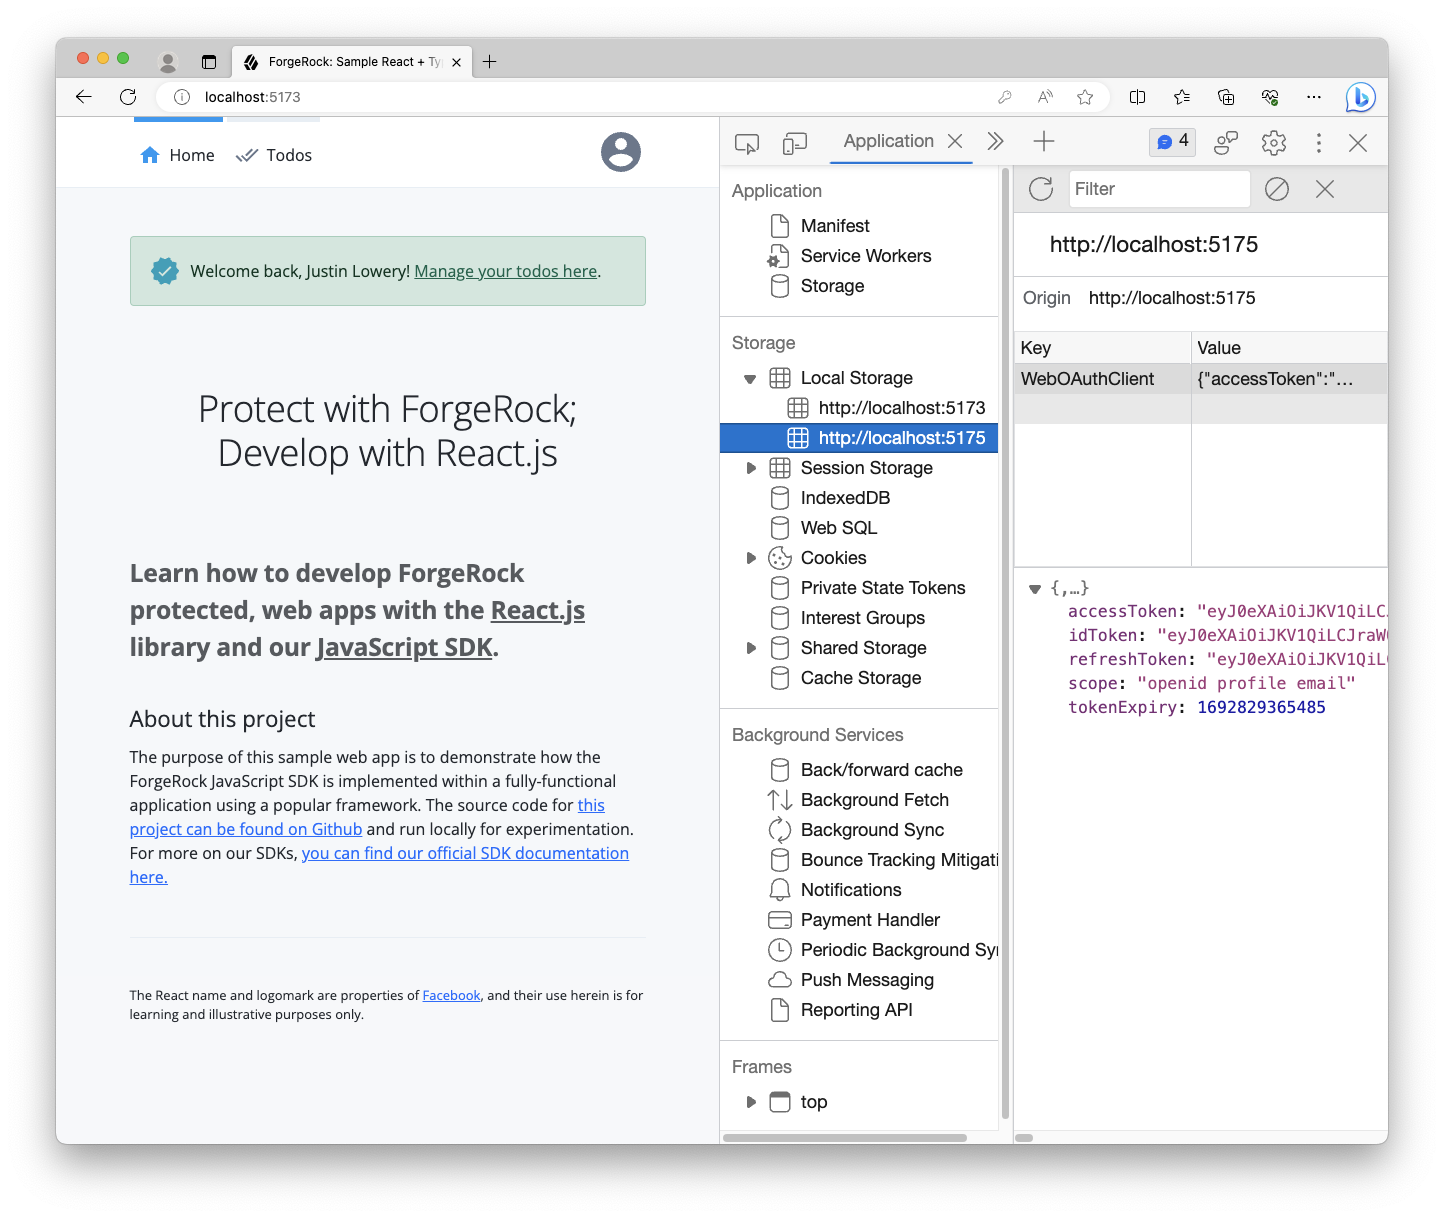
To test whether Token Vault is successfully implemented, go to the Application or Storage tab of your dev tools and inspect the localStorage section.
You should see two origins: http://localhost:5173, our main app, and http://localhost:5175, our Token Vault Proxy.
Your user’s tokens should be stored under the Token Vault Proxy origin on port 5175, not under the React app’s origin on port 5173.
If you observe that behavior, then you have successfully implemented Token Vault. Congratulations, your tokens are now more securely stored!
If you don’t see the tokens in the Token Vault Proxy origin’s localStorage, then follow the troubleshooting section below:
Troubleshooting
Getting failures in the service worker registration
Make sure your dedicated Vite configuration is correct.
Also, check the actual file output for the interceptor.js file. If the built file has ES Module syntax in it, or it looks incomplete, then it can cause this issue — Service Workers in some browsers, even the latest versions, don’t support the same ES version or features as the main browser context.
Tokens are not being saved under any origin
Open up your browser’s dev tools and ensure the following:
-
Your Token Vault Interceptor is running under your main app’s origin.
-
Do you have an
/access_tokenrequest? It comes after the/authorizerequest and redirect. -
Your Token Vault Interceptor is intercepting the
/access_tokenrequest. If it is, you should see two outgoing requests: one for the main app and one for the Token Vault Proxy. -
Your Token Vault Proxy is running within the
iframeand forwarding the request. -
There are no network errors.
-
There are no console errors.
| Enabling Preserve Log for both the Console and the Network tabs is very helpful. |
I’m getting a CORS failure
Make sure you have both origins listed in your CORS configuration.
Additionally, it’s best if you use the Ping SDK template when creating a new CORS config in your server.
If both origins are listed, make sure you have no typos in the allowed methods. The methods like GET and POST are case-sensitive. Also, check the headers, which are NOT case-sensitive.
Allow Credentials must be enabled.
Troubleshoot the Token Vault
How do I fix CORS errors?
Make sure your CORS configuration in your authorization server allows and accepts origins from both the origin of your main app and also the origin of the Token Vault Proxy.
These two origins should be unique from one another.
What can cause iframe errors?
This is likely an error coming from the /authorize request to collect OAuth 2.0 or OIDC tokens.
Make sure you are using Ping SDK for JavaScript 4.0 or newer.
To diagnose the issue, copy the full /authorize request URL from the network tab in your dev tools and paste it into your browser’s URL field to directly visit it.
A 400 error coming from the /authorize endpoint could be caused by a misconfiguration. For example, if a consent page is rendering ensure you enabled the implied consent property in both your OAuth 2.0 Provider and the OAuth 2.0 client.
Make sure you are allowing the use of third-party cookies. For example, the incognito or private modes in Chromium browsers disable third-party cookies by default, as do Webkit-based browsers.
Why are the tokens not being stored?
If you are receiving tokens from the /access_token endpoint but they are not getting stored, this is likely caused by the Token Vault Interceptor not routing the requests to the Token Vault Proxy configured in your main app.
Only the Token Vault Proxy can store tokens when the Token Vault is enabled.
To fix this, ensure your config is identical between your main app’s SDK config found in Config.set() and the config found in your Token Vault Interceptor file.
We recommend using environment variables, rather than hard-coding the values directly in each of the modules.
Why does the Interceptor (Service Worker) not work or report errors in Firefox or Safari?
Your bundler is likely not bundling the Token Vault Interceptor into a single file, and language features are present in the bundle that these browsers do not support in a Service Worker context.
Ensure that your bundler configuration, such as Vite or Webpack, is creating a single file output and that it is down-leveled to ES2020.
We recommend a dedicated bundle configuration for the Token Vault Interceptor, separate from your application bundle.
What can cause “400 Proxy Error”?
These errors often occur when the Token Vault Proxy itself is encountering an error, and not actually an error response from your authorization server.
Inspect the network tab in your dev tools to find the specific error message in the response, which will help you debug the underlying issue.