Evaluation
These topics cover the tasks you need to quickly get a test or demo AM instance running.
Access Management
Learn about ForgeRock® Access Management.
Step 1. Prepare your server
Prepare your computer to host Access Management.
Step 2. Deploy AM
Deploy the AM WAR file into Tomcat.
Step 3. Configure AM
In the AM admin UI, create an authentication tree.
Step 4. Authenticate to AM
Log in for the first time, using your authentication tree.
Next steps
Discover what else AM has to offer.
ForgeRock® Identity Platform serves as the basis for our simple and comprehensive Identity and Access Management solution. We help our customers deepen their relationships with their customers, and improve the productivity and connectivity of their employees and partners. For more information about ForgeRock and about the platform, see https://www.forgerock.com.
Access Management (AM)
AM provides a service called access management, which manages access to resources, such as a web page, an application, or a web service, that are available over the network. Once it is set up, AM provides an infrastructure for managing users, roles, and access to resources. In this chapter, you manage access to a single web page.
AM centralizes access control by handling both authentication and authorization. Authentication is the process of identifying an individual, for example, by confirming a successful login. Authorization is the process of granting access to resources to authenticated individuals.
AM centralizes authentication by using a variety of authentication modules that connect to identity repositories that store identities and provide authentication services. The identity repositories can be implemented as LDAP directories, relational databases, RADIUS, Windows authentication, one-time password services, and other standards-based access management systems.
Authentication trees provide fine-grained authentication by allowing multiple paths and decision points throughout the authentication flow. They are made up of authentication nodes, which define actions taken during authentication. Authentication nodes are more granular than modules, with each node performing a single task, such as collecting a username or making a simple decision. Authentication nodes can have multiple outcomes, rather than just success or failure. AM lets you create complex yet customer-friendly authentication experiences by linking nodes together, creating loops, and nesting nodes within a tree.
AM centralizes authorization by letting you use AM to manage access policies separate from applications and resources. Instead of building access policy into a web application, you install an agent with the web application to request policy decisions from AM. This way you can avoid issues that could arise when developers must embed policy decisions into their applications. With AM, if policy changes or an issue is found after the application is deployed, you have only to change the policy definition in AM, not deploy a new version of the application. AM makes the authorization decisions, and web and Java agents enforce the decisions on AM’s behalf.
Keep on reading to try AM’s access management capabilities by installing AM and configuring an authentication tree.
Step 1. Prepare your server
To install AM in a demo or test environment, perform the following prerequisite tasks:
- Check disk space
-
AM’s distribution
.warfile includes an embedded DS server, which stores AM’s configuration data and serves as an identity store.The DS server requires free disk space equal to or greater than 5 GB, plus 5% of the total size of the filesystem in the $HOME directory of the user running the container.
- Prepare a fully qualified domain name (FQDN)
-
AM requires that you use fully qualified domain names. This is because AM uses HTTP cookies to keep track of sessions for single sign-on (SSO), and setting and reading cookies depends on the server name and domain.
For information on preparing an FQDN, see Prepare a fully qualified domain name.
- Install a supported Java development kit (JDK)
-
AM is a Java web application, so you need to download and install a supported JDK. For the list of supported JDK versions, refer to the Java requirements.
For information on installing a JDK, see Install a JDK and Apache Tomcat.
Ensure that the JDK’s default truststore, for example,
$JAVA_HOME/lib/security/cacerts, has, at least,644permissions:$ sudo chmod 644 $JAVA_HOME/lib/security/cacertsbashWhy is this required?
When evaluating AM, the installation process deploys an embedded DS instance that AM uses as configuration store, user store, and CTS store. To connect to the DS instance using LDAPS, AM requires access to the self-signed certificate that DS generates.
If you are installing AM for evaluation purposes, AM creates a copy of your JDK’s default
lib/security/cacertstruststore, names ittruststore, and places it in/path/to/openam/security/keystores/.AM then attempts to add the DS self-signed certificate to that store, with an alias of
ds-ca-cert.If the lib/security/cacertstruststore does not have the default password ofchangeit, and/or if it does not have at least644permissions, then AM installation will fail, as it will not be able to open the truststore to add the DS certificate.You can change the permissions back as they were originally after installing AM.
- Install a supported web container
-
Although AM can run in a number of application servers, download Apache Tomcat for now.
For the list of supported versions, refer to Application containers.
For information on installing Apache Tomcat, see Install a JDK and Apache Tomcat.
- Download ForgeRock Access Management
-
The ForgeRock BackStage download site hosts downloadable versions of AM.
For the list of supported operating systems, refer to the Operating system requirements.
|
The procedures to set up the software are written for use on a UNIX-like system. If you are running Microsoft Windows, adapt these examples accordingly. |
Prepare a fully qualified domain name
Before deploying and installing AM, give your system a DNS alias, such as openam.example.com.
You can add a DNS alias by editing your hosts file.
|
If you already have a DNS server set up, or use a service such as localtest.me, you can use those instead of editing your hosts file. |
-
Add the aliases to your hosts file using your preferred text editor:
# Edit /etc/hosts
$ sudo vi /etc/hosts
Password:

$ cat /etc/hosts | grep openam
127.0.0.1    localhost openam.example.com
bash -
Proceed to install a JDK and Apache Tomcat.
Install a JDK and Apache Tomcat
AM runs as a Java web application inside an application container.
Apache Tomcat is an application container that runs on a variety of platforms.
The following instructions are loosely based on the RUNNING.txt file delivered with Apache Tomcat:
-
Extract the JDK download file:
$ mkdir -p /path/to/JDK
$ unzip ~/Downloads/openjdk-X_bin.zip -d /path/to/JDK
bash -
Extract the Apache Tomcat download file:
$ mkdir -p /path/to/tomcat
$ unzip ~/Downloads/apache-tomcat-X.X.XX.zip -d /path/to/tomcat
bash -
Create an Apache Tomcat script to set the
JAVA_HOMEenvironment variable to the file system location of the JDK and to set the heap and metaspace size appropriately. For example:-
Unix/Linux
-
Windows
Create a
setenv.shscript in/path/to/tomcat/bin/:export JAVA_HOME="/path/to/usr/jdk" export CATALINA_OPTS="$CATALINA_OPTS -Xmx2g -XX:MaxMetaspaceSize=256m"bashCreate a
setenv.batscript in\path\to\tomcat\bin\:PS C:\path\to> $env:JAVA_HOME += ";C:\path\to\usr\jdk" PS C:\path\to> $env:CATALINA_OPTS += ";-Xmx2g -XX:MaxMetaspaceSize=256m"powershell -
-
(UNIX-like systems only) Make the scripts in Apache Tomcat’s
bin/directory executable:$ chmod +x /path/to/tomcat/bin/*.shbash -
If you have a custom installation that differs from the documented Apache Tomcat installation, make sure to set Apache Tomcat’s
CATALINA_TMPDIRto a writable directory to ensure the installation succeeds. This temporary directory is used by the JVM (java.io.tmpdir) to write disk-based storage policies and other temporary files. -
Make sure that your system’s firewall does not block the port that Apache Tomcat uses (
8080by default).See the Apache documentation for instructions for allowing traffic through the firewall on a specific port for the version of Apache Tomcat on your system. A variety of firewalls are in use on Linux systems. The version your system uses depends on your specific distribution.
-
Start Apache Tomcat:
$ /path/to/tomcat/bin/startup.shbashIt might take Apache Tomcat several seconds to start. When it has successfully started, you should see information indicating how long startup took in the
/path/to/tomcat/logs/catalina.outlog file.INFO: Server startup in 4655 ms
-
Go to Apache Tomcat’s homepage; for example,
http://openam.example.com:8080.If Apache Tomcat works correctly, the homepage displays a success message: "If you’re seeing this, you’ve successfully installed Tomcat. Congratulations!".
-
Proceed to Step 2. Deploy AM.
Step 2. Deploy AM
Deploying AM creates a default configuration that you can access as AM’s administrative user, amAdmin.
Deploy ForgeRock Access Management
Deploy AM into Apache Tomcat, and configure it for use:
-
Copy the AM
.warfile to deploy in Apache Tomcat asopenam.war:$ cp AM-7.3.2.war /path/to/tomcat/webapps/openam.warbashIt can take Apache Tomcat several seconds to deploy AM.
-
Go to the deployed AM application; for example,
http://openam.example.com:8080/openam/. -
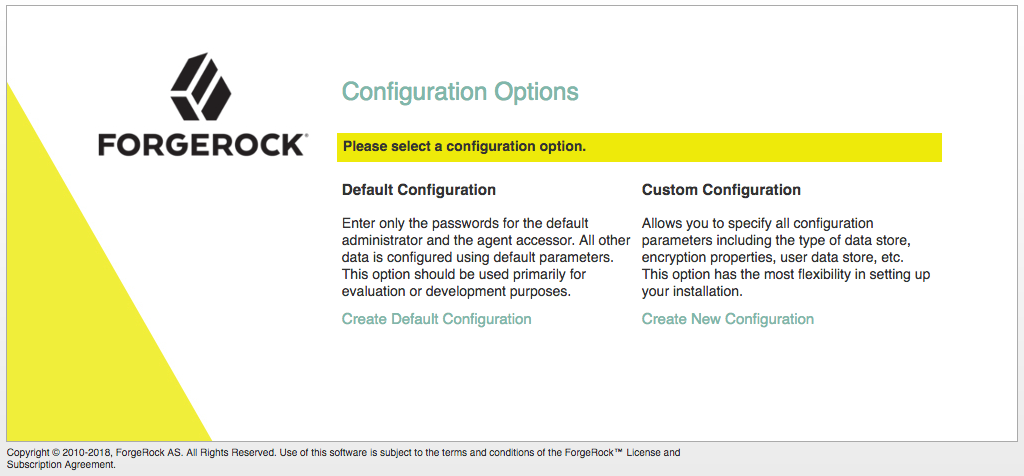
On the AM configuration screen, click Create Default Configuration.
-
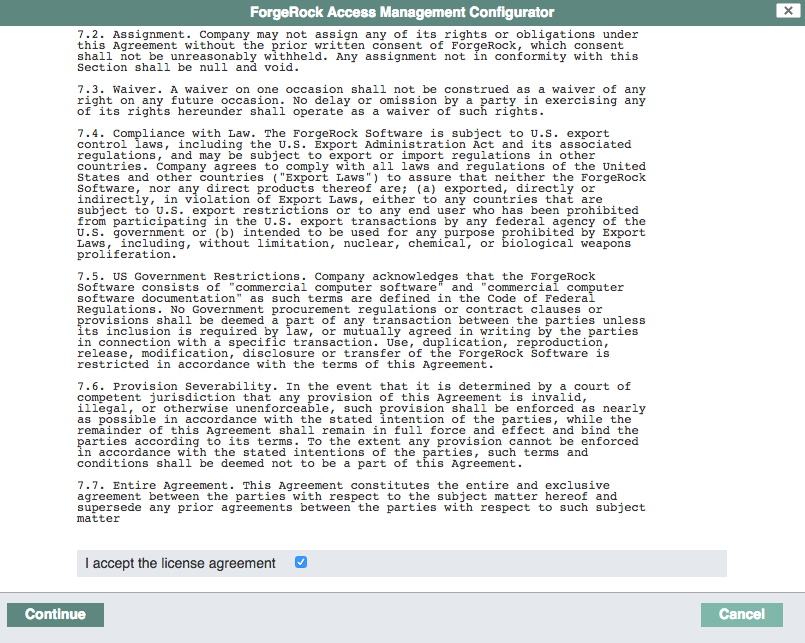
Review the software license agreement. If you agree to the license, click I accept the license agreement, and click Continue.
-
Set the Default User [amAdmin] password to
changeit, and click Create Configuration to configure AM.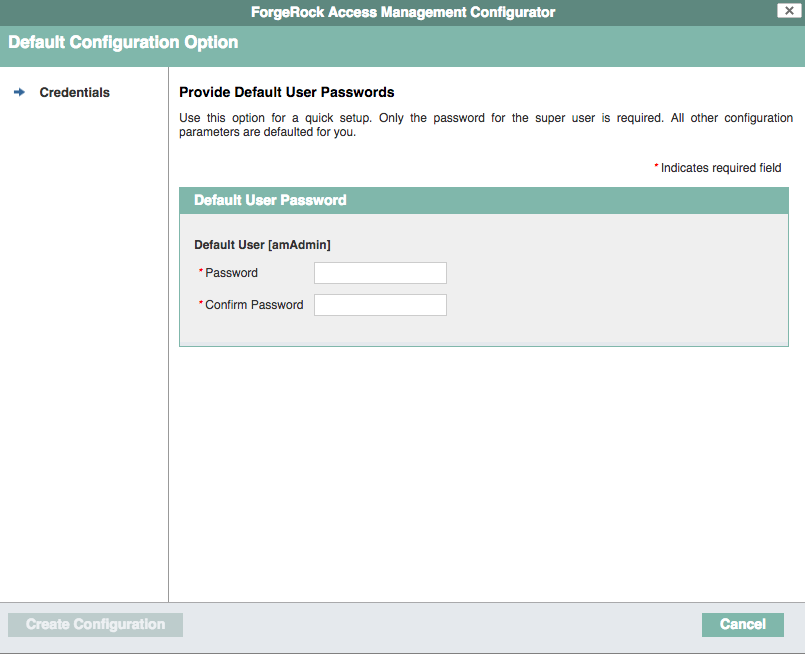
When configuring AM for real-world use, do not use this password. It is only to get started with AM. The amAdminuser is the default AM administrator, who has full control over the AM configuration. -
Click the Proceed to Login link, then log in as
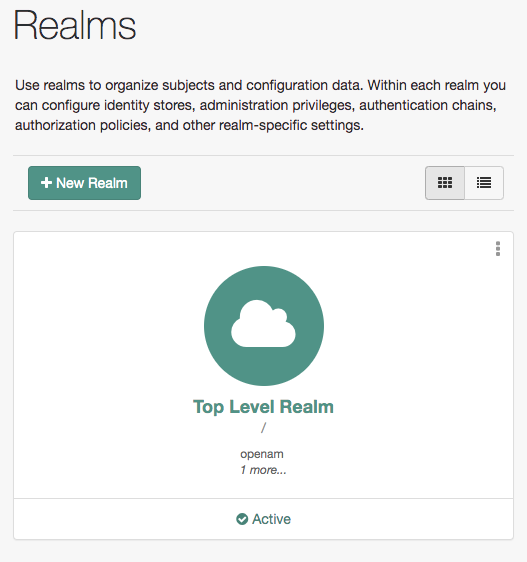
amAdminwith the password you configured in a previous step,changeit.After login, AM directs you to the Realms page.
AM stores its configuration, including the embedded DS server, in a directory named after the deployment URI. In other words, if AM is deployed under
/openam, then it saves its configuration under$HOME/openam/.If you need to delete your configuration, the quickest way to start over is to stop Apache Tomcat, delete the AM configuration directory, and restart the AM web application to start the process from the beginning. AM is now configured, and ready for use.
-
After successfully logging in to the AM admin UI, proceed to Step 3. Configure AM.
Step 3. Configure AM
Authentication trees provide fine-grained authentication by allowing multiple paths and decision points throughout the authentication flow.
Authentication trees are made up of authentication nodes, which define actions taken during authentication. Authentication nodes are granular, with each node performing a single task, such as collecting a username or making a simple decision. Authentication nodes can have multiple outcomes rather than just success or failure.
|
AM provides a number of sample authentication trees to demonstrate how nodes can be put together. For information on setting up authentication trees, see Configure authentication trees. |
Configure an authentication tree
Follow these steps to create an authentication tree that you can use to log in to AM:
-
On the Realms page of the AM admin UI, choose the realm in which to create the authentication tree.
-
On the Realm Overview page, click Authentication in the menu on the left, and click Trees.
-
On the Trees page, click Create Tree.
Enter a tree name; for example,
myAuthTree, and click Create.The authentication tree designer is displayed, with the
Startentry point connected to theFailureexit point, and aSuccessnode.The authentication tree designer provides the following features on the toolbar:
Authentication tree designer toolbar Button Usage 
Lay out and align nodes according to the order they are connected.

Toggle the designer window between normal and full-screen layout.

Remove the selected node. Note that the
Startentry point cannot be deleted. -
Drag the following nodes from the Components panel on the left-hand side and drop them into the designer area:
The Data Store Decision authentication node uses the credentials to authenticate the user against the identity stores configured for the realm. In this example, the username and password are obtained by a combination of the Username Collector and Password Collector nodes.
-
Drag and drop the Username Collector and Password Collector onto the Page node, so that they will both appear on the same page when logging in.
-
Connect the nodes as follows:

You can configure the node properties by using the panel on the right side of the page. For more information on the available properties for each node, see Authentication nodes configuration reference.
For more information on setting up more complex authentication trees, see Configure authentication trees.
-
You are now ready to authenticate your first user!
Proceed to Step 4. Authenticate to AM.
Step 4. Authenticate to AM
Now that you have completed Step 3. Configure AM,
you can use the myAuthTree tree you created to authenticate a user.
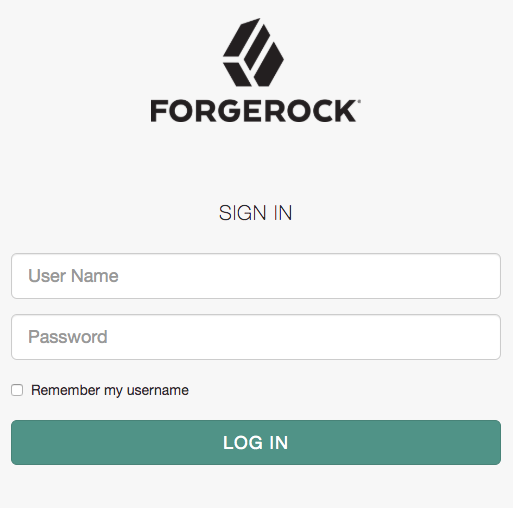
To test your authentication tree in a web browser, go to a URL similar to the following:
http://openam.example.com:8080/openam/XUI/?realm=/&service=myAuthTree#login
Use the correct FQDN, port number, and deployment path for your environment.
Also ensure you use the correct authentication tree name, in the example above, the tree is named myAuthTree.
Log in as the built-in demo user, with the password Ch4ng31t.
On successful login, AM creates a cookie named iPlanetDirectoryPro in your browser for your domain;
for example, example.com. That cookie is then available to all servers in the example.com domain,
such as openam.example.com.
If you examine this cookie, you see that it has a value such as AQI5wM2L...*AAJTS....
This is the SSO token value. The value is an encrypted reference to the session
that is stored only by AM.
Only AM can determine whether you are actually logged in, or whether the
session is no longer valid, and you need to reauthenticate.
The AM session is used for SSO. When the browser presents the cookie to a server in the domain, the agent on the server can check with AM using the SSO Token as a reference to the session. This lets AM make policy decisions based on who is authenticated, or prompt for additional authentication, if necessary.
Your SSO session can end in a few ways. For example, when examining the cookie in your browser, you should notice that it expires when the browser session ends (when you shut down your browser). Alternatively, you can log out of AM explicitly.
Sessions can also expire. AM sets two limits: one that causes your session to expire if it remains inactive for a configurable period of time (default: 30 minutes), and another that caps the session lifetime (default: 2 hours).
Congratulations on authenticating your first user with AM!
See what else can AM do for you by reading Next steps.
Next steps
AM can do much more than authenticate users. In addition to being the right foundation for building highly available, Internet-scale access management services, AM has a rich set of features that make it a strong choice for a variety of different deployments.
Find out more about them:
User self-service features
Discover how end users can manage their profiles.
Single sign-on
Create seamless end user journeys.
SAML v2.0 federation
Federate identities with the SAML v2.0 standard.
OAuth 2.0-based federation
Protect applications with OAuth 2.0, OpenID Connect 1.0, and UMA 2.0.
Access policies and policy enforcement
Centrally control access to your organization’s applications.
Modern APIs for developers
Discover the REST and Java APIs that AM exposes.
User self-service features
AM provides user self-registration and password reset services that allow users access to applications without the need to call your help desk.
AM has access to the identity repositories that store user profiles. AM is therefore well-placed to help you manage self-service features that involve user profiles.
-
User self-registration. AM provides user self-registration as a feature of AM’s REST APIs. New users can easily self-register in AM without assistance from administrators or help desk staff.
For information on configuring self-registration, see Configure user registration.
For details on building your own self-registration application using the REST API, see Register a user.
-
Password reset. With AM’s self-service password reset, users can help reset passwords, as well as update their existing passwords. AM handles both the case where a user knows their password and wants to change it, and also the case where the user has forgotten their password and needs to reset it, possibly after answering security questions.
For details on setting up password reset capabilities, see Configure forgotten password reset.
For details on building your own application to handle password reset using the REST API, see Reset forgotten passwords.
-
Dashboard service. Users often have a number of applications assigned to them, especially if your organization has standardized SaaS, for example for email, document sharing, support ticketing, customer relationship management, web conferencing, and so forth. You can create an interface for users to access these web-based and internal applications using AM’s dashboard service.
The AM cloud dashboard service makes this relatively easy to set up. For basic information on using the service, see Dashboards.
AM’s user-facing pages are fully customizable and easy to skin for your organization. UI customization has details on how to customize user-facing pages.
Single sign-on
Single sign-on (SSO) and cross-domain single sign-on (CDSSO) are core features of AM. Once you have set up AM, you protect as many applications in the network domain as you want. Simply install web or Java agents for the additional servers, and add policies for the resources served by the applications. Users can authenticate to start a session on any site in the domain and stay authenticated for all sites in the domain without needing to log in again (unless the session ends, or a policy requires stronger authentication).
Many organizations manage more than one domain. When you have multiple distinct domains in a single organization, cookies set in one domain are not returned to servers in another domain. In many organizations, sub-domains are controlled independently. These domains need to be protected from surreptitious takeovers like session cookie hijacking. AM’s CDSSO provides a safe mechanism for your AM servers in one domain to work with web or Java agents from other domains, while allowing users to sign-on once across many domains without needing to reauthenticate. CDSSO allows users to sign on in one of your domains and not have to sign on again when they visit another of your domains.
For details on how to configure web and Java agents for CDSSO, see Implement CDSSO.
SAML v2.0 federation
Security Assertion Markup Language (SAML) 2.0 grew out of earlier work on SAML v1.x and the Liberty Alliance. SAML defines XML-based, standard formats and profiles for federating identities. SAML v2.0 is supported by a wide range of applications including major software as a service (SaaS) offerings. AM can function as a hub in deployments where different standards are used. For details on AM’s SAML v2.0 capabilities, see SAML v2.0.
When your deployment serves as an identity provider for a SAML federation, AM makes it easy to develop applications called Fedlets that your service providers can easily deploy to participate in the federation. For details, see Implement SAML v2.0 service providers by using Fedlets.
OAuth 2.0 and OAuth 2.0-based standards federation
OAuth 2.0 and OpenID Connect 1.0 are open standards for authorization using REST APIs to allow users to authorize third-party access to their resources. These standards make it easier to federate modern web applications. User-Managed Access (UMA) 2.0 takes OpenID Connect a step further, and lets the end user manage access to their resources.
AM can serve as the authorization server for your clients, or as a client to another authorization server. As an authorization server, AM supports capabilities such as:
-
Dynamic client registration
-
Using macaroons as access and refresh tokens
-
Client-side access and refresh tokens
-
Proof-of-possession
-
Scripted OpenID Connect claims
-
Authentication requirements for ID tokens.
For more information, see:
Policy enforcement points and access policies
AM can handle large numbers of access policies, each of which gives you control over user provisioning and user entitlements. For details, see Authorization.
AM also supports standards-based access policies defined using the eXtensible Access Control Markup Language (XACML). XACML defines an XML Attribute-Based Access Control (ABAC) language with Role-Based Access Control (RBAC) features as well. For details on using XACML policies with AM, see Import and export policies.
AM also includes web agents and Java agents, which are add-on components that operate as a policy enforcement point (PEP) for a website or application. For example, you can install a web agent to enforce AM’s authorization decisions on Apache HTTP Server.
Learn more in the Web Agents documentation and the Java Agents documentation.
Furthermore, ForgeRock Identity Gateway works with applications where you want to protect access, but you cannot install a web or Java agent. For example, you might have a web application running in a server for which no agent has been developed. Or you might be protecting an application where you simply cannot install an agent. In that case, IG functions as a flexible reverse proxy with standard SAML v2.0 capabilities.
Modern APIs for developers
For client application developers, AM offers REST and Java APIs.
-
AM REST APIs make the common CRUD (create, read, update, delete) easy to use in modern web applications. They also offer extended actions and query capabilities for access management functionality.
To get started, see REST API.
-
AM Java APIs let your Java and Java applications call on AM for authentication and authorization in both AM and federated environments.
For details, see the ForgeRock Access Management Java API Specification.
AM provides built-in support for many identity repositories, web servers and web application containers, access management standards, and all the flexible, configurable capabilities mentioned in this page. Yet, for some deployments you might still need to extend what AM’s capabilities. For such cases, AM defines Service Provider Interfaces (SPIs) where you can integrate your own plugins. For information about extension points, and some examples, see the following: