Connect AM to PingOne
Connect your AM deployments to PingOne so that you can configure PingOne Protect in your AM authentication journeys.
To connect AM to PingOne, you must:
-
Set up PingOne environments
Set up at least one PingOne environment using the Customer solution option.
You can use additional PingOne environments if required. For example, to separate development, test, and production deployments, or to serve users in different regions or countries.
-
Create PingOne worker applications
Create a worker application in each of your PingOne environments. These provide access to the PingOne admin APIs using OIDC.
Learn more in Create a worker application in PingOne.
-
Create secrets for the OIDC credentials
Store your worker application client secret in an AM secret store that’s accessible to the realm where you’ll create your PingOne Worker service configuration.
Learn more in Secret stores.
-
Create PingOne worker services
For each worker application, create a PingOne worker service configuration in the realm where you’ll configure your PingOne journeys.
Learn more in Create a PingOne Worker service in AM.
-
Map secrets for the PingOne worker services
Map the secret you created to the
am.services.pingone.worker.identifier.clientsecretsecret label.Where identifier is the value you entered in the Client Secret Label Identifier field when you created the PingOne Worker service configuration.
Learn more in Map and rotate secrets.
|
Complete this setup for each PingOne environment that AM uses. After that, reuse the same AM worker service configuration across the PingOne Protect journeys that target that environment. |
Create a worker application in PingOne
Create a worker application in PingOne for AM to use when calling PingOne APIs.
-
In the PingOne admin console, open the target environment and click Manage Environment.
-
Go to Applications > Applications, then click the icon.
-
Add an application of type
Workerand save your changes. -
Click Grant Roles.
-
Select the
Identity Data Adminrole, choose your target environment, and save your changes. -
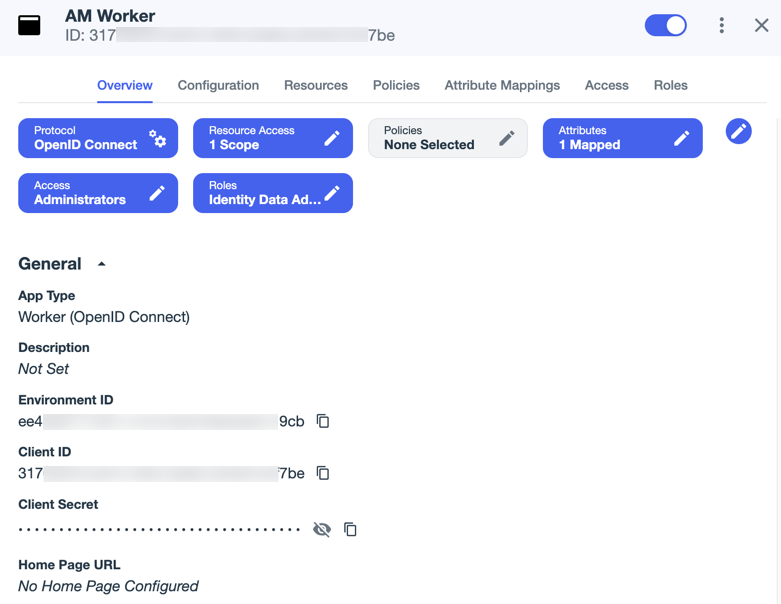
Go to the Overview tab and enable the worker application using the toggle switch in the top-right corner.
The worker application should now resemble the following:
-
Make a note of the following values:
Environment ID
Client ID
Client SecretYou’ll need them when you create the PingOne Worker service in AM.
Create a PingOne Worker service in AM
Create a PingOne Worker service configuration for your worker application.
-
In the AM admin UI, go to Realms > realm name > Services and click Add a Service.
-
Select
PingOne Worker Serviceand click Create. -
On the Secondary Configurations tab, click Add a Secondary Configuration.
-
Enter a name for the configuration, for example,
AM Workerand click Create. -
Enter the client ID and environment ID you copied earlier in the Client ID and Environment ID fields.
-
Enter an identifier in the Client Secret Label Identifier field. This identifier is used to create a secret label for the client secret.
The secret label uses the template
am.services.pingone.worker.identifier.clientsecretwhere identifier is the Client Secret Label Identifier value.This field can only contain characters
a-z,A-Z,0-9, and.and can’t start or end with a period. -
Ensure that the PingOne API Server URL and PingOne Authorization Server URL are correct for the region where your PingOne environment is located:
Region API URL Authorization URL North America (excluding Canada)
https://api.pingone.com/v1https://auth.pingone.comCanada
https://api.pingone.ca/v1https://auth.pingone.caEurope
https://api.pingone.eu/v1https://auth.pingone.euAsia-Pacific
https://api.pingone.asia/v1https://auth.pingone.asia